
Introduction
I had the task to figure out how to install Windows 10 with a blocksize of 16k in order to align with the deduplication of data on a HPE 3PAR Thin Technologies when used with VMWare ESXi 6.5 Update 2.
 Note: You can use the info here to also modify Windows Server installs to avail of 64k blocksizes by adjusting the script.
You can see some information about performance of VMWare virtual machines with different settings here.
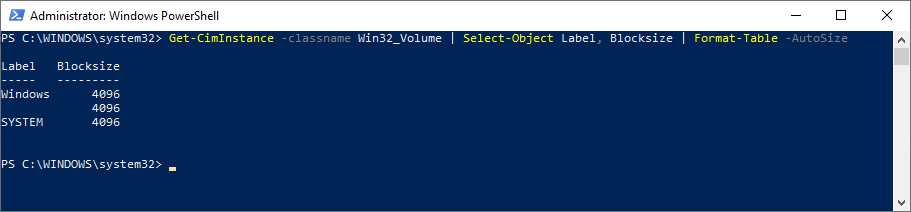
A quick look at the formatting steps in a default (or even an MDT based) task sequence did not offer any option for configuring block size. By default, Windows will be installed with a 4k block size, and you can determine the blocksize with the following PowerShell.
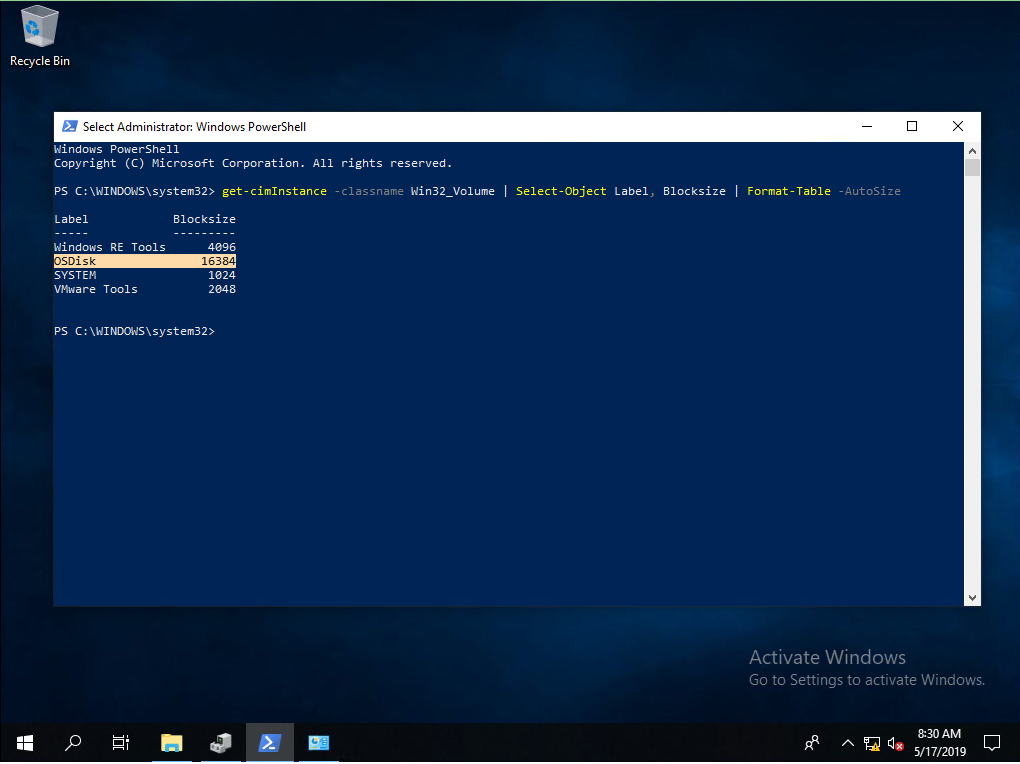
Get-CimInstance -classname Win32_Volume | Select-Object Label, Blocksize | Format-Table -AutoSize
You can clearly see the 4k blocksize (4096 bytes) listed below on a default Windows 10 installation.
Step 1. Import the drivers into SCCM
Note: This blogpost assumes you want to deploy Windows with custom blocksizes on ESXi 6.5 Update 2, if you are using different hardware, use the suppliers drivers as appropriate.
After downloading, extracting the necessary drivers from here,
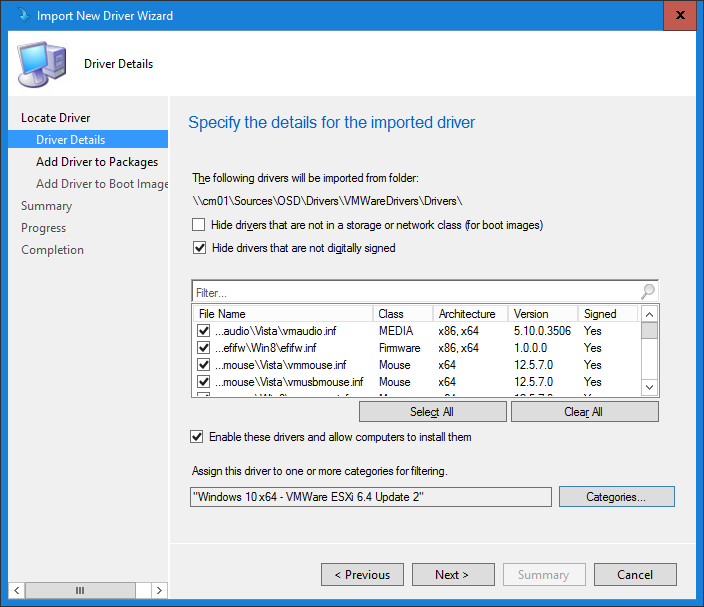 create a driver package in SCCM and distribute it to your distribution points.

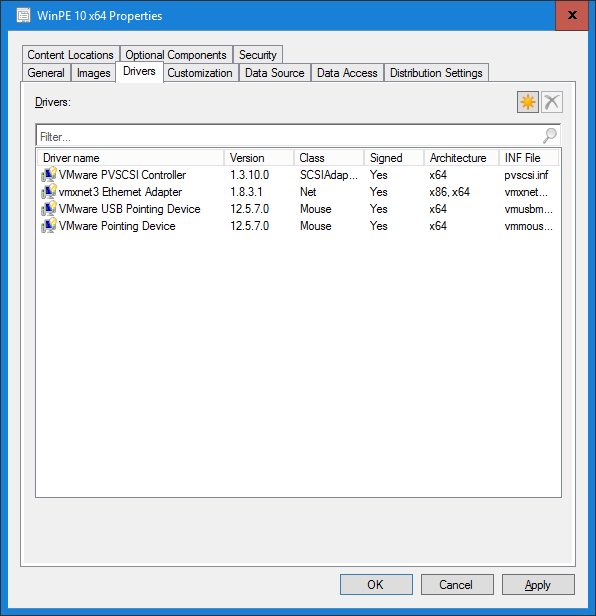
Step 2. Add drivers to the boot image
Next I needed to import storage and network drivers into my SCCM boot image namely
- VMXNET3 Ethernet Adapter
- PVSCSI Controller
The other two Mouse vmware drivers are optional (but recommended).
 Note: I won’t go into detail about importing drivers into a boot image as that is not the focus of this blog post.
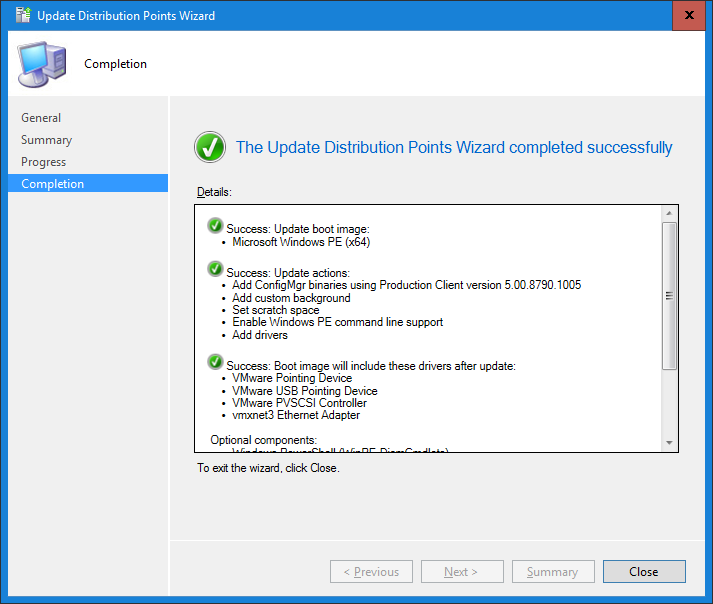 You can obtain these drivers from the VMWare Tools iso on the ESXi or via here.
Step 3. Edit a task sequence
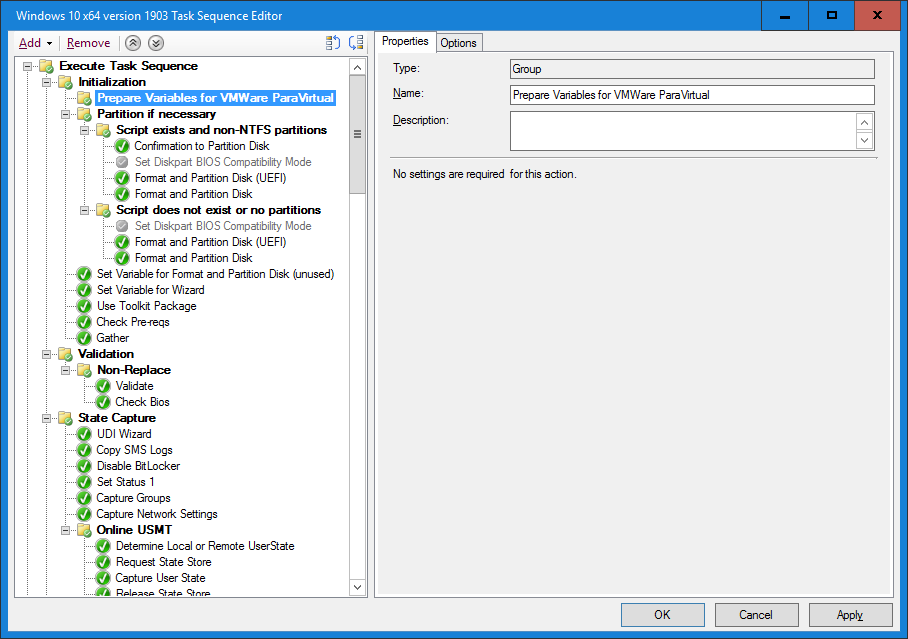
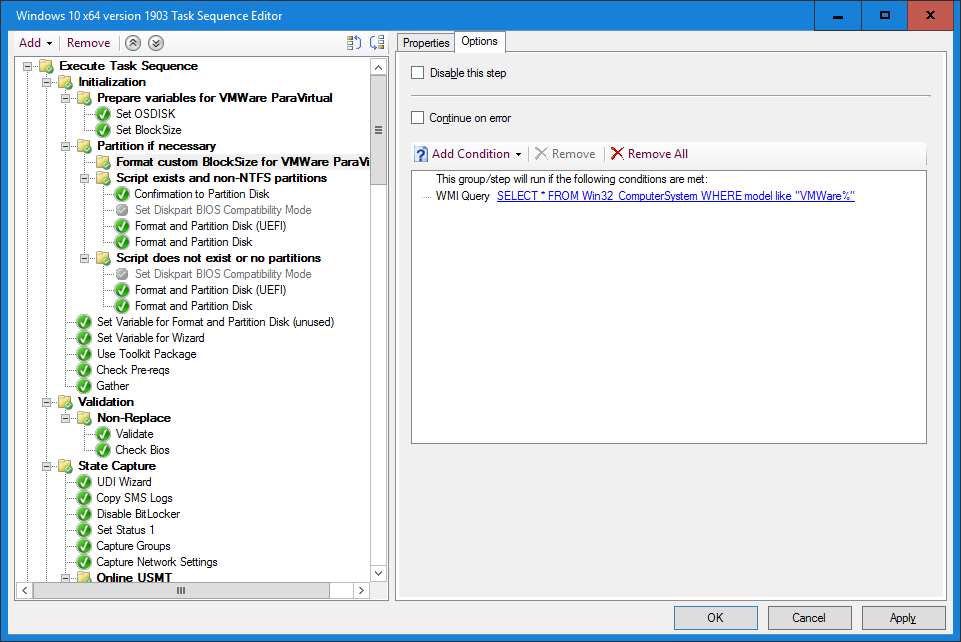
Edit an already created task sequence, locate the Initialization Group and add the following Group (before the Partition if necessary Group) called:
Prepare variables for VMWare ParaVirtual
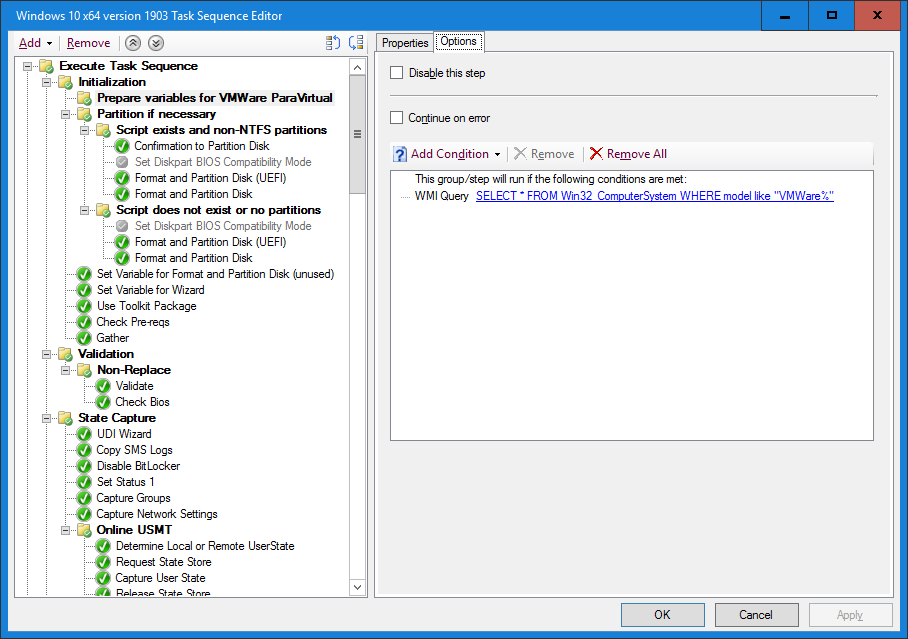
 On the Options tab of the new group, set it to run with the following Query.
SELECT * FROM Win32_ComputerSystem WHERE model like "VMWare%"
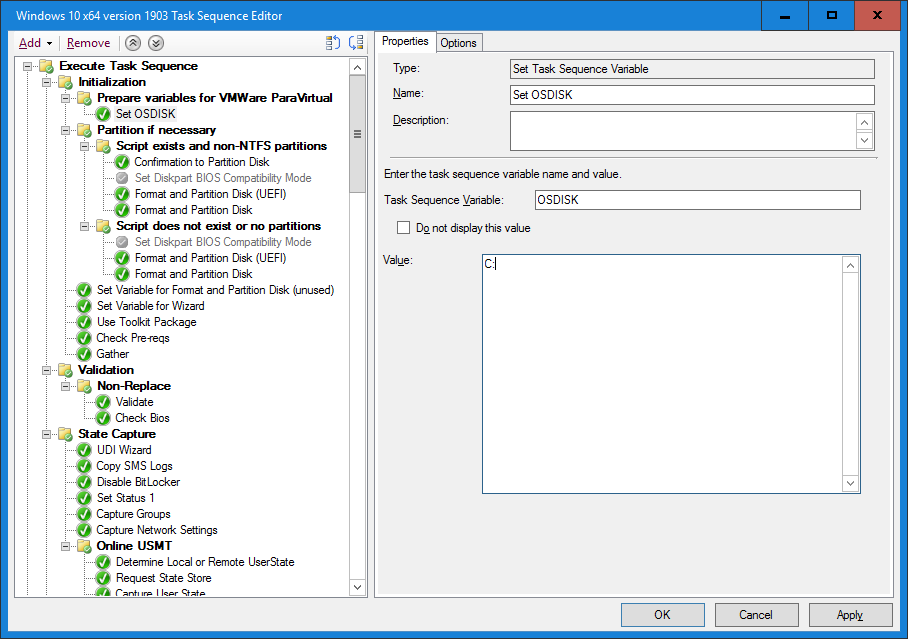
 Create a new Set Task Sequence variable step where the variables name is OSDISK and the value is C:
 Create another Set Task Sequence Variable step where the variables name is BlockSize and the value is 16K
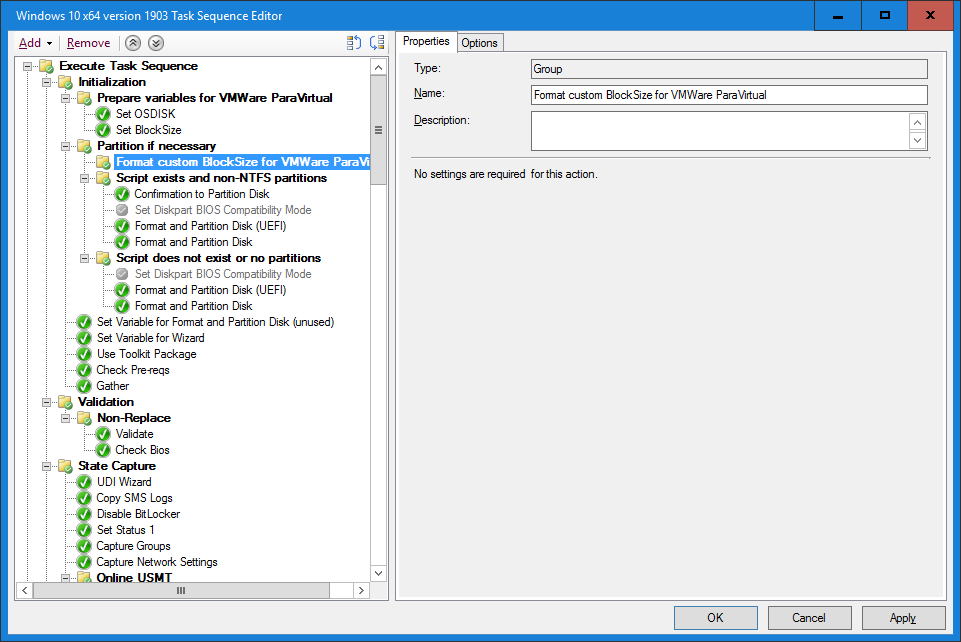
 In the Partition if necessary Group, create a new sub-group called Format custom BlockSize VMWare ParaVirtual
 On the Options tab of the new group, set it to run with the following Query.
SELECT * FROM Win32_ComputerSystem WHERE model like "VMWare%"
 Next create a Run Command Line step called Create custom diskpart script and paste the following code into it, set the timeout to 1 minute.
cmd.exe /c echo select disk 0 > x:\diskpart.txt & cmd.exe /c echo clean >> x:\diskpart.txt & cmd.exe /c echo convert gpt >> x:\diskpart.txt & cmd.exe /c echo create partition primary size=2048 >> x:\diskpart.txt & cmd.exe /c echo format quick fs=ntfs label="Windows RE Tools" >> x:\diskpart.txt & cmd.exe /c echo assign letter="T" >> x:\diskpart.txt & cmd.exe /c echo set id="de94bba4-06d1-4d40-a16a-bfd50179d6ac" >> x:\diskpart.txt & cmd.exe /c echo gpt attributes=0x8000000000000001 >> x:\diskpart.txt & cmd.exe /c echo create partition efi size=1024 >> x:\diskpart.txt & cmd.exe /c echo format quick fs=fat32 label="System" >> x:\diskpart.txt & cmd.exe /c echo assign letter="S" >> x:\diskpart.txt & cmd.exe /c echo create partition msr size=128 >> x:\diskpart.txt & cmd.exe /c echo create partition primary >> x:\diskpart.txt & cmd.exe /c echo format quick fs=ntfs label="OSDisk" unit=%BlockSize% >> x:\diskpart.txt & cmd.exe /c echo assign letter=%OSDISK% >> x:\diskpart.txt & cmd.exe /c echo list volume >> x:\diskpart.txt & cmd.exe /c echo exit >> x:\diskpart.txt
This basically creates a txt file on x:\ called diskpart.txt which contains the info needed to format our chosen partition (in this case OSDISK) with a 16K BlockSize. You can modify the script as you wish to use say, a 64K size for Windows Server OS and change the desired partition structure.
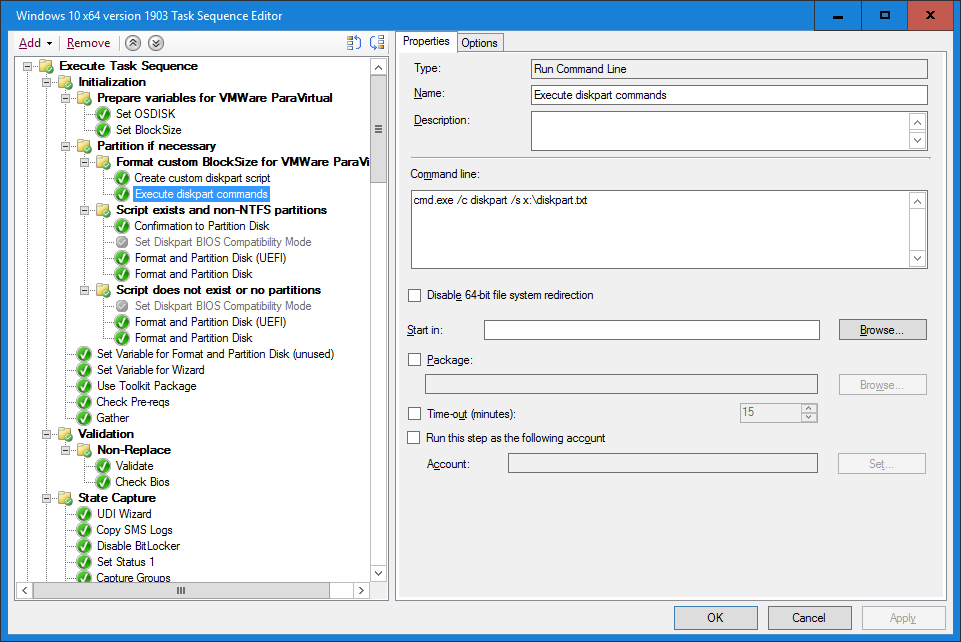
 Next, create another Run Command Line step to do the following command
cmd.exe /c diskpart /s x:\diskpart.txt
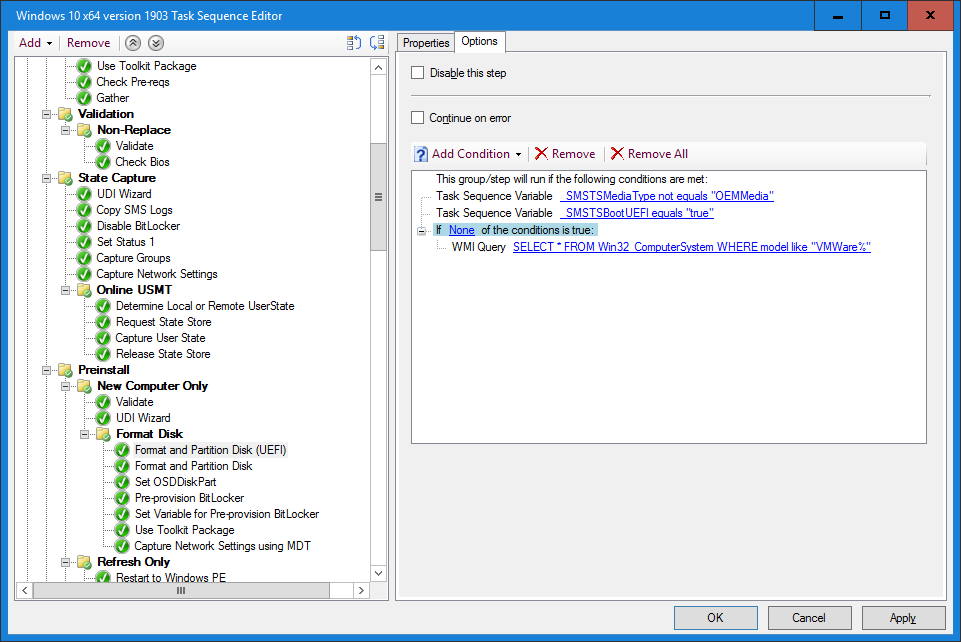
 Finally, add an if none of the conditions is true option on all the following Format groups (such as Script exists and non-NTFS partitions and Script does not exist or no partitions….) which is like so…
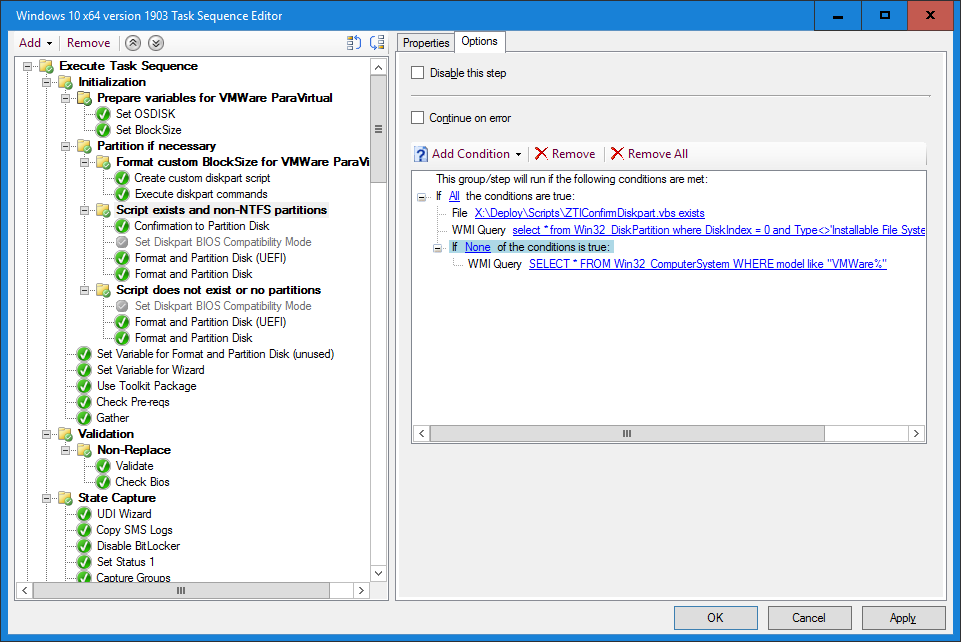 and…
and…
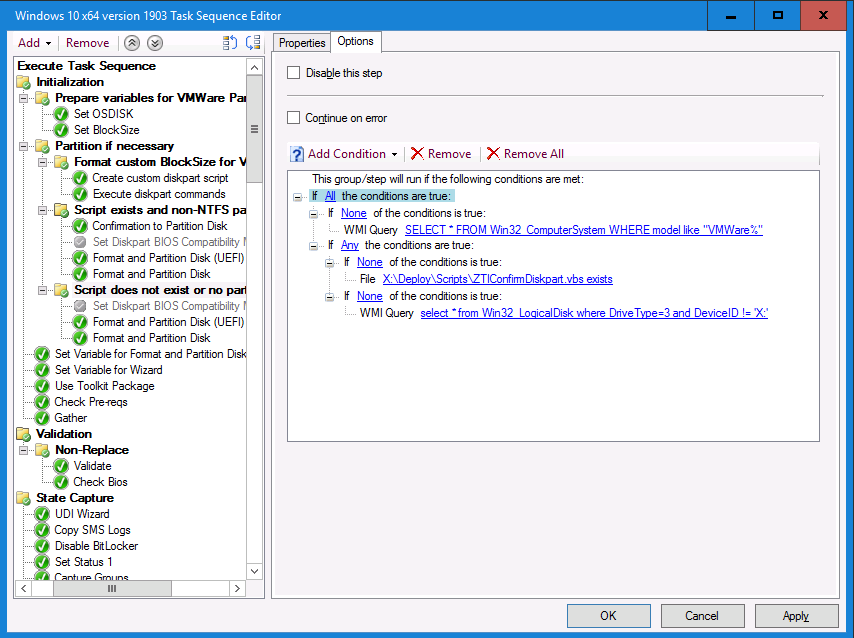 and…
and…
 Save the changes and close the task sequence editor.
Step 4. PXE boot a VMWare Virtual machine running on your ESXi 6.5 host
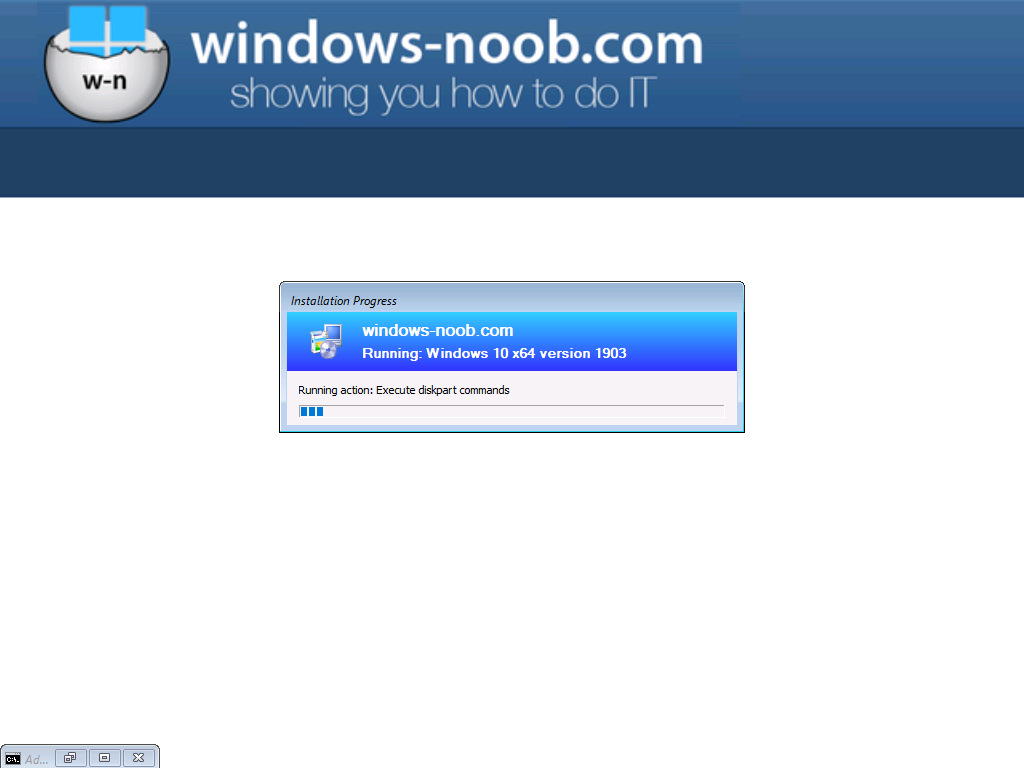
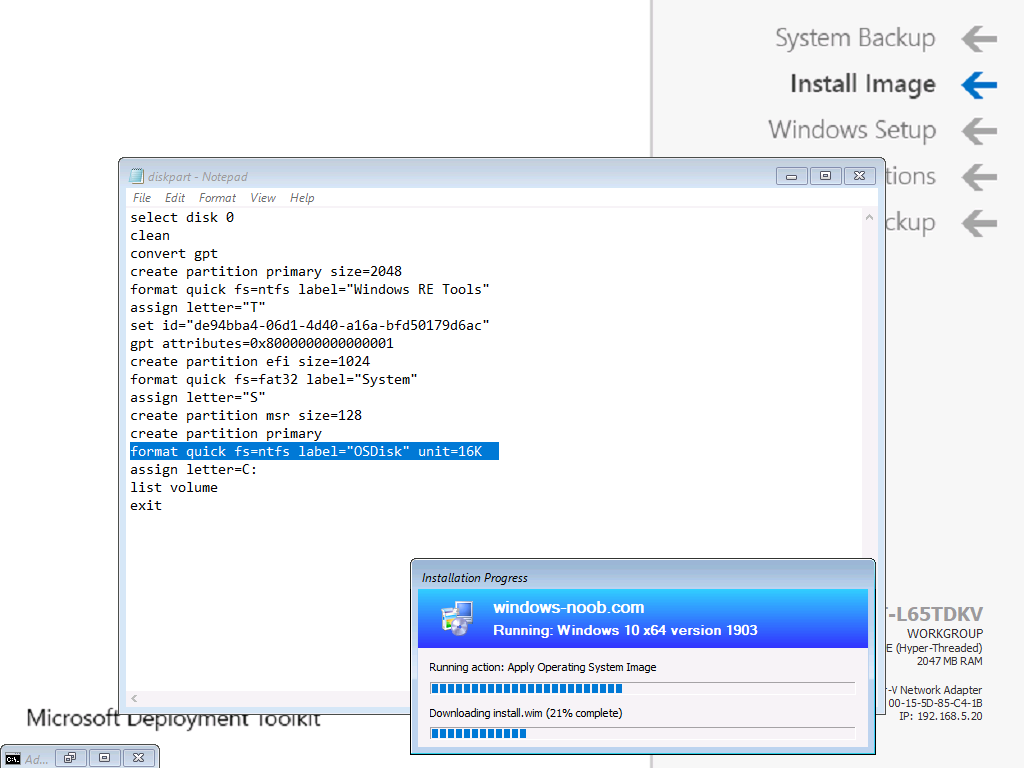
After PXE booting a VMWare virtual machine, select the task sequence above and verify that it creates the x:\diskpart.txt file and then executes the diskpart commands as shown below.
If you look at the highlighted line in the diskpart script, you can see unit=16K, which is the custom BlockSize variable defined earlier.
Once the machine has finished deploying, you can verify the blocksize using the PowerShell commands at the start of this blogpost.
 Job done !
Note: If you find that your virtual machines are BSOD’ing during deployment with a Driver PNP Watchdog blue screen error, then power them off, and remove any snapshots. This appears to be a known bug with VMWare ParaVirtual and Windows 10.
