
Introduction
The Microsoft Surface Pro 3 is a really beautiful device, I’ve had the pleasure of using one and it really is a game changer for Microsoft, if they keep developing this excellent product at this pace then I think we’ll see more and more Surface Pro’s in Enterprises as time goes on.

Problem
We all want to re-image our devices when we get them, that’s part of what we do. Reimaging the Surface Pro 3 via Configuration Manager 2012 R2 is possible via USB media or UEFI network boot (as it’s a UEFI only device you cannot use PXE legacy network boot).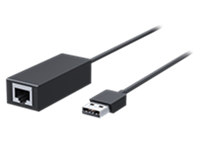
When UEFI network booting a Microsoft Surface Pro 3 with the Microsoft branded Surface Ethernet Adaptor (either of the models listed below)
- model 1552 (100mb)
- model 1663 (Gigabit)
you may observe that it takes a very long time to download the boot wim (3 hours or so).
 This problem can occur on Surface Pro 3’s that have an earlier firmware installed.
Solution
There’s updated firmware available for the Microsoft Surface 3 via Windows Update or via this link that you can install (in Windows or as part of Windows setup) which will resolve the problem.
I believe the update that resolves the above problem was released in June 2014 (more than likely it was the Surface Pro UEFI (v3.7.150.0) update released in that month however I have not had that confirmed yet).
You can use that driver package as part of normal driver package installation and this will update the firmware on the device however the first UEFI boot on affected systems will still take approx 3 hours.
If you don’t want to wait, then boot the device using USB media instead (boot media or standalone media as described here).
You can use Windows Update to install the firmware manually by following the process below:
| 1: | Swipe in from the right edge of the screen and then tap or click Settings. (If you’re using a mouse, point to upper-right corner of screen, move the mouse pointer down, and then click Settings.) |
| 2: | Tap or click Change PC settings, and then tap or click Update and recovery. |
| 3: | Tap or click Check now. |
| 4: | If there are updates available, tap or click View details. |
| 5: | Tap or click to select the updates you want to install, and then tap or click Install. You may need to restart Surface after the updates have been installed. |
Related Reading
- http://www.microsoft.com/en-us/download/details.aspx?id=38826
- https://www.niallbrady.com/2013/03/04/how-can-i-deploy-windows-8-x64-to-the-microsoft-surface-pro-using-configuration-manager-2012-sp1/
- http://social.technet.microsoft.com/Forums/en-US/d0c8822d-beb3-4a01-9da5-5ff5070c8f98/having-issues-with-surface-pro-3-downloading-boot-image-over-pxe?forum=configmanagerdeployment
- http://www.microsoft.com/surface/en-us/support/install-update-activate/pro-3-update-history

Pingback: How can I deploy Windows 8.1 x64 to the Microsoft Surface Pro 3 using System Center 2012 R2 Configuration Manager ? | just another windows noob ?
Pingback: Where do I find the MAC address of my Surface Pro 3 Ethernet Adapter in order to use UEFI network boot ? | just another windows noob ?
Pingback: Why is my Surface Pro 3 not BitLockered after OSD via System Center 2012 R2 Configuration Manager ? | just another windows noob ?
Pingback: New Surface Pro 3 drivers are available today for November 2014 | just another windows noob ?
Pingback: Can you PXE boot a Surface Pro 3 without a Microsoft USB nic ? yup and here’s how | just another windows noob ?