Introduction
Now that the Microsoft Surface Pro is available organizations are buying it and re-imaging the default Windows 8 Professional installation with their own corporate install (usually means installing an Enterprise edition of Windows 8). In this post I’ll show you how to install Windows 8 X64 Enterprise in UEFI mode, with BitLocker enabled using USB based Standalone media created using Configuration Manager 2012 SP1.
Note: Use this guide with care, it is provided to assist you with imaging your Surface Pro in an automated way. windows-noob.com will not be held responsible for any problems that may arise as a result of deploying Windows 8 X64 to your Surface Pro using the methods described below.
First of all, re-imaging the Surface Pro is not that straight forward given the fact that the device has no external facing network card (RJ-45), however it does however have a USB 3 port so you can connect USB devices and use them accordingly.
Secondly, the Surface Pro is UEFI only and 64 Bit so you can only install a 64bit UEFI capable operating system on it.
Thirdly, the Surface Pro has only got one USB 3 port, and we are going to use this port to do our imaging, however we want to connect both a USB flash key and a USB network dongle at the same time, as a result we will use a USB 4-port hub to split one USB port into many.
Lastly, and more importantly there is no ability in the current Surface Pro firmware to boot over the network, (it’s rumored to be available in a later firmware release from Microsoft, no ETA on that however) therefore we’ll use USB Standalone media to install our corporate image.
For the purpose of this guide i’ve used some additional hardware listed below:
- USB network dongle model dlink Dub E-100
- 8GB USB key
- USB 4-port hub
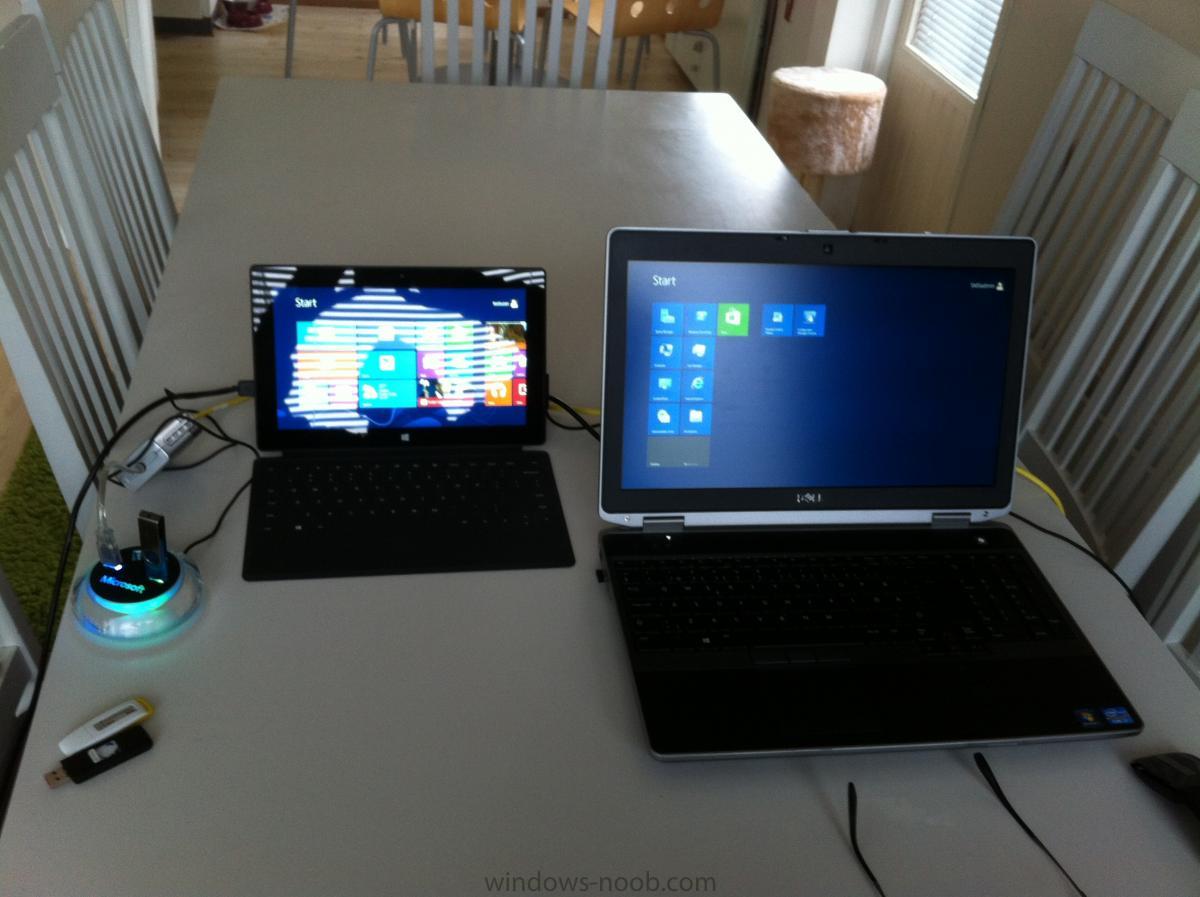
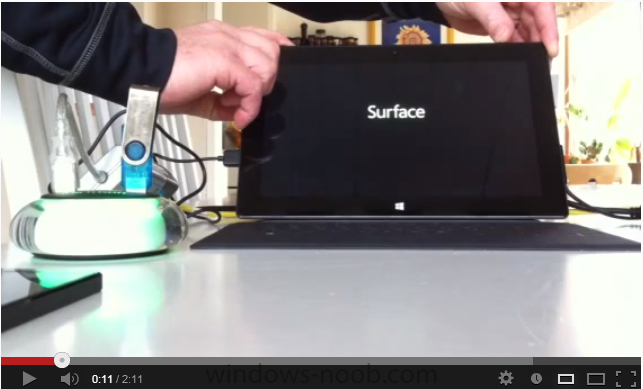
So, in the photo below you can see the Surface Pro is connected to a USB 4-port hub, and that hub has a USB key and USB Network dongle attached, that is in turn connected to my Configuration Manager 2012 SP1 Server environment running on HyperV (it’s a LAB).
Step 1. Create the task sequence
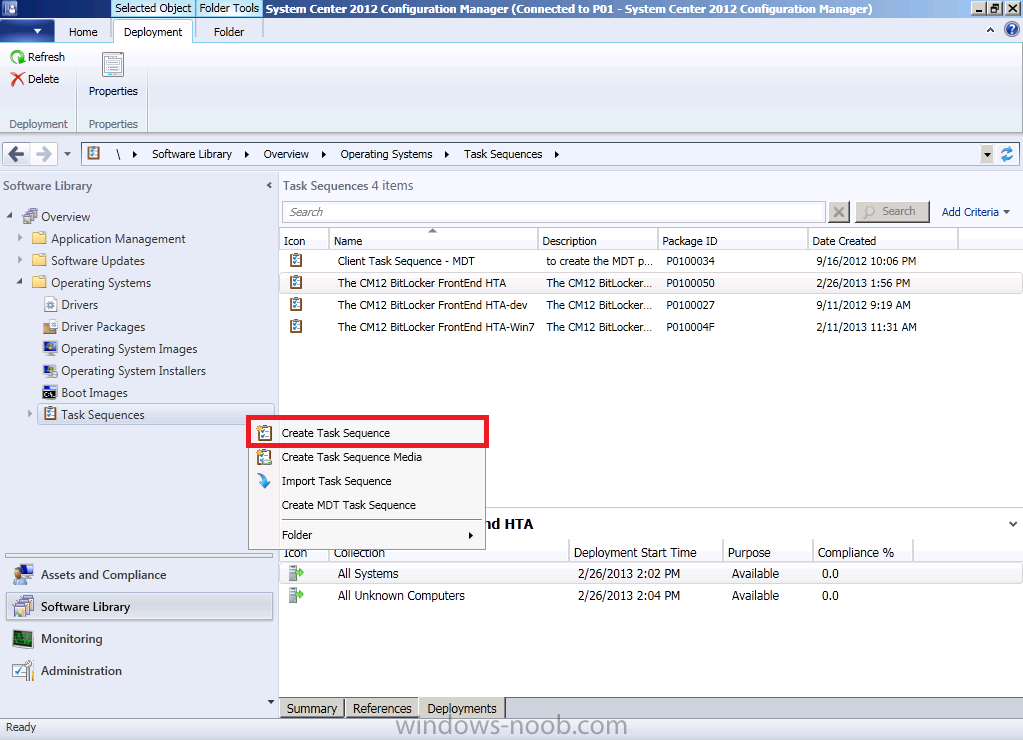
In the System Center 2012 Configuration Manager SP1 console navigate to Software Library, select operating systems and right click on task sequences, select Create Task Sequence
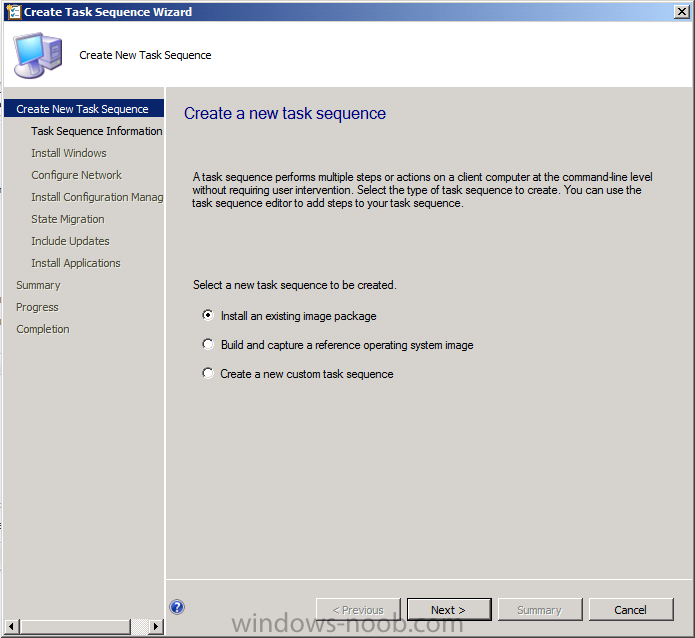
The Create New Task Sequence wizard appears, choose Install an existing image package
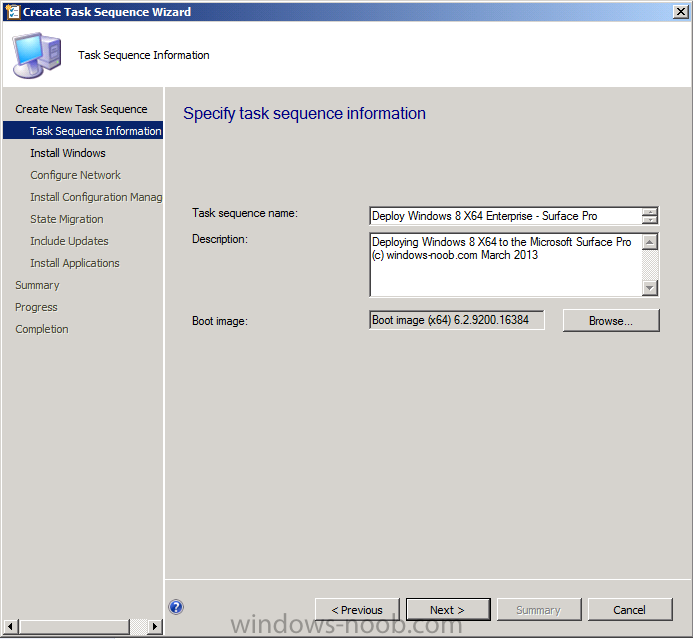
On the Specify Task Sequence information screen give the task sequence a suitable name like Deploy Windows 8 X64 Enterprise – Surface Pro and choose the X64 boot image (this is very important as it will not boot with the x86 boot image)
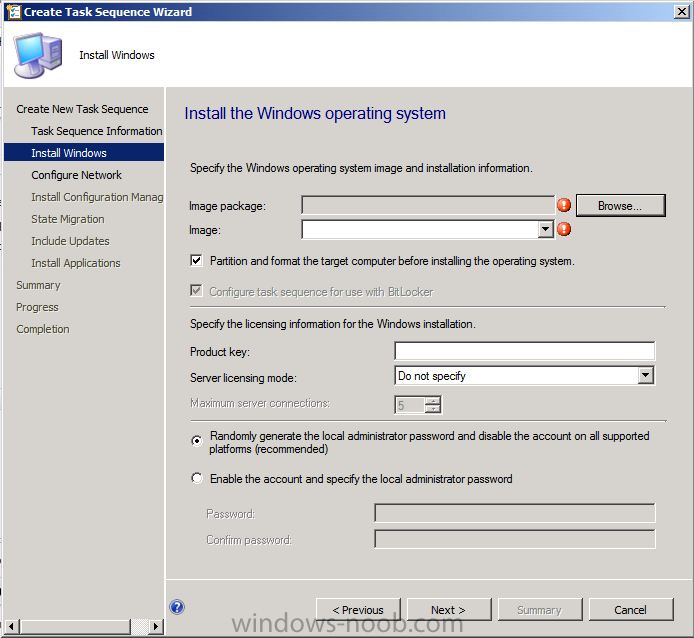
for the Install the windows operating system step click on Browse
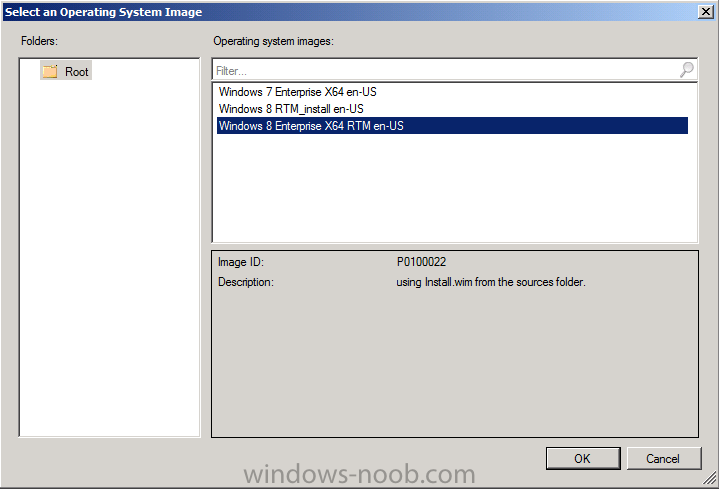
and select the Windows 8 Install.wim file (from the sources folder on your Windows 8 media) which has been previously added as an Operating System Image and distributed to your distribution points,
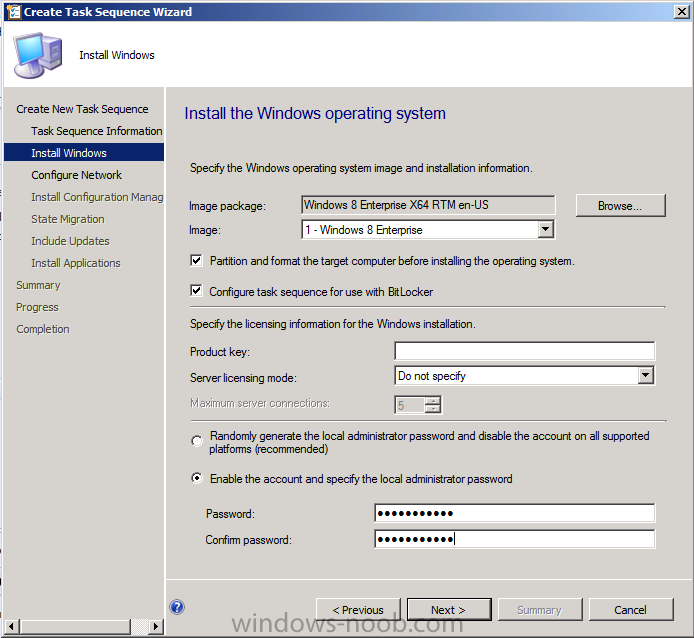
fill in the product key and change the administrator password so if your deployment fails for any reason and it’s not domain joined you’ll at least be able to login and troubleshoot. Note that the BitLocker ability is now available and you can select or deselect it if you wish, if you do select it then keep in mind that you may need to extend the Active Directory Schema to support Bitlocker.
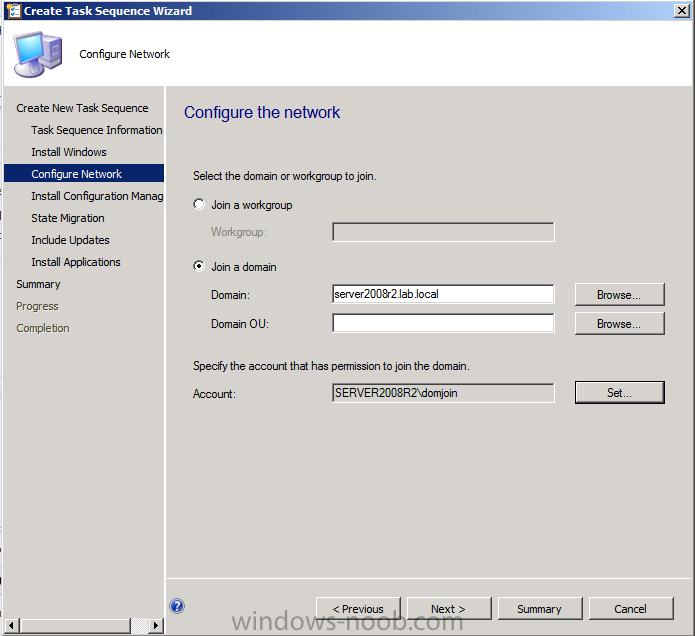
fill in the domain join details in the Configure the Network step and verify your domain join account settings by clicking on verify before continuing
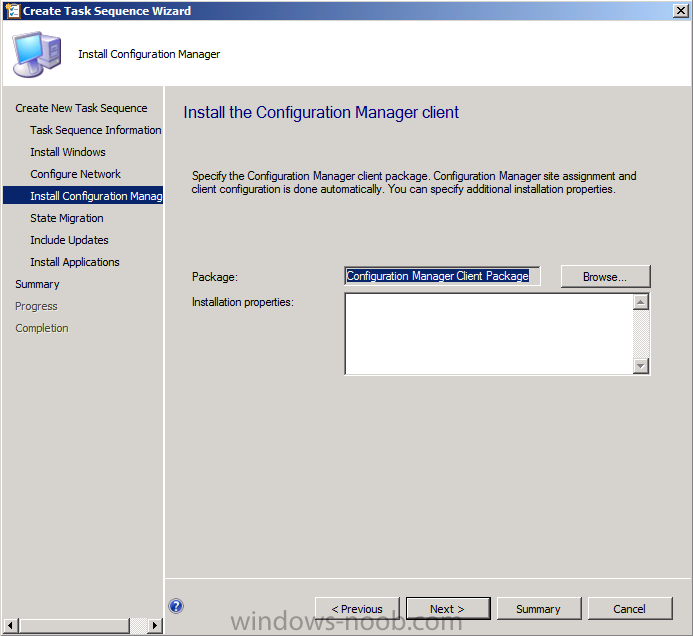
point to your Configuration Manager Client package in the Install the configuration manager client step
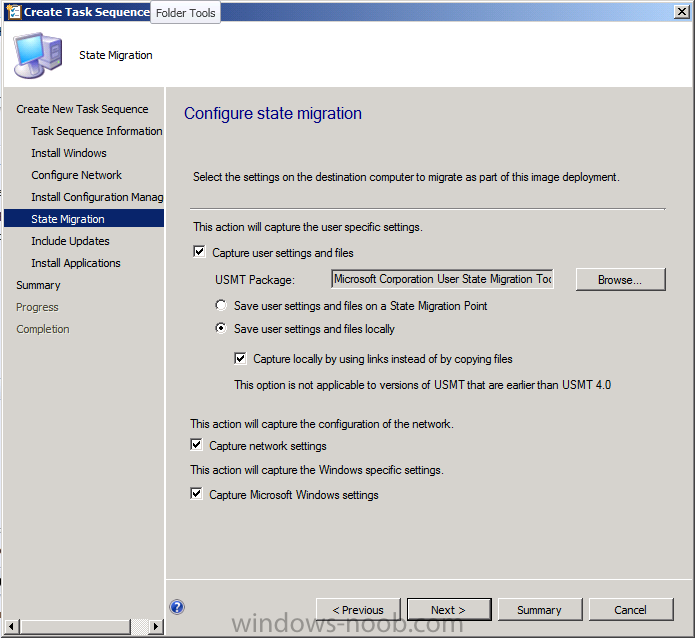
if you want to migrate users data then make your appropriate choices in the Configure State Migration step
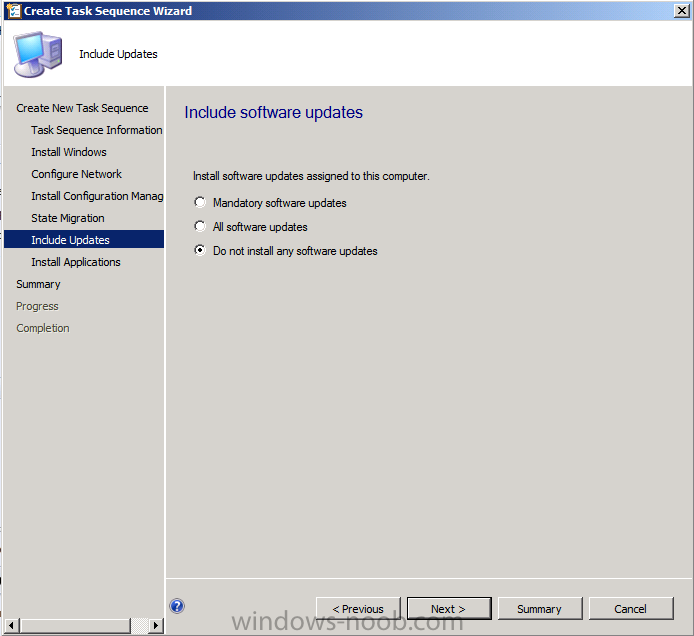
on the include software updates screen, it’s not selected by default so leave it like that
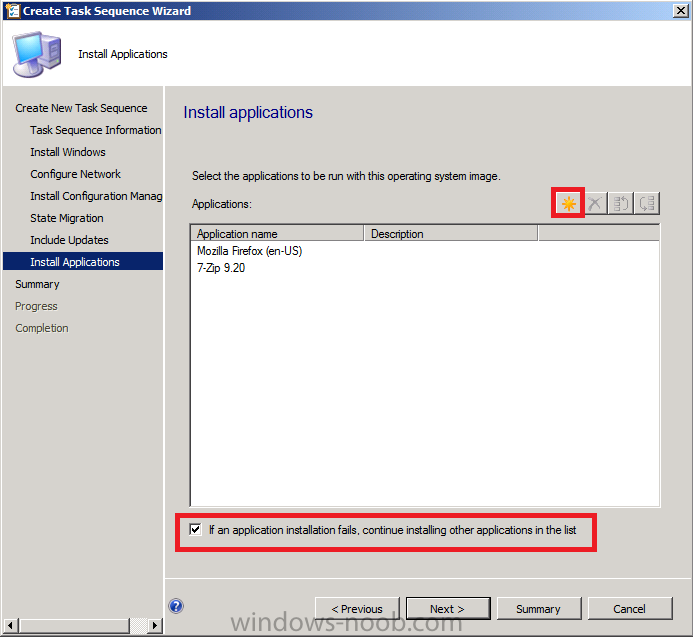
and then add some applications by clicking on the Yellow starburst and selecting your application, to continue installing applications if one fails, select the appropriate checkbox
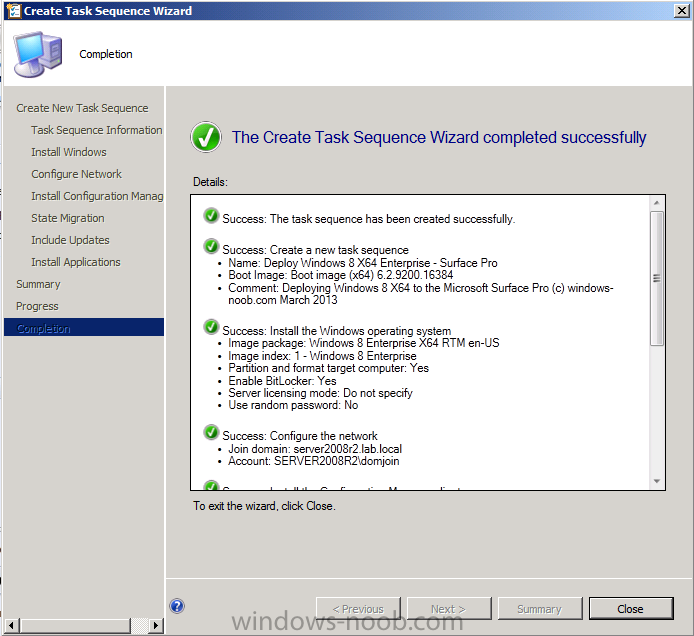
and click next through to completion
Step 2. Import drivers for the Surface Pro into Configuration Manager
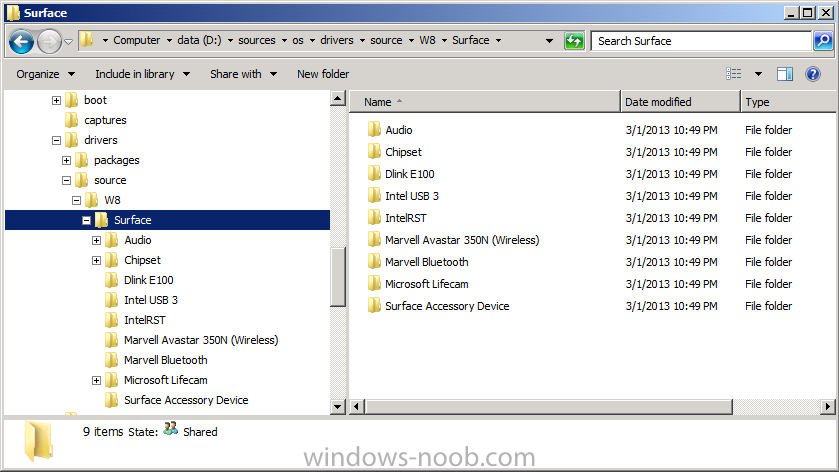
We need to install drivers for the Surface Pro during installation of Windows 8 otherwise certain functionality won’t work (like wireless for example), you could use something like Driver Genius to extract the drivers stored on your Surface Pro before you wipe it or use the drivers that someone else has already extracted, I like using ready made drivers so head on over to this site, download those drivers and extract them to your Configuration Manager server somewhere like \\sccm\sources\os\drivers\source\W8\Surface
The extracted drivers should look something like this:
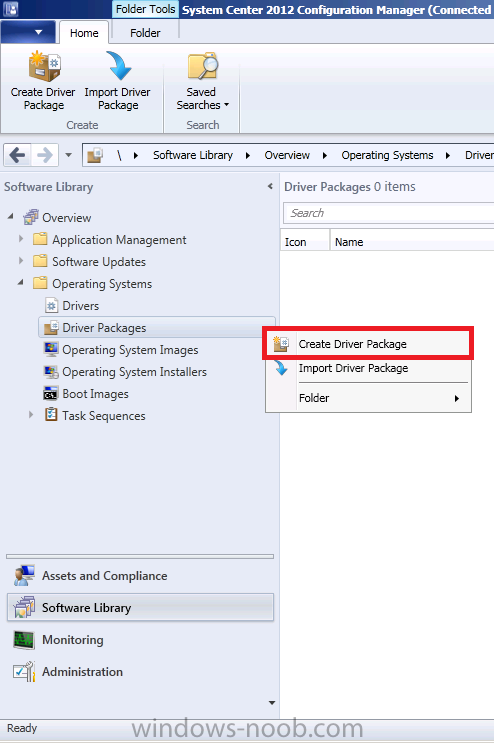
Once done, create a new empty driver package by right clicking on Driver Packages and choose Create Driver Package
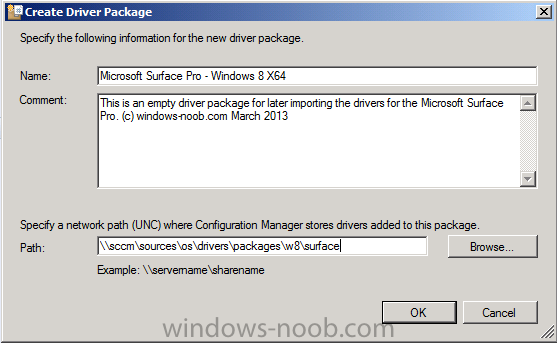
give the package a suitable name like Microsoft Surface Pro – Windows 8 X64 and note that the path is for the driver package itself and not the drivers we extracted above, so keep them separate, in this case use \\sccm\sources\os\drivers\packages\w8\Surface
import drivers (into the package)
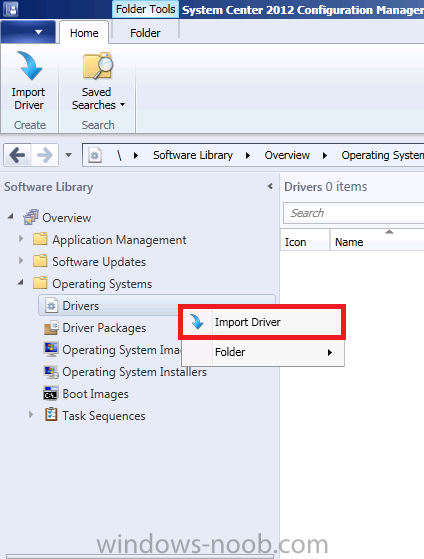
In the configuration Manager console select Drivers, right click and choose Import driver
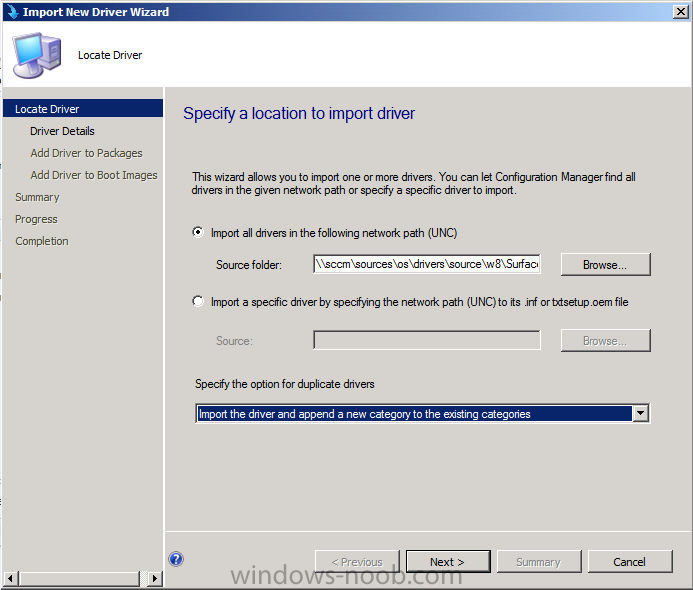
point to the UNC path where you copied the extracted files eg: \\sccm\sources\os\drivers\source\w8\surface
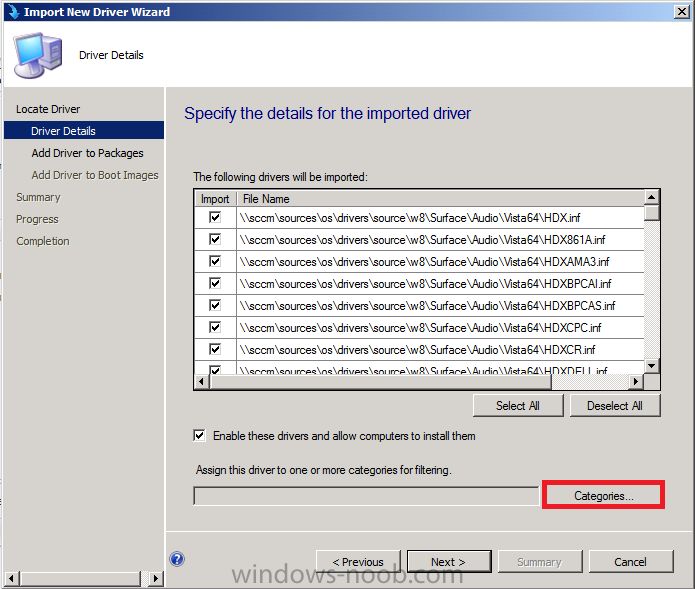
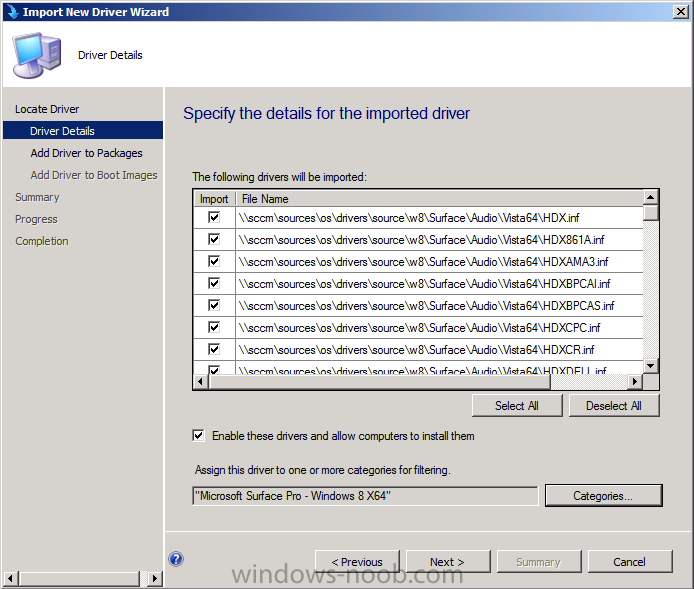
on the specify the details for the imported driver step click on Categories
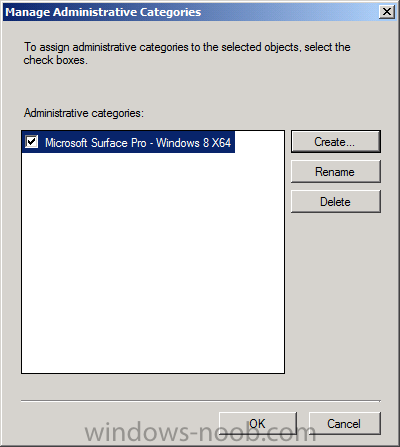
and click create, give the category a name like Microsoft Surface Pro – Windows 8 X64
so our driver details now looks like this
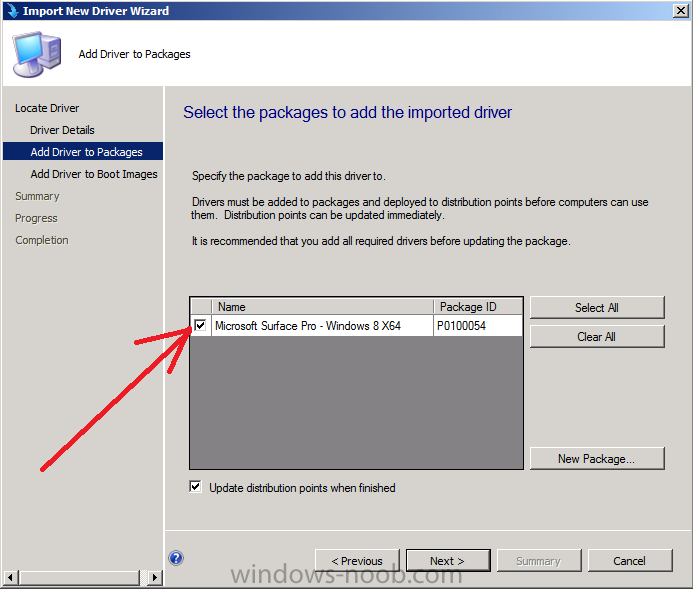
on the Add drivers to packages screen select our Microsoft Surface Pro – Windows 8 X64 package
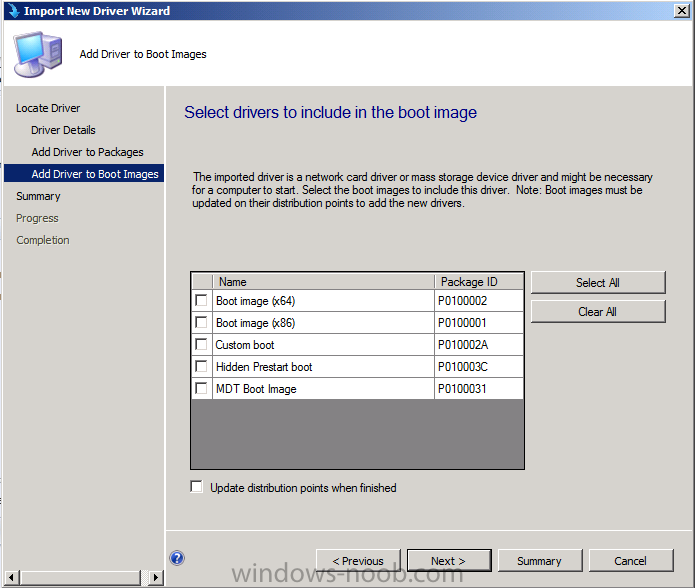
we will not be adding any drivers to any boot images so click next through that step
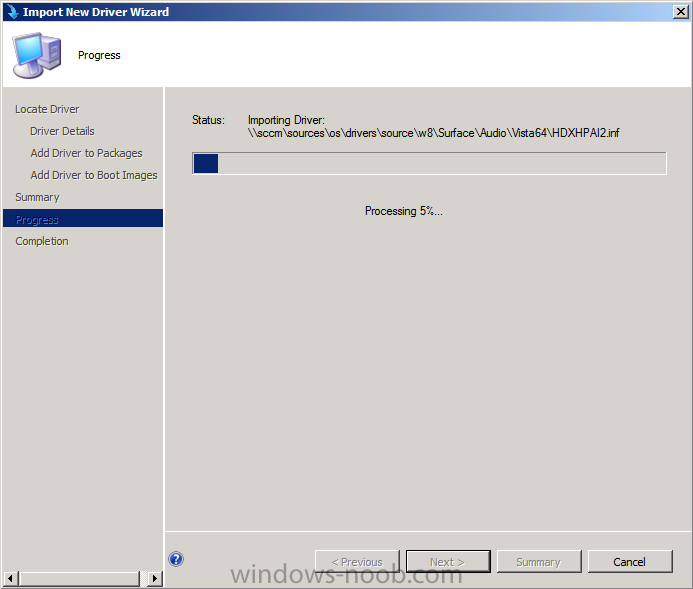
and click next through the wizard and it will start importing the drivers (warning, can take some time….)
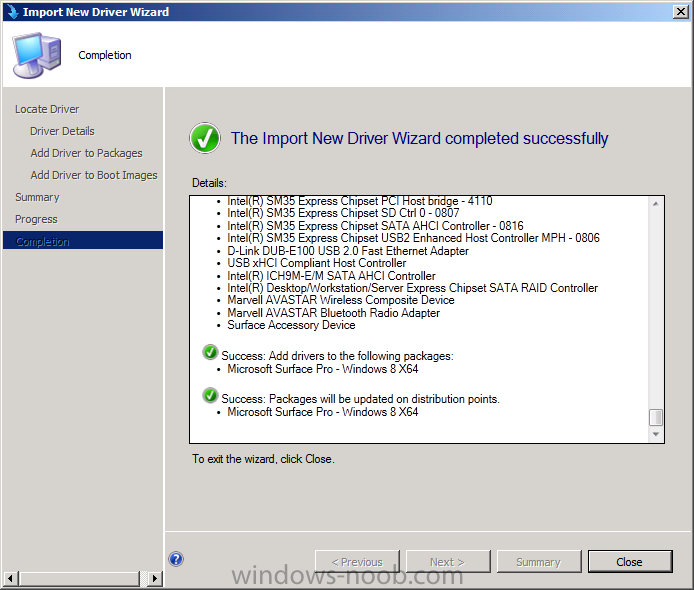
After a (long) while the driver import should complete
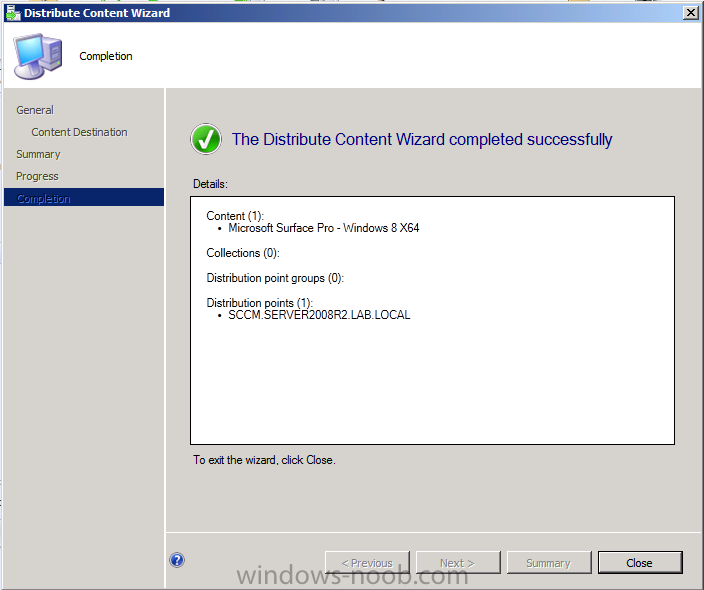
Lastly, don’t forget to select the Driver Package and distribute it to your distribution points by right-clicking the driver package and choosing Distribute content.
Step 3. Edit the Task Sequence
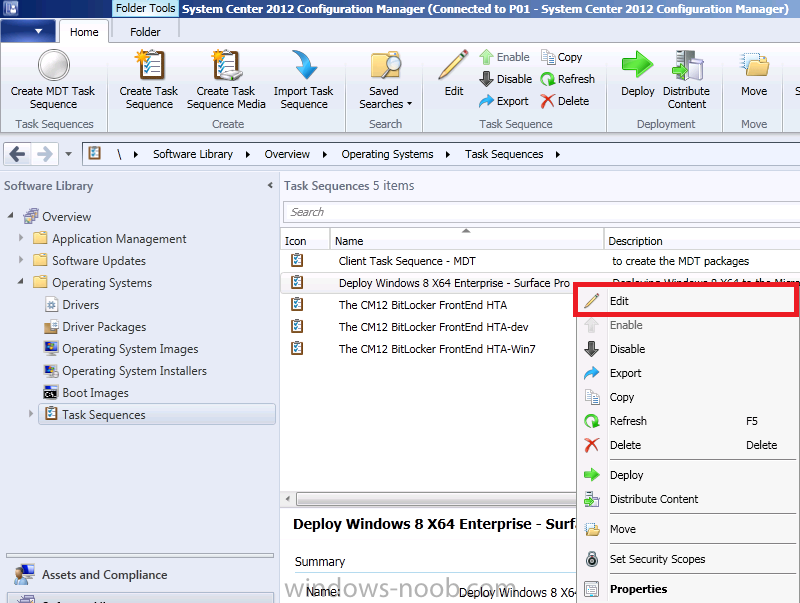
Now we want to edit the task sequence to change how it applies drivers, so right click on the Task Sequence and choose Edit
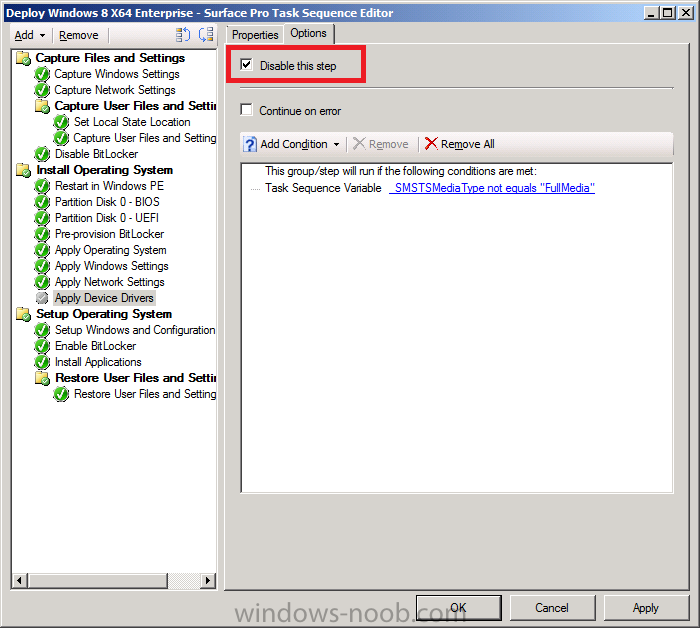
Disable the Apply Device Drivers step by selecting it, clicking on the options tab and selecting disable this step
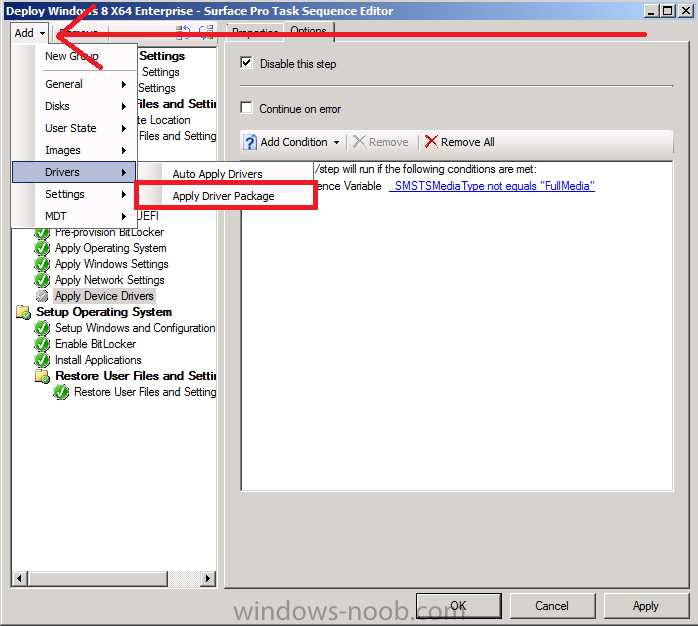
once done, click on Add then Drivers then Apply Driver Package like in the screenshot below
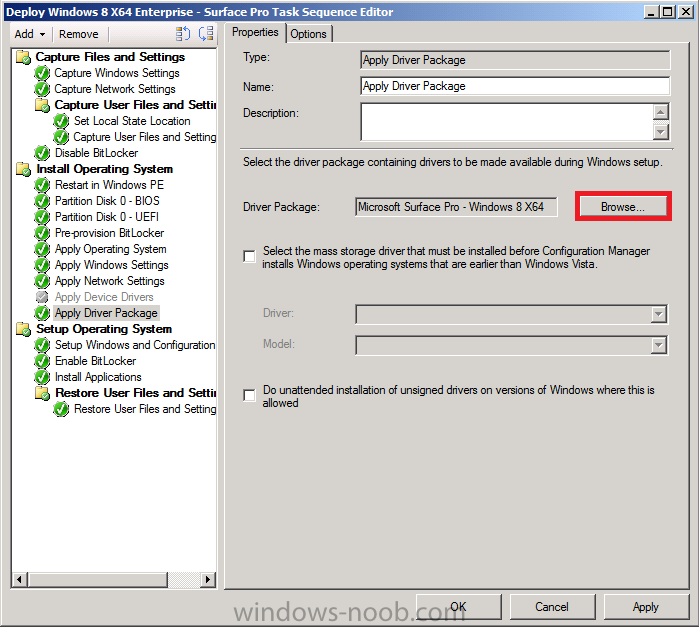
select the Microsoft Surface Pro – Windows 8 X64 driver package by clicking on browse
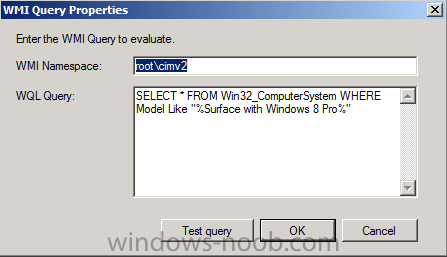
then click on the Options tab and click on add condition then query wmi, use the following WMI query
SELECT * FROM Win32_ComputerSystem WHERE Model Like "%Surface with Windows 8 Pro%"
Step 4. Create the Task Sequence standalone media
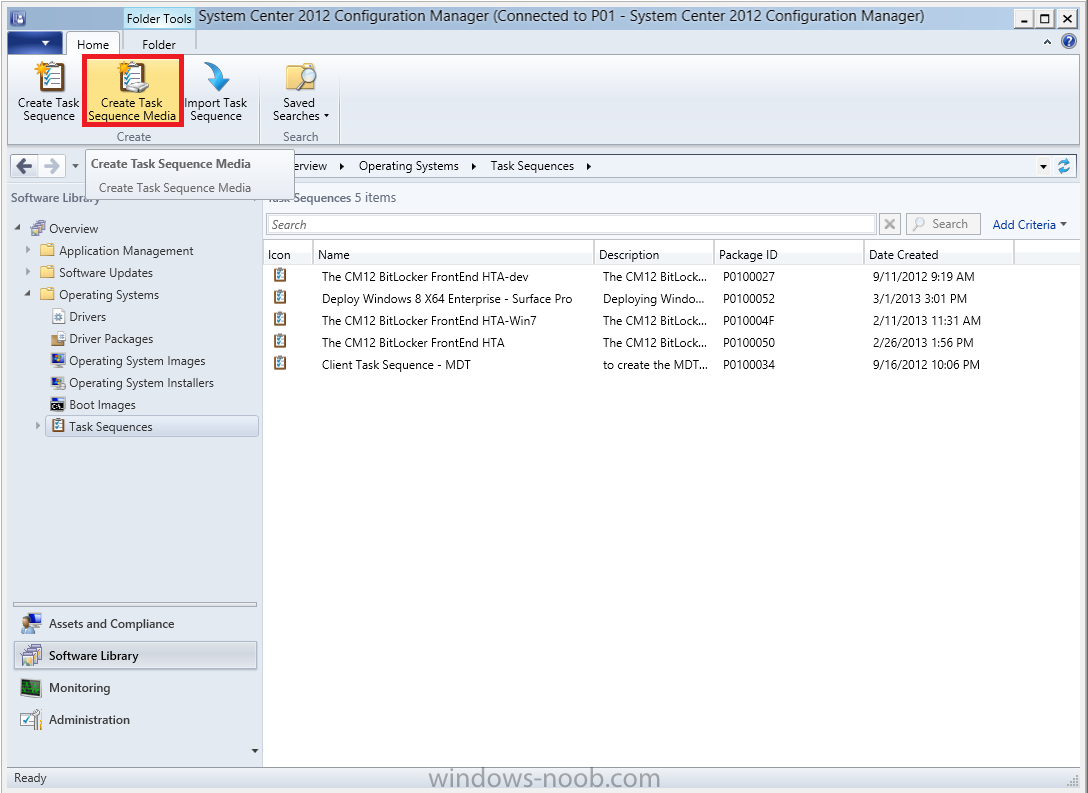
Now everything is in place to create the Standalone media, so insert a USB key into your computer running a Configuration Manager console and browse to Task Sequences in the Operating System Deployment section.
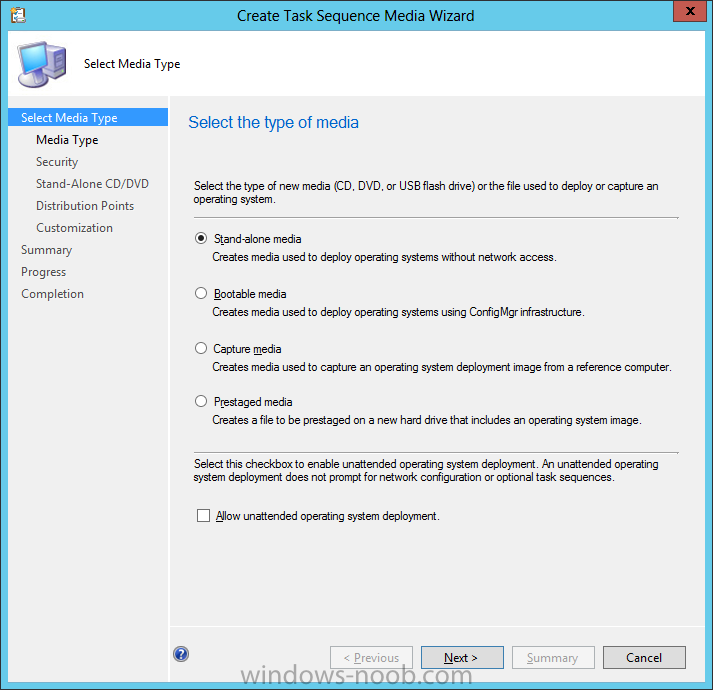
In the ribbon click on Create Task Sequence media
when the Select the type of media screen appears, choose Stand-alone media
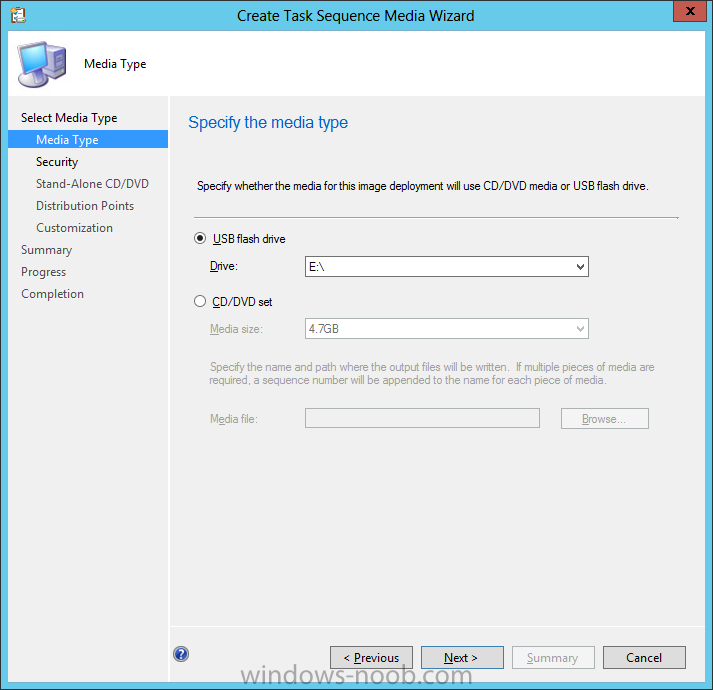
on the Specify the media type screen select USB (first option) and select the drive letter corresponding to your USB key
answer yes to the format prompt
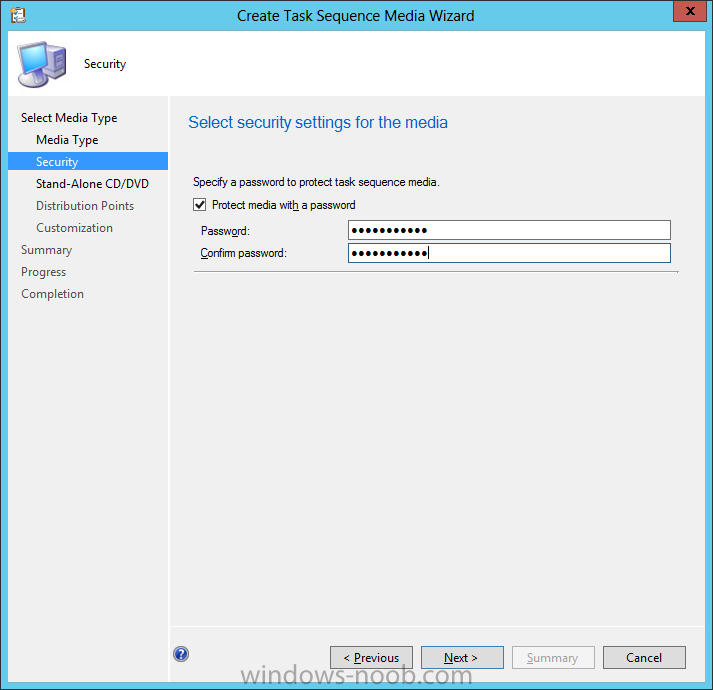
enter a security password (to ensure that no one accidently wipes a device)
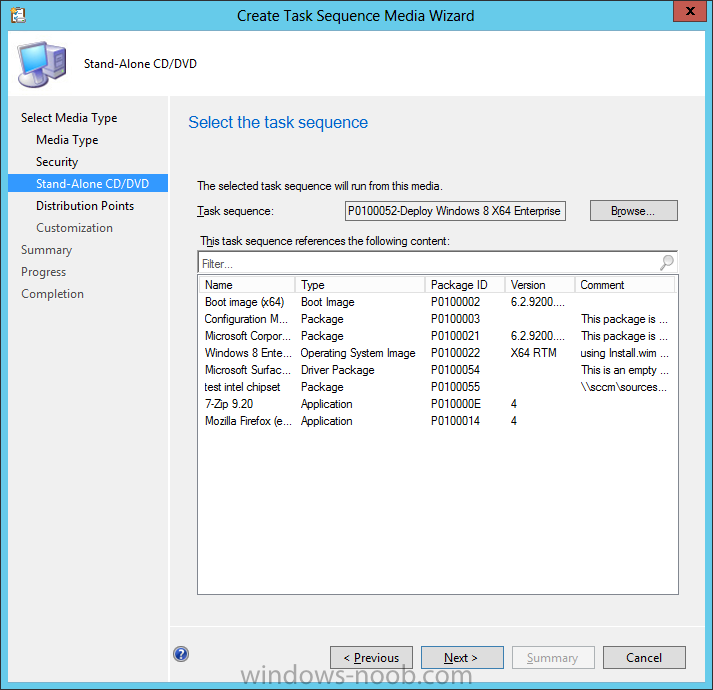
and click on browse to select our previously created Task Sequence
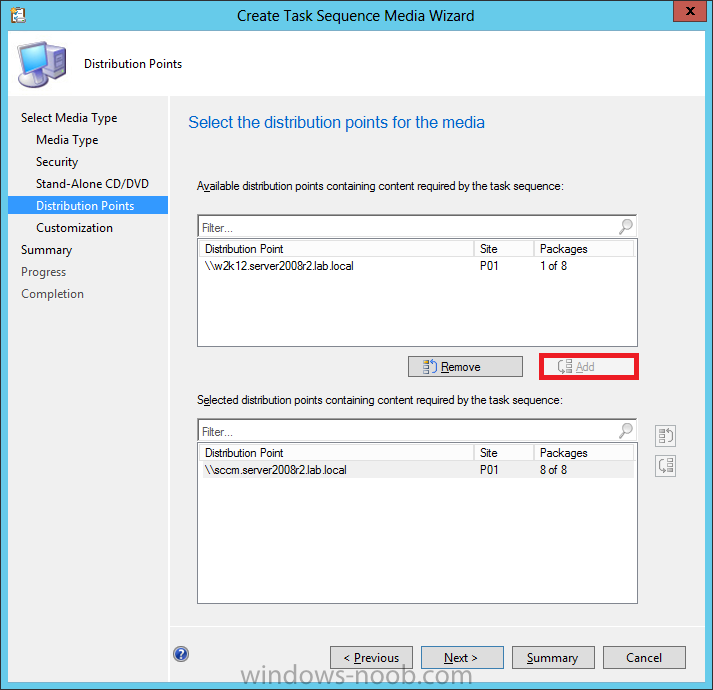
next you’ll see what packages are on distribution points, select the ones appropriate for your environment (if you forgot to distribute a package exit the wizard and fix that, then start this process again), in the example below i’ve clicked on Add and added 8 of 8
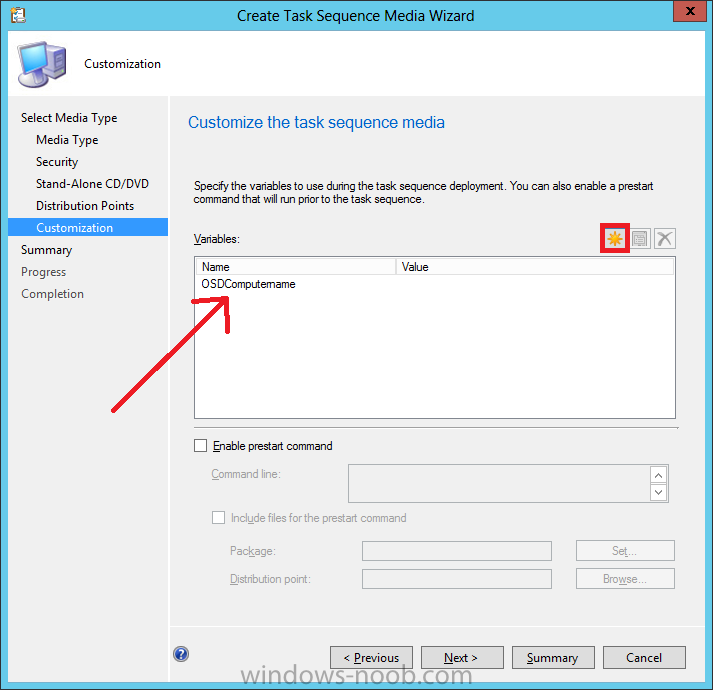
next you can add any computer variables or a prestart command, i’ve covered those elsewhere but for this task sequence i’ll add the OSDComputername variable and leave it blank to forcefully prompt for a computername during deployment otherwise we’ll get the MININT-xxxxxx name.
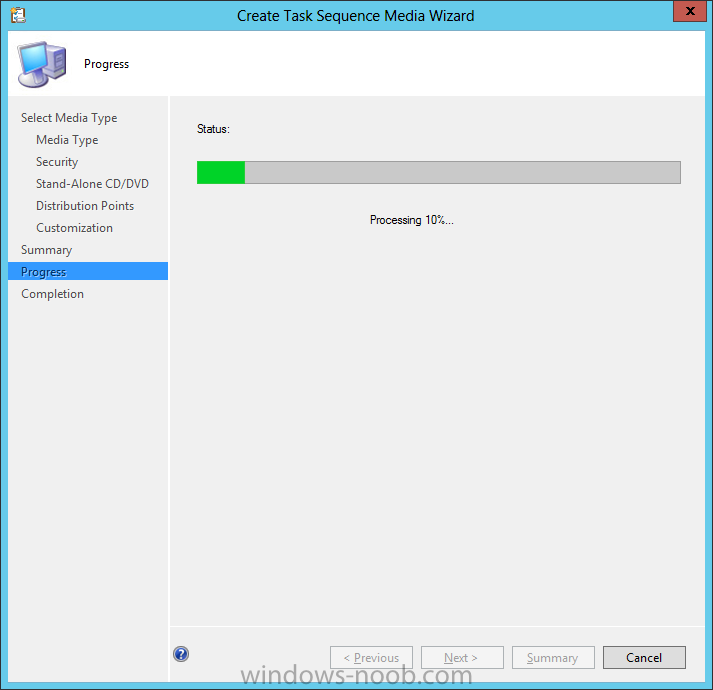
click next at the summary and accept any UAC prompt, it will begin creating the USB media
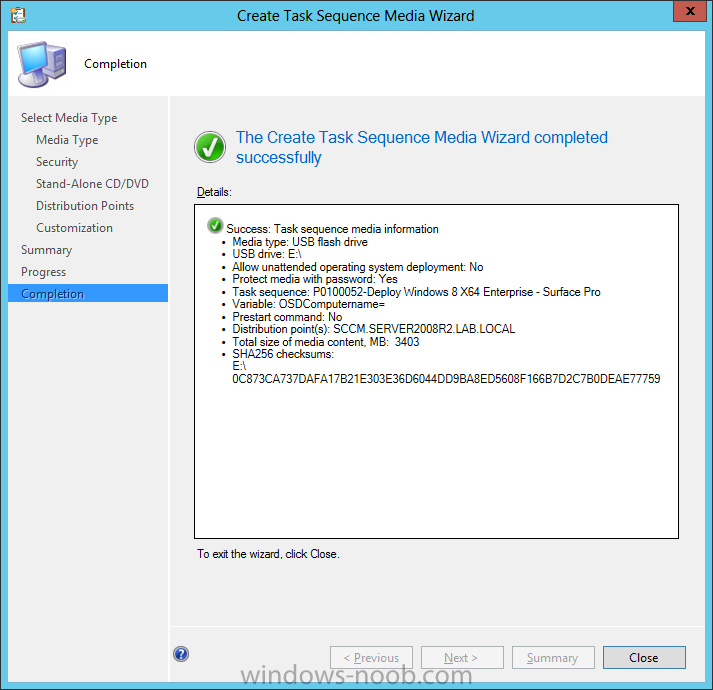
and after a while it will complete.
Step 5. Boot from the USB stand-alone media
Shutdown the Surface Pro and when it is powered off, make sure the USB 4 port hub with the USB stand-alone media and USB Network dongle is connected, then press and hold the volume down key on the left side of the Surface Pro and press the power button once. If you do the combination correctly, the system will attempt to boot from the USB stand-alone media.
Below you can see the boot process (YouTube video with no narration sorry) and I also enter the ComputerName as part of that process, yes you can even see one of our cats, called Trauma in the background.
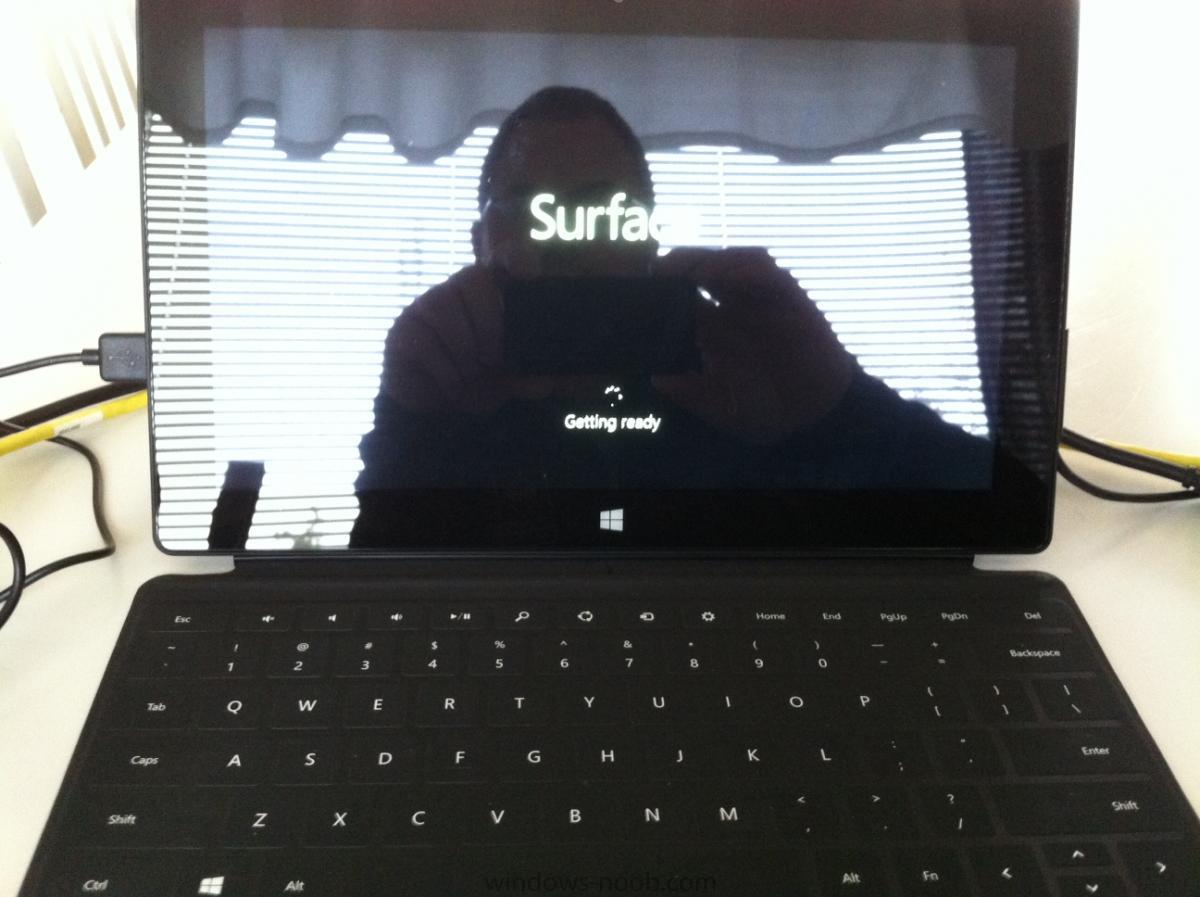
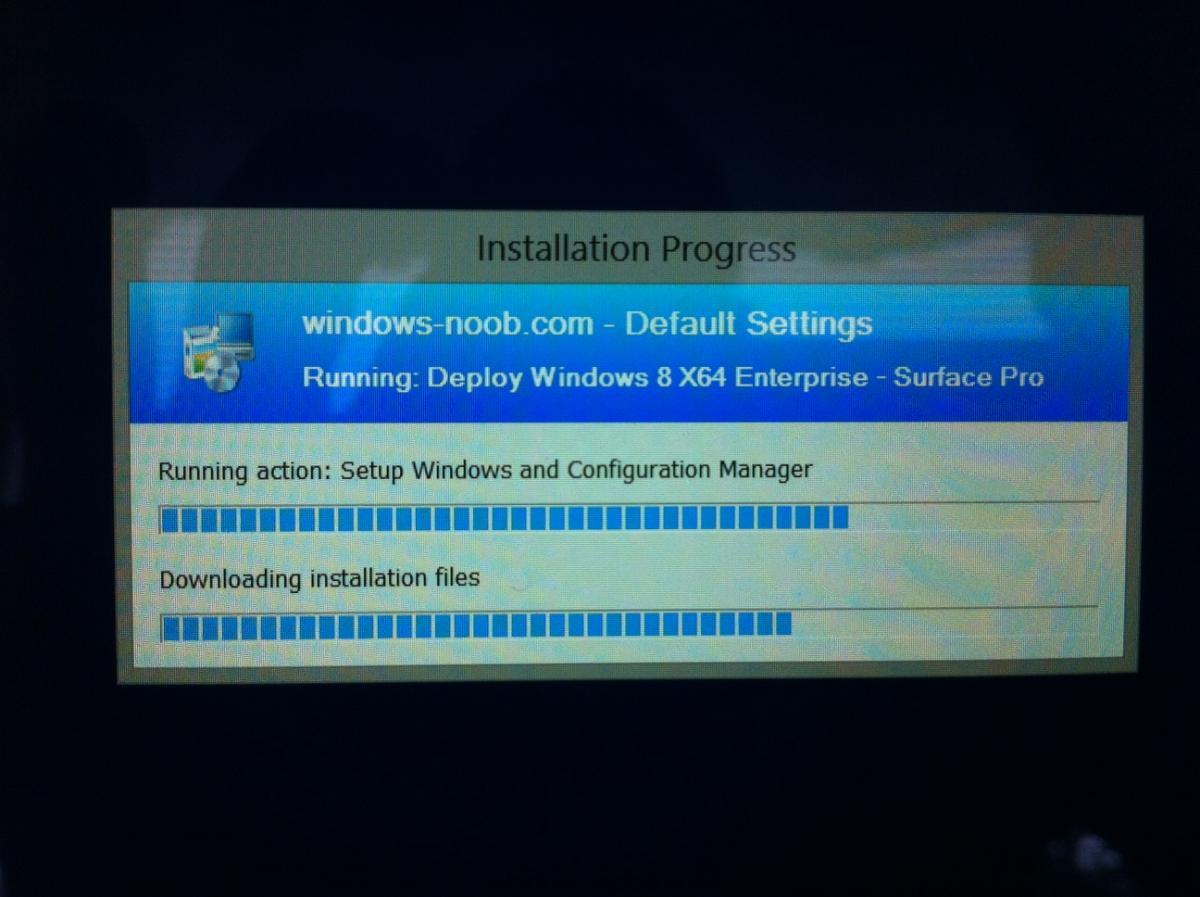
Ok once the process kicks off you can sit back and admire the automation via Configuration Manager 2012 SP1, it will install all the drivers included in your Driver Package and join the domain,
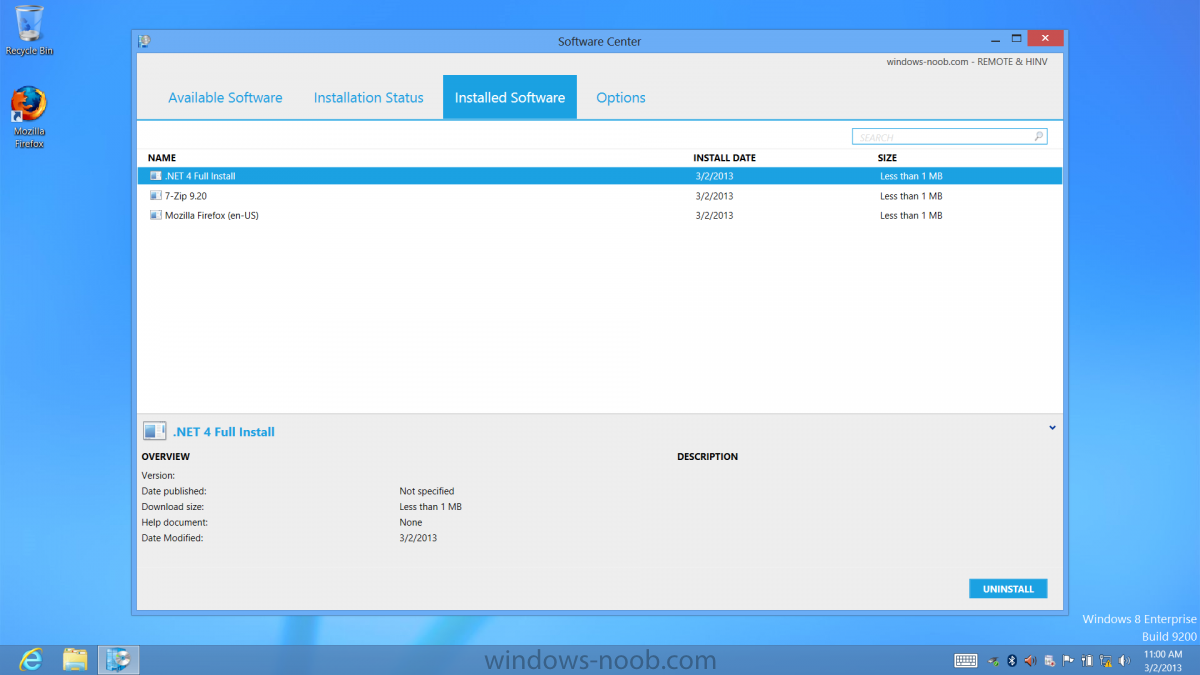
then it will Setup windows and Configuration Manager, reboot and enable BitLocker install your Applications and eventually present you with the login screen.
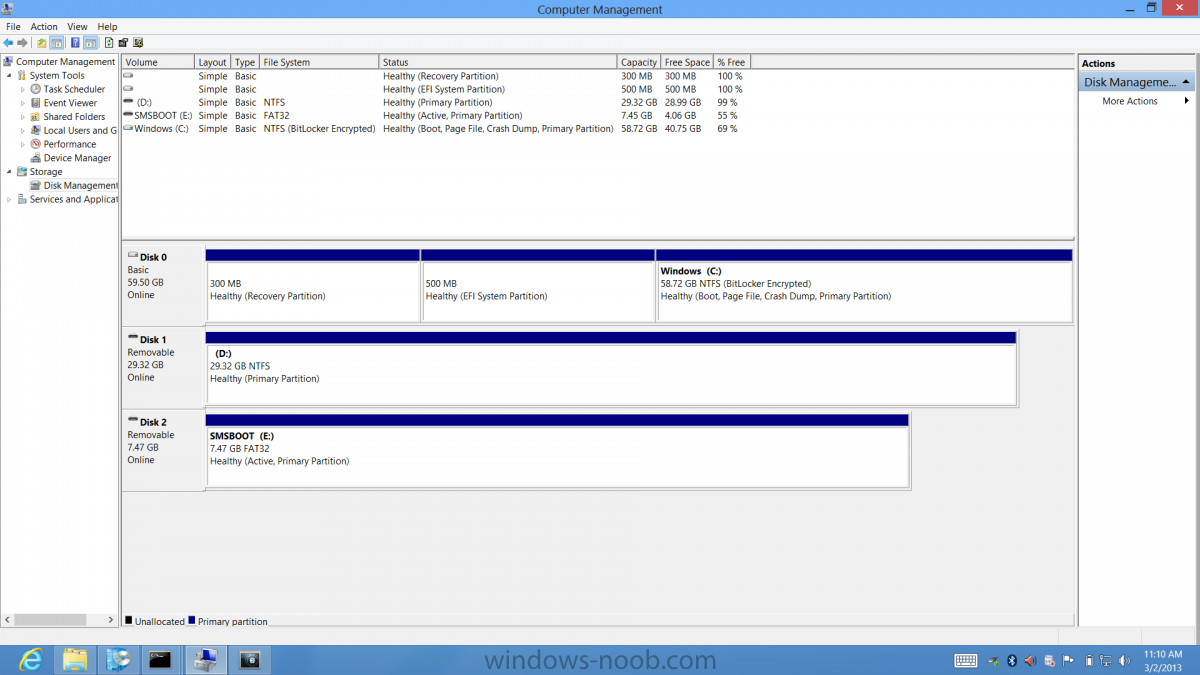
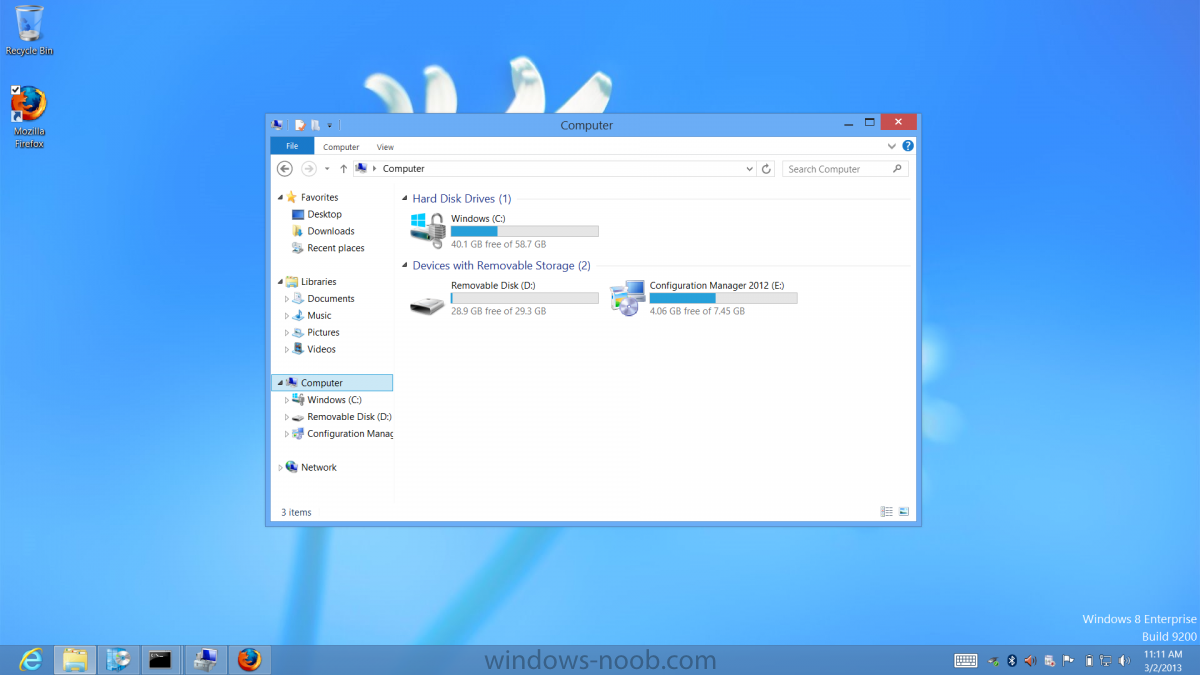
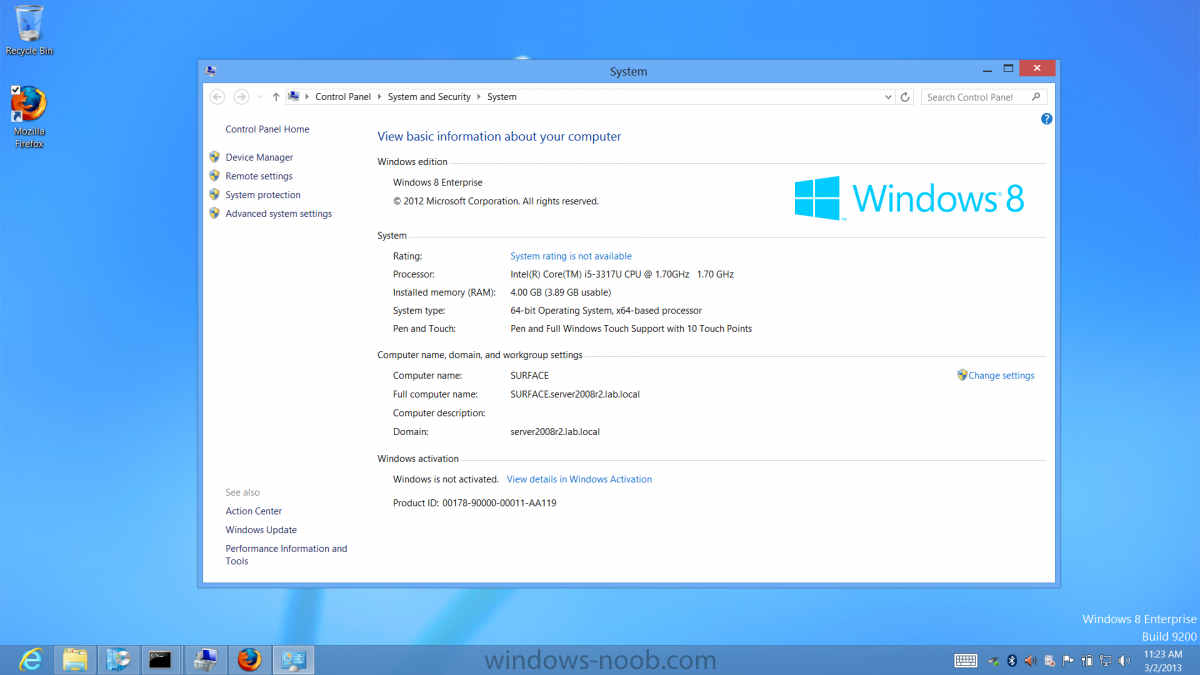
Login and you’ll see the Surface Pro is installed with Windows 8 X64 Enterprise, it has BitLocker Enabled, it’s paritioned for UEFI and it’s managed by Configuration Manager 2012 SP1.
Now is that cool or what ?, oh yeah !
some more screenshots below
original post on windows-noob.com




Pingback: BitLocker Problem with SCCM 2012 and Surface Pro | SCCM GURU
Pingback: Microsoft Surface Pro – Windows 8-Treiber zum Download | clientmgmt.de
Pingback: Why does my Surface Pro 3 take a very long time to UEFI Network Boot using System Center Configuration Manager 2012 R2 ? | just another windows noob ?