
Introduction
Now that the awesome Microsoft Surface Pro 3 is readily available and getting plenty of good press, customers are buying it and re-imaging the default Windows 8.1 Professional installation with their own corporate install.

In this post I’ll show you how to install Windows 8.1 X64 Enterprise using UEFI network boot via System Center 2012 R2 Configuration Manager.
Step 1. Get the drivers
Download the Microsoft Surface Pro 3 drivers from the following link.
http://www.microsoft…s.aspx?id=38826
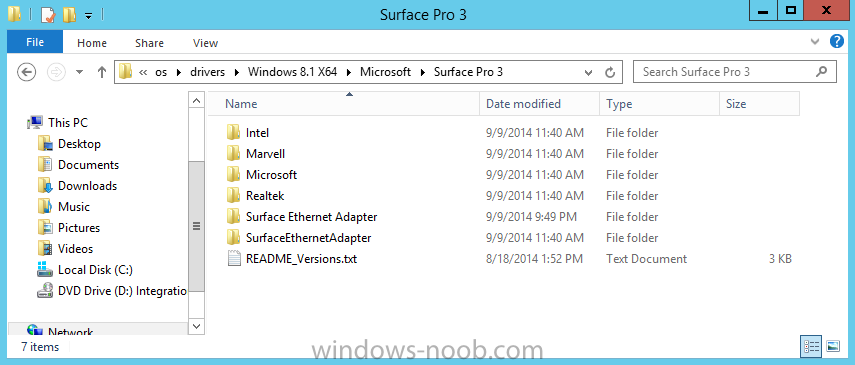
I’d recommend you choose whatever are the latest zipped drivers for the product, in my case that was those from August, namely Surface Pro 3 – August 19, 2014.zip. Extract the zip file to somewhere useful like
\\server\sources\os\drivers\Windows 8.1 x64\Microsoft\Surface Pro 3\
as shown in the screenshot below
Step 2. Import the drivers into Configuration Manager
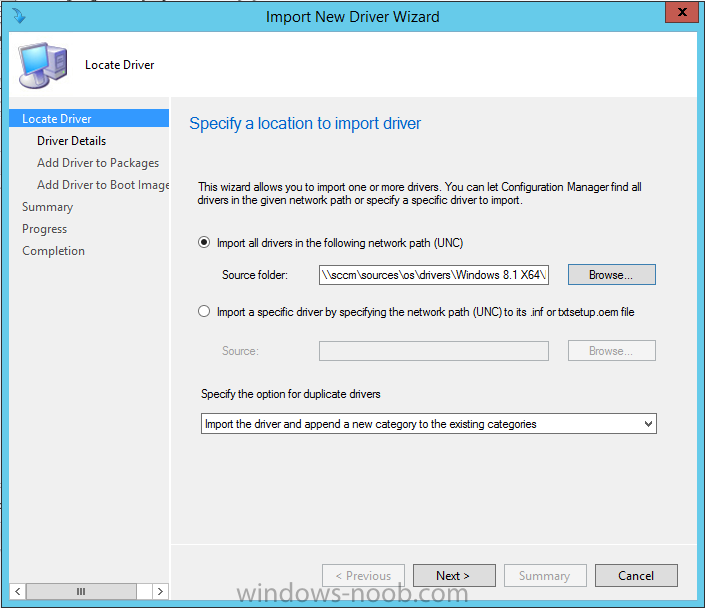
In the Configuration Manager console, expand Software Library and select the Operating System node, next select Drivers. Right click and choose Import Driver as in the screenshot below

select Import all drivers in the following network path and use the Driver path that we specified above in Step 1, eg:
\\server\sources\os\drivers\Windows 8.1 x64\Microsoft\Surface Pro 3\
as shown below
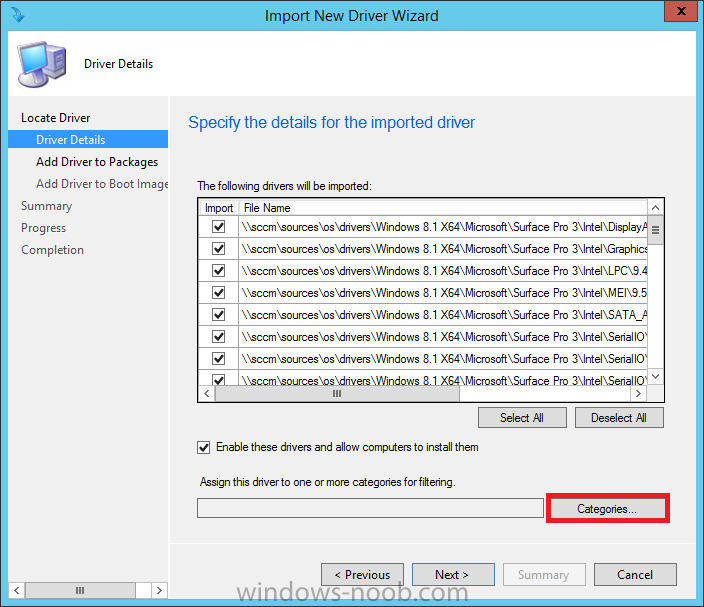
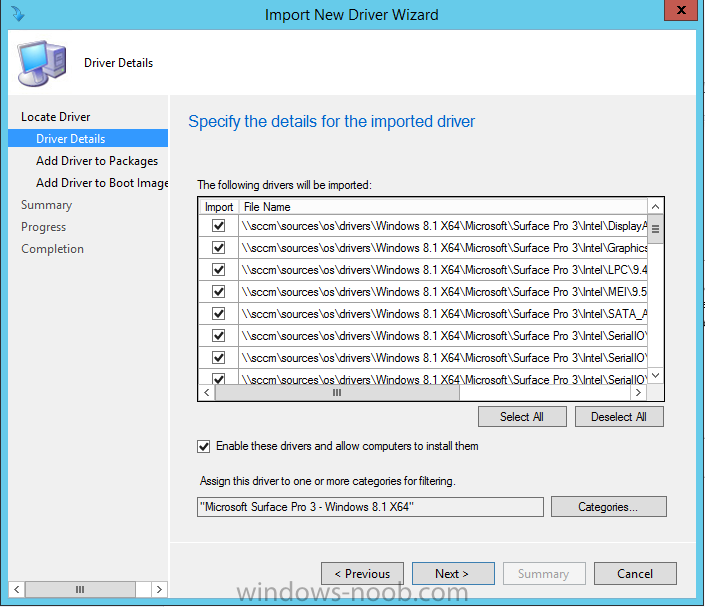
As these are new drivers for a new product, we want to categorize them for searching later, so click on Categories
click on Create and enter Microsoft Surface Pro 3 – Windows 8.1 X64 as the category name as shown below
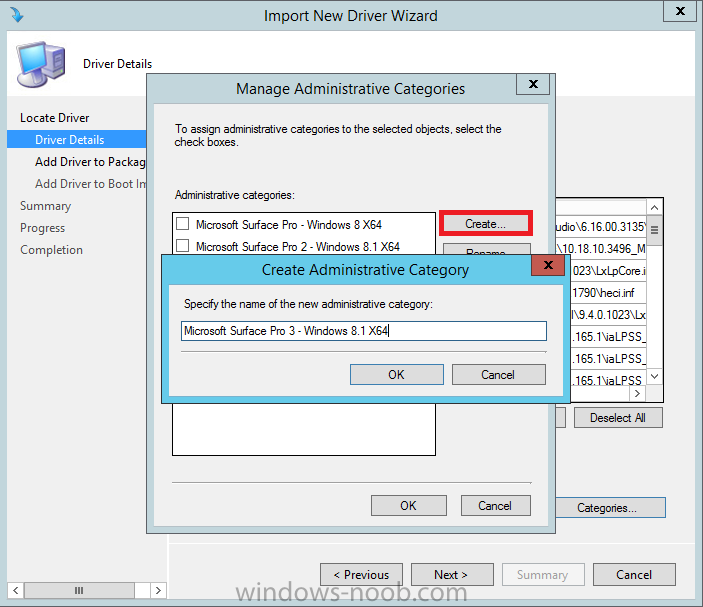
click on Ok so it shows like the screenshot below
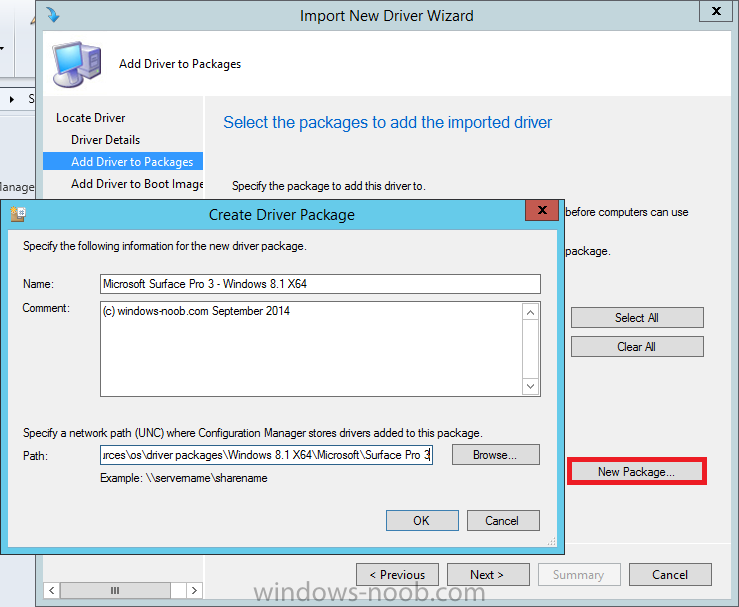
for the Add drivers to package screen, click on New Package and fill in the package details as shown below, for Path, make sure that you’ve pre-created a suitably named empty folder for your driver package to be stored such as the example below:-
\\server\sources\os\driver packages\Windows 8.1 x64\Microsoft\Surface Pro 3\
before continuing, remove the check mark from Update Distribution Points when finished as we still need to distribute this new package to one or more distribution points
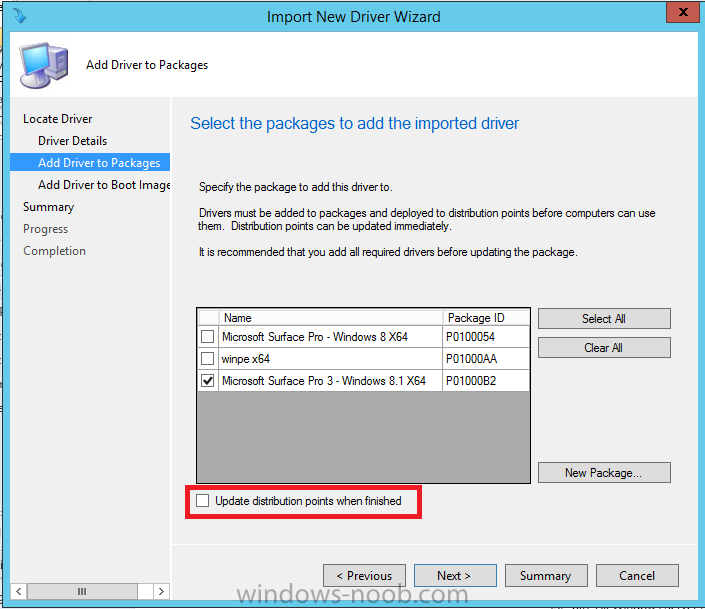
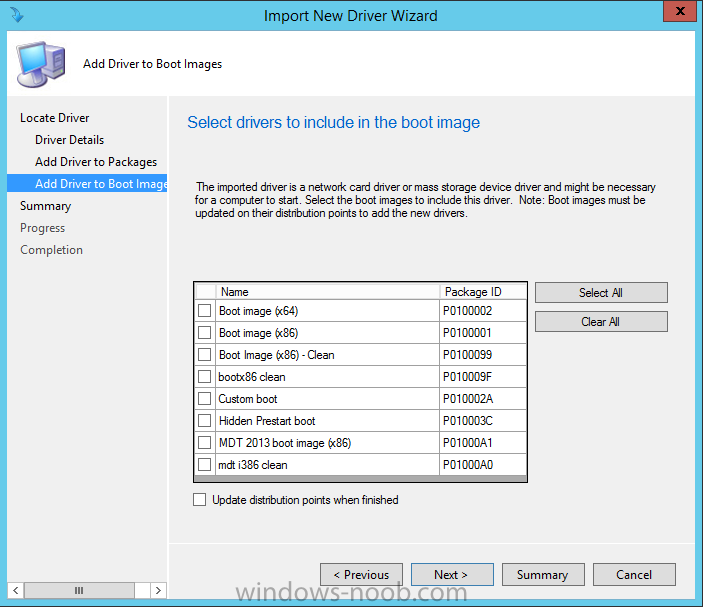
and we will not be adding these drivers to the boot image so do not select any boot image, we will add the network driver to the boot image later in this guide. With boot images you only want to add the bare minimum drivers and only if needed.
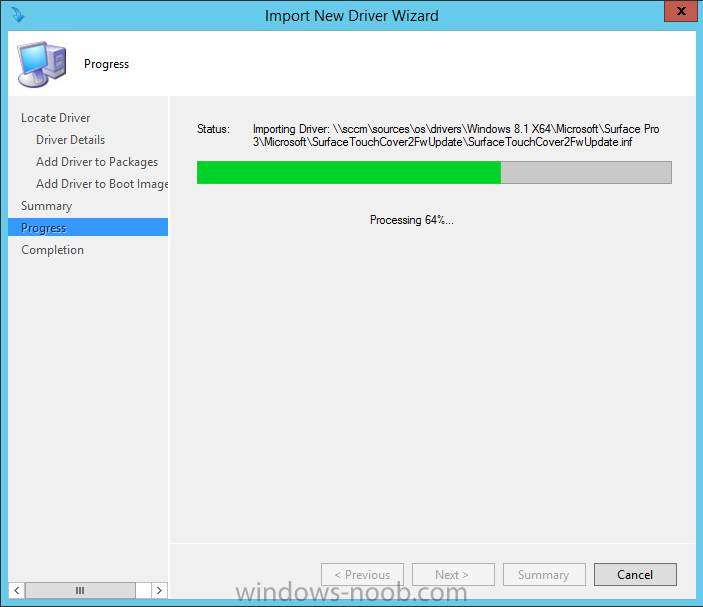
Click next and the driver import begins,
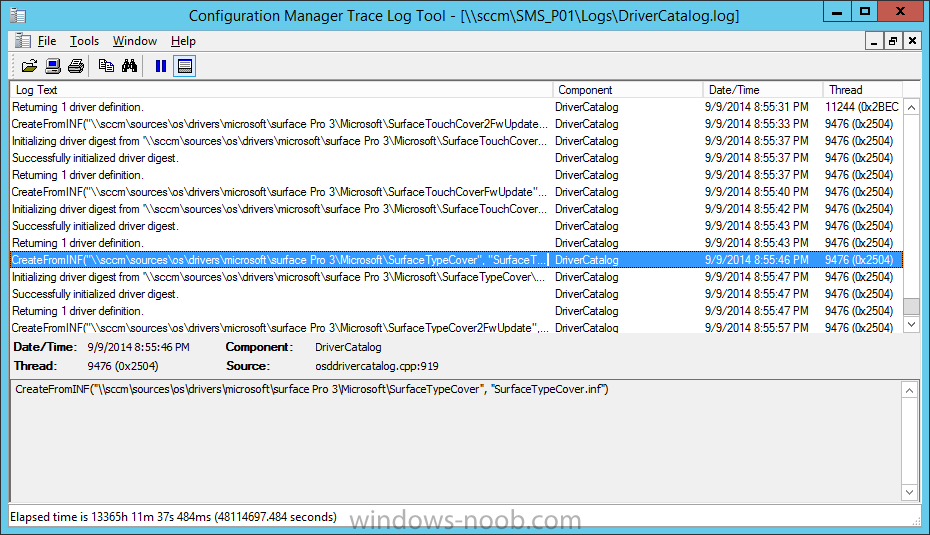
Tip: You can monitor DriverCatalog.log in CMtrace on the site server to view details about device drivers that are been imported into the driver catalog.
if all went well after a few minutes you’ll get a completion message,

Tip: If there were any problems with duplicate drivers you might want to try Jason Sandy’s duplicate drivers helper script here. If you’d like to automate the above with a PowerShell script then try this one from Kent Agerlund.
If there are other ssues with importing drivers please refer to the SMSProv.log for details of what failed and why. You can search that file for the name of the driver that failed to import.
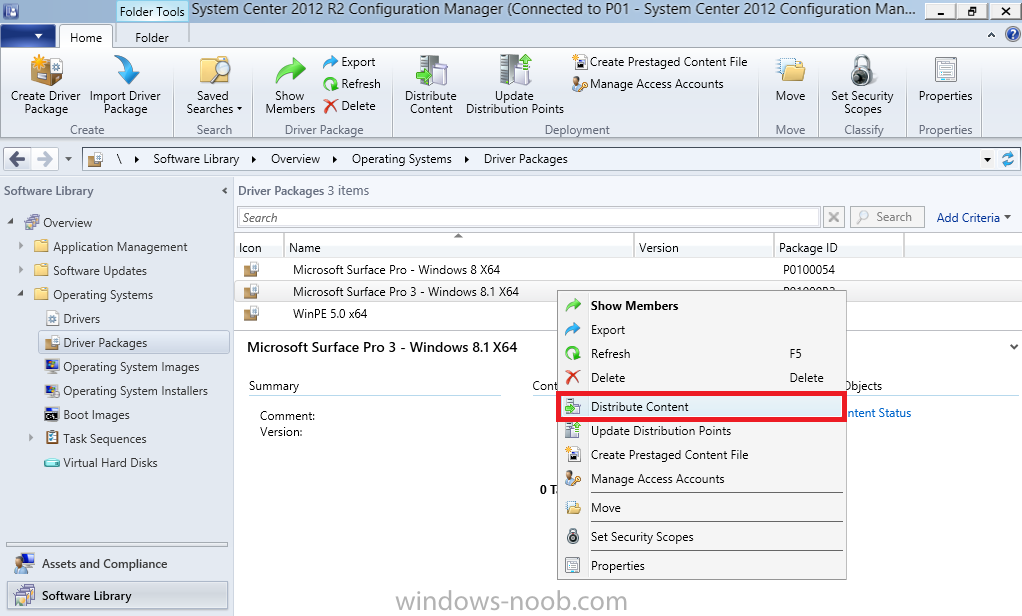
Step 3. Distribute the Surface Pro 3 Driver Package
Now that our drivers are imported and a driver package created, we need to make them available to our computers to install, and to do that we need to distribute the driver package to one or more distribution points.
Select Driver Packages, you’ll see the new Microsoft Surface Pro 3 – Windows 8.1 X64 driver package, select it and right click, choose Distribute Content as shown below
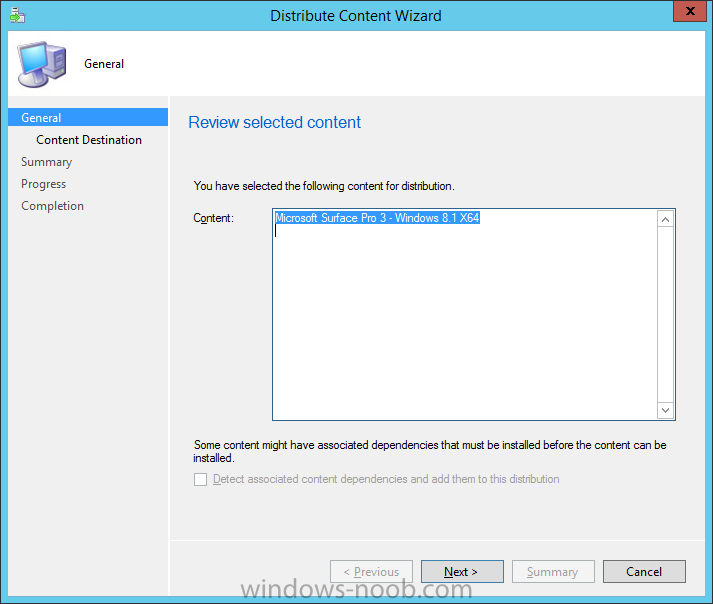
click next at the Review selected content screen
Select Add and from the drop down choose Distribution Point then select one or more distribution points from the list,
Tip: When testing new drivers it’s a good idea to distribute them to one distribution point only until you’ve fully tested them and are happy with the driver package, once you are happy, distribute the driver package to the remaining distribution points.

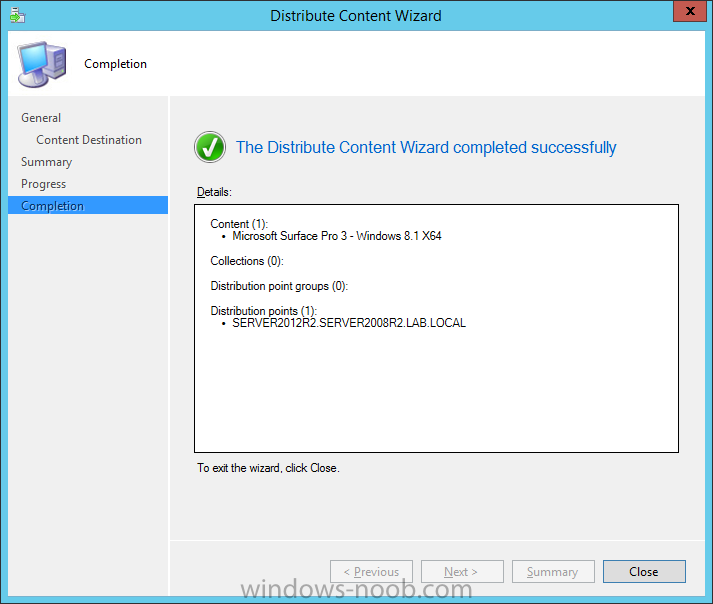
and complete that wizard
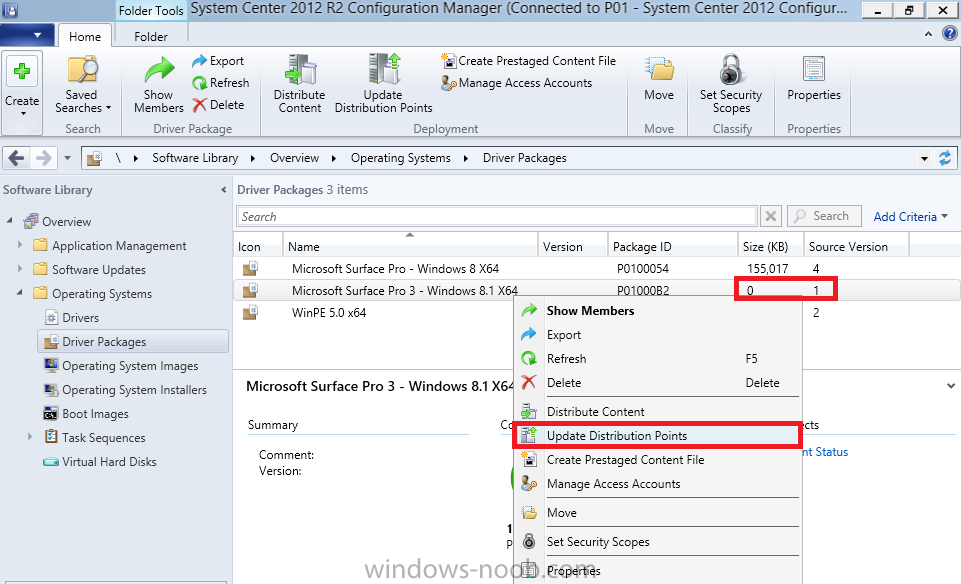
Once done, if the driver package size show’s as 0 KB, then right click on your driver package and choose Update Distribution Points so that the source version of the driver package is at least 2. the source version increments by 1 every time you update the driver package to your distribution points (when adding or removing drivers for example).
answer ok when prompted to update the distribution points

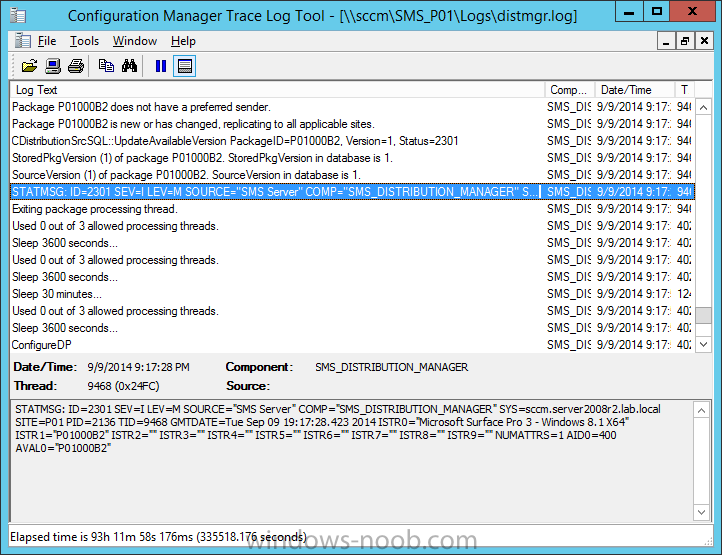
you can monitor the updating and distribution of the driver package in distmgr.log using cmtrace.
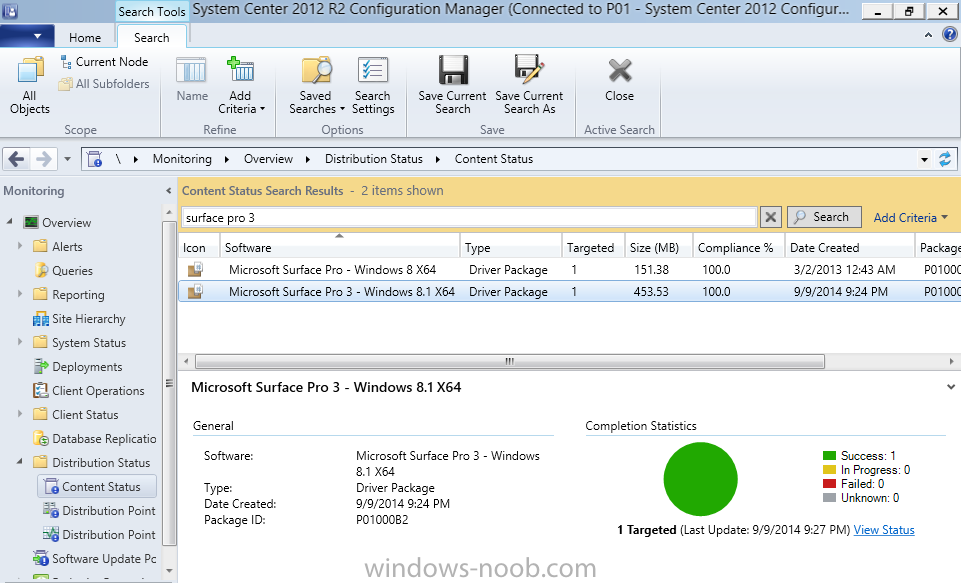
or via the Monitoring Node, select distribution status and then content status and search for Surface Pro 3 as shown below
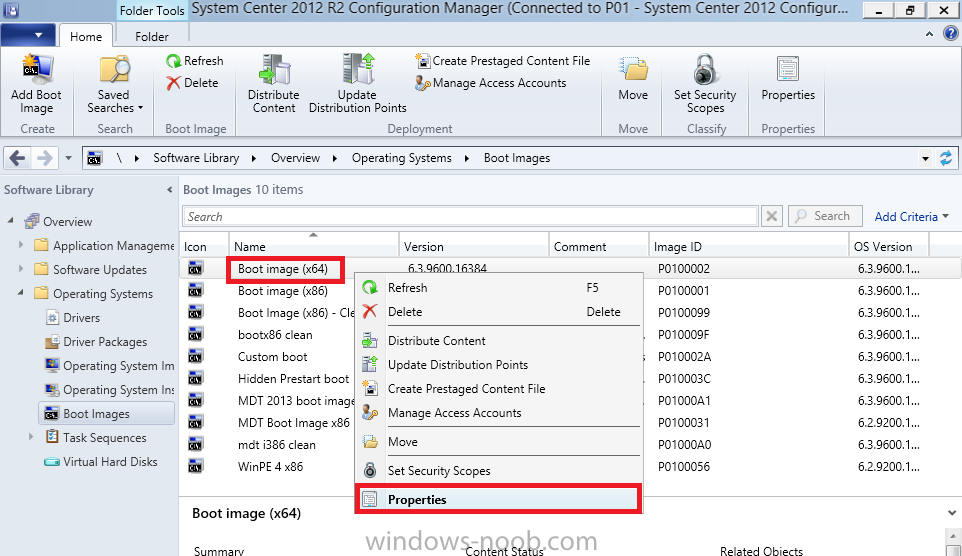
Step 4. Add the network driver to our X64 boot wim
As we will UEFI network boot we need the nic driver added to our X64 boot wim. Select the X64 boot wim and right click, choose Properties
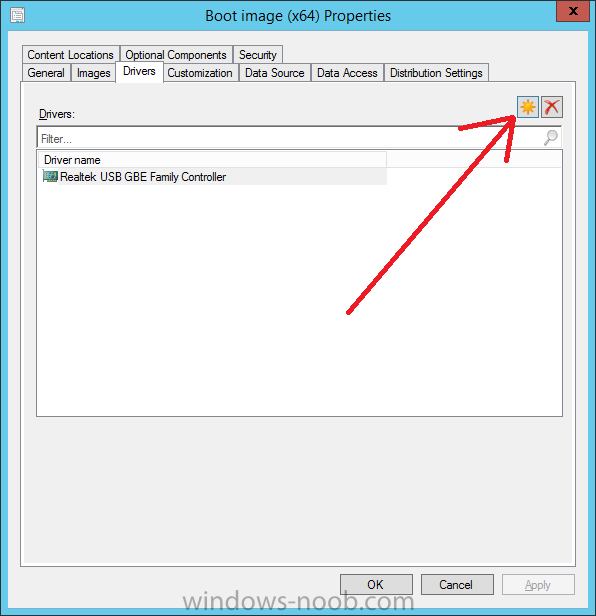
select the drivers tab and then click on the Yellow startburst to add a new driver to the boot wim
Search for Surface Ethernet Adapter as shown below
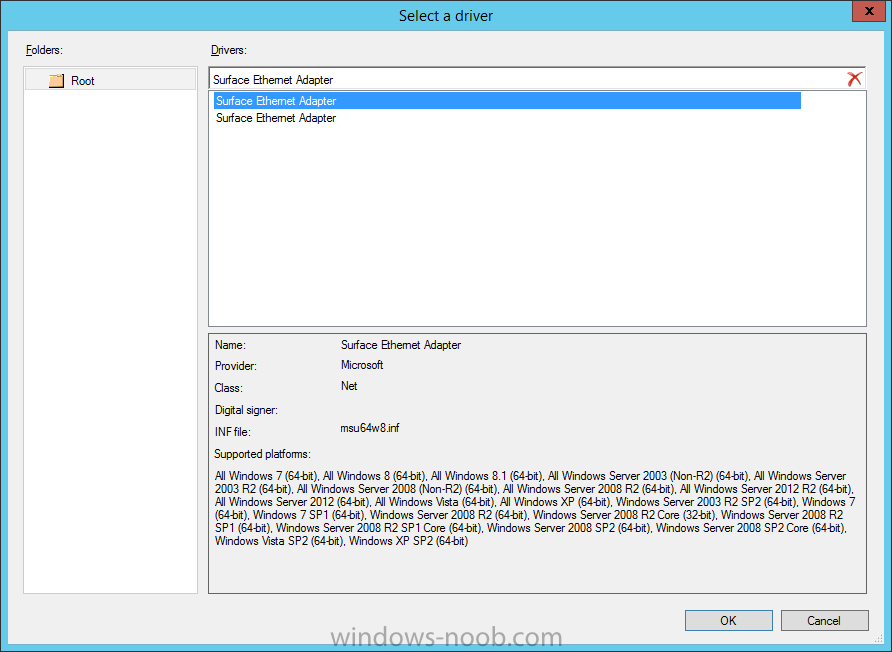
The driver shown above (msu64w8.inf) is the 100mbit driver (download the Surface Ethernet Adapter 100mbit driver from here for model 1552), the other driver (msu30x64w8.inf) is for gigabit (model 1663).
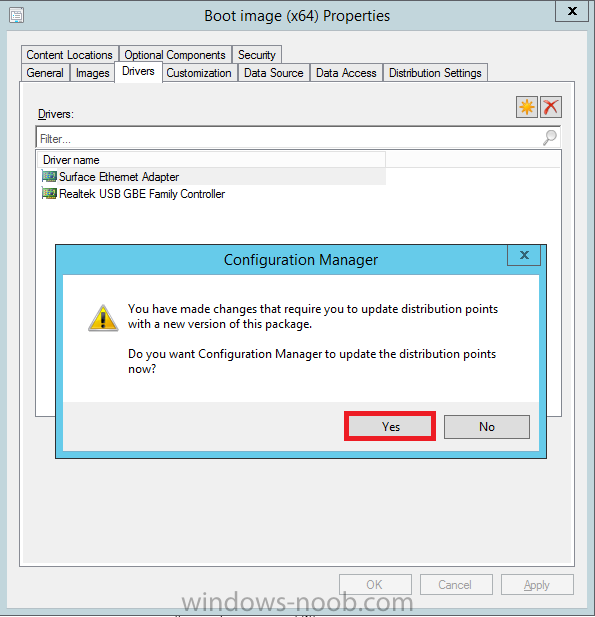
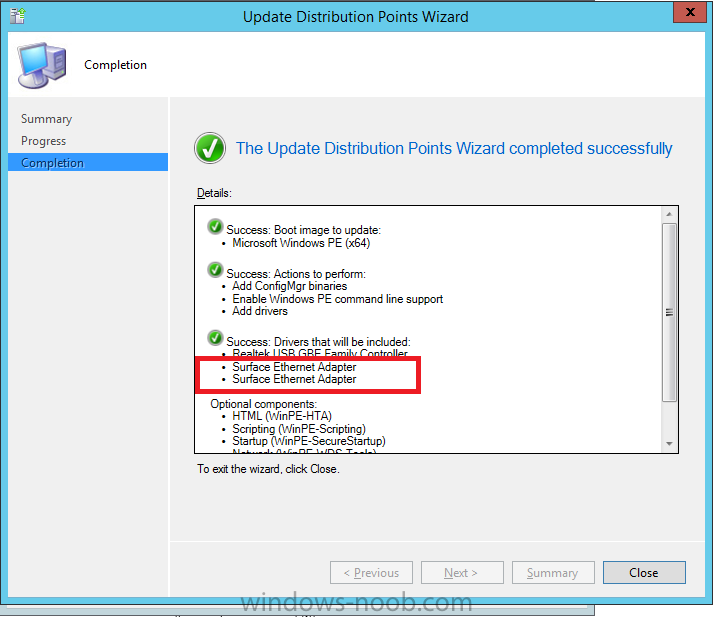
Click ok and then click on Apply, answer Yes to the update distribution points question as shown below
Once done you’ll see this
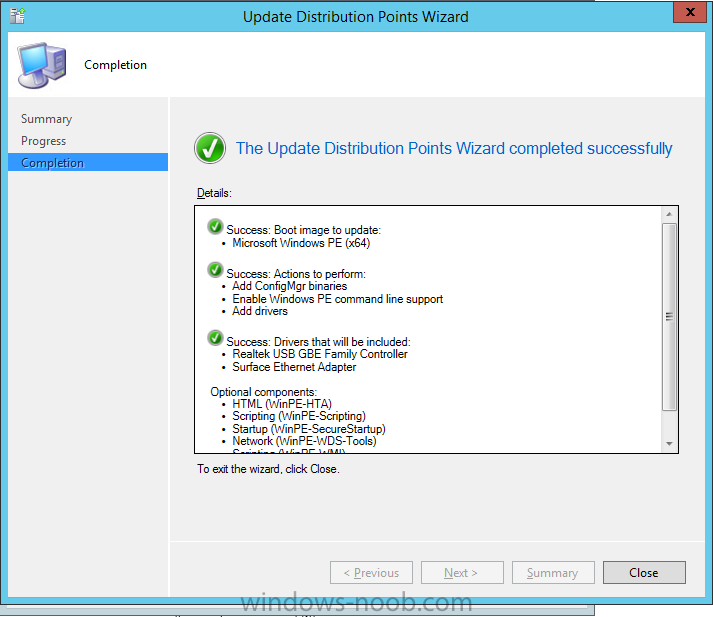
if you also added the 100mbit driver you’ll see it listed twice, one is the 100mbit driver, the other is gigabit
Step 5. Edit and then deploy a Windows 8.1 task sequence
For the purpose of keeping this guide concise i’ll assume you already have a Deploy Windows 8.1 X64 task sequence ready made, if not then please follow this guide and return here when done.
Right click the task sequence, choose Properties and select the advanced tab, make sure the boot image is 64 bit and that it’s the boot image you added the drivers to in step 4. Click Ok when done.
Next, right click the task sequence and choose Edit, locate the Apply Network settings step and click it, next choose the Add drop down and select Drivers, select Apply Driver Package option as shown in the screenshot below
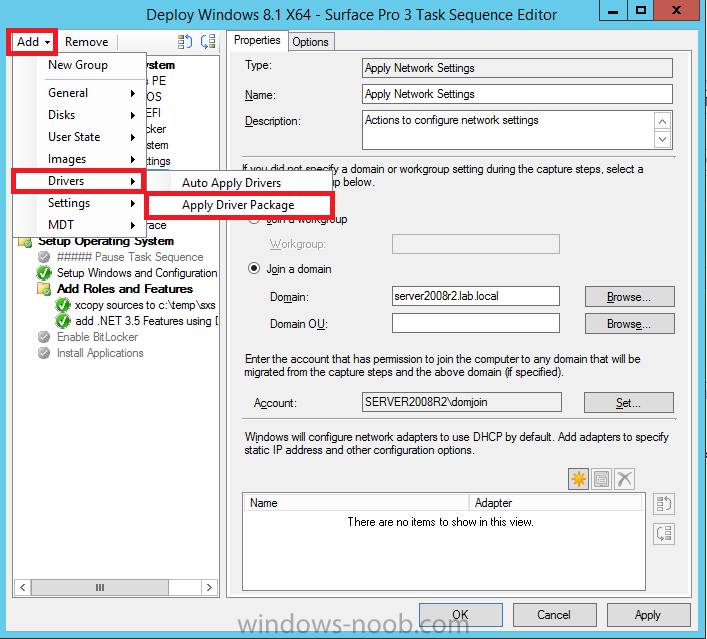
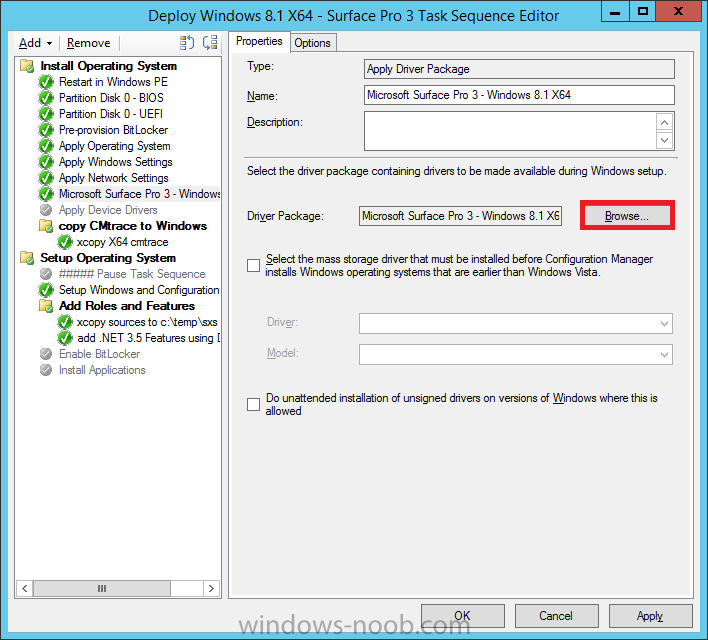
name the step Microsoft Surface Pro 3 – Windows 8.1 X64 and click on browse to select the driver package we created earlier as shown below
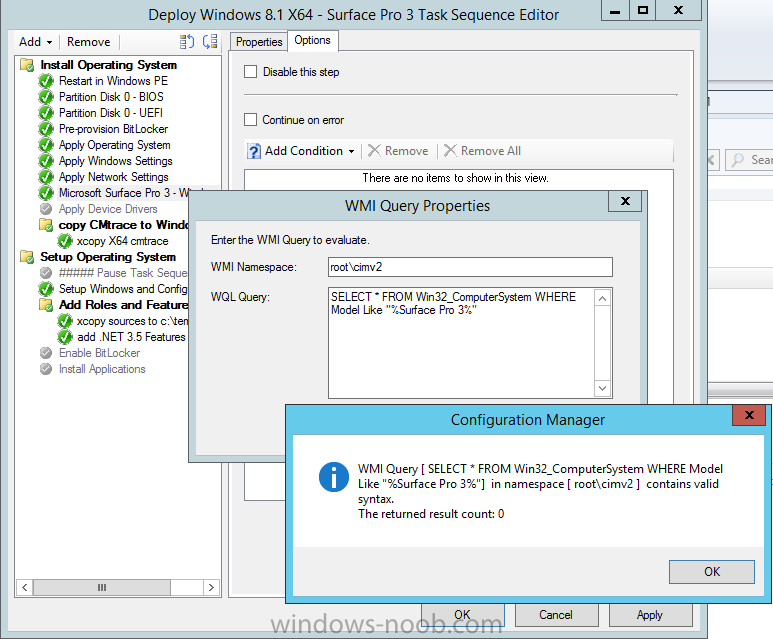
next click on the Options tab and select WMI Query from the drop down options, paste in the following code
SELECT * FROM Win32_ComputerSystem WHERE Model Like "%Surface Pro 3%"
and make sure to test the query as shown below before applying.
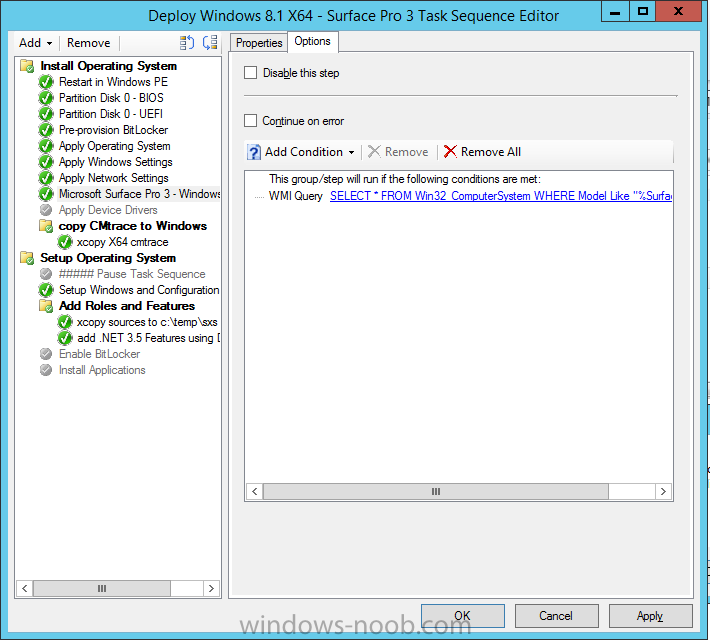
here’s the finished options step
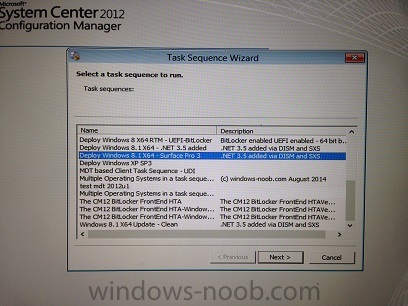
Once you are done with your edits, Deploy the task sequence to a collection that you’ve added a membership query for the computername/mac address of your Surface Pro 3 dongle. For the purpose of simplicity i’m not going into those details, you can review how to import that info into configuration manager in this post.
Step 6. Start UEFI network boot and enjoy the show !
Once all the above is done you are ready to watch the deployment, so connect the Surface Pro 3 to your wired network and shut it down before continuing.
Tip: To power it off, you can hold the power button on the top left for 13 seconds or so to force it off, or boot into Windows and choose Shutdown from the Start screen.
Once the device is properly powered off (and not restarted) press and hold volume down (left side) and then press the power button briefly, this will tell the device to boot from UEFI network boot (if a usb dongle or docked nic is attached) or USB media.
Below are a few photos of the UEFI network boot (sorry the iPhone takes less than optimal photos).

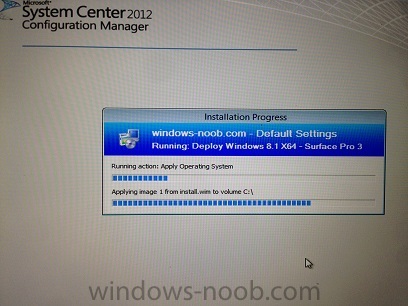
Note: if your device takes forever to download the boot wim, please read this post for a solution.
Job done !
Summary
Imaging UEFI based computers with Windows 8.1 X64 is exciting, challenging and fun even if the technology has been around for a while. As more and more cool hardware like the Microsoft Surface Pro 3 are made available, being able to image them successfully with System Center 2012 R2 Configuration Manager is a dream come true.
Related reading
- Where do I find the MAC address of my Surface Pro 3 Ethernet Adapter in order to use UEFI network boot ? – http://www.niallbrad…i-network-boot/
- Why is my Surface Pro 3 not BitLockered after OSD via System Center 2012 R2 Configuration Manager ? – http://www.niallbrad…ration-manager/
- Why does my Surface Pro 3 take a very long time to UEFI Network Boot using System Center 2012 R2 Configuration Manager ? http://www.niallbrad…anager-2012-r2/
- Surface Pro 3, Surface Pro 2, and Surface Pro firmware and driver packs http://www.microsoft…s.aspx?id=38826
Downloads
You can download a Microsoft Word copy of this guide here.  How can I deploy Windows 8.1 X64 to the Microsoft Surface Pro 3 using Configuration Manager 2012 R2.zip 2.49MB
