
In Part 1 of this series we got our AD and SCCM servers ready, and then we installed System Center 2012 Configuration Manager as a standalone Primary site. In Part 2 we configured the SCCM server further by adding some Windows Server roles necessary for the following Configuration Manager 2012 functionality, Software Update Point (SUP) and Operating System Deployment. In Part 3 we configured the server further by Enabling Discovery methods and creating Boundary’s and Boundary Groups. In Part 4 we configured Client Settings, Added roles and Distributed the Configmgr Client to our Computers within the LAB, then in Part 5 we enabled the Endpoint Protection Role and configured Endpoint Protection settings and targeted a collection called All Windows 7 Computers with these settings and policies.
Now we will configure our SUP further to Deploy software updates to our All Windows 7 Computers and Build Windows 7 X64 collections.
Step 1. Configure the SUP Products to Sync and Perform a Sync
Perform the following on the SCCM server as SMSadmin
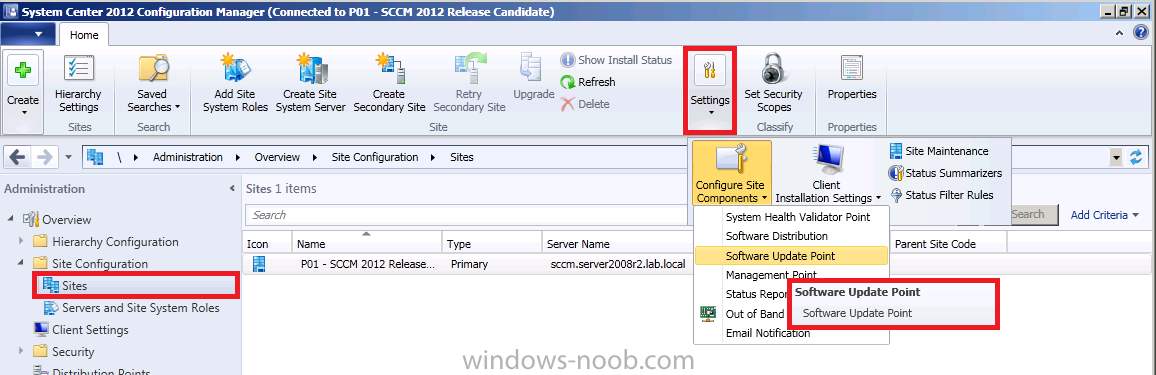
Click on Administration, expand Overview and expand Site Configuration, select Sites and click on Settings in the ribbon and click on Configure Site Components and select Software Update Point.
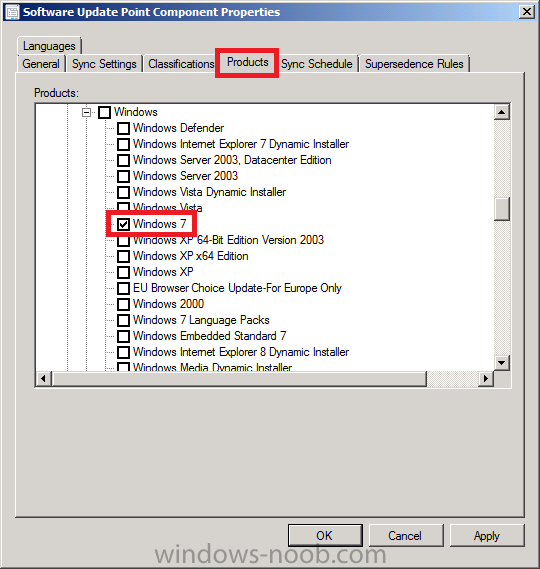
In the Products tab ensure that the product Windows 7 check box is selected.
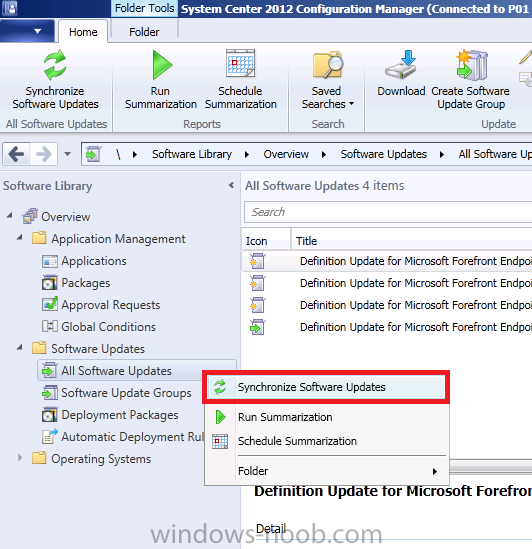
Click on Software Library, Software Updates, right click on All Software Updates and choose Synchronize Software Updates, answer Yes when prompted.
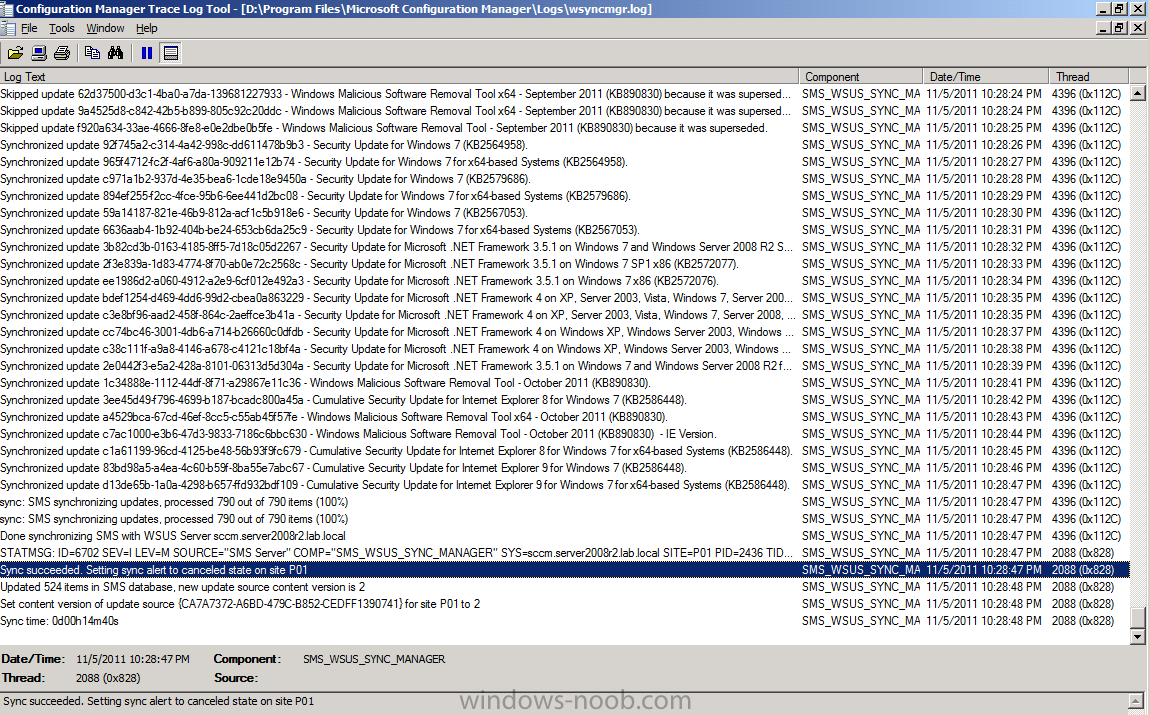
Monitor the Sync process using the Wsyncmgr.log file in CMTrace.
As we started the sync manually you should search for the following string “Performing Sync on local request“, followed by the status of the sync and you know it’s complete when you can see the following line “Sync Succeeded. Setting Sync alert to cancelled on Site P01.“
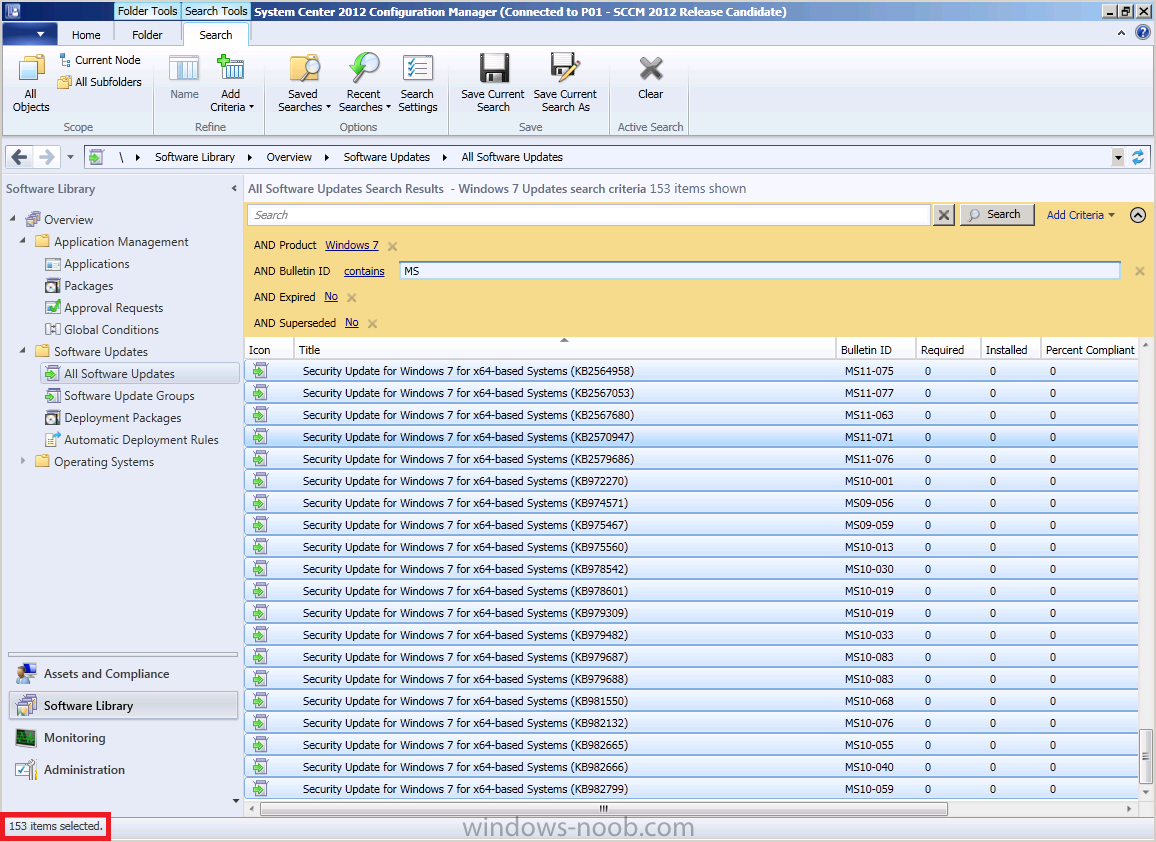
Step 2. Specify Search Criteria for Software Updates
Perform the following on the SCCM server as SMSadmin
In the console, click Software Library, expand it and select All Software Updates then click on Add Criteria in the top right of the search field. In the scrollable Add Criteria menu, select the following options
- Bulletin ID
- Expired
- Superseded
- Product
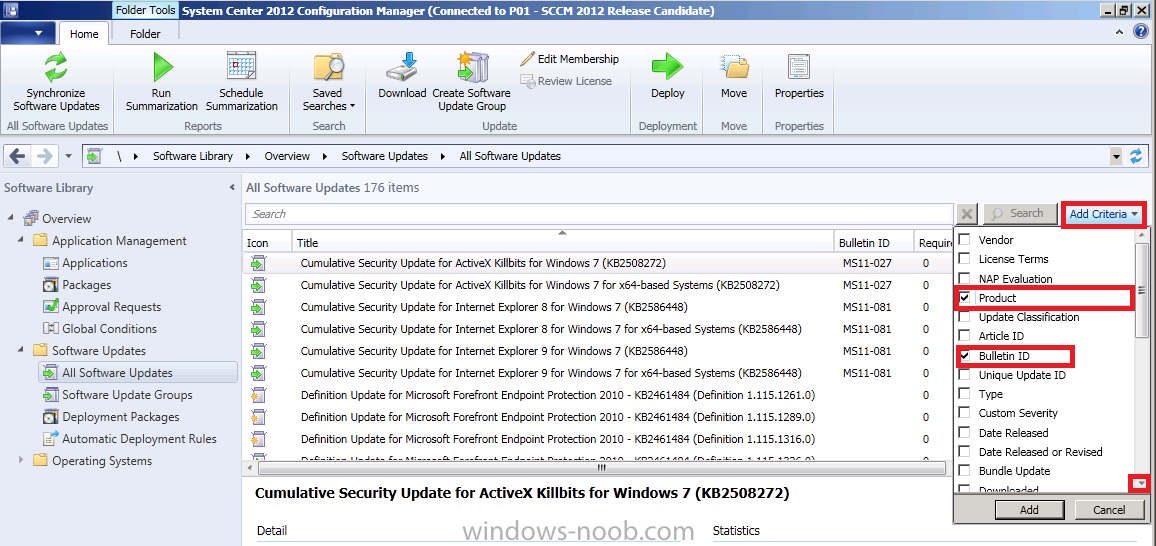
then define the criteria using the drop down menus beside each option
so that they look as follows:-
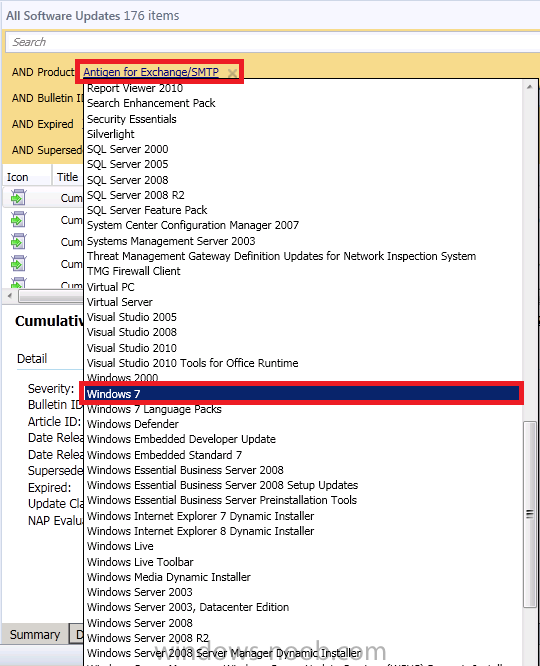
- Product = Windows 7
- Bulletin ID =MS
- Expired = No
- Superseded = No
then click on Search, you’ll get a list of results like so
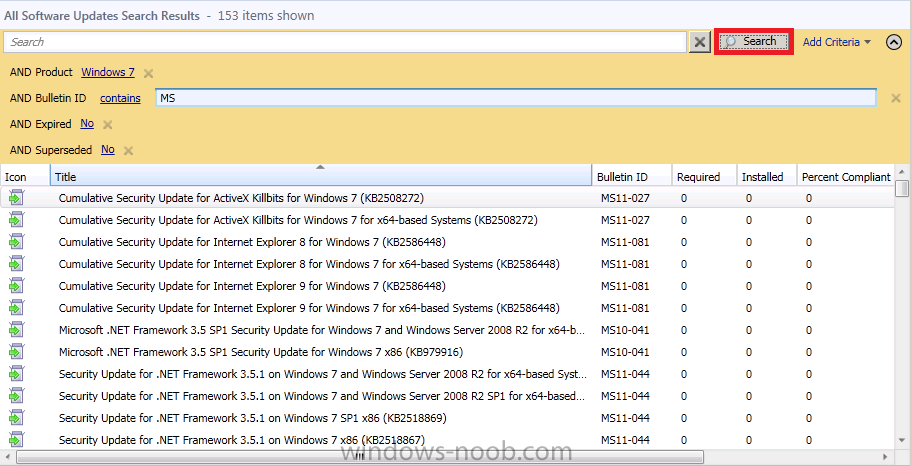
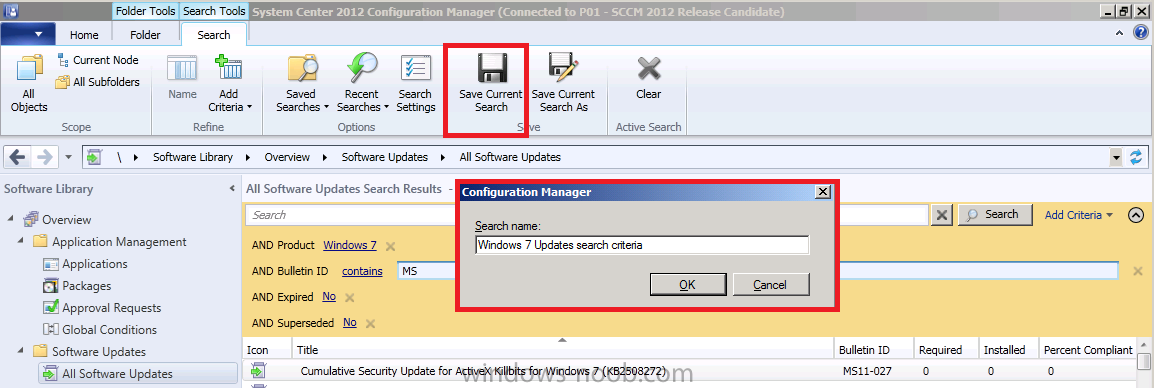
let’s save our Search criteria and call it Windows 7 Updates search criteria, you can return to this search later by clicking on saved searches and selecting your search from the list.
Step 3. Create a Software Update Group that Contains the Software Updates
Perform the following on the SCCM server as SMSadmin
Note: Normally you’d want to look through
all these updates and filter out (delete) the ones that are not
applicable to you, such as Beta or Service Packs, Delete these from your
list before continuing.
After we’ve trimmed down out updates we’ll select the remaining updates by selecting all the updates found in our search criteria above by clicking on one update and then pressing CTRL + A,
it should say 153 (or similar) items selected in the bottom left
corner, make sure you are still in the Search Criteria as in the picture
below
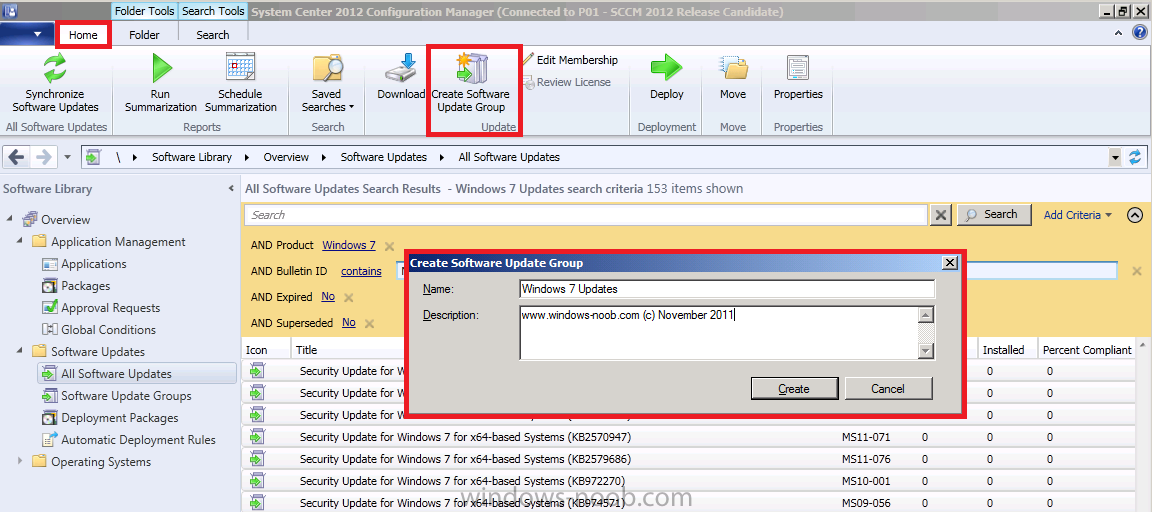
In the ribbon, click on Home and then in the Update click on Create Software Update Group, call it Windows 7 Updates and click on Create
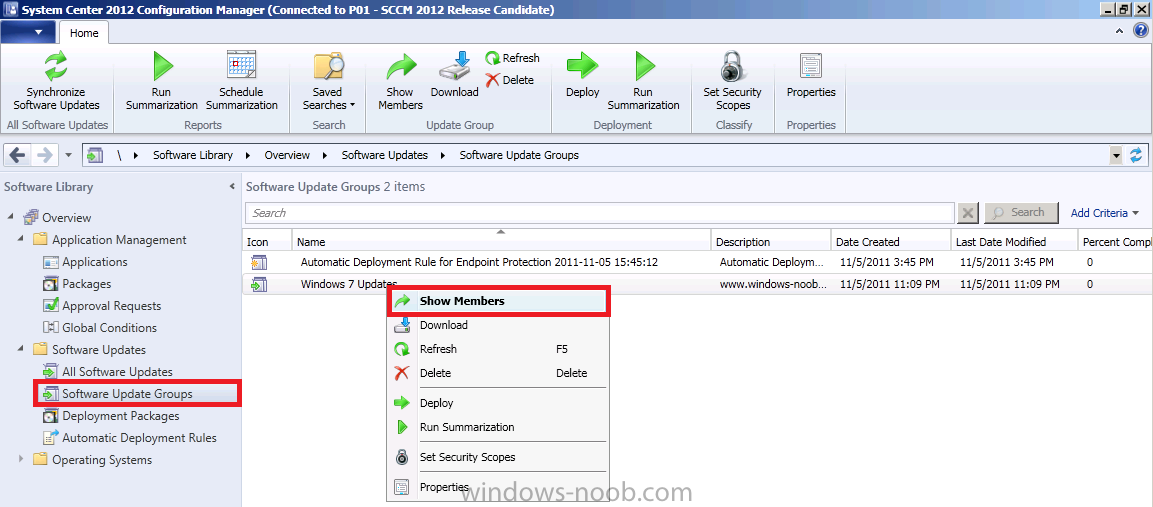
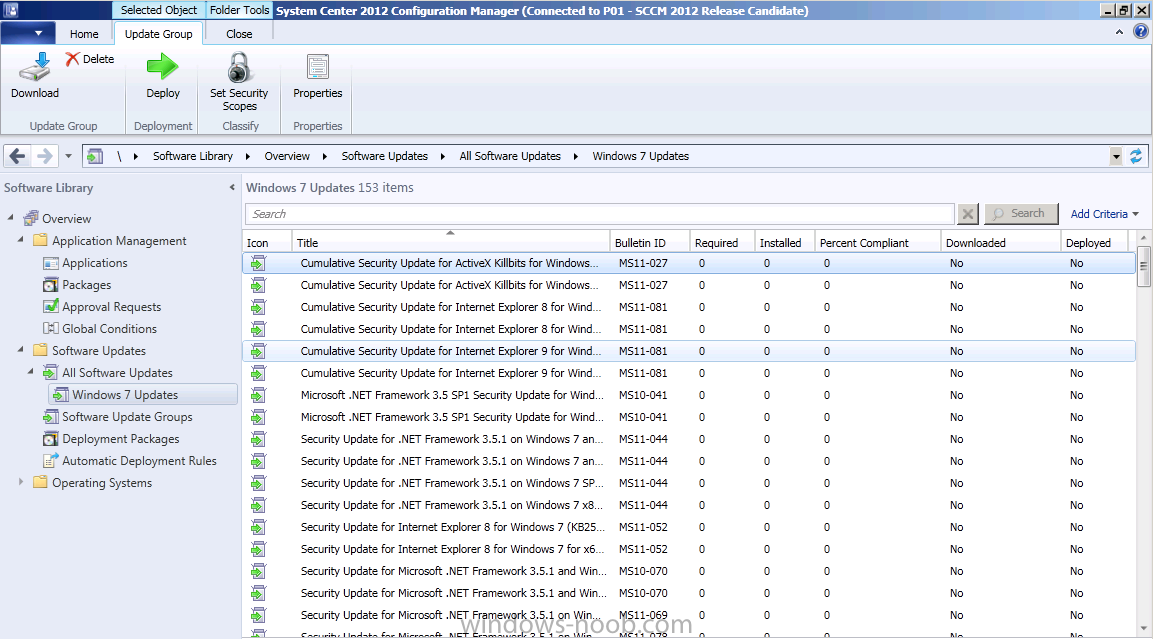
Now you can click on Software Update Groups in the console and you’ll see your newly created Software Update Group, right click on it and choose Show Members to see the updates in this group.
this lists the Sotware Updates contained in the Software Update Group
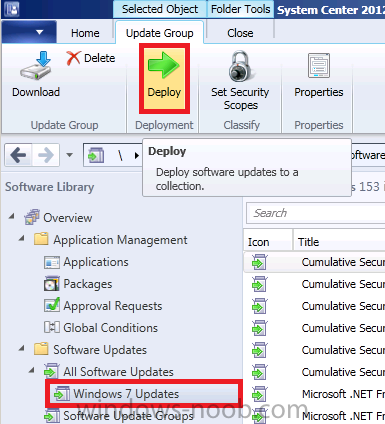
Step 4. Deploy the Software Update Group
Perform the following on the SCCM server as SMSadmin
We could  download the Content for the Software Update Group to verify that it’s available before distributing it to our Distribution Points, but we’ll skip that step and go ahead and deploy our Updates to our previously created All Windows 7 Computers collection. Select the Windows 7 Updates Software Update Group and in the Ribbon click on Deploy.
give it a name and point it to our All Windows 7 Computers collection.
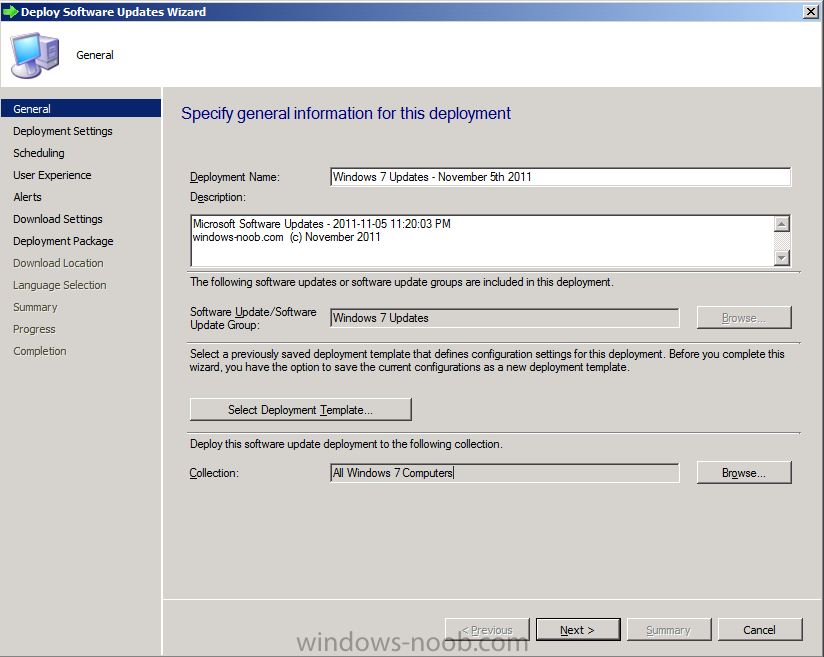
Note: if you click on Select deployment Template, it will appear empty as you have no created any templates yet.
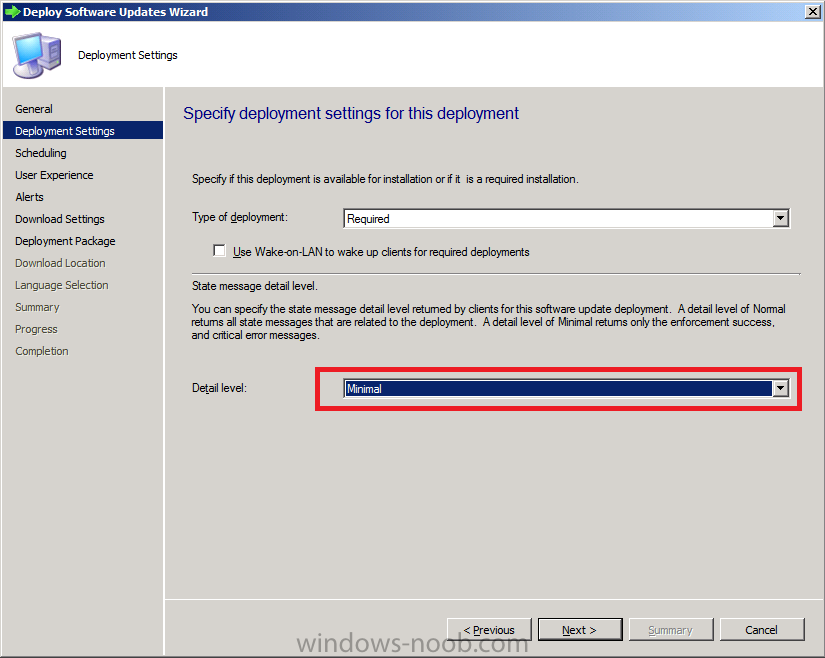
for Deployment Settings set the type of deployment to Required (mandatory) and State message level to Minimal (to reduce Configuration Manager server load via state messages)
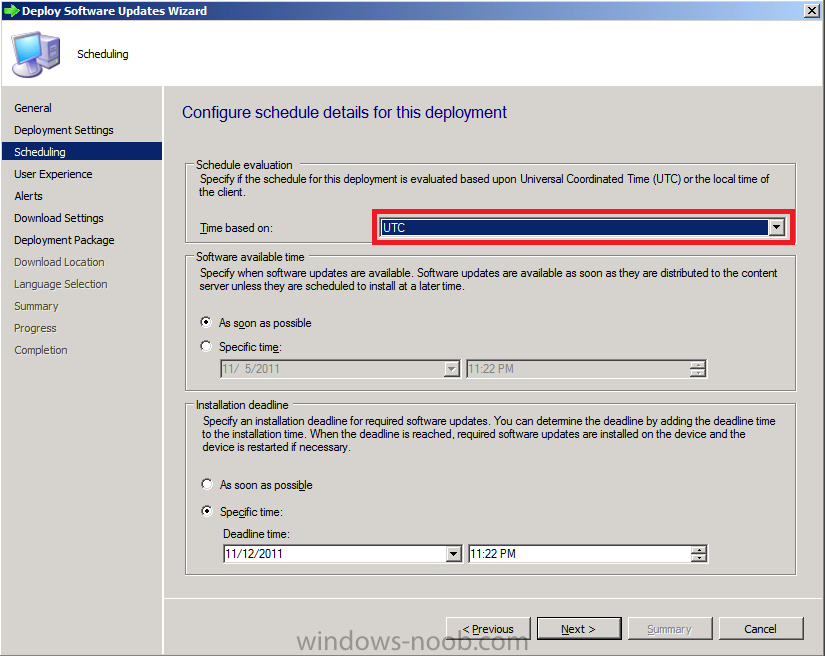
For scheduling set the Time Based on to UTC
for User Experience we want the user to see they are being updated,
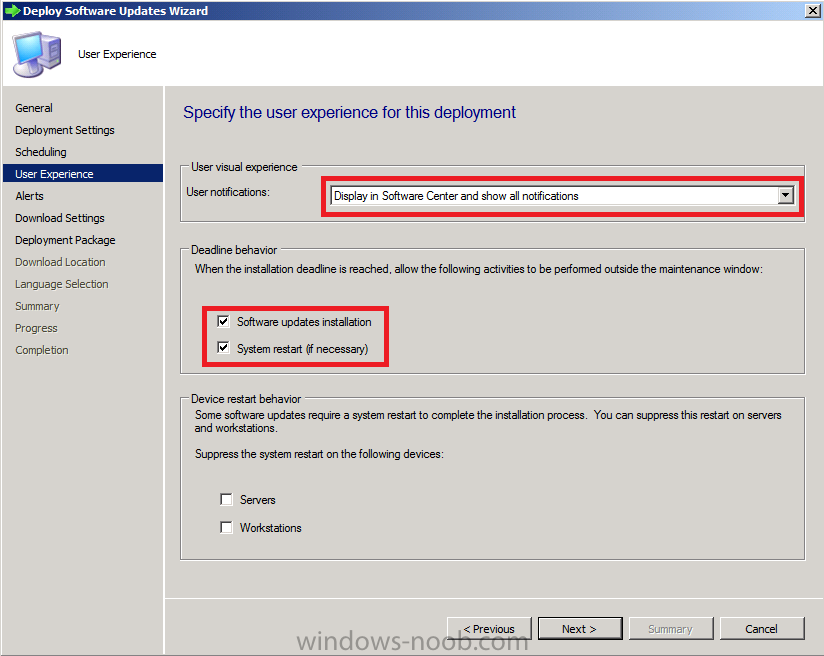
set Alerts client compliance is below the following to 80%, click next the and leave the Download settings as they are, click next
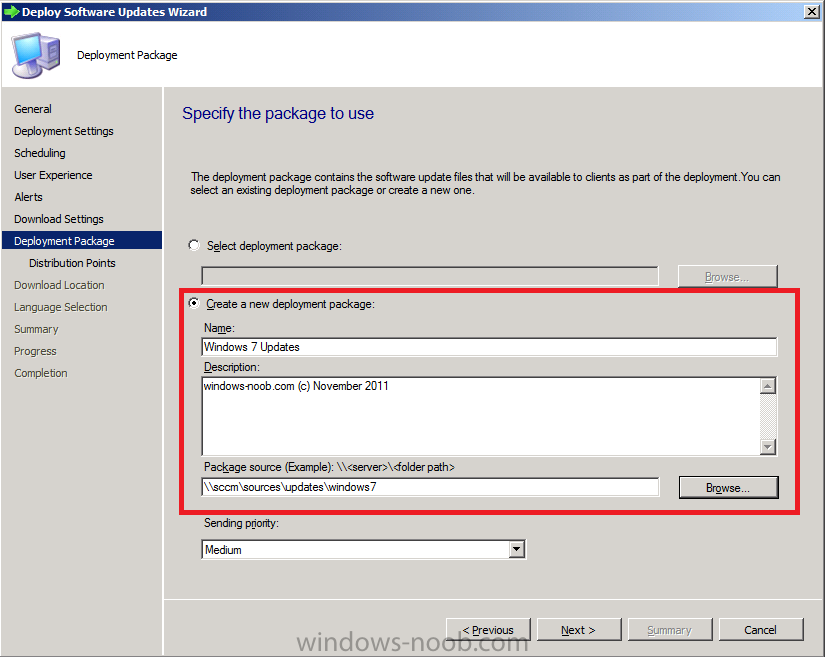
when you get to Deployment Package, choose create a new deployment package,
Note: Make sure that \\sccm\sources\updates\windows7 (or whatever path you choose) exists otherwise the wizard will fail below when it tries to Download as the Network Path won’t exist
select your Distribution Point and click next, then for Download Location select Download Software Updates from the Internet, select the English language and at the summary screen click on Save As Template, call the template Windows 7 updates Template

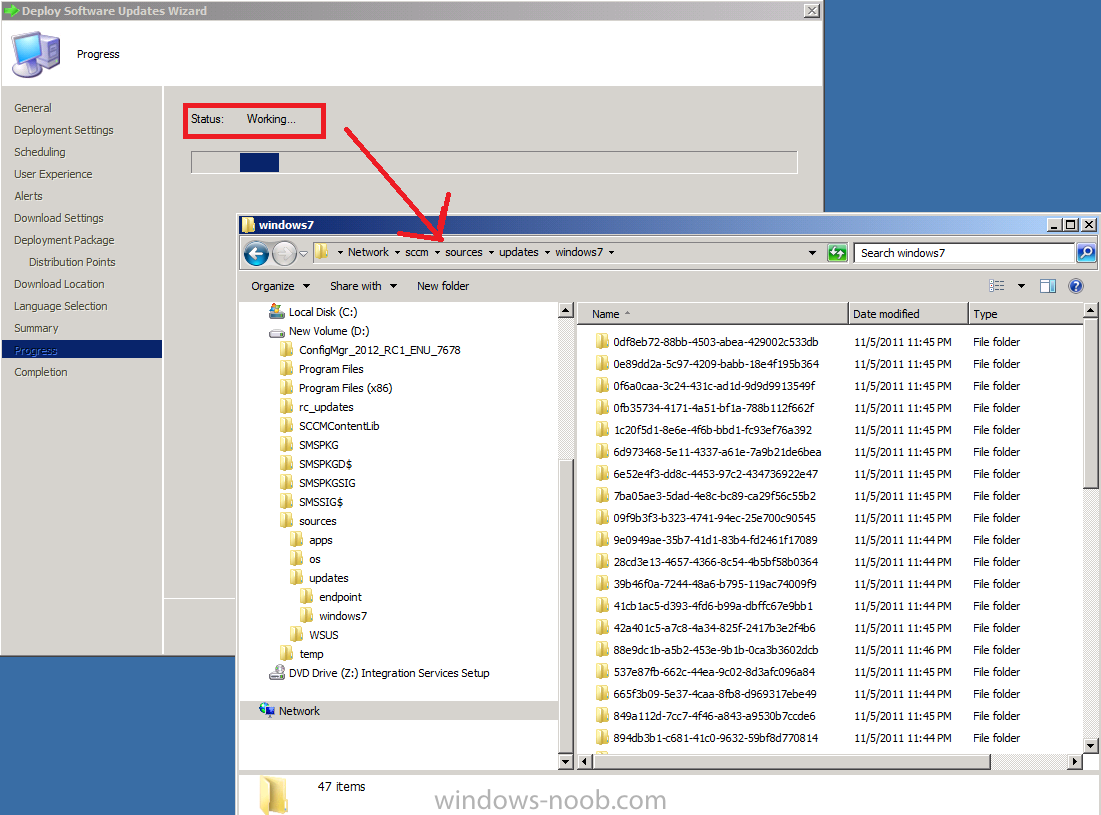
TIP: To review the progress of this task,
while you are waiting for the wizard to complete you can browse the UNC
on your server of your Deployment Package to see that it’s actually filling up with updates, you should see something like this
And that’s it, after you complete the wizard the software updates in the software update group
are deployed to computers in the target collection, In the next two
parts we will start adding clients to that collection and we will verify
that the above is really working.
Original post > https://www.windows-noob.com/forums/index.php?/topic/4467-using-sccm-2012-rc-in-a-lab-part-6-deploying-software-updates/
