
In Part 1
of this series we got our AD and SCCM servers ready, and then we
installed System Center 2012 Configuration Manager as a standalone
Primary site. In Part 2 we configured the SCCM server further by adding some Windows Server roles
necessary for the following Configuration Manager 2012 functionality,
Software Update Point (SUP) and Operating System Deployment. Now we will
configure the server further by Enabling some Discovery methods and
creating Boundary’s and Boundary Groups.
Configuring Discovery Methods.
Active Directory Discovery Methods
Configuration Manager 2012 Active Directory discovery methods can
discover Active Directory sites, subnets, users, and computers that are
stored in Active Directory Domain Services. To discover information from
Active Directory, Configuration Manager requires access to the Active
Directory locations that you specify and will use the computer account
of the site server that runs the Active Directory discovery method. Or,
you can specify a Windows account to run any Active Directory discovery
method.
For information on Planning Discovery methods for SCCM 2012, please refer to these pages on Technet:-
- Planning for Discovery in Configuration Manager 2012 – http://technet.micro…y/gg712308.aspx
- Decide which Discovery Methods to Use – http://technet.micro…K_DecideMethod_
Decide Which Discovery Methods to Use
To discover possible Configuration Manager client computers or user
resources, you must enable the appropriate discovery methods. You can
use different combinations of discovery methods to locate different
resources and to discover additional information about those resources.
The discovery methods that you use determine the type of resources that
are discovered and which Configuration Manager services and agents are
used in the discovery process. They also determine the type of
information about resources that you can discover.
Discover Computers
When you want to discover computers, you can use Active Directory System Discovery or Network Discovery.
As an example, if you want to discover resources that can install the
Configuration Manager client before you use Client Push Installation,
you might run Active Directory System Discovery. Alternately you could
run Network Discovery and use its options to discover the operating
system of resources (required to later use push client installation).
However, by using Active Directory System Discovery, you not only
discover the resource, but discover basic information and can discover
extended information about it from Active Directory Domain Services.
This information might be useful in building complex queries and
collections to use for the assignment of client settings or content
deployment. Network Discovery, on the other hand, provides you
information about your network topology that you are not able to acquire
with other discovery methods, but Network Discovery does not provide
you any information about your Active Directory environment.
It is also possible to use only Heartbeat Discovery to force the
discovery of clients that you installed by methods other than client
push installation. However, unlike other discovery methods, Heartbeat
Discovery cannot discover computers that do not have an active
Configuration Manager client, and returns a limited set of information.
It is intended to maintain an existing database record and not to be the
basis of that record. Information submitted by Heartbeat Discovery
might not be sufficient to build complex queries or collections.
If you use Active Directory Group Discovery to discover the membership
of a specified group, you can discover limited system or computer
information. This does not replace a full discovery of computers but can
provide basic information. This basic information is insufficient for
client push installation.
Discover Users
When you want to discover information about users, you can use Active
Directory User Discovery. Similar to Active Directory System Discovery,
this method discovers users from Active Directory and includes basic
information in addition to extended Active Directory information. You
can use this information to build complex queries and collections
similar to those for computers.
Discover Group Information
When you want to discover information about groups and group
memberships, use Active Directory Group Discovery. This discovery method
creates resource records for security groups.
You can use this method to search a specific Active Directory group to
identify the members of that group in addition to any nested groups
within that group. You can also use this method to search an Active
Directory location for groups, and recursively search each child
container of that location in Active Directory Domain Services.
This discovery method can also search the membership of distribution
groups. This can identify the group relationships of both users and
computers.
When you discover a group, you can also discover limited information
about its members. This does not replace Active Directory System or User
Discovery and is usually insufficient to build complex queries and
collections or serve as the bases of a client push installation.
Discover Infrastructure
There are two methods that you can use to discover infrastructure, Active Directory Forest Discovery and Network Discovery.
You can use Active Directory Forest Discovery to search an Active
Directory forest for information about subnets and Active Directory site
configurations. These configurations can then be automatically entered
into Configuration Manager as boundary locations. When you want to
discover your network topology, use Network Discovery. While other
discovery methods return information related to Active Directory Domain
Services and can identify the current network location of a client, they
do not provide infrastructure information based on the subnets and
router topology of your network.
Step 1. Enable Discovery Methods
Perform the following on the SCCM server as SMSadmin
Note:- Site Hierarchy and Site Operations have been renamed from Beta 2 to Hierarchy Configuration and Site Configuration.
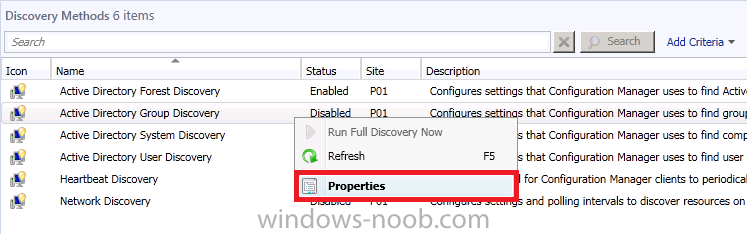
Click on the Administration workspace, expand Overview, Hierarchy Configuration and select Discovery Methods, you can see that Heartbeat Discovery is the only Method Enabled by Default.
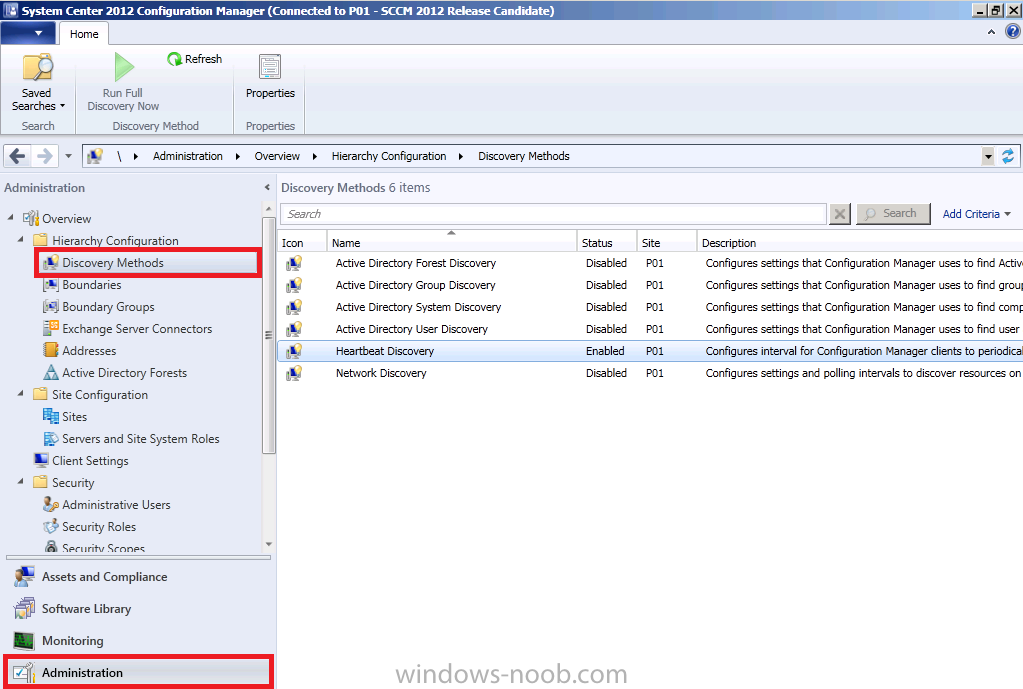
We want our LAB to discovery All Computers and Users so we will enable the following discovery methods
- Active Directory Forest Discovery
- Active Directory Group Discovery
- Active Directory System Discovery
- Active Directory User Discovery
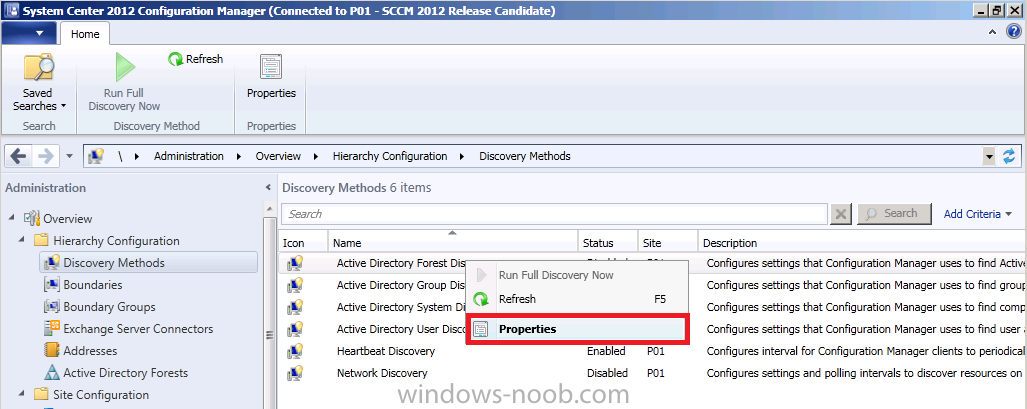
Right click on Active Directory Forest Discovery and choose Properties,
place a checkmark in the three available options
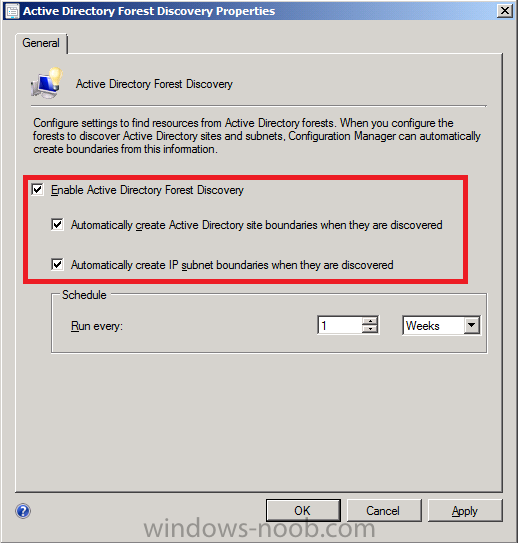
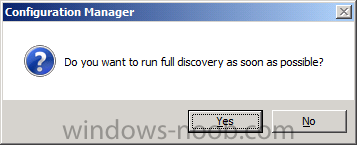
click Apply and answer yes to the Full Discovery question
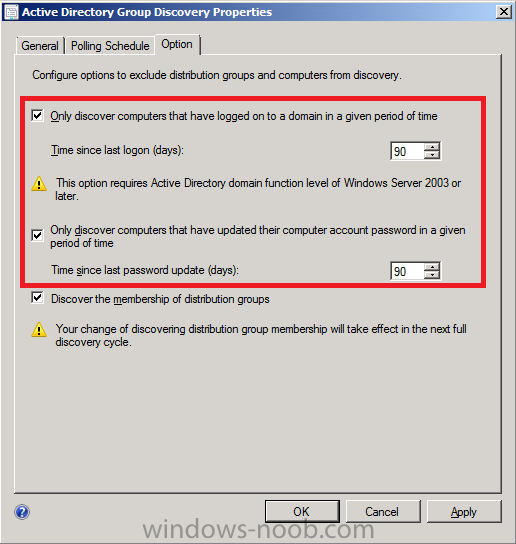
Now we will Enable Active Directory Group Discovery, so as before, right click on it, choose Properties
when the properties screen appears, place a checkmark to Enable the discovery Method,
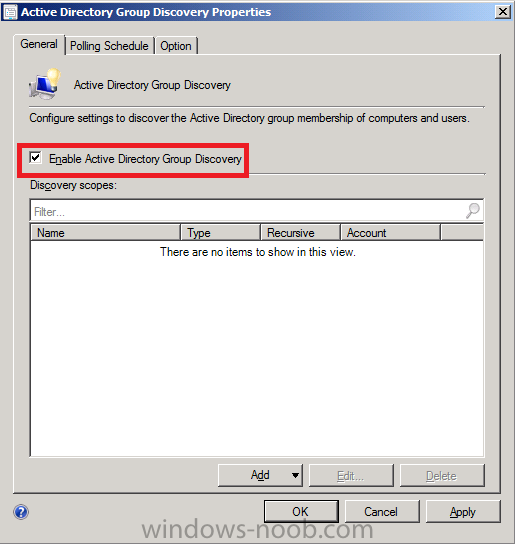
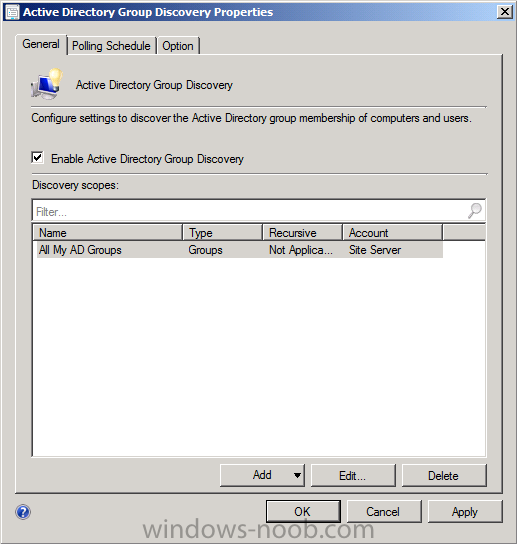
Click on Add, select Groups

click on Browse

Click on Advanced

click on Find Now and select all groups found (ctrl_a)

click ok, Give the Name a descriptive name like All My AD Groups

click ok, and it will now appear in the list of Discovery Scopes
Click on the Polling Schedule Tab, note that Delta Discovery is enabled already, now click on the Option tab (this is new since Beta 2)
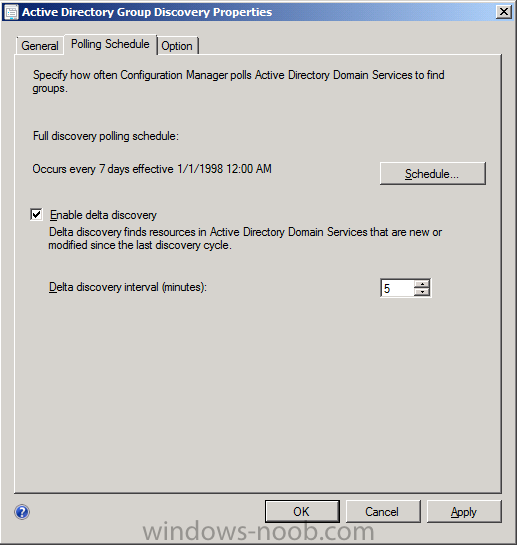
Note:- There are three new options available in the interestingly named Option
tab, select them if you wish, basically they allow us to NOT discovery
stale objects in AD (no DDR will be created when they are detected),
this is good as not all AD people remove stale accounts and this will
help to improve our SLA’s with more accurate information about what
systems are live or not in our organisation.
Next we will configure Active Directory System Discovery, so right click it and select Properties, the properties page will show, place a checkmark to Enable Active Directory System Discovery
click on the Yellow StarBurst, then click on Browse and select your default Active Directory Container
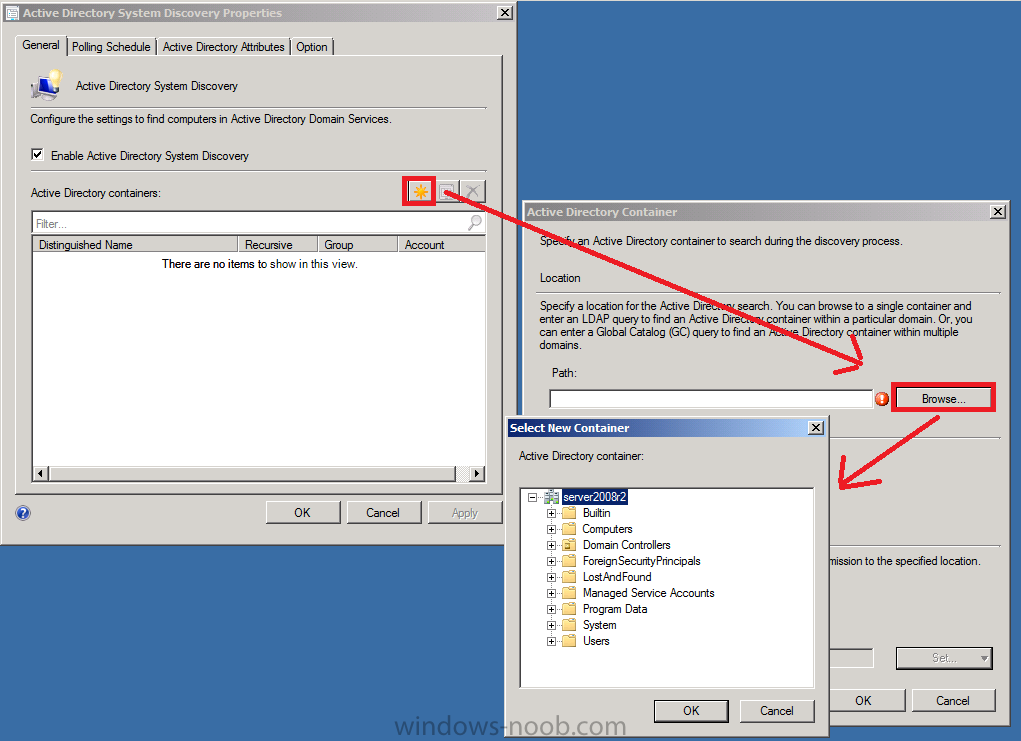
so it appears like so
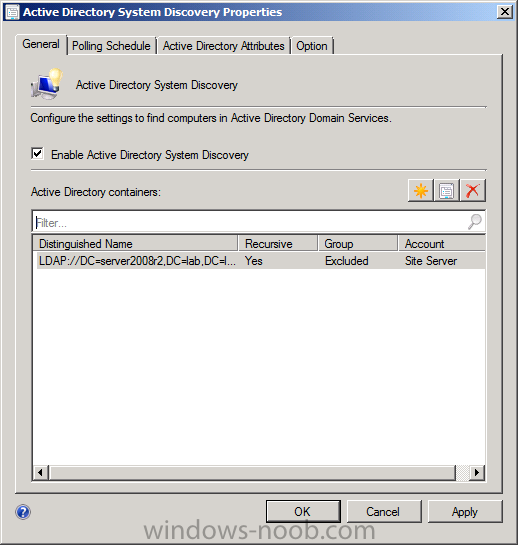
you can review the other tabs, including the new Option tab, select the options within there also.

and finally we’ll enable Active Directory User Discovery, right click on it, choose Properties, and enable it as below
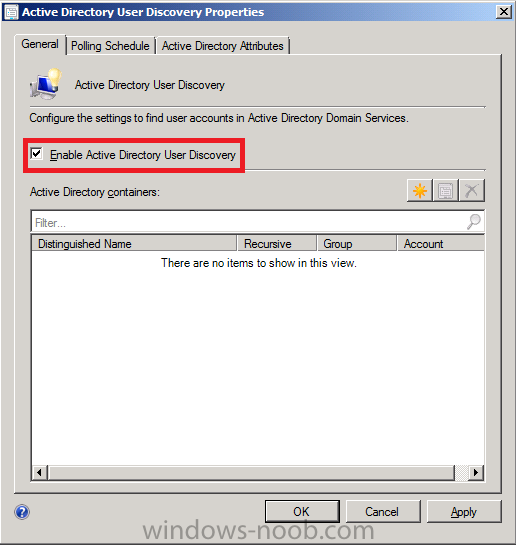
add the Active directory container discovery by clicking on the yellow starburst and adding the default container

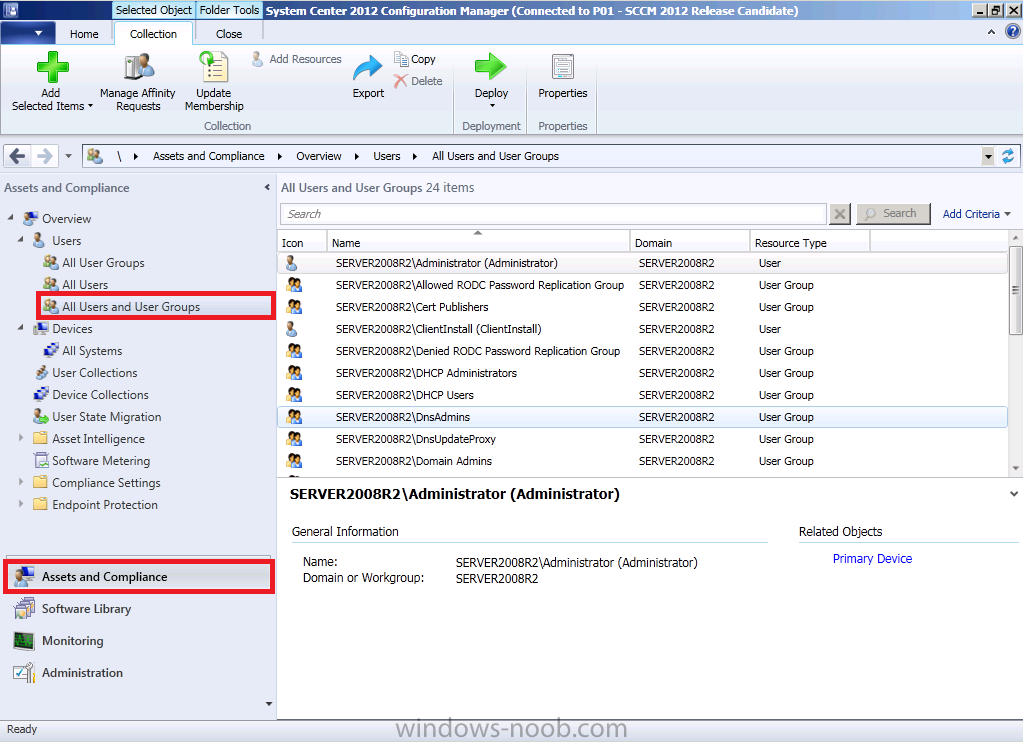
Once done you can click on Assets and Compliance to verify that your Users, Groups and Systems are being Discovered (in the screenshot below I’m showing users and user groups).
Step 2. Configure Boundaries
Perform the following on the SCCM server as SMSadmin
In Configuration Manager 2012, a boundary
is a network location that can contain one or more devices that you
want to manage. Boundaries can be an IP subnet, Active Directory site
name, IPv6 Prefix, or an IP address range, and it can include any
combination of these elements. To use a boundary you must add the boundary to one or more boundary groups.
Boundary groups are collections of boundaries and they allow clients to
find an assigned site and to locate content when they need to install
software, such as applications, software updates, and operating system
images.
Boundaries are no longer site-specific. Instead, you define them one
time only for the hierarchy and they are available for all sites in the
hierarchy. Each boundary must be a member of a boundary group before a
device on that boundary can identify an assigned site or locate content
on a distribution point. Each boundary represents a network location in
Configuration Manager 2012 and it is available from every site in your
hierarchy. A boundary does not enable you to manage clients at the
network location. To manage a client, the boundary must be a member of a
boundary group.
Content Location
You can associate one or more distribution points with each boundary
group. You can also associate a distribution point with multiple
boundary groups. When a client requests content for a deployment,
Configuration Manager sends the client a list of distribution points
that have the content and that are associated with a boundary group that
includes the current network location of the client.
Configuration Manager 2012 supports overlapping boundary configurations for content location.
When a client requests content and the client network location belongs
to multiple boundary groups, Configuration Manager sends the client a
list of all distribution points that have the content. This behavior
enables the client to select the nearest server from which to download
the content.
You can configure the network connection speed of each distribution
point in a boundary group. Clients use this value when they connect to
the distribution point. By default, the network connection speed is
configured as Fast, but it can also be configured as Slow. The network
connection speed and the deployment configuration determine whether a
client can download content from a distribution point when the client is
on an associated boundary.
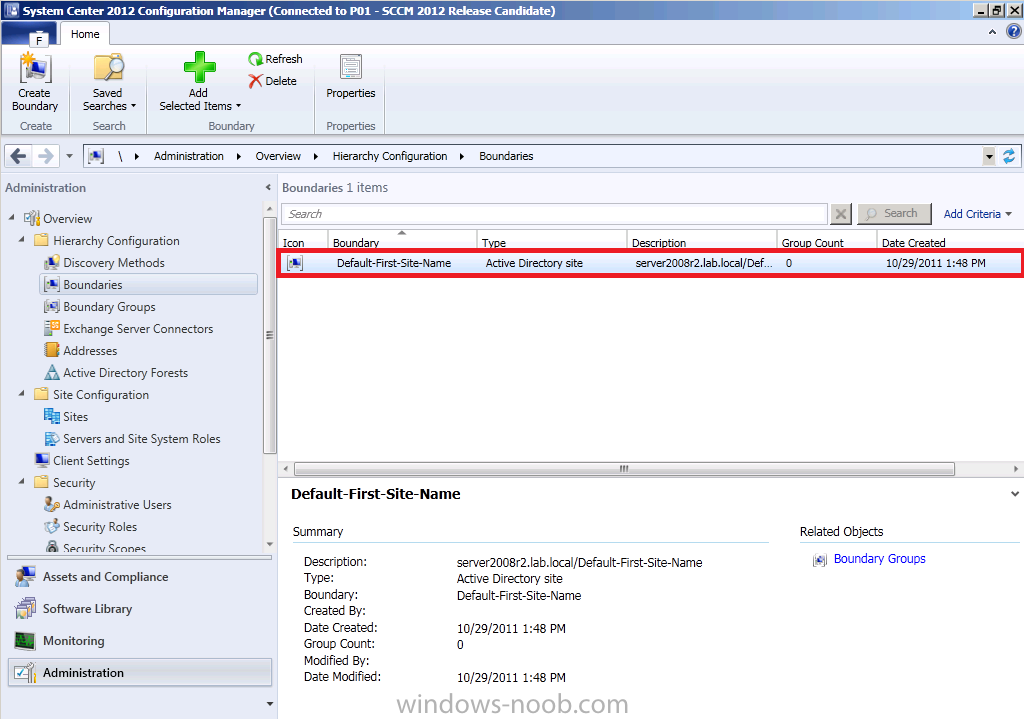
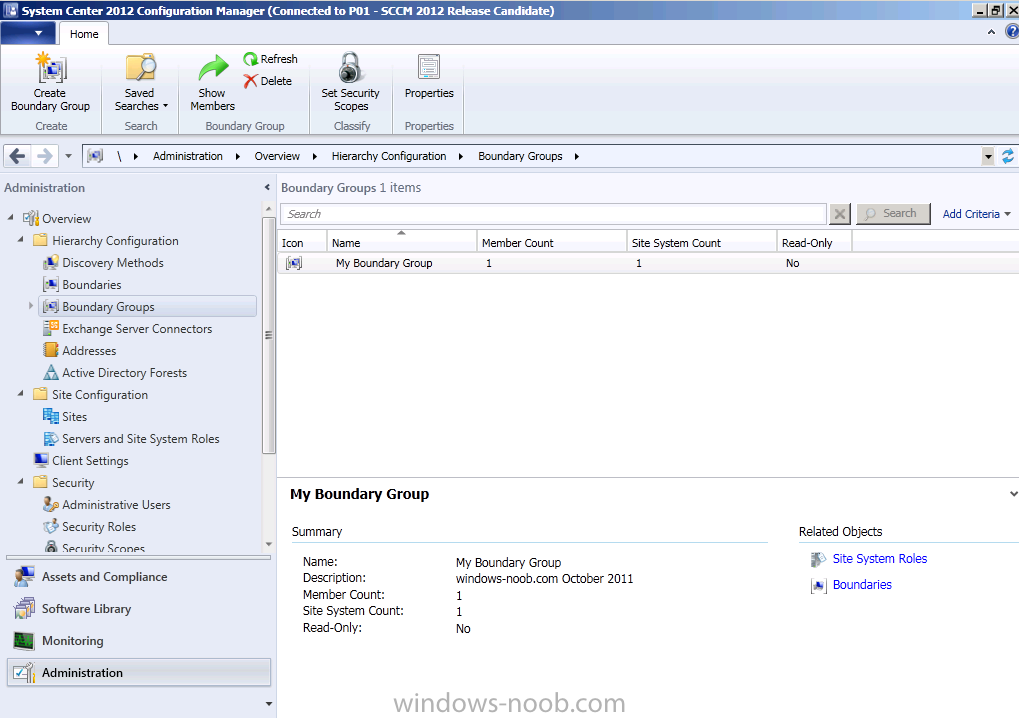
In the Administration section, select Boundaries, our previosly discovery Active Directory Site is listed.
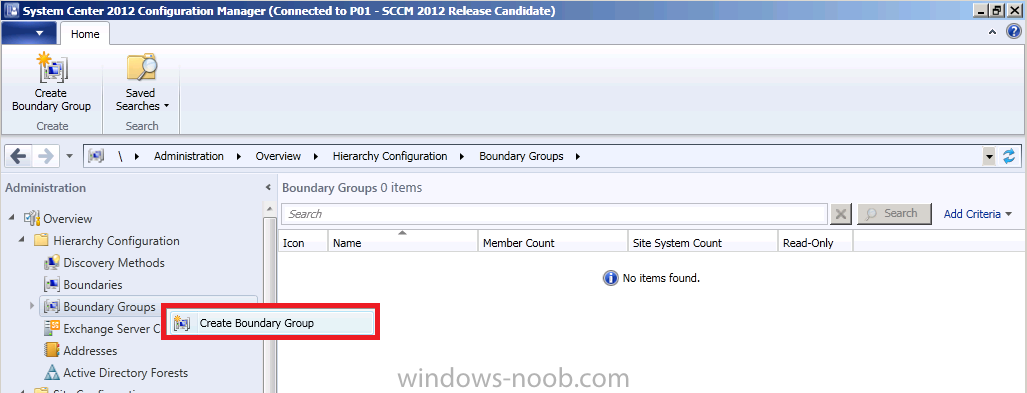
right click on Boundary Groups and choose Create Boundary Group
give the Boundary Group a name (and a description if you wish), click on Add
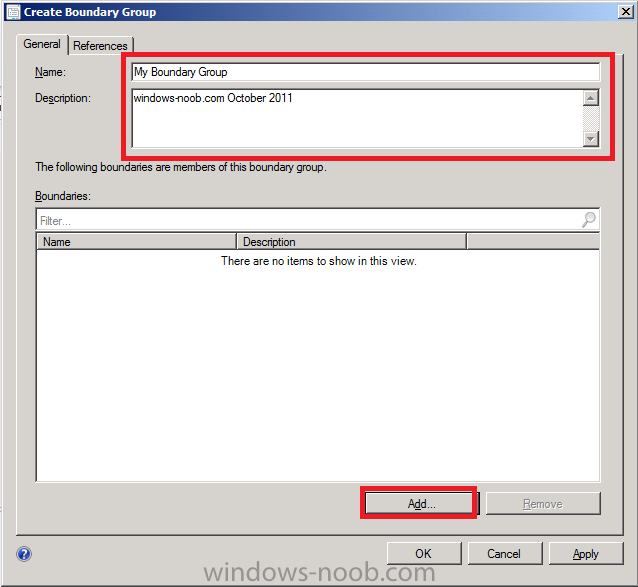
In the Add Boundaries window, place a checkmark in our Default-First-Site-Name Boundary.
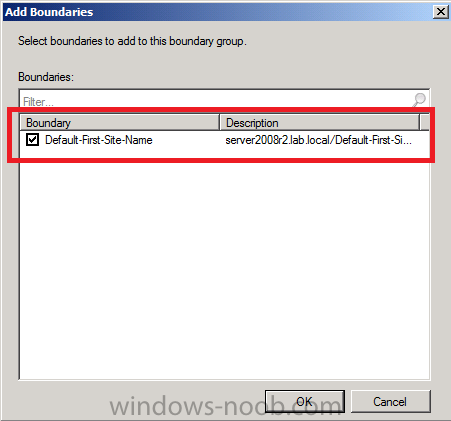
click ok, It now appears in our list of Boundaries which are a member of this Boundary Group, click on References

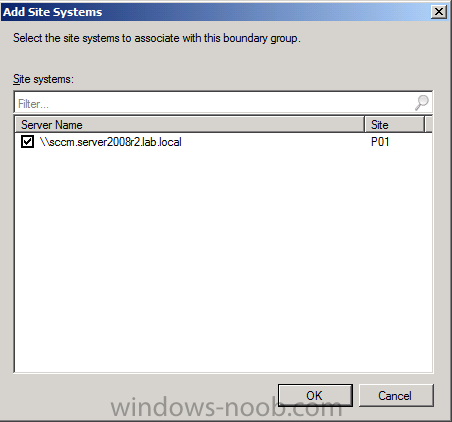
place a checkmark in Use this Boundary Group for site assignment then click on Add
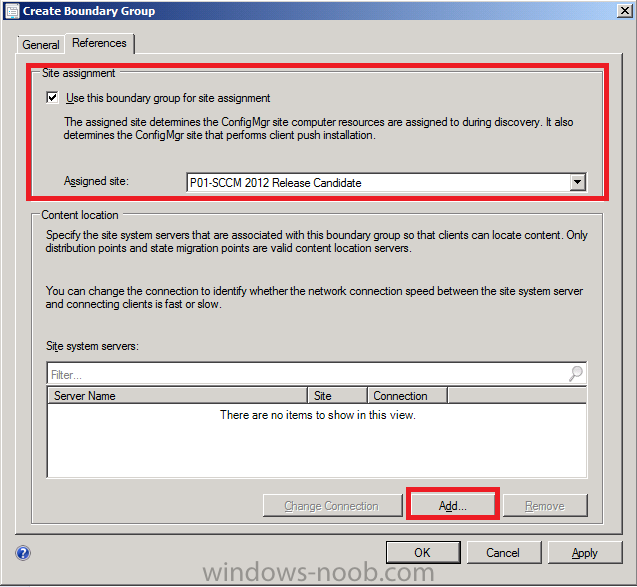
select our site system then click ok
click Apply
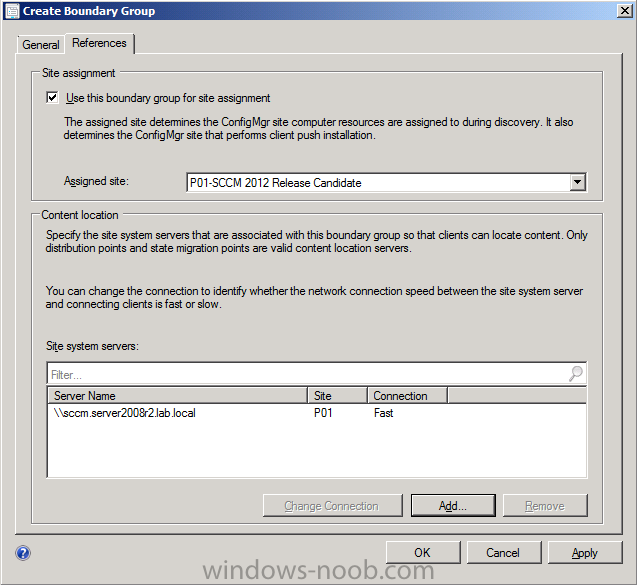
Now we have defined which site our clients can get assigned to via the Boundary Group, and we have defined their content location
In the next Part we will configure some more Site roles and configure Client Settings.
The original post is here
