In Part 1
of this series we got our AD and SCCM servers ready, and then we
installed System Center 2012 Configuration Manager as a standalone
Primary site. In Part 2 we configured the SCCM server further by adding some Windows Server roles
necessary for the following Configuration Manager 2012 functionality,
Software Update Point (SUP) and Operating System Deployment. In Part 3
we configured the server further by Enabling some Discovery methods and
creating Boundary’s and Boundary Groups. Now we are ready to configure
Client Settings, Add roles and Distribute the Configmgr Client to our
Computers.
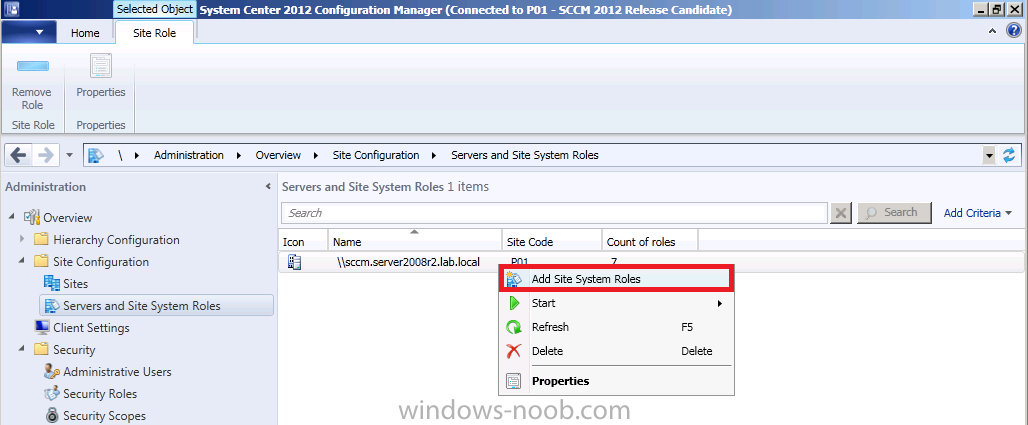
Step 1. Add the Application Catalog Web Site Roles
Perform the following on the SCCM server as SMSadmin
In Administration, click on Servers and Site System Roles and right click on our Site Server, choose Add Site System Roles.
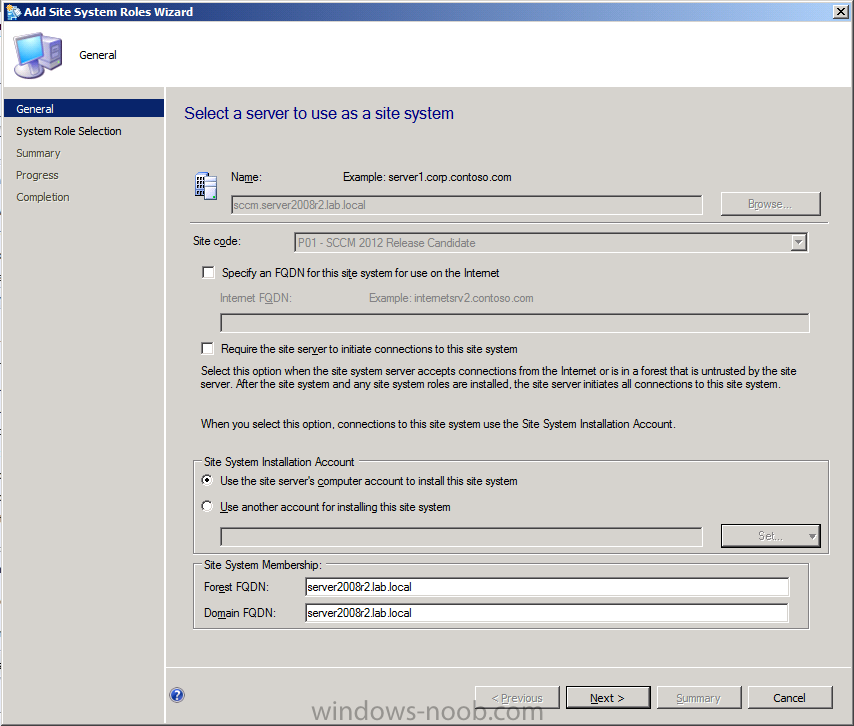
click next at the wizard general screen
Select both of the Application Catalog roles
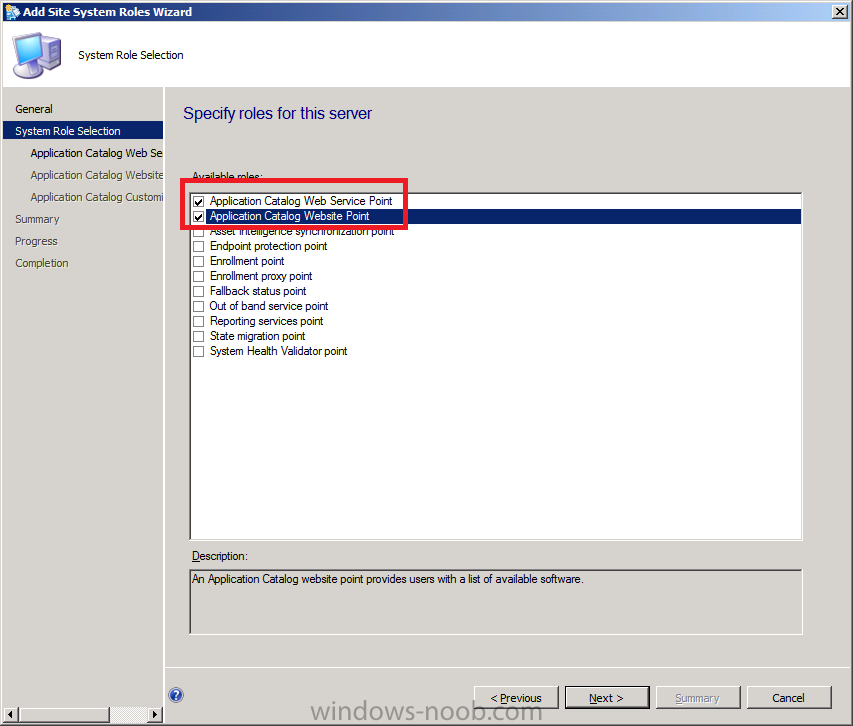
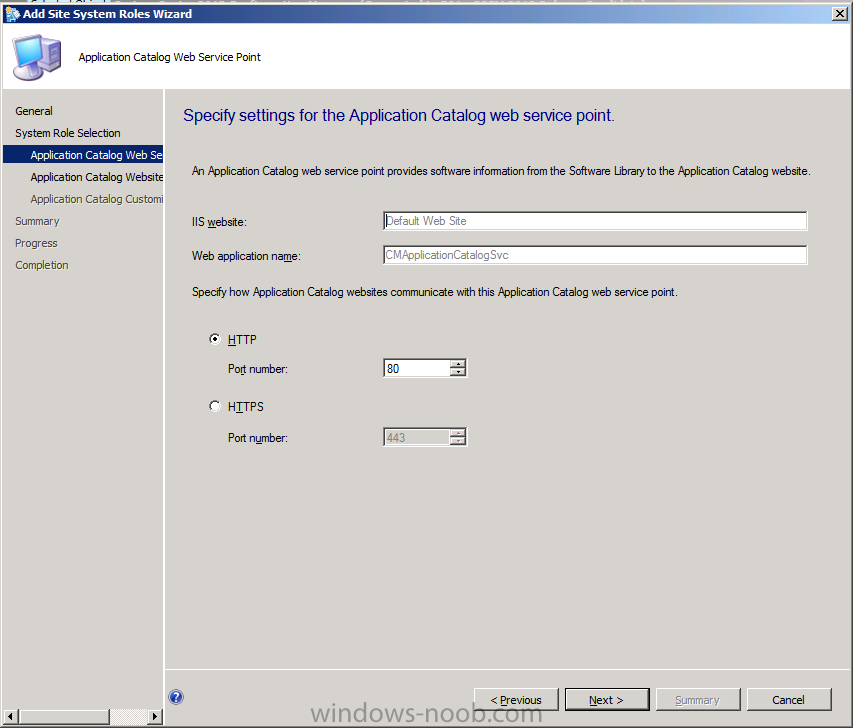
confirm your Application Catalog Web service point selections
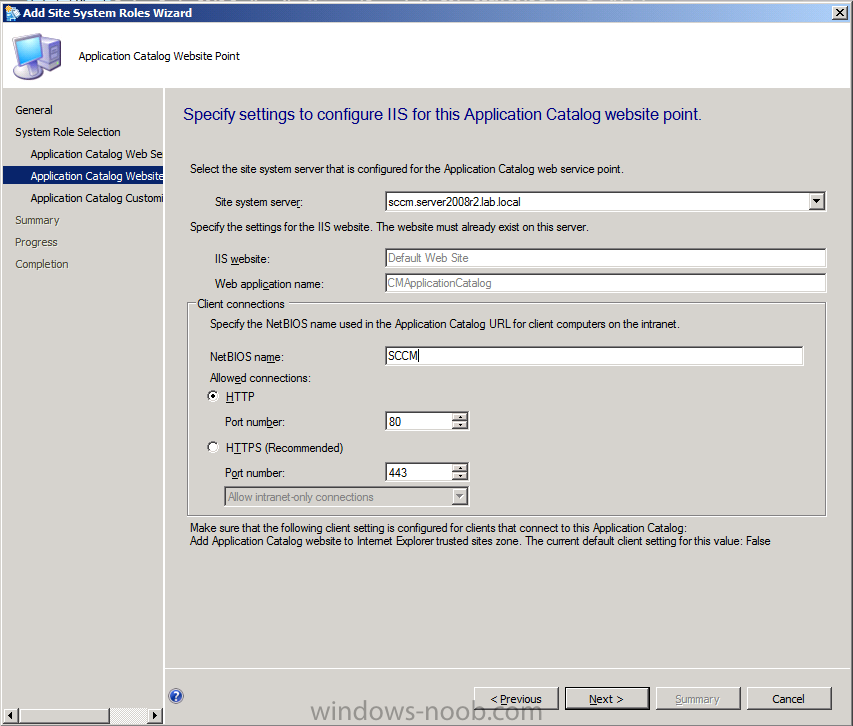
and the Application Catalog Website Point settings
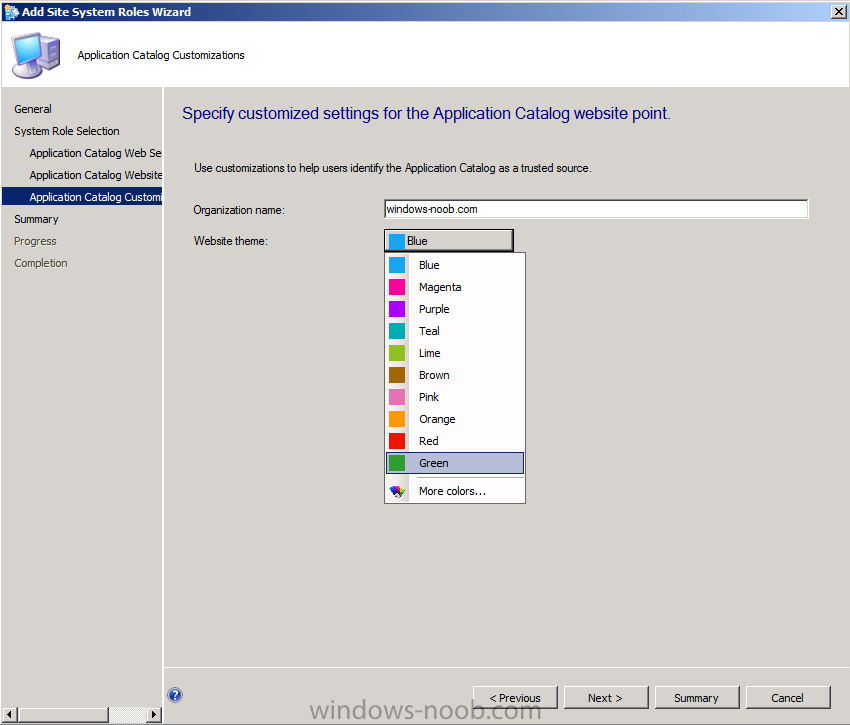
enter your Organisation name and pick a Color scheme for the Application Catalog ! (New since Beta 2) !
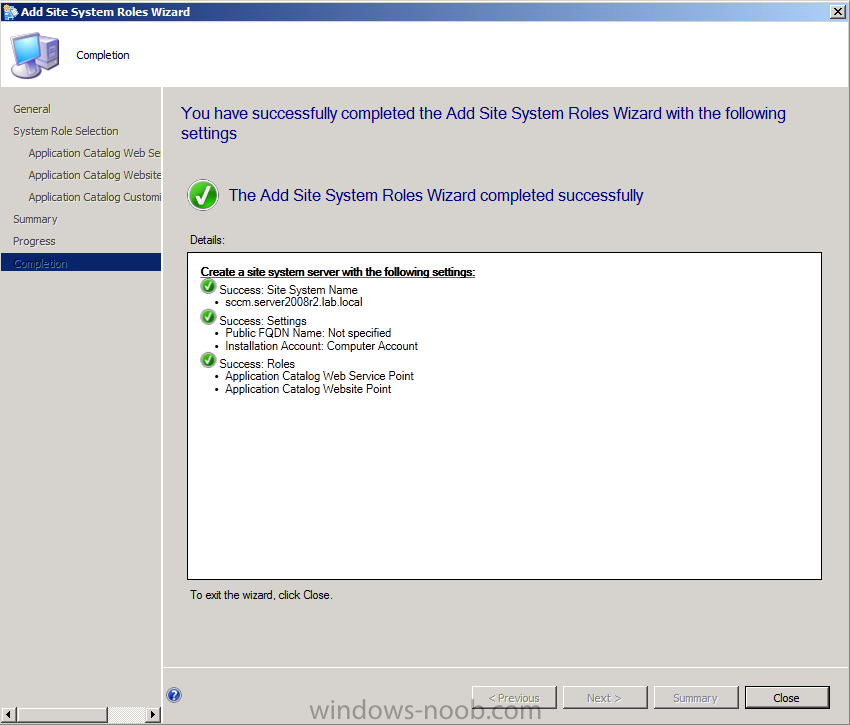
click next through the summary and progress screens, verify everything at the completion screen.
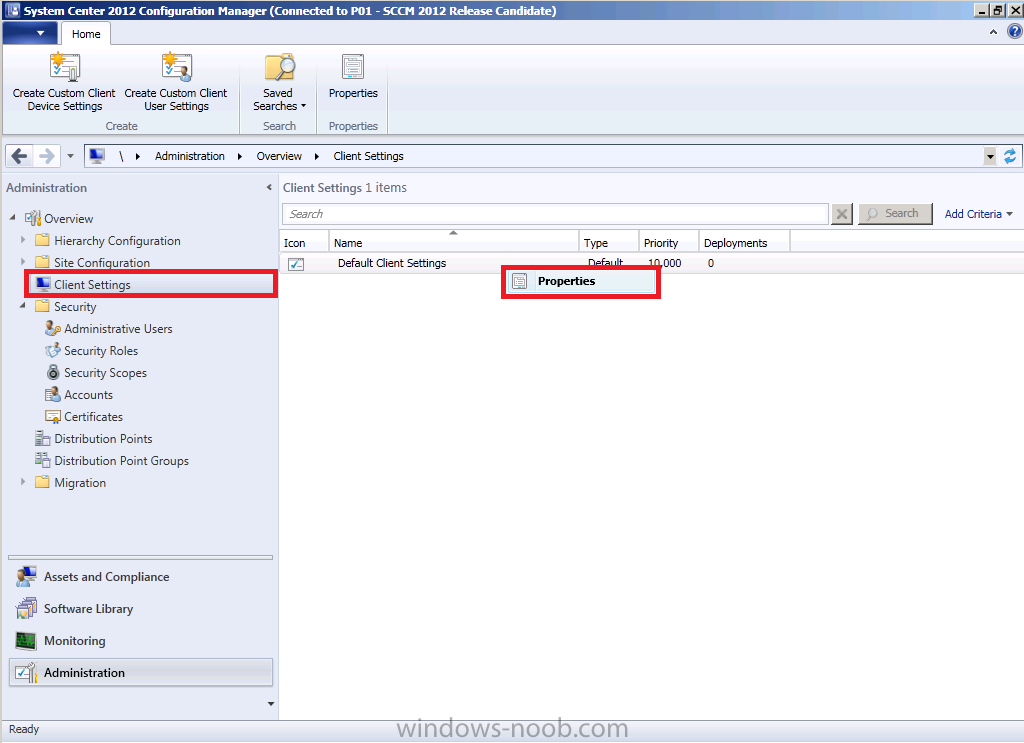
Step 2. Configure Client Agent Settings
Perform the following on the SCCM server as SMSadmin
In the Administration section click on Client Settings in the left pane, and select the Default Client Settings listed, right click choose Properties
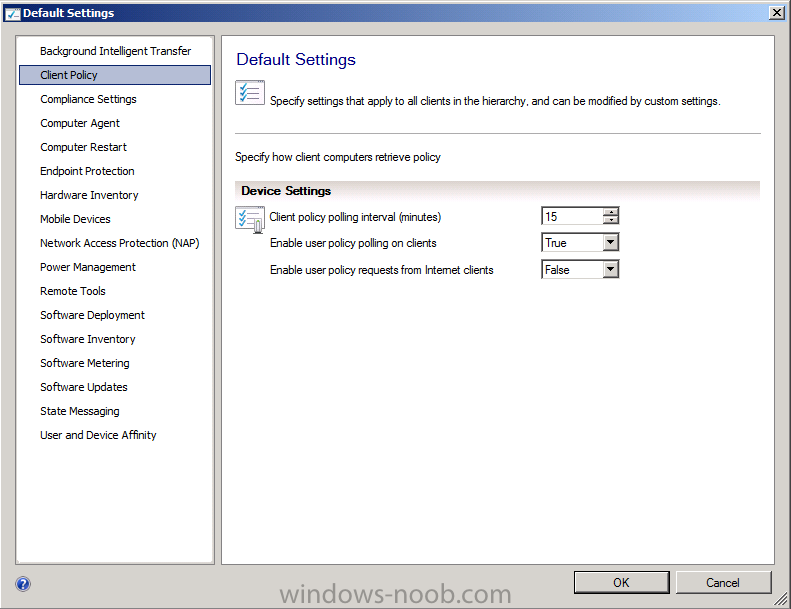
Click on Client Policy and we’ll set this
to every 15 minutes as it’s a LAB (the Default setting is 60 minutes),
this means that once every 15 minutes the Client will contact it’s
Management Point for any new policy.
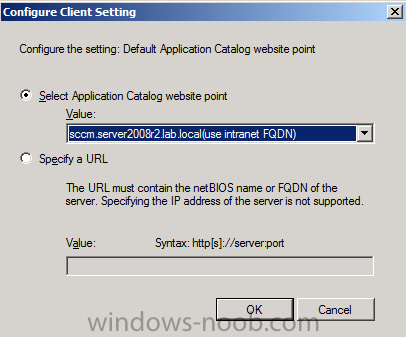
now choose Computer Agent and configure it as follows:-
Click on Set Website for Default Application Catalog Website and set it to select the FQDN one that is listed
Set Add default Application Catalog website to Internet Explorer trusted zone to True
Set the Organization Name Displayed in Software Center to My Organization (change that to suit your organization)
so your Computer Agent settings should look like this

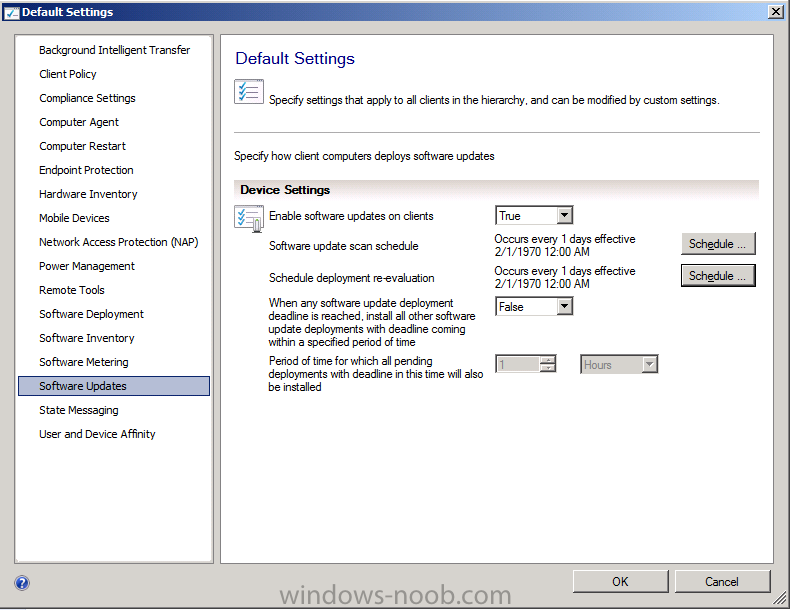
Set Software updates schedule from 7 days to 1 day
Select User and Device Affinity and change Allow users to define their primary device to True.
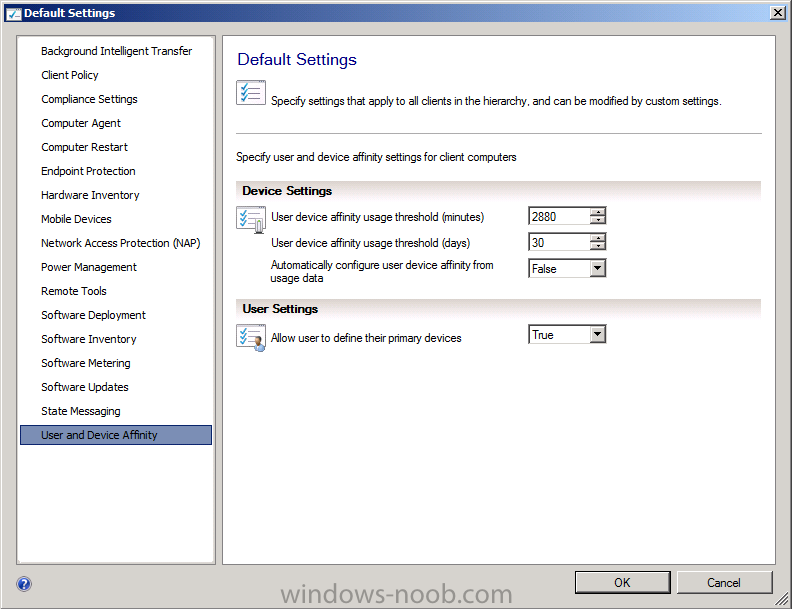
click Ok to save the Client Agent Settings.
Step 3. Deploying the Client Agent
Perform the following on the SCCM server as SMSadmin
Now that we have made changes to the Default Client settings,
we want to deploy the ConfigMgr Client to our computers in the LAB.
Before doing so we need to decide what method is appropriate for
installing the client on our computers.
The following methods are available
Client Installation Method Description
- Client
push installation – Automatically installs the client to assigned
resources and manually installs the client to resources that are not
assigned. - Software update point installation – Installs the client by using the Configuration Manager 2012 software updates feature.
- Group Policy installation – Installs the client by using Windows Group Policy.
- Logon script installation – Installs the client by using a logon script.
- Manual installation – Manually installs the client software.
- Upgrade
installation – Upgrades clients to a newer version by using
Configuration Manager 2012 application management. You can also use
Configuration Manager 2007 software distribution to upgrade clients to
Configuration Manager 2012. - Client Imaging – Prestages the client installation in an operating system image.
Please refer to Technet to Determine the Client Installation Method to Use in Configuration Manager 2012.
For the purposes of this LAB we will select Client Push Installation.
Note: we will use the
ClientInstall account to install the configmgr client on our computers,
make sure that this account is a local administrator on your target
computers.
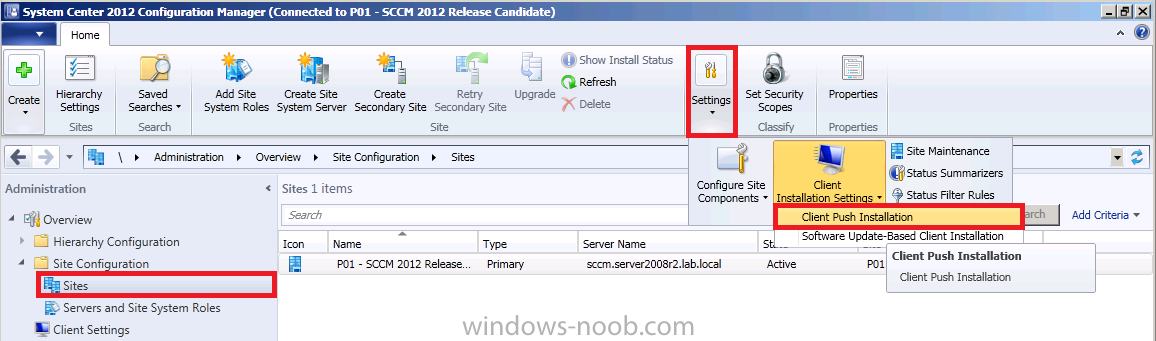
In Administration, click on Site Configuration, Sites, select our site, in the ribbon above click on Settings, it will open a new menu, from that menu select Client Installation Settings and from there select Client Push Installation.
On the general screen, place a checkmark in Enable Automatic site-wide client push installation

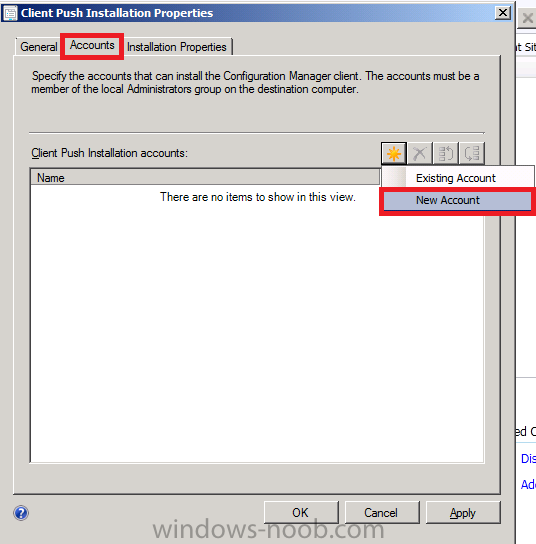
Click on the Accounts tab, and select the yellow star, choose New Account
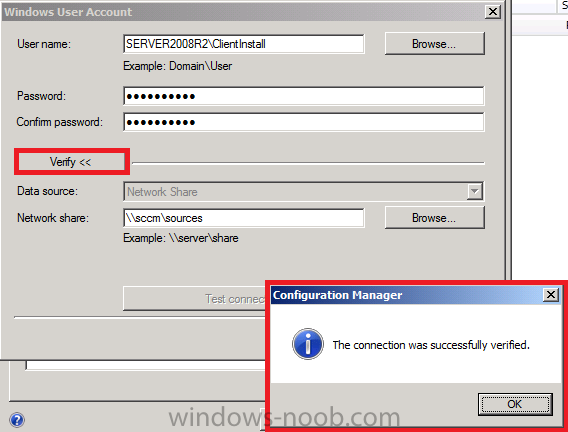
type in (or browse to select the AD user) the Client Push account, use our ClientInstall account which we created in Active Directory in Part 1.

Note the Verify button, this is new since
Beta 2 and allows you to verify that the credentials can connect to your
network resources, if you get your password wrong it will tell you !
Click on Verify and type in a Unc path to check.
Click Ok.
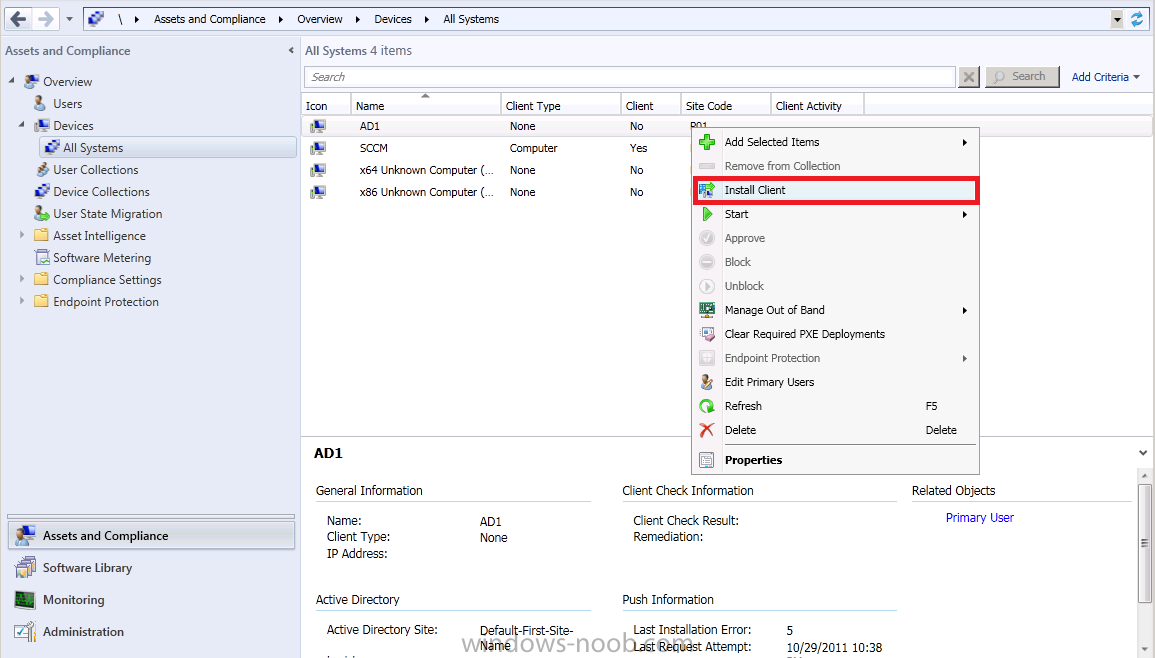
Click on Assets and Compliance and expand Devices, All Systems, you should see that our SCCM server has a client installed but our Domain Controller does not. Right click on the Domain Controller and choose Install Client.
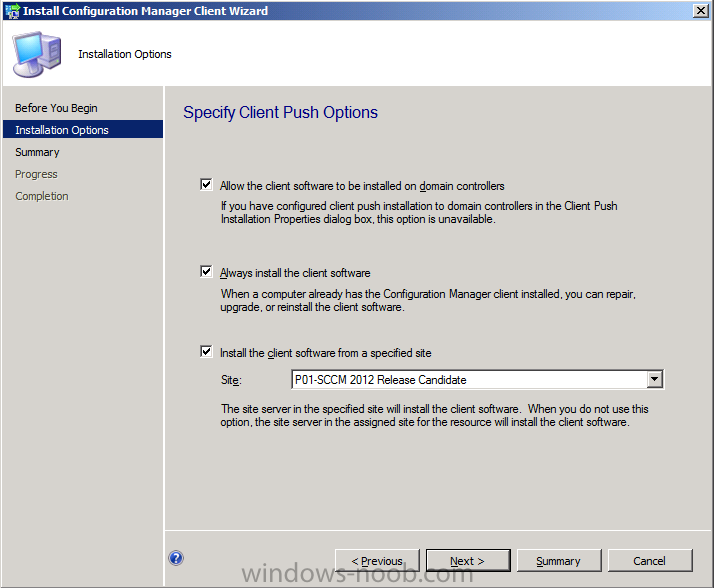
set the Installation Options
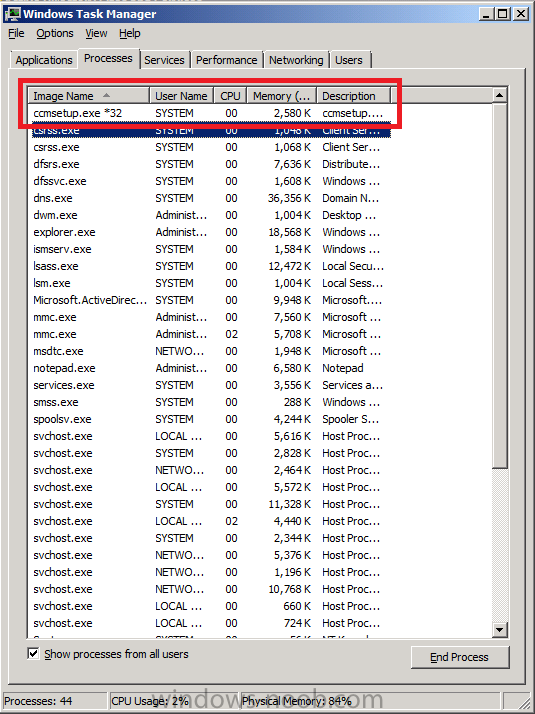
click next through the wizard, close. Meanwhile, on the DC (AD1-Domain Controller) check task manager, and you’ll see ccmsetup starting…success
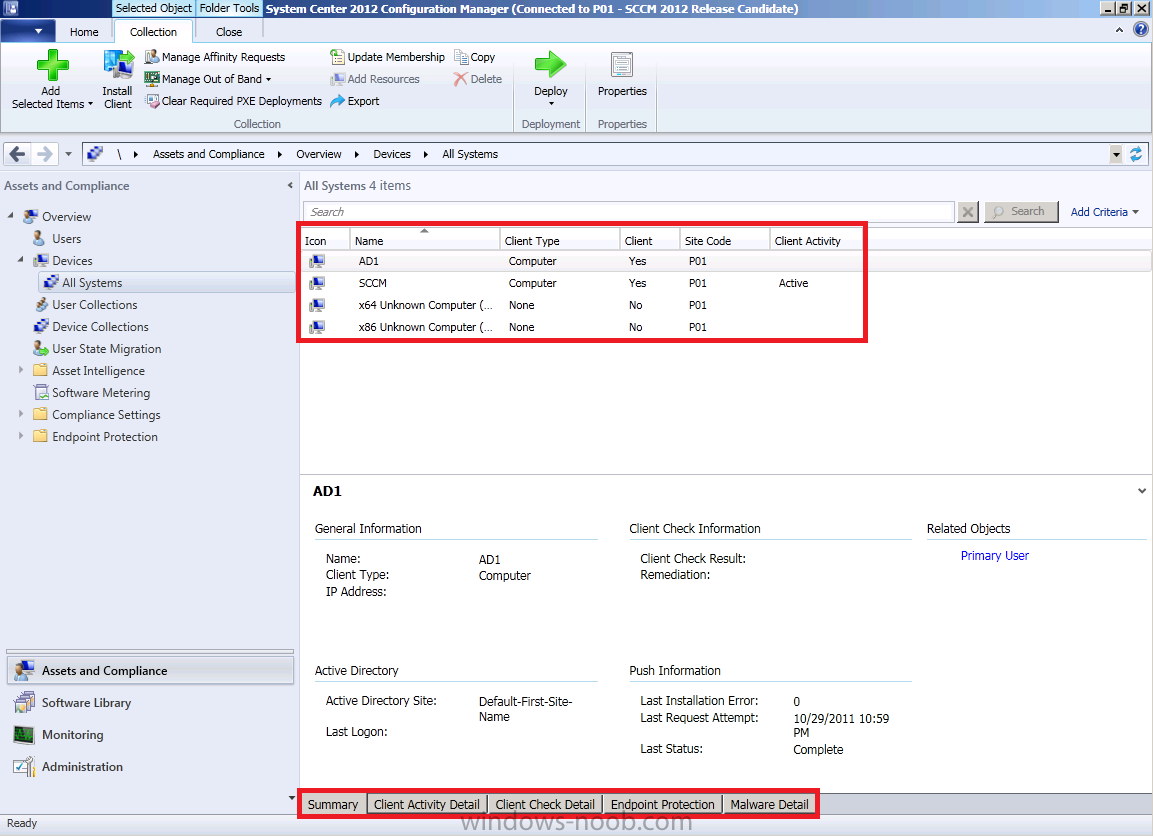
after some minutes the client is installed and you can refresh the view,
you’ll notice is says Client=Yes on both our systems in the Lab and
there are new tabs to look at since beta 2 on the bottom of the screen.
We’ll get to them in a later post.
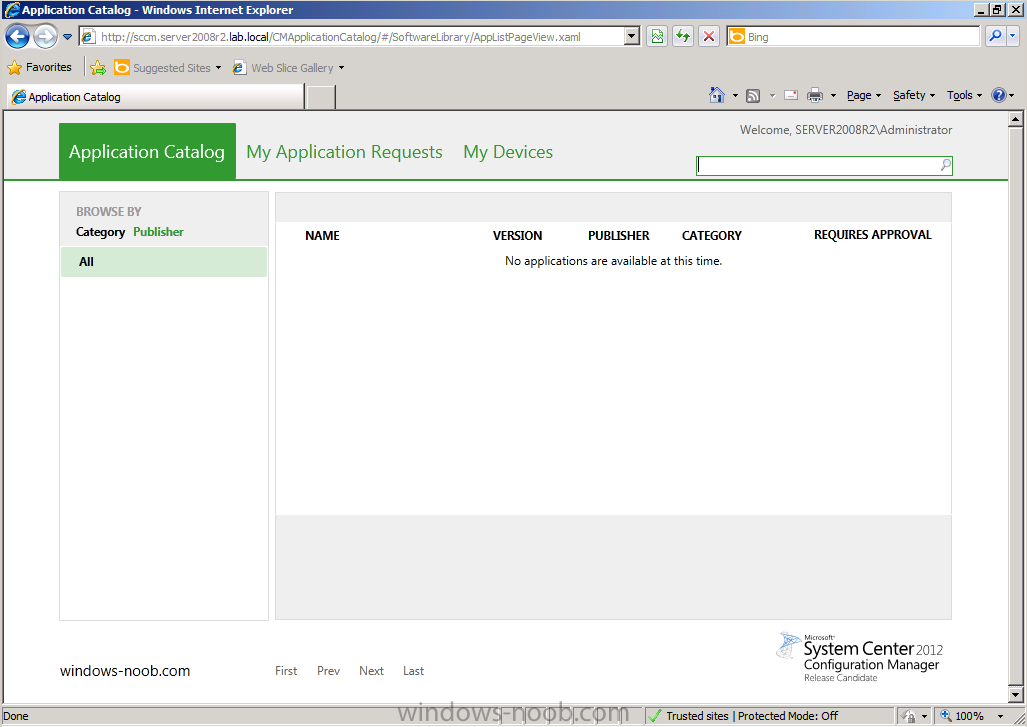
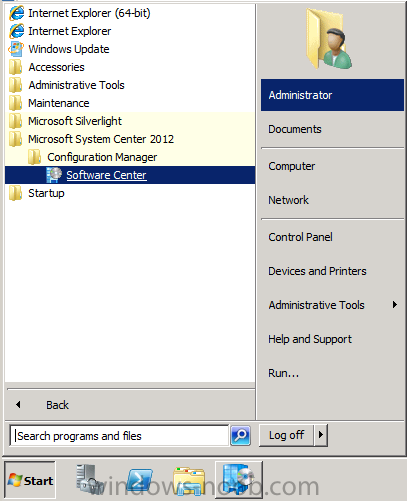
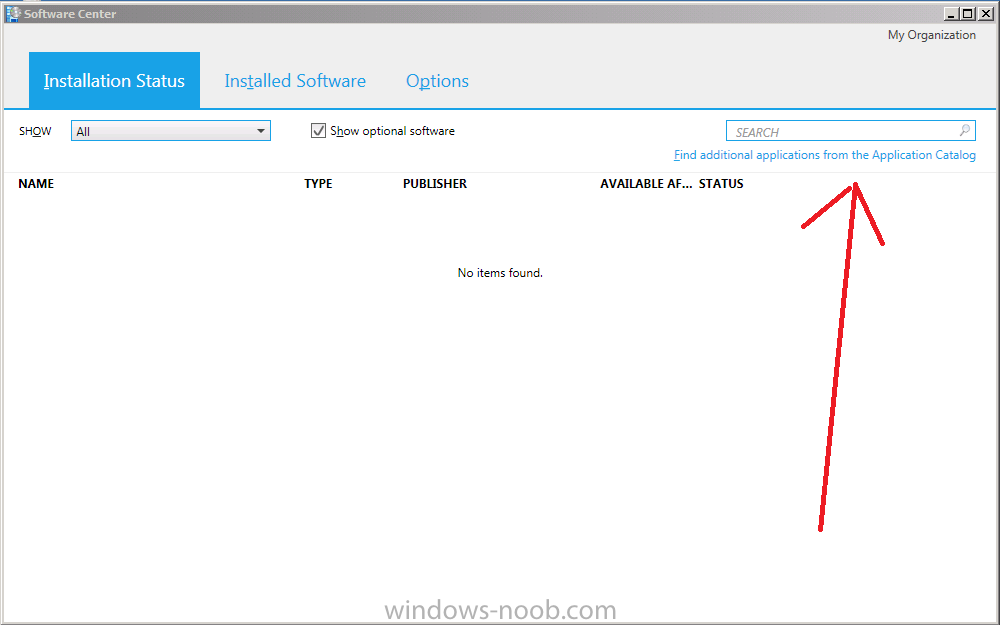
On your AD computer you can start Software Center
click on Find applications from the application catalog
and your Application Catalog will pop up in Green !