
In Part 1
of this series we got our AD and SCCM servers ready, and then we
installed System Center 2012 Configuration Manager as a standalone
Primary site. Now we will configure the SCCM server further by adding
some Windows Server roles necessary for the
following Configuration Manager 2012 functionality, Software Update
Point (SUP) and Operating System Deployment.
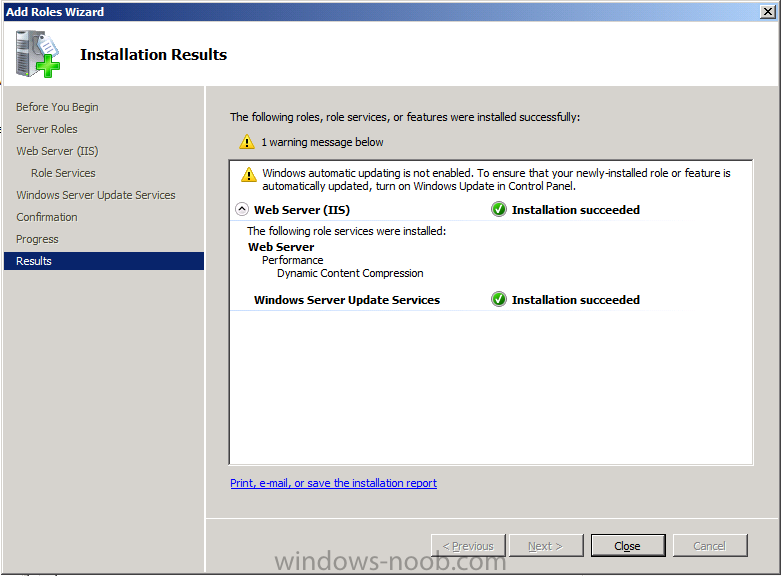
Step 1. Add the WSUS Update Services 3.0 SP2 role
Perform the following on the SCCM server as SMSadmin
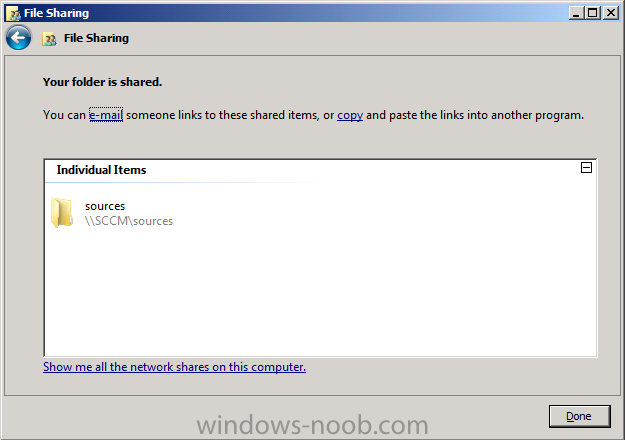
Before starting this step create a folder on D:\ called sources and share it as sources, give Everyone Read access.
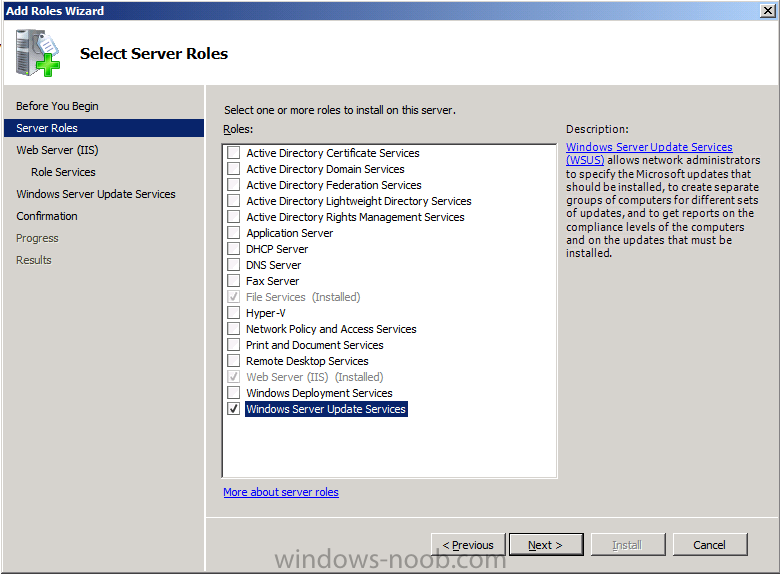
We’ll need the WSUS role installed as part of the Software Update Point role installation in the next step, so start Server Manager
and click on Roles, Add Roles. Select Windows Server Update Services
and a window will pop up asking to add role services required for Windows Server Update Services (IIS Dynamic Content compression), click Add Required Role Services
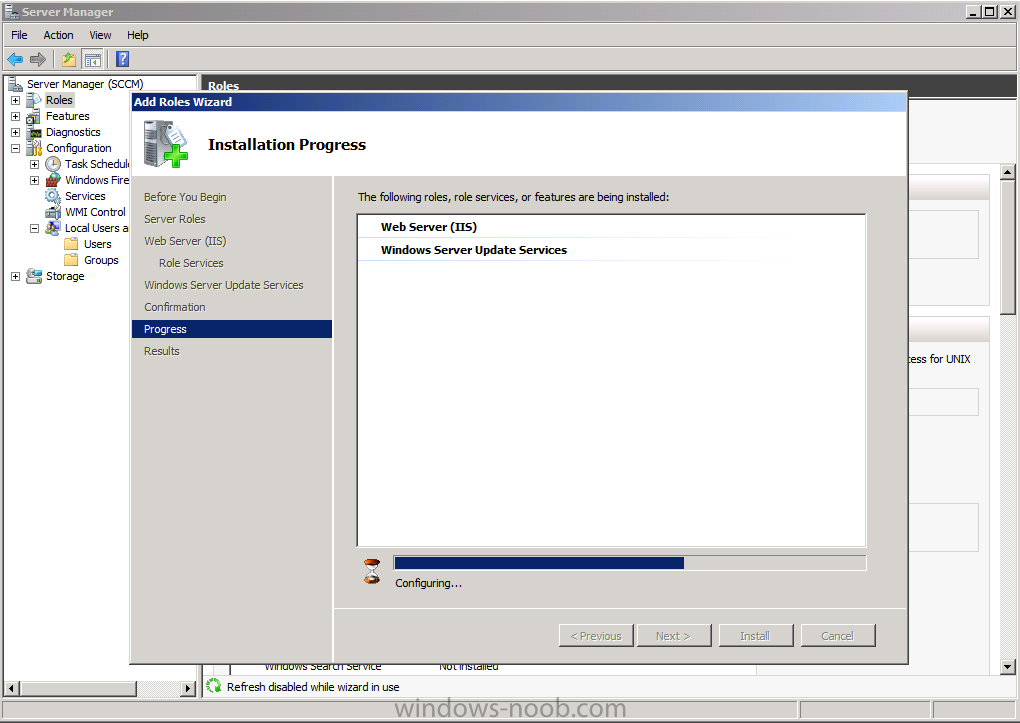
click next through the wizard, you’ll see the Select Role Services window appear, click next
again, at the confirmation click Install, the WSUS role will be
downloaded (so you’ll need a network connection to the Internet)
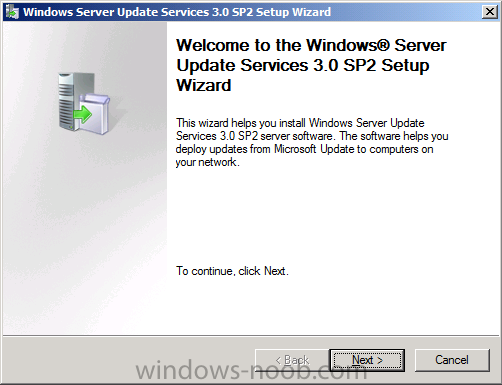
after a while you’ll see the Welcome to Windows Server Update Services 3.0 SP2 setup wizard appear click next (which is probably hidden behind the active window, so in your system tray find it and click on it to show the wizard otherwise you’ll be twiddling your thumbs for a long time wondering whats going on)
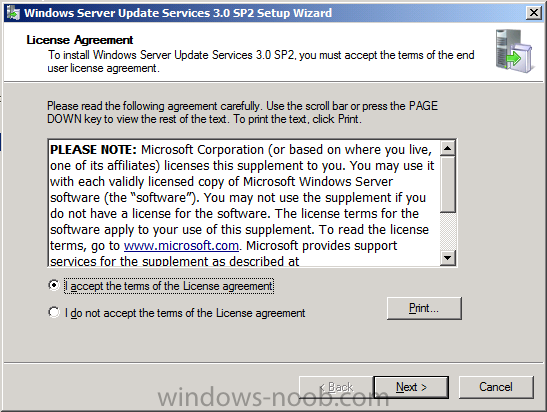
Accept the Eula and click next
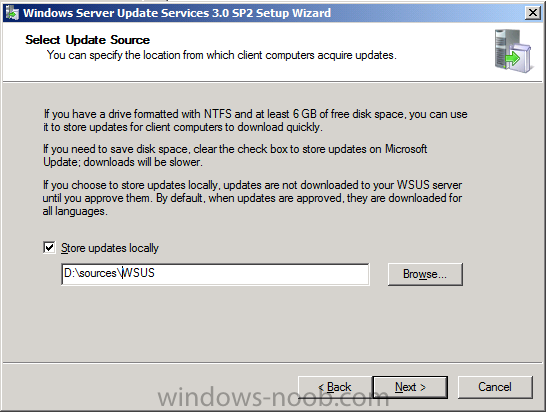
for Select Update Source, choose where to store the updates locally, select D:\sources\WSUS
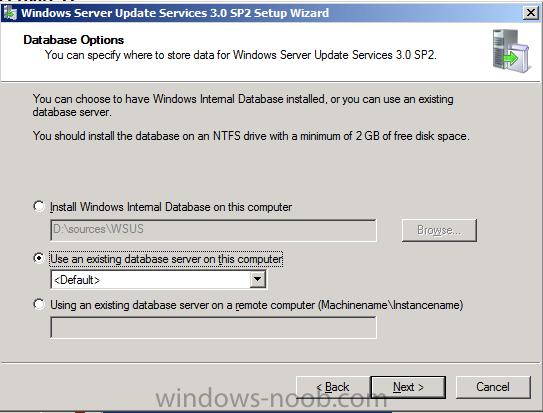
for database options choose Use an existing database server on this computer, click next
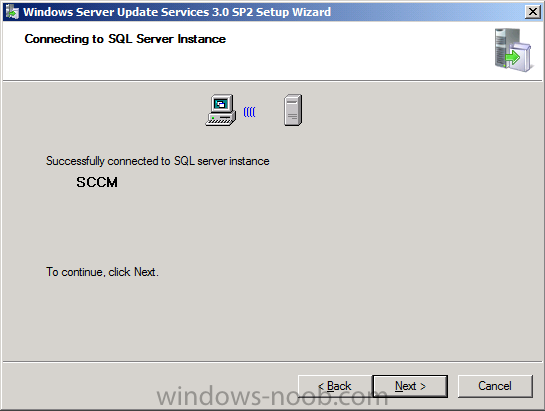
it will connect to your SCCM SQL server instance, click next
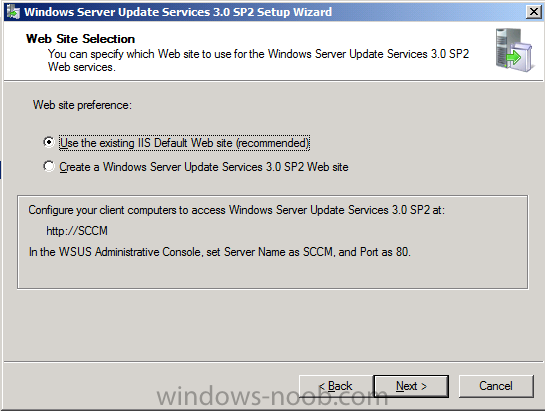
accept the web site preference, Use an existing Default website
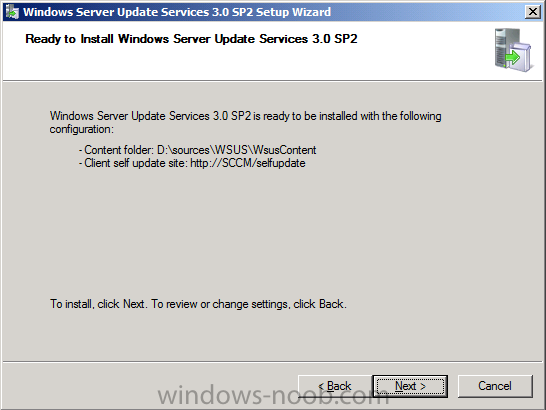
at the ready to install WSUS, click next
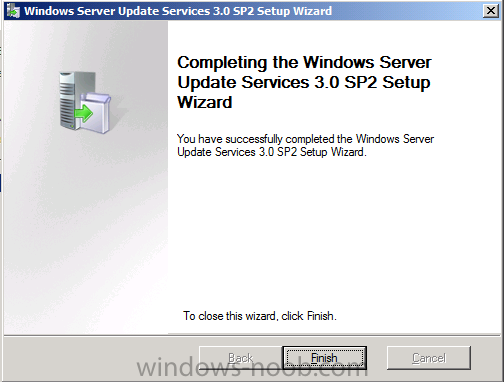
click Finish when done.
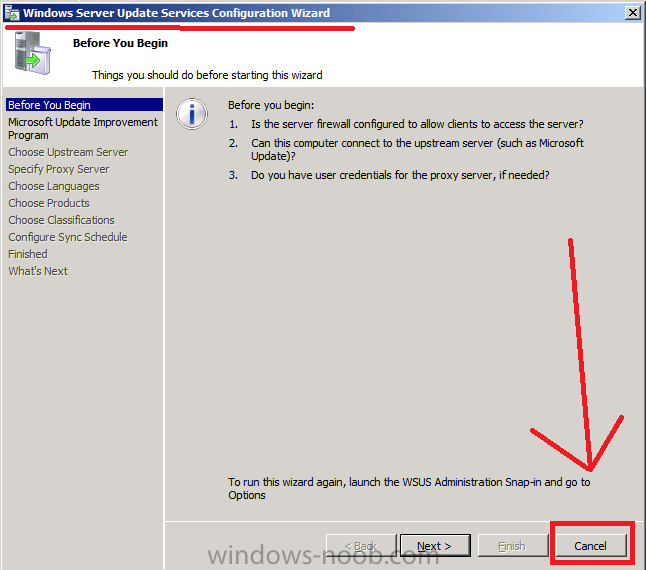
followed by cancelling the WSUS configuration Wizard.
and close the Roles Wizard
Step 2. Add Windows Deployment Services.
Perform the following on the SCCM server as SMSadmin
In Server Manager, click Add roles select Windows Deployment Services and click next
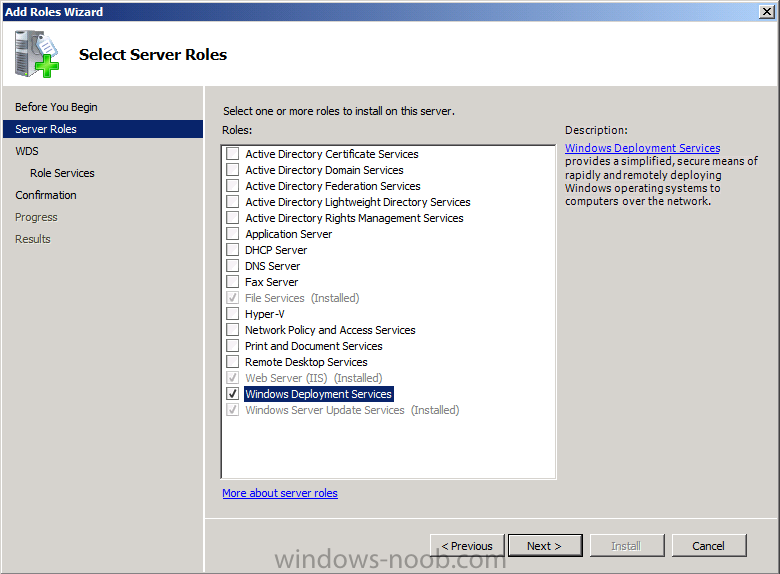
click Next, Next, and Install and click Close when done. Close Server Manager.
Step 3. Add the SUP role
Perform the following on the SCCM server as SMSadmin
Start up the ConfigMgr console, click on Administration in the Wunderbar, click on Site Configuration, and select Servers and Site System Roles, Right click on your server and choose Add Site System Role

click next at the Add Site System Roles Wizard
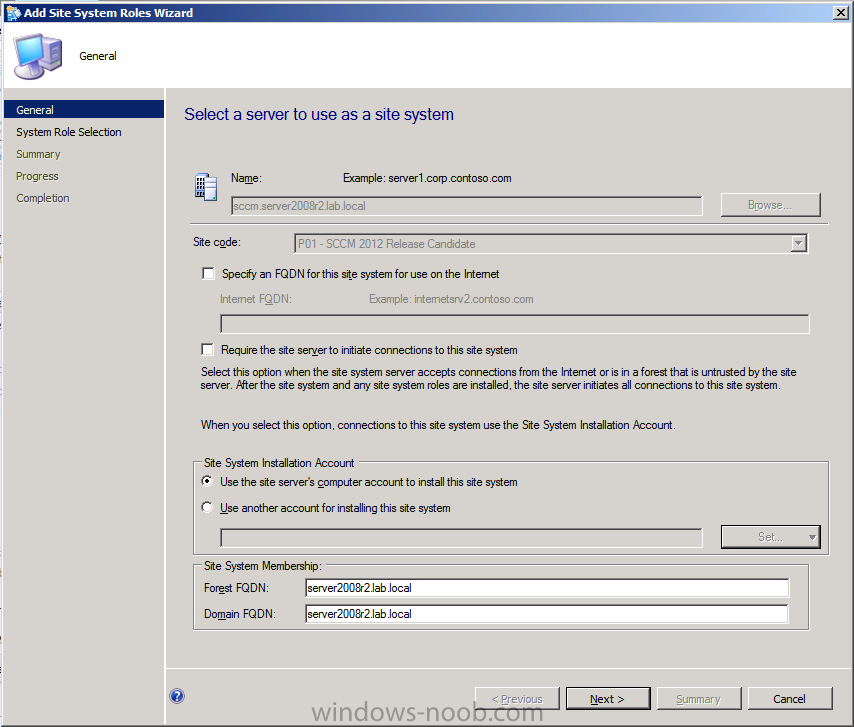
Select Software Update Point and click Next
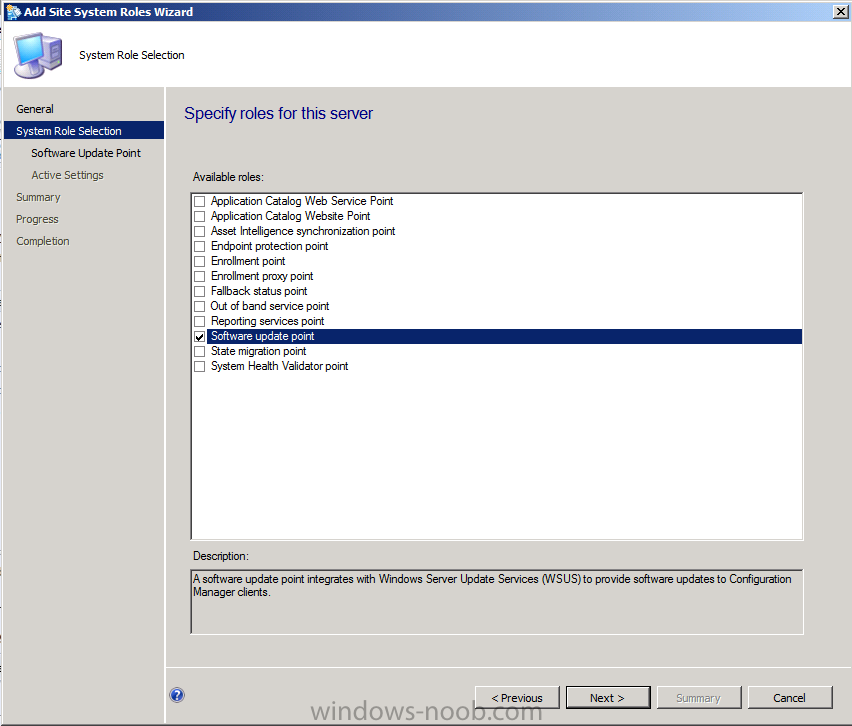
if you need to input proxy information, do it here

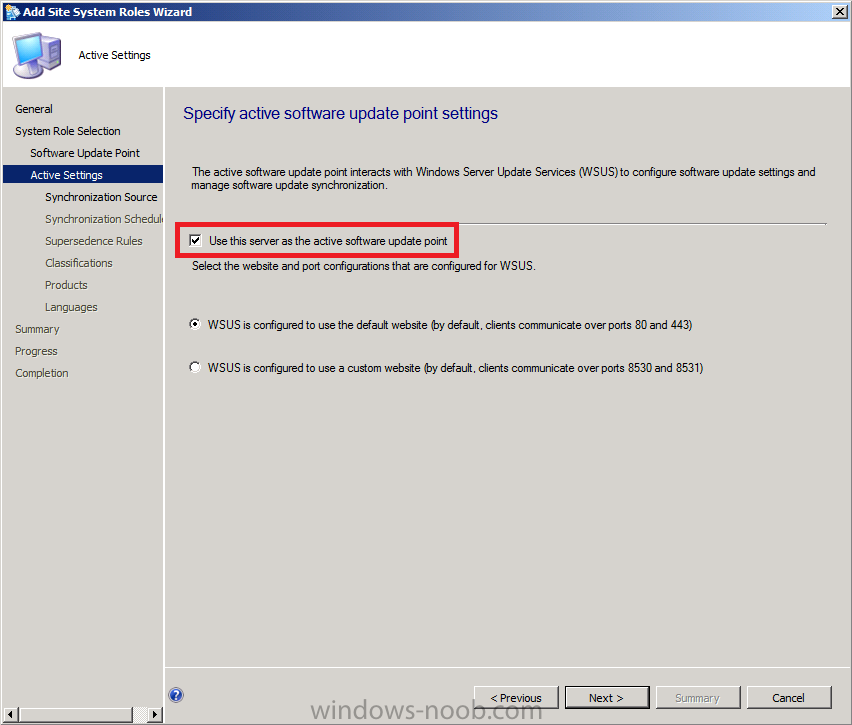
next select Use this server as the Active Software Update Point
and the wizard screen will expand as a result, leave the ports as they
are (we didn’t change them from the Default when we installed WSUS)
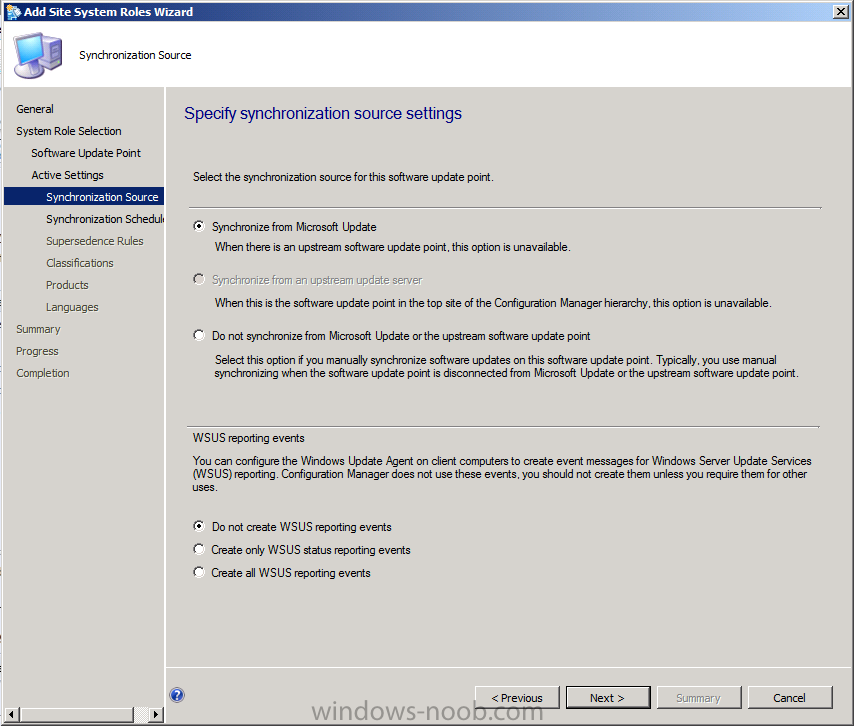
to Specify Synchronization Settings, select Synchronize from Microsoft Update
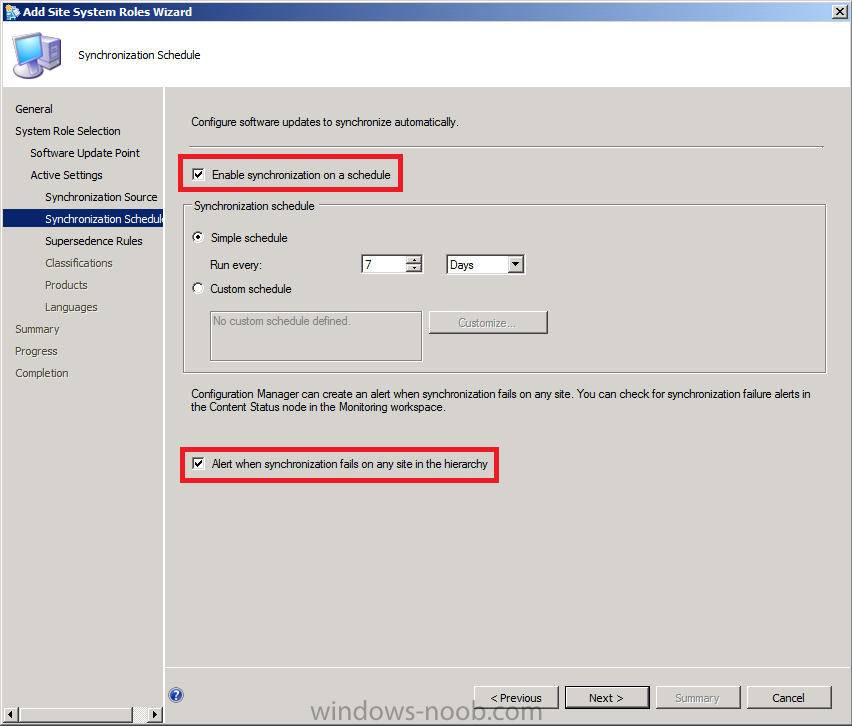
next we configure the Schedule and Alert settings, please enable both.
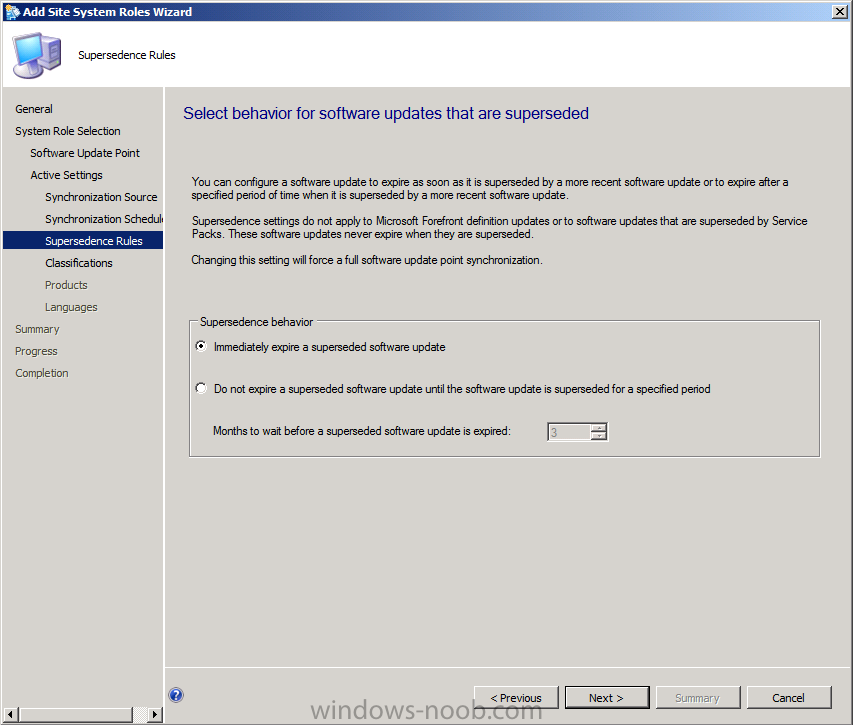
leave the supersedence rules as they are, note the note about Service packs and Endpoint Protection updates.
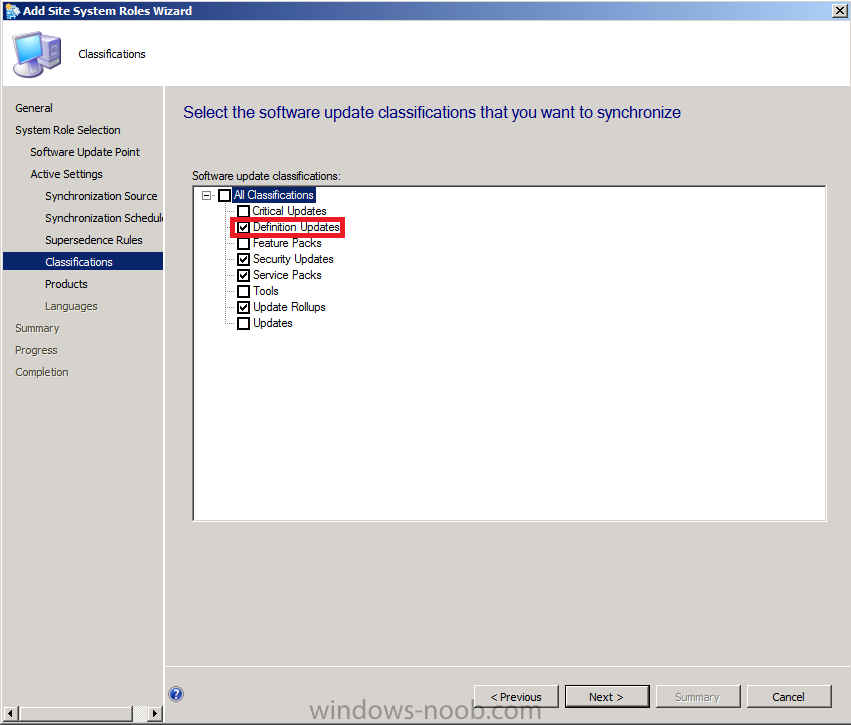
As we will be configuring System Center Endpoint Protection (SCEP) later in this series, let’s add Definition Updates in the Classifications choice
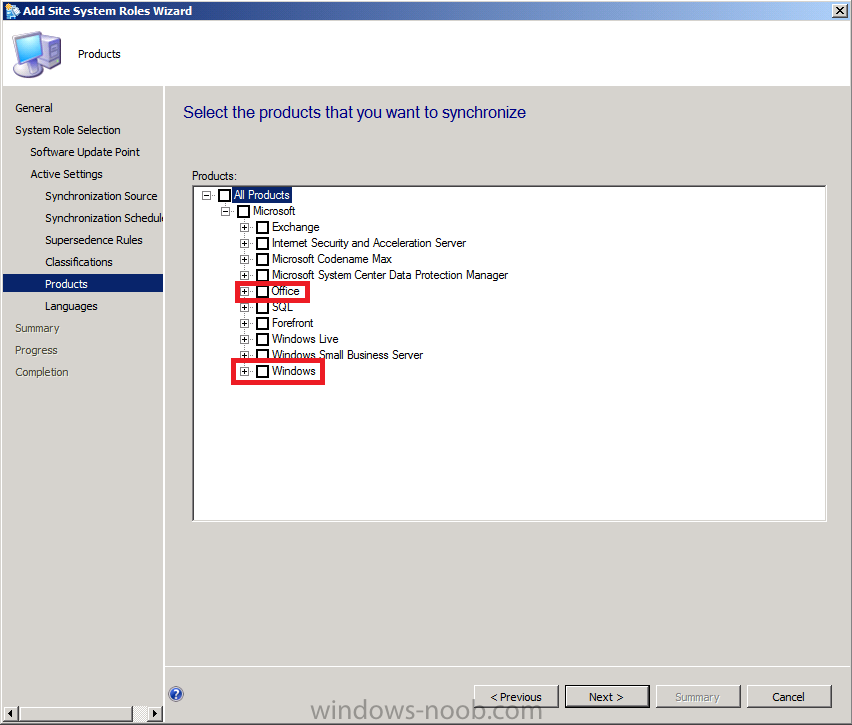
Remove the checkmarks from Office and Windows in the Products list, we will revisit this list after our first Sync.
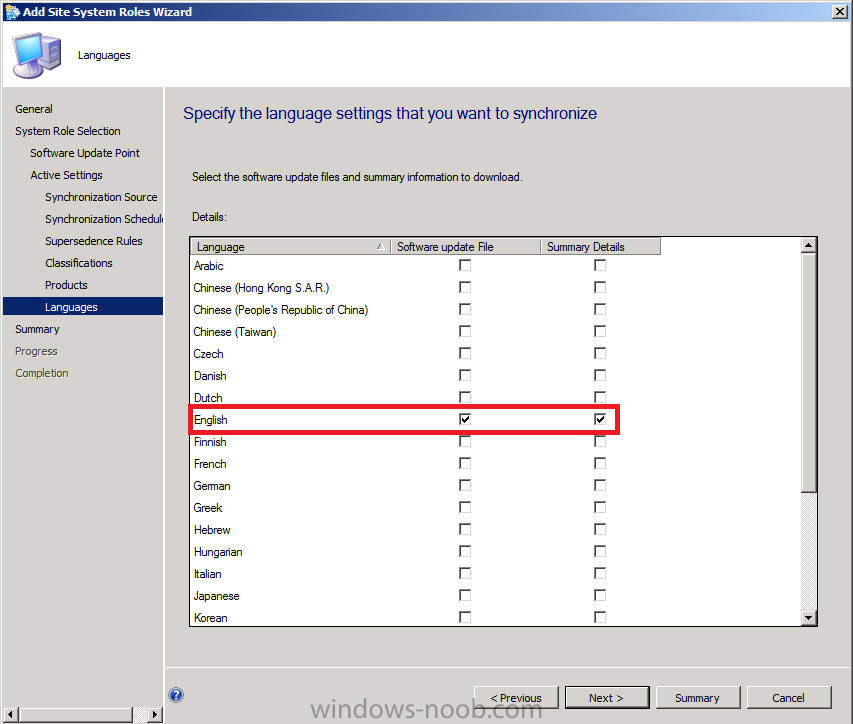
On the Languages screen, remove all
checkmarks in all languages except English (well if you want other
languages add them, but for me it’s just English)
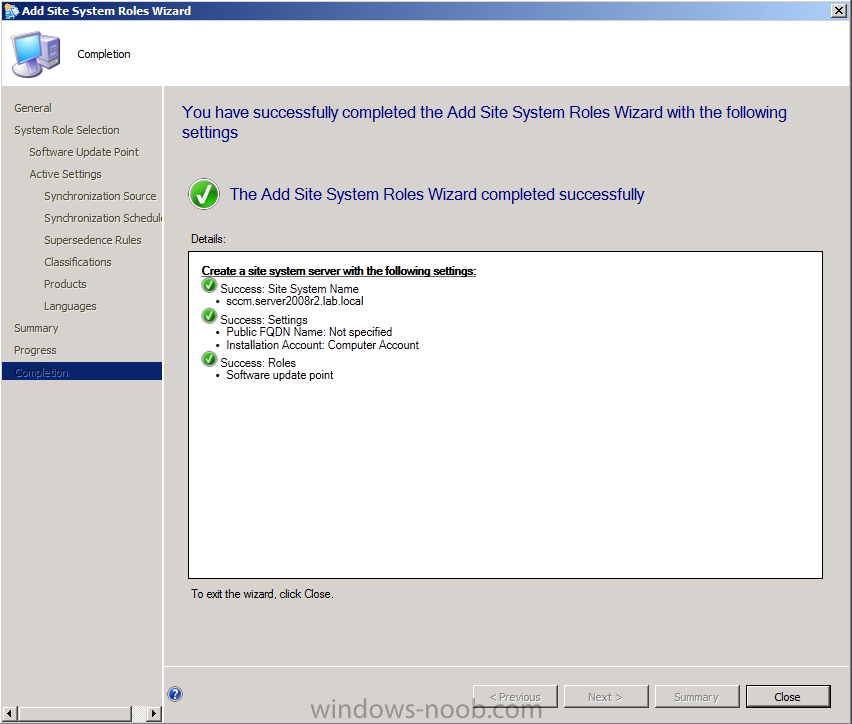
click next at the summary and progress, review the completion message and click Close.
Original post here > https://www.windows-noob.com/forums/index.php?/topic/4427-using-sccm-2012-rc-in-a-lab-part-2-add-sup-and-wds/
