In Part 1. of this series we Installed SCCM 2012, in Part 2 we started to configure it. In Part 3,
we configed Beta 2 some more by enabling Active Directory discovery
methods, adding some site system roles, configuring the computer client
agent and client push settings and finally doing a manual client
installation to verify it all worked, in Part 4
we looked at installing an application using Application Management and
the Software Catalog and the Software Center features of SCCM 2012, and
in Part 5, we added the FSP, SLP, SMP, SUP. In Part 6
we got our SCCM 2012 server ready for Deploying Windows 7 Enterprise
SP1 so that we can start deploying some Windows 7 clients to enhance our
LAB, then in Part 7 we created a Build and Capture Task Sequence and deployed it to our Build and Capture collection.
Now we will configure the Network Access Account because it is needed during the Build and Capture task sequence to access network resources (the Local System Account won’t have access to these network resources and if you have not configured your Network Access Account you’ll see Authentication failure 401 error messages in your SMSTS.log file).
In addition to configuring the Network Access Account, we’ll PXE boot
our Virtual Machine and observe the Build and Capture process, we will
also look at how we can monitor our Build and Capture Deployment while
it’s happening on our SCCM 2012 server.
Step 1. Configure the Network Access Account
Perform the following on our vNext server as SMSADMIN.
In the ConfigMgr console, select Site Operations, Sites and right click
on our P01 site, choose Software Distribution (alternatively in the
ribbon click on Configure Site Components, Software Distribution)
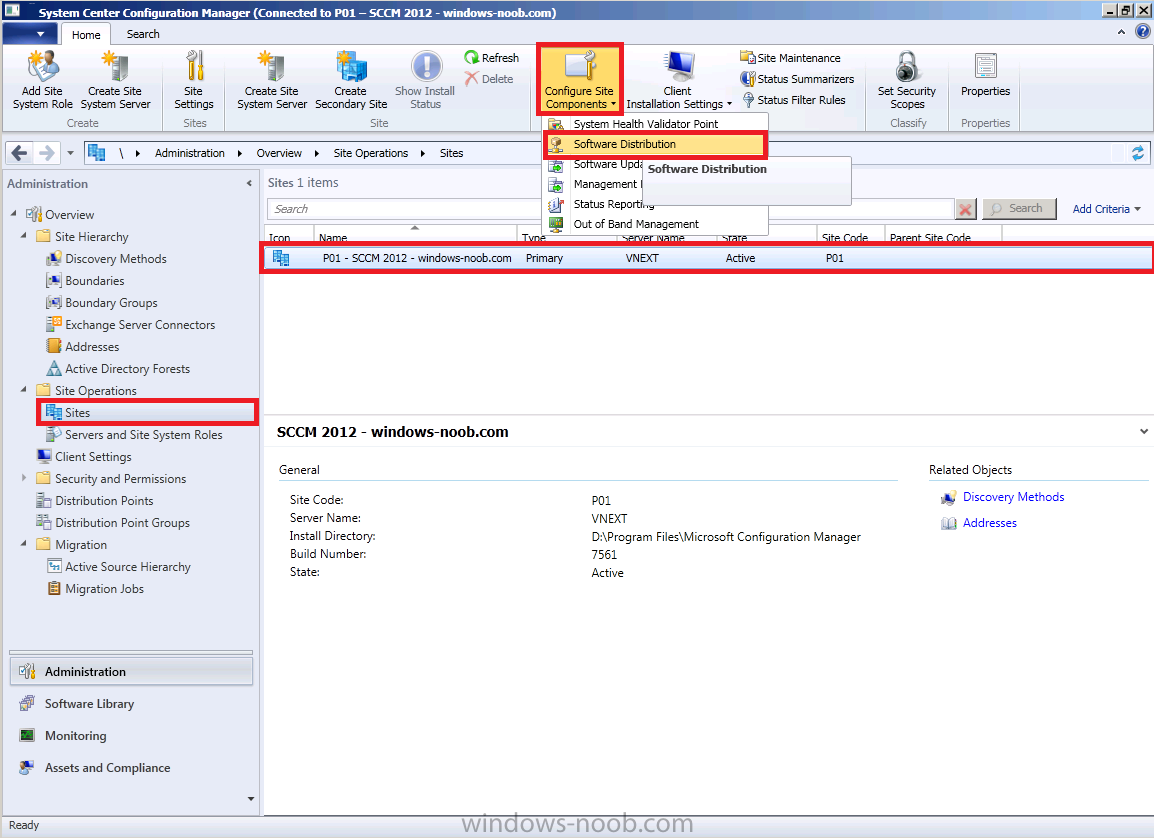
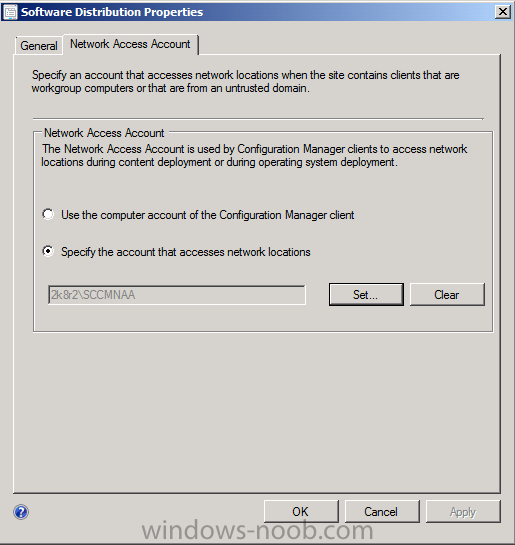
when the Software Distribution window appears, click on the Network
Access Account tab, and input your Network access account credentials,
we will use the user called SCCMNAA which we created in Part 1 of this series.
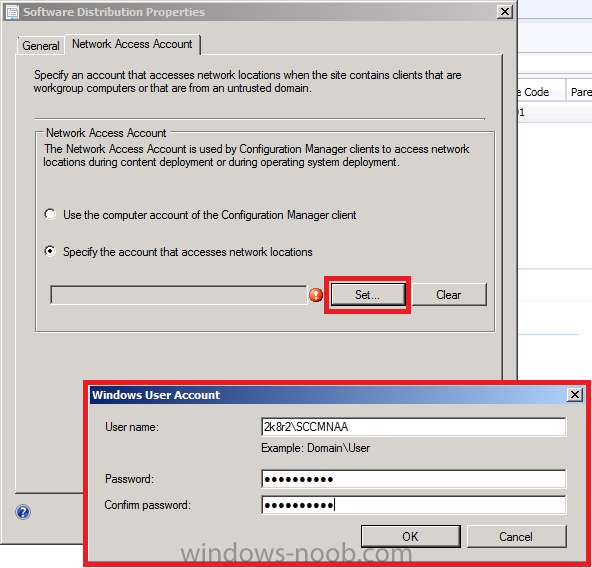
click Apply
Step 2. Boot our Virtual Machine
We have already created a new VM for our Build and capture process, and now we will PXE boot it and observe the process.
Press F12 when prompted
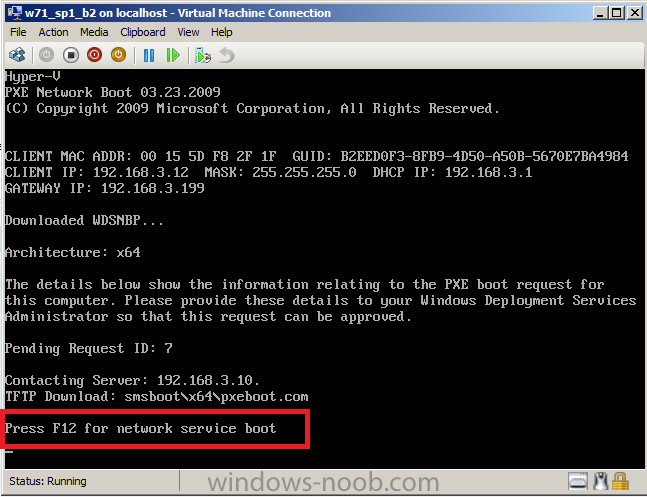
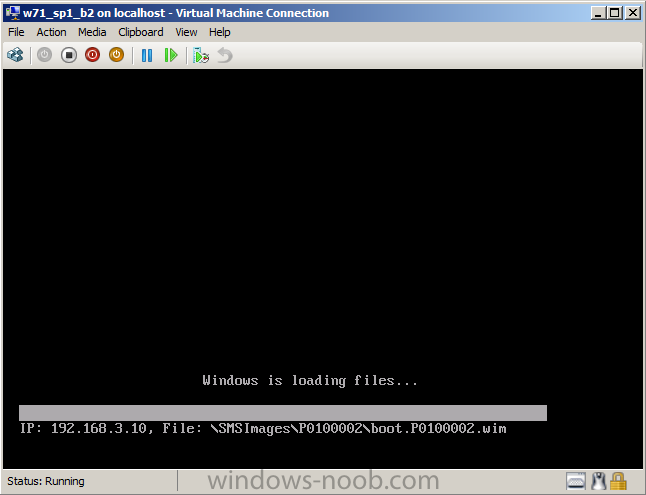
the PXE boot process begins, windows is loading files…
we get prompted for the PXE password
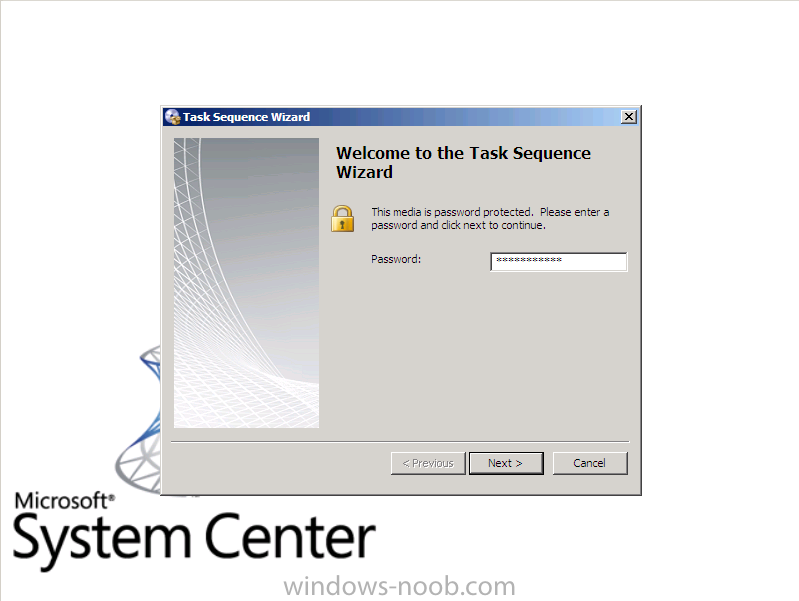
click next, and the list of available task sequences appears
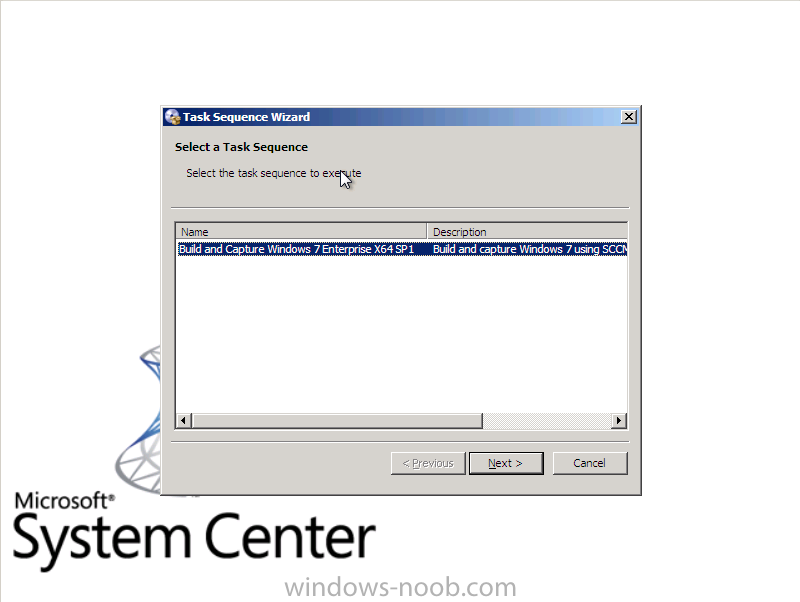
select our previously created Build and capture task sequence and click next
after partitioning and formatting the disc, the apply operating system step begins…
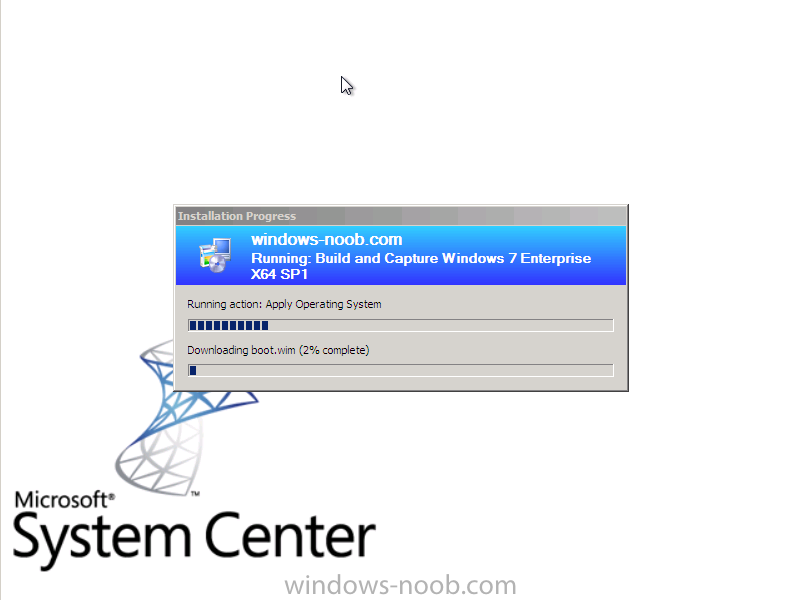
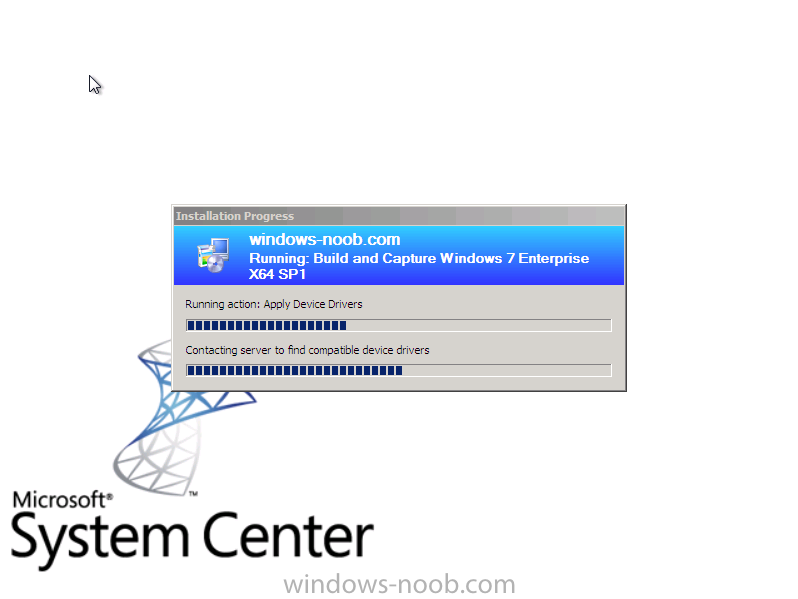
Apply Windows Settings, Apply Network Settings, Apply Device Drivers…
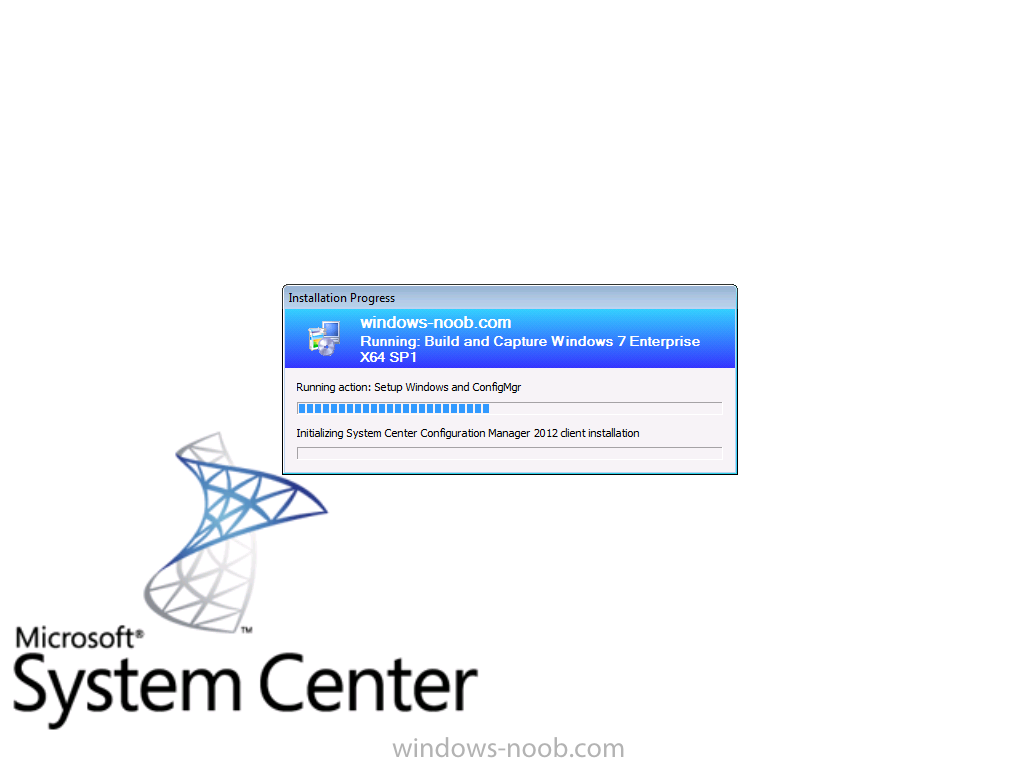
and it starts to Setup Windows
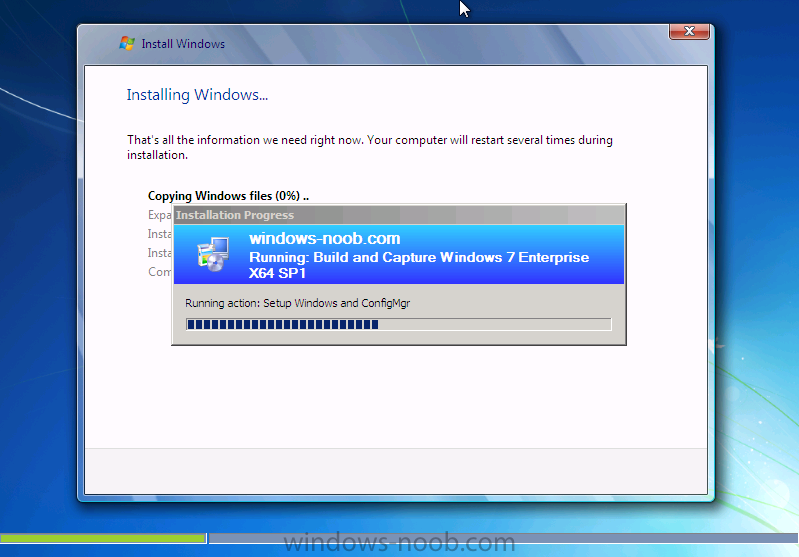
the next step involves rebooting the computer
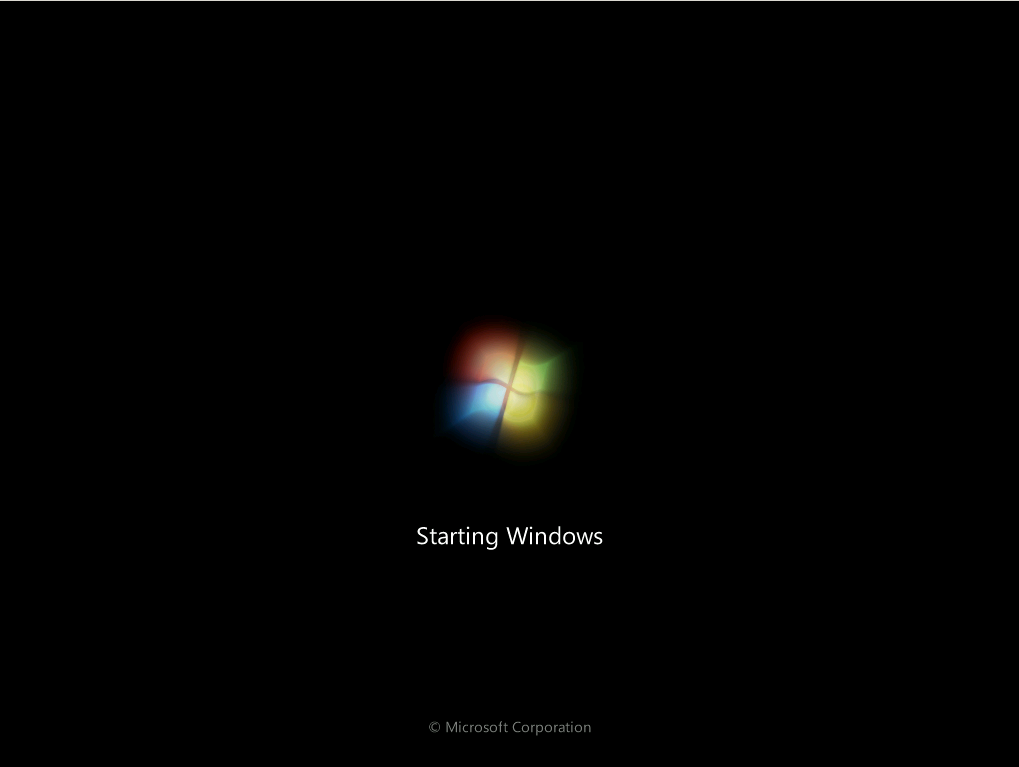
which allows Windows setup to continue (adding drivers etc) before another reboot…and then setting up the Configmgr client,
followed by installing updates and then applications, we have not
created any Update deployments so nothing will happen in that step
(we’ll come back to that later in this series).
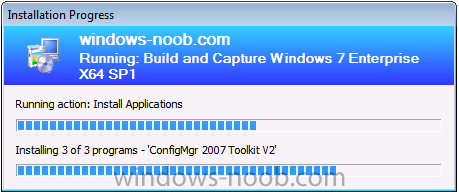
After it’s done with the Applications, it will continue on to another reboot
Tip:
while you are waiting you can click on Monitoring, Deployments, select
our Build and Capture Task Sequence to see an overview of the Deployment
in process,
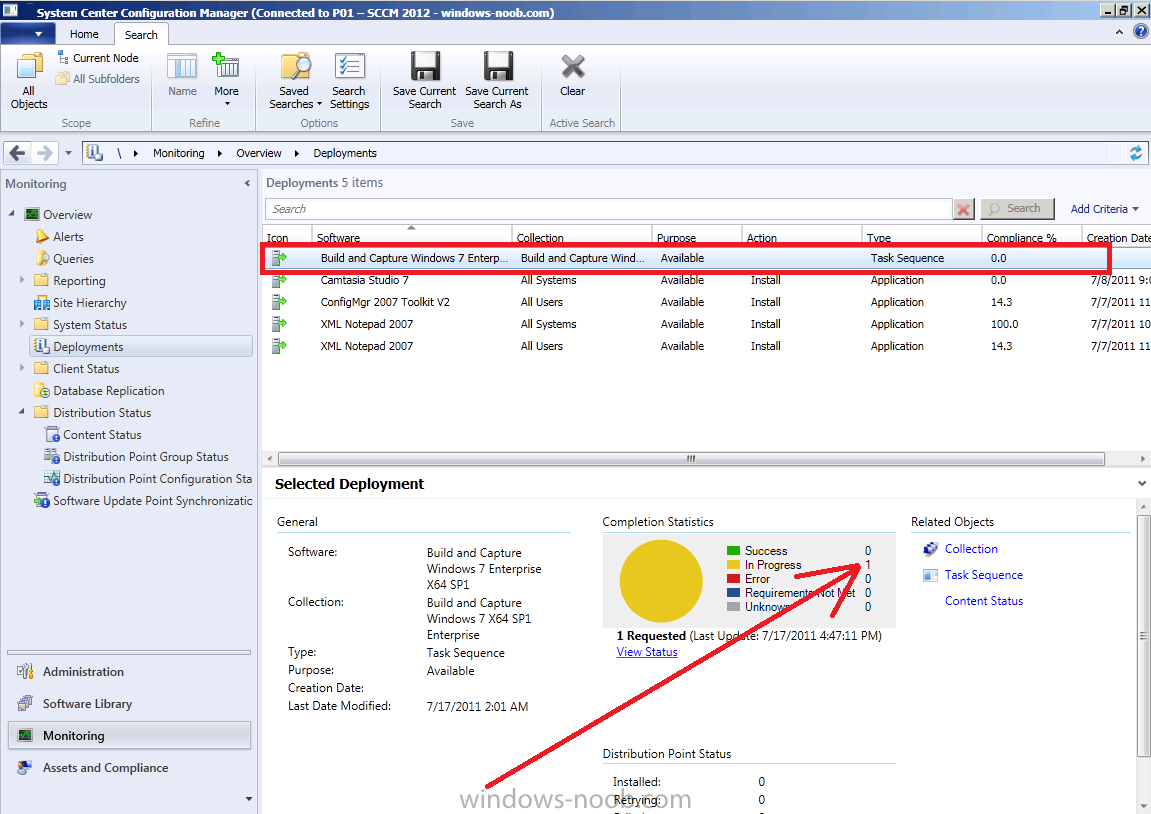
click on View Status followed by More Details to get more info about what is happening
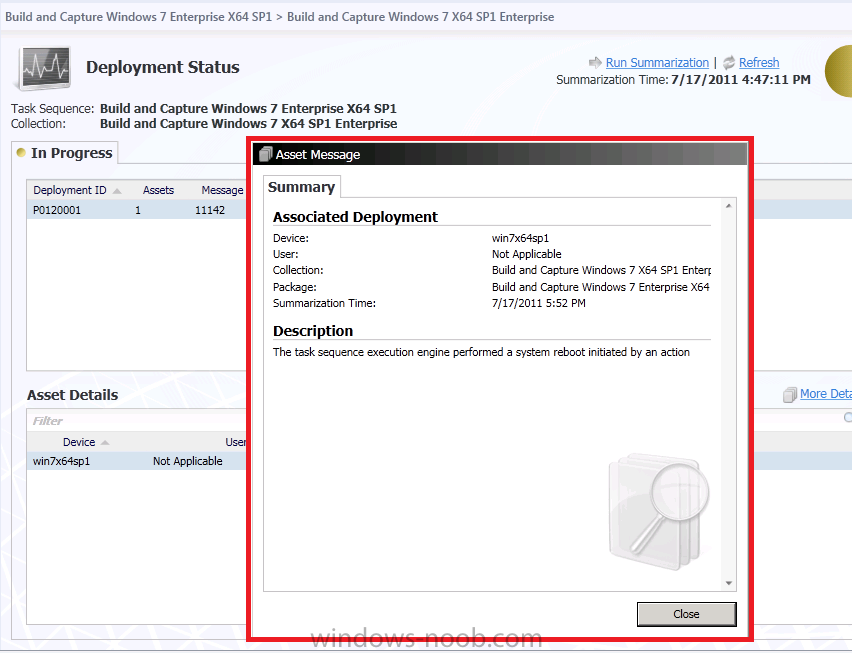
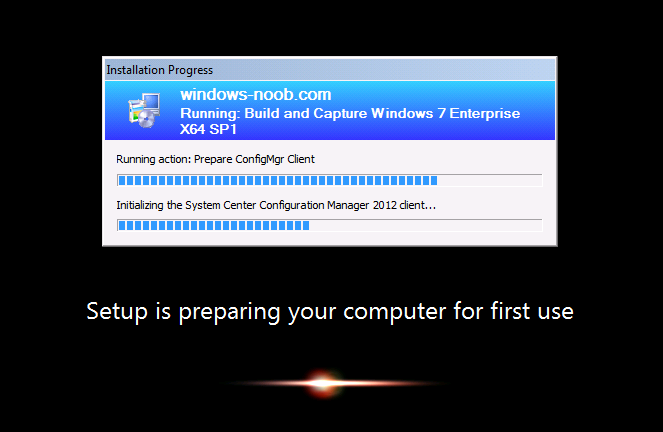
Meanwhile, the task sequence continues by Initializing the Configuration Manager 2012 client *slow*
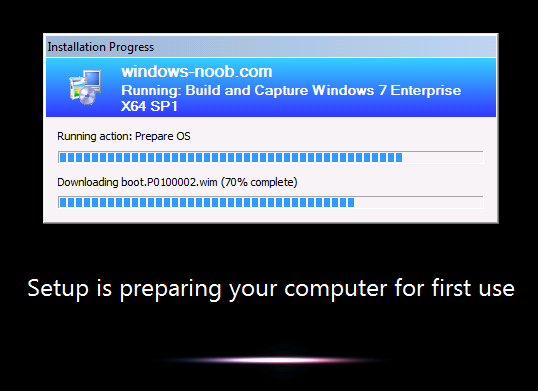
before doing the Prepare OS step
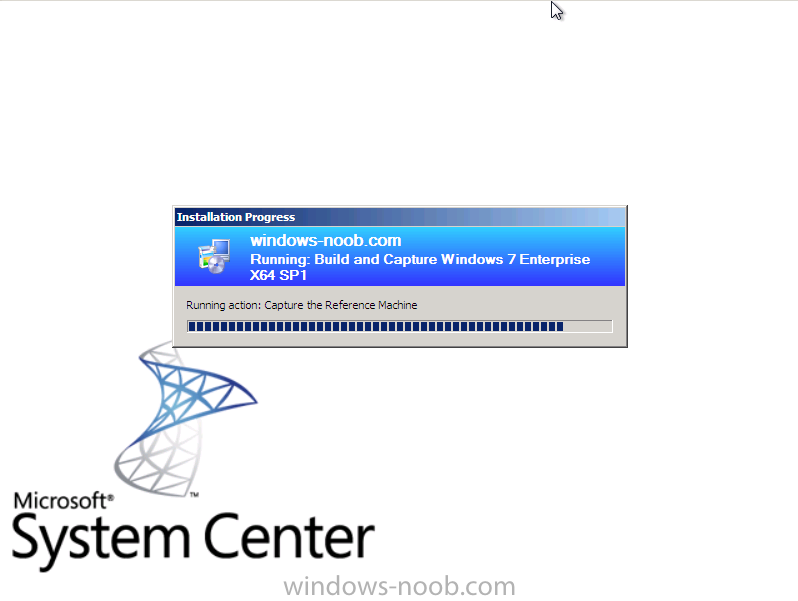
and finally after rebooting into WinPE, we being capturing our Windows 7 X64 SP1 image, success !