
In Part 1. of this series we Installed SCCM 2012, in Part 2 we started to configure it. In Part 3,
we configed Beta 2 some more by enabling Active Directory discovery
methods, adding some site system roles, configuring the computer client
agent and client push settings and finally doing a manual client
installation to verify it all worked, in Part 4
we looked at installing an application using Application Management and
the Software Catalog and the Software Center features of SCCM 2012, and
in Part 5, we added the FSP, SLP, SMP, SUP. In Part 6
we got our SCCM 2012 server ready for Deploying Windows 7 Enterprise
SP1 so that we can start deploying some Windows 7 clients to enhance our
LAB, now we will create a Build and Capture Task Sequence.
The Build and Capture Task Sequence
A build and capture task sequence is used
to create the Master (or Core) image. The image created in the build
and capture task is the image to be used in the Deploy Task Sequence.
You would typically add only FAT applications to the master image, such
as Office 2010, ForeFront Antivirus SAP and so on. Windows updates are
also important as we want our clients to be secure. Therefore you must
use a Server Locator Point in the Setup Windows and ConfigMgr
step in the Task sequence. That way the workgroup computer can find the
windows updates correctly from the SUP. Do NOT join the master image
computer to a domain, workgroup only. The captured image will contain
the base Operating System, plus some key applications, plus windows
updates and some patches/fixes. Advertise this task sequence to a Build
and Capture Collection, add computers to that collection via direct
membership or computer association. Do NOT join the computer to the
domain, keep it clean, free of GPO’s and other domain changes (registry
pollution…) Virtual machines are the best for creating Images, keep the
image hardware agnostic, vmware or hyperV are recommended, hyperV
doesn’t require nic drivers… Only add FAT applications, apps that change
infrequently within the organisation, such as Office 2010. Software
size should also be considered. Add windows updates by specifying SLP in
the Setup Windows and ConfigMgr step.
Step 1. Create the Task Sequence
Perform the following on the vNext server as SMSadmin
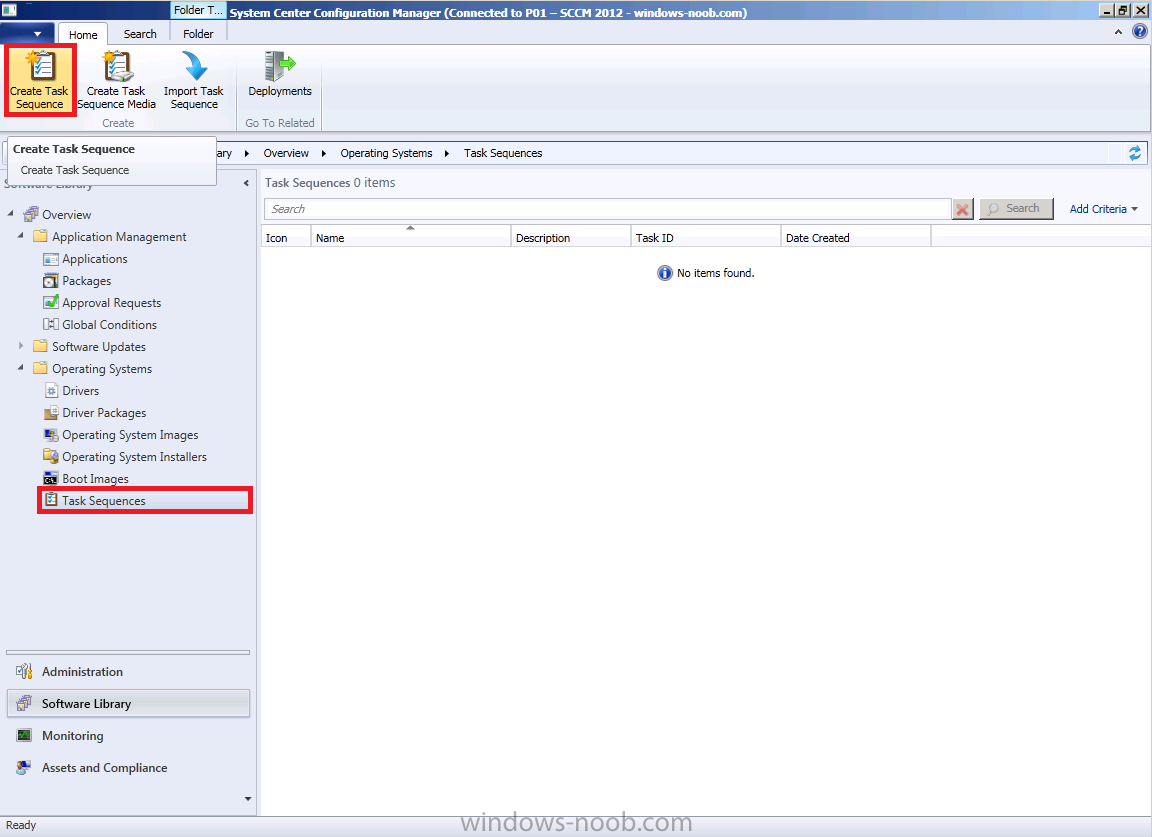
In the Configmgr Console click on Task Sequences under Software Library, Operating System Deployment. In the Ribbon click on Create Task Sequence
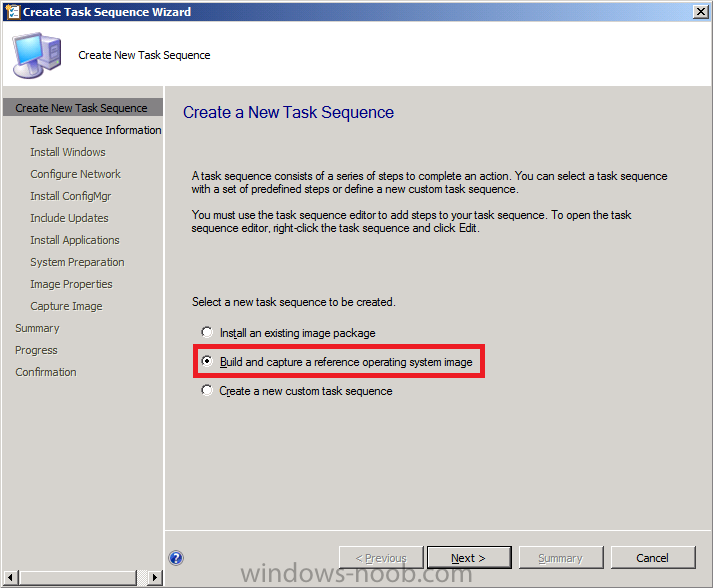
when the wizard appears, choose build and capture a reference operating system image
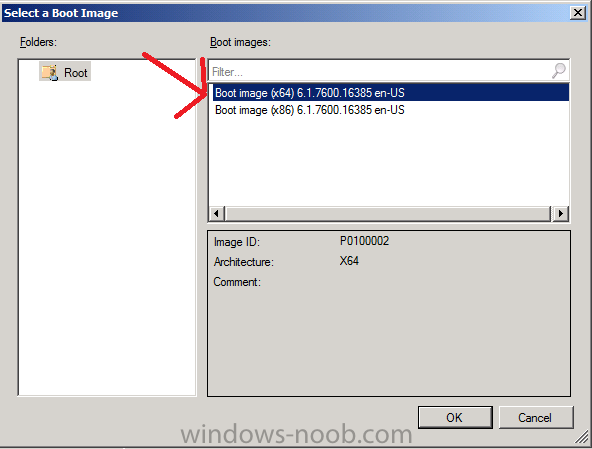
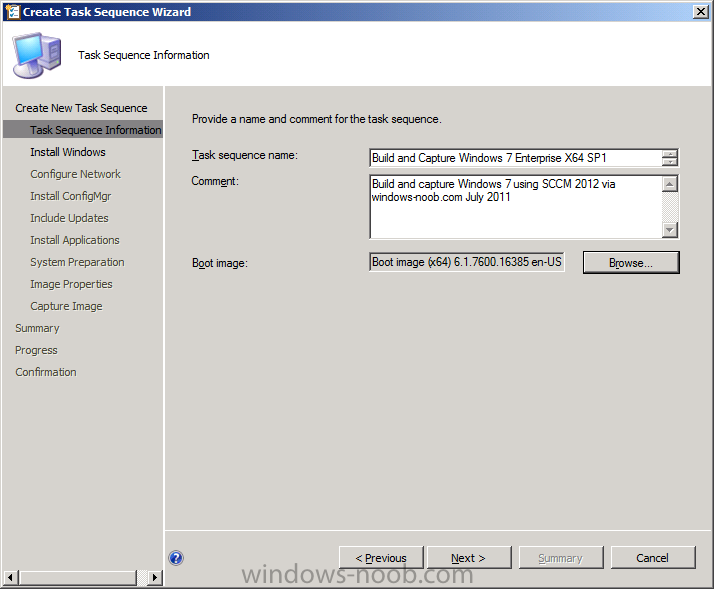
fill in the image details and click on browse to select the boot image
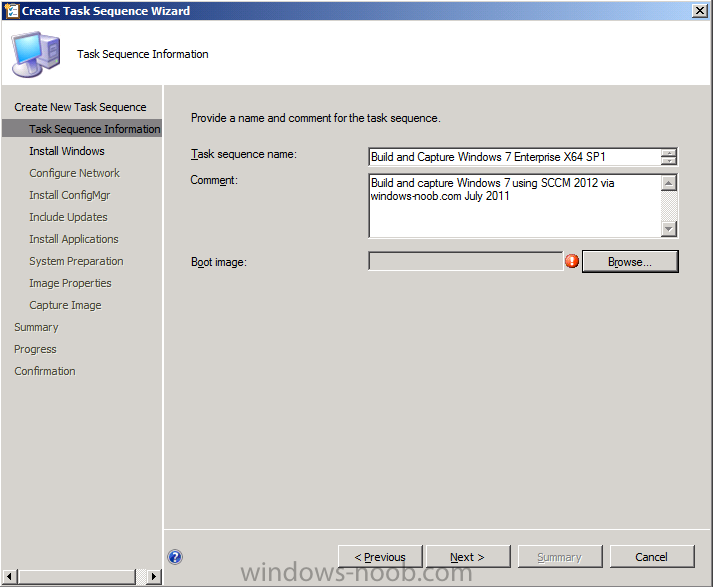
as we are Build and Capturing a X64 image, we need to specify the X64 bit boot image
so it now looks like this
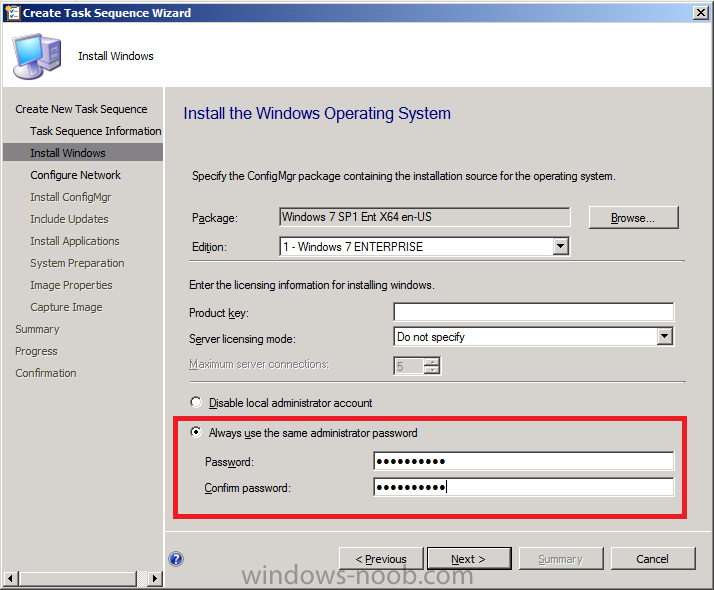
in the next screen we get to select our Operating System Installation source Image that we added in Part 6, in addition to this i’d recommend you DON’T enter the Product Key and that you DO enter an Administrator Password
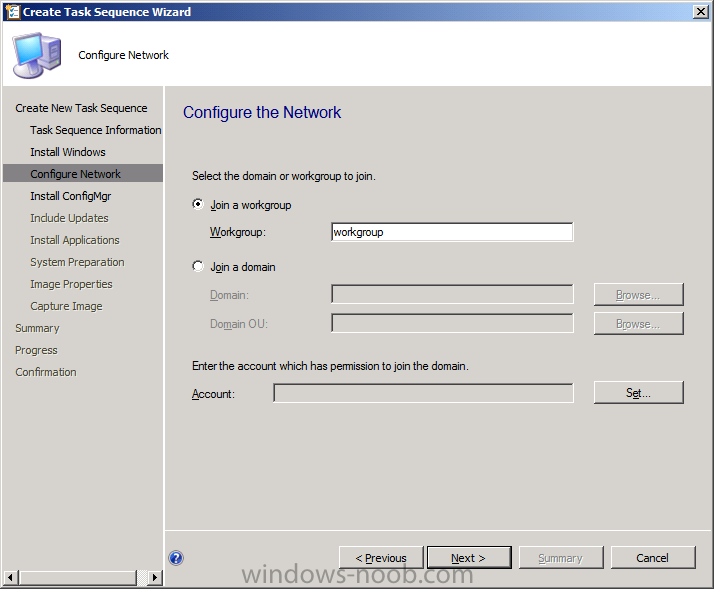
next we should join a workgroup, to keep the build and capture image clean (as explained above)
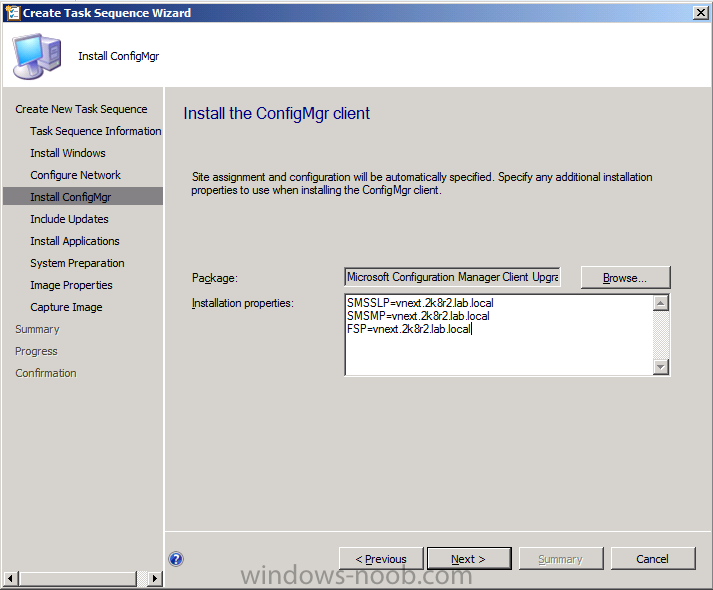
and next we get to install the Configmgr Package from definition, select
it and if you want windows updates installed (we havn’t created any
windows updates deployments yet.. we will soon) then specify your SLP
settings as per this post
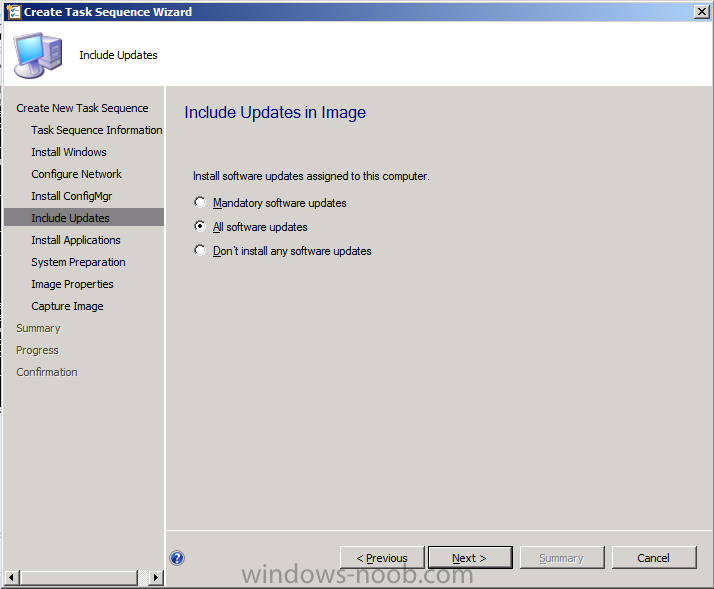
for the software updates step select All Software Updates
for the Install Applications step, select the Yellow Starburst and pick an application you’ve added previously
do it again (click on the Yellow Starburst) and add some more apps, this
is to see multiple apps getting installed in one step, place a
checkmark in if an application installation fails, continue installing other applications in the list

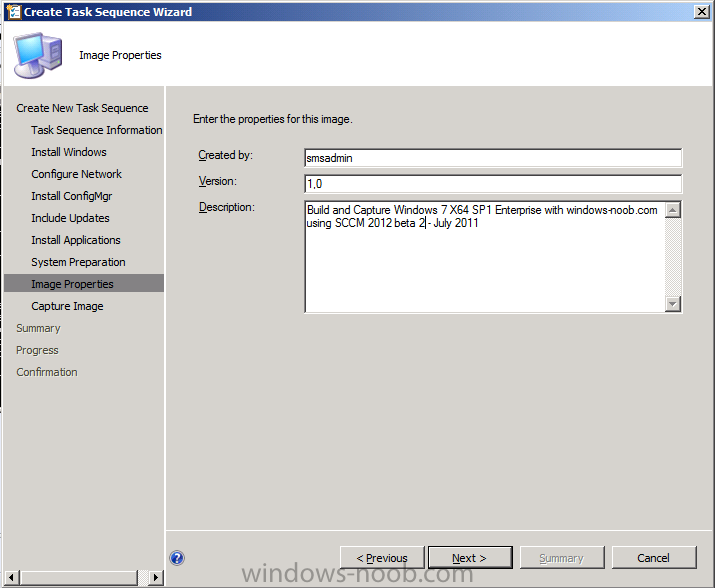
this is Windows 7 so click through the system preparation step, and fill in the Image Properties
and fill in the capture image details (I created a folder called captures in \\vnext\sources\captures and added the SMSADMIN account as the capture account)

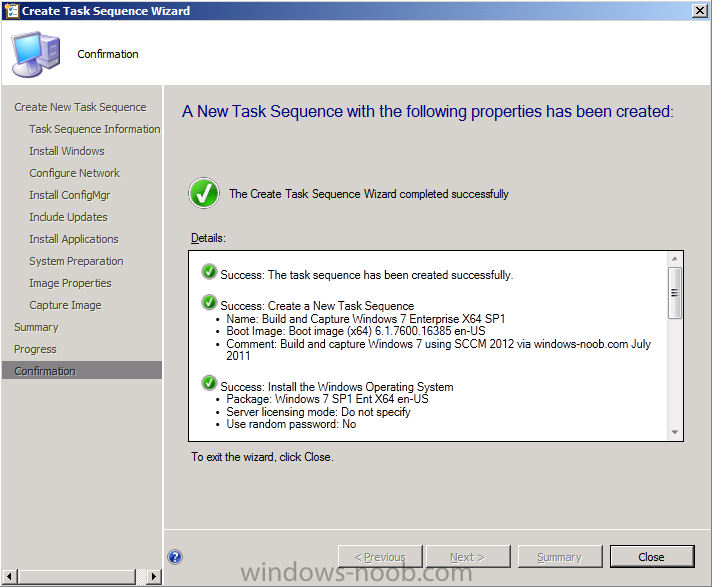
click next at the summary and review the confirmation screen.
the rest of this post can be found on windows-noob.com here
