
In Part 1. of this series we Installed SCCM 2012, in Part 2 we started to configure it. In Part 3,
we configured Beta 2 some more by enabling Active Directory discovery
methods, adding some site system roles, configuring the computer client
agent and client push settings and finally doing a manual client
installation to verify it all worked, in Part 4
we looked at installing an application using Application Management and
the Software Catalog and the Software Center features of SCCM 2012, and
in Part 5, we added the FSP, SLP, SMP, SUP. In Part 6
we got our SCCM 2012 server ready for Deploying Windows 7 Enterprise
SP1 so that we could start deploying some Windows 7 clients to enhance
our LAB, then in Part 7 we created a Build and Capture Task Sequence and deployed it to our Build and Capture collection. In Part 8
we created our Network Access Account and captured our Windows 7 SP1
image (and Windows 7 RTM). Now we will deploy that captured image to a
new Virtual Machine.
Perform the following on your SCCM 2012 beta 2 server as SMSadmin.
Step 1. Import the captured images
If you havn’t already done so repeat the Build and Capture Process so that we have both Windows 7 X64 SP1 and Windows 7 X64 images captured.
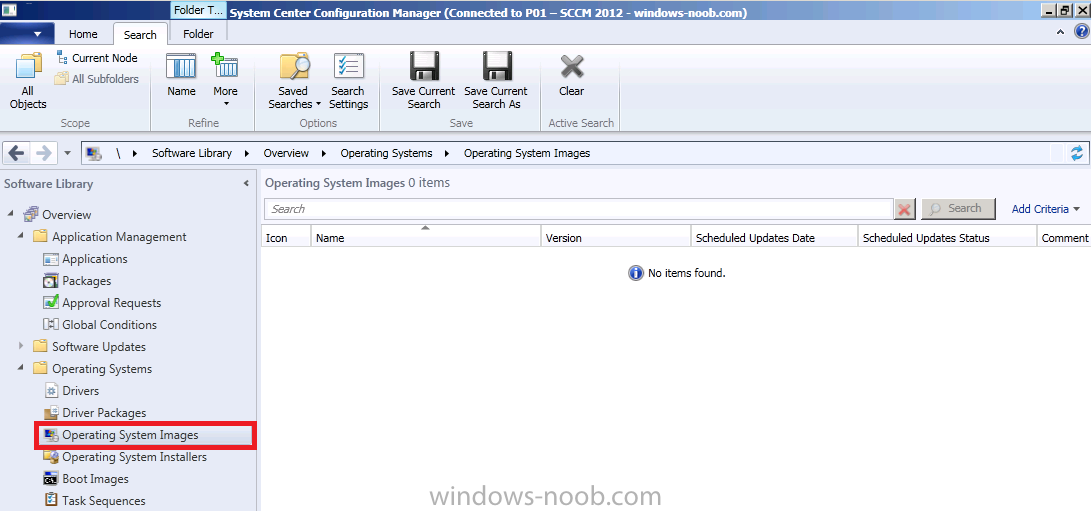
In the Software Library, Operating Systems section of the Configmgr console, click on Operating System Images, you’ll note that it is empty because we havn’t imported any images yet.
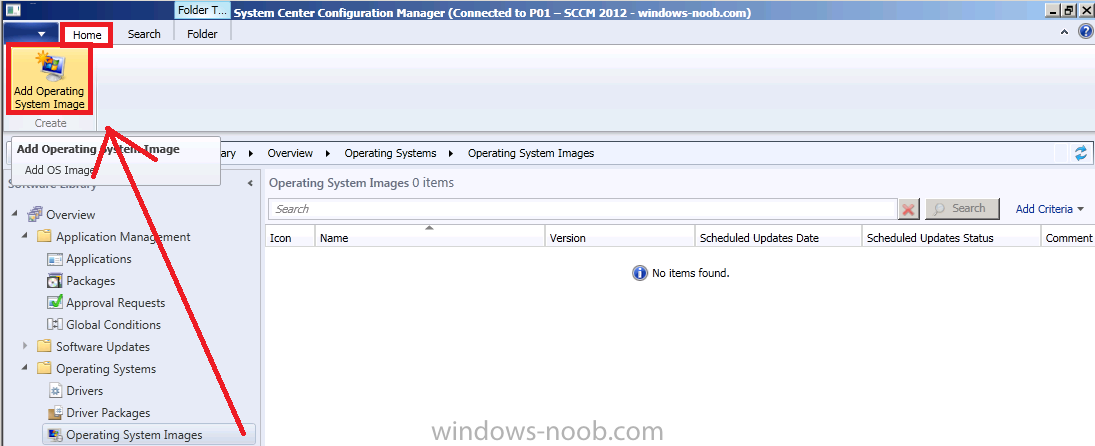
In the ribbon above, click on Home and then Add Operating System Image
for data source enter the capture UNC eg: \\vnext\sources\captures and click on browse,
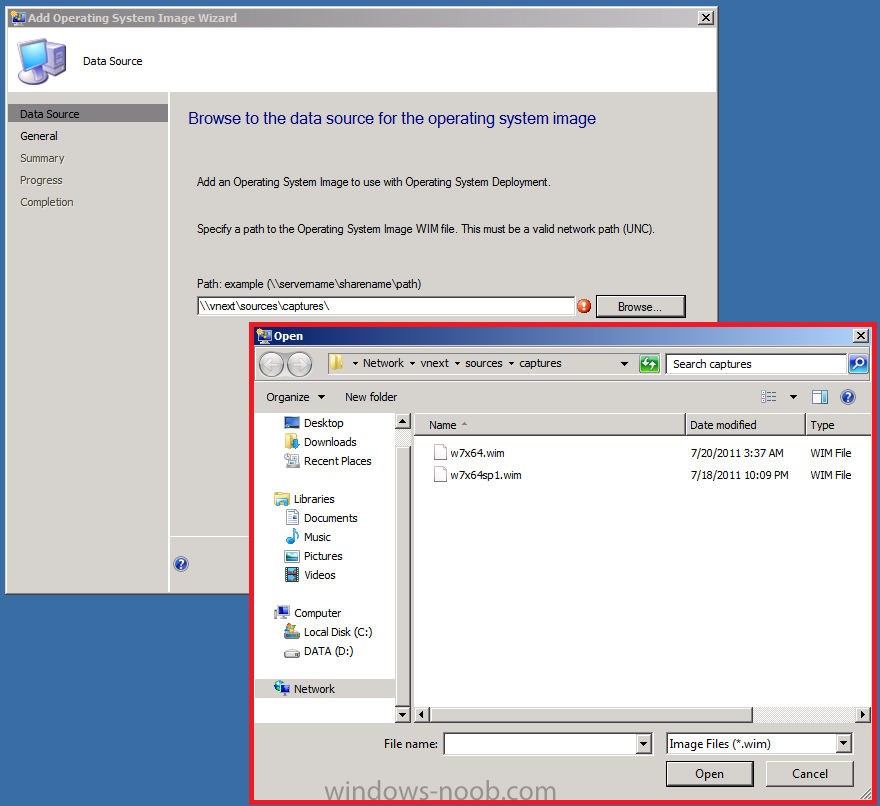
select the W7x64SP1.wim file
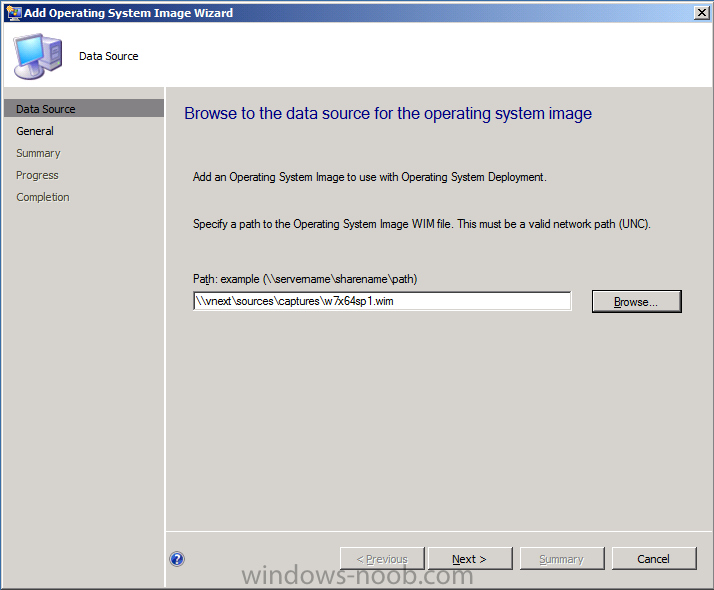
enter the operating system image data
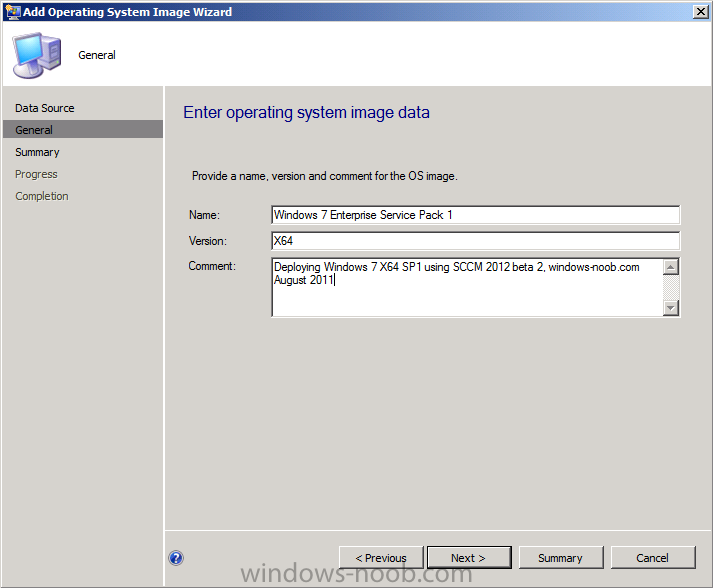
click next and next again
review the add operating system image Wizard completion message
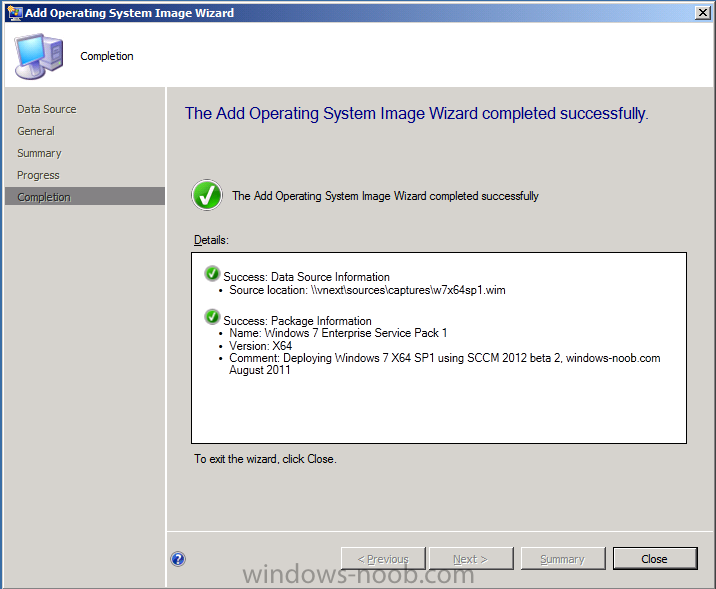
click Close, then repeat the above process for our Windows 7 X64 image (RTM).
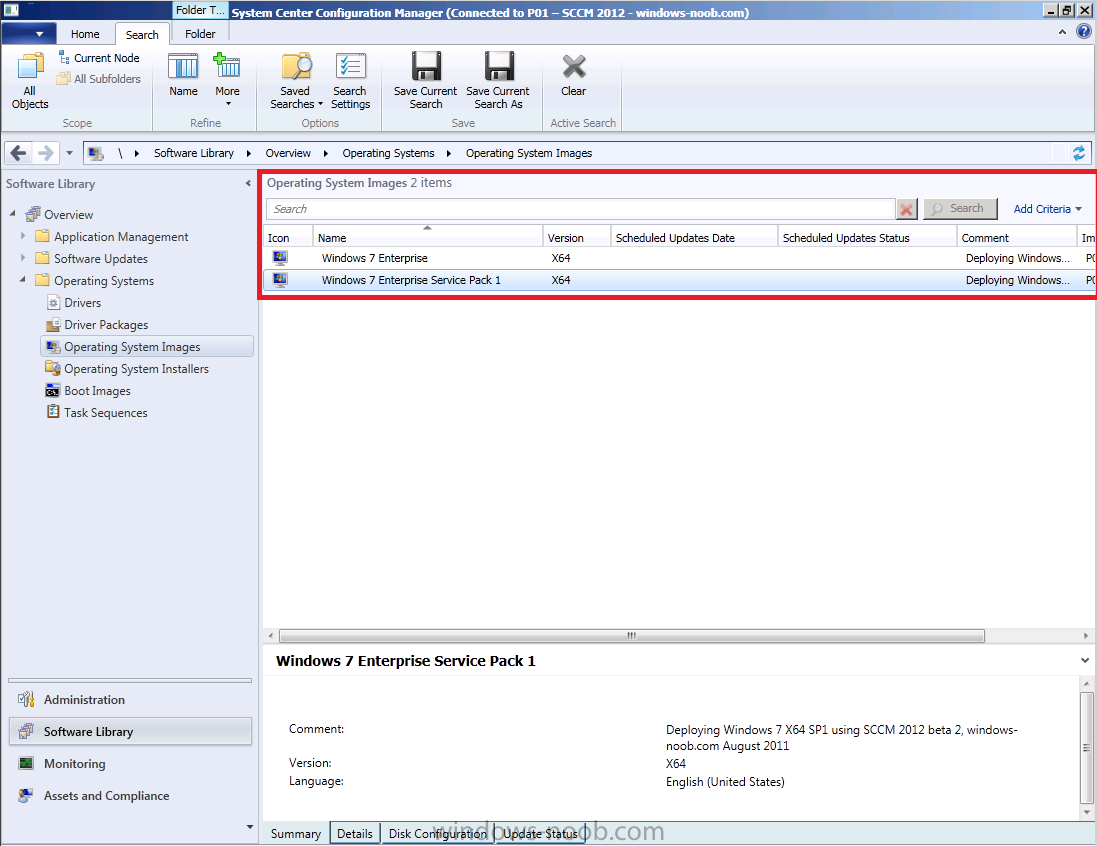
Both images should now appear
To read the remainder of this post please click here
