

Introduction
If you’ve followed my previous guide here, you’ll have learned how to Deploy Windows 8 to the Microsoft Surface Pro using Configuration Manager 2012 SP1, however that guide didn’t show you how to set the DPI (dots per inch) setting for the Surface Pro high resolution display.
The DPI setting is important because if it’s set too low the text will appear in very small fonts on that high resolution screen making it very hard to read any text, therefore we will set it to a value that is more comfortable on our eyes.
Step 1. Copy Windows 8 source files locally
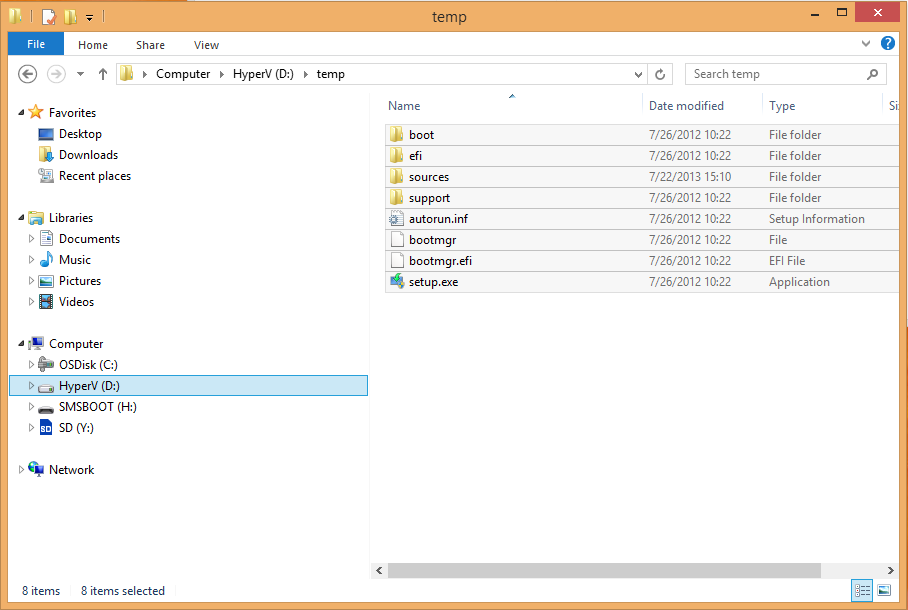
On a computer that has the Windows Assessment and Deployment Kit installed, extract a copy of Windows 8 source files locally. In this guide I’ve extracted the Windows 8 X64 Enterprise iso to D:\temp.
Step 2. Use Windows System Image Manager to create an unattend.xml file
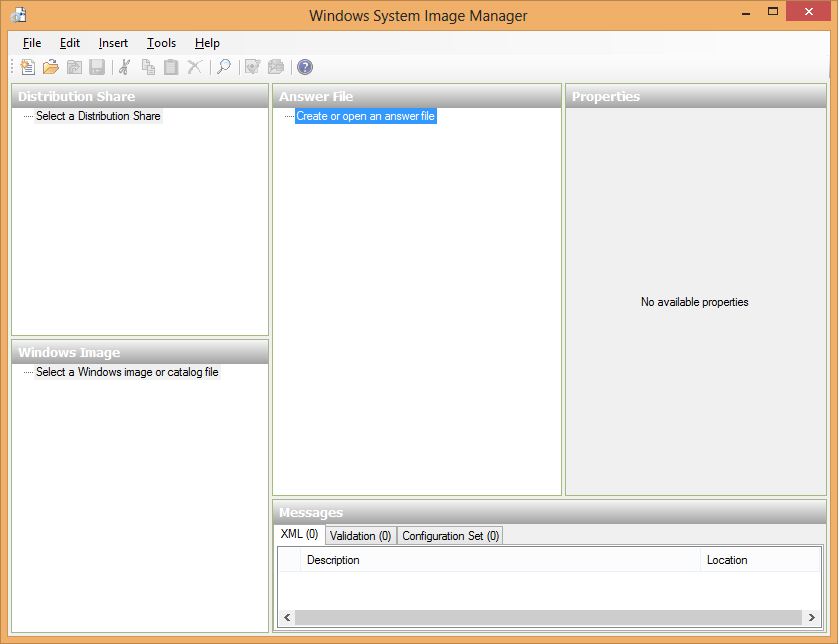
As a user that has Local Administrative permissions, start up Windows System Image Manager (Windows SIM) to create our new unattend.xml file.
To find Windows SIM in Windows 8 with the WADK installed, simply open the Windows 8 start screen and type Windows System Image Manager into the search field like so:

Click on the app to start it and Windows System Image Manager will appear. If you have not used Windows SIM before it will appear empty like in the screenshot below.
We now need to use our extracted Windows 8 source files to create a catalog (CLG) file so that Windows SIM knows what options are available to us when building answer files.
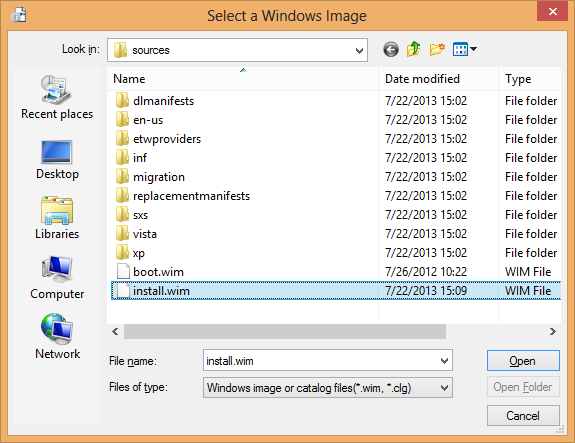
Click on File, then Select Windows Image.
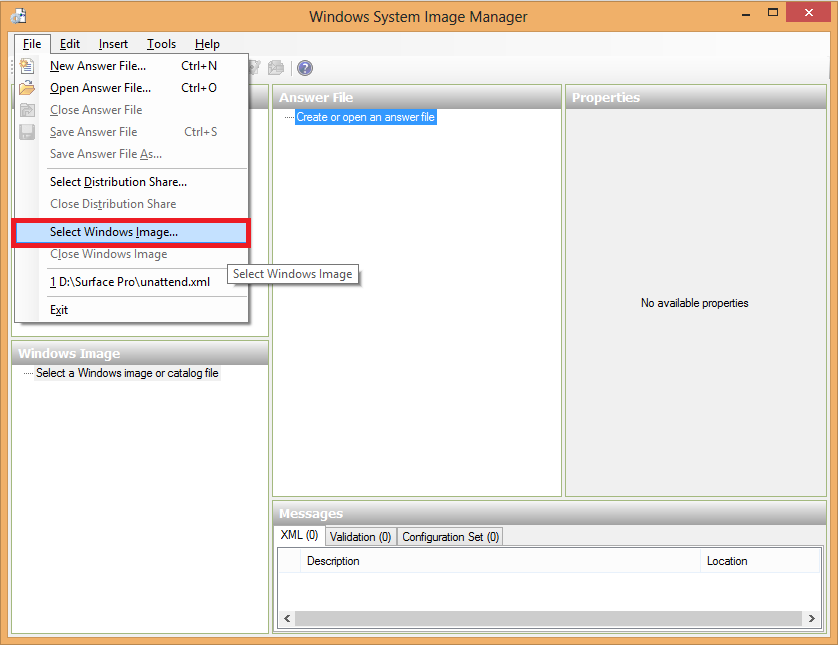
Point it to the install.wim file located in the Sources folder in your extracted Windows 8 source files.
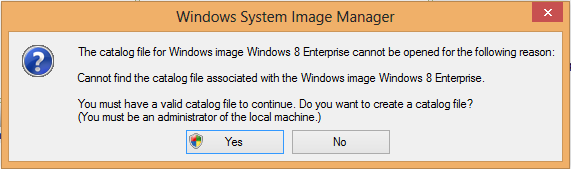
and answer Yes when prompted to create a CLG file
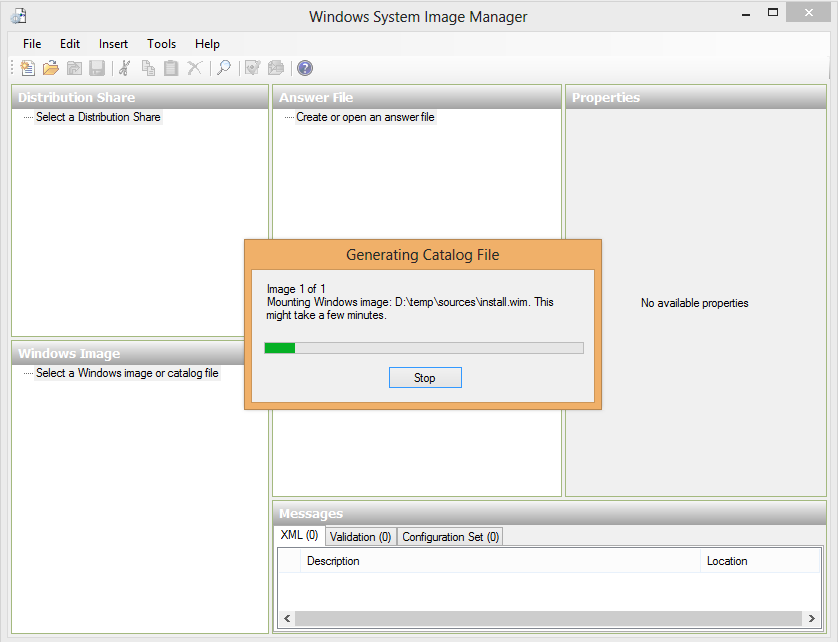
It will take some minutes to generate the Catalog File, time for a cup of coffee, or two.
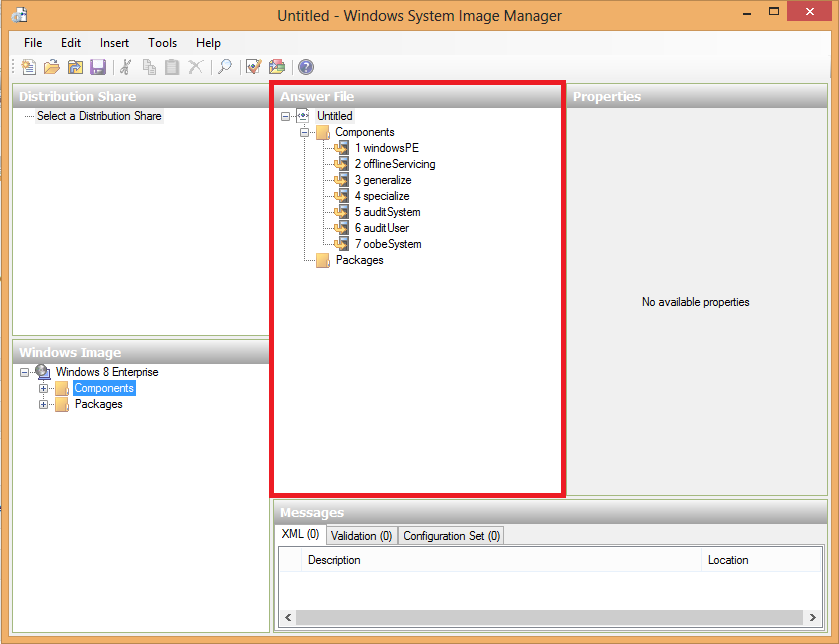
After a while the catalog file is created and Windows SIM will present you with your Windows 8 Enterprise image in the Windows Image pane, now we can create our Unattend.xml file.
Right click on Create or open an answer file and choose New Answer File.

The structure for your answer file will now appear in the answer file pane.
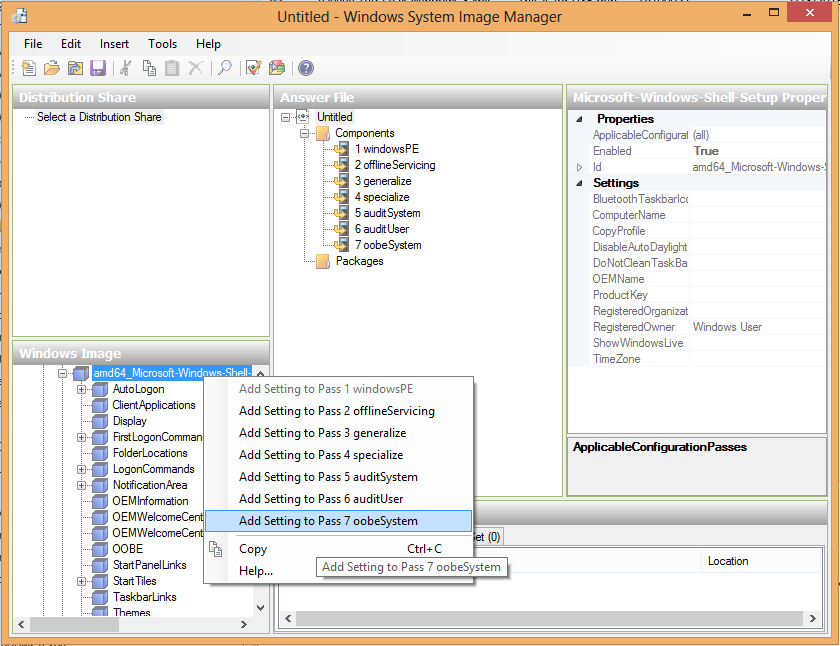
In the Windows Image pane (bottom left) expand Components by clicking on the plus sign beside it and locate a component called amd64_Microsoft-Windows-Shell-Setup_6.2.9200.16384_neutral. Right click it and choose Add Setting to Pass 7 oobeSystem.
Note: if the passes are greyed out make sure you created the new answer file above.
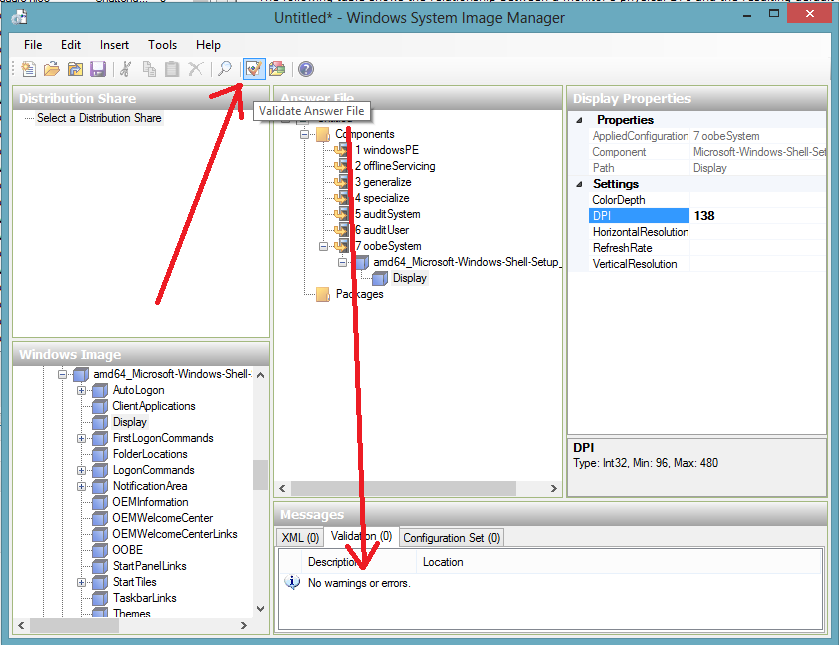
In the Windows Image pane, click on Display and in the Display Properties, enter a value in the DPI field. You can use the table below to help decide what value to enter.
- Less than 116 – Scale Level=100%
- 116 to 138 – Scale Level=125%
- More than 138 – Scale Level=150%
TIP: open Windows System Image Manager help and search for DPI to get in-depth information about what settings to use in different scenarios.
In this guide I’ll enter a value of 138 DPI which will mean that we end up with a custom scale level of 144%. I arrived at this number by simply testing various numbers until I was happy with the results.
Feel free to experiment with the values in this field and report your results.

Click on Validate
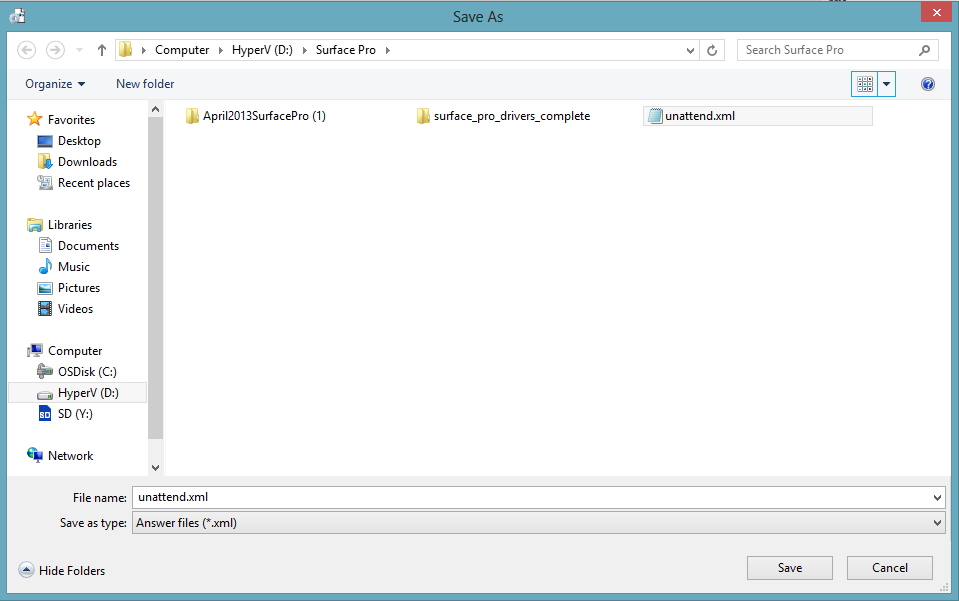
then save it as unattend.xml somewhere locally
Step 3. Create an Unattend.xml Package on our Configuration Manager server
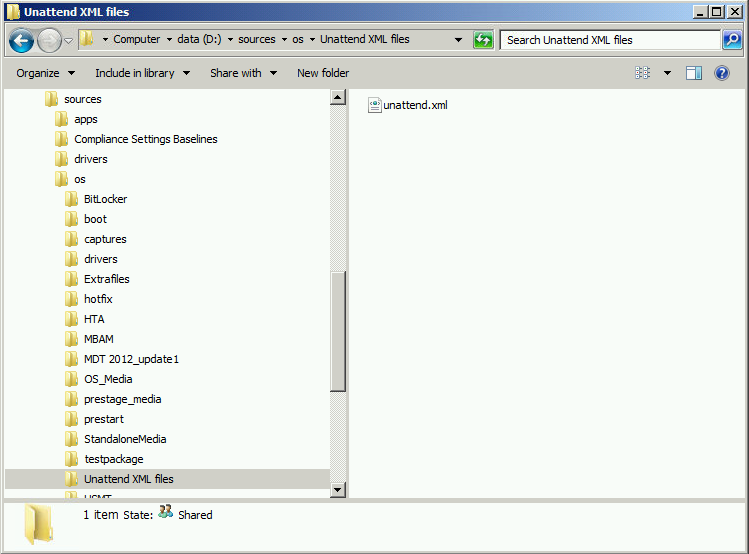
On our Configuration Manager server, copy the unattend.xml file created above to a folder called Unattend.XML files, and copied the unattend.xml file into that folder, you can rename this file to DPI_settings.xml if you wish if that makes it easier to understand what it is.
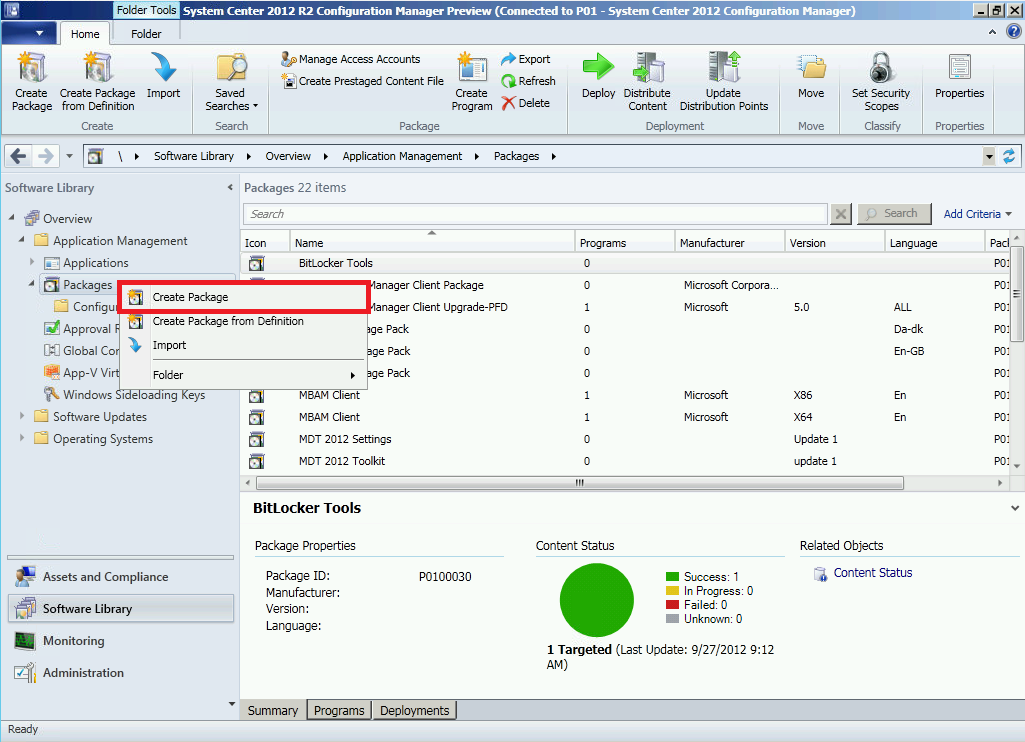
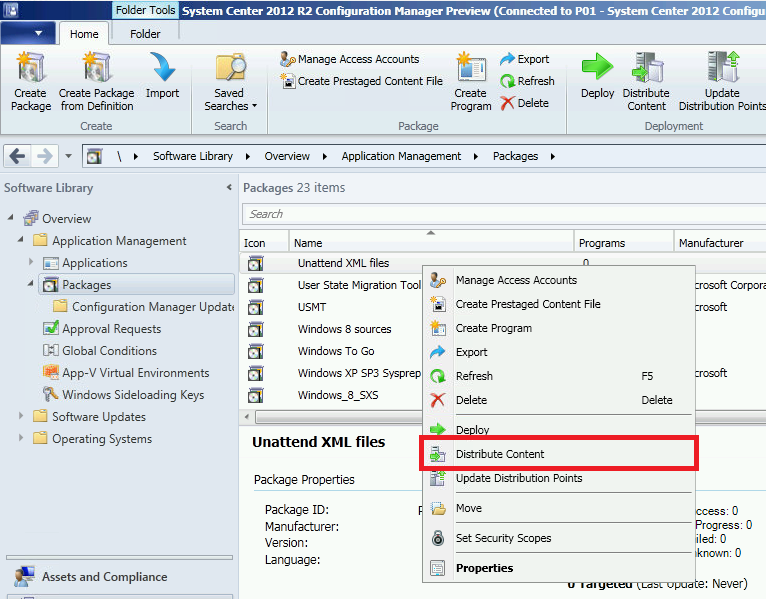
In the Configuration Manager console, browse to Software Library and choose Application Management, and then select Packages. Right click on Packages and choose Create Package
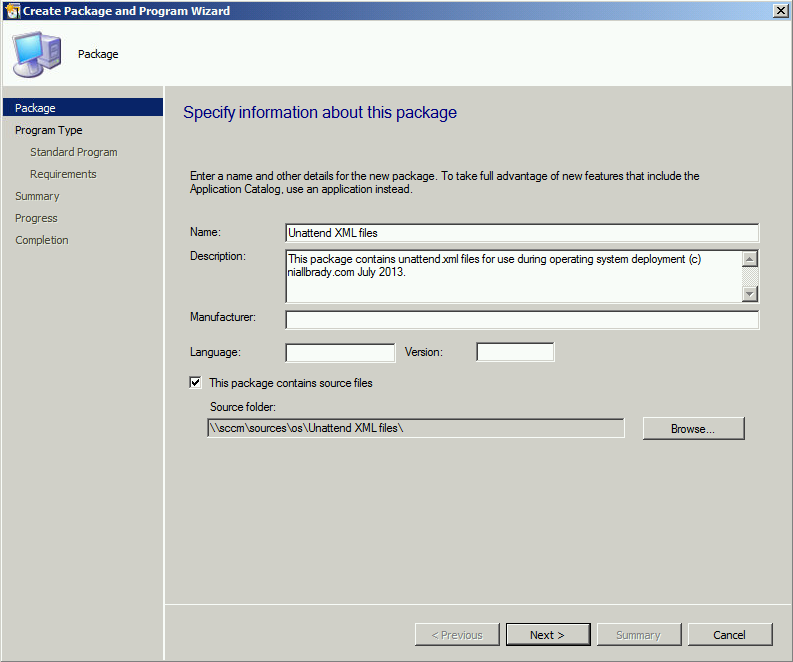
Fill in some details about the package and browse to the UNC location of where your file is stored
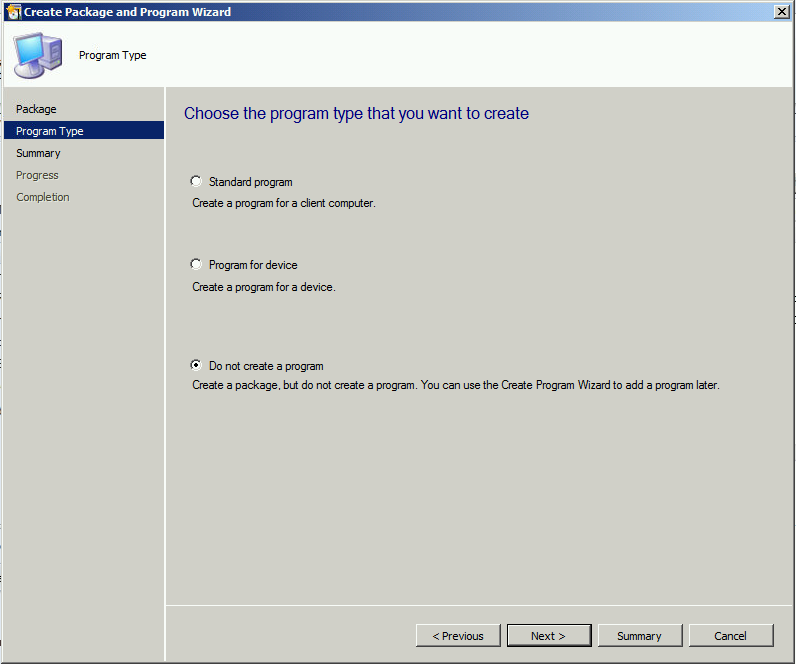
we are not creating a program so select the third option, Do not create a program
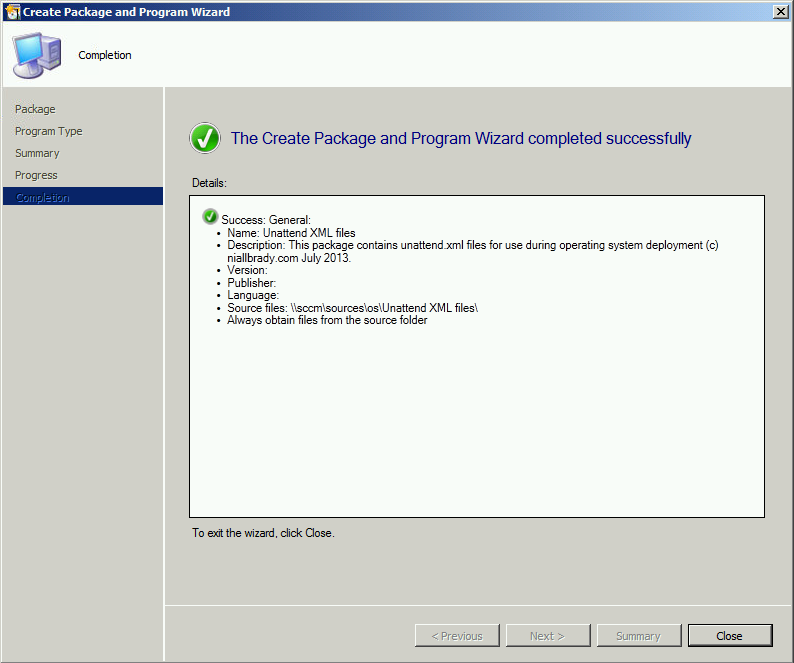
and continue through the wizard until completion.
Step 4. Distribute our package to the distribution points
Right click our package and choose Distribute Content.
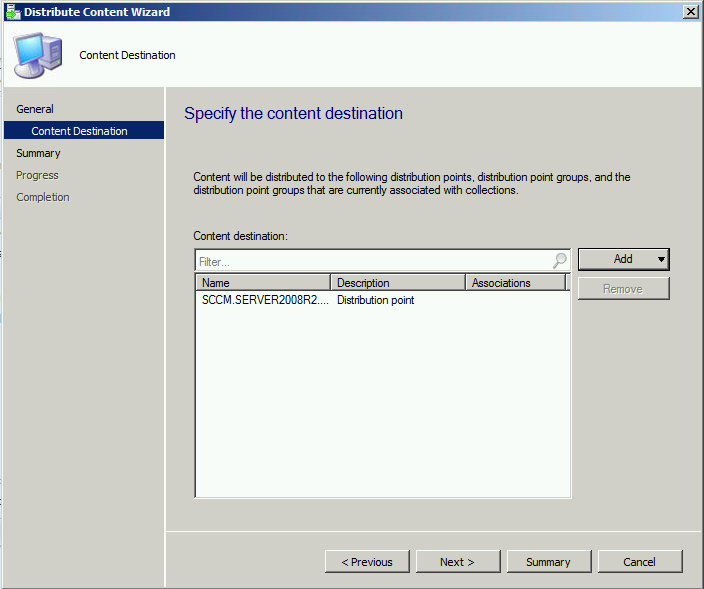
click next, then when you get to the Content Destination screen, click on the Add button, select Distribution Points and select your chosen dp’s.
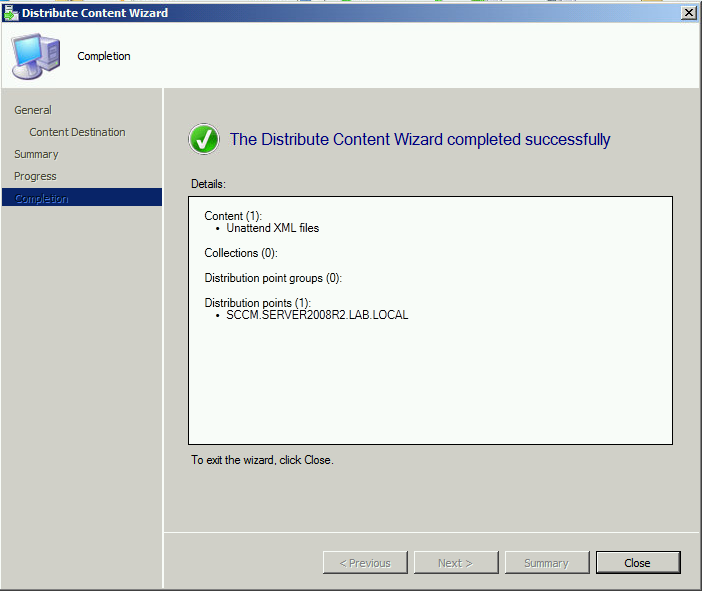
continue that wizard through to completion.
Step 5. Add the unattend.xml to a task sequence
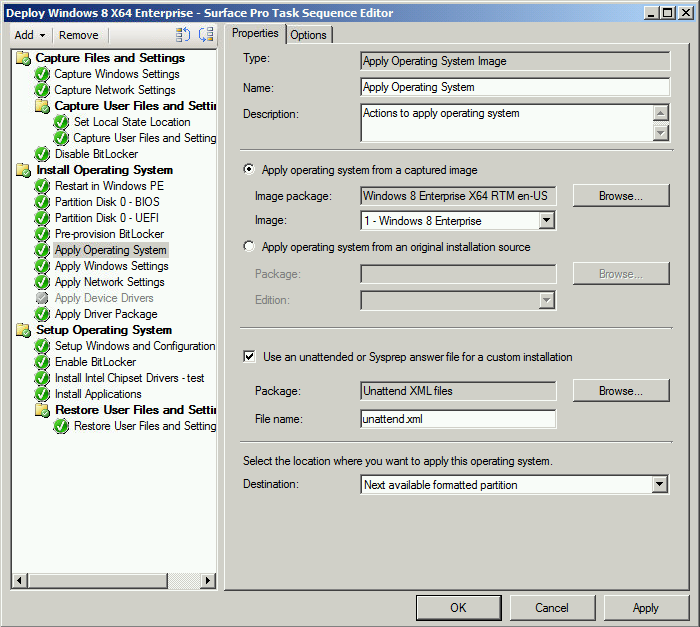
In this step we’ll add the unattend.xml file to our previously created Deploy Windows 8 X64 Enterprise – Surface Pro task sequence.
Right click the task sequence choose Edit, select the Apply Operating System Step and in the Use an unattended or Sysprep Answer file for a custom installation option click on browse, select our Unattend XML files package, and enter the name of the file as per the screenshot below
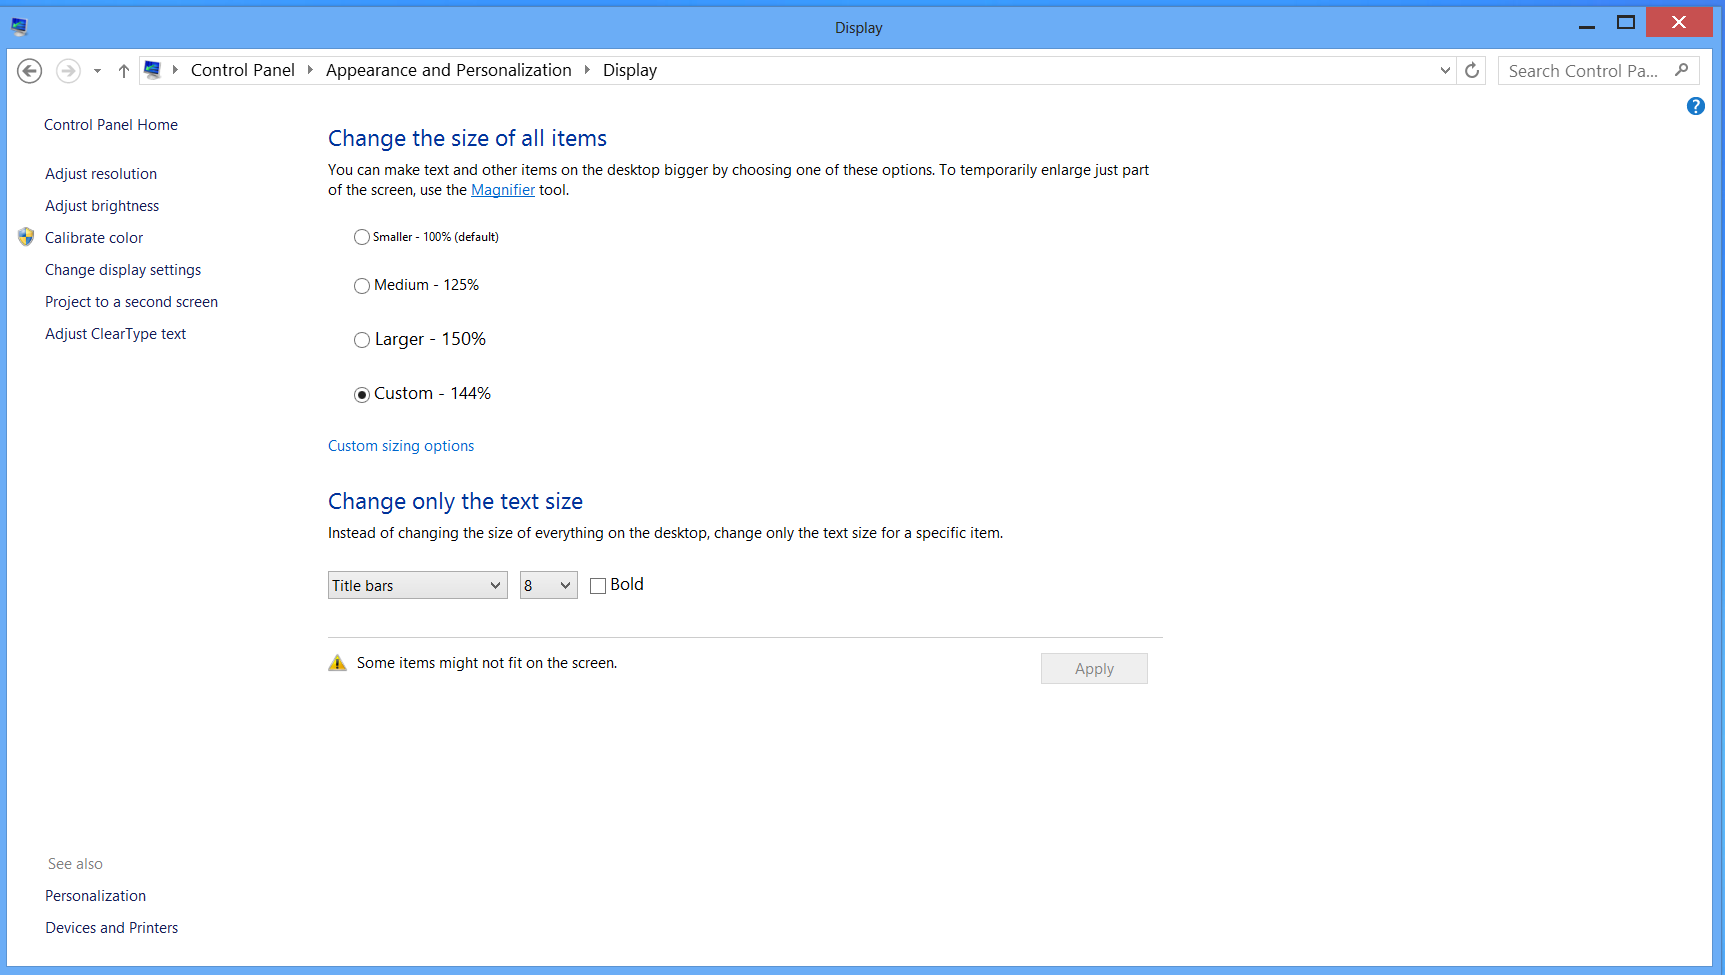
Step 6. Deploy a Surface Pro and review the DPI settings
Deploy a Surface Pro and once done login and right click on the desktop, choose Screen Resolution, then select Make Text and other items larger or smaller
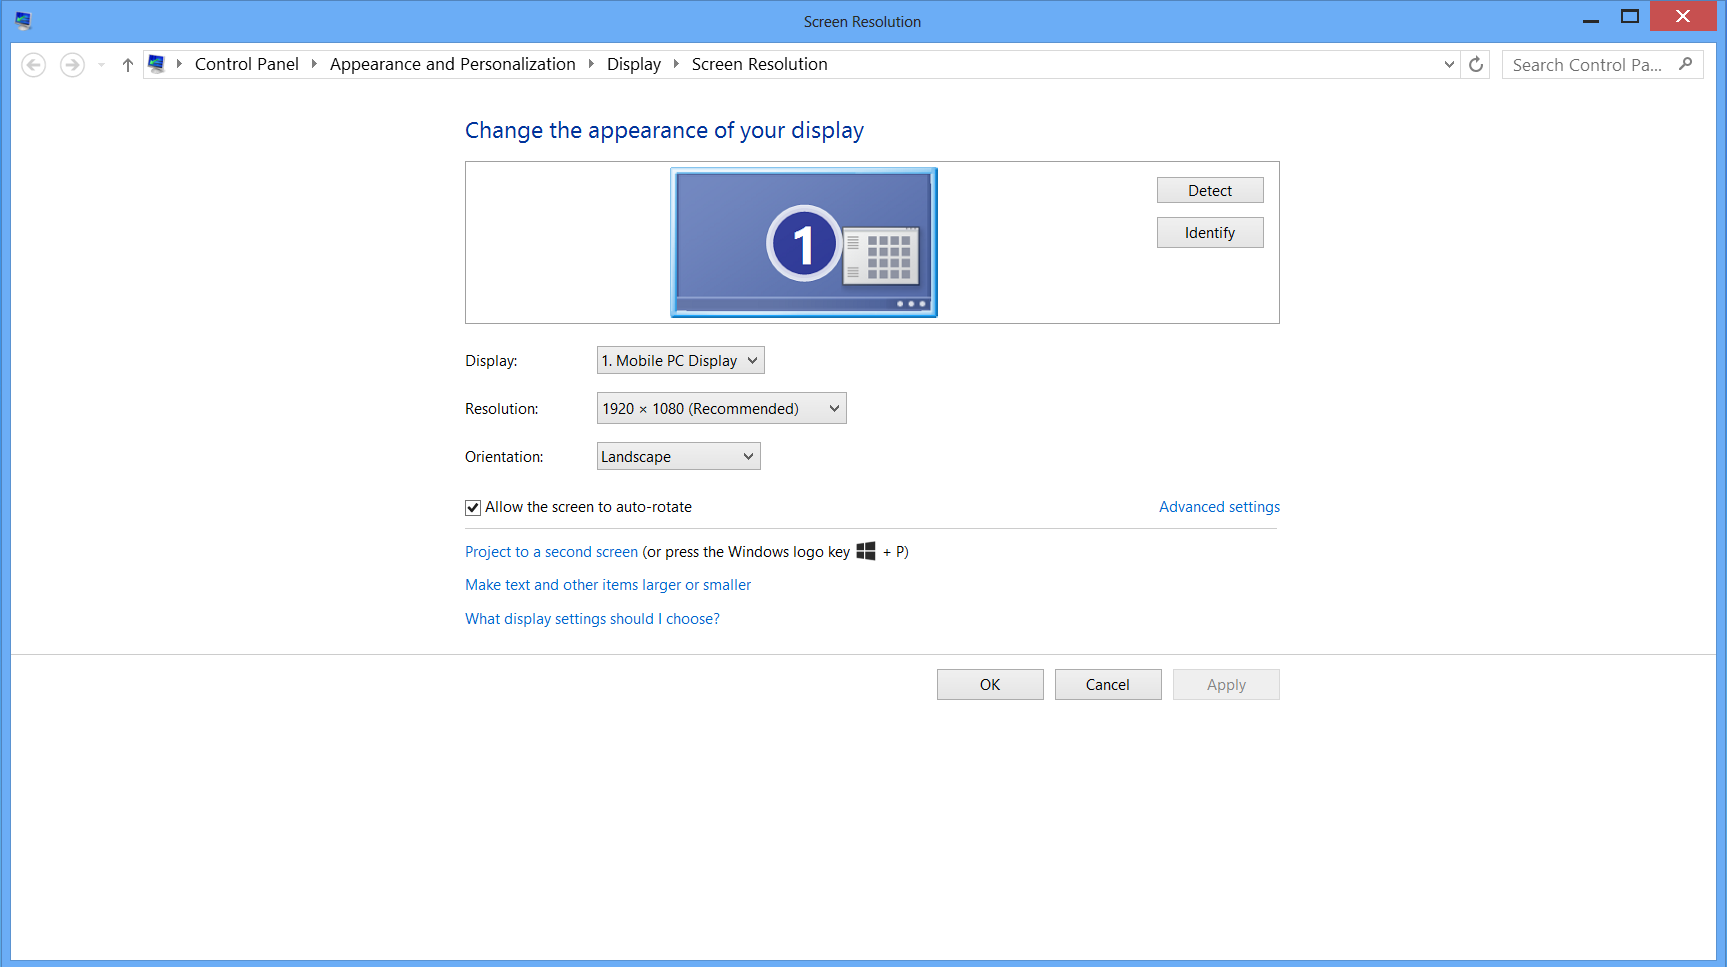
You should see that the settings we set in the unattend.xml file for DPI have been applied and a custom level of 144% is in use.
Job done !
Summary
In this post we’ve used a component of the Windows Assessment and Deployment Kit called Windows System Image Manager to create a new answer file (unattend.xml) .
This file contains a component (amd64_Microsoft-Windows-Shell-Setup_6.2.9200.16384_neutral) that is called upon to provide details during the 7th pass (Pass 7 oobeSystem) of the operating system deployment that sets the DPI setting .
Setting the DPI for high resolution tablet devices like the Microsoft Surface Pro allows you to take advantage of its’ superior screen qualities.
Additional reading
- How can I deploy Windows 8 X64 to the Microsoft Surface Pro using Configuration Manager 2012 SP1
- Setting DPI in unattend.xml may not work if region settings are changed during OOBE
- Download Windows Assessment and Deployment Kit for Windows 8
- unattended settings that can be set in Windows® 8 and Windows Server® 2012.
until next time, adios, ciao, au revoir.

Pingback: How can I set the DPI setting when deploying Windows 8 to the Microsoft Surface Pro with Configuration Manager 2012 SP1? | MS Tech BLOG