
Introduction
AT the build conference in San Francisco yesterday Microsoft unveiled a preview version of Windows called Windows 8.1, and in conjunction with the recent release of System Center 2012 R2 Configuration Manager preview, we have the ability to deploy this new OS to see what’s changed both in Configuration Manager and in Windows 8.1. A lot has changed with the introduction of System Center 2012 R2 Configuration Manager including a whole bunch of Operating System Deployment changes listed here and that includes support for Windows Server 2012 R2 and Windows 8.1.
In this guide we will use System Center 2012 R2 Configuration Manager to Deploy Windows 8.1 Preview. If you have not yet installed R2 then follow this guide.
Note: Prior to installing R2 I have installed both CU1 and CU2 for System Center 2012 Configuration Manager SP1, as they contain several fixes (PowerShell amongst others).
I’ll use PowerShell wherever possible in this guide and i’d suggest you begin to do so to (if you haven’t already), if you missed my introduction to PowerShell in Configuration Manager then please see this post.
Step 1. Get the Windows 8.1 Preview ISO and extract it
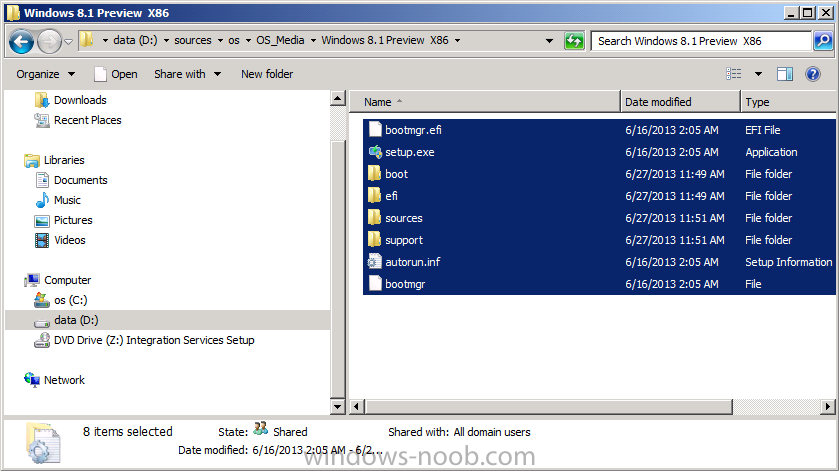
Download the preview version of Windows 8.1 from MSDN.com or from this link, extract the ISO and copy extracted files and folders to your sources share on your Configuration Manager server. I copied it to \\sccm\sources\os\os_media\windows 8.1 preview X86
Step 2. Add the Windows 8.1 Install.WIM file
We need to add our operating system image file to Configuration Manager, to do so we can use two methods, either in the console using manual steps or in using powershell.
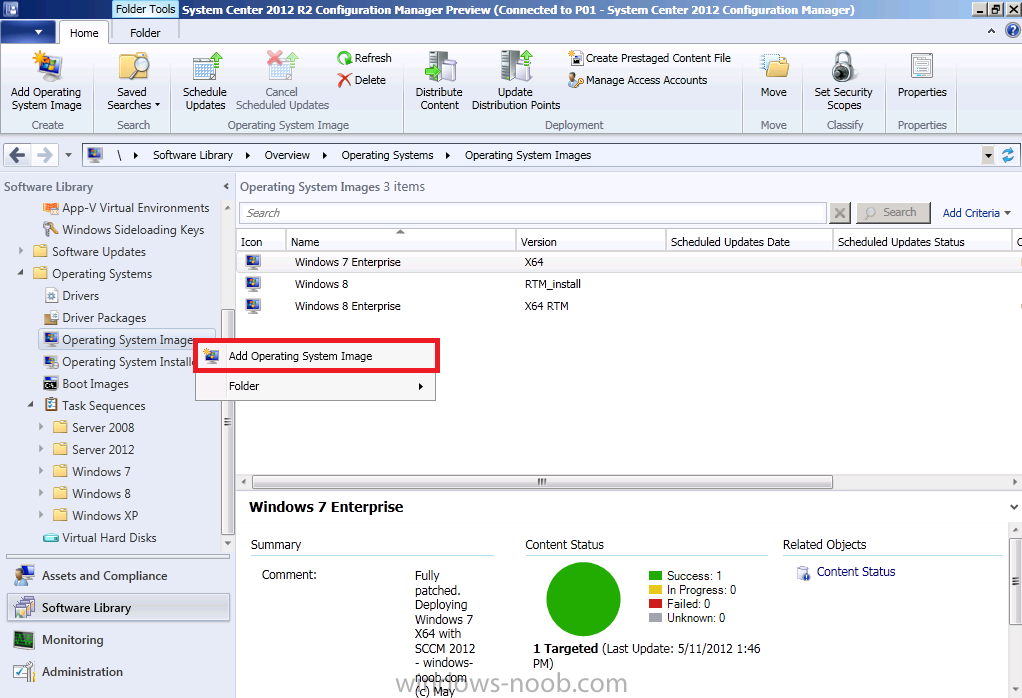
Method #1 – Do it in the console
In the Operating System Deployment section of the Software Library workspace, select Operating System Images and right click, choose Add Operating System Image
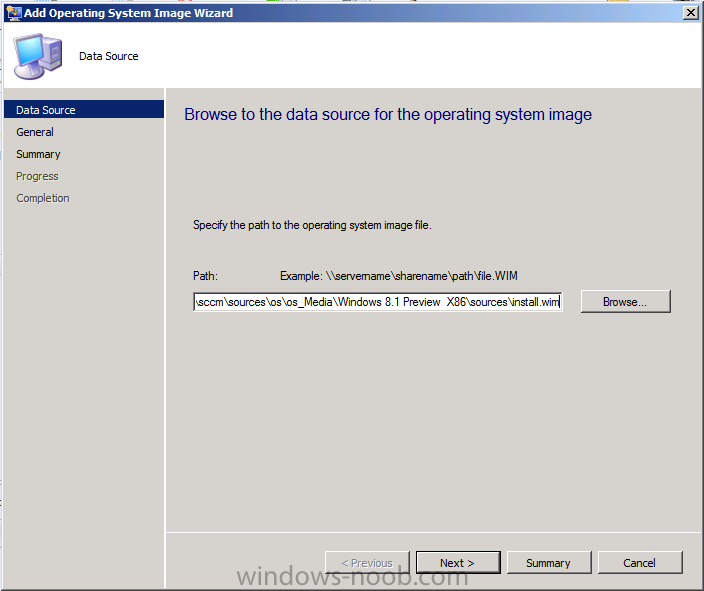
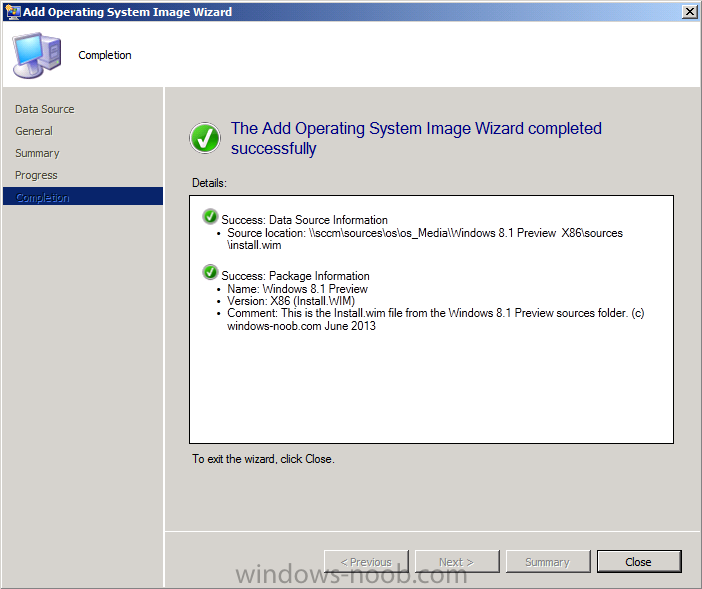
Point the wizard to the Install.WIM file in the sources folder of your extracted media files, eg: \\sccm\sources\os\os_media\windows 8.1 preview X86\sources\install.wim
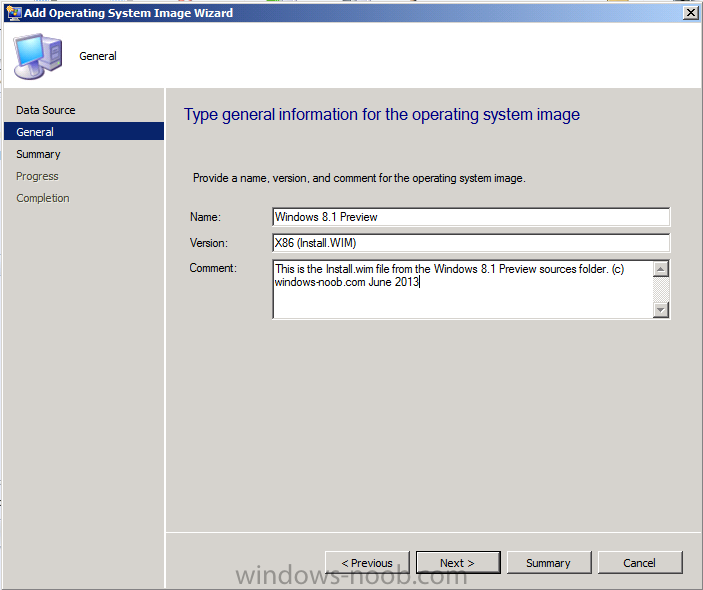
On the General screen, fill in information about the Windows 8.1 Preview image you are adding and edit the version or description info so that it clearly points out that this is the Install.WIM file that you are using (to make it clear later when adding Windows 8.1 Preview images to any Deploy Windows 8.1 task sequences).
continue with the wizard through to completion.
Method #2 – Do it using PowerShell
In a powershell console use the following (point it to your path)
New-CMoperatingSystemImage -Name "Windows 8.1 Preview" -path "\\sccm\sources\os\OS_Media\Windows 8.1 Preview X86\sources\install.wim" -Version "X86 (Install.WIM)" -Description "This is the Install.wim file from the Windows 8.1 Preview sources folder. (c) windows-noob.com June 2013"
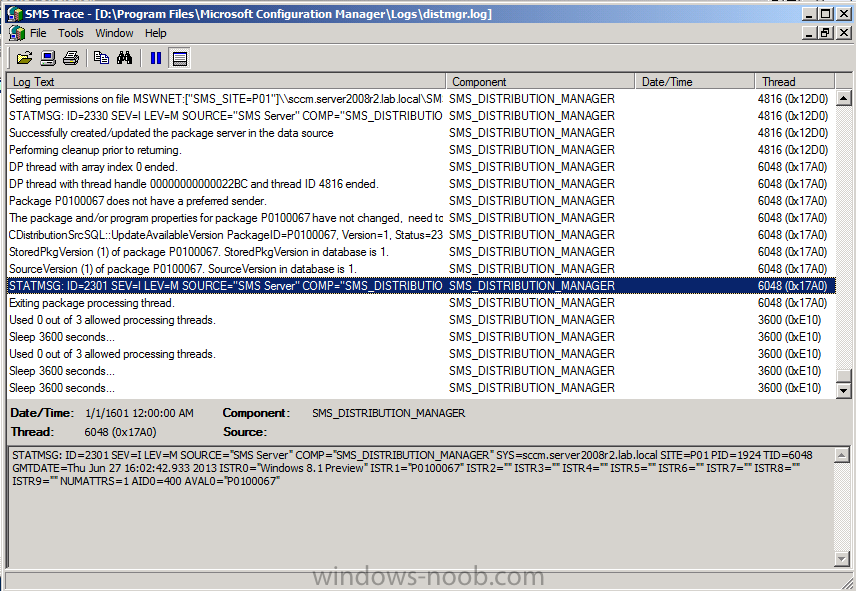
Step 3. Distribute content to our Distribution points
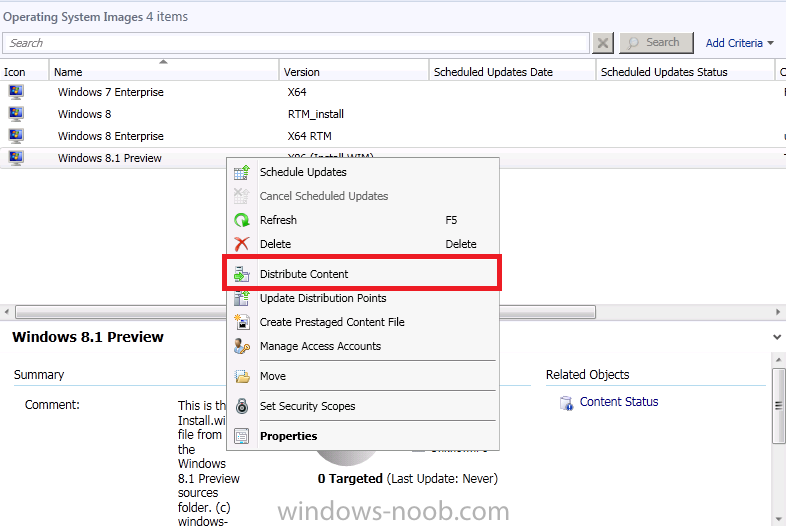
Now that we’ve added the image to Configuration Manager we need to distribute it to our distribution points otherwise our client computers cannot download it.
Method #1 – Do it in the console
Right click on the image and choose Distribute Content
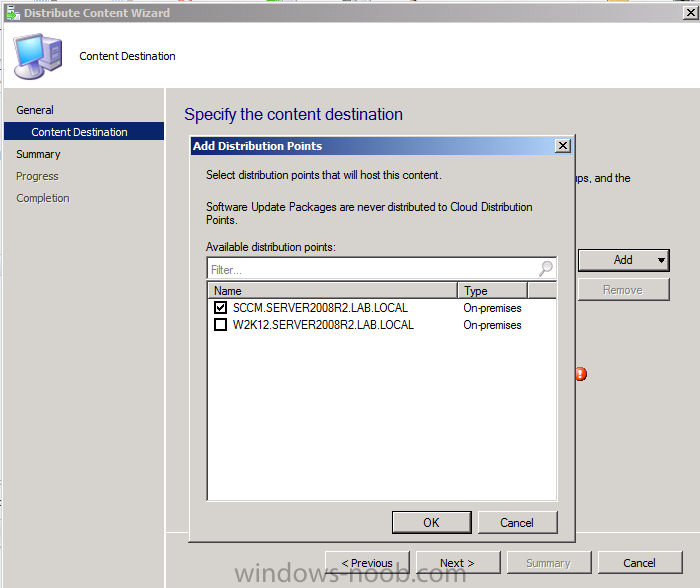
click next at the Review Selected Content screen, click on Add to add your distribution points, select the distribution points from the list available
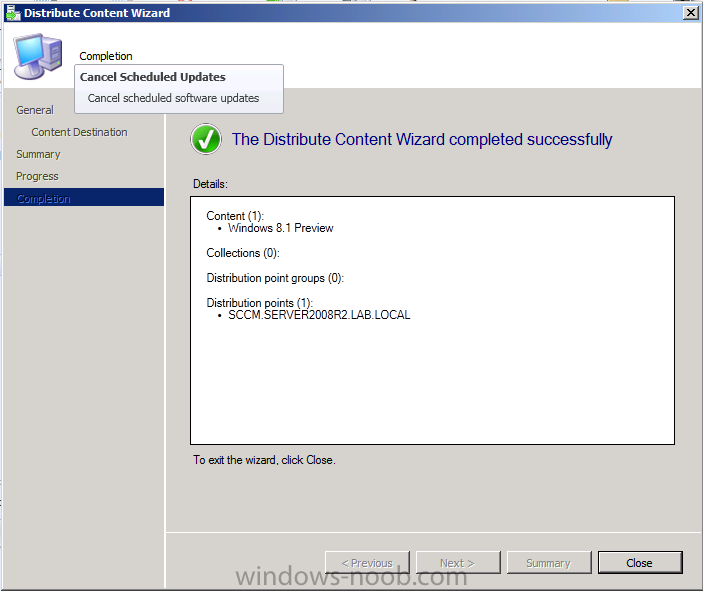
and continue through the wizard until completion.
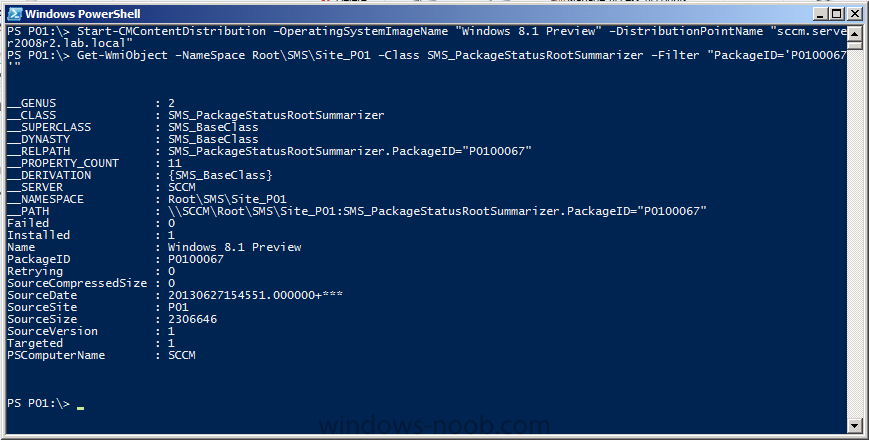
Method #2 – Do it using PowerShell
In a powershell console use the following (point it to your distribution point)
Start-CMContentDistribution –OperatingSystemImageName "Windows 8.1 Preview" –DistributionPointName "sccm.server2008r2.lab.local"
and review the distribution of the image via distmgr.log
or via PowerShell by specifying the package ID of the Operating System Image.
Get-WmiObject –NameSpace Root\SMS\Site_P01 –Class SMS_PackageStatusRootSummarizer –Filter "PackageID='P0100067'"
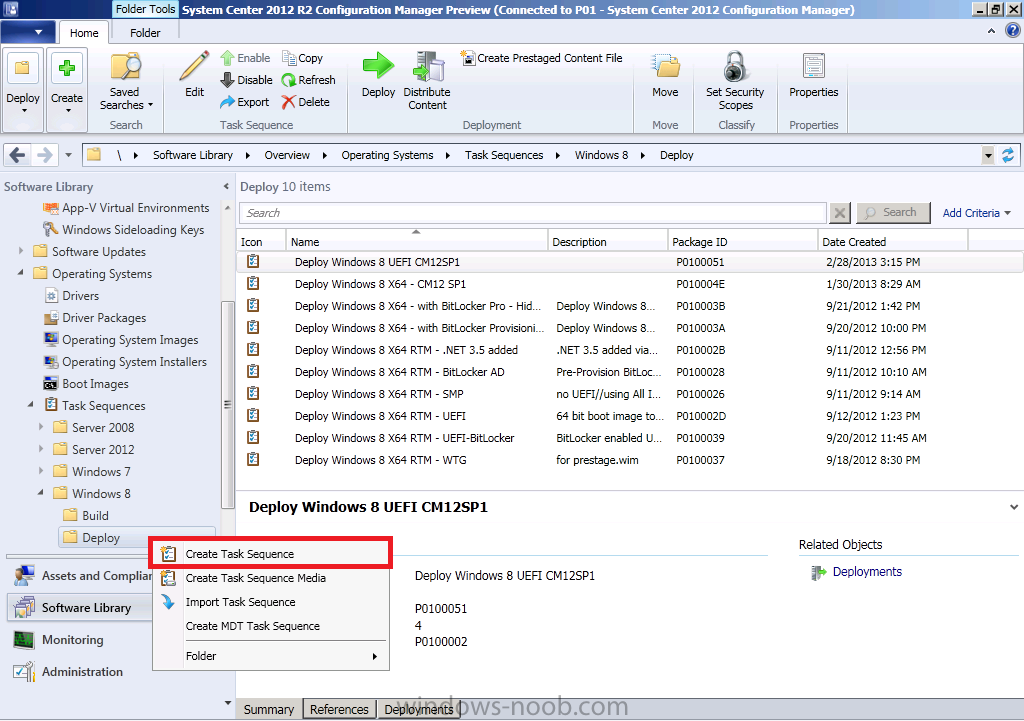
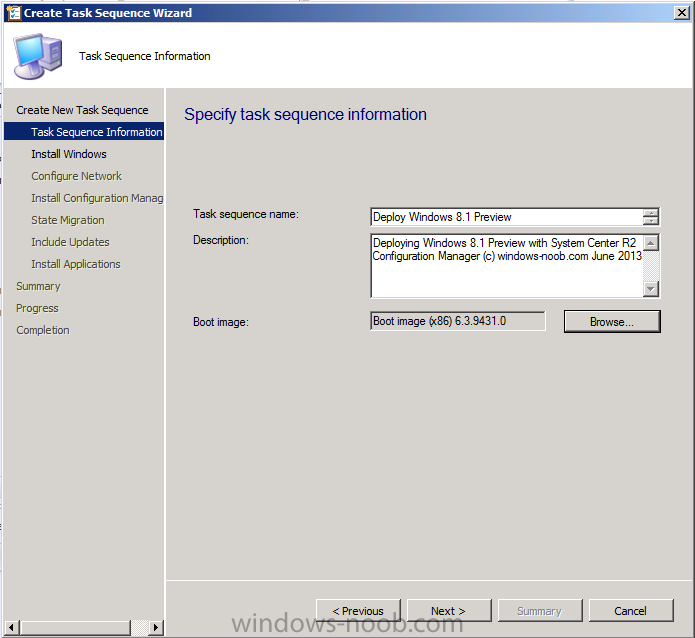
Step 3. Create a Deploy Windows 8.1 task sequence
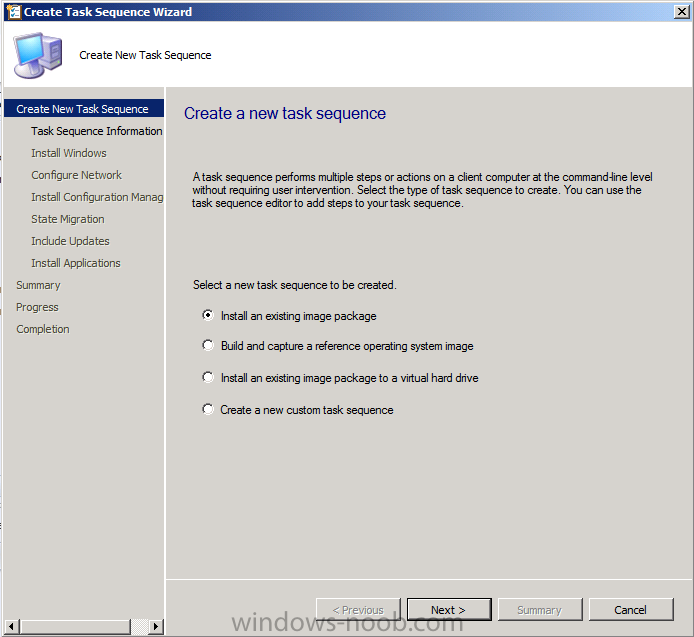
In the console right click on Task Sequences, choose Create Task sequence
choose Install an existing package, (side note there is a new option since the introduction of R2, and that new option is called Install an Existing image package to a virtual hard drive, this setting is for Virtual Machine Manager use).
fill in the task sequence information and select the X86 boot image (note that the version of the boot image is 6.3.9431.0)
Select the newly added Windows 8.1 Preview image, it has two indexes Windows 8 Pro and Windows 8, enter your local administrator password, decide if you want to use BitLocker disc encryption or not, enter the Product key (otherwise you’ll get prompted later on) and click next when done
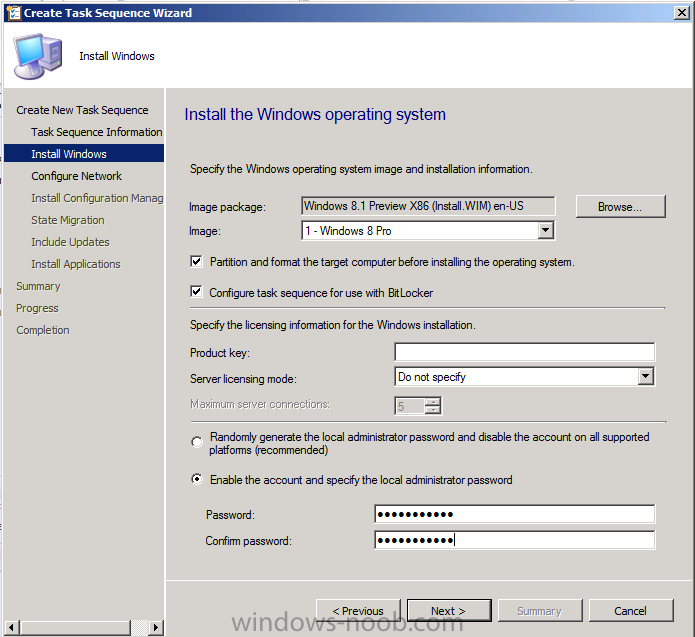
Note: in the screenshot above the product key is blank for security purposes, make sure to fill yours in if you do NOT want to be prompted during the task sequence deployment.
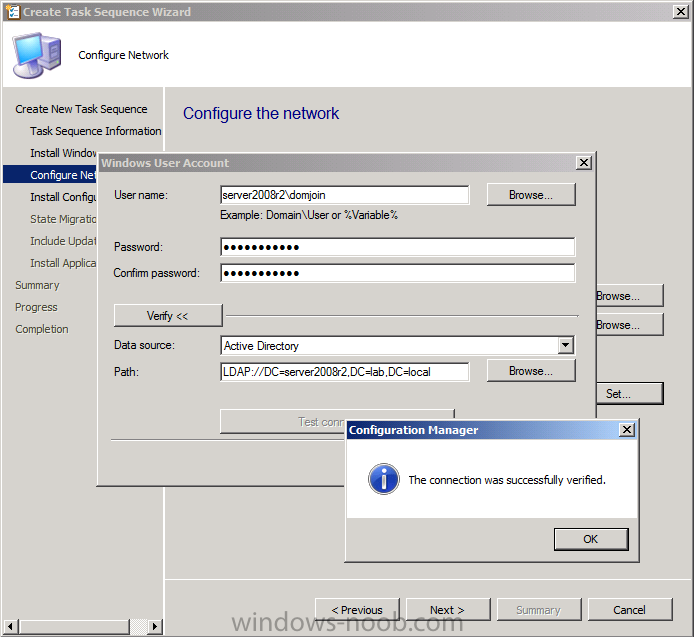
for configure network settings, enter a domain join account, and verify that it works before continuing
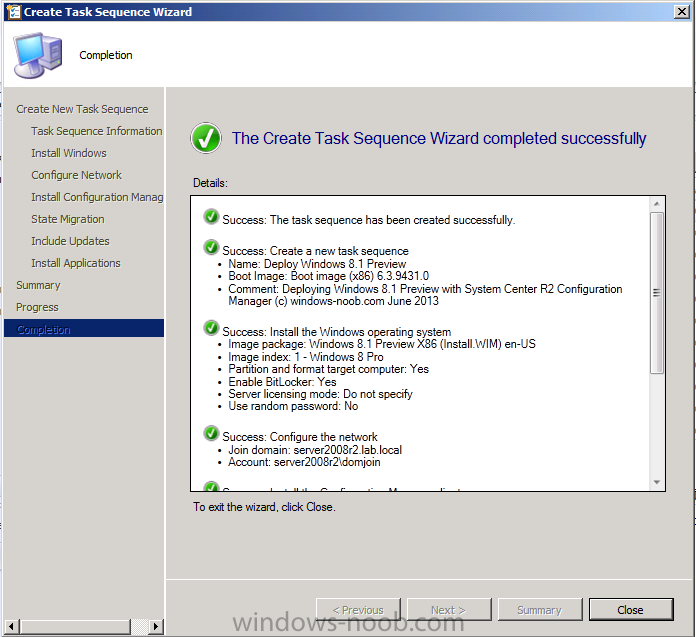
click next through the wizard until completion.
Step 4. Edit the task sequence
Right click on our newly created task sequence and choose Edit.
Locate the built in Enable BitLocker step and add the following wmi query for root\cimv2 so that it won’t run on Virtual Machines otherwise the task sequence will bomb out on hyperV virtual machines…
select * from Win32_ComputerSystem where Model <> "Virtual Machine"
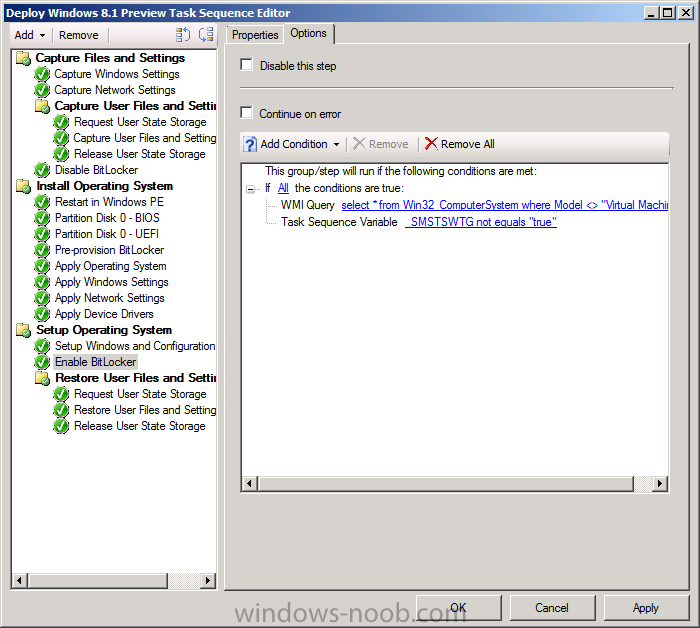
click Apply to save the changes and then click Ok.
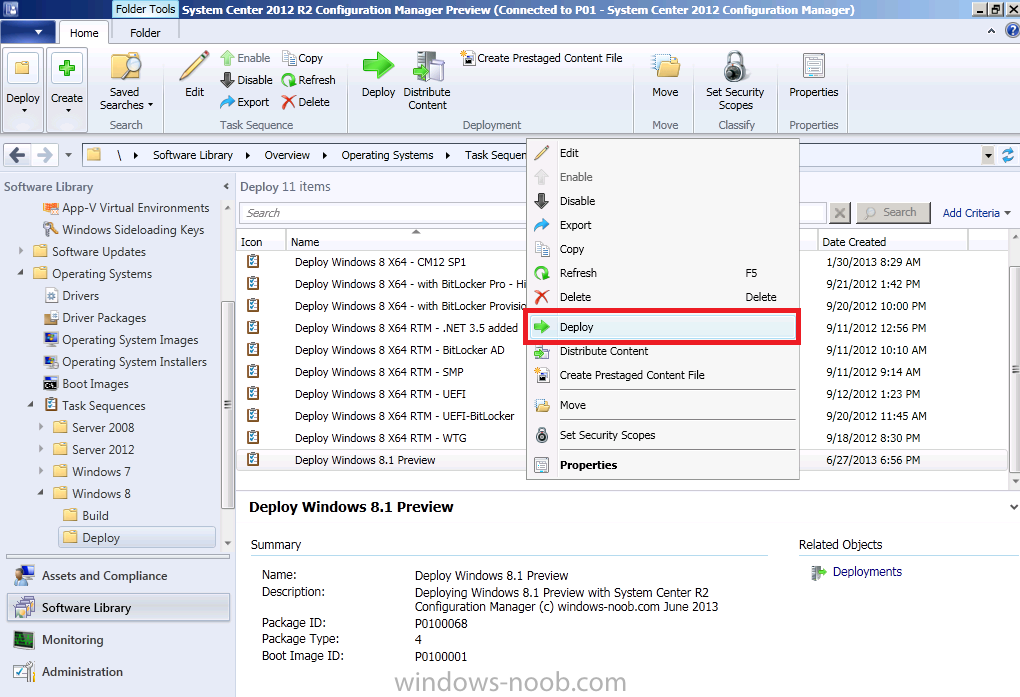
Step 5. Deploy the task sequence
Method #1 – Do it in the console
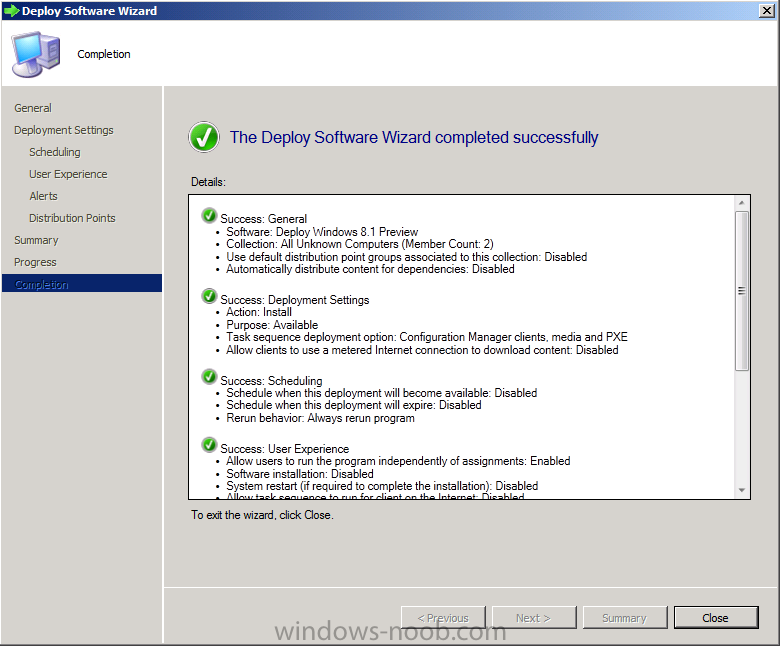
Right click on the task sequence and choose Deploy
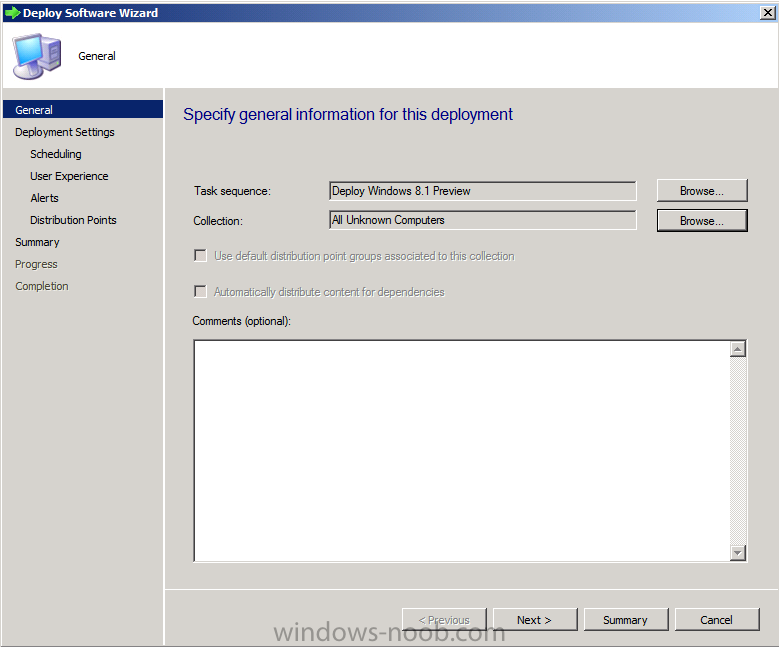
and choose a collection, in my example i’ll use the All Unknown Computers collection
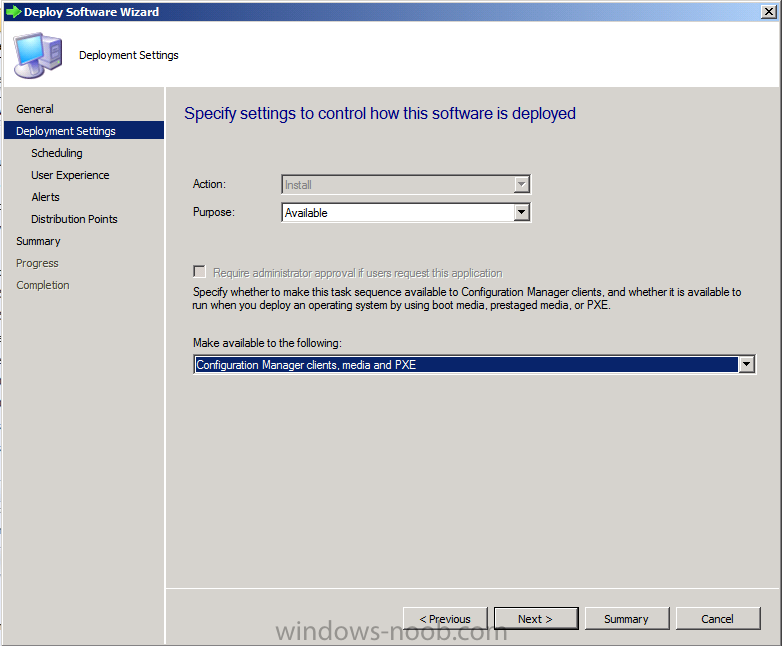
set the deployment purpose as Available (optional) and make if available to Configuration Manager Clients, Media and PXE.
click next through the wizard until completion
Method #2 – Do it using PowerShell
Use the following, replace the package ID listed below with the package ID of your Deploy Windows 8.1 Preview task sequence.
Start-CMTaskSequenceDeployment –TaskSequencePackageId "P0100068" –CollectionName "All Unknown Computers" –Comment "© windows-noob.com June 2013" –Deploypurpose "Available" –MakeAvailableTo "ClientsMediaAndPXE"
Step 6. PXE boot and a new (unknown) computer
PXE boot a computer (I use hyperV virtual machines with legacy nics added as the first boot device), press F12 when prompted to start the network boot process
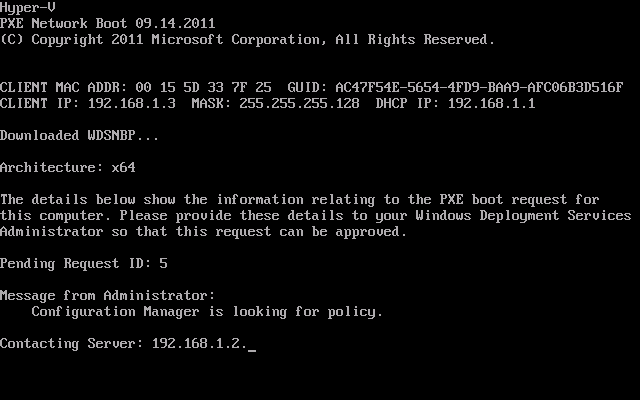
the boot wim file will be downloaded, note that this is a new version since you already updated Windows ADK to 8.1 to support deploying Windows 8.1
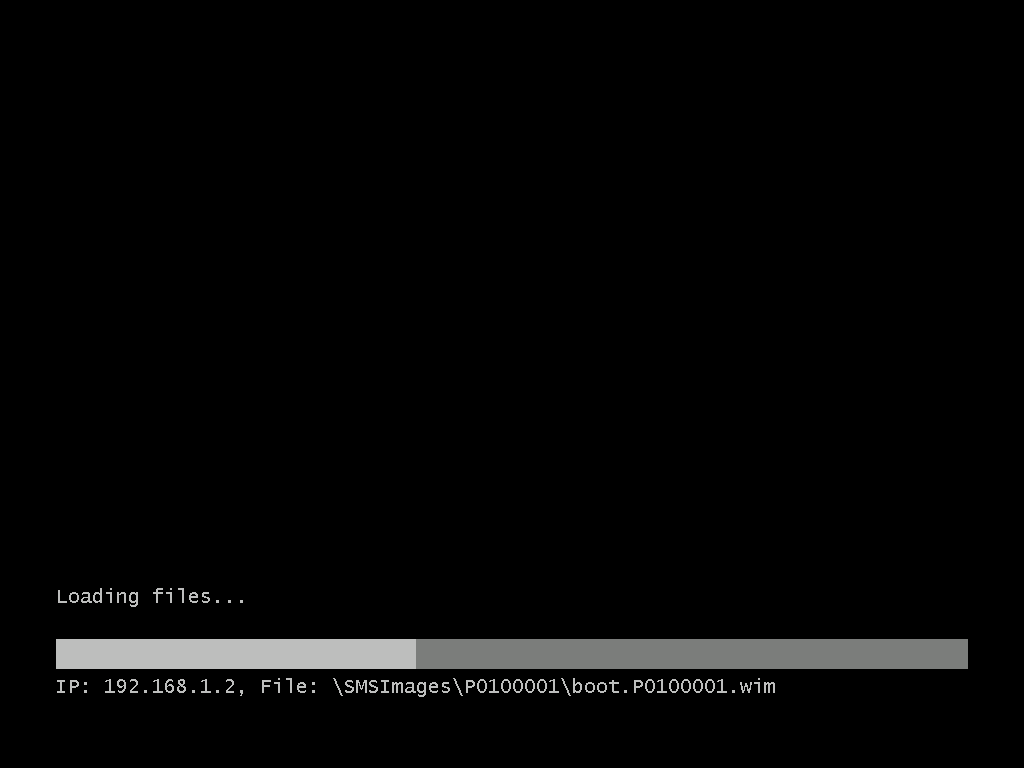
and you can clearly see that the version of WinPE has changed, with the new Fish logo, cute

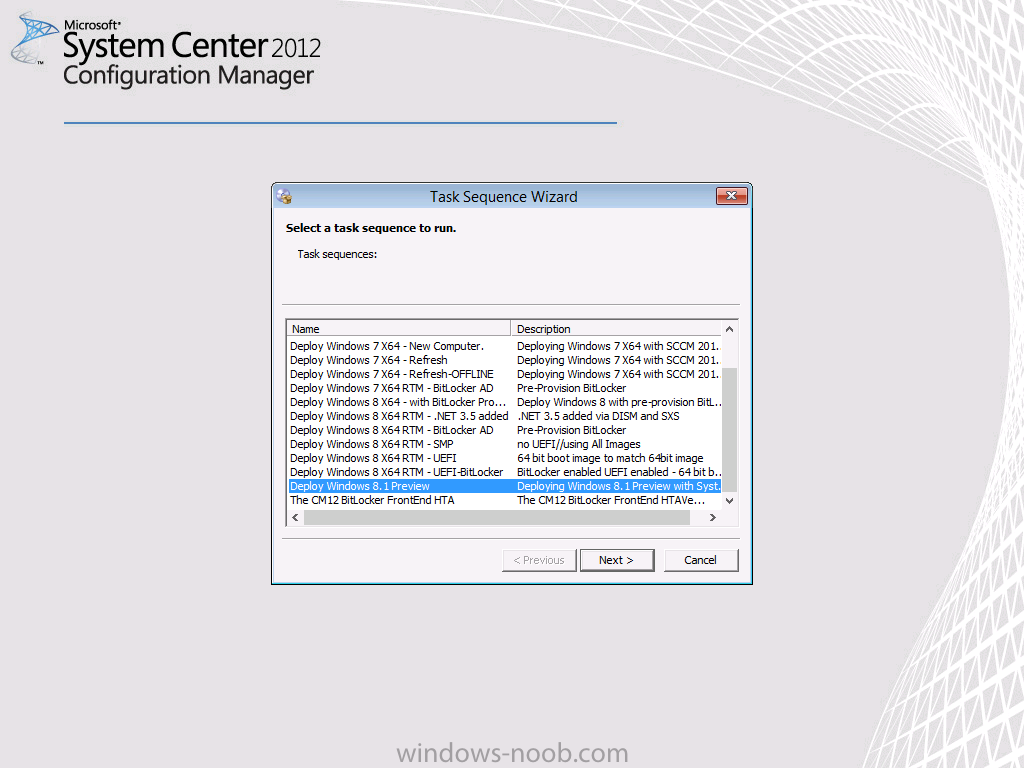
select our Deploy Windows 8.1 Preview task sequence
and off it goes…
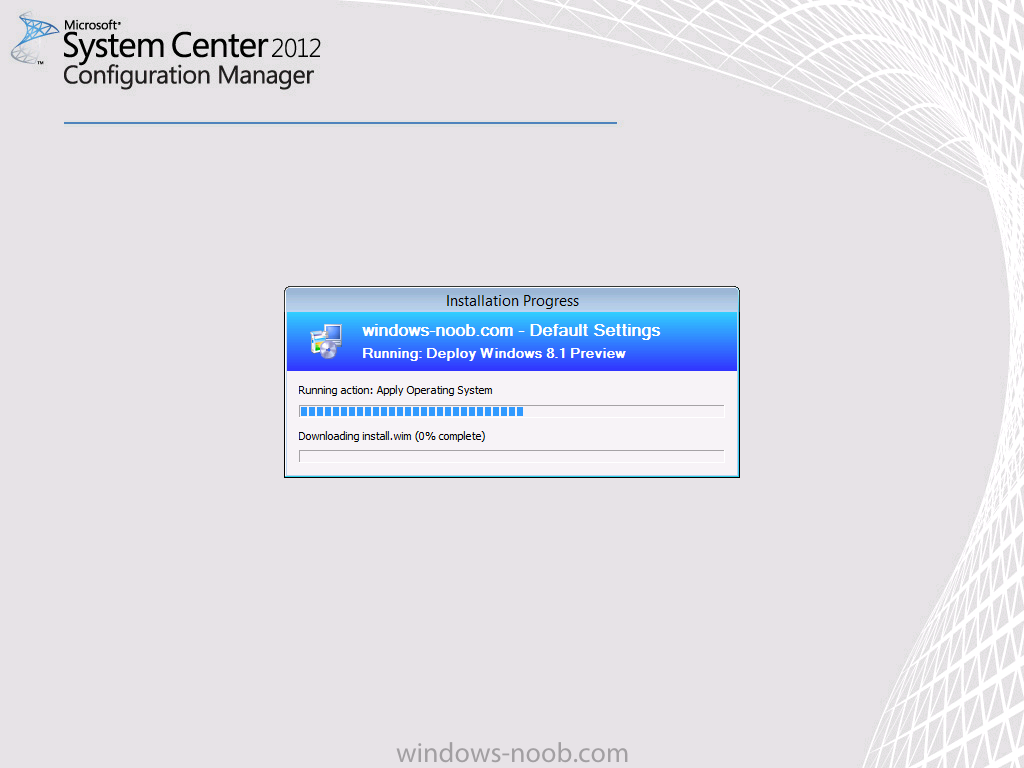
the Windows 8.1 wim file get’s downloaded and applied, and the computer reboots to start windows setup, we get to see the fish again (do you remember where we saw him before, it was in Windows 8 Consumer Preview here)

before a few more reboots to get windows ready for the next stage, installing the Configuration Manager client,

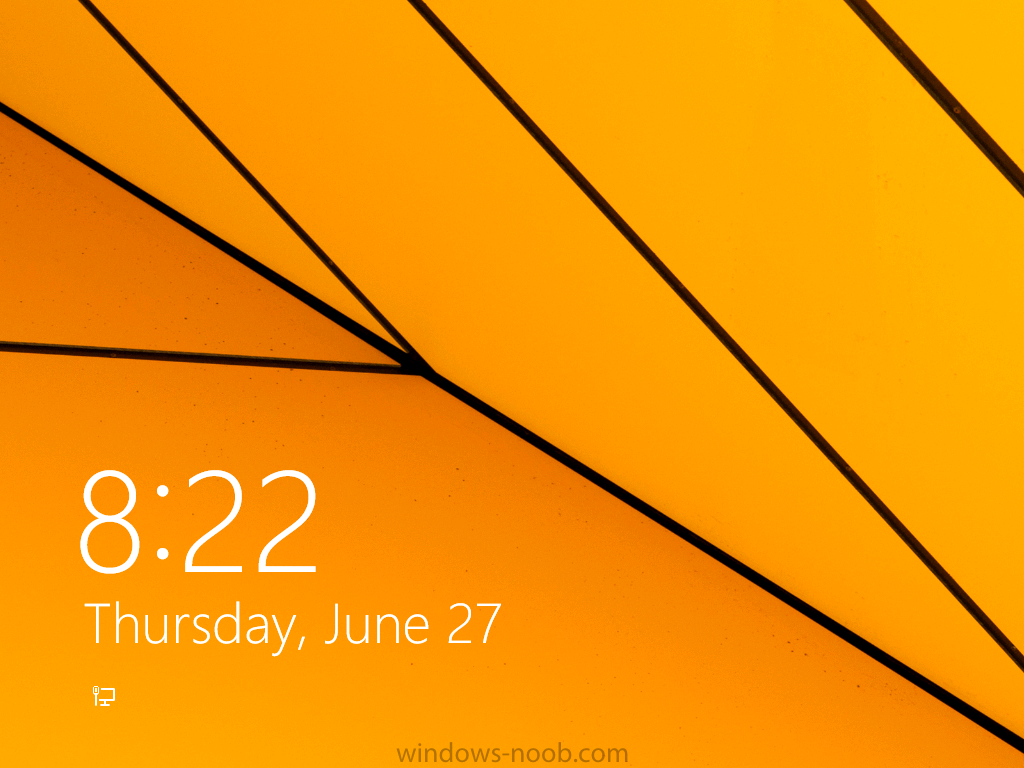
before being presented with the new login screen for Windows 8.1
so login with your testuser credentials to see the new start screen

and the new desktop
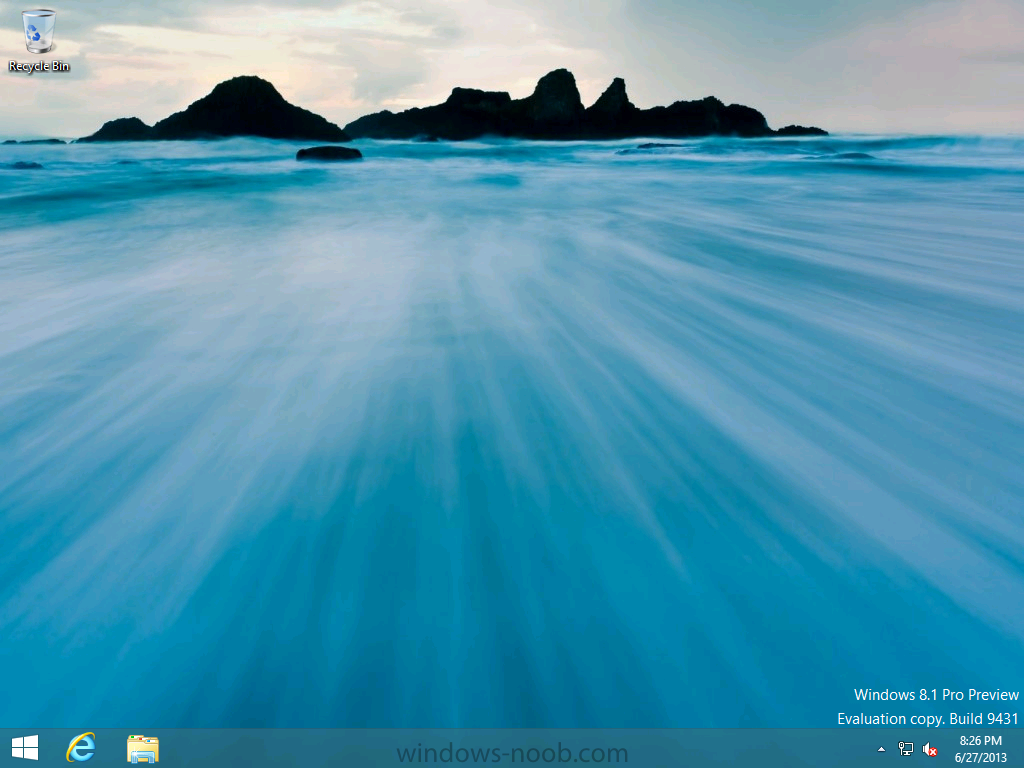
cool ! job done.
Summary
In this guide (there is an index here) you’ve learned how to Deploy Windows 8.1 Preview with System Center 2012 R2 Configuration Manager, you’ve learned the steps required to successfully deploy that image and finally you’ve done most of the work using PowerShell Cmdlets (where available). Congratulations !

Pingback: How can I deploy Windows 8.1 using System Center 2012 R2 Configuration Manager | MS Tech BLOG