
Introduction
In a previous post you reviewed what Windows Information Protection (WIP) is and how you can configure Intune to use it, you then deployed a WIP policy to a group of users and verified the end result on a Azure AD joined (with Auto-MDM enrollment) Windows 10 version 1703 device.
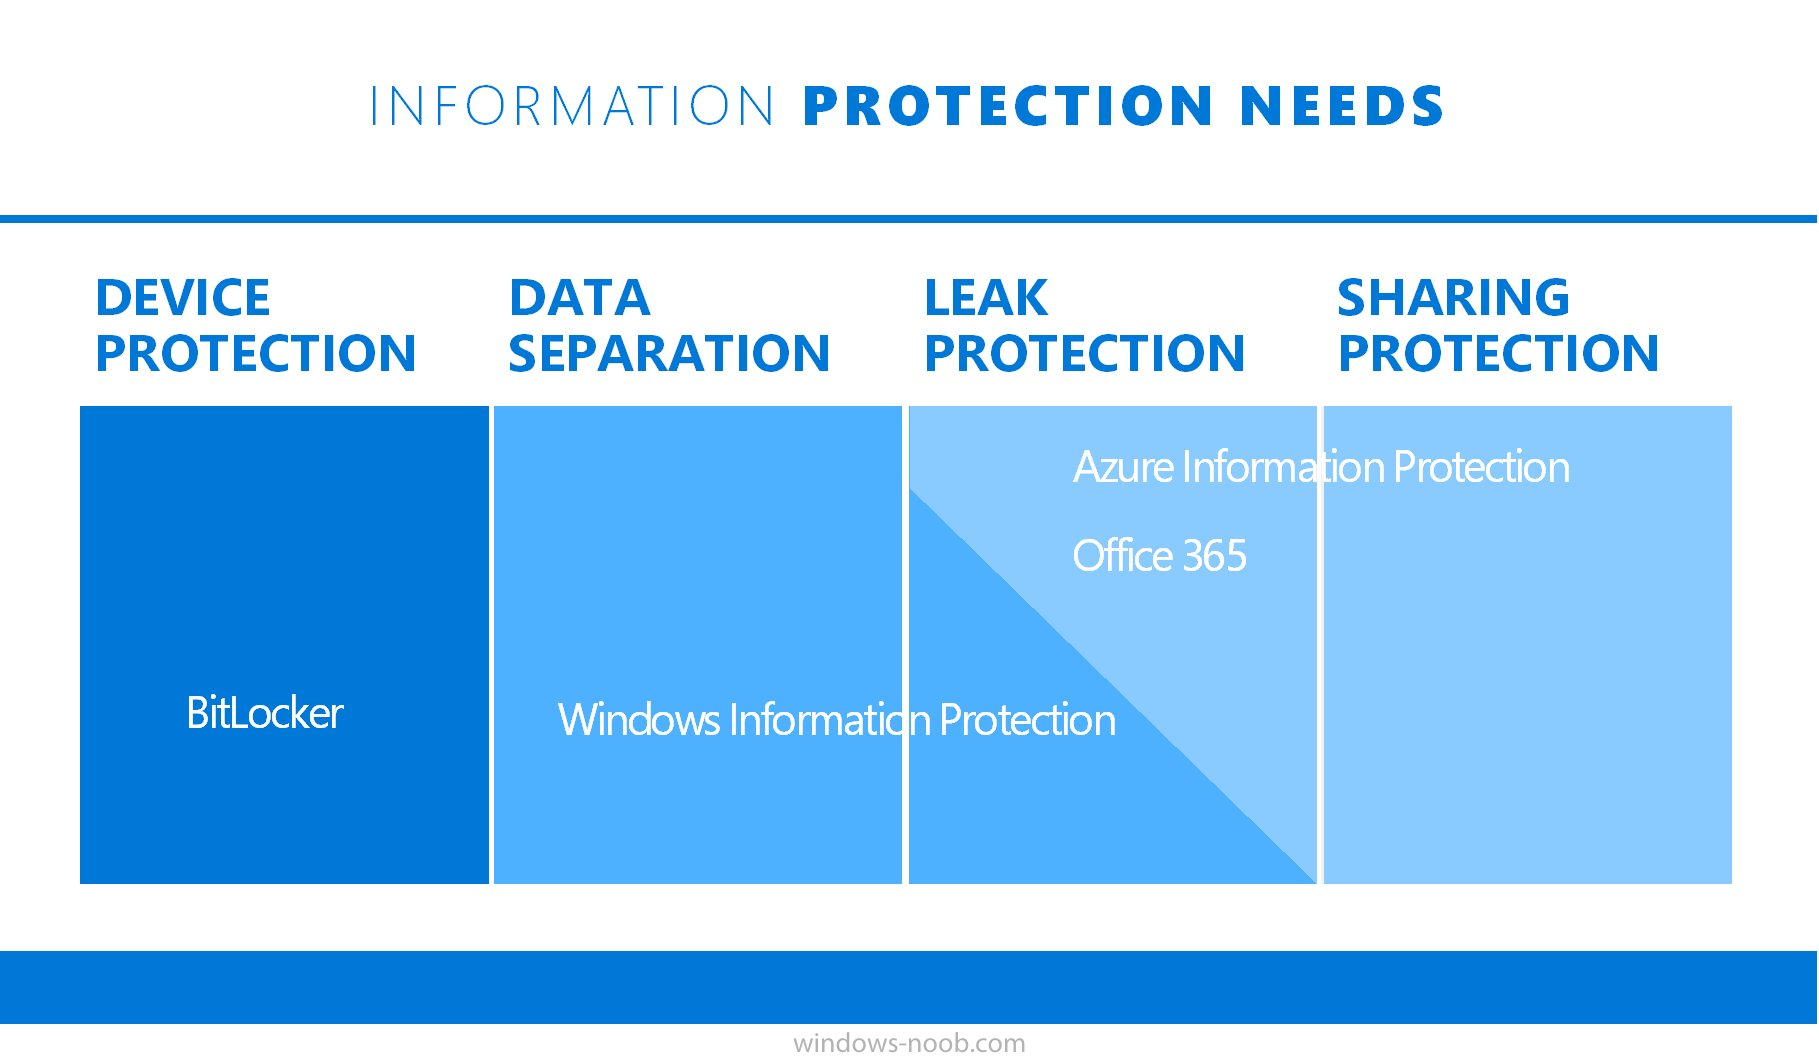
If you are still not familiar with WIP then I’d recommend you review this blog post from Microsoft, it covers it really well. The graphic below also gives you a nice indication of where WIP fit’s in to your information protection needs and how it fits neatly into the Data Separation and Leak Protection space.
In this post, you will see how WIP works on a Windows 10 version 1703 device that is Azure AD registered and not enrolled into MDM (MAM-WE). This is a typical Bring Your Own Device (BYOD) scenario.
Create a WIP policy for Windows 10 devices without enrollment
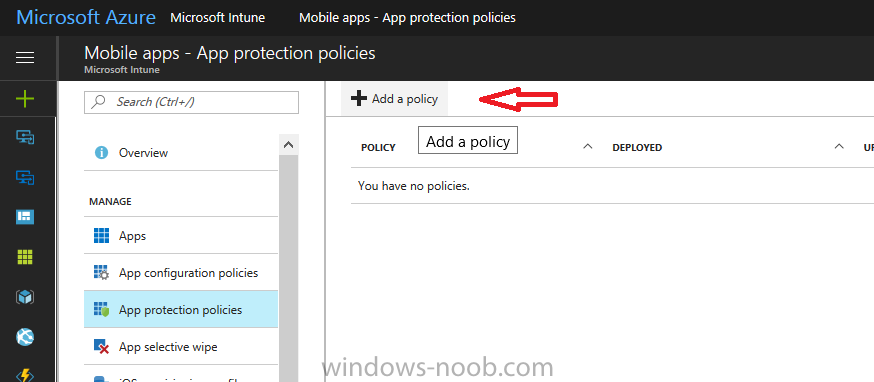
In a previous post you configured MAM in Azure, and now you will create a WIP policy for Windows 10 devices that are not enrolled into MDM, this will give you additional options to configure in the advanced section of the WIP Policy. To create the WIP Policy in the Microsoft Intune service in Azure, select Mobile Apps then click on App protection policies. Next click on Add a Policy.
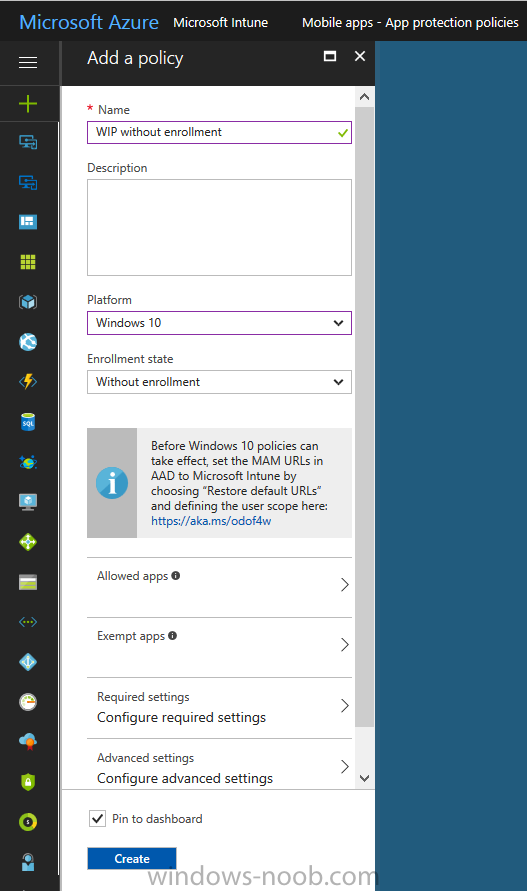
Give the policy a descriptive name, and optionally a description of what it does, in the Platform drop down select Windows 10 from the choices available. Next choose your enrollment option for Enrollment State, select Without Enrollment.
Note, if you select the wrong enrollment option you cannot change it later, you’ll have to recreate the policy with the correct enrollment option.
Next, there are two sections in the Create Policy wizard related to Apps.
- Allowed apps – These are the apps that must adhere to the policy
- Exempt apps – These apps are exempt from the policy and can access enterprise data freely.
Note: Apps can be enlightened or unenlightened. Enlightened apps can differentiate between corporate and personal data, correctly determining which to protect, based on your policies. Unenlightened apps consider all data corporate and encrypt everything. For a list of Enlightened apps see here.
Adding Allowed Apps
Click on Allowed apps and then click on Add apps to add one or more apps that you want to adhere to the policy. There’s a drop down with Recommended apps selected by default and those apps are listed below the drop down.
- Recommended apps: a pre-populated list of (mostly Microsoft Office) apps that allow admins easily import into policy.
- Store apps: Admin can add any app from the Windows store to policy.
- Windows desktop apps: Admin can add any traditional Windows desktop apps to the policy (e.g. exe, dll, etc.)
If you want to add your own Store apps or Desktop apps manually then you’ll need to select the appropriate option and fill in the blanks. To get information about how to generate the info needed for manually adding Store and Windows desktop apps see this post.
To add Allowed apps, click on Add apps, then select Recommended apps and make your selection from those available. For the purposes of this guide select Microsoft Edge and Notepad from the list of apps available.
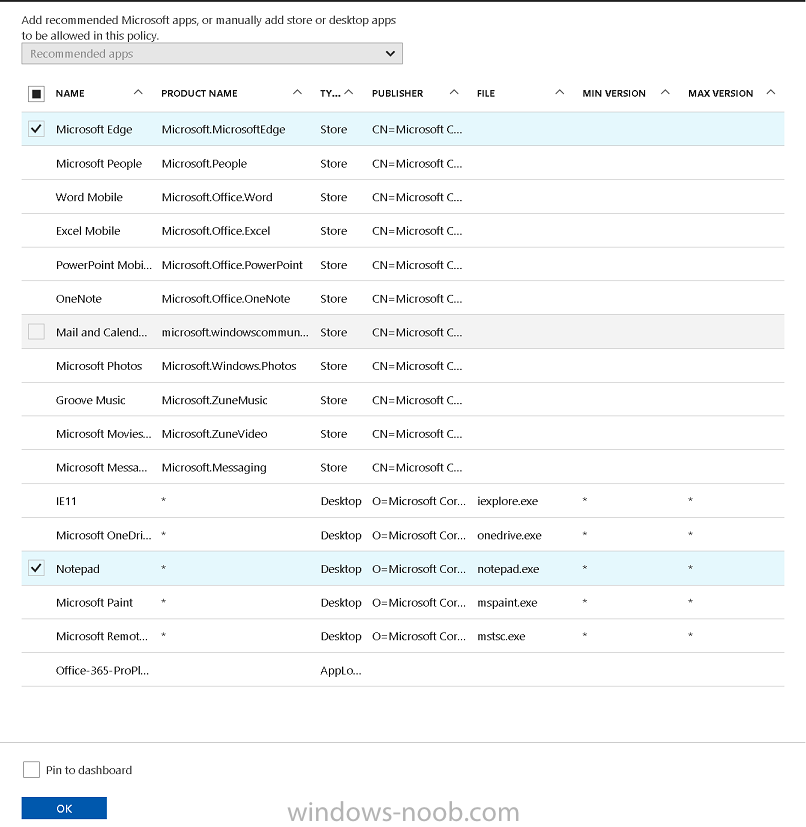
Click OK on the Recommended apps page, then click on OK on the Add apps page, next you will add an additional desktop app such as Microsoft Word 2016, to do so use the following method.
read the rest @ windows-noob.com here
