
Introduction
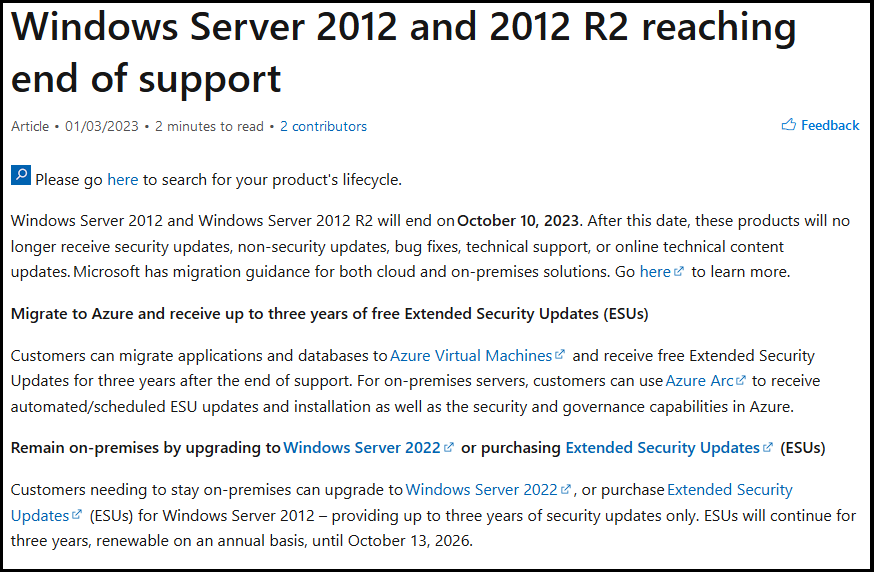
My Configuration Manager Technical Preview Lab has been running since 2015 and when I installed it, Windows Server 2012R2 was the logical choice for the Domain Controller. Fast forward to 2023 and the imminent news that Windows Server 2012 R2 will reach end of support in October 2023.
I still use my ConfigMgr labs and update the Technical Preview releases every month since it was first released, so I wanted to keep this on-premises lab going. I decided that it was time to upgrade my Lab’s aging domain controller to a newer more secure operating system. In-place upgrades from Windows Server 2012 R2 to Windows Server 2022 are possible but not recommended for Domain Controllers. Take note of the recommendation from Microsoft below.

Based on that recommendation, that meant deploying a new one side-by-side and migrating things over to the new one before decommissioning the old. As this is an on-premises lab my goal was to upgrade to the latest and greatest Windows Server 2022.
In this blogpost I’ll cover the following:
- Prerequisites
- Install a new Windows Server, rename it, join the domain
- Update the server
- Install Active Directory Domain Services
- Promote to a domain controller
- Move FMSO to the new domain controller
- Verify FMSO roles
- Demote the old domain controller
- Recommended reading
Prerequisites
Before starting make sure to review the list of prerequisites needed. Microsoft has detailed them here. They are also listed here. You should follow these general steps before you promote a server to a DC that runs a newer version of Windows Server:
- Verify the target server meets the system requirements.
- Verify application compatibility.
- Review recommendations for moving to a newer version of Windows Server.
- Verify security settings.
- Check connectivity to the target server from the computer where you plan to run the installation.
- Check for availability of the necessary Flexible Single Master Operation (FSMO) roles in Active Directory.
Note: If you are doing this in a LAB and I’d suggest you do for practice, take a backup snapshot of your old domain controller before continuing.
Install a new Windows Server, rename it, join the domain
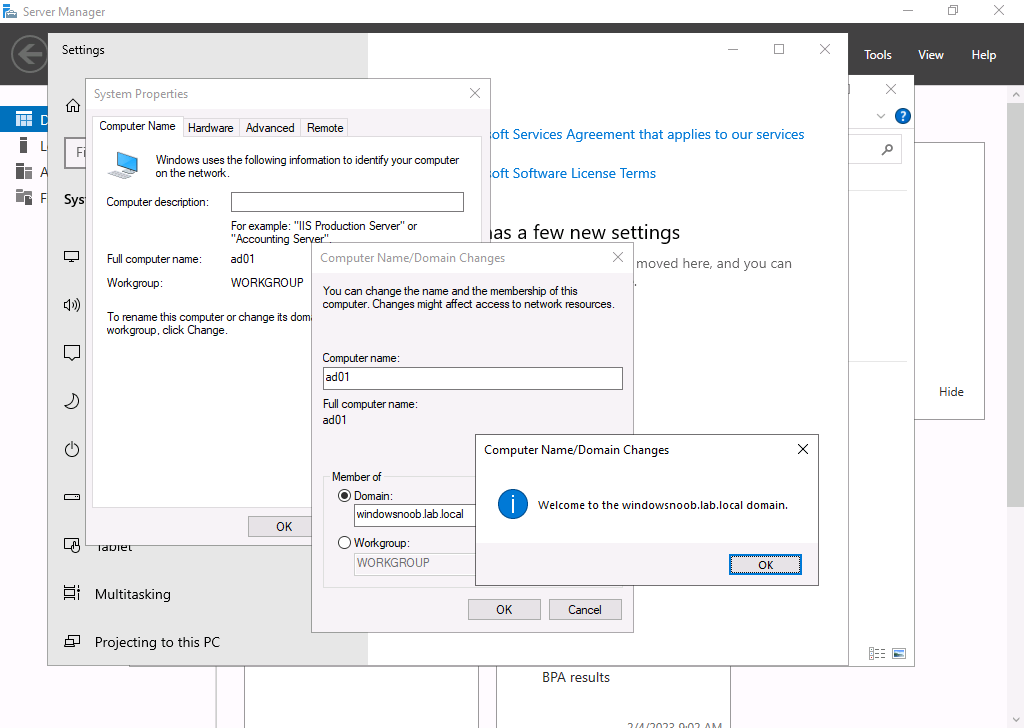
You can install your new server whichever way that suits you, it’s quick. Once done, rename the server to it’s new name, and join the domain where you other domain controller(s) reside.
Update the server
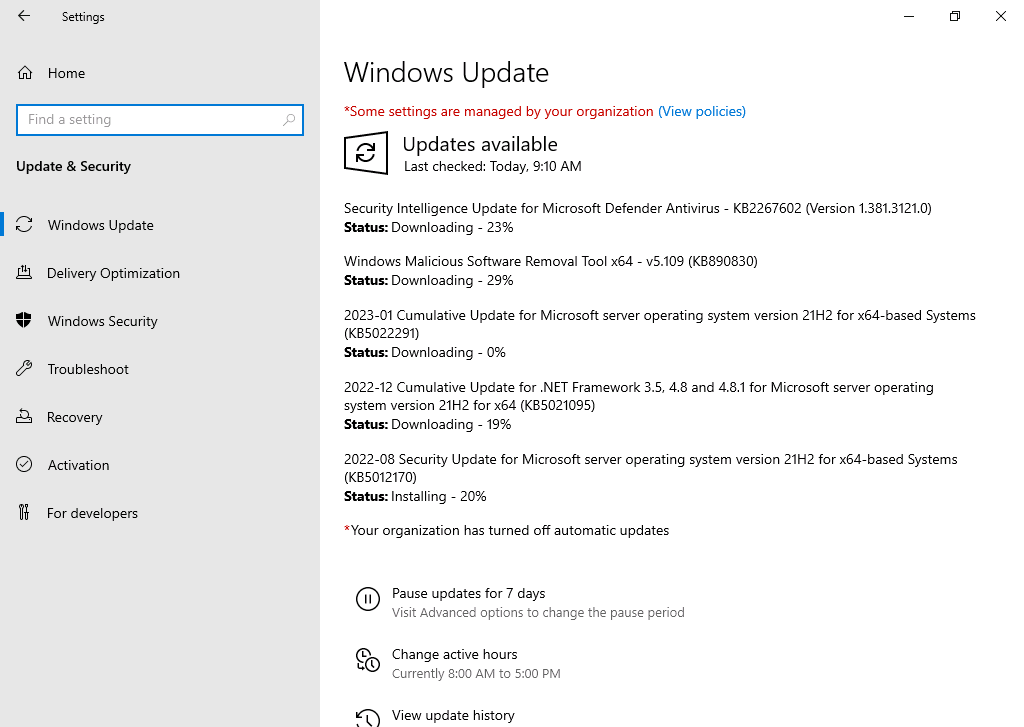
After you’ve installed the server there will most likely be several updates waiting to be installed, so go ahead and install them, repeat until complete.
Install Active Directory Domain Services
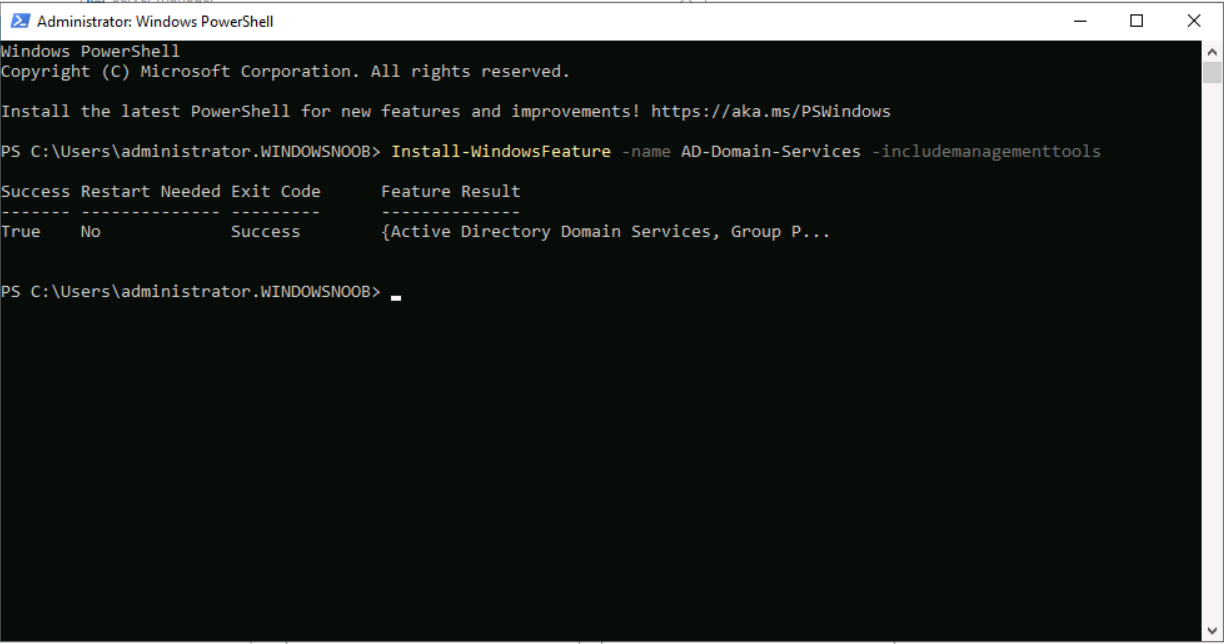
Next we need to install Active Directory Domain Services (ADDS) on the new server and that can be done easily with PowerShell. In an administrative Windows PowerShell prompt enter the following:
Install-WindowsFeature -Name AD-Domain-Services -IncludeManagementTools
Promote to a domain controller
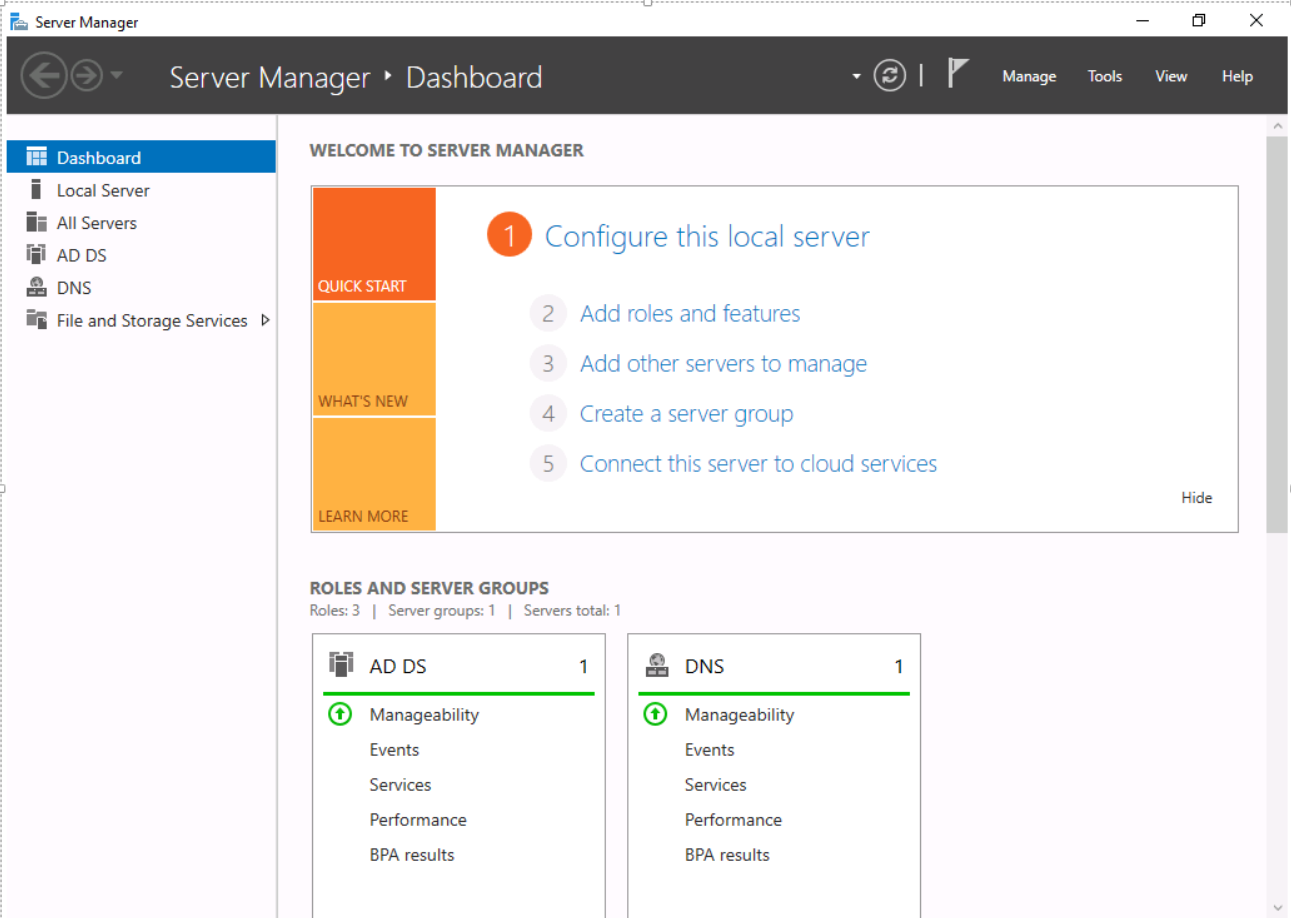
Once ADDS is complete you’ll promote the new server to a domain controller. To do that open Server Manager and you’ll see a yellow exclamation mark highlighting Post-deployment Configuration required for Active Directory Domain Services on the new server.

Click on Promote this server to a domain controller and this will launch the Active Directory Domain Services Configuration Wizard. From the list of available deployment operation options select Add a domain controller to an existing domain.

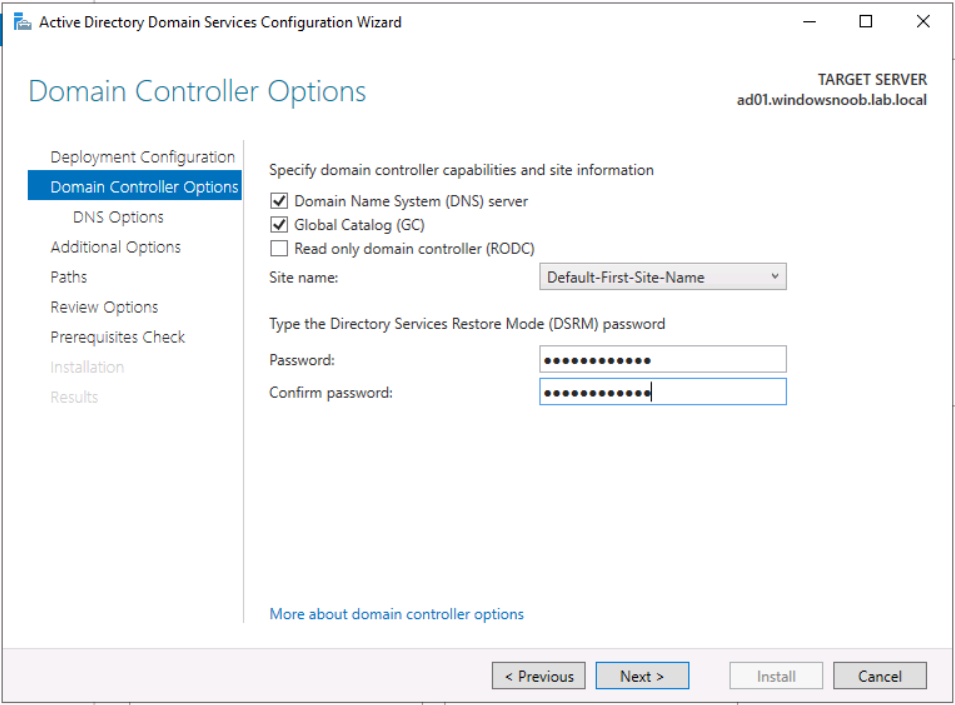
fill in the Directory Services Restore Mode (DSRM) password
If you are using .local FQDN’s in your lab like me it’s OK to click OK to the warning.

On the Specify Install From Media (IFM) Options screen select the option that suits your scenario best

and decide where you want the NTDS, logs file folder and SYSVOL folder to be located (or accept the defaults)

take note of the Preparation Options

before you see the Review Options screen, at this point you can also click on View Script to get a PowerShell script of your actions which is useful for automating the installation of more Domain Controllers.

Clicking Next will bring you to the Prerequisites Check results.

and clicking Install will start the promotion of this server to a domain controller. As long as you are signed in with a domain admin account, adprep will automatically prepare your existing domain. After it’s completed and restarted, sign in on the new domain controller and there should be no additional configuration tasks waiting in Server Manager.
Move FMSO to the new domain controller
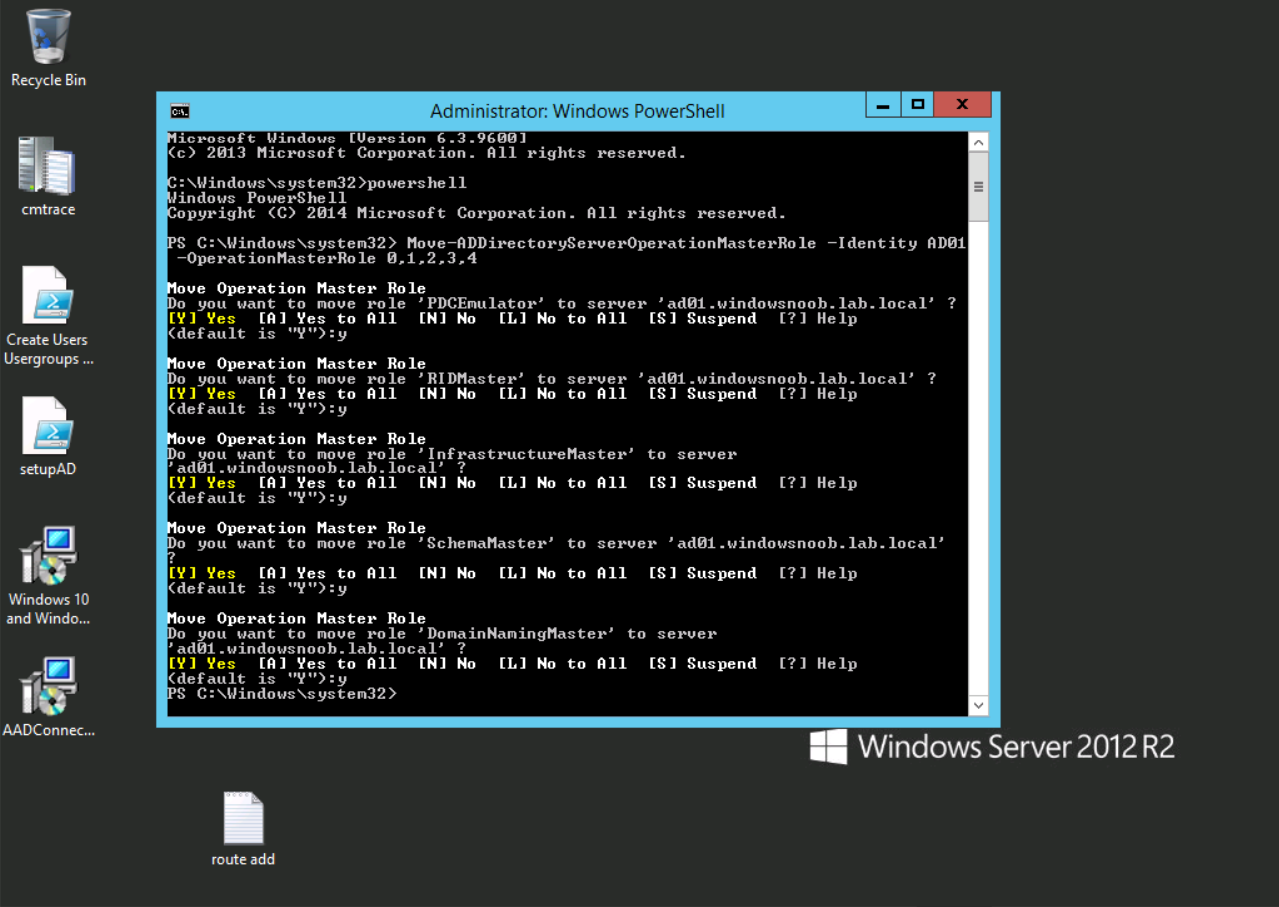
After the server was promoted to a domain controller it’s time to move the Flexible Single Master Operation (FMSO) from the old domain controller to the new domain controller. To do that open an administrative PowerShell window on the old domain controller server. In the PowerShell window, use the
Move-ADDirectoryServerOperationMasterRole
cmdlet to move the FSMO roles. You can enter the name of each Operation Master Role or use numbers to specify the roles. For more information, see Move-ADDirectoryServerOperationMasterRole.
Verify FMSO roles
Now that you’ve moved the FMSO roles you should verify that they are in place correctly on the new domain controller, to do that on the new domain controller open an Administrative PowerShell window and type the following.
Get-ADDomain

Verify that the following match the FQDN of your NEW domain controller.
- InfrastructureMaster
- PDCEmulator
- RIDMaster
Demote the old domain controller
Once everything is verified and complete it’s time to demote the old domain controller. Only start this part when you are sure that everything you need on the new domain controller is in place and working, for example, in my case I had to manually add the DHCP server options/scope etc to my new domain controller as it was not carried over. On the old domain controller open an Administrative PowerShell window and issue the following command.
Uninstall-ADDSDomainController

after answering Y it will do the operations and restart the server.

Verification
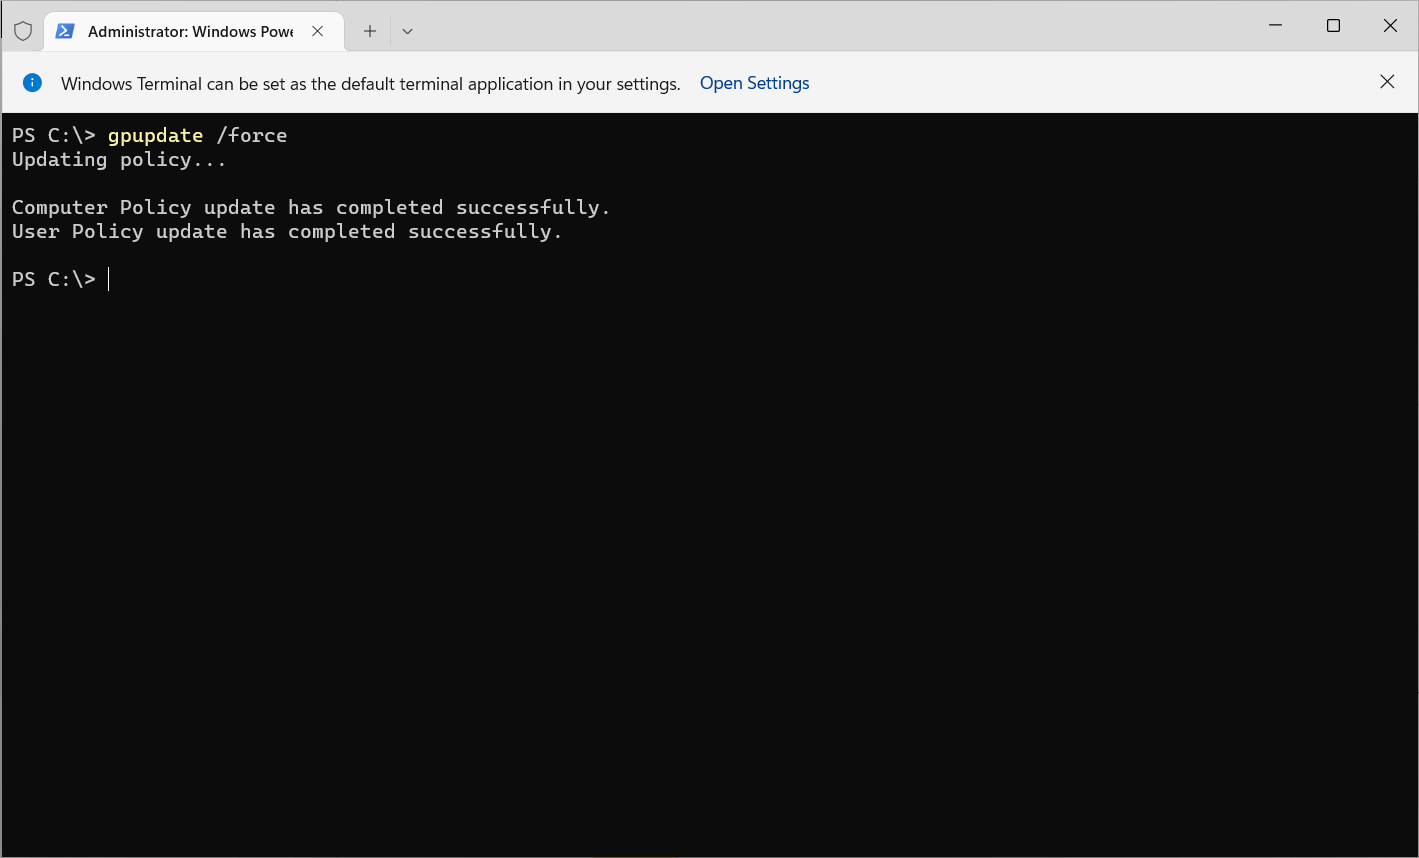
On any domain joined device (for example on my hybrid Azure AD joined Windows 365 Cloud PC) issue a GPUpdate /force. This will pull group policy from the nearest domain controller (your new domain controller in a one DC environment.
You should also verify main services such as
- DNS
- DHCP
- PKI
and any other services that were provided on your old domain controller. Once you are happy with everything, power off the old domain controller and optionally rename it so you know it’s demoted and offline.

Job done !
Recommended reading
- End of Support for Windows Server 2012 R2 – https://learn.microsoft.com/en-us/lifecycle/announcements/windows-server-2012-r2-end-of-support
- Hardware requirements – https://learn.microsoft.com/en-us/windows-server/get-started/hardware-requirements
- Prerequisites before upgrading – https://learn.microsoft.com/en-us/windows-server/identity/ad-ds/deploy/upgrade-domain-controllers#prerequisites
- Recommendations for upgrading Windows Server domain controllers – https://learn.microsoft.com/en-us/windows-server/identity/ad-ds/deploy/upgrade-domain-controllers
- Move-Active Directory Server Operations Master Role – https://learn.microsoft.com/en-us/powershell/module/activedirectory/move-addirectoryserveroperationmasterrole?view=windowsserver2022-ps
