
Introduction
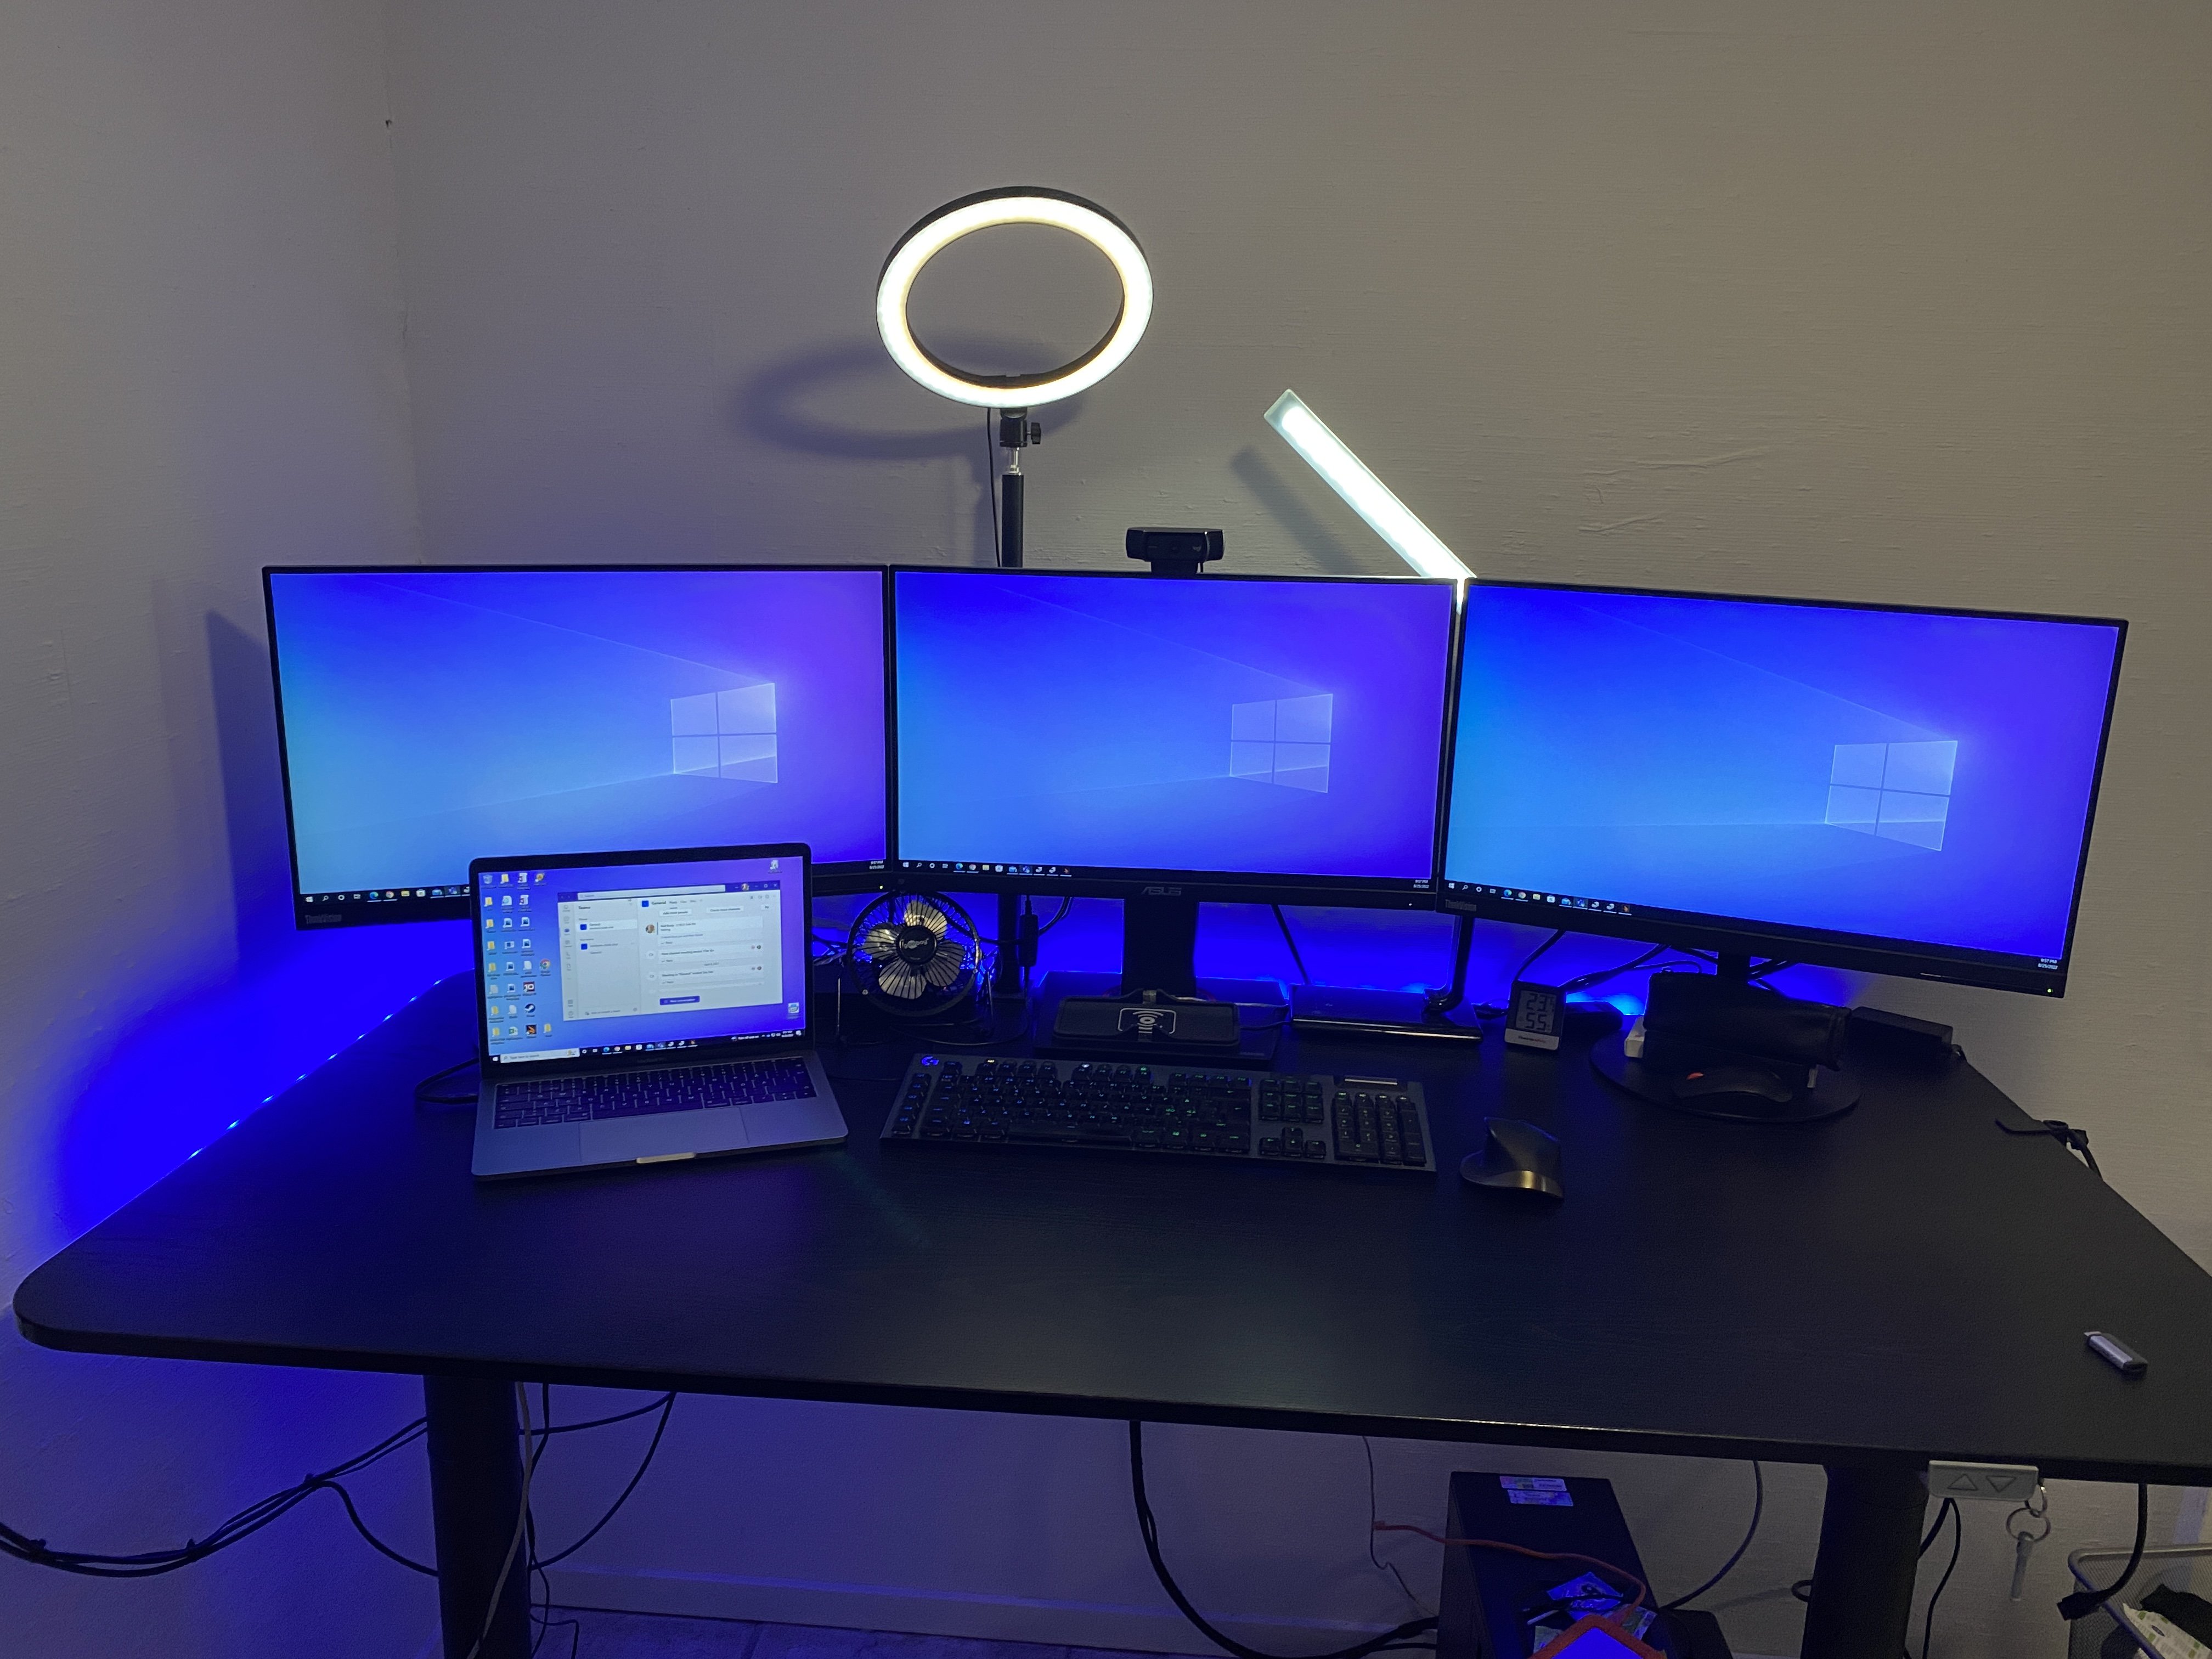
Windows 365 gives you the power to do your job anywhere, and when you install the Remote Desktop app (available for Windows, iOS, Android, Mac) you’ll be able to get your job done using multiple monitors. I’m a great believer in multiple monitor setups and like to use 3 monitors when working from home.
In this blog post you’ll see how you can use multiple monitors with Windows 365 whether you are using Windows or an Apple Mac as the base OS that you connect from.
Step 1. Get the Remote Desktop app
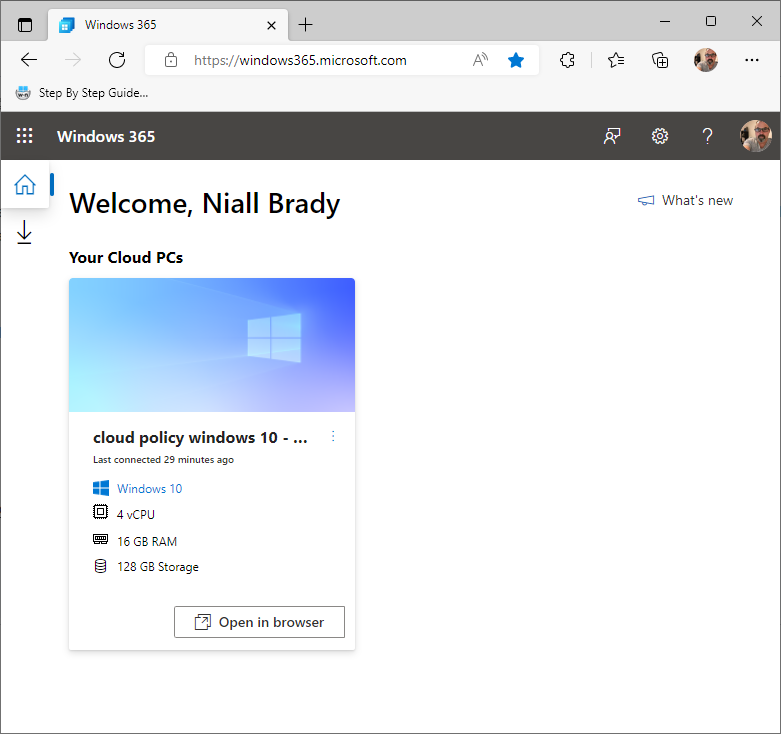
When you login to https://windows365.microsoft.com you’ll be presented with a web page similar to below showing one or more Cloud PC’s assigned to you.
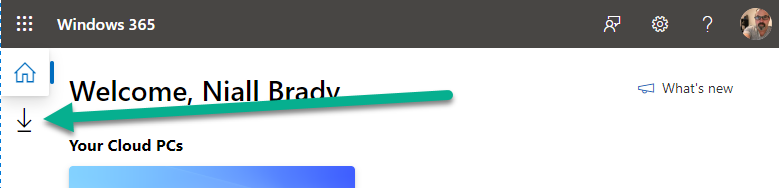
Click on the download icon and click on it for Remote Desktop app.
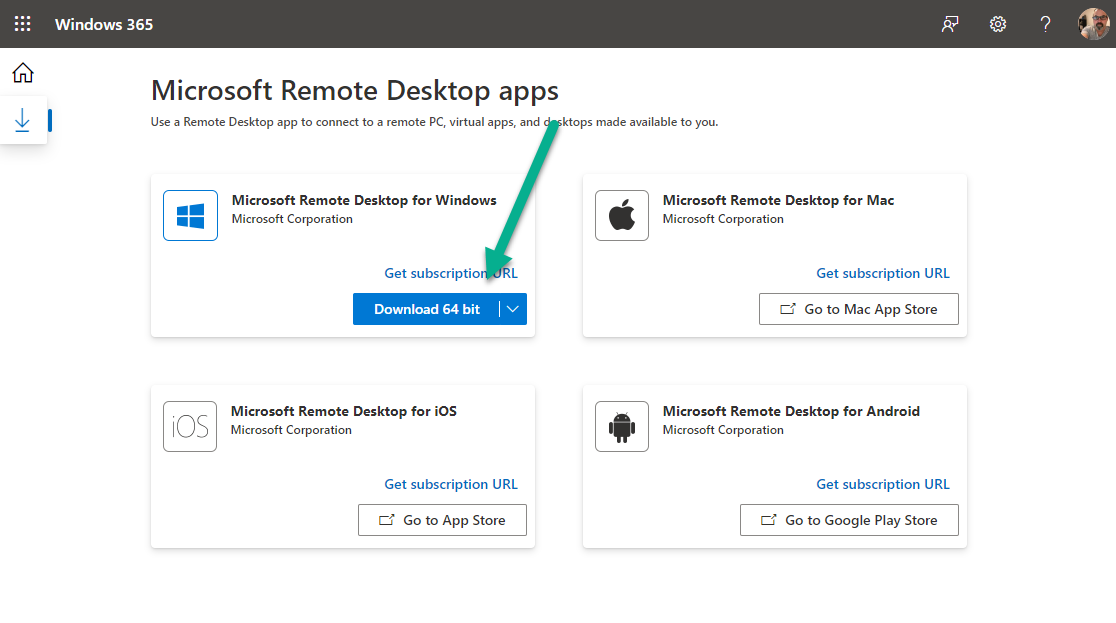
Next, select the client agent download that matches your operating system (and architecture), in this example I’ll download the Windows client.
Step 2. Configuring remote desktop for Windows
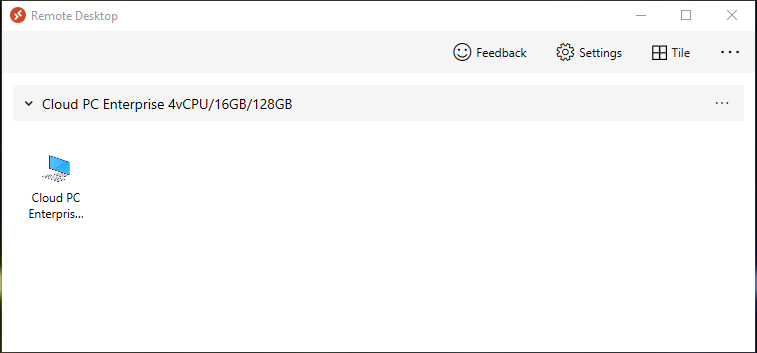
After the Remote Desktop app is installed and subscribed, it will launch. You can see your Cloud PCs in tiled format.
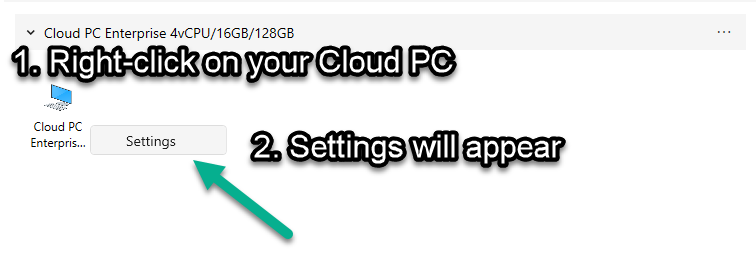
To modify the display setting for the Windows version of the Remote Desktop app, right click on the Cloud PC and settings will appear for that Cloud PC.
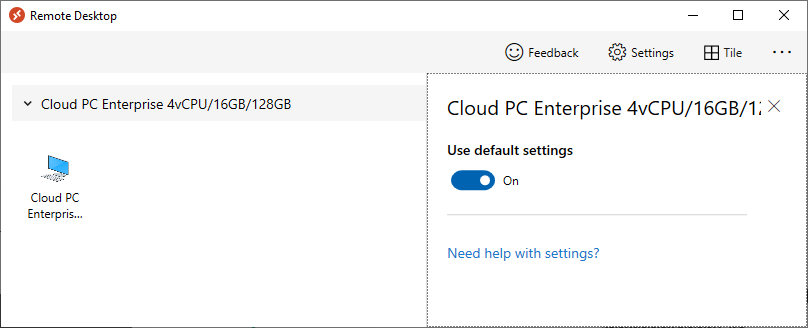
By default, Use default settings is enabled. Disable it to see more options.
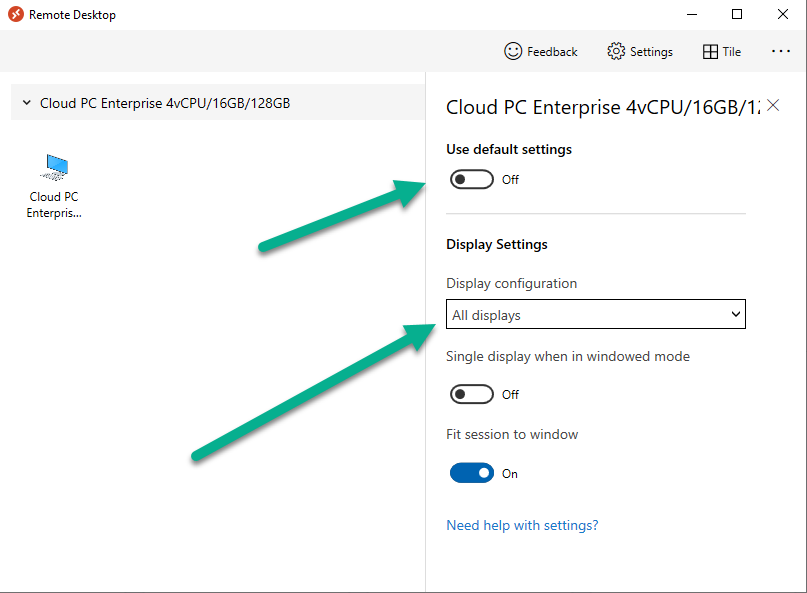
After turning default settings off, you’ll see some nice display options, click on the Drop Down Menu.
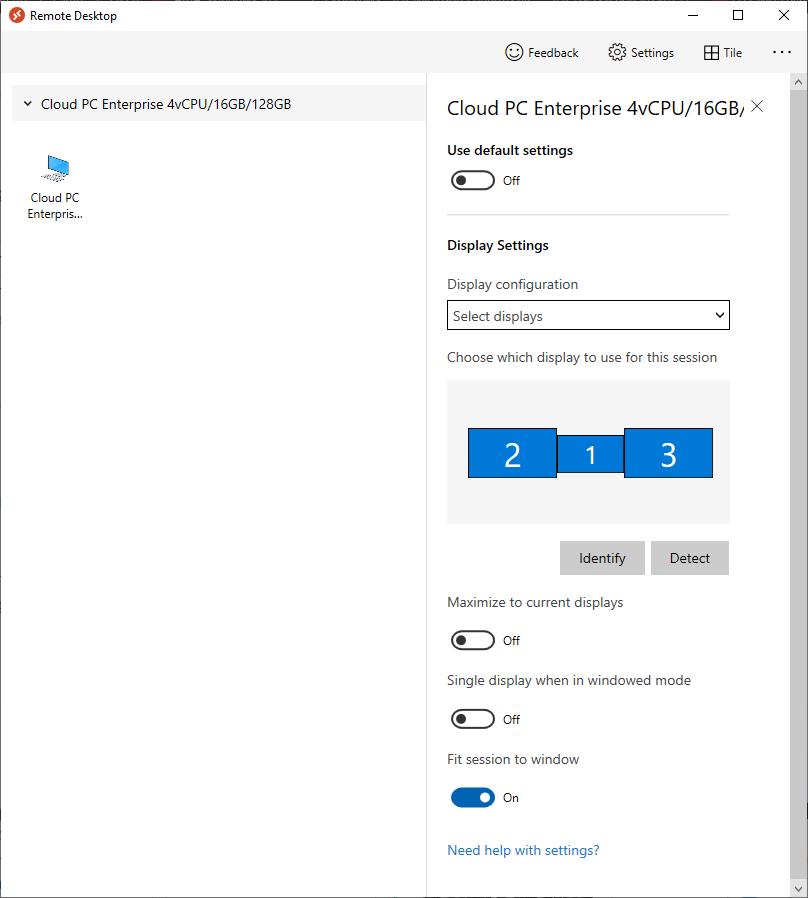
In my example, I want to use all three monitors and arrange them to my liking, so I select the Select Displays option, from there i can identify the order of my monitors and select how many I wish to use, I selected all 3.
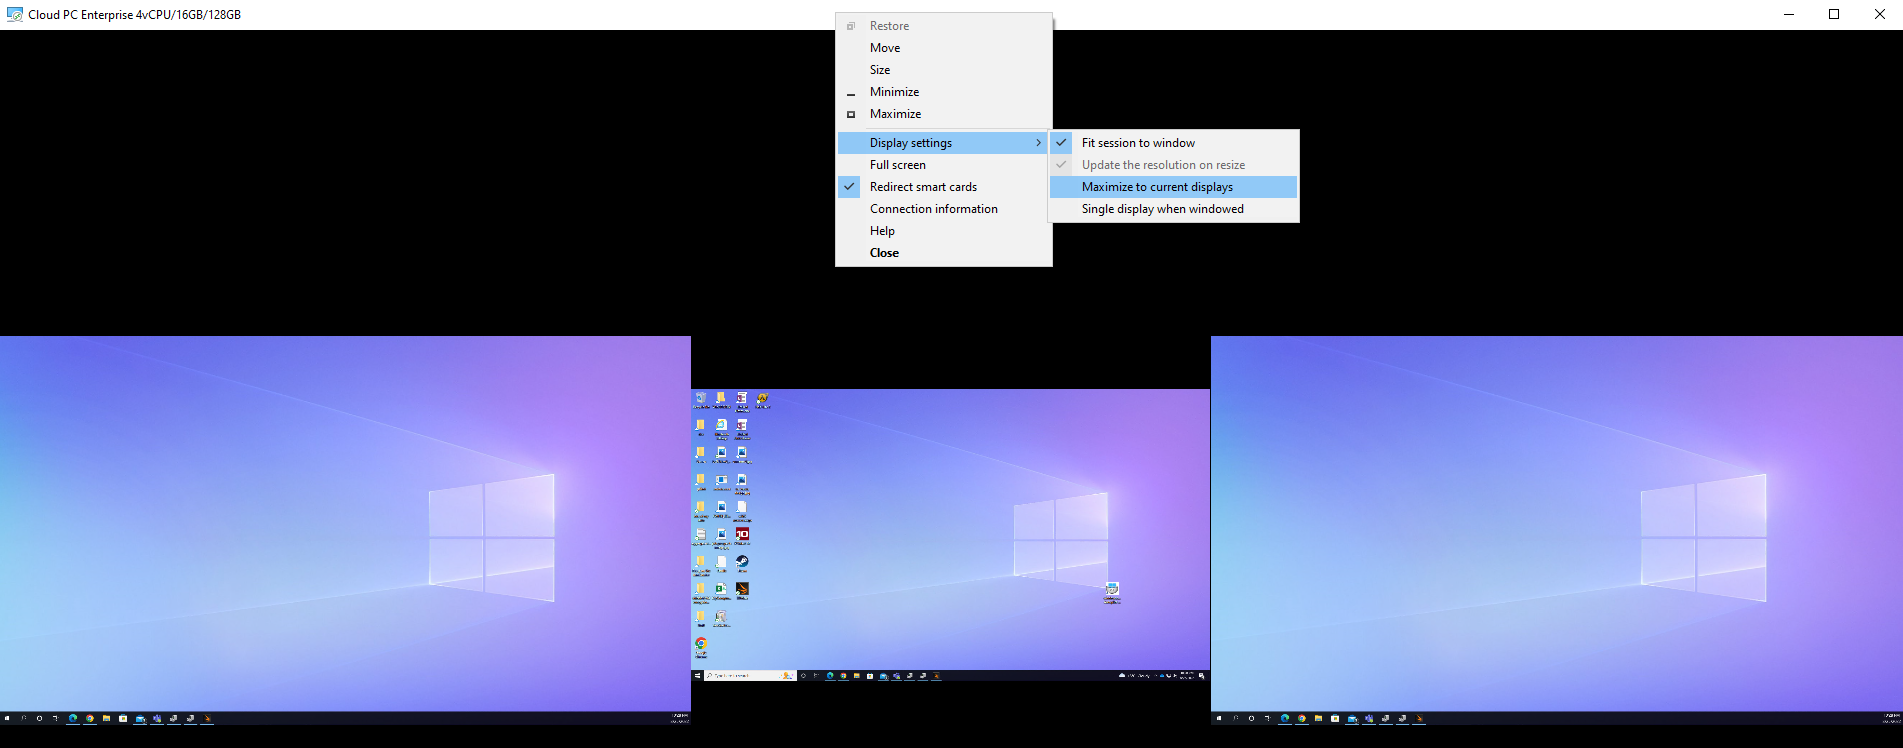
After enabling this, I close the settings option and launch the remote desktop app. Here is the result, my Windows 365 Cloud PC is using all 3 monitors. Awesome or what !

If you take the display out of full screen you can right click the Remote Desktop toolbar and you’ll have some additional options with Display Settings.
Step 3. Configuring remote desktop for Apple Mac
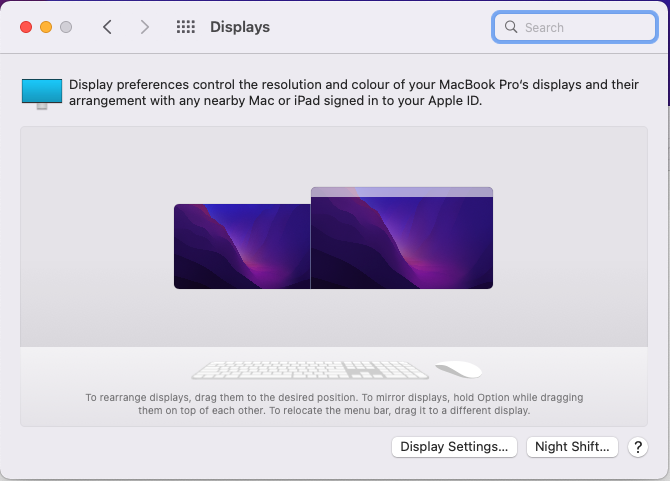
On an Intel based Macbook Pro with DisplayLink drivers installed, the experience is similar except you first have to have configured your desired display settings in Mac System Preferences by clicking on the Display icon.
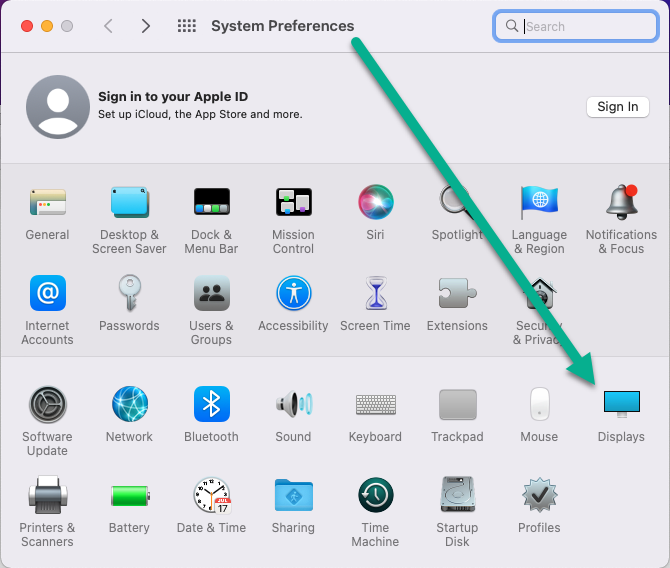
And then configure your desired preferences there.
Next, open the Windows 365 Remote Desktop app and on your selected Cloud PC, use the 2 finger click on the touchpad and then select Edit.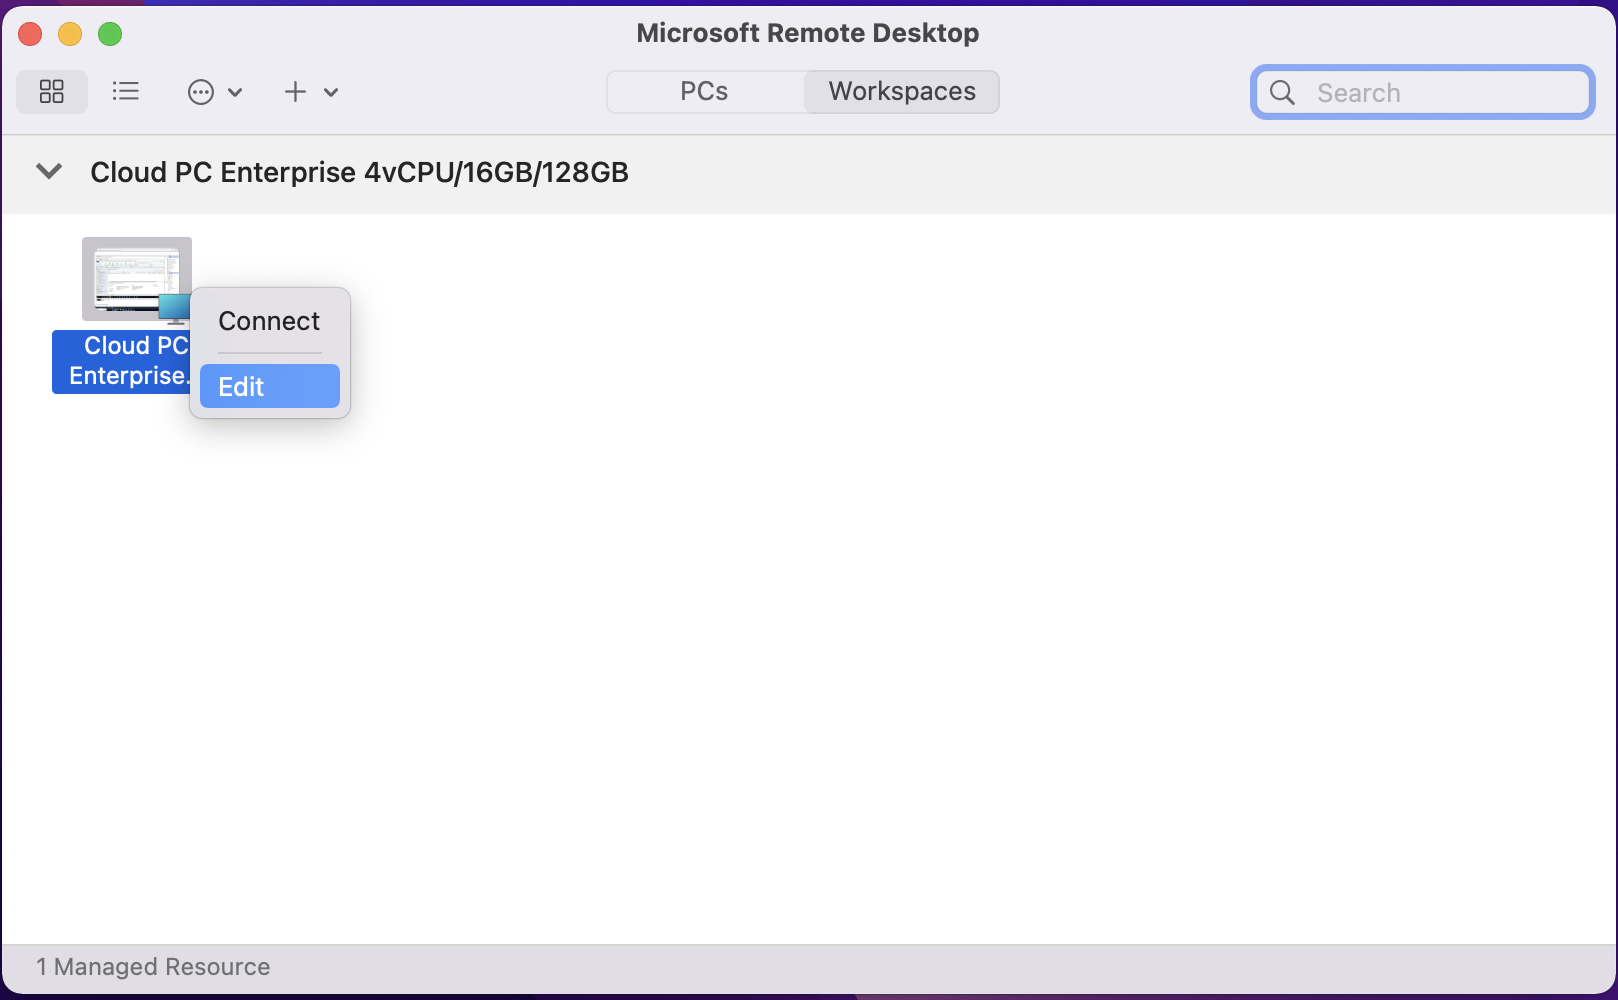
Make your desired choice for how you want the monitors to display things by clicking on both the Apple Mac and the External monitors listed.
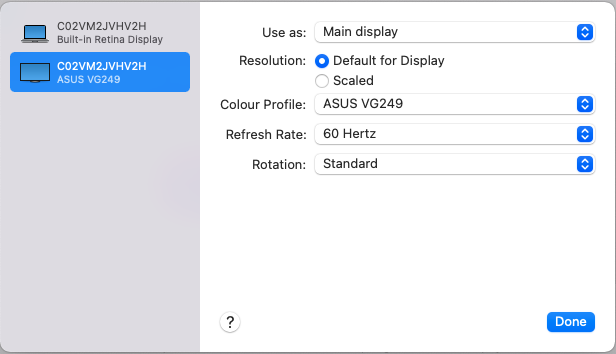
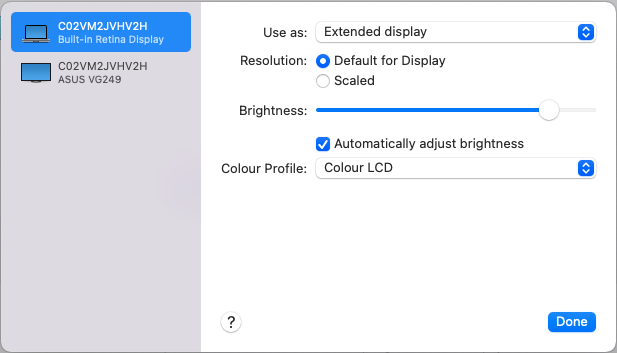
Once you are happy with the configured settings close that window by clicking on Done and launch your Cloud PC, here’s a view of the same thing via the Mac.
So there you have it, you can really maximise the benifit of multiple monitors when using your Cloud PC.
cheers
niall
Related reading
Get started with the Windows Desktop client | Microsoft Docs

Hi Niall, thanks for the great article. Not sure if the RD App has recently changed but I found that we are no longer able to right click on the cloud PC to bring up the settings menu. So I’m struggling to find a way to set multiple monitors. Have you come across this?
Cheers A
hi Ashwina, i just checked and the options are still there for me, are you sure you are following my advice above ? what version of the rd app are you trying with ?
Hi – Thanks for the article, very helpful.
In response to Ashwina’s question, try hover over the 3 dots next to the cloud PC, then clicking the right mouse button. You should see the settings on the new application version there. Niall’s on the money beyond that point.