
Introduction
If you are testing Windows 365 and want to delete your Cloud PC in order to start over again from scratch, the process is (currently) not that straightforward, but that’s what I’ll cover in this blog post. Note that Delete is not the same as re-provisioning a Cloud PC (which I’ll cover in another blog post).
If you are new to Windows 365 then checkout this blog post series where myself and Paul explain what it is and how to get started.
Step 1. Verify the current status of the Cloud PC
Once you’ve provisioned one or more Cloud PC’s they’ll show up in Microsoft Endpoint Manager in the Windows 365 node as shown below. If the Cloud PC is in use and all is OK the Status will be listed as Provisioned.
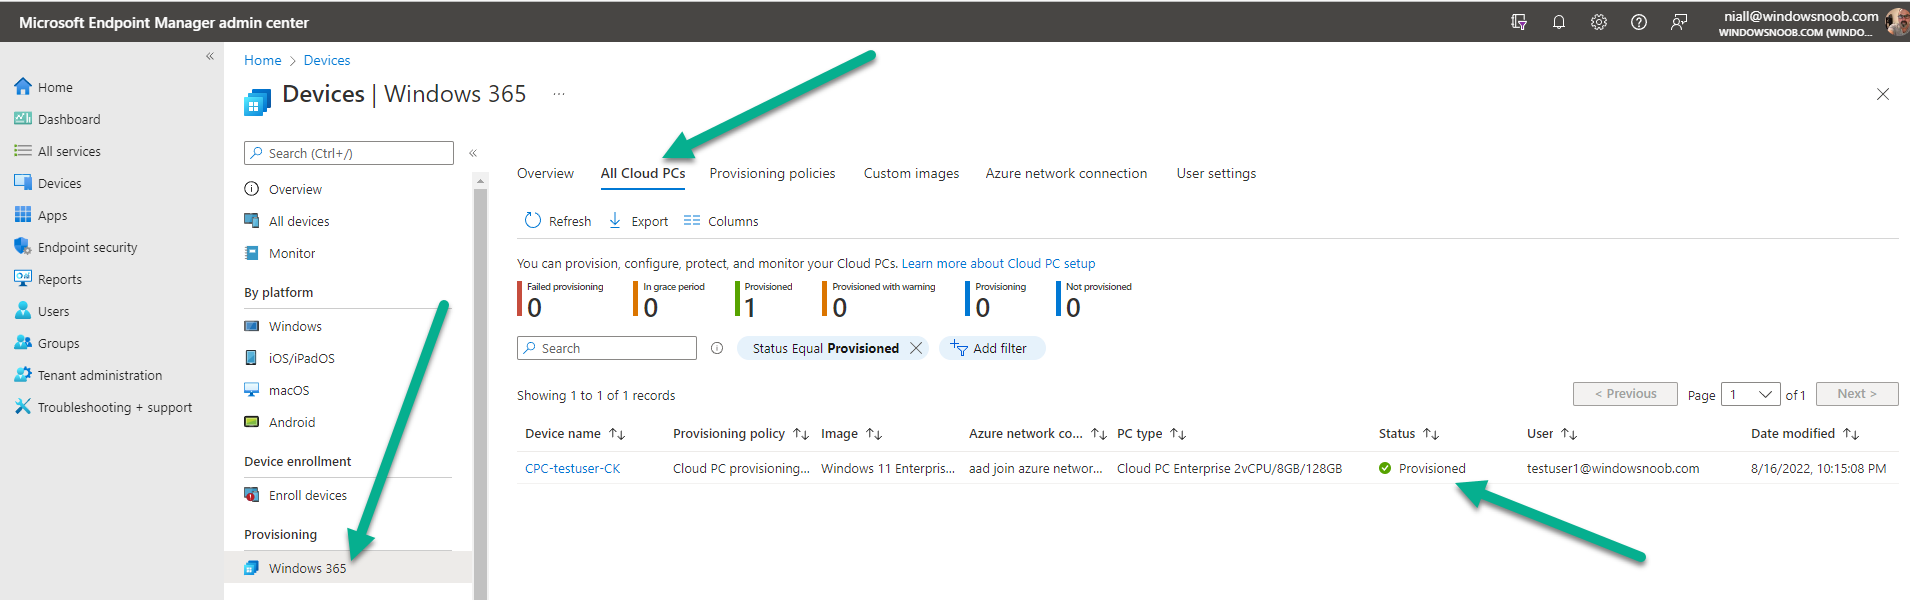
Once you’ve decided that you want to delete a Cloud PC, the first thing to do is to remove the assigned license from the user of that resource. In the screenshot above we can see that the user is testuser1@windowsnoob.com.
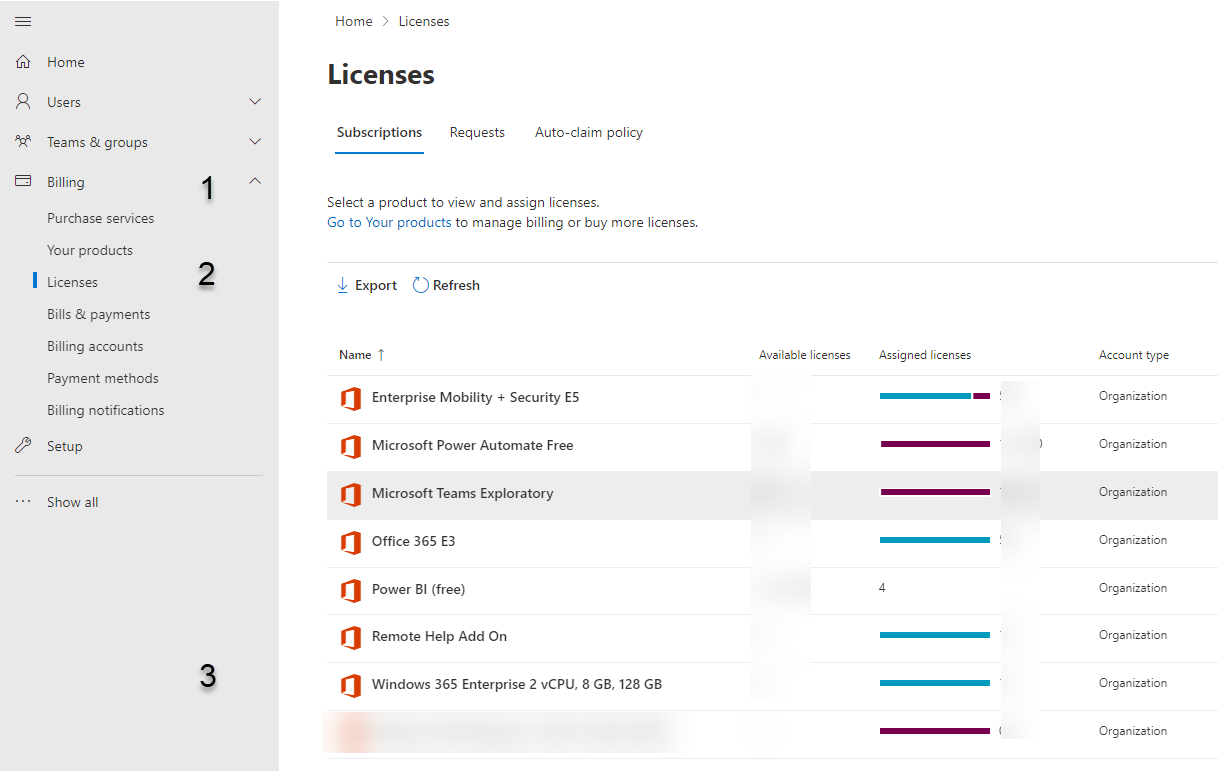
Step 2. Remove the Windows 365 license from the target user
Log in to the Microsoft 365 admin center and expand the billing node (1), then select licenses (2) and finally select the Windows 365 License type (3), as shown here.
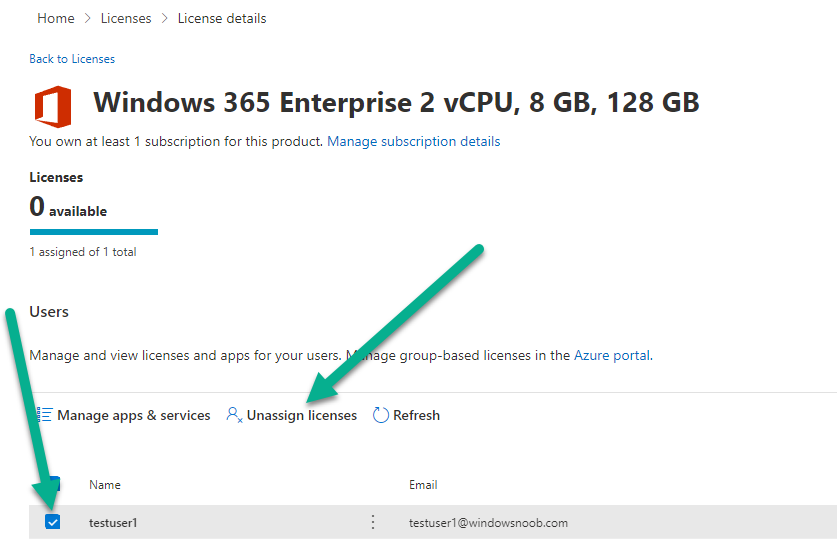
After selecting the appropriate Windows 365 license name listed, select the checkbox beside the user you wish to remove the assignment from and then select Unassign licenses.
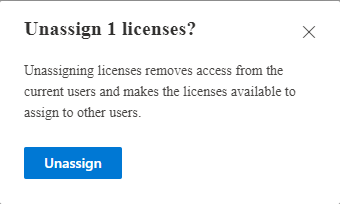
You will be asked to confirm that you want to Unassign X licenses (depending on how many users you are removing the license from), click Unassign to continue.
After clicking Unassign the screen will be updated to reveal that fact.
![]()
Step 3. Check the new status of the Cloud PC
Back in MEM, check the status of the Cloud PC that you have just removed the license from. Hit Refresh to update the status. It will most likely show No Results, if so, remove the filter (red arrow).
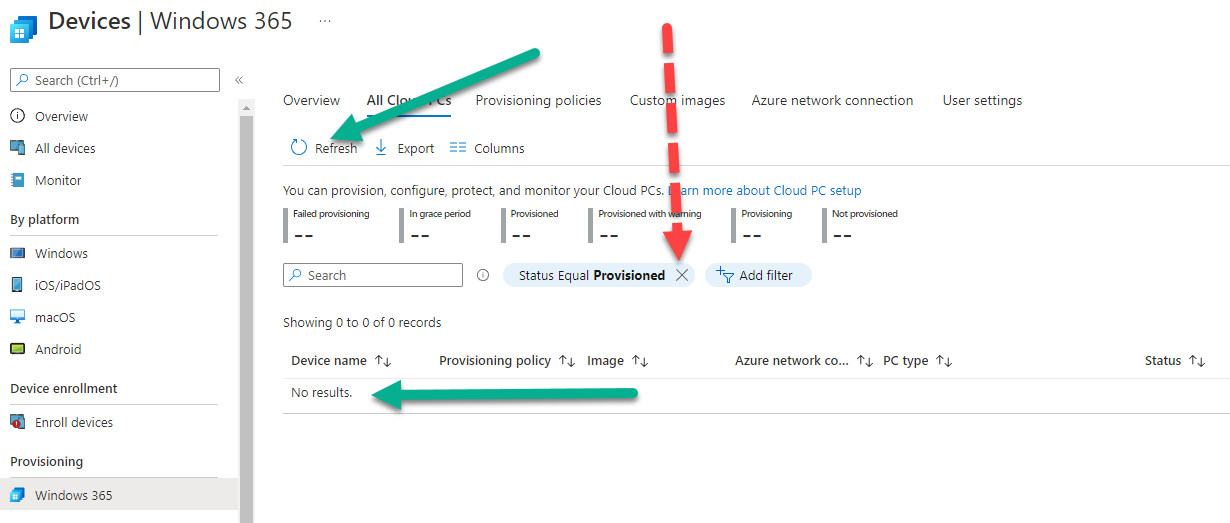
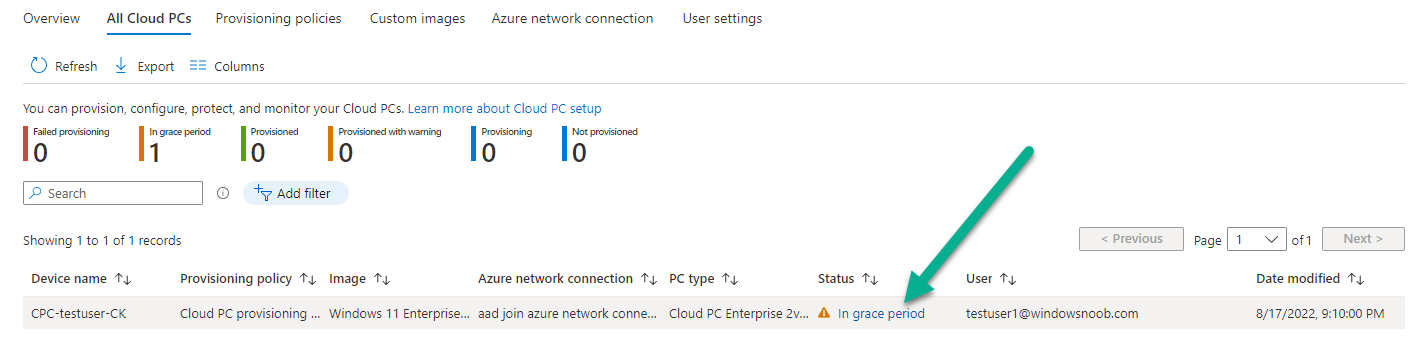
After removing the Status Equal filter, you should see your Cloud PC in a Status of In Grace Period.
Step 4. End the grace period
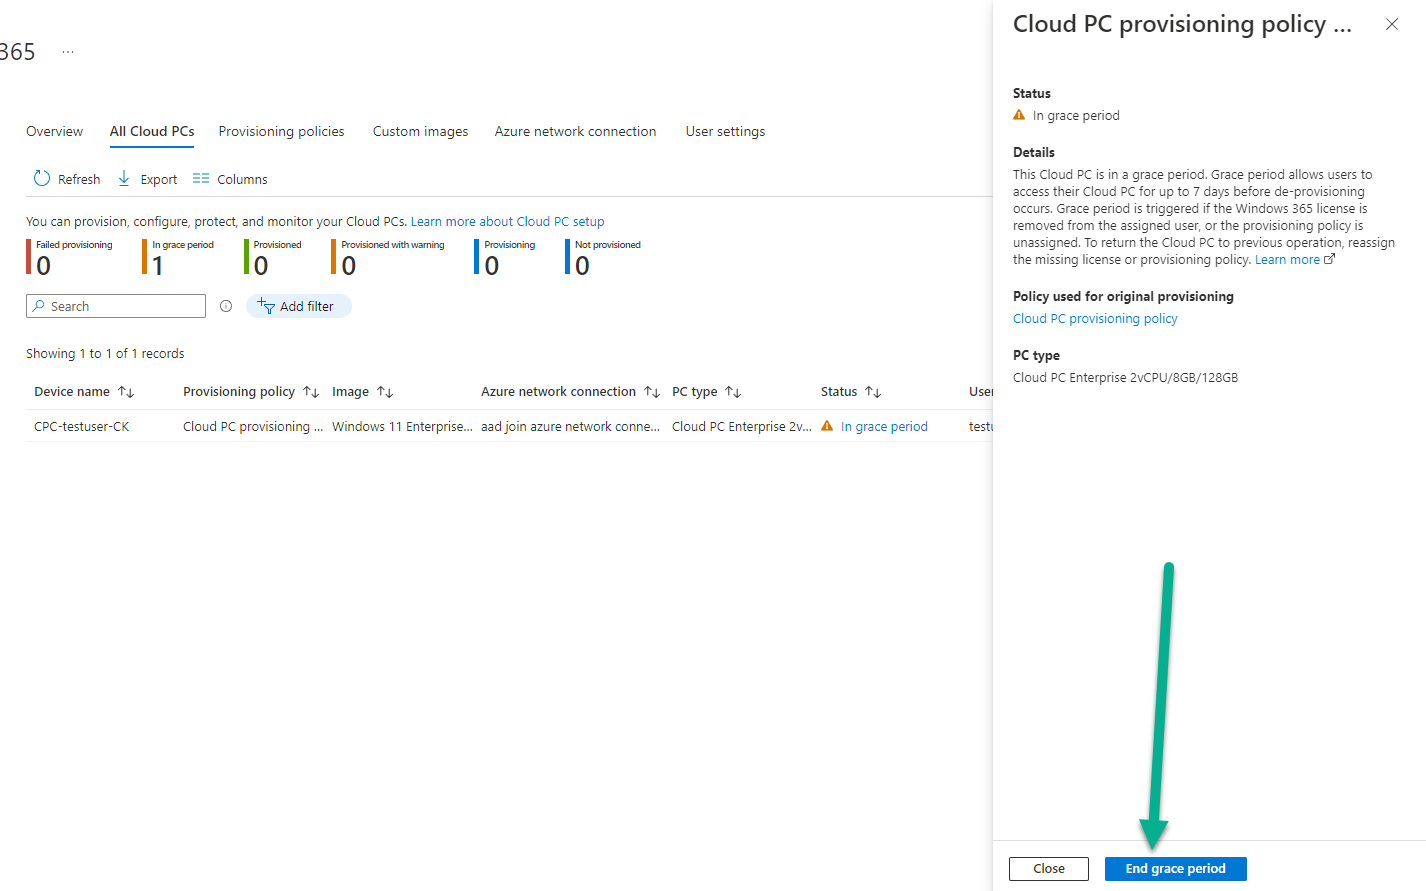
To delete the Cloud PC as quickly as possible, click on the In grace period status. This grace period normally allows the Cloud PC to remain in this state for up to 7 days.
Click on End grace period
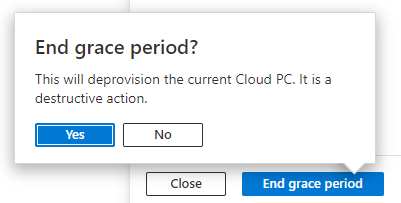
confirm your action by clicking Yes to the destructive action warning.
After clicking yes the following occurs…
- The Cloud PC will start deprovisioning.
- The user loses access to the Cloud PC.
- The operating system and data are deleted from the Cloud PC. The Cloud PC is no longer available.
- If the original provisioning policy was replaced with a different policy, the Cloud PC will be reprovisioned with the settings in the new policy.
In the MEM portal, the status of the Cloud PC will change to deprovisioning.

Step 5. The user experience
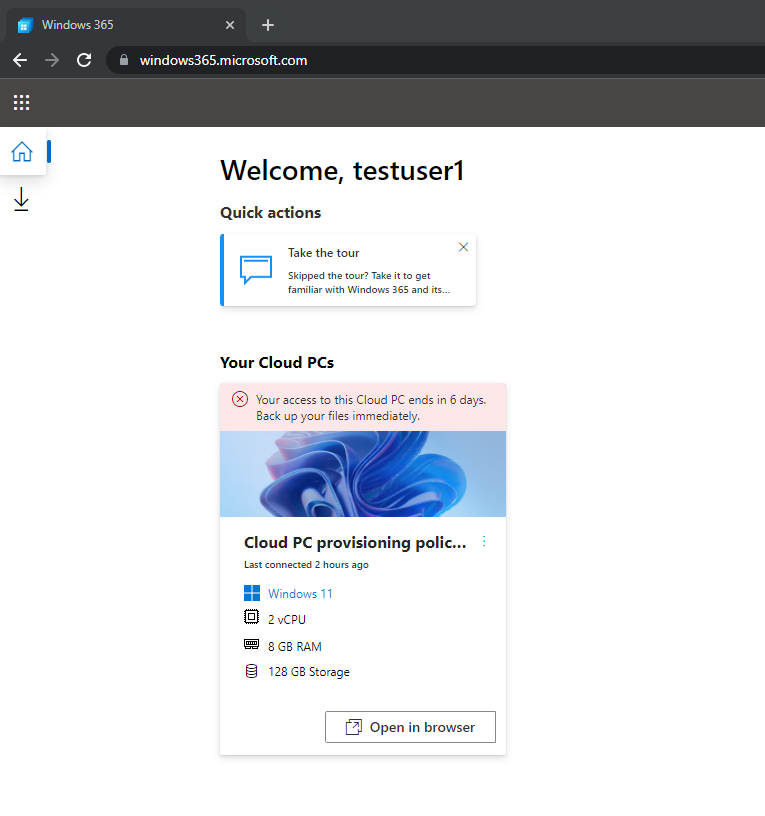
In the Windows 365 web portal, the user would be notified that their Cloud PC will be de-provisioned within that time limit.
However, no such notification is sent to the (same) user logged on to the Cloud PC that I am aware of.
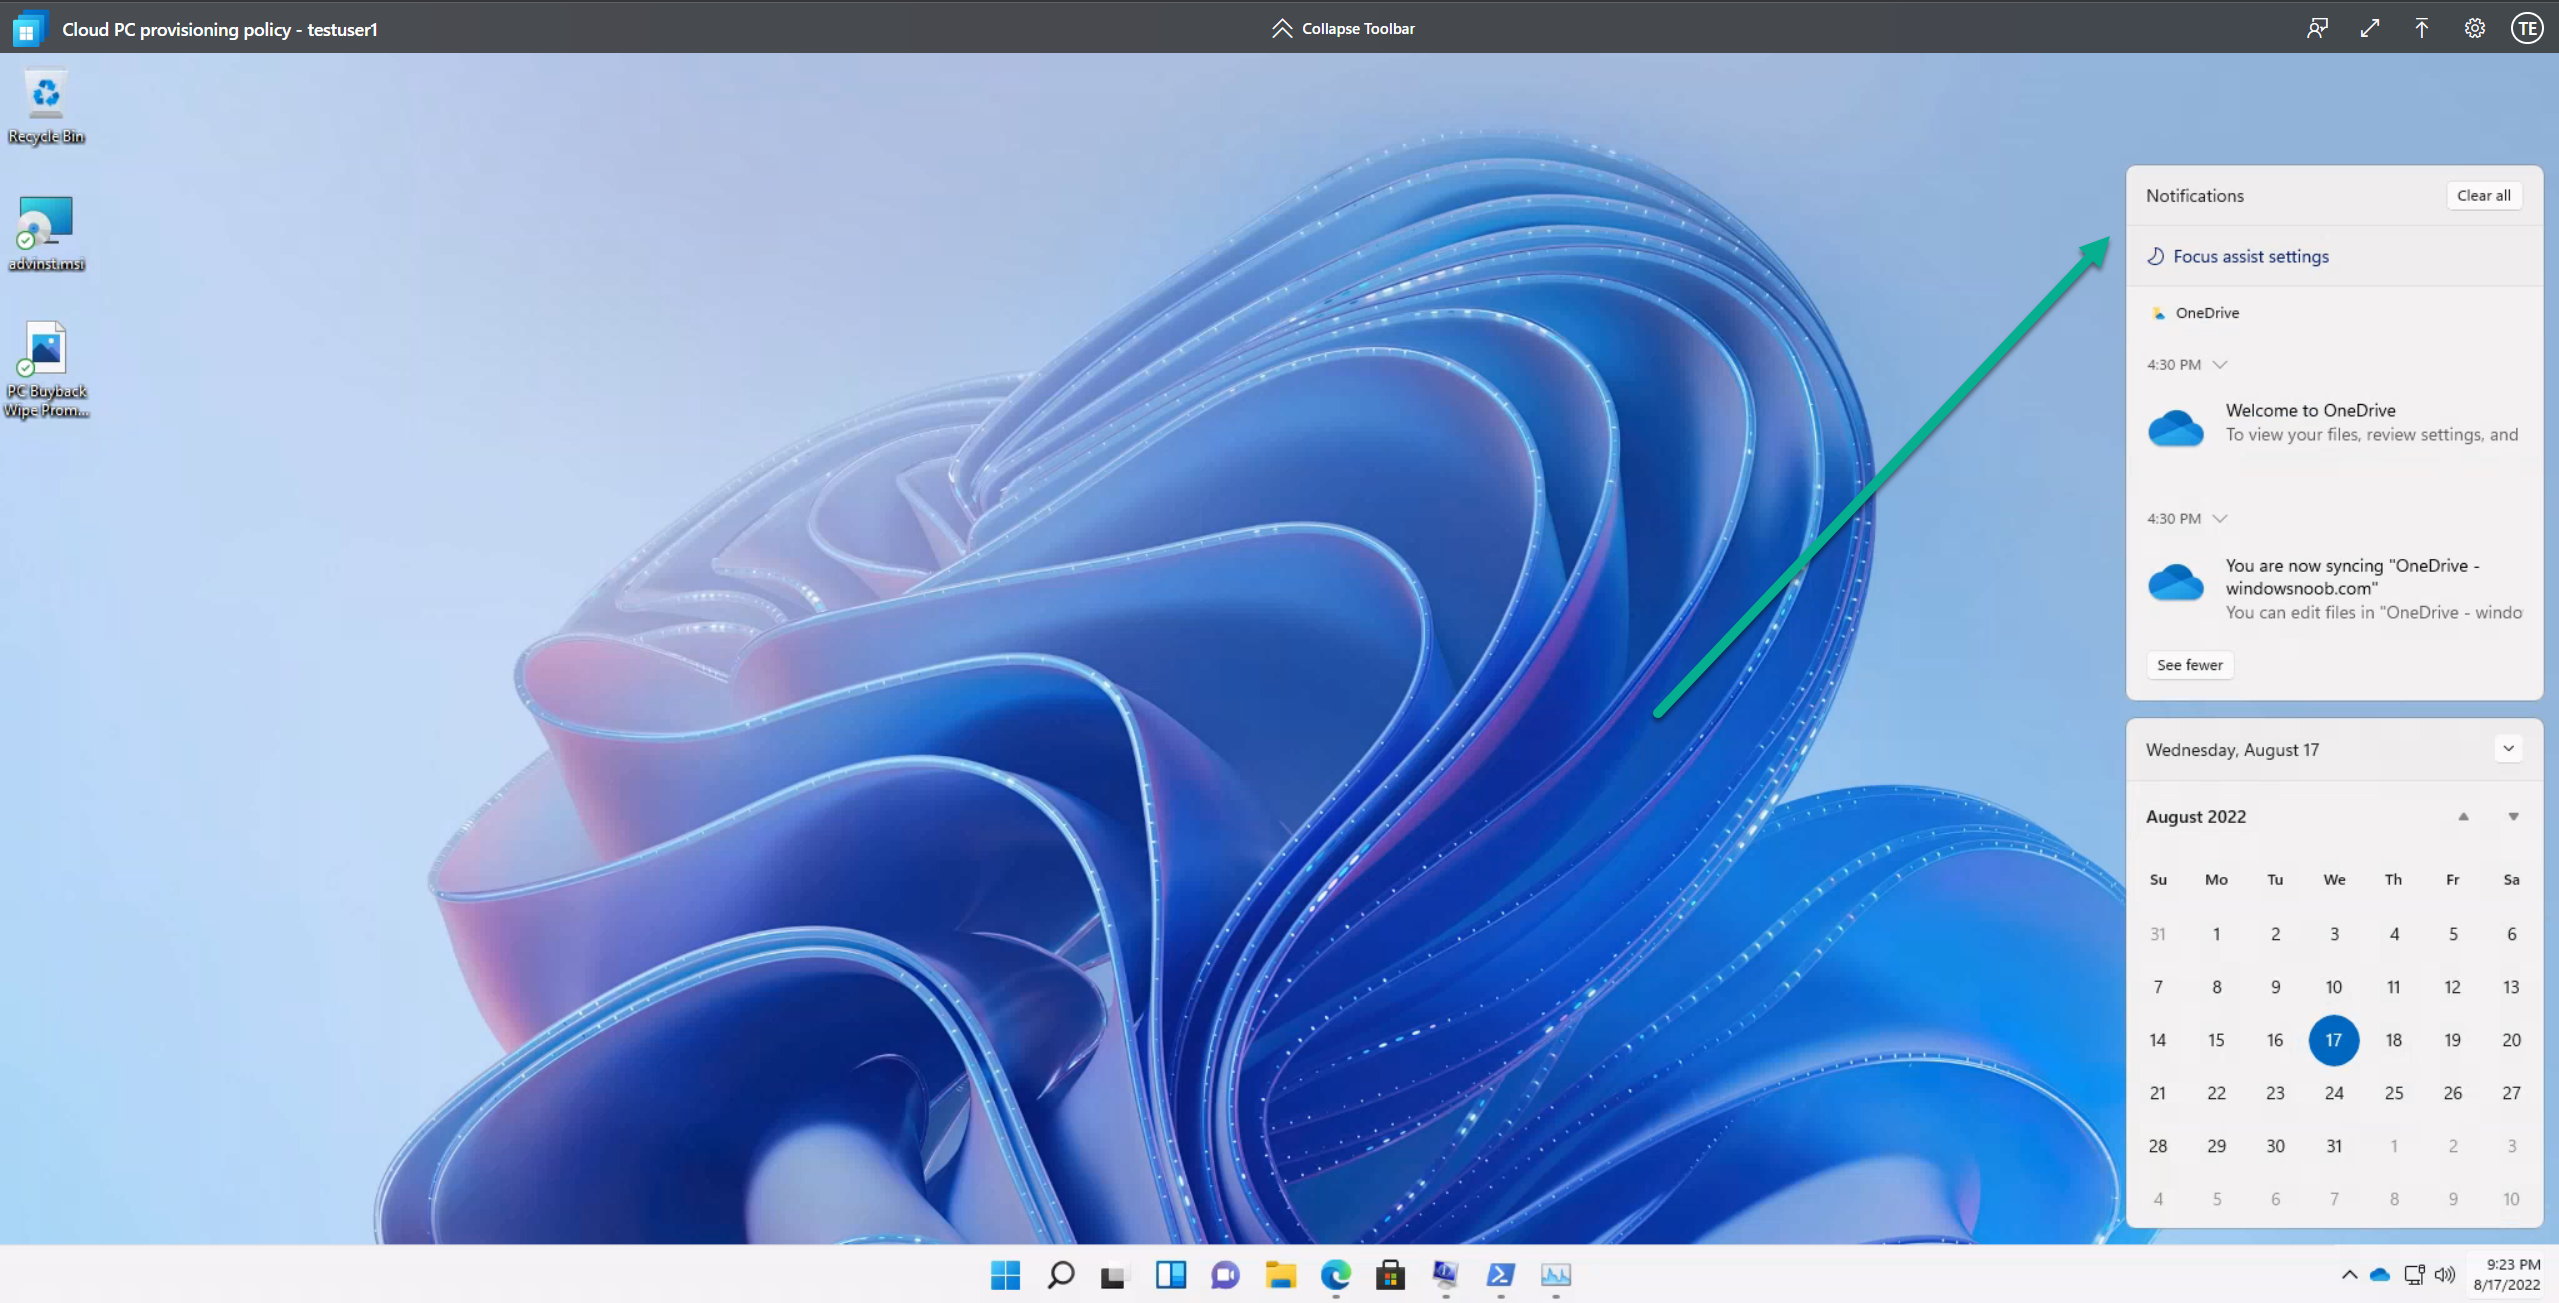
After some minutes when the policy syncs to the Cloud PC the end user will see the screen ‘shutting down’ and the following message will appear.

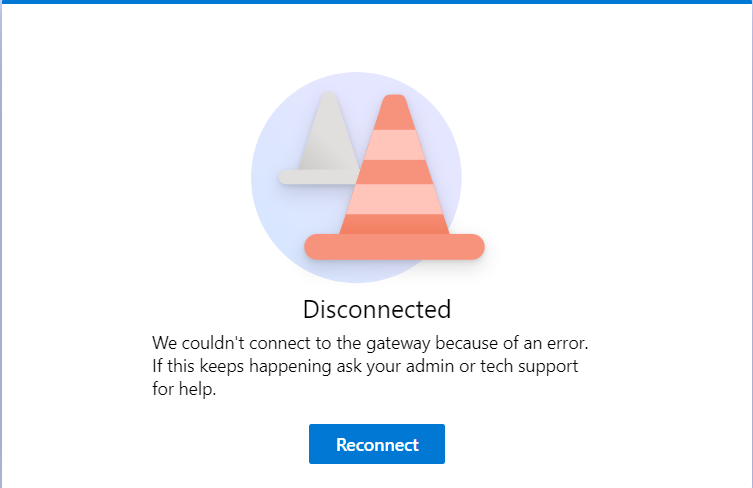
At this point, there is no point reconnecting as the device has been deleted. If however they do click on Reconnect they’ll see the following.
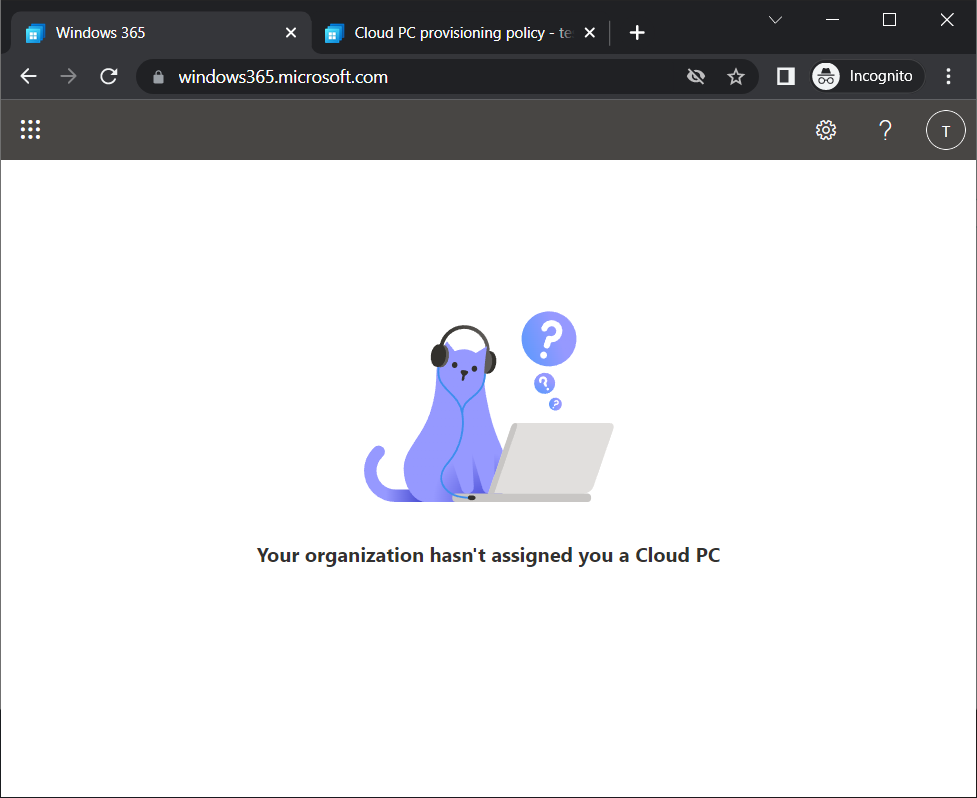
If the user tries to go back to the Windows 365 portal, they’ll see the following.
While the above process does indeed delete the Windows 365 Cloud PC, it does not remove any of the following:
- Associated Resource Group
- Associated Provisioning policies
- Associated Azure Network Connections
- Custom Image(s)
- User Settings
If you really want everything removed then you’ll have to delete those manually in MEM/Azure also.
I hope you found this useful, until next time, adios.
Related reading
- End Grace Period https://docs.microsoft.com/en-us/windows-365/enterprise/end-grace-period
- https://techcommunity.microsoft.com/t5/windows-365/how-can-i-delete-a-cloud-pc/m-p/2669556
