
Introduction
This week started off pretty badly for me, in that I attempted to repair a noisy fan on my Lenovo Thinkpad P1 (Generation 1) and sadly that went south very quickly. To cut a long story short, there are two fans which plug into the motherboard using very small connectors, and when I removed one of them I did so at an angle (don’t do that…), this in turn bent one of the pins on the inside of that connector so when i reconnected the fan, it wouldn’t sit flush in the connector.
Below you can see the connector on the motherboard (1) before it broke off completely, it’s at an angle, the bent pin is inside that connector in the area of the white triangle. The plug that supposed to connect (2) has damage marks to one of the pins which i could see clearly with a magnifying glass.
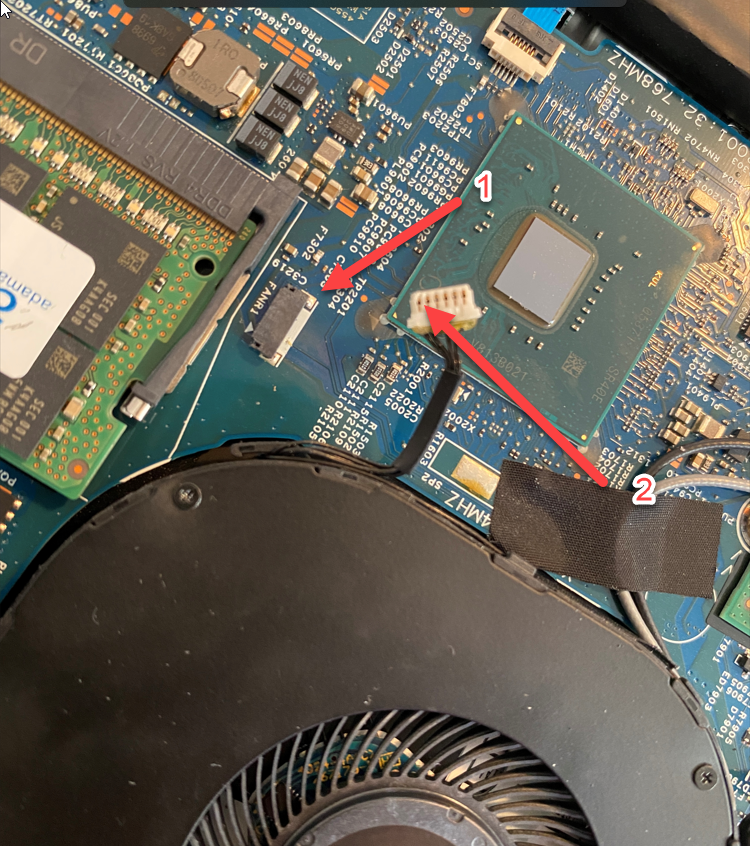 So what did I do, I pushed (2) harder into (1), and unfortunately that broke the tiny connector off the motherboard.
As a result of damaging my treasured Lenovo, which now only has one of two fans working, I needed to quickly move my virtual machines off to a spare lesser specification lab computer. That part was easy enough, but getting those virtual machines to boot on the emergency lab machine was less so, so I’ll cover that process here.
The problem
When importing virtual machines from another lab you might see the following error.
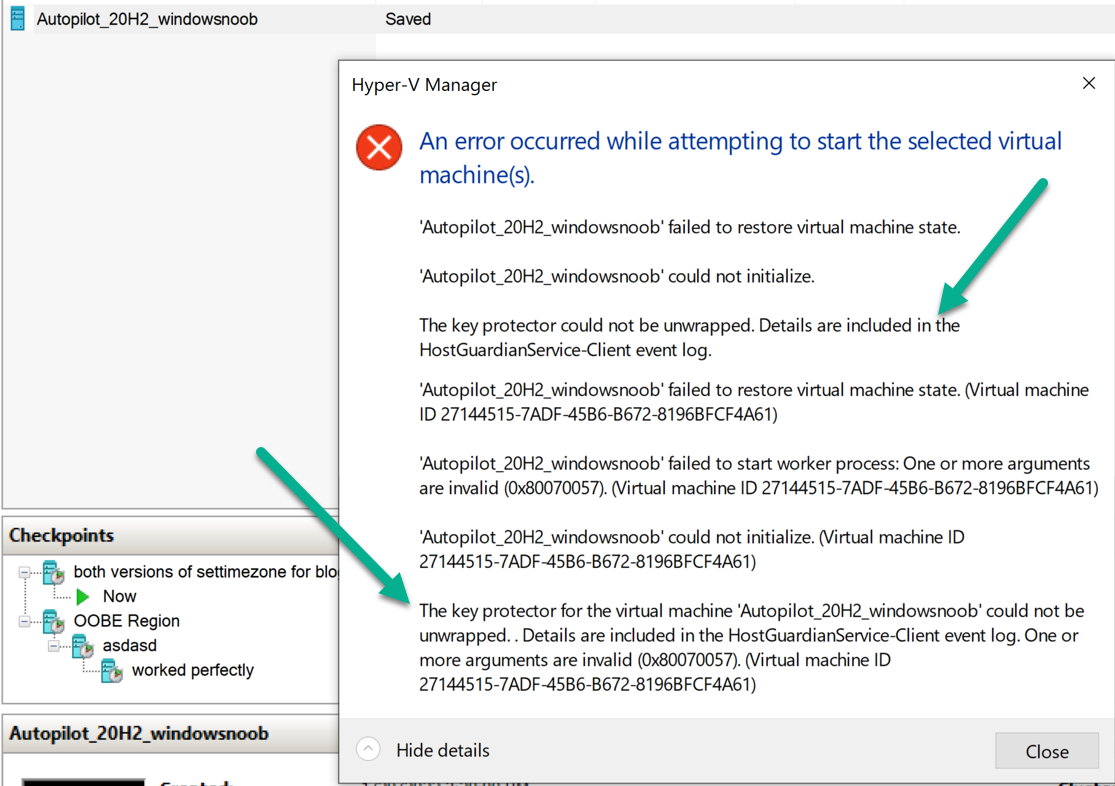 Here’s part of the lengthy error message.
The key protector could not be unwrapped. Details are included in the HostGuardianService-Client event log.
Long story short, as I was using Virtual TPM’s in some of my virtual machines, the needed certificates were missing on the new server, more details are in the event-viewer.

Export the needed certificates from the old lab
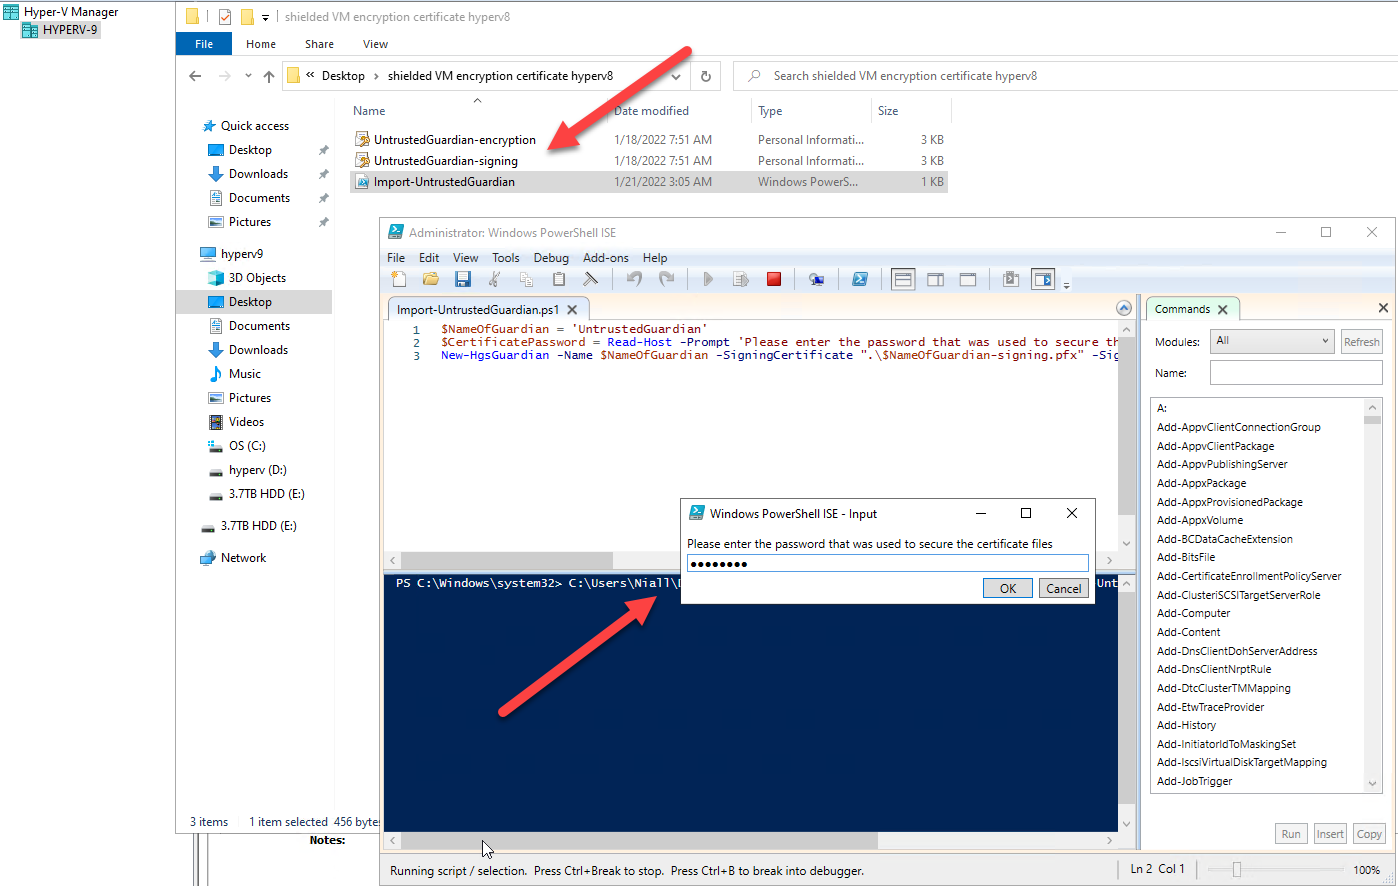
To resolve the problem, you’ll need two scripts originally mentioned in the following blog.
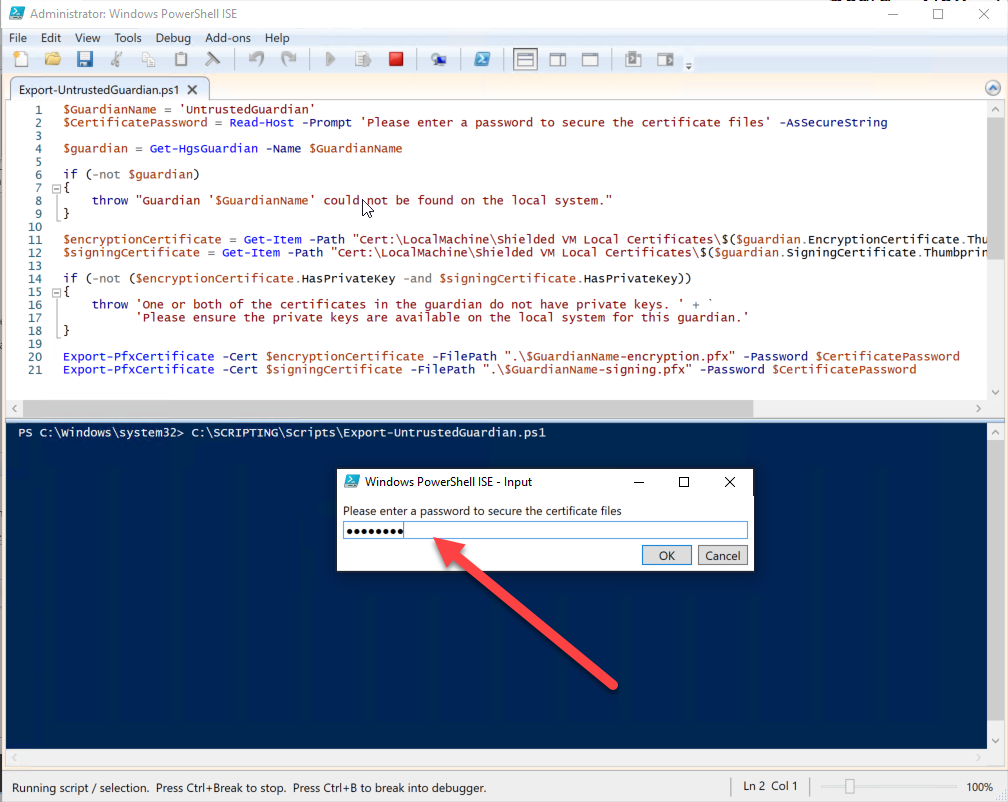
Run the this script with local Administrator permissions on your old lab to export the needed certificates.
$GuardianName = 'UntrustedGuardian'
$CertificatePassword = Read-Host -Prompt 'Please enter a password to secure the certificate files' -AsSecureString

$guardian = Get-HgsGuardian -Name $GuardianName

if (-not $guardian)
{
throw "Guardian '$GuardianName' could not be found on the local system."
}

$encryptionCertificate = Get-Item -Path "Cert:\LocalMachine\Shielded VM Local Certificates\$($guardian.EncryptionCertificate.Thumbprint)"
$signingCertificate = Get-Item -Path "Cert:\LocalMachine\Shielded VM Local Certificates\$($guardian.SigningCertificate.Thumbprint)"

if (-not ($encryptionCertificate.HasPrivateKey -and $signingCertificate.HasPrivateKey))
{
throw 'One or both of the certificates in the guardian do not have private keys. ' + `
'Please ensure the private keys are available on the local system for this guardian.'
}

Export-PfxCertificate -Cert $encryptionCertificate -FilePath ".\$GuardianName-encryption.pfx" -Password $CertificatePassword
Export-PfxCertificate -Cert $signingCertificate -FilePath ".\$GuardianName-signing.pfx" -Password $CertificatePassword
Enter the password when prompted.
 The script writes two PFX files to the directory you ran the script from.
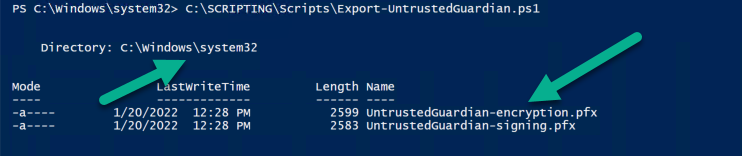 Copy those PFX files.
Import on the new lab
On your new lab computer, run the following script in the same directory as the copied .PFX files as Administrator.
Enter the previously set password when prompted.
and the certificates you just imported can be seen using Certlm.msc, note how they have the old host name (hyperv8).
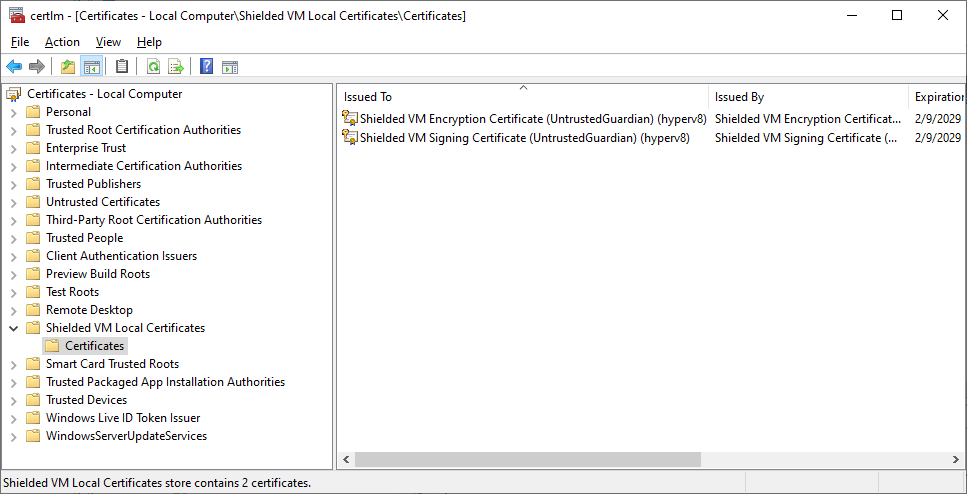
Job done !
