
Introduction
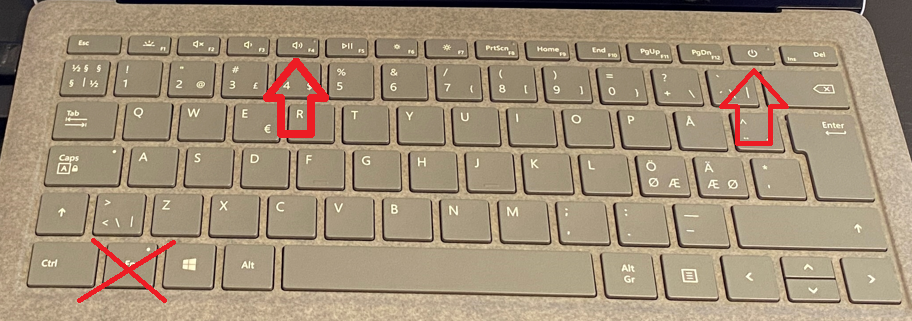
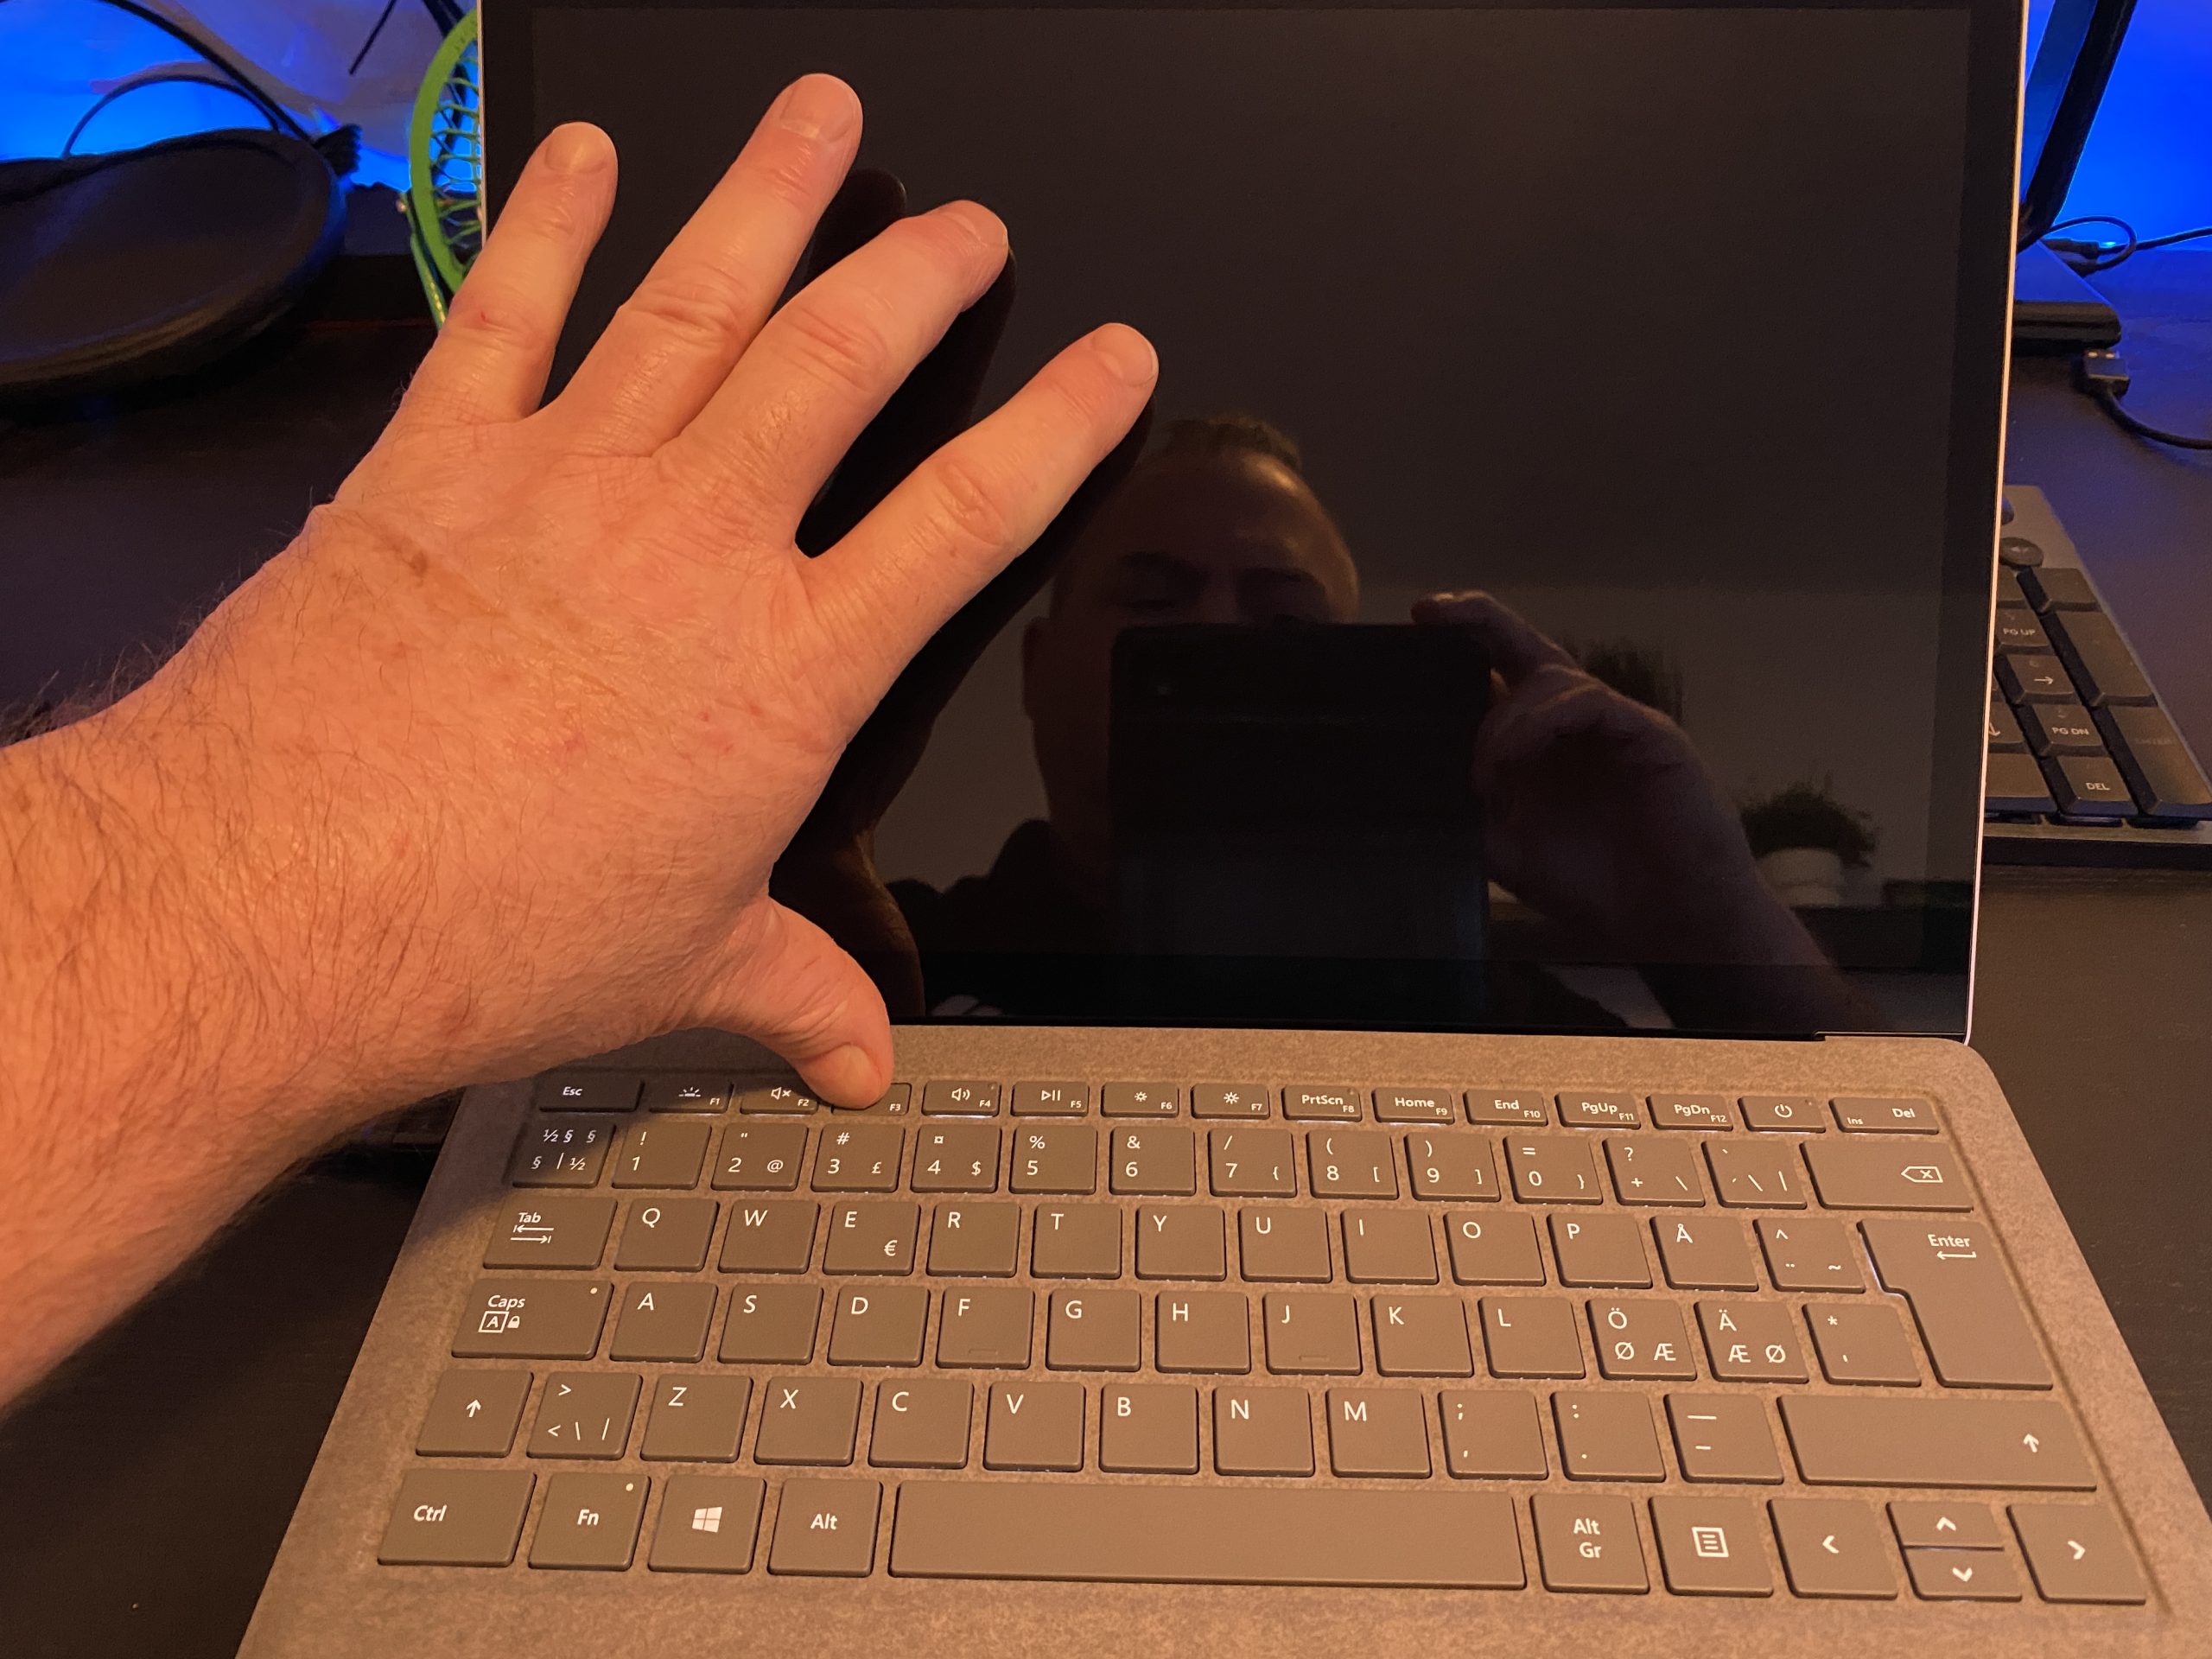
I wanted to capture the (Intel based) factory image from a Microsoft Surface Laptop 4 before testing the equipment, and to do so I had to figure out how to boot from USB. This was a little bit tricky as there are no ‘rocker’ volume buttons on the casing of this laptop as their are on other Surface Models. Instead, the volume controls are actually on the keyboard function keys.
Depending on how you create your USB bootable media, you’ll need to approach it differently. If you created the media using Rufus then you’ll need to disable Secure Boot in the UEFI bios before attempting to USB boot otherwise the Surface Laptop 4 will ignore your attempts to boot from USB.
Step 1. Make sure it’s powered OFF
Before attempting this, keep in mind that the Surface Laptop 4 must be in a shutdown state (fully turned off) when trying to boot from media. In other words it must be cleanly shutdown and not in a standby mode.
Tip: If the Surface Laptop 4 is booting to the first screen of Windows OOBE (Out Of Box Experience) you can press Left shift, and F10 and issue the following command to shut the computer down cleanly.
shutdown /s /t 0
Step 2. Plug in USB media
I connected a bootable USB drive created with Windows media using Rufus into the USB-A port.
Step 3. Optionally disable Secure Boot
Note: This step should only necessary if you are booting from USB media created by utilities such as Rufus.
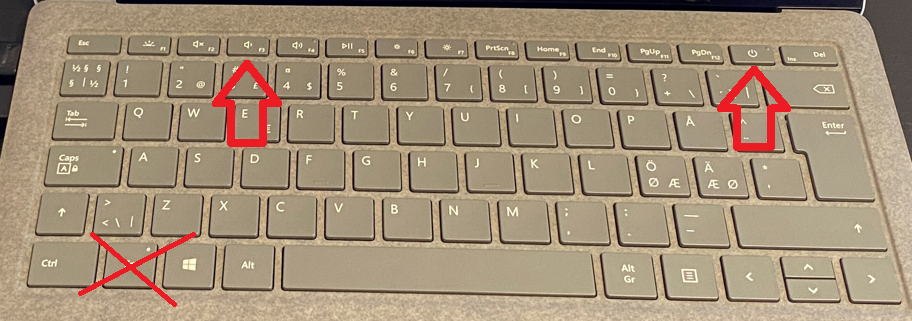
To temporarily disable Secure boot, first ensure that the Surface Laptop 4’s function key (Fn) is not active (no LED showing) and then press and hold the volume up key (F4) before pressing the power on key as shown in the photo below.
This will boot into the Surface UEFI settings screen.
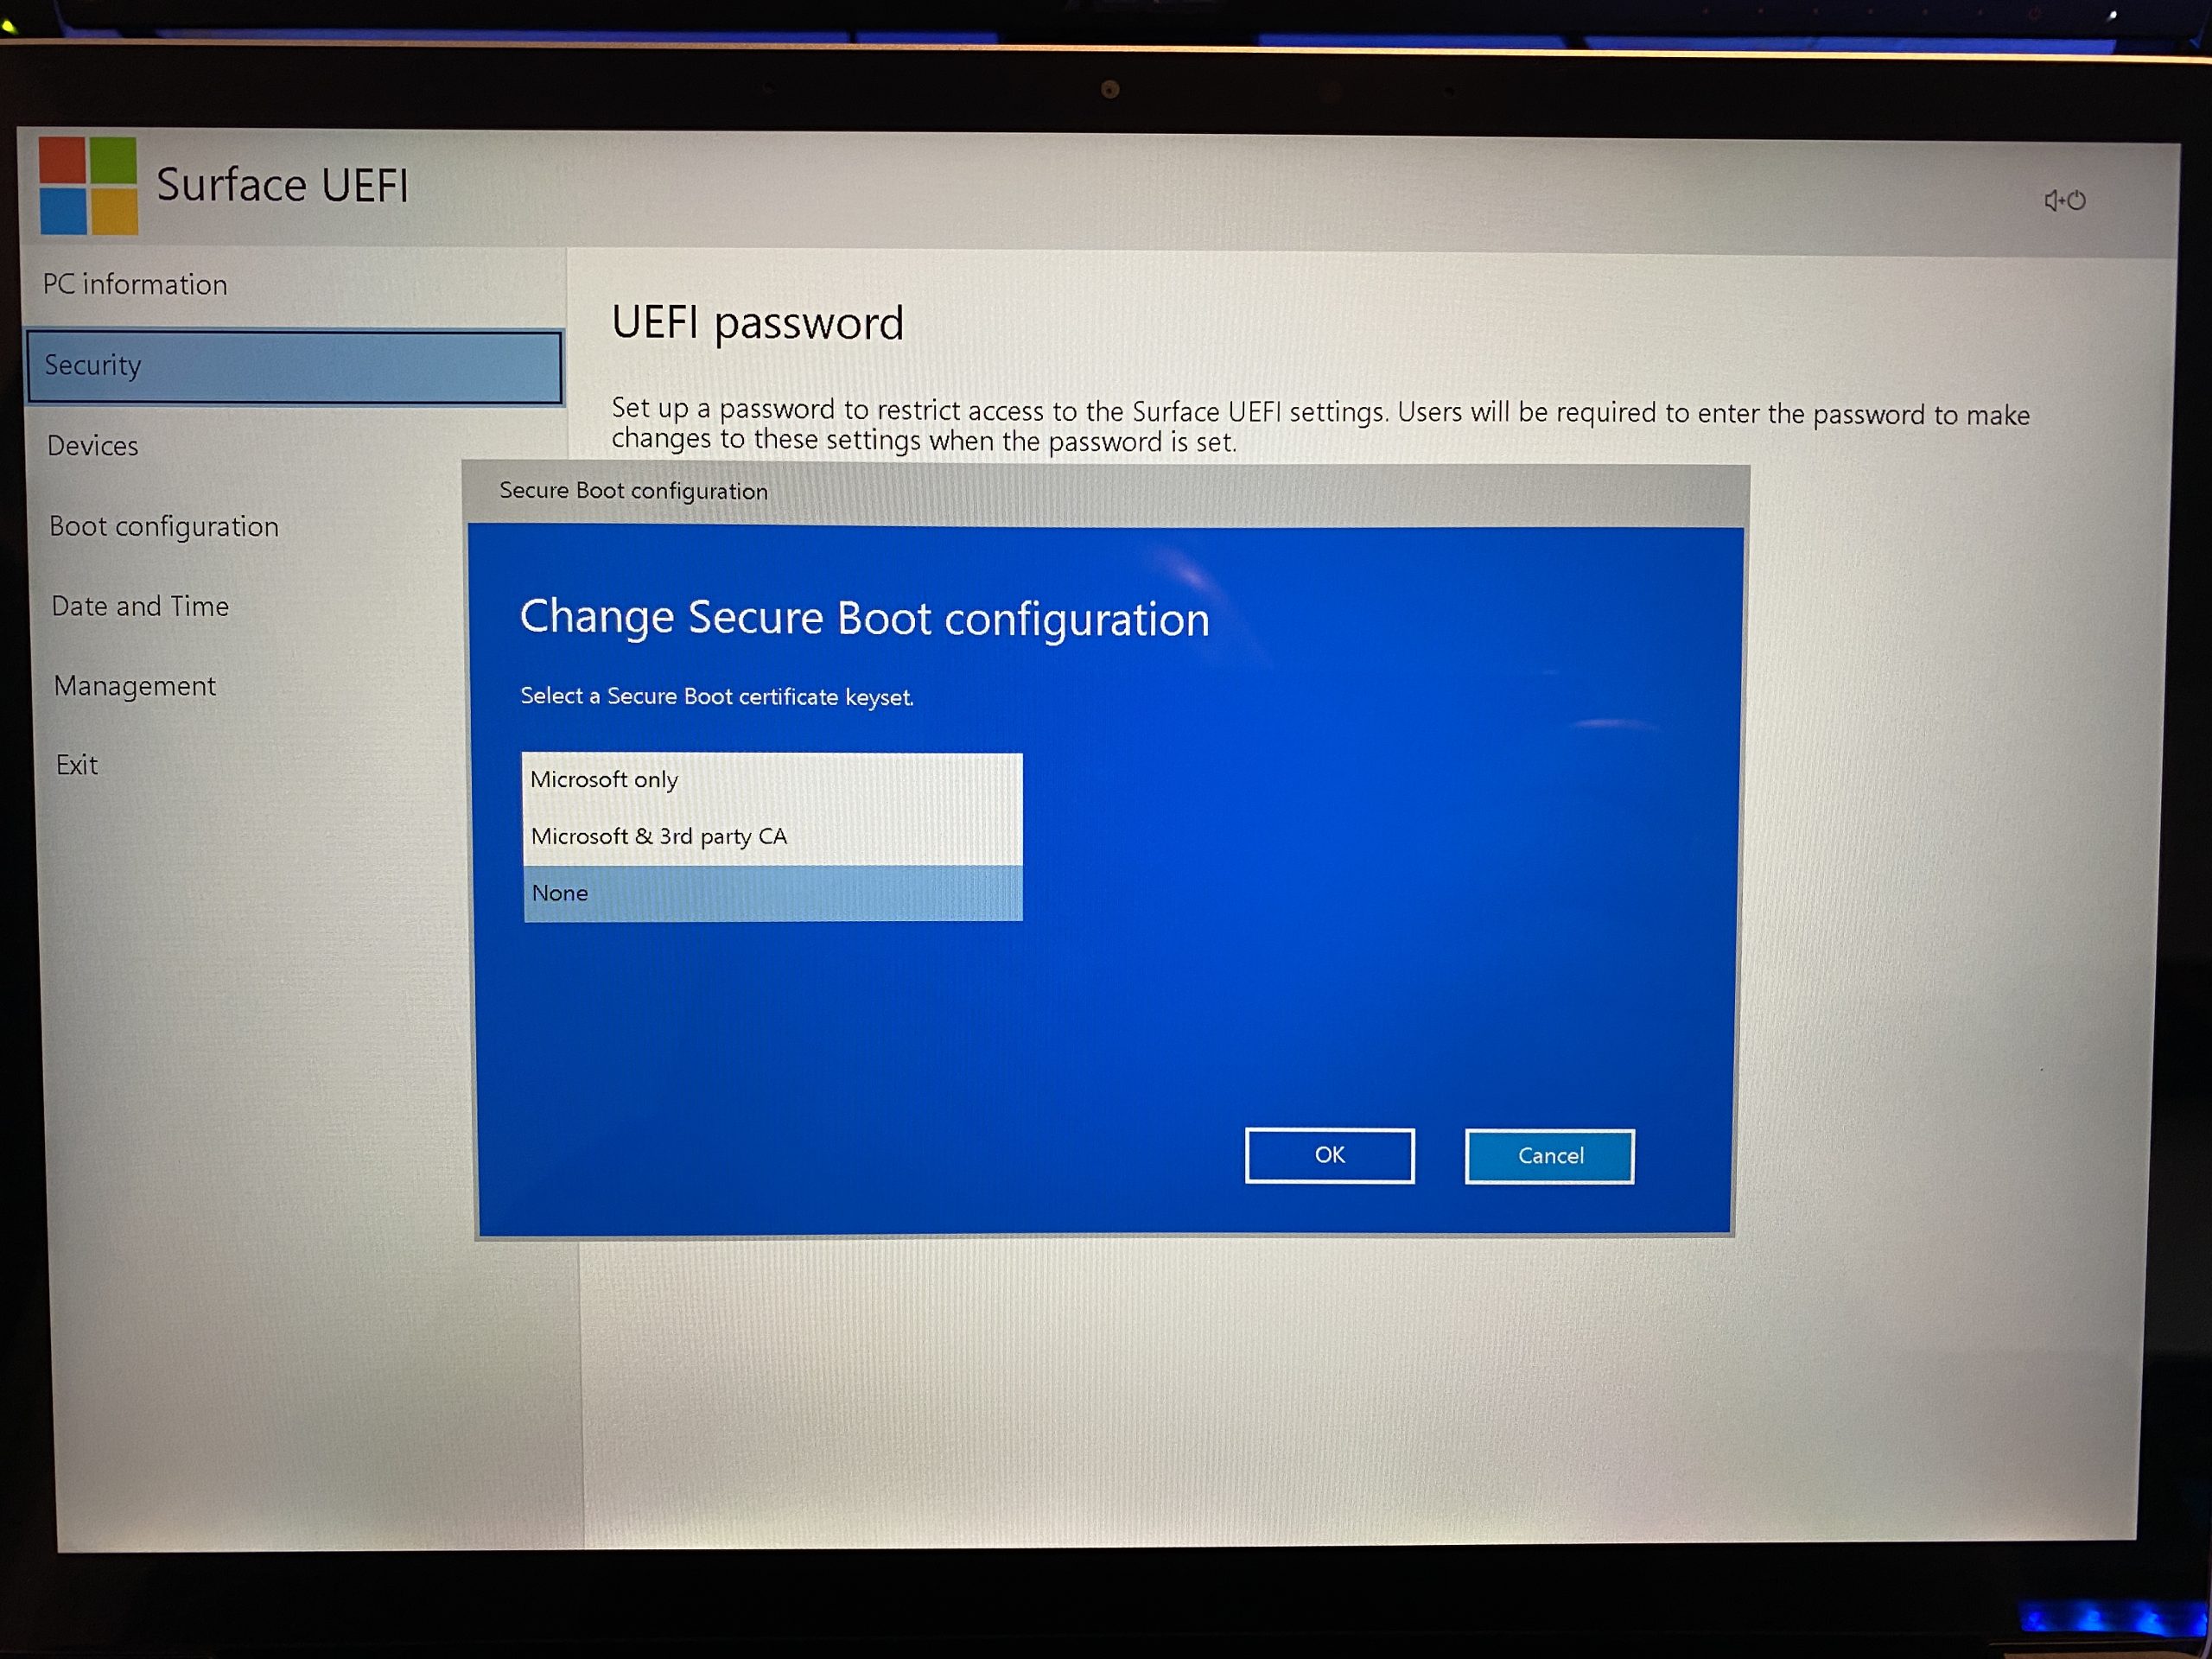
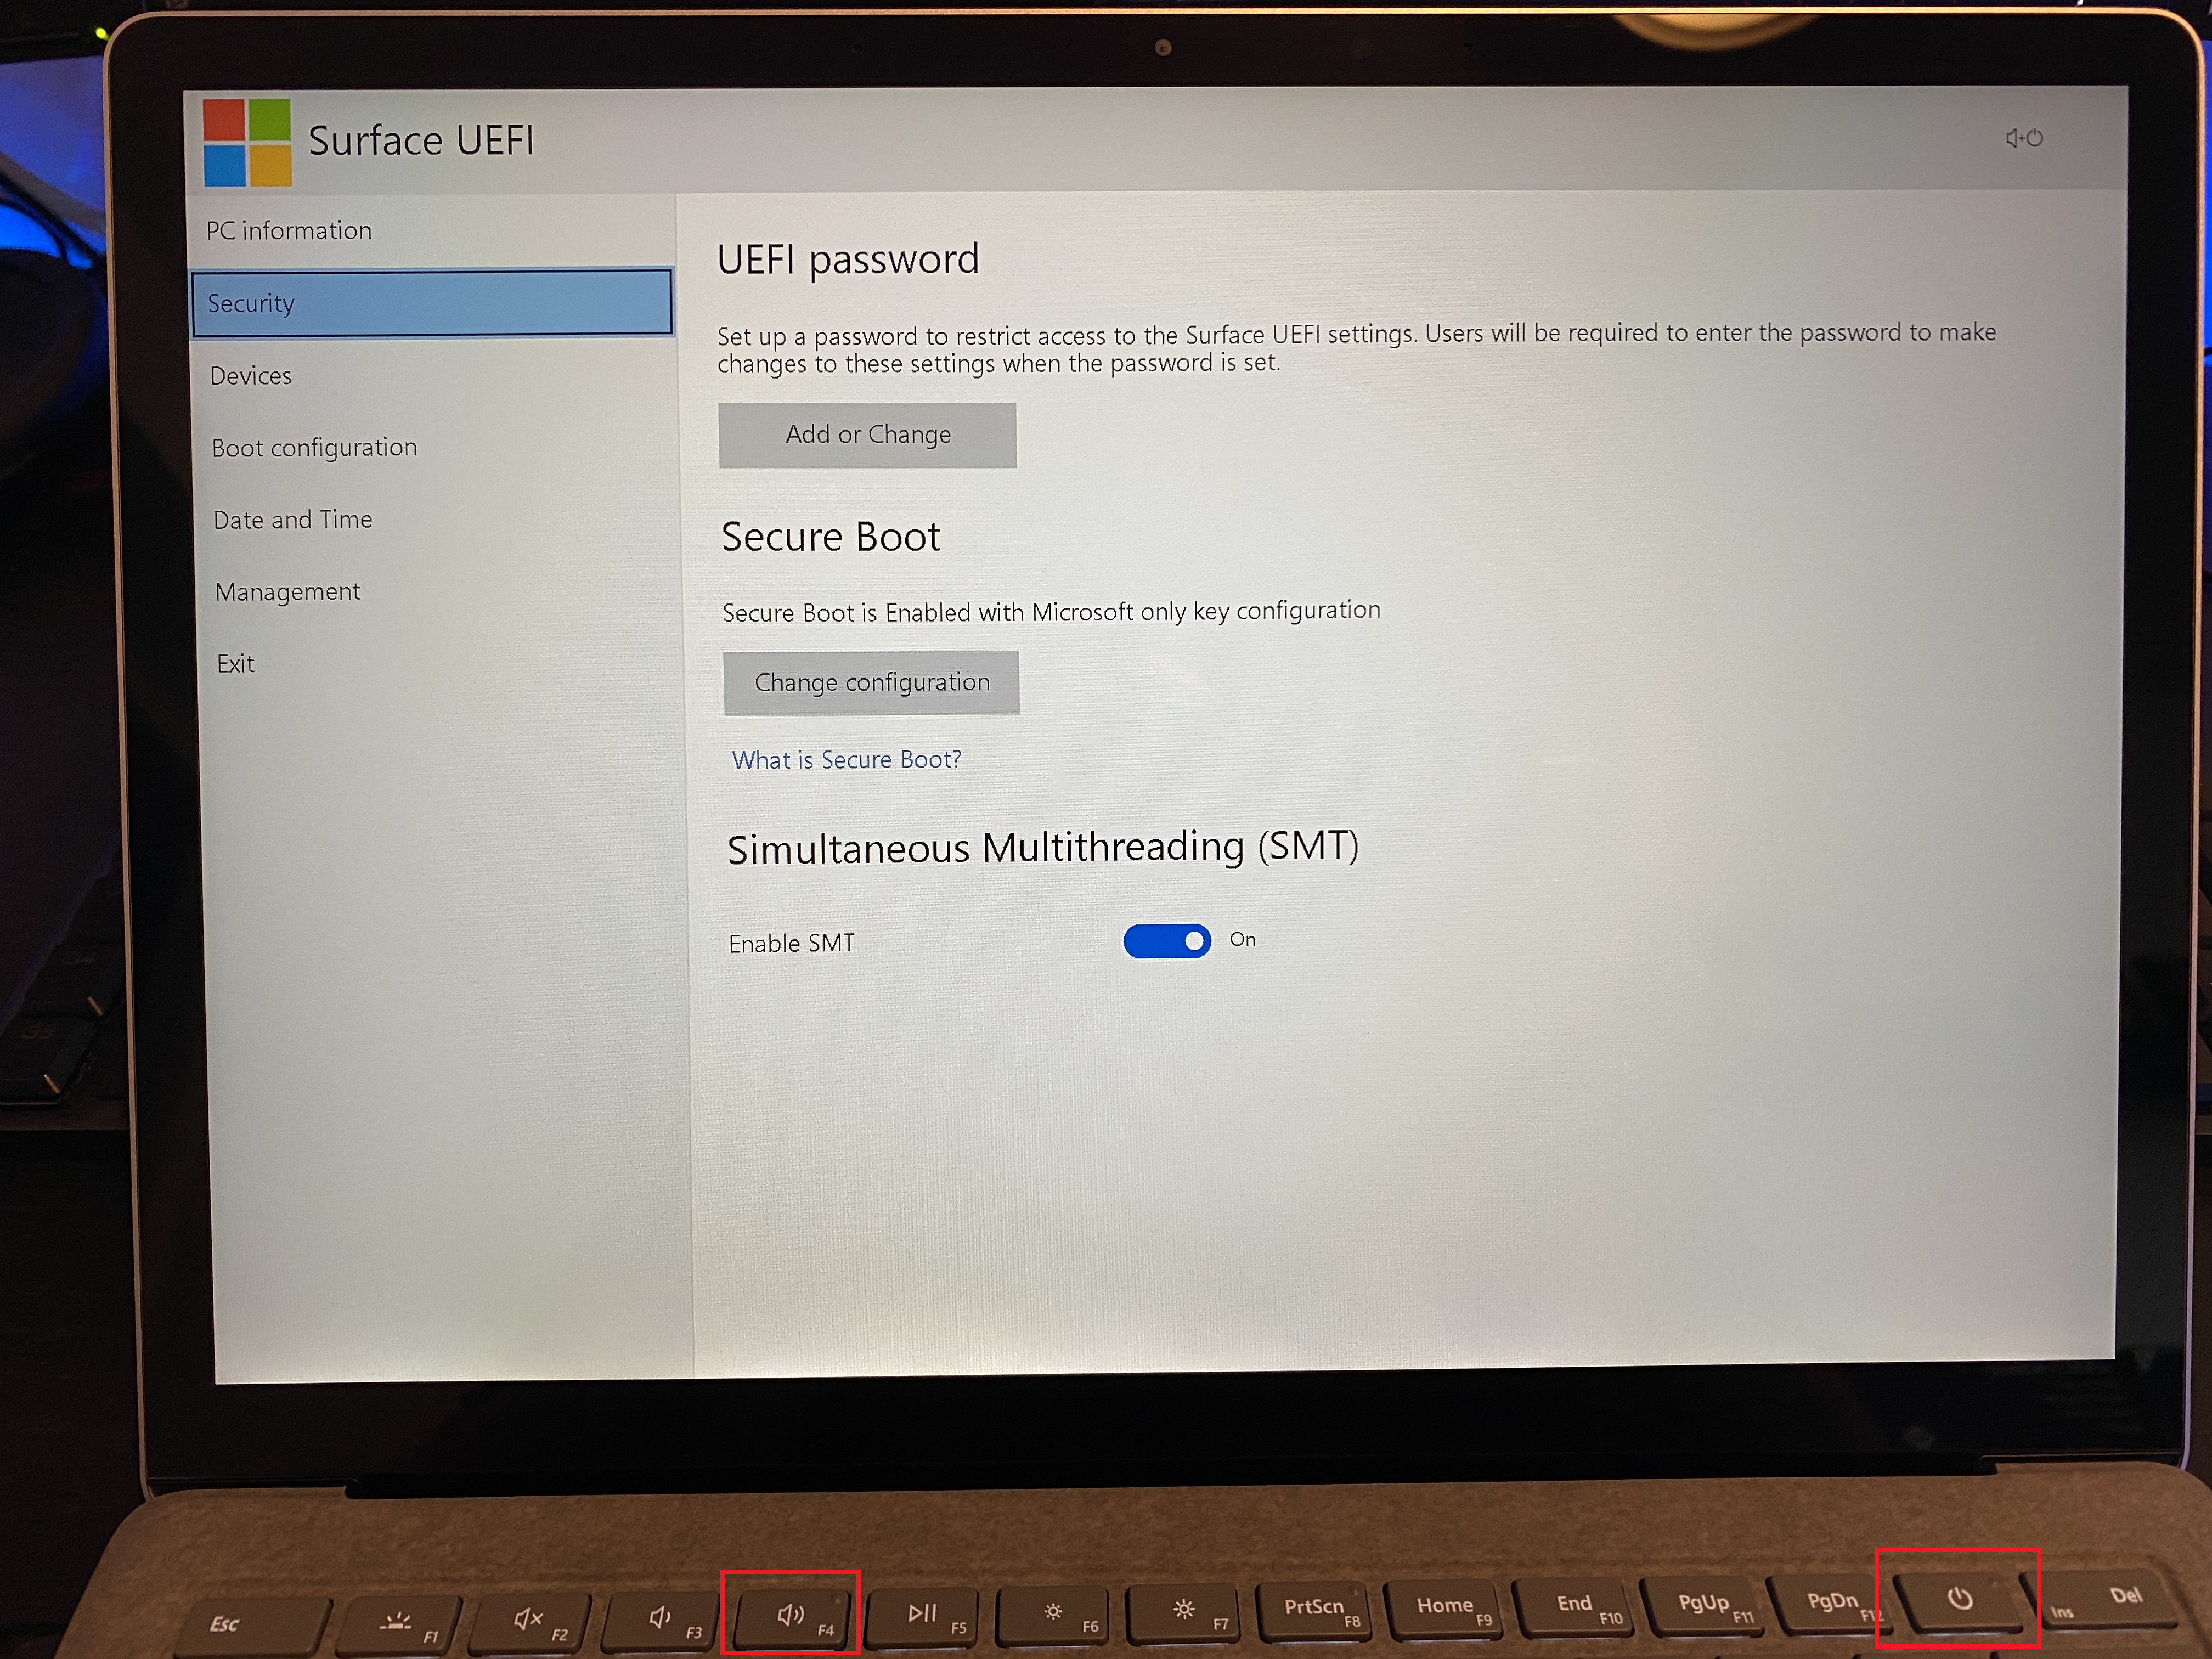 Next, select the Security option, and click on Change Configuration under the Secure Boot heading. Set it to None.
 Next select Exit, notice there is a Restart now. You will need to press this at the same time as pressing down the volume down key.
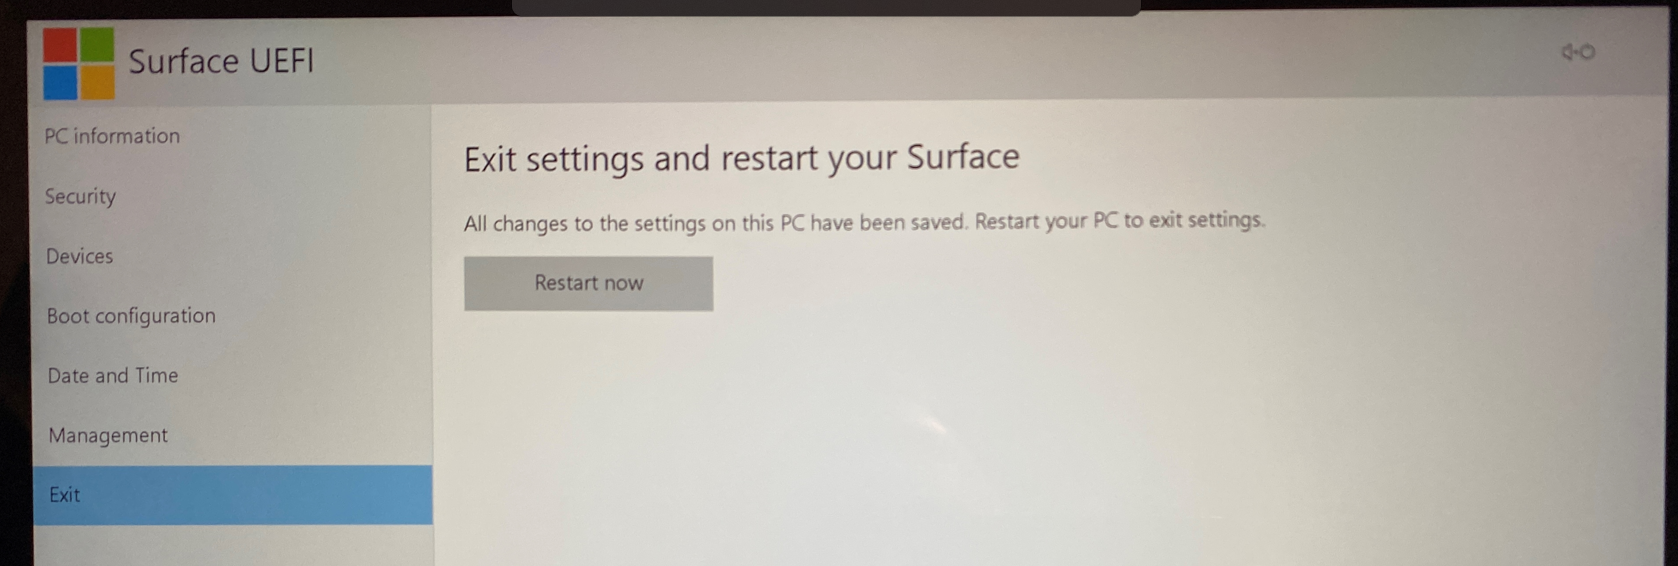
Doing so should boot from any USB bootable media. When I took this screenshot below, I was holding down the F3 key (volume down) and I used my other finger to tap Restart now. Unfortunately I took the photo a little bit too late as it already started to boot from the USB media.
Step 4. Boot while pressing volume down + power button
If the above didn’t work for you, try this way. Make sure the Fn key LED light is OFF. Then, press and hold the volume down key (F3) and then press the power on key.
The computer should now boot from your USB bootable media as shown below.
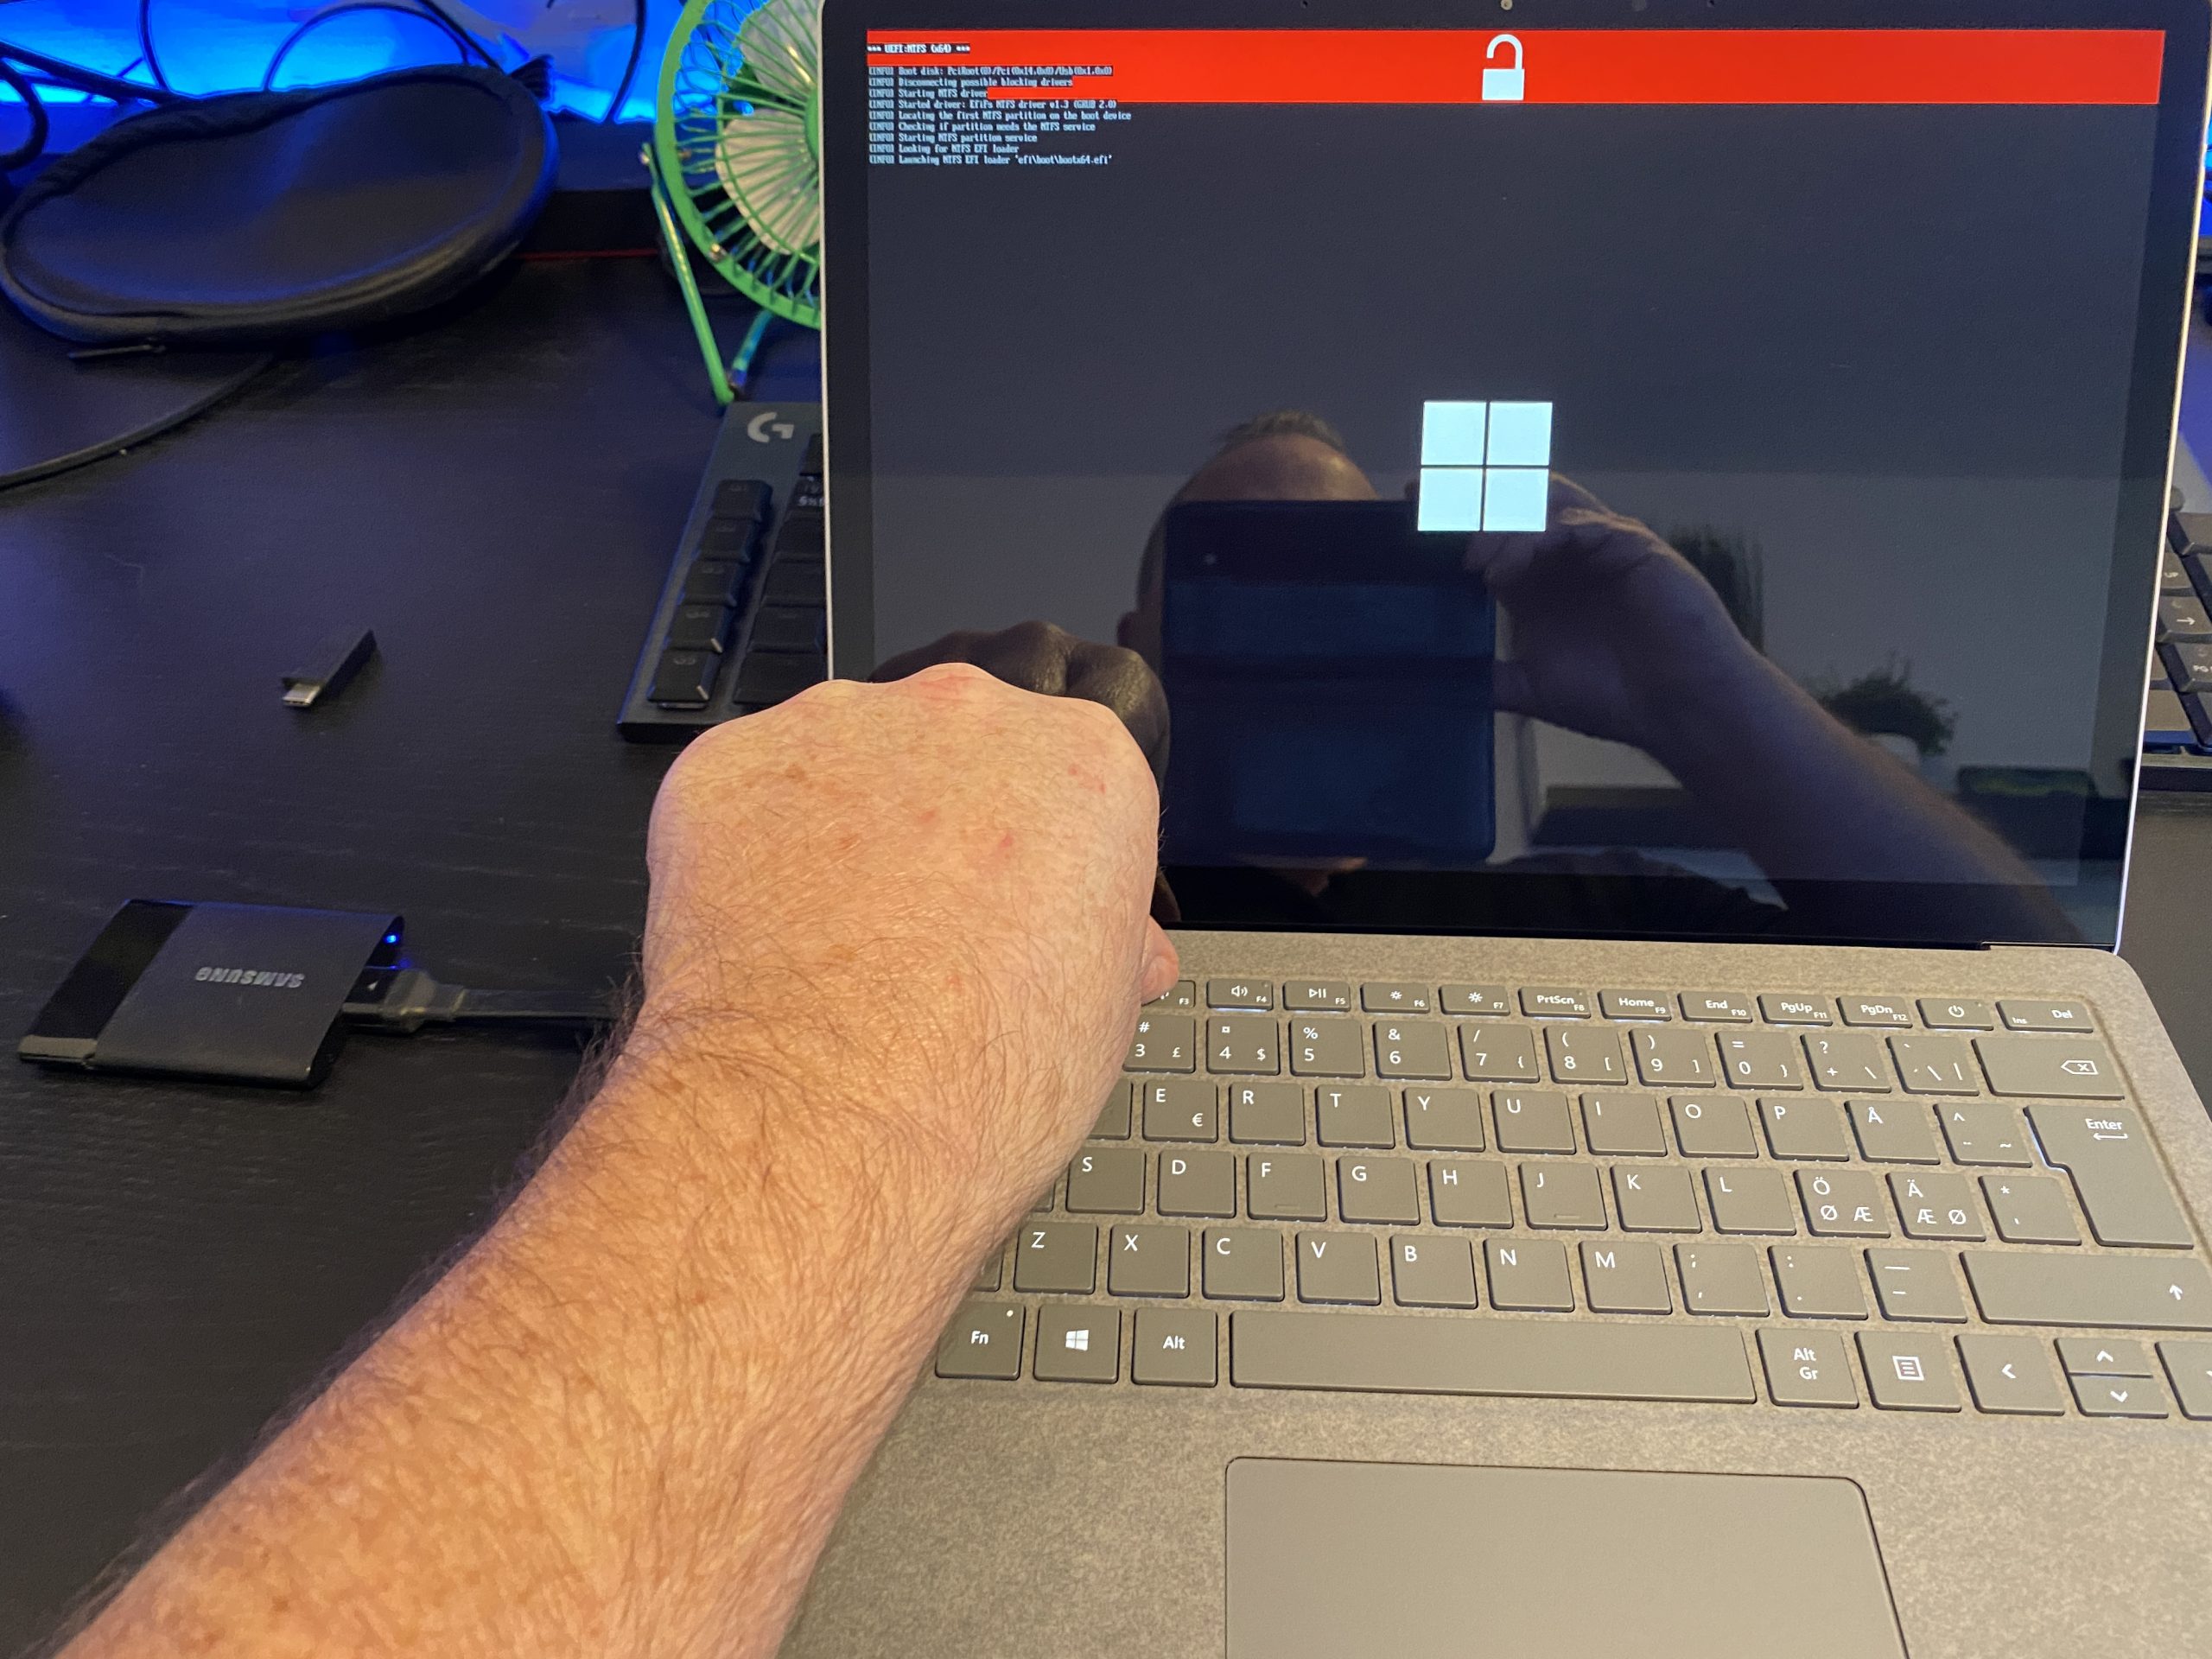 The bootable media in this case is a 500GB ssd connected to the USB-A connector, notice that the Rufus boot loader is showing and that the red line on top of the screen announces that Secure boot is disabled.
At this point your USB bootable media should work as expected, allowing you to install Windows fresh or to capture the image.

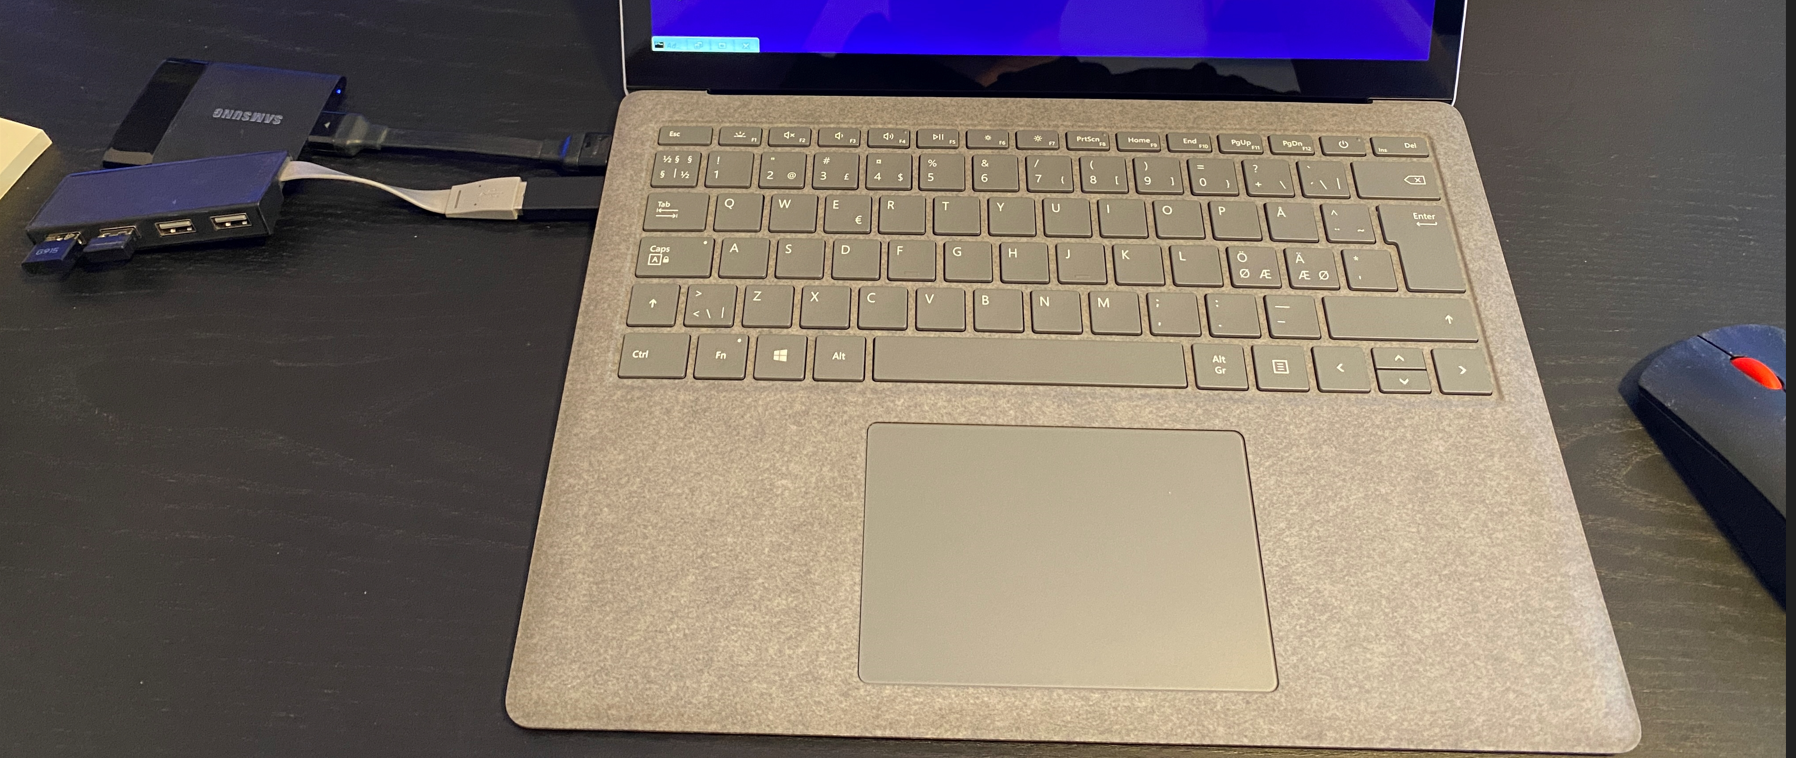
however, you might note that there are no keyboard/mouse drivers built-in to your USB media, if so, connect a USB keyboard/mouse combo via a USB-C dongle + USB adapter as I did here. This allowed me to use external USB based mouse/keyboard.
 If you want to download the drivers for your Surface Laptop 4 then pick one of the 2 links below depending on your hardware.
|
Surface Laptop 4 with Intel Processor |
https://www.microsoft.com/download/details.aspx?id=102924 |
| Surface Laptop 4 with AMD Processor | https://www.microsoft.com/download/details.aspx?id=102923 |
Note: Once you are done with the USB bootable media, don’t forget to re-enable Secure Boot if you disabled it.
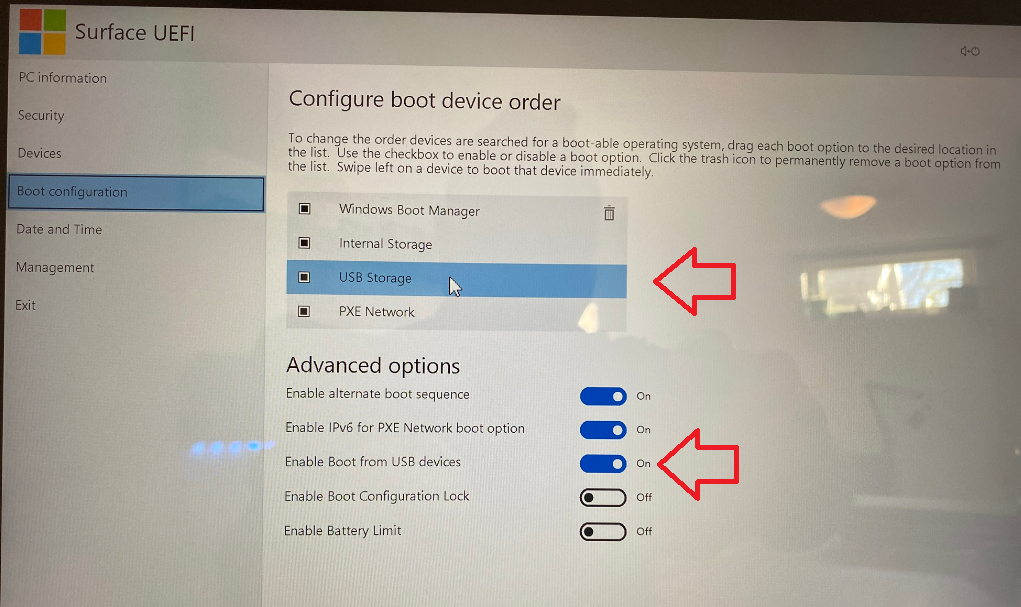
Step 5. Verify boot configuration
If it’s still not booting from your USB media, then verify in the boot configuration that both USB Storage and Enable Boot from USB devices are selected.
That’s it for this blog post,
see you in the next one 🙂
cheers
niall
