Introduction
I’ve had a lot of questions recently about people wanting to use the new BitLocker Management capabilities in Configuration Manager, and to make use of those abilities during OSD (Operating System Deployment). First things we need to keep in mind is that the BitLocker Management capabilities change quite a bit depending on the version of ConfigMgr you are using, the newer version it is, the more feature rich.
IMPORTANT UPDATE July, 2021: PLEASE READ THE FOLLOWING !!!
using BitLocker Management in ConfigMgr and do OSD, read this !
With ConfigMgr 1910, the abilities are minimal and therefore you’ll have to have manual steps to make up for it in the task sequence. A lot has changed since the early release of Bitlocker Management so in this blog post I will assume you are using either CM1910, CM2002 or CM2006.
So what is our overall goal here?
It’s to better understand what the different versions of Configuration Manager (with BitLocker Management enabled and configured as per my previous guides) and to be able deploy an operating system (Windows 10 version 1909 or later) to a computer and have it secured from the outset with BitLocker, and to have BitLocker configured with the same encryption algorithm we defined in our BitLocker Management policy and for the recovery key information to be stored in ConfigMgr’s database.
Note: As the ConfigMgr agent is in provisioning mode during Operating System Deployment (OSD), it cannot process policy, therefore even if you add the computer to a collection targeted with BitLocker Management policy during OSD, it will not apply that policy until after the task sequence has successfully completed operations.
Deploying a computer with default BitLocker steps using CM1910 or CM2002
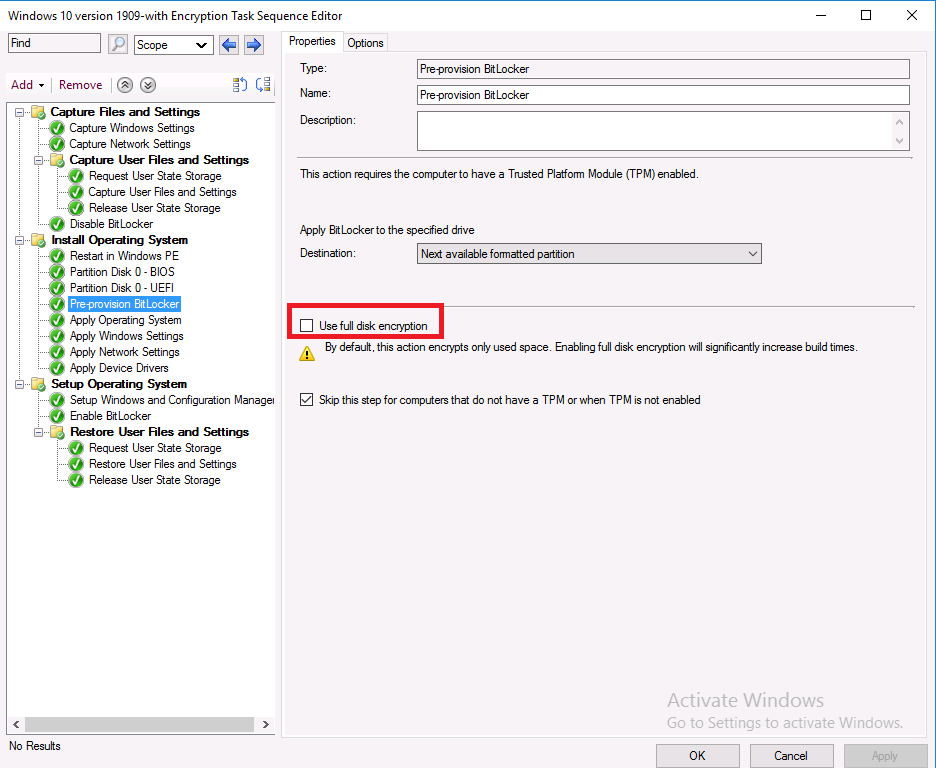
In ConfigMgr if you create a standard Install operating system task sequence with BitLocker included, even with BitLocker Management enabled, it will add a few BitLocker Specific steps namely
- Disable BitLocker (Capture USMT state phase)
- PreProvision BitLocker
- Enable BitLocker
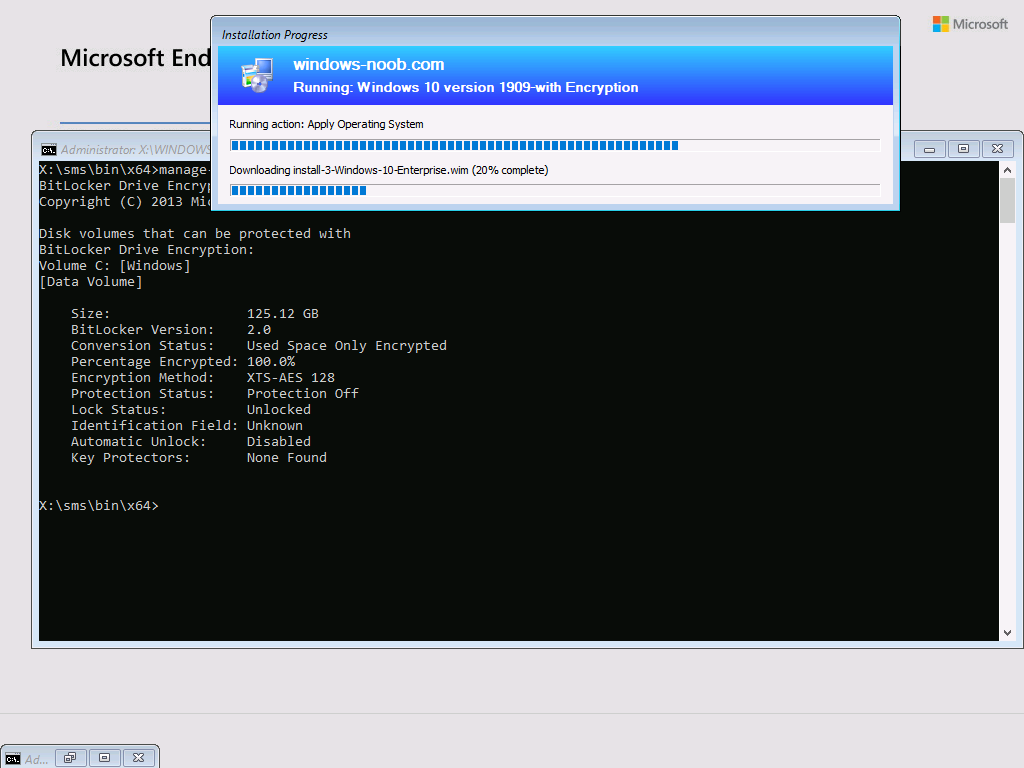
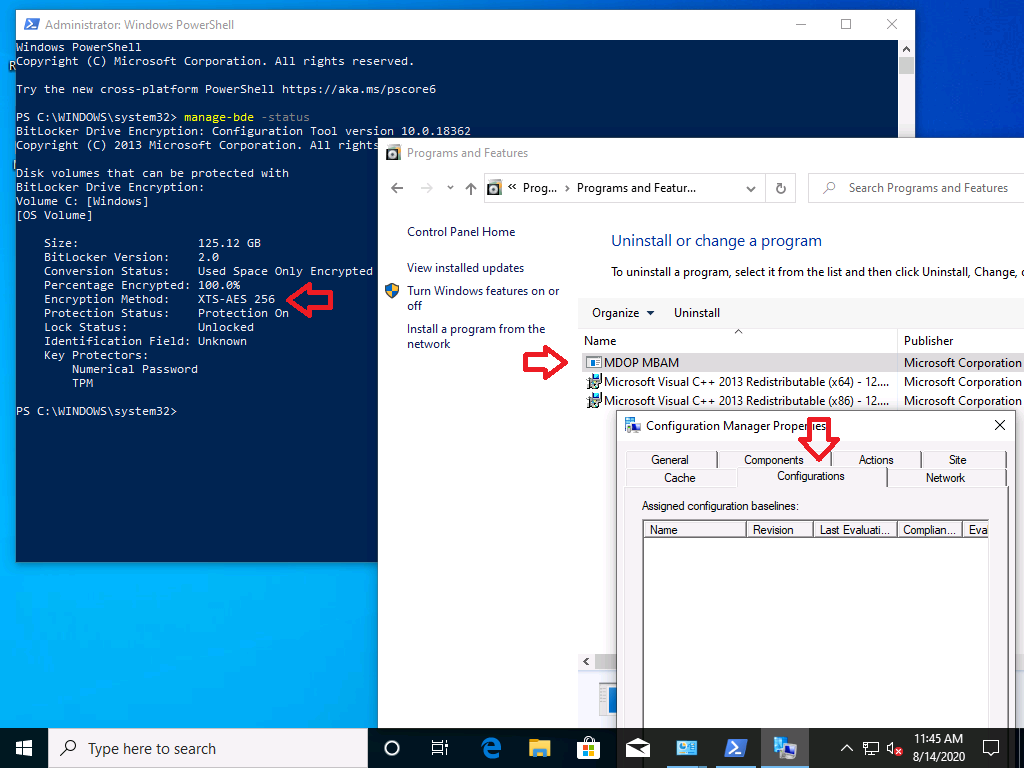
These steps alone can enable a default configuration of Bitlocker but it may not be what you want, for example, the encryption algorithm will most likely not match your policy setting and will instead use the default value of XTS-AES 128 shown below.
In addition, the conversion listed above is Used Space Only Encrypted, you can change that to Full Disk Encryption if that’s what you prefer
For more info on using the FDE options in the steps see the following blog post. https://www.niallbrady.com/2020/02/25/full-disk-encryption-a-closer-look-on-real-hardware/
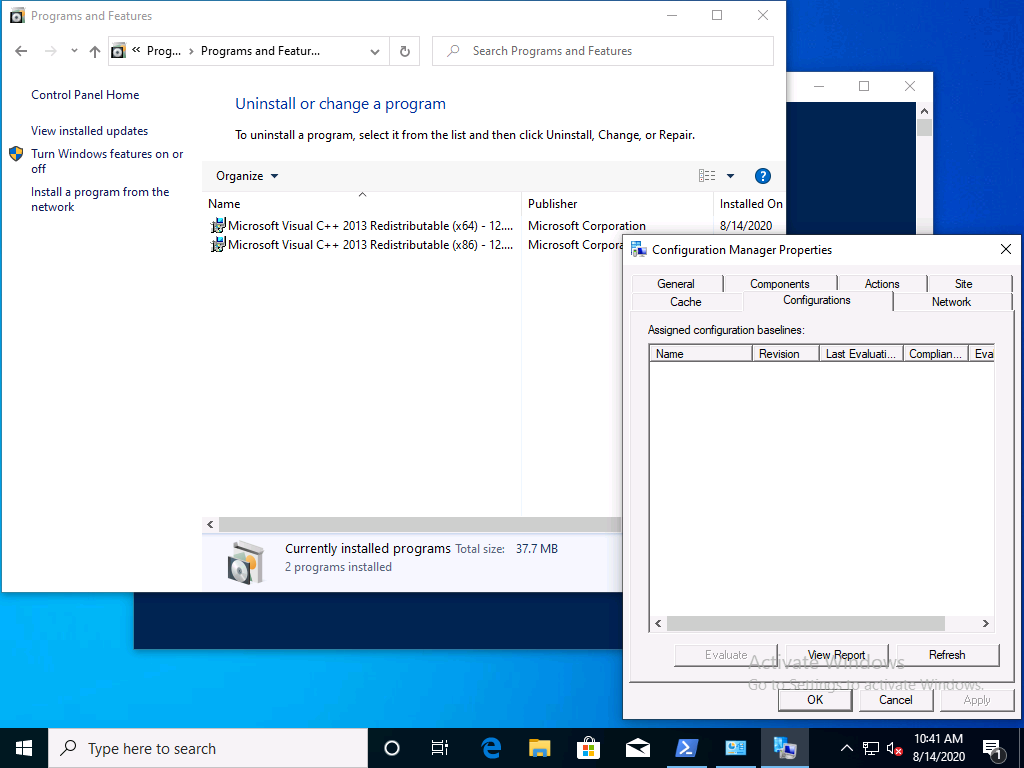
If you leave everything in the default task sequence as default the end result will be a Bitlocker encrypted OS volume with XTS-AES128 using Used Space Only as shown here.
The computer will not have any MDOP agent installed (unless you target it somehow) and will not have any BitLocker Management policy deployed (unless again, you somehow target it with that policy.
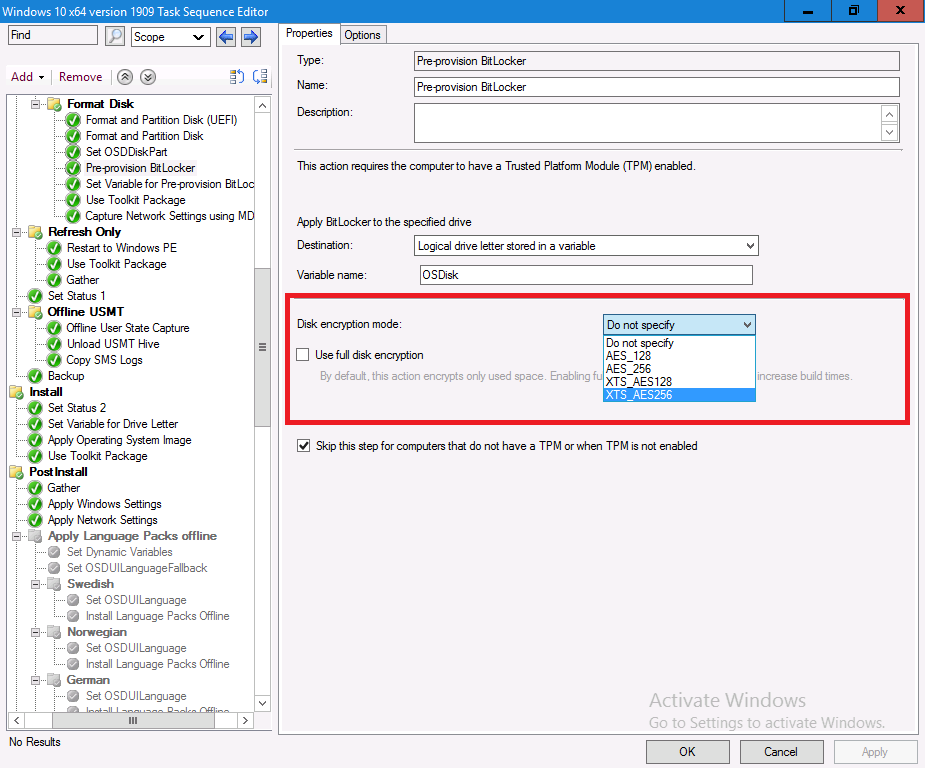
Changing the default Encryption Algorithm
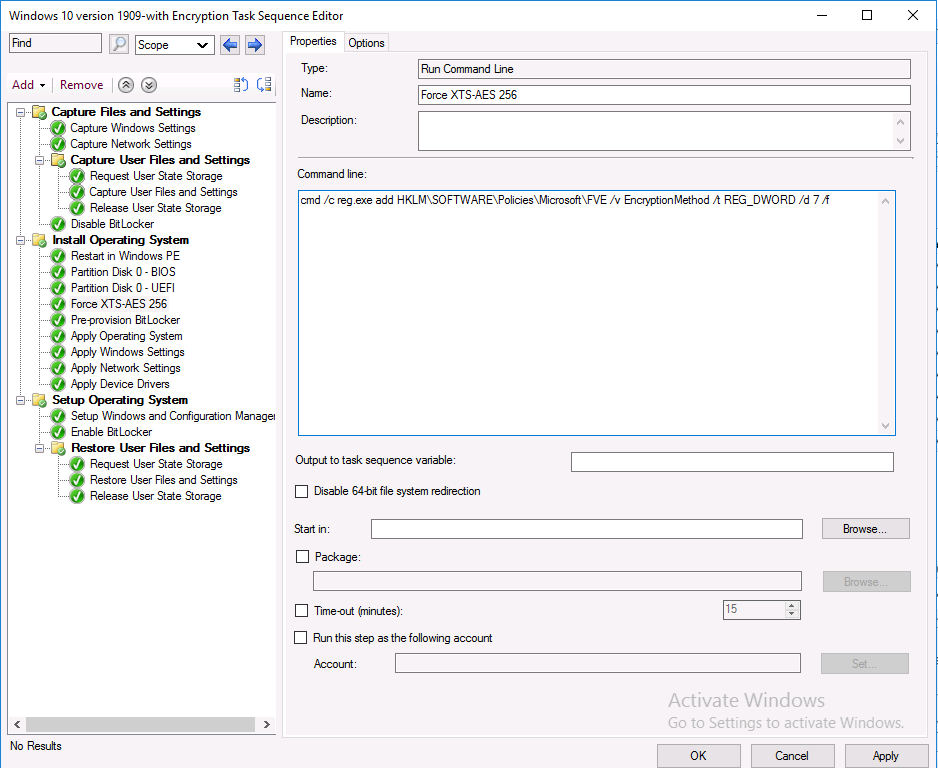
To change the encryption algorithm in an OSD task sequence in Configuration Manager 1910 or 2002 you’ll need to add steps (before the Pre Provision BitLocker step) to the task sequence to force that encryption algorithm. The possible settings are listed below as registry keys, the REG_DWORD value 7 below will force it to use XTS-256 AES which is recommended.
cmd /c reg.exe add HKLM\SOFTWARE\Policies\Microsoft\FVE /v EncryptionMethod /t REG_DWORD /d 7 /f
as shown here.
The values you can use are listed below:
Value 3, AES_128: The volume has been fully or partially encrypted with the Advanced Encryption Standard (AES) algorithm, using an AES key size of 128 bits.
Value 4, AES_256: The volume has been fully or partially encrypted with the Advanced Encryption Standard (AES) algorithm, using an AES key size of 256 bits.
Value 6, XTS_AES128: The volume has been fully or partially encrypted with the Advanced Encryption Standard (AES) algorithm, using an XTS-AES key size of 128 bits. – This is the default of Windows PE 10.0.586.0 (1511 Release)
Value 7, XTS_AES256: The volume has been fully or partially encrypted with the Advanced Encryption Standard (AES) algorithm, using an XTS-AES key size of 256 bits.
Ok now that we know how to force the algorithm, let’s redeploy the computer to see the result.
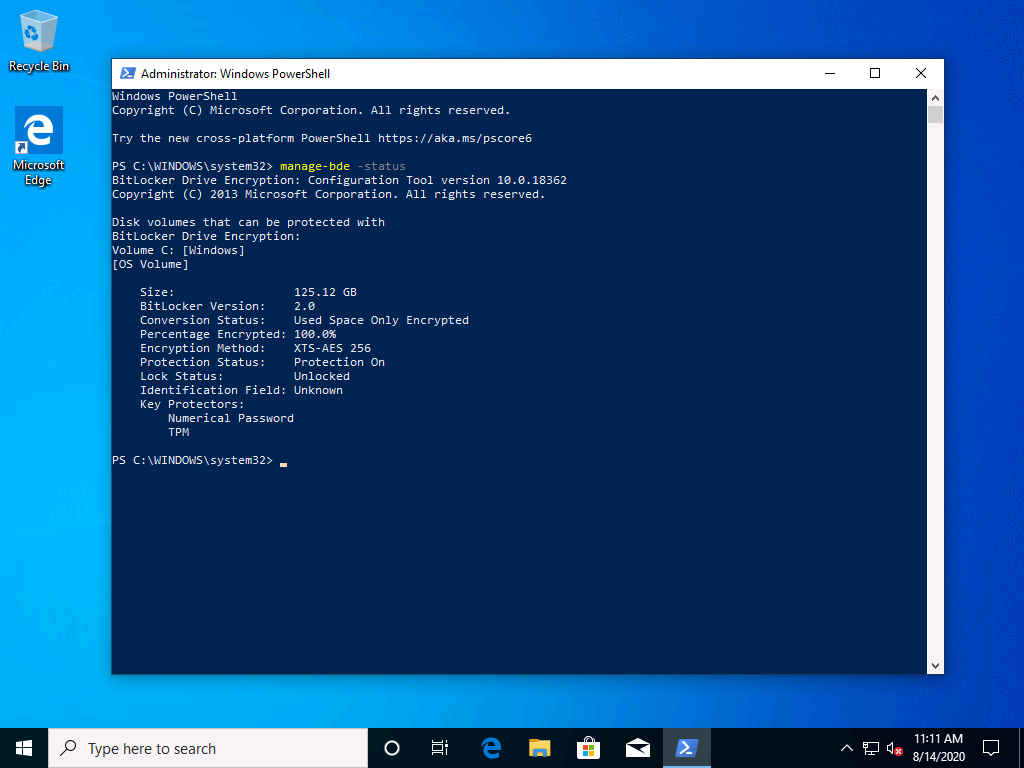
So that was successful, but still there is no MDOP client agent and no BitLocker Management policy.
Adding the MDOP agent
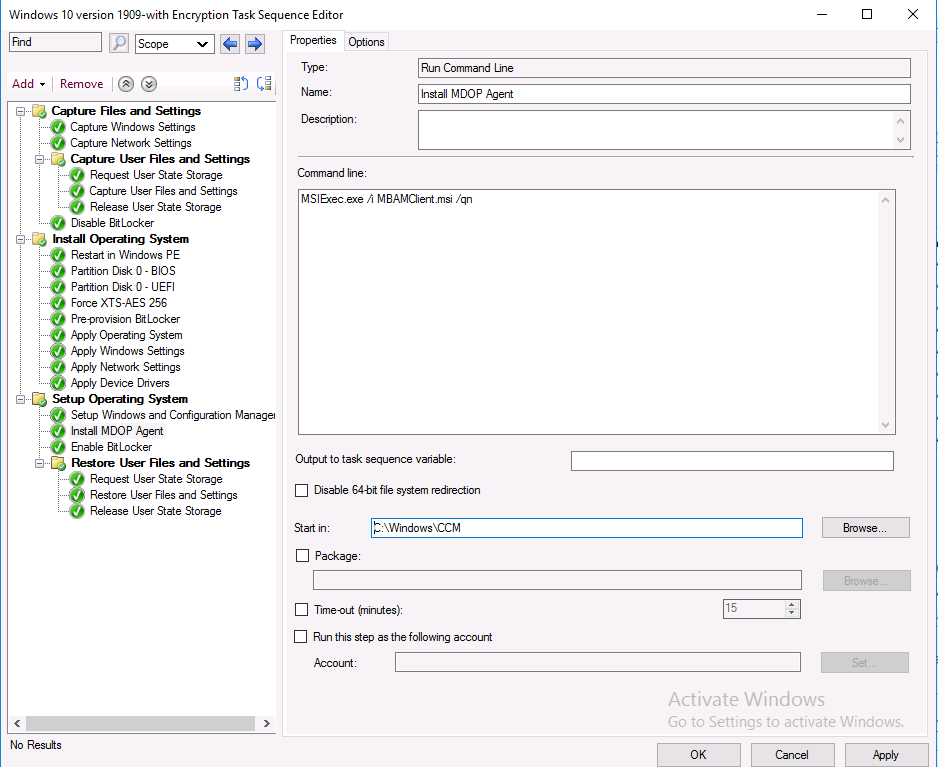
To add the MDOP agent is simple enough as the MSI file we need is included with the files installed when you install the Configuration Manager client agent, and located in C:\Windows\CCM.
To install it during a task sequence, simply create a Run Command Line step after the Setup Windows and ConfigMgr step but before the Enable BitLocker step as shown below.
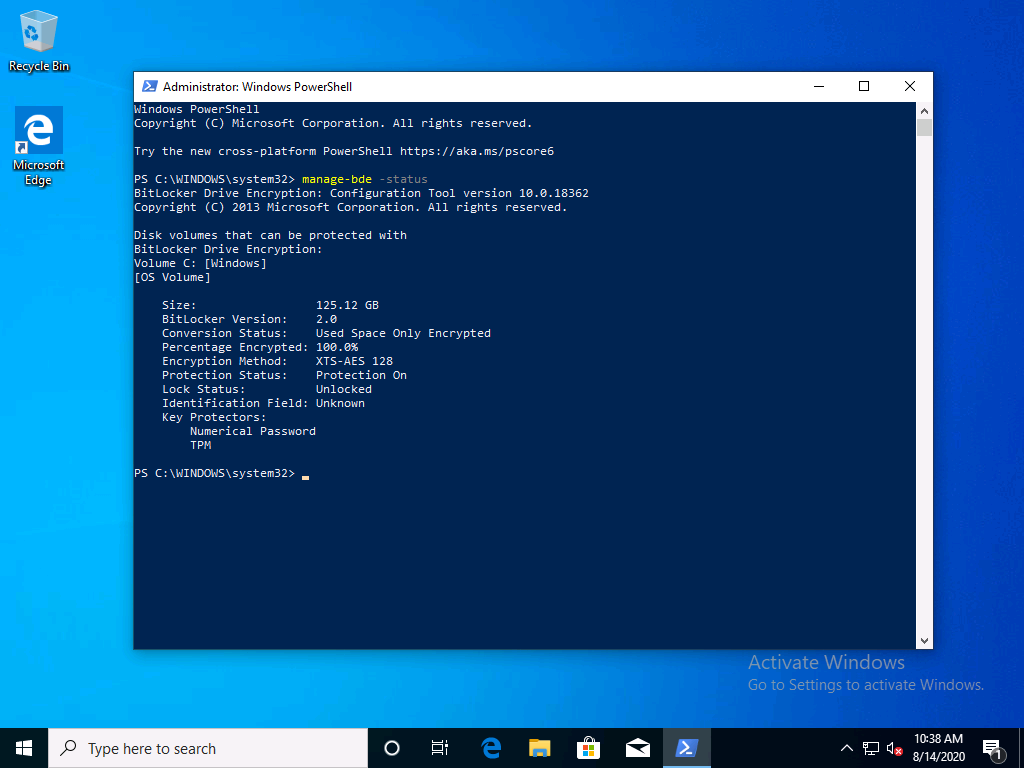
So, now that we’ve configured the Encryption Algorithm and have added the MDOP Agent, let’s redeploy our computer to see what happens.
The end result, we have the right encryption algorithm settings, and the MDOP agent is installed, but there is still no BitLocker Management policy applied.
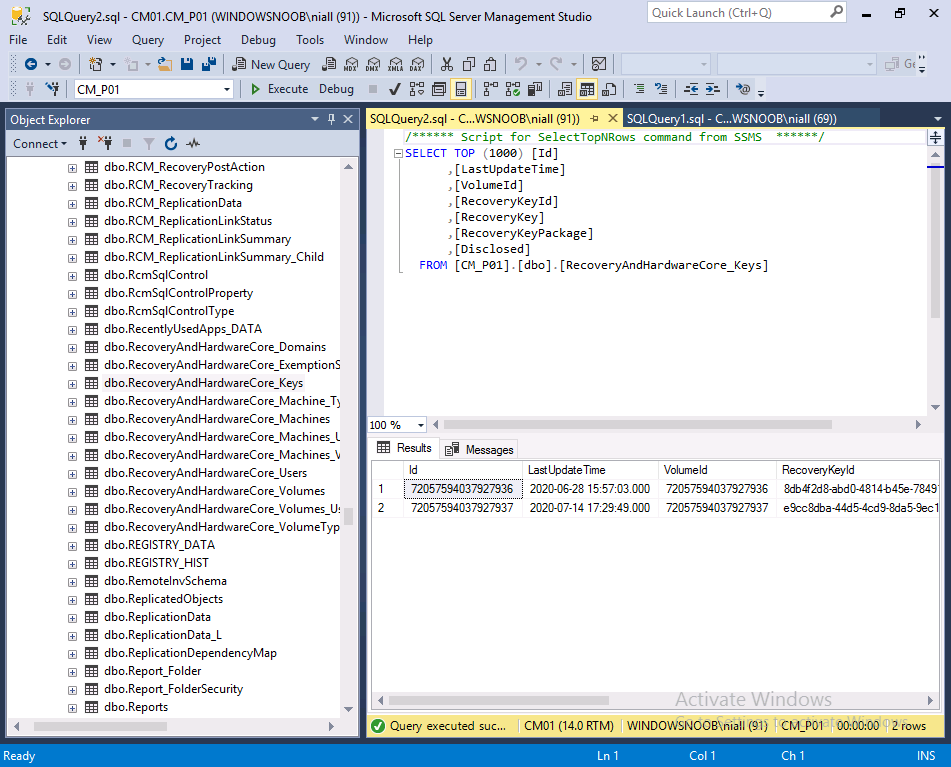
Meaning that the MDOP agent won’t know what to do with itself and therefore no new keys will be stored in ConfigMgr’s database from this computer (until it get’s BitLocker Management policy) as you can see below, note today is 2020/8/14 and the last key added in this lab was a month ago exactly.
So what is our next option ?
READ THIS PLEASE
Summary
To summarize, you’ve created manual steps in the task sequence to set the desired encryption algorithm settings, you’ve created a package and installed the MDOP agent and used a PowerShell script to store the recovery key information in ConfigMgr’s database.
You would however still need to add the deployed computer to a collection where BitLocker Management policy is deployed if you want to report on the compliance of your deployed computers. In other words, there is no real native support for BitLocker Management configured policy within an OSD task sequence currently, instead, you must manually specify those configured settings within your task sequence if you want your devices encrypted with the same settings as your configured policy.
Lastly, if you are using CM2006 or later, things are a little bit easier and you no longer have to manually set the registry keys for encryption algorithim, instead in both the PreProvision BitLocker step and Enable BitLocker step you have a new drop down which you can use to set those values.