
Introduction
This multi-part guide will show you how to install the latest baseline version of Configuration Manager from Microsoft. The latest available baseline version is System Center Configuration Manager (Current Branch) version 1902 as of April the 10th 2019. I blogged how to upgrade to 1902 here. This guide is aimed a new installations of SCCM. Baseline media is used to install new ConfigMgr sites or to upgrade from supported versions, for more information about baseline media please see my blog post here.
This series is broken down into the following parts:-
- Part 1 – Get the lab ready, configure ADDS
- Part 2 – Join CM01 to Domain, add users, create the Systems Management container, delegate permission
- Part 3 – Role and Feature installation, installation of WDS and ADK
- Part 4 – Configure and install SQL Server 2017
- Part 5 – Configure and install SCCM 1902 Current Branch (This part)
- Part 6 – Post configuration
You can use this multi-part guide to get a hierarchy up and running on Windows Server 2019 using SQL Server 2017. The concept behind this is to guide you through all the steps necessary to get a working Configuration Manager Primary site installed (for lab use) using manual methods or automated using PowerShell. This gives you the power to automate the bits that you want to automate, while allowing you to manually do other tasks when needed. You decide which path to take. PowerShell knowledge is desired and dare I say required if you are in any way serious about Configuration Manager.
I will show you how to do most steps via two methods shown below, it’s up to you to choose which method suits you best but I highly recommend automating everything that you can, using PowerShell.
- Method #1 – Do it manually
- Method #2 – Automate it with PowerShell
Downloads
The scripts used in this part of the guide are available for download here. Unzip to C:\Scripts. The scripts are placed in the corresponding folder (Part 1, Part 2 etc) and sorted into which server you should run the script on (DC01 or CM01).
Step 1. Restart the Configuration Manager Primary Server
Note: Perform the following on the Configuration Manager server (CM01) as a Local Administrator
Open an administrative command prompt and issue the following command:
shutdown /r
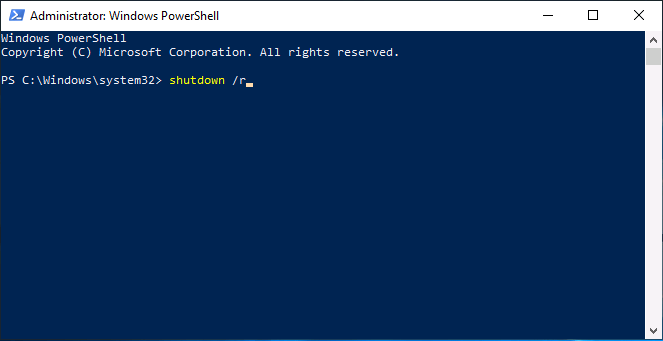
This will restart the server, which is a good idea after having just installed SQL Server 2017.

Step 2. Install the WSUS role
Note: Perform the following on the Configuration Manager server (CM01) as a Local Administrator
Now that SQL server is installed (and the server is rebooted, you did reboot it didn’t you ?), you can utilize that SQL Server installation for the Windows Server Update Services (WSUS) database instead of the default WID (Windows Internal Database). To install WSUS and configure it to use the SQL server database instead of the Windows Internal Database, do as follows:
Method #1 – Do it manually
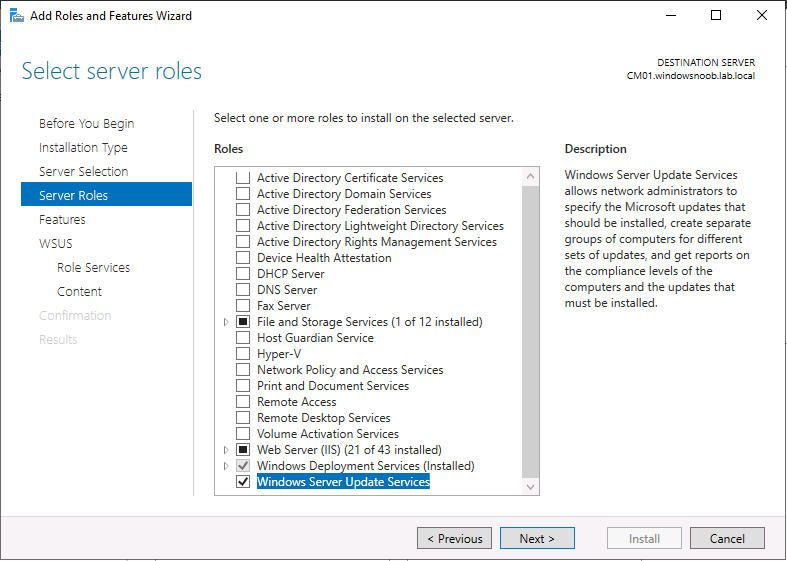
Using Roles and Features in Server Manager, add the Windows Server Update Services role.
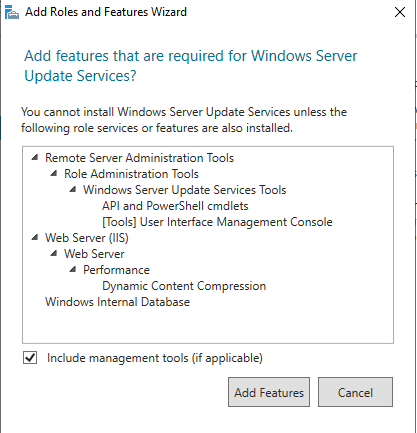
When prompted to add features for the WSUS role, click on Add features.
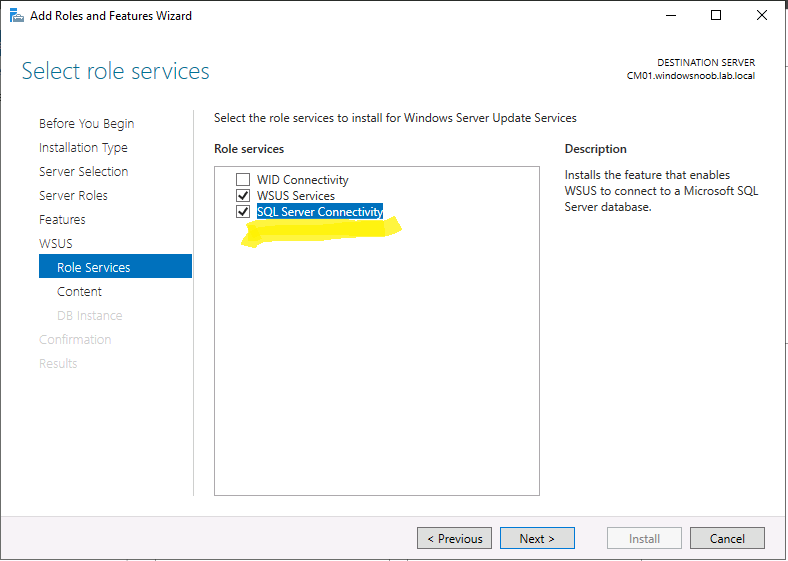
When prompted for the Role Services, remove WID Connectivity by unchecking that box, and add SQL Server Connectivity instead.
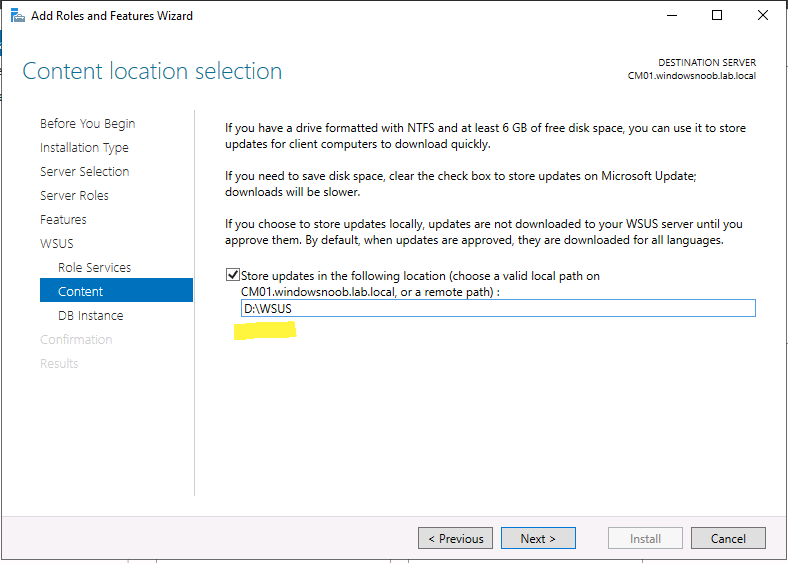
When prompted for Content location, enter a valid path
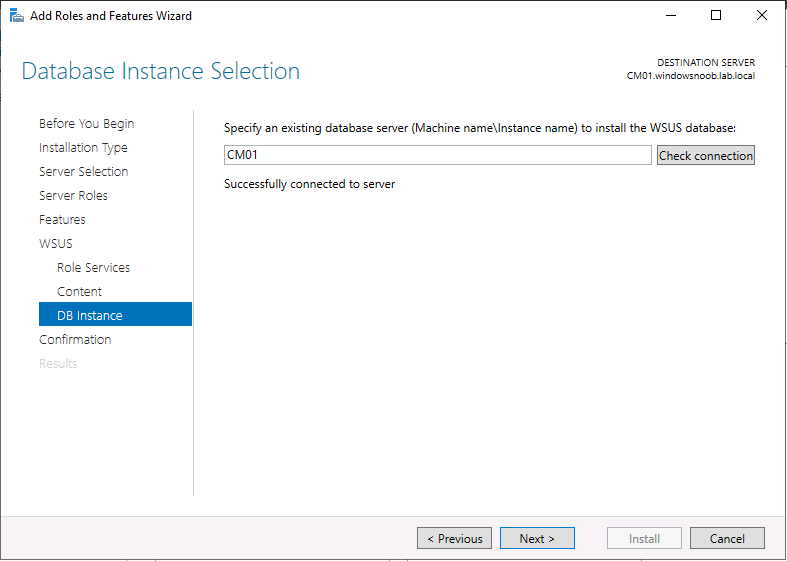
When prompted for Database Instance Selection, enter the server name and click on Check Connection
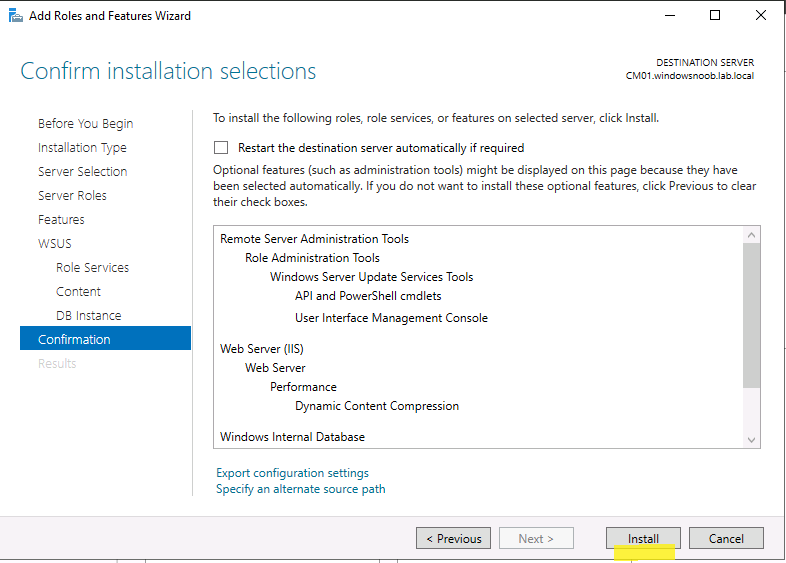
On the Confirm Installation Selections screen, click on Install.
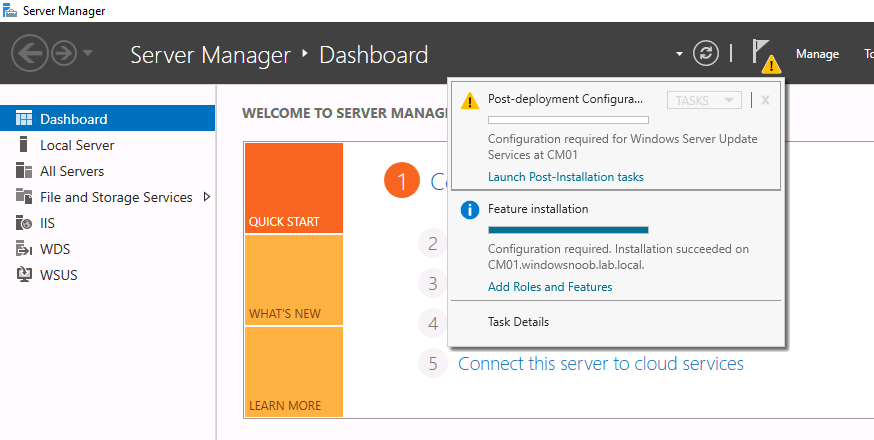
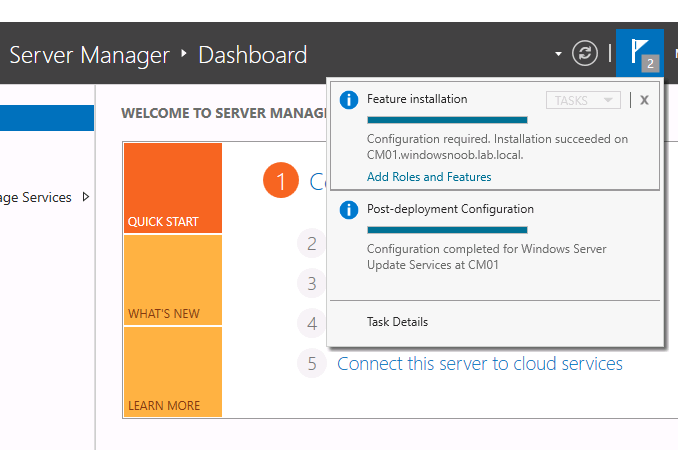
and finally click Close. After installing the WSUS role, in Server Manager, click on the yellow exclamation mark and choose Launch Post Installation Tasks.
When the tasks are completed
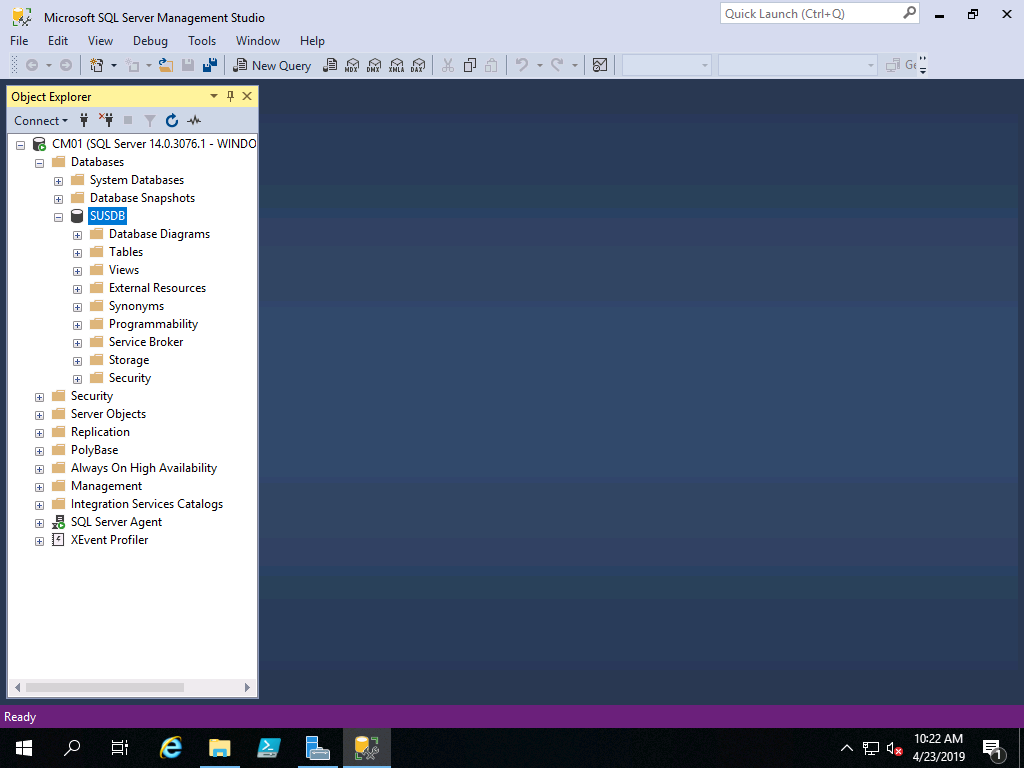
The WSUS database (SUSDB) can now be observed using SQL Server SSMS.
Method #2 – Automate it with PowerShell
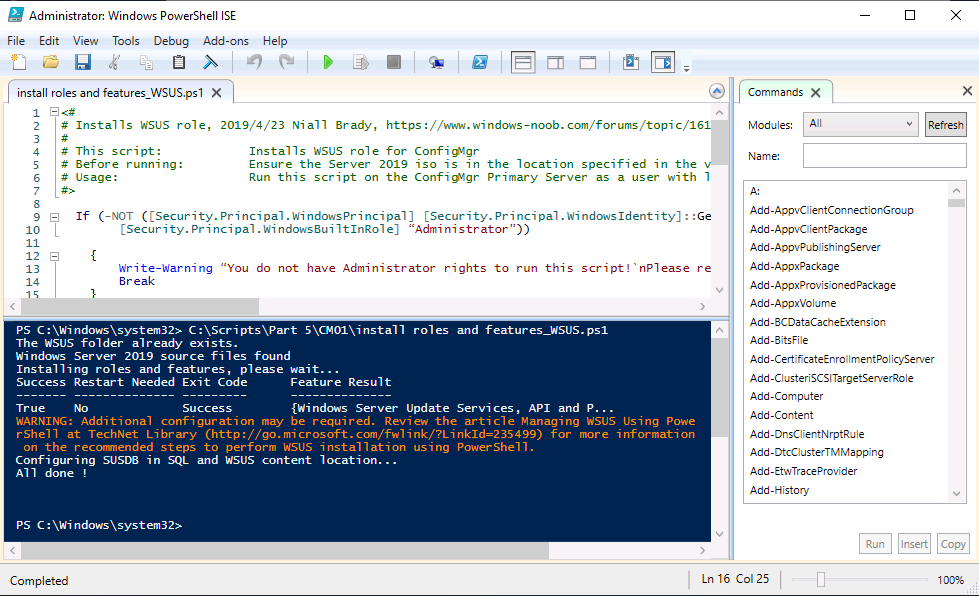
Browse to the location where you extracted the scripts, C:\scripts. Start Windows PowerShell ISE as administrator, open the Install roles and features_WSUS.ps1 script, edit the $servername variable and replace CM01 with the ServerName your are installing ConfigMgr on (SQL server).
Note: Make sure to have your Windows Server 2019 media in the path referred to by $Sourcefiles.
1. Extract the scripts to C:\Scripts on CM01 and load the Install roles and features_WSUS.ps1 script located in C:\Scripts\Part 5\CM01
2. Edit the variables [lines 22-25] as desired before running.
3. Start Windows PowerShell ISE as Administrator and run the script by clicking on the green triangle.
To read the rest of this post please click here.
