Introduction
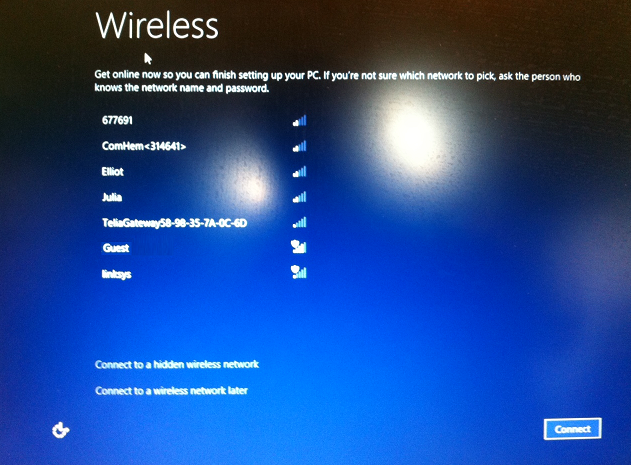
During Windows 8 deployments, if you are using wireless capable computers then you’ll most likely have wireless enabled on them by default and this means that the following screen will most likely appear during Windows 8 setup (OOBE).
The installation will halt until you pick a wireless network or until you click on the Connect to a wireless network later link.
That is great if you want to connect to a wireless network during setup, but not great if you want everything automated, so how do we stop this screen from popping up ? We can create a custom unattend.xml file to change this behavior and the best way of doing this is by using Windows SIM which is a component of the Deployment Tools which in turn is part of the Windows Assessment and Deployment Kit (Windows ADK). So if you havn’t installed the ADK yet, do so now.
Step 1. Start Windows SIM
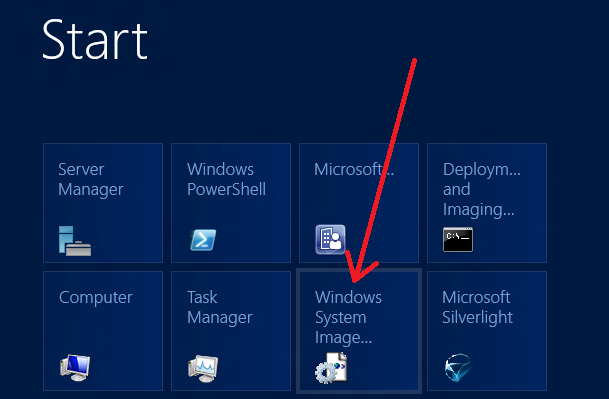
Start up Windows SIM located in the start menu on your Server 2012 install
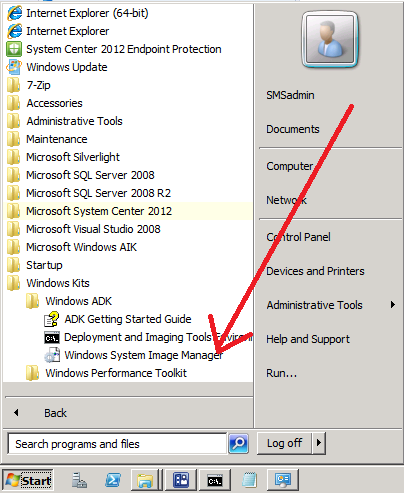
or it can be found here on traditional Server 2008R2 start menu
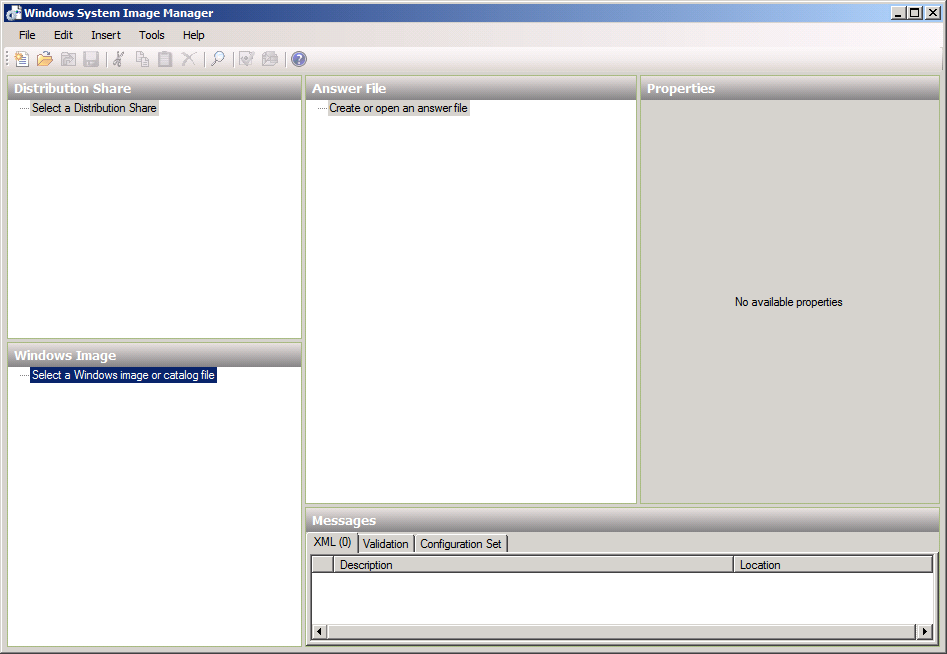
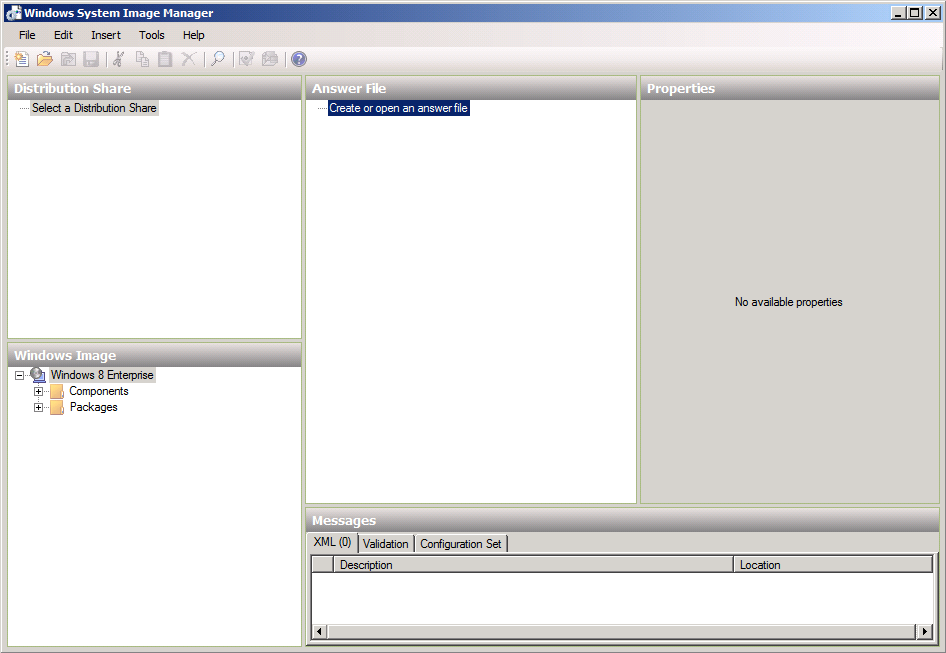
The application will appear pretty bland on first start but we’ll change that soon enough
Step 2. Select a Windows Image and create a new Answer File
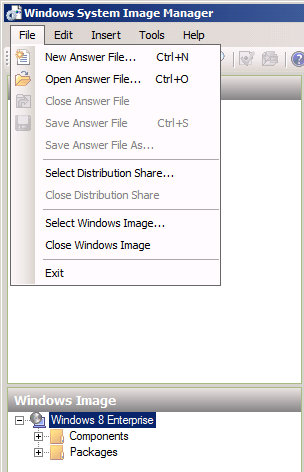
Click on File and choose Select Windows Image,
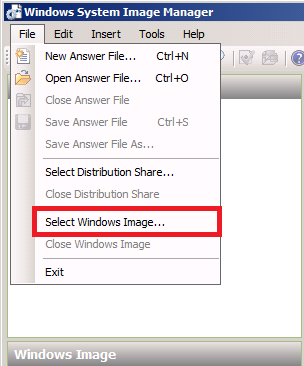 browse to the path of your Windows 8 media and select the Install.WIM file located in the sources folder of that media, if it’s the first time you’ve done this you’ll get a message about the Catalog File being missing, answer Yes.
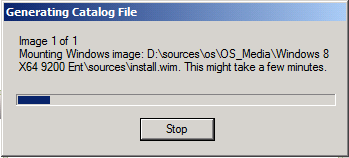
Note that you’ll need to be logged on as a local administrator of this machine. Next you’ll see Windows SIM is mounting the image to generate the catalog file
and once it’s done mounting the image and generating the catalog file you’ll see your image listed in the Windows Image section of Windows SIM.
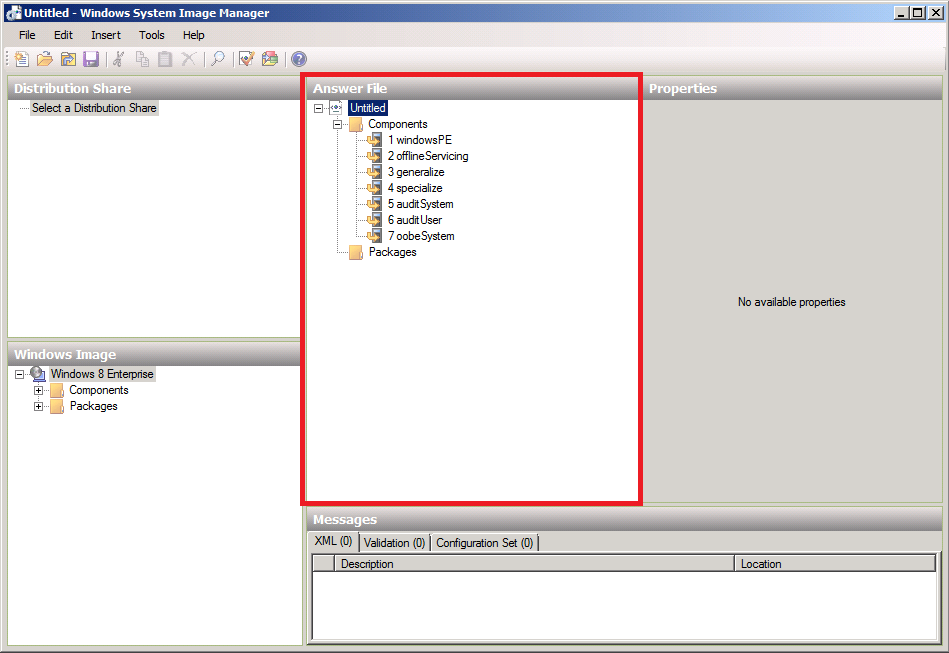
Now click on the File menu again, and choose New Answer File,
this will populate our Answer File Pane with the 7 passes of a Windows Deployment.
Step 3. Add our changes to the answer file
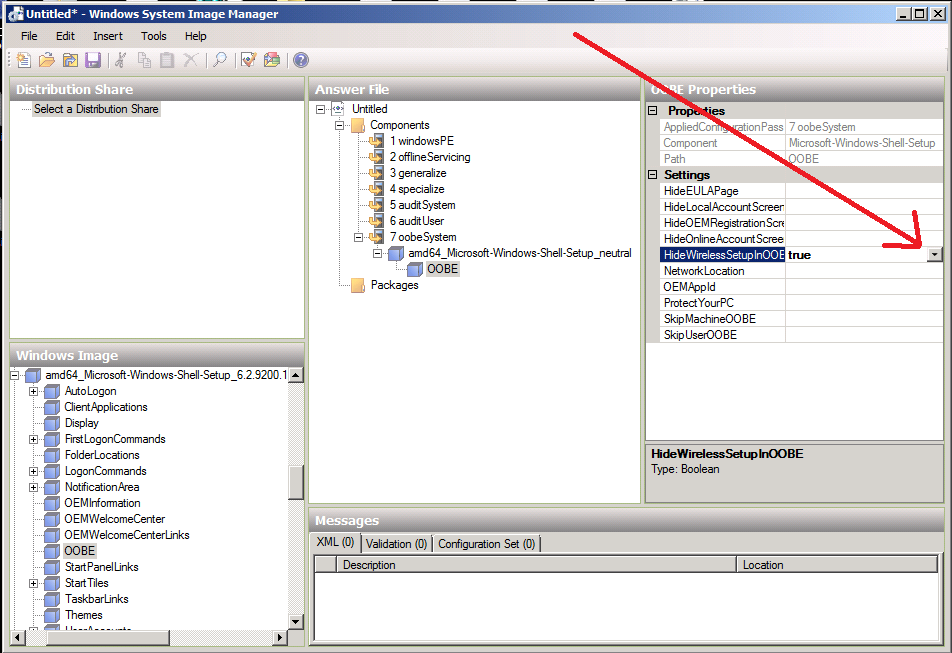
Expand Components and scroll down the component called amd64_Microsoft-Windows-Shell-Setup_6.2.9200.16384_neutral
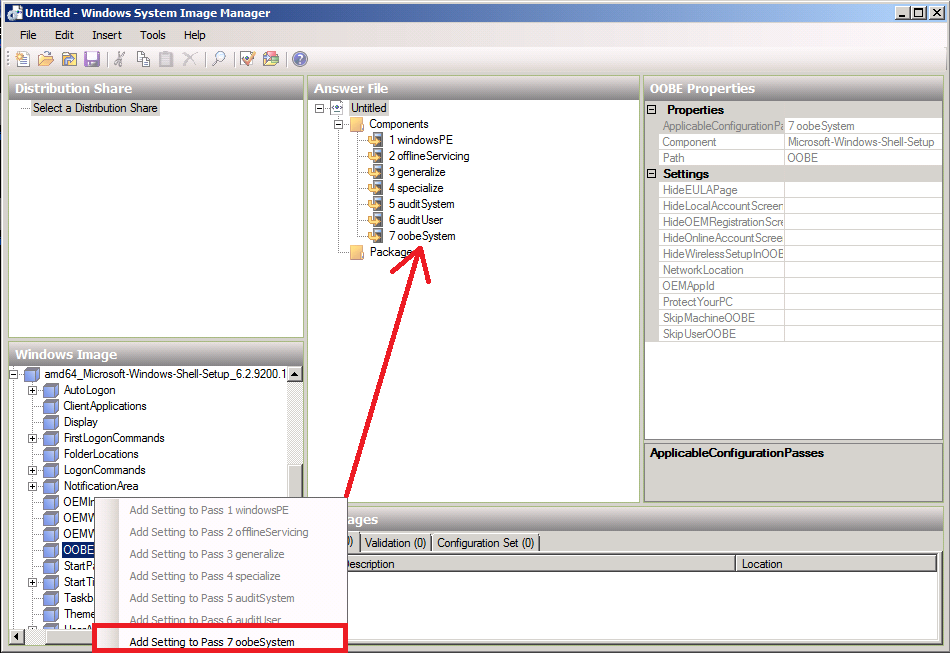
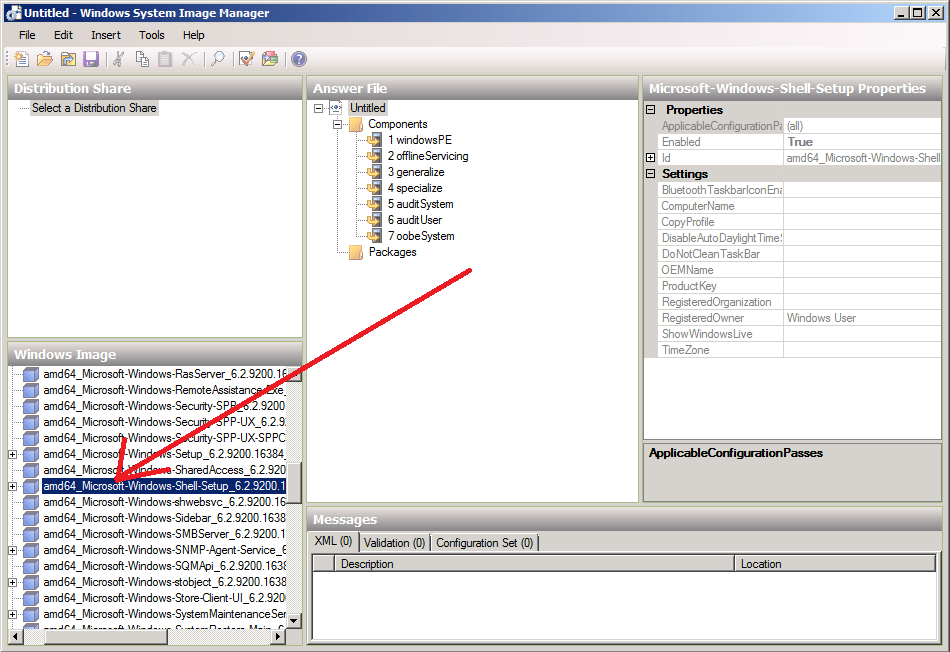 click on the plus to the left of this component and find a section in it called OOBE (out of box experience), select it. You will note that the settings associated with this section are listed to the right in the OOBE Properties window pane however we cannot do anything with them until we add them to a Pass.
Right click on OOBE and choose Add Setting to Pass 7 oobeSystem
find the setting HideWirelessSetupInOOBE and click on the drop down menu, select TRUE to hide this.
Step 4. Save our Changes to the Answer File
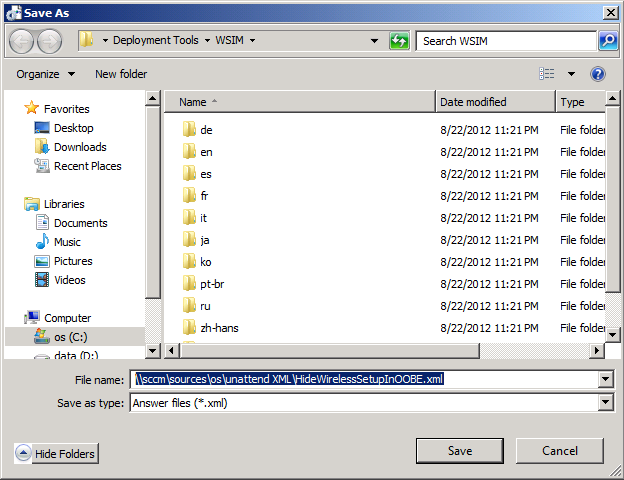
And for the purposes of this post, we are done with editing this unattend.xml (however feel free to experiment with the settings listed), click on File and choose Save Answer file as
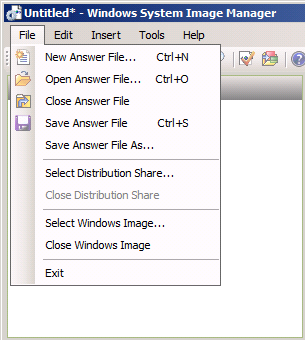 Save the file on your Configuration Manager server in your \\server\sources\os\unattend xml\ folder as HideWirelessSetupInOOBE.xml. (If you are are doing many customizations in your xml name it unattend.xml for simplicity)
Step 5. Create a Package in Configuration Manager
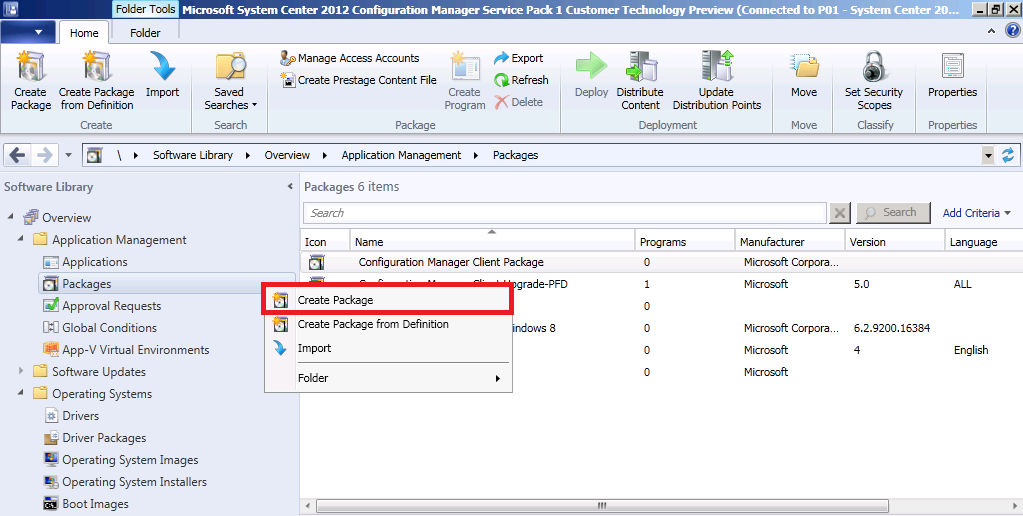
Now we need to create a package containing this unattend.xml file within Configuration Manager 2012. In the Software Library workspace, select Application Management, Packages, and choose Create Package.
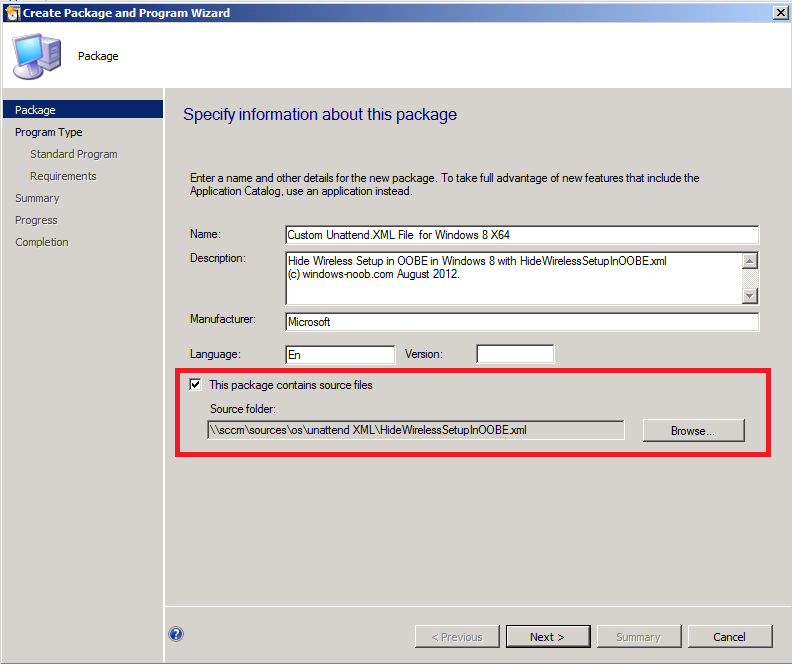
fill in some details about the package making sure to select This Package Contains source files and browse to the UNC where you saved your Unattend.xml file earlier.
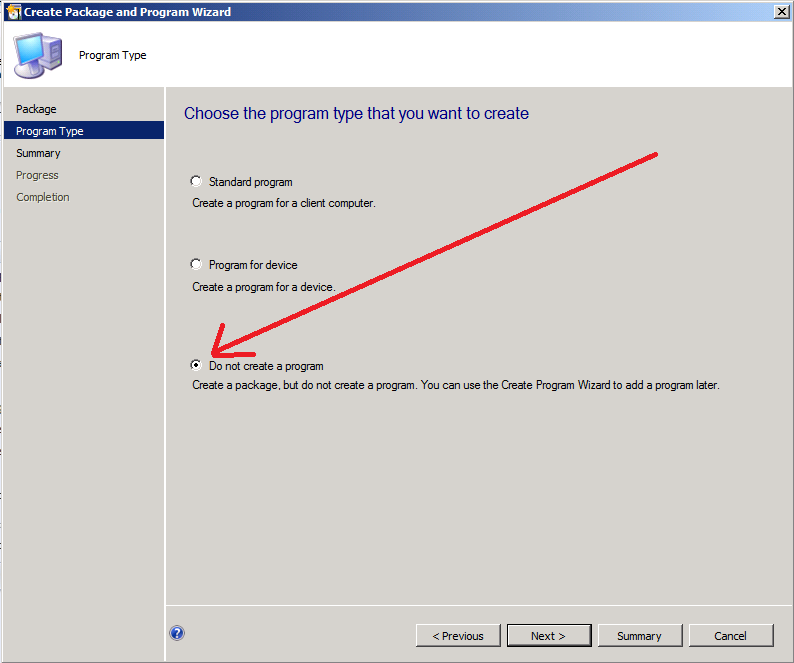
Click next and select Do not create a program (as none is needed)
and continue through the wizard to completion.
Step 6. Distribute Content
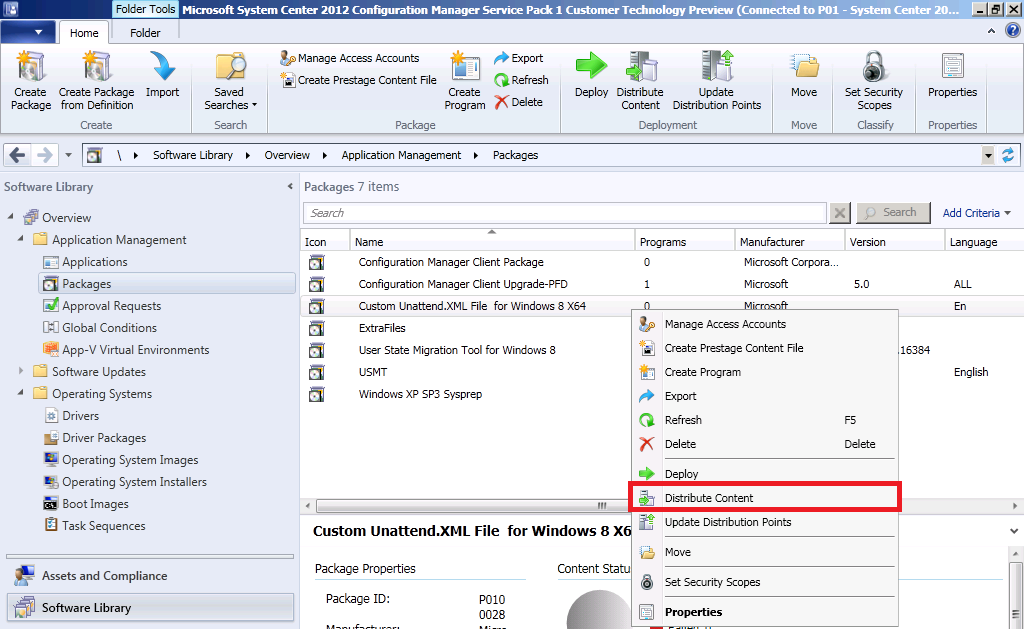
Now that our package is made we need to distribute the content to our distribution points otherwise our clients cannot find it. Right click on our newly created package and choose Distribute Content.
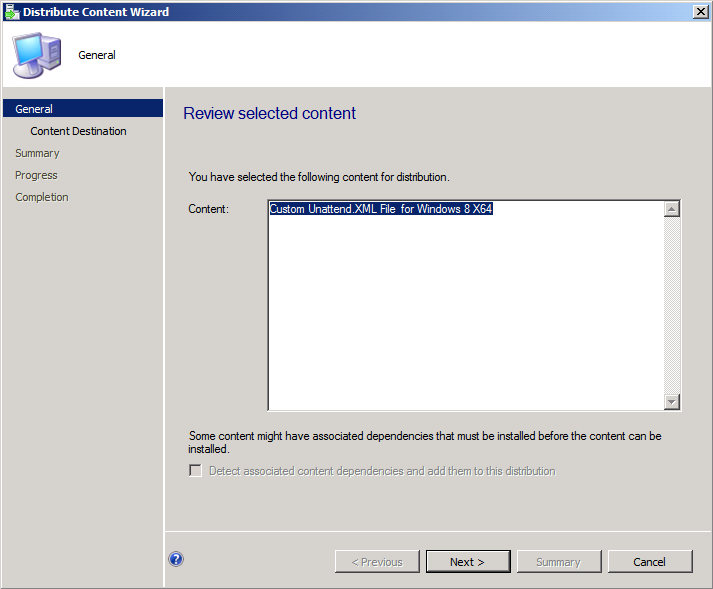
The Distribute Content wizard appears, select next
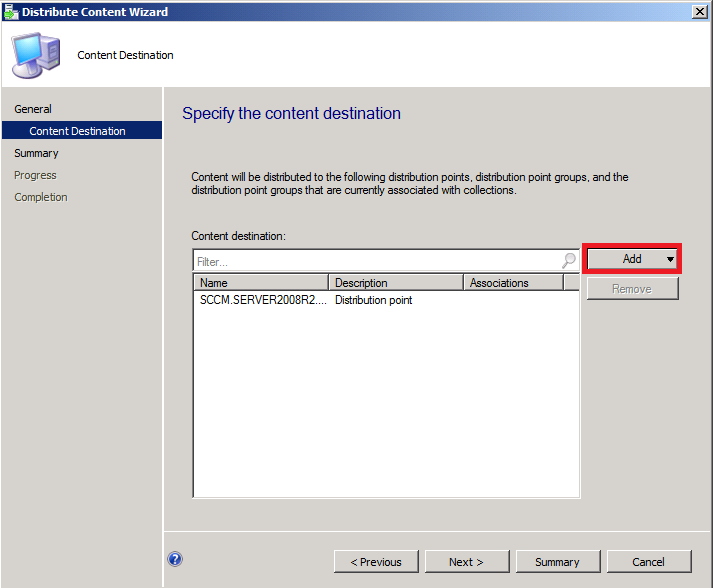
Add your distribution points by selecting Add, select Distribution Point from the drop down menu and placing a check mark beside any DP you want to include, and then click next through the remainder of this wizard
Step 7. Edit your task sequence
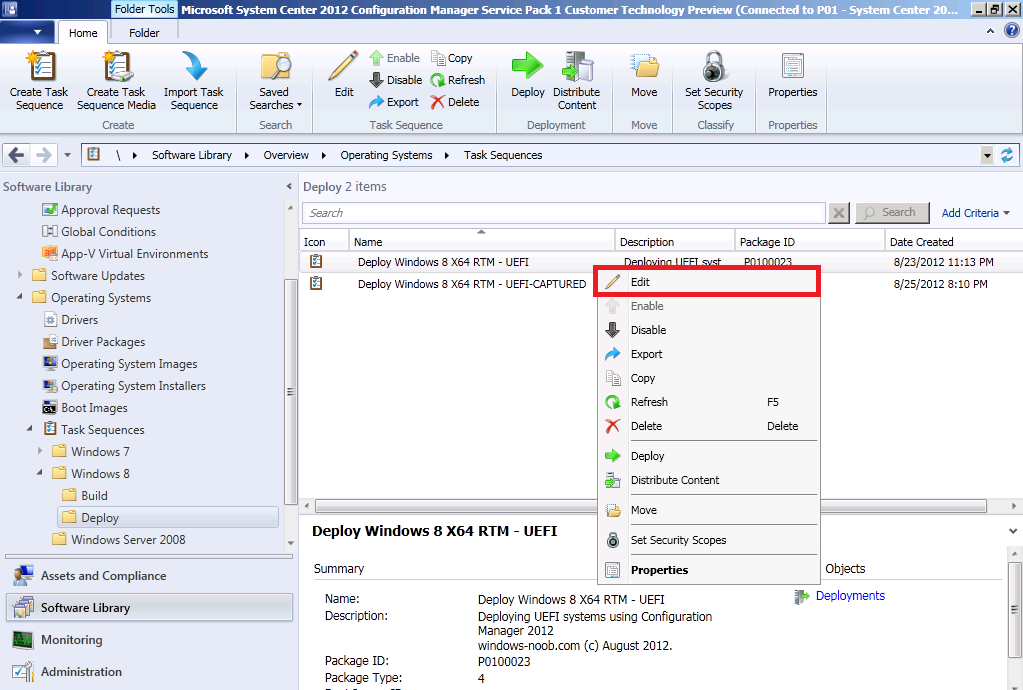
Now all the steps are in place to edit our task sequence to add our unattend file, so select your Deploy Windows 8 task sequence, right click and choose Edit.
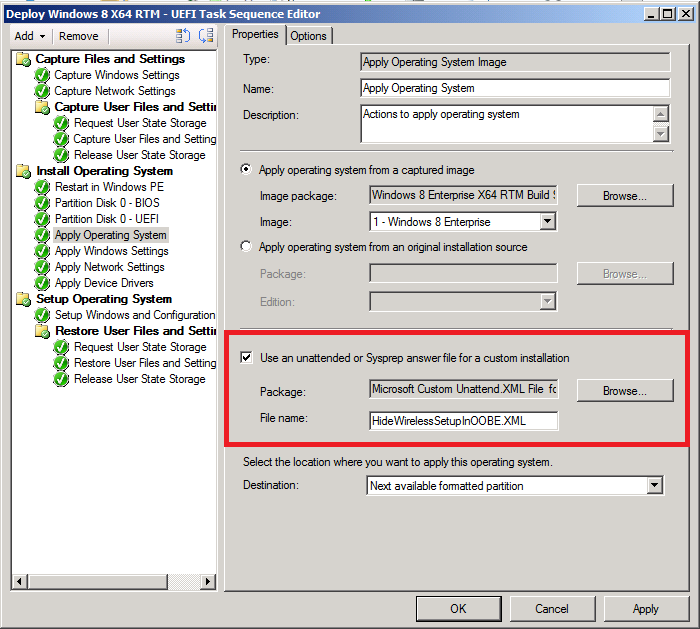
and select the Apply Operating Image step, in this step place a checkmark in Use an unattended or sysprep answer file for a custom installation and browse to our previously created package, select the package, click ok and type in the name of our unattend.xml file as in the screenshot below:
Click Apply and you are done, try a new deployment and note that you are no longer prompted to Connect to a wireless network during OOBE.
cheers
niall !




Hi Niall,
Many thanks for this really useful guide. I have tried this out but had no luck and am still seeing the ‘Connect to a Wireless Network’ prompt during the build process. I have tried it with both 8 and 8.1 Ent and Pro versions of Windows (x86 and x64), I have also tried with 8.1 Embedded Industry Enterprise (x64) (this will be the final version we use). Unfortunately I have been unsuccessful with all flavours so far…. I there anything else that I can try? I am getting low on idea’s and need to get this one resolved as the build process needs to be automated for deployment on thousands of devices.
Many thanks,
Ali
you must be doing something wrong then as it does work, can you attach your smsts.log file so i can see the step taking place successfully >?
Niall,
I have a similar scenario whereby we are deploying Win7 x64 via Task Sequence. On a particular model workstation (HP Elite800 All-In-One) everything with the Task Sequence seems to run fine until we get into the Software Install phase. At some point during software install, it appears the wireless must be connecting as the primary adapter and then the install of the software fails. If prior to starting the Task Sequence, we disable the wireless card in the Bios, the Task Sequence runs all the way through without any problems.
Wondering if there is a way to prevent the Task Sequence from seeing the wireless card all together and only allow it to use the wired connection for completing all the tasks.
thanks
Moe