In Part 6 we configured our SUP further to Deploy software updates to our All Windows 7 Computers and Build Windows 7 X64 collections. In Part 7 we used the Build and Capture process to create our Base Windows 7 X64 wim image. In Part 8 we created a USMT 4 package to migrate the users data using hardlinking and then we imported the captured image into ConfigMgr and created a Deploy Windows 7 X64 task sequence. We created a Deploy Windows 7 X64 Collection and set some User Device Affinity collection variables.
In Part 9 we created an Application, and created a deployment type for that application to only install if the Primary User
was True for that device (User Device Affinity), we then copied our
Task Sequence (duplicated it), deployed the new Task Sequence, added a
computer to the new collection and then PXE booted the computer to the
Deployment Menu. In Part 10
we monitored the Deployment process in a lot of detail to how UDA sent
state messages and we verified that our application installed on the
users Primary Device, in addition we modified our collection variables,
and added a prestart command to our boot image to prompt for the
SMSTSUdaUsers. In Part 11 we setup the Reporting Services Point Role and verified that reporting was working.
In Part 12 we demonstrated a new feature in ConfigMgr which allows us to Patch operating system WIM images using Offline Servicing. This means that you can apply Windows Updates by using Component-Based Servicing (CBS) to update the your previously captured WIM images. In Part 13 we looked at how Role Based Administration is used within ConfigMgr and we created a new custom role
to allow a user (or users within a Security Group) to view Software
Update Reports. This is useful because you will probably want one team
to take care of configuring and deploying software updates, and to grant
another (Management etc) the capability of reviewing Compliance
Reports.
Now we will perform a side-by-side migration from Configuration Manager 2007.
For recommended reading about migrating to Configuration Manager 2012
and best practise advice, please refer to the following links from
Technet:-
- Introduction to Migration in System Center 2012 Configuration Manager
- Planning for Migration to System Center 2012 Configuration Manager
- Configuring Migration to System Center 2012 Configuration Manager
- Operations for Migrating Configuration Manager 2007 to System Center 2012 Configuration Manager
- Security and Privacy for Migration to System Center 2012 Configuration Manager
Some key points about migration.
- Before you migrate any data from Configuration Manager 2007, you must first install and configure the
System Center 2012 Configuration Manager hierarchy. You should not try
to recreate or mirror your hierarchy from the source to the destination.
Plan to only migrate what you need in the new hierarchy and focus on the new features and design of Configuration Manager 2012.
- You cannot upgrade from SMS 2003 to Configuration Manager 2012,
the only supported method is to migrate from SMS 2003 to Configuration
Manager 2007 (in-place or side-by-side) and then perform a side-by-side
migration to Configuration Manager 2012. Or, you could call it a day on
SMS 2003 and start fresh with Configuration Manager 2012.
- You cannot do an in-place upgrade from Configuration Manager 2007 to Configuration Manager 2012. If you want to migrate your data and objects from Configuration Manager 2007 to Configuration Manager 2012 then you have to perform a side-by-side migration.
- Your source hierarchy (Configuration Manager 2007) must be at Service Pack 2 level.
- You must specify the top level site of your source heirarchy (Configuration Manager 2007).
- When System Center 2012 Configuration Manager gathers data, the following network protocols and ports are used:
NetBIOS/SMB – 445 (TCP), RPC (WMI) – 135 (TCP), SQL Server – 1433
(TCP). As a result, ensure that they are not blocked between your source
and destination servers.
- To perform the migration, the account used in Configuration Manager 2012 console must be a member of the Full Administrator
security role. This security role grants permissions to manage all
migration operations, which includes the creation of migration jobs,
cleaning up, monitoring, and the action to share and upgrade
distribution points.
- If you have mixed
collections containing users and computers in Configuration Manager
2007, separate them into separate collections prior to the migration.
- Site codes must be unique. You cannot re-use site codes from a source hierarchy (Configuration Manager 2007) to the destination hierarchy (Configuration Manager 2012).
- When you migrate content, it is the compressed source files that migrate to System Center 2012 Configuration Manager.
- We can migrate the following:
Collections, Advertisements, Boundaries, Software distribution
packages, Virtual application packages,Software Updates, Operating
System Deployment, Desired Configuration Management, Asset Intelligence,
Software metering rules.
Ok now that we are aware of the above, and after reviewing the pages on
Technet for best practise advice, let’s do a simple migration in our
LAB. This LAB has a Configuration Manager 2007 server configured with a
separate boundary from our Configuration Manager 2012 site boundaries.
Both sites are within the same AD Forest. Both sites are standalone
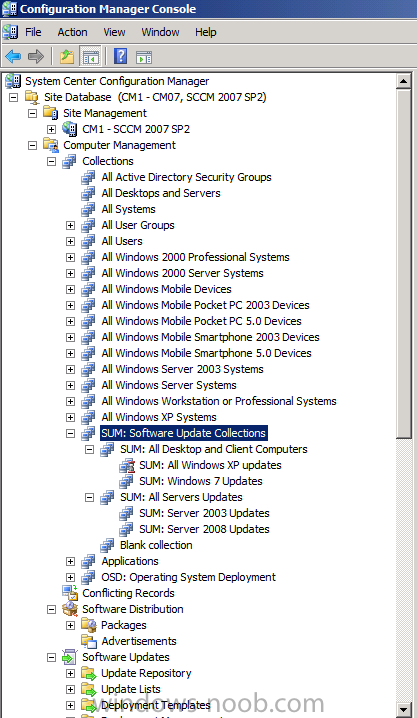
primaries. For this LAB we will migrate some Software Update items. Before doing so let’s take a very quick look at what the software updates collection structure looks like in our Configuration Manager 2007 site.
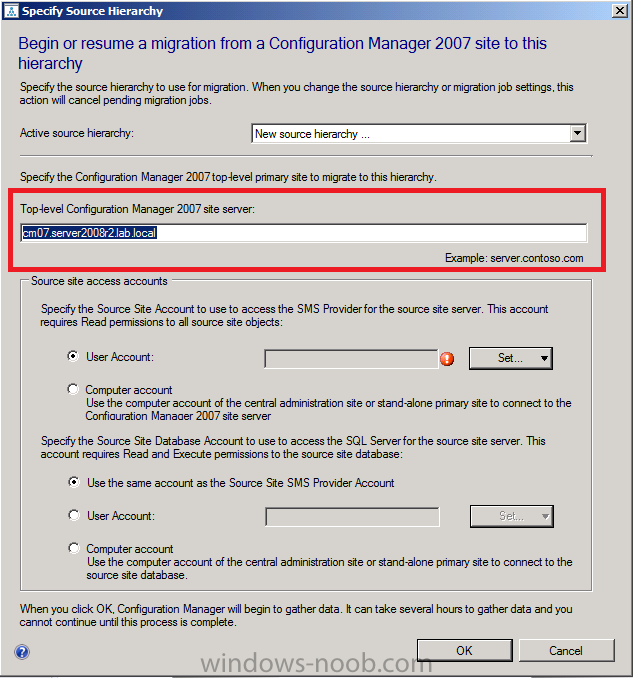
Step 1. Specify Source Hierarchy
Perform the following on your Configuration Manager 2012 server as SMSadmin.
In the Administration workspace, expand Overview and select Migration, as we havn’t migrated anything yet it’s going to look pretty bland.

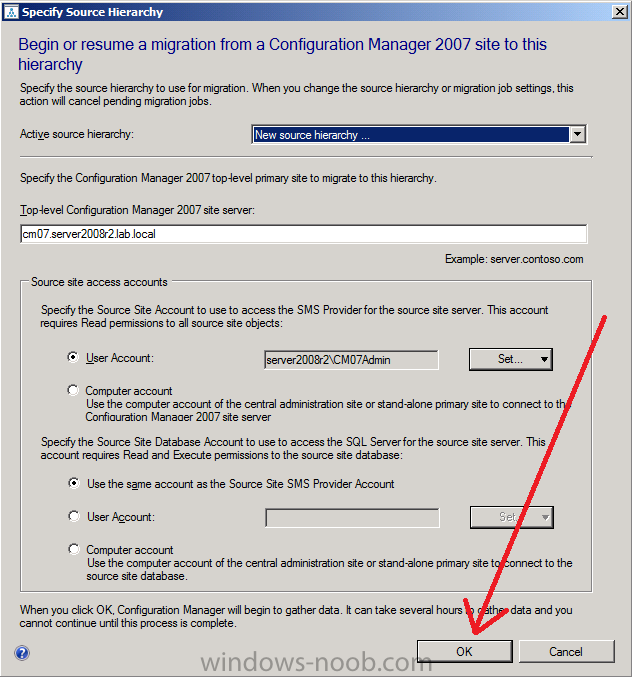
We need to specify the source hierarchy in order to establish a
connection between the source (CM07) and destination (CM12) servers, so
click on Specify Source Hierarchy in the ribbon.

when the wizard appears we need to specify the Top-Level Configuration Manager 2007 site server. So fill in those details.
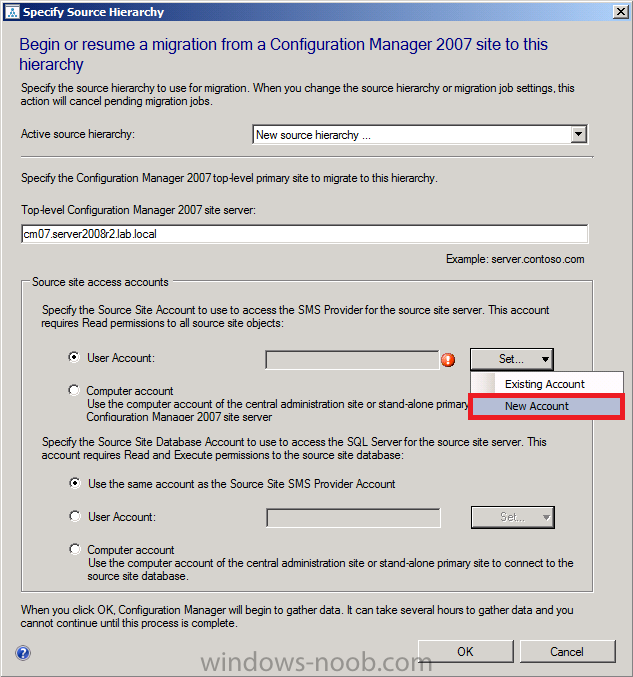
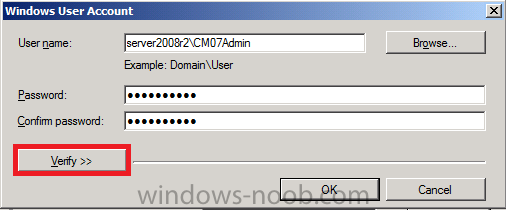
Next we need to specify the Source site account to use to access the SMS Provider for that site server. The account needs read permissions on all source site objects. In our LAB we will specify the CM07Admin account which was the same account used to install that site server. So click on the Set drop down menu and select New Account.
Input your account credentials and click on Verify
Click on Test connection
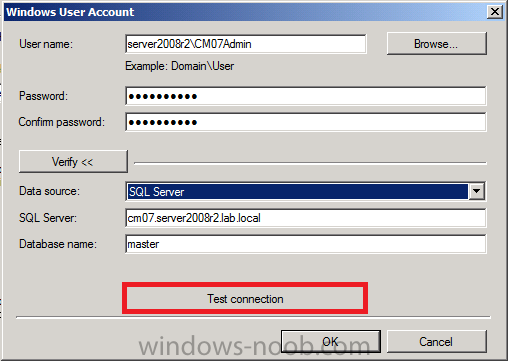
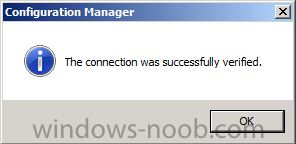
make sure you see a successful connection before proceeding.
We will use the same account as the source site SMS provider account, so click on OK to exit this wizard.
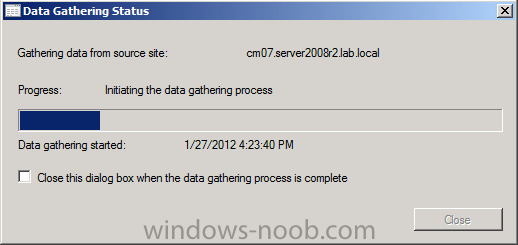
after clicking ok you’ll see a window informing you that it is gathering data from the source site
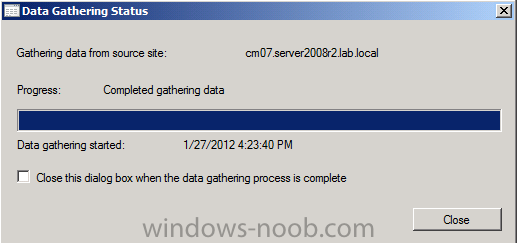
a few minutes later and it’s done, close that window.
at this point we can now see that our migration summary window has populated with some information.
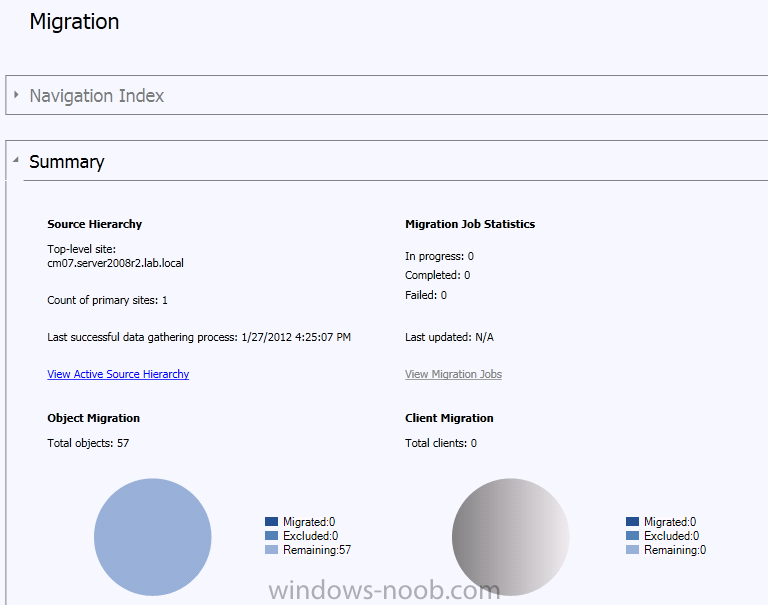
Note: You can start and
stop the data gathering process by using the Gather Data Now, and Stop
Gathering Data actions in the Configuration Manager console.
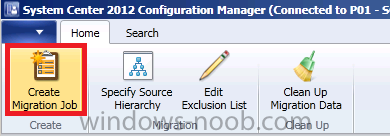
Step 2. Create a migration job
Perform the following on your Configuration Manager 2012 server as SMSadmin.
In the ribbon click on Create Migration Job
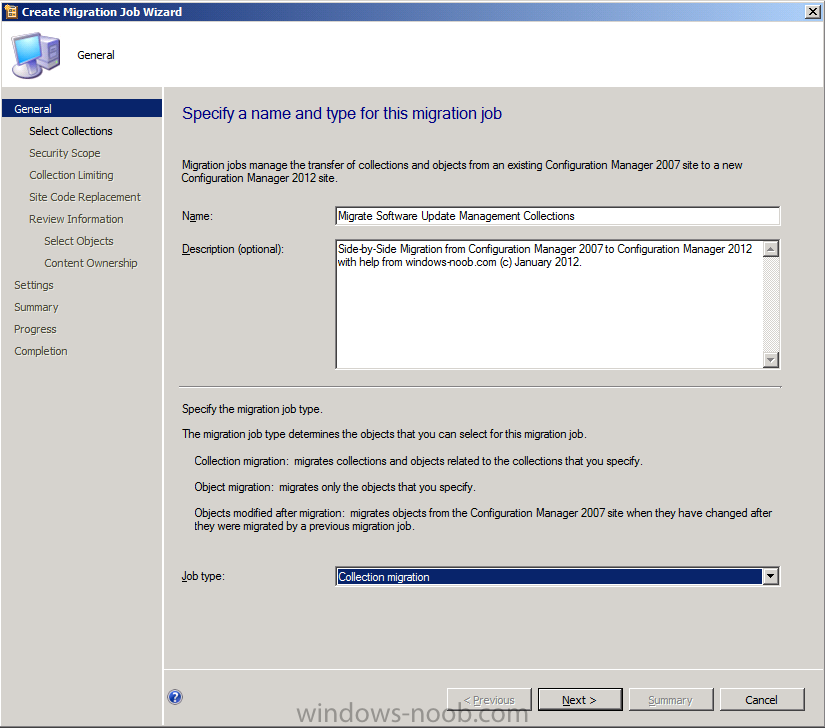
When the Migration Job wizard appears give it a name that is descriptive of what we are planning on migrating. Notice that in the drop down menu for Job Type we have three choices
- Collection Migration
- Object Migration
- Objects modified after migration
In this case we are going to migrate collections, so we will name this migration job as follows:- Migrate Software Update Management Collections
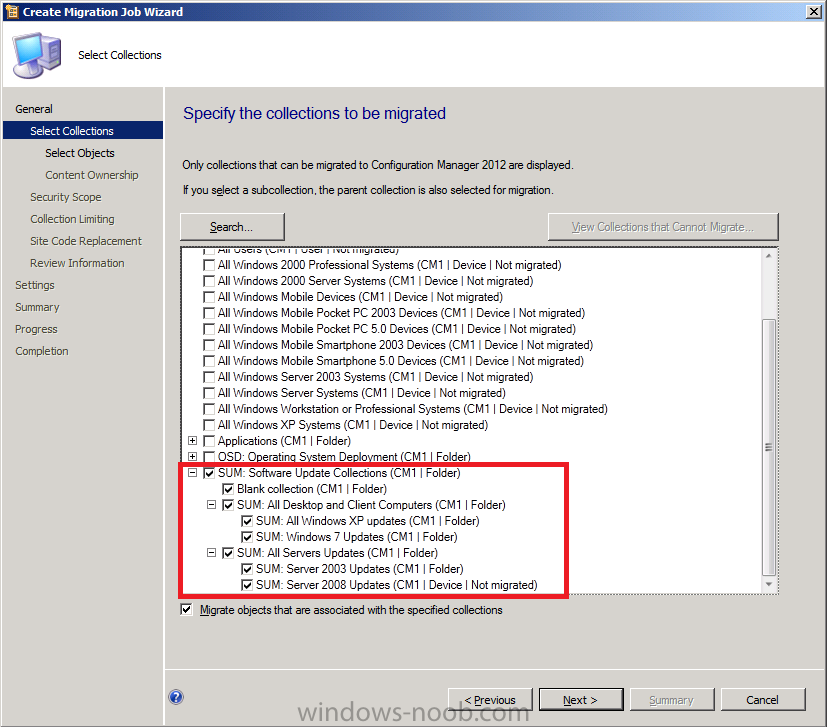
Click next and a list of collections that
can be migrated to Configuration Manager 2012 are displayed. As we are
only interested in migrating our Software Update collections, let’s
select them. If you have advertisements associated with these
collections (Deployment Management Tasks) then they will be migrated
also if you select Migrate objects that are associated with the specified collections.
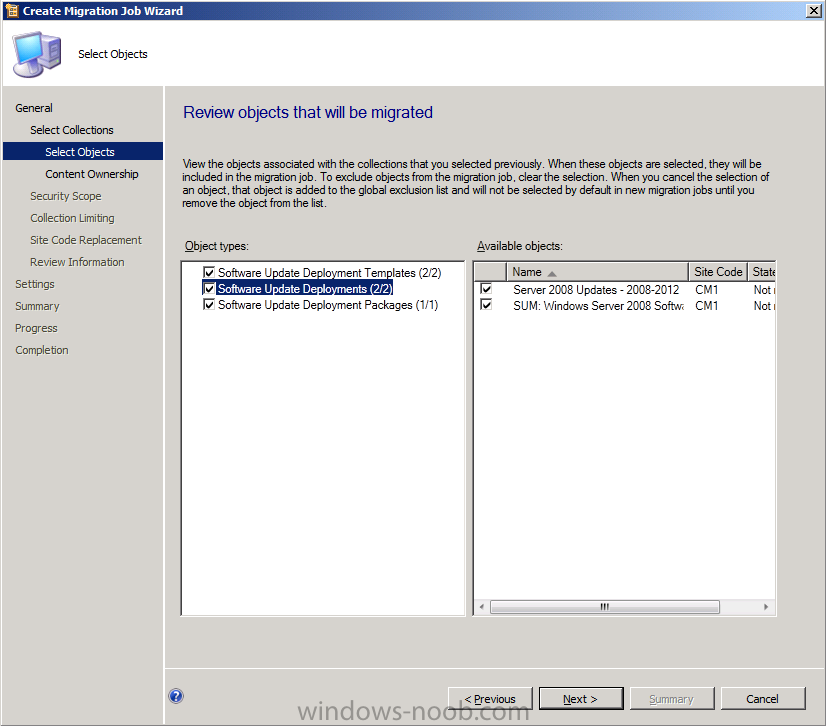
next we get to select objects that we want to migrate. Look through what
is highlighted and decide if you really want to migrate it or not, this
is a LAB so we’ll let everything stay selected.
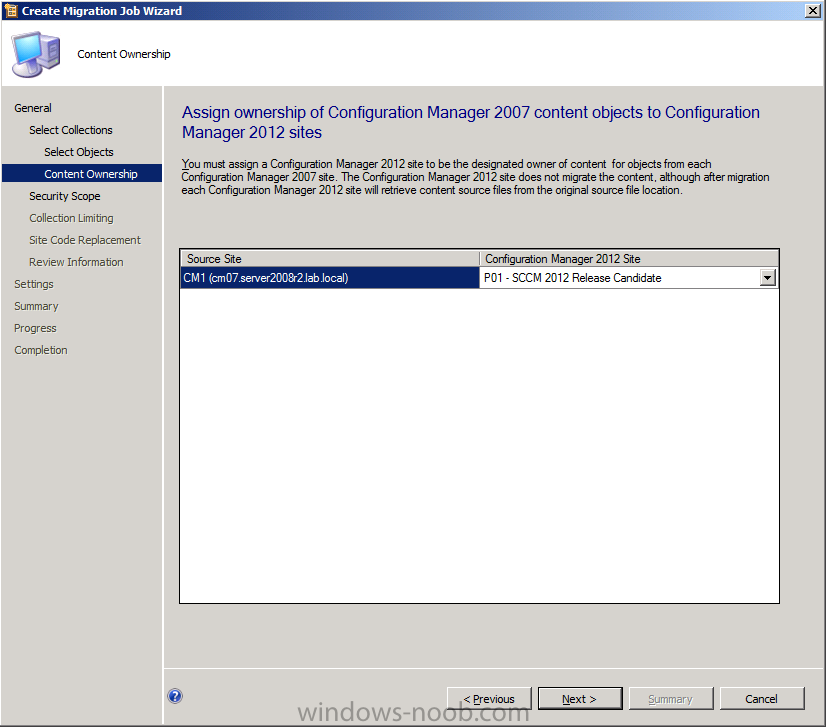
for Content ownership, specify which site
in your Configuration Manager 2012 hierarchy will be the designated
owner of the content, in our LAB we have standalone primaries so just
click next.
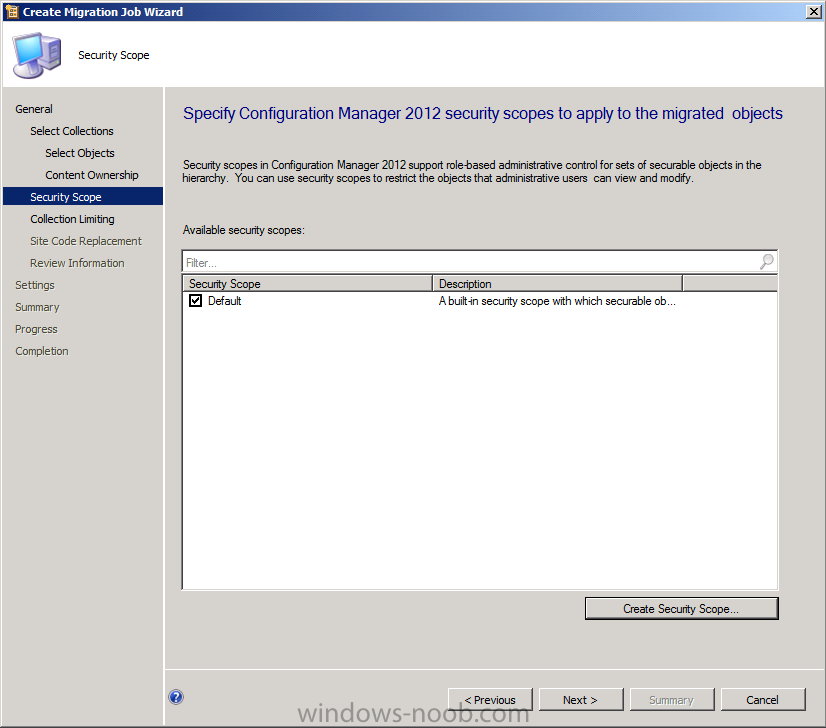
next you can specify the Security Scope to be applied to the migrated objects, select the Default option. (I will return to Security Scopes in a separate Part).
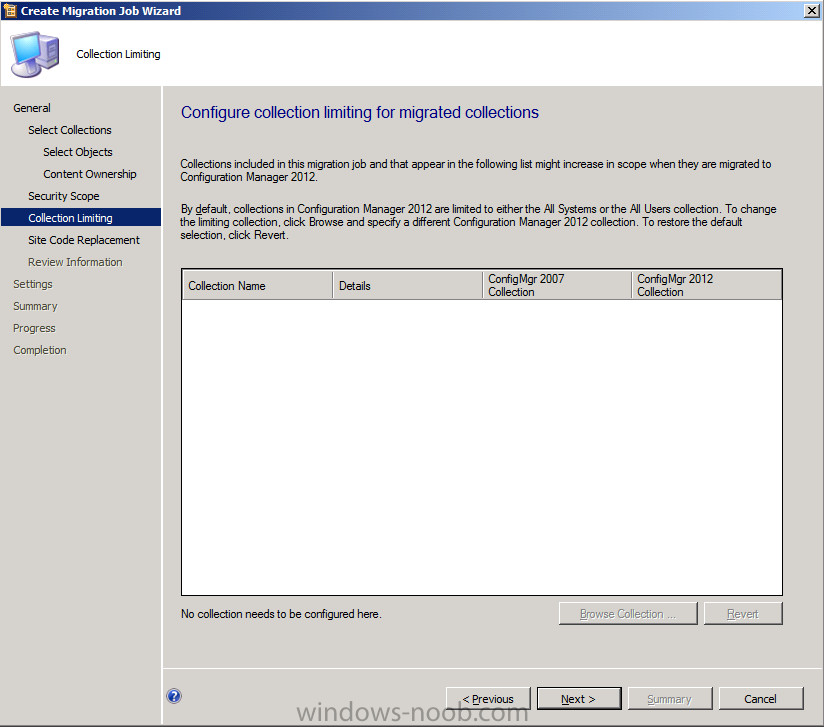
if any collections need to be limited to All Systems or All Users then they’ll appear here, we are ok so lets proceed.
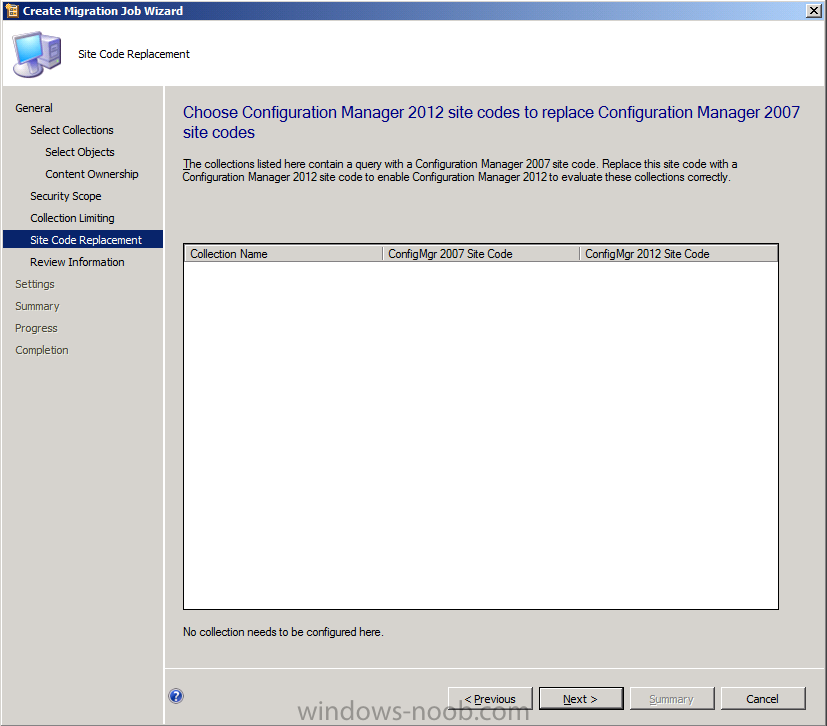
On the Site Code Replacement screen you may
see collections that are based on Queries that are limited to Site
codes, we don’t have any in this LAB so nothing appears, but if you have
any queries like this in your LAB then you’ll see those collections
listed here. What it’s telling you is that you’ll have to edit the
queries to point to the new site code.
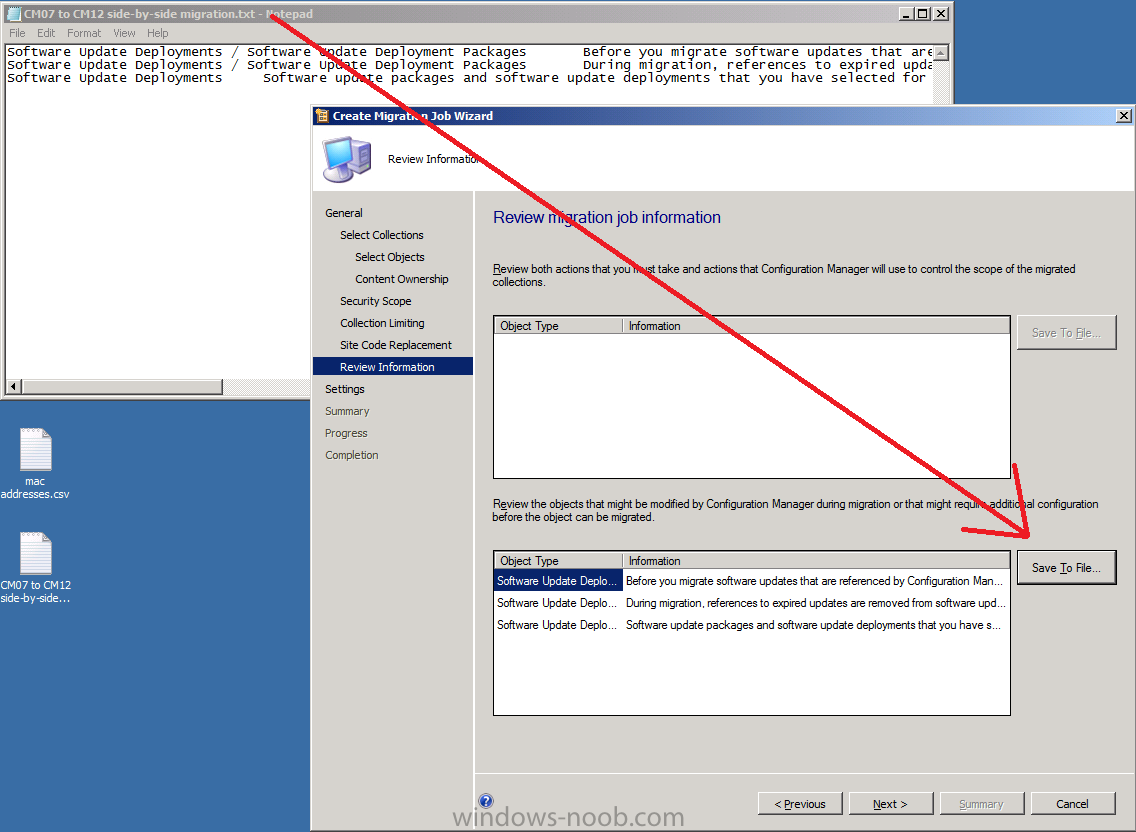
and now you get to review the information, you can save it to a file (recommended) which is a plain text file that lists things that you should be aware of. Save the file, read it. Action it.
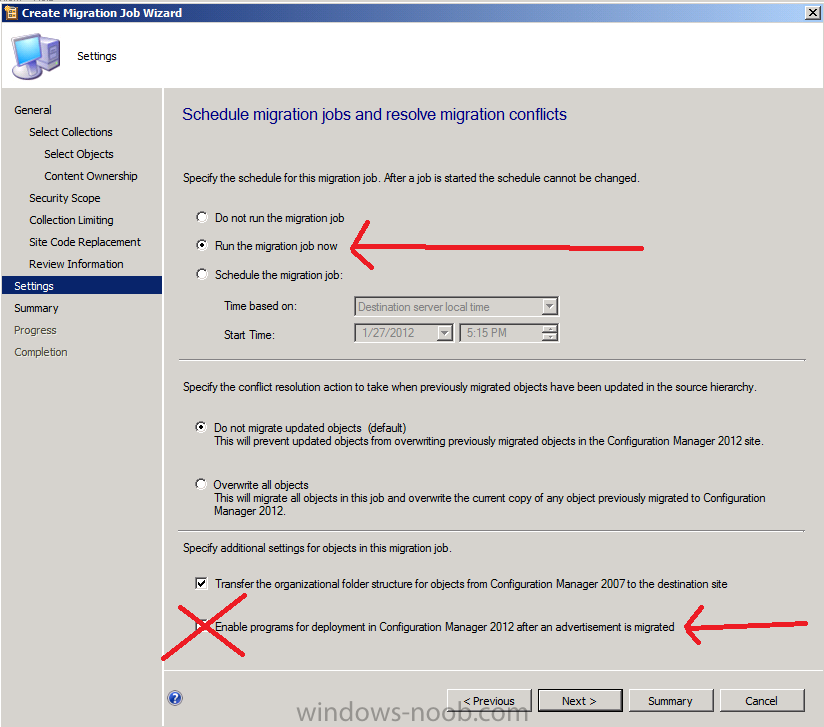
Next you can decide to run the migration job now (default) or schedule
it until later. We want to migrate now so let’s do that. Note that we don’t want
any new deployments being enabled after an advertisement is migrated so
verify that setting is not selected (by default it is not selected).
This will mean that you have to manually enable the deployments in
Configuration Manager 2012, but that’s ok isn’t it.
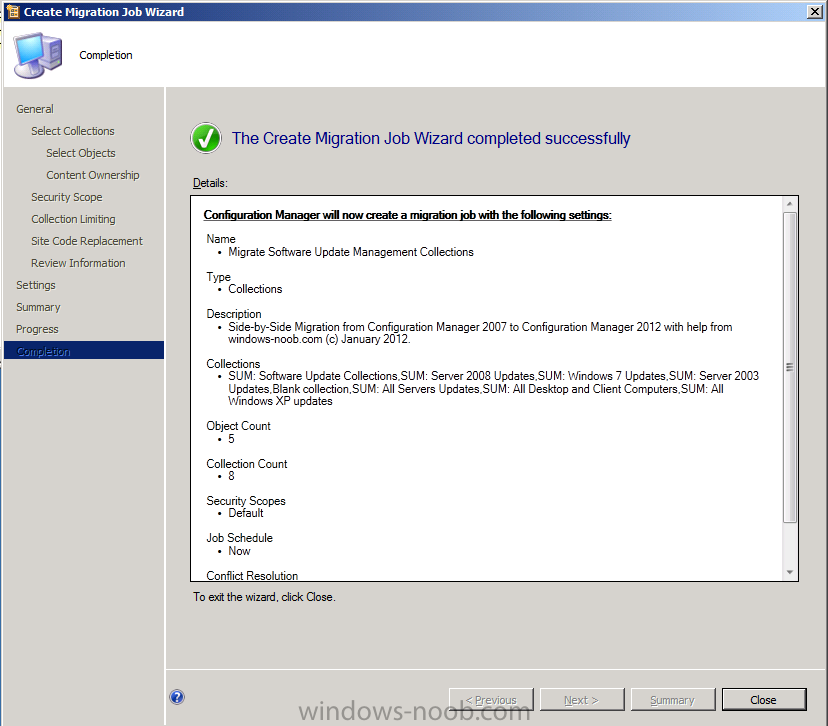
click next at the summary and let the wizard do its work…then review the confirmation screen
Step 3. Monitor your migration job and resolve issues found.
Perform the following on your Configuration Manager 2012 server as SMSadmin.
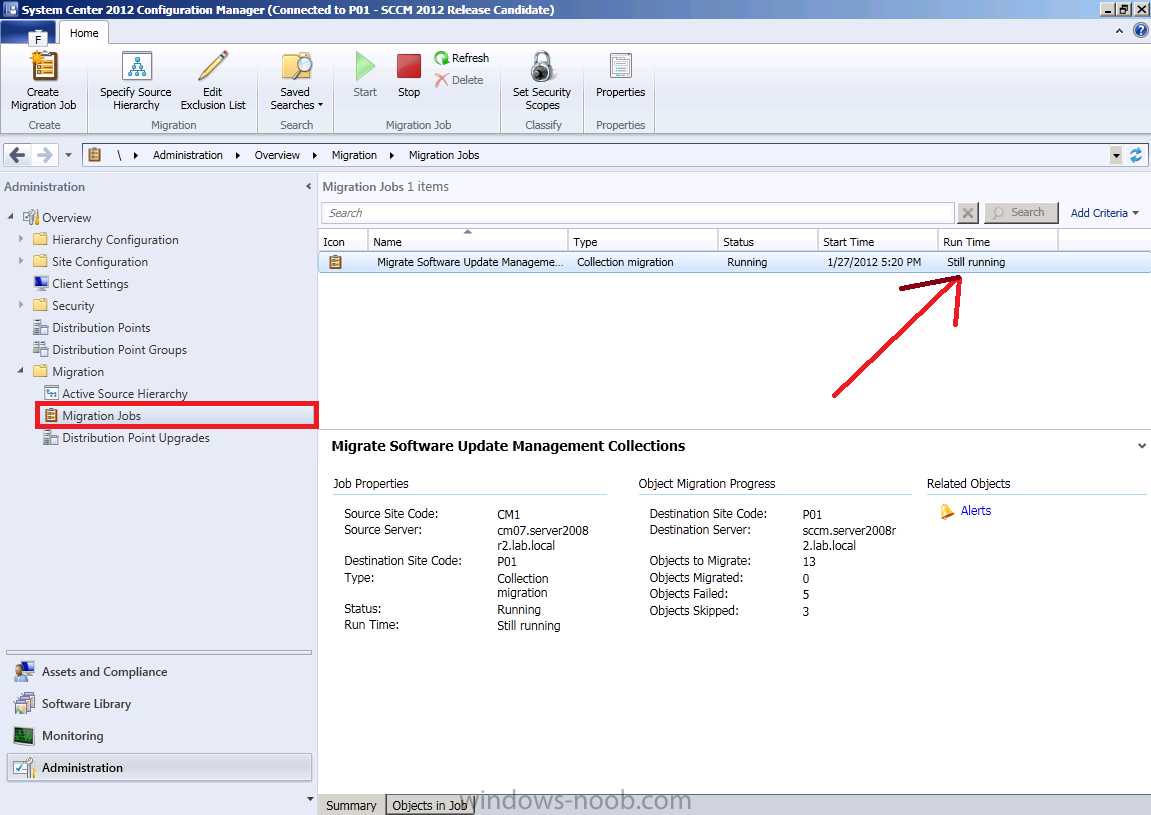
In the console click on Migration Jobs and you’ll see the status of our newly created migration job, in the screenshot below it is still running.
After a while it should complete, note that the status in our LAB says Failed. Before we find out why, let’s review the information that the job shows us in the summary,
in particular let’s review the Object Migration Progress. We can see
that it has migrated 2 objects, 7 failed and 3 were skipped.
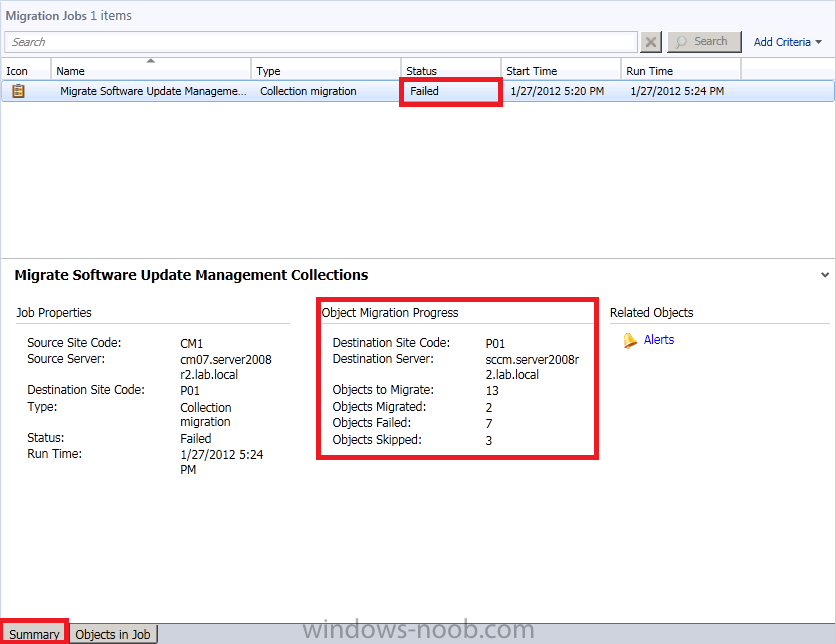
Click on the Objects in Job tab to get specific information about the status of migration.
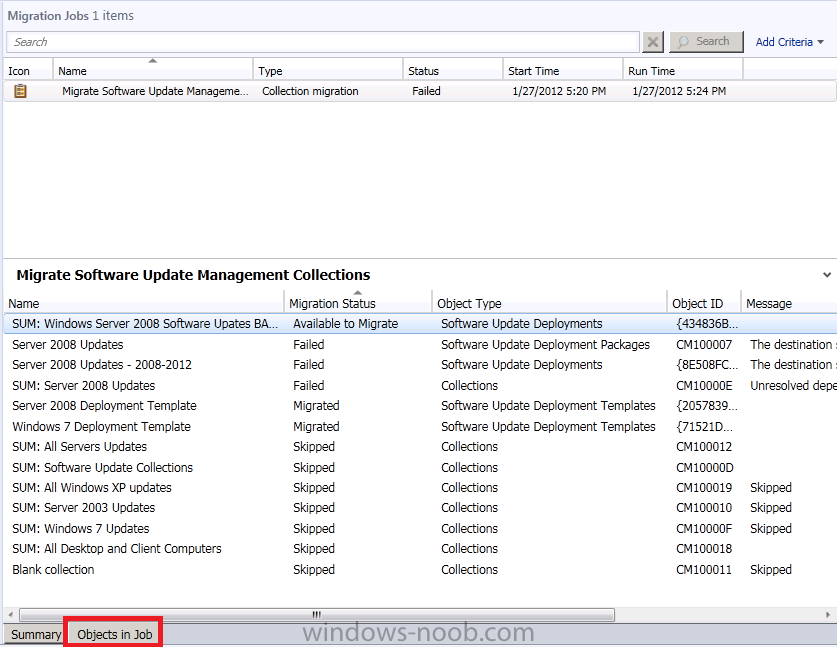
The objects that are skipped are empty collections
(empty collections are NOT migrated). The failed objects are more
interesting and you can select each object that has failed and read its
corresponding message (by scrolling to the right) to find out what you need to do to fix it.

for example, the following message appears on one of the objects:-
Quote
destination site has not yet synchronized the software update with
UniqueID 5f8a1117-…..required for migration of the software update
package. Ensure the software update point has been configured and the
software updates are synchronized at the destination site.
Great, now we know what’s wrong and how to fix it.
The message in this example is telling us that the products synched are
not matching on the destination (it doesn’t understand how to deal with
them) so let’s verify how our Products are configured on both sites, CM07 on the left, CM12 on the right, see the difference ?
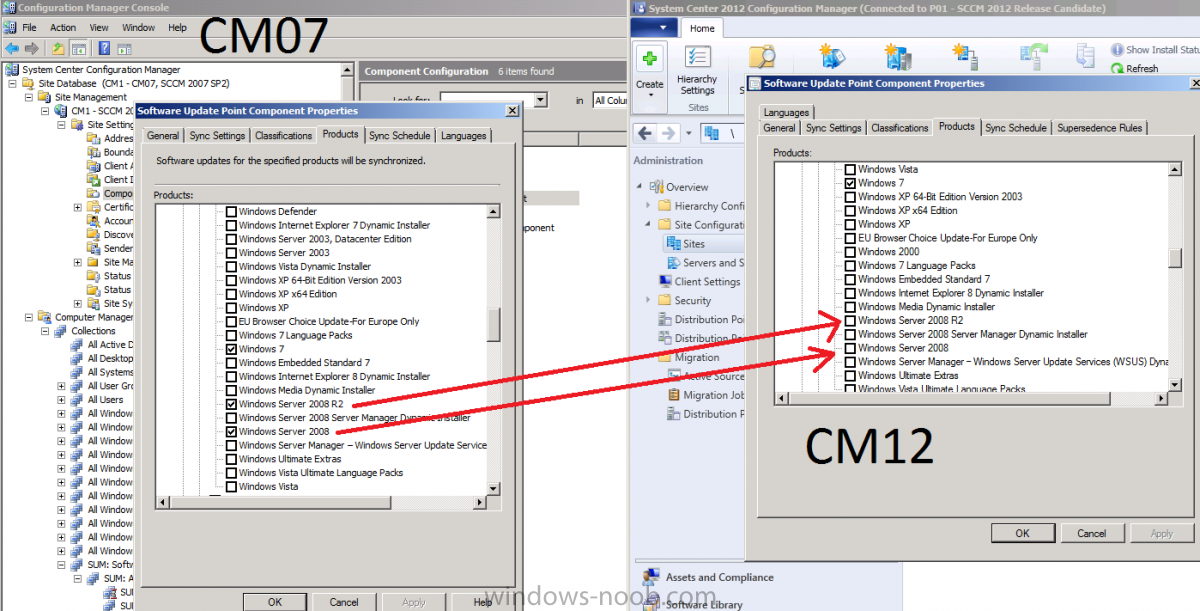
They should both be identical prior to running the Migration Job, this is an important lesson for you 🙂
So correct the problem, do a Software update sync on CM12 and run your migration job again. Repeat this process for each failed message
until all messages have been actioned upon. Note that you will most
likely have to go and Gather Data again particularly if the
logs/messages tell you to do so. But once you’ve resolved the problems
your migration should complete as per the screenshot below.

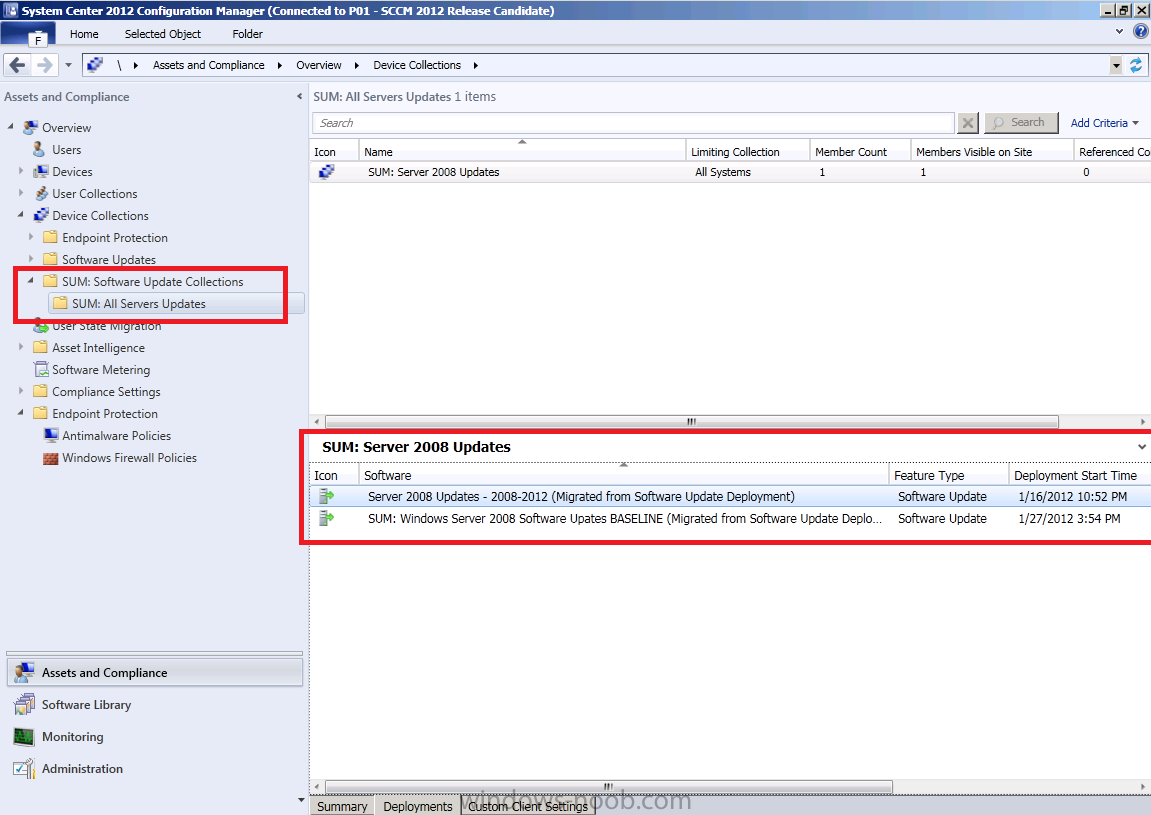
and here’s what did get migrated, I may go into further details about
migrations in a later post, notice the migrated Advertisments become
Deployments.
another view in Software Library, Software Updates
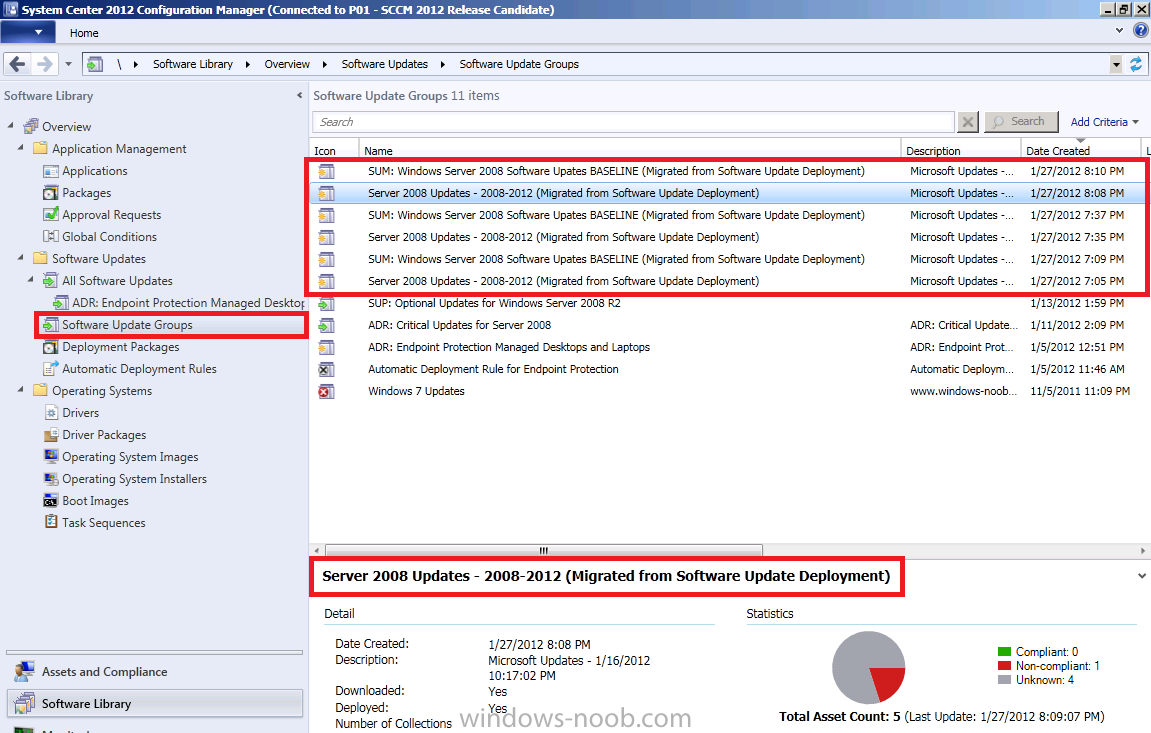
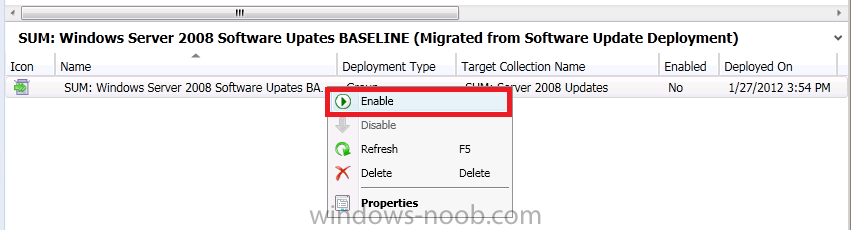
don’t forget to enable any Deployments that you want enabled
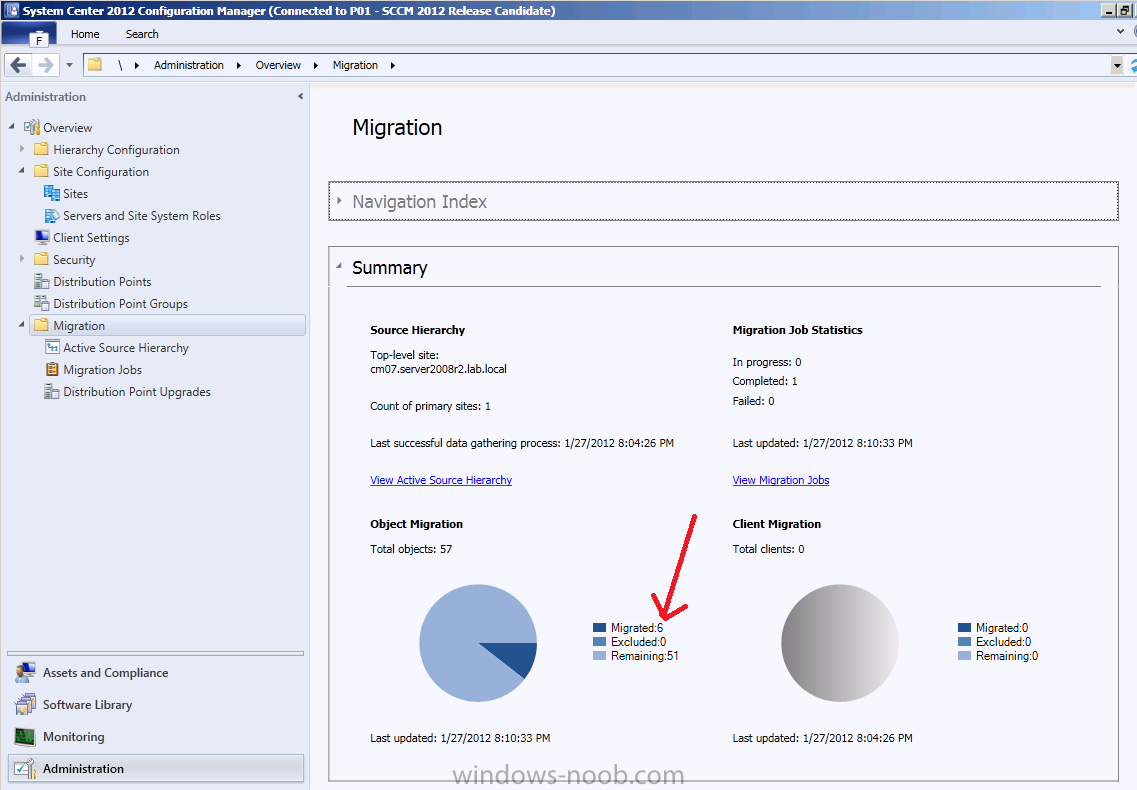
Finally, you can review the Migration Summary
screen to get an overview of your total Migration Progress (you’ll need
to create more migration jobs to get the other objects if you want them
Troubleshooting note
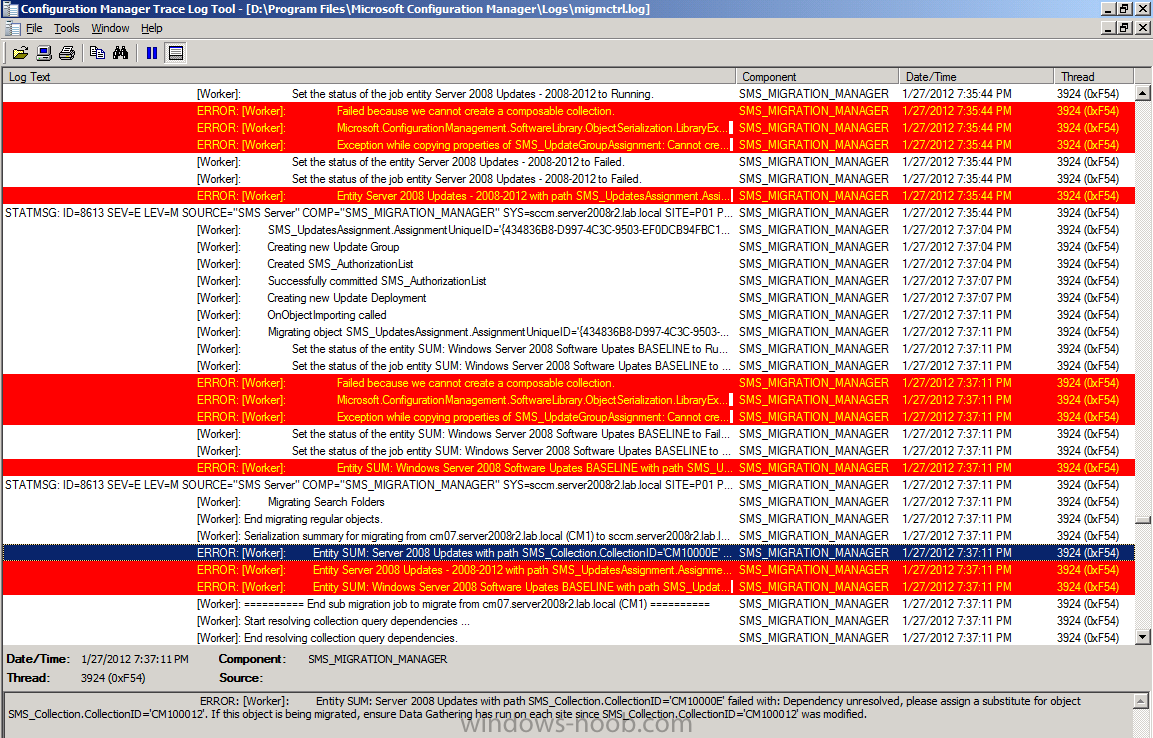
You can review the migctrl.log and smsprov.log
log files for more information about problems with your migration see
screenshot below. They will give you more information about what is
going on behind the scenes.