
In Part 1 of this series we got our AD and SCCM servers ready, and then we installed System Center 2012 Configuration Manager as a standalone Primary site. In Part 2 we configured the SCCM server further by adding some Windows Server roles necessary for the following Configuration Manager 2012 functionality, Software Update Point (SUP) and Operating System Deployment. In Part 3 we configured the server further by Enabling Discovery methods and creating Boundary’s and Boundary Groups. In Part 4 we configured Client Settings, Added roles and Distributed the Configmgr Client to our Computers within the LAB, then in Part 5 we enabled the Endpoint Protection Role and configured Endpoint Protection settings and targeted a collection called All Windows 7 Computers with these settings and policies.
In Part 6 we configured our SUP further to Deploy software updates to our All Windows 7 Computers and Build Windows 7 X64 collections. In Part 7 we used the Build and Capture process to create our Base Windows 7 X64 wim image. In Part 8 we created a USMT 4 package to migrate the users data using hardlinking and then we imported the captured image into ConfigMgr and created a Deploy Windows 7 X64 task sequence. We created a Deploy Windows 7 X64 Collection and set some User Device Affinity collection variables.
In Part 9 we created an Application, and created a deployment type for that application to only install if the Primary User
was True for that device (User Device Affinity), we then copied our
Task Sequence (duplicated it), deployed the new Task Sequence, added a
computer to the new collection and then PXE booted the computer to the
Deployment Menu. Now we will monitor the Deployment process in a lot of
detail to see what happens with UDA and more.
Step 1. Deploy Windows 7 X64 and monitor the progress
Perform the following on your SCCM 2012 server as SMSadmin.
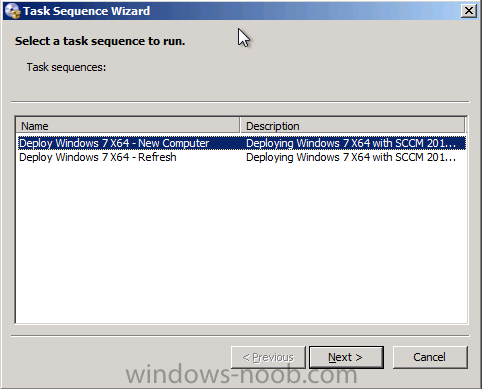
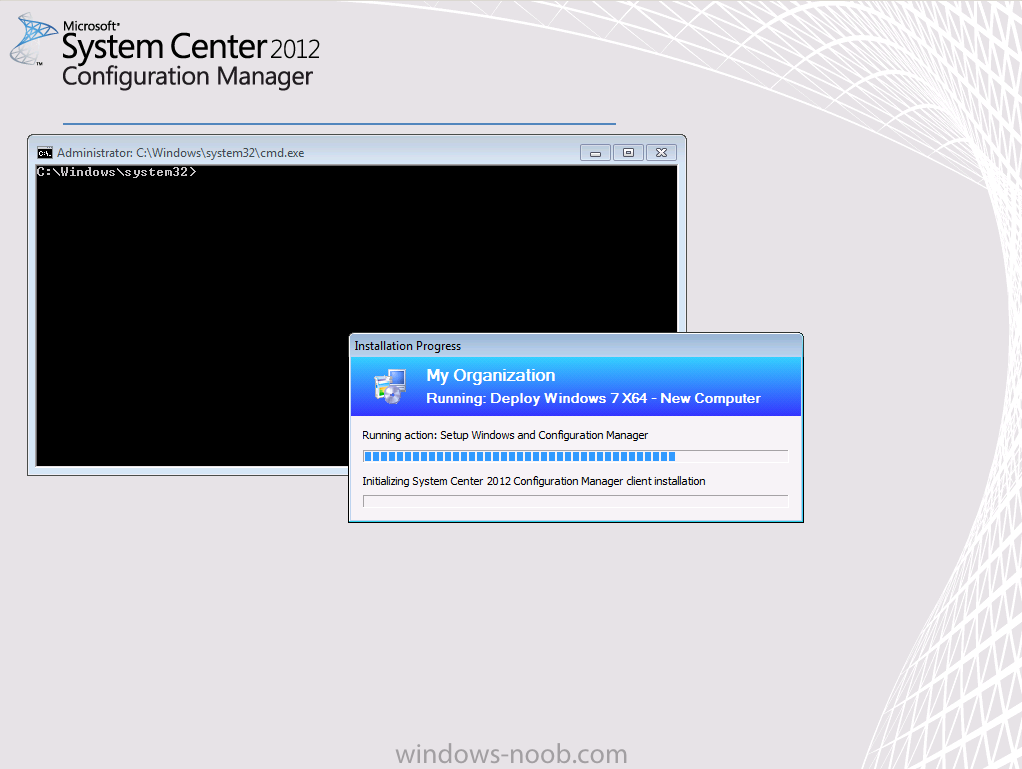
Recap: After PXE booting our W72 virtual machine, we entered the PXE password and then we selected the Deploy Windows 7 X64 – New Computer
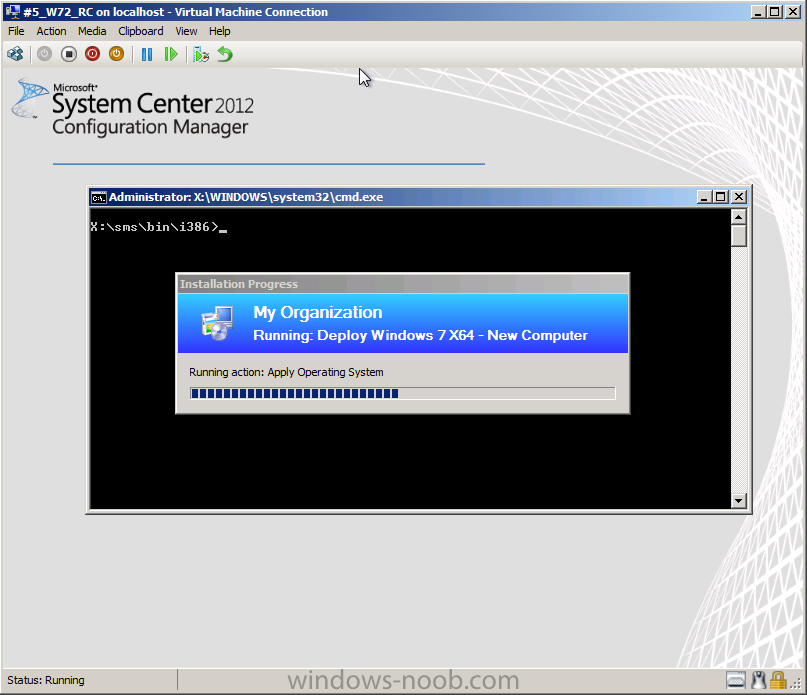
and it formatted the disc and then started applying the Operating
System, at this point I want you to pay close attention to the
Deployment progress so that you can see when it sets the UDA
relationship, if your image is already deployed don’t worry, you can
delete the computer in SCCM, reimport it to the Deploy collection and
PXE boot again. What we want to do here is to view the SMSTS.log file
around the time that Setup Windows and Configmgr step is running, to do
this we will press F8 at the right time, so press F8 now during the
Apply Operating System phase
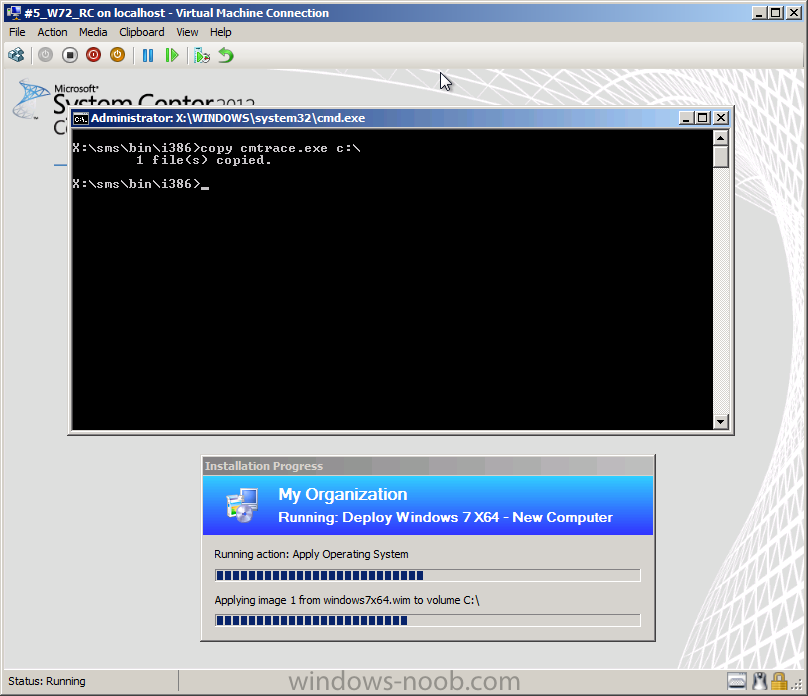
while the image is being applied to c:\ you may as well copy over our troubleshooting tool, CMtrace.exe to the root of c:\
x:\sms\bin\i386\copy cmtrace.exe c:\
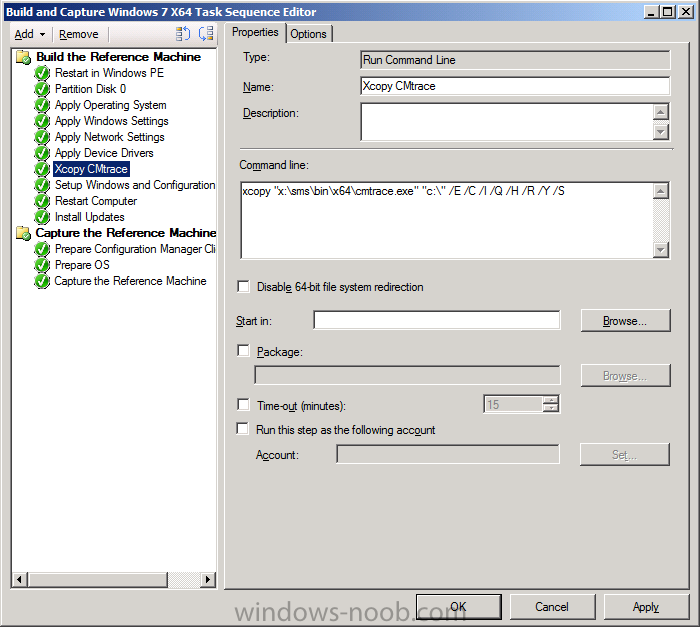
Tip: As the CMTrace tool is now embedded in our boot images, you can automate the above by adding a step to your Build and Capture Task Sequence (or even your Deploy Task Sequence) as long as it occurs before the Setup Windows and ConfigMgr step, the code is xcopy “x:\sms\bin\x64\cmtrace.exe” “c:\” /E /C /I /Q /H /R /Y /S. Note: the path will change depending on what architecture boot image you are using !
after the image is applied the Virtual Machine wants to reboot, so type Exit in your console and the vm will reboot into Windows
and then Setup is installing devices and applying system settings
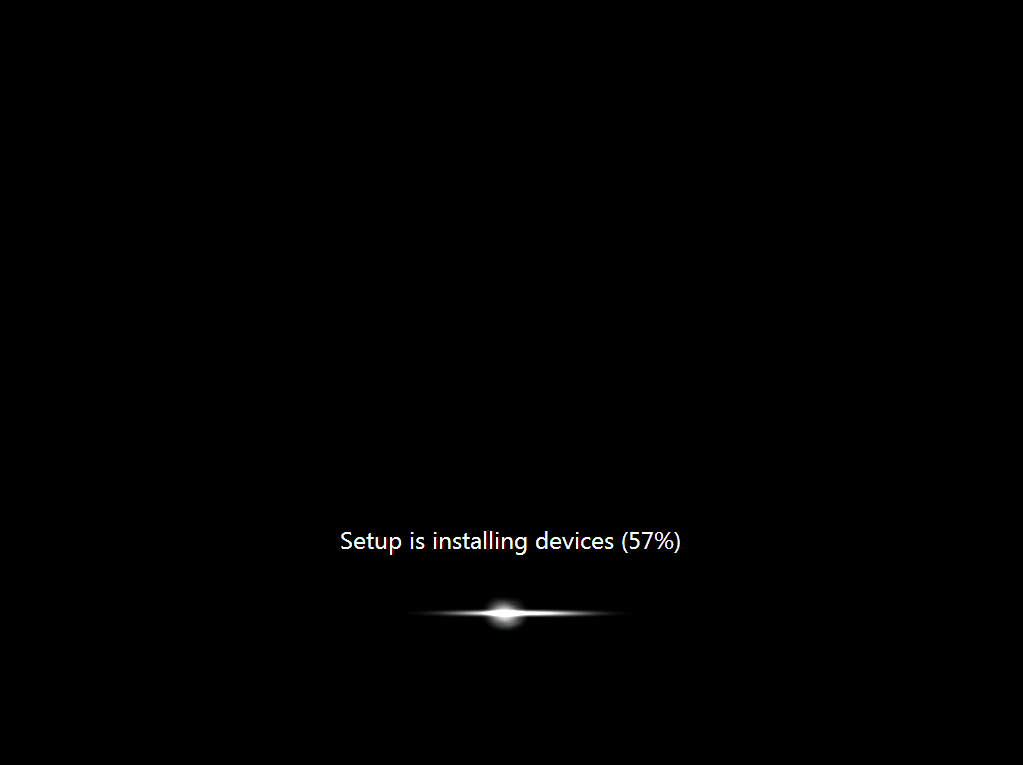
followed by another reboot, and then Setup is preparing your computer for first use,
and this is where you need to be awake if you want to witness this
part of the process, when you see the blue windows screen press F8 again
and it’s now at the Setup Windows and ConfigMgr step
type c:\cmtrace.exe and answer yes to make it the default logging tool, open the following file C:\_SMSTaskSequence\Logs\smsts.log
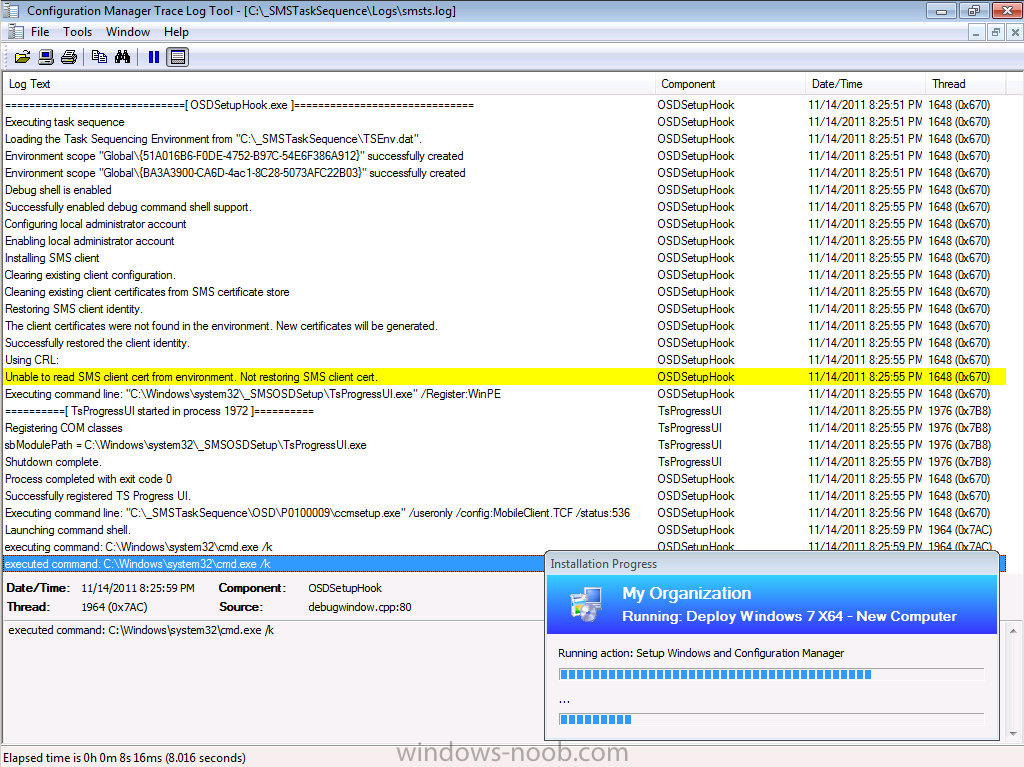
meanwhile on your SCCM server, open the following log file in CMTrace.exe,
D:\Program Files\SMS_CCM\Logs\MP_Status.log
and look for the following line:-
Quote
that is the UDA state message being sent

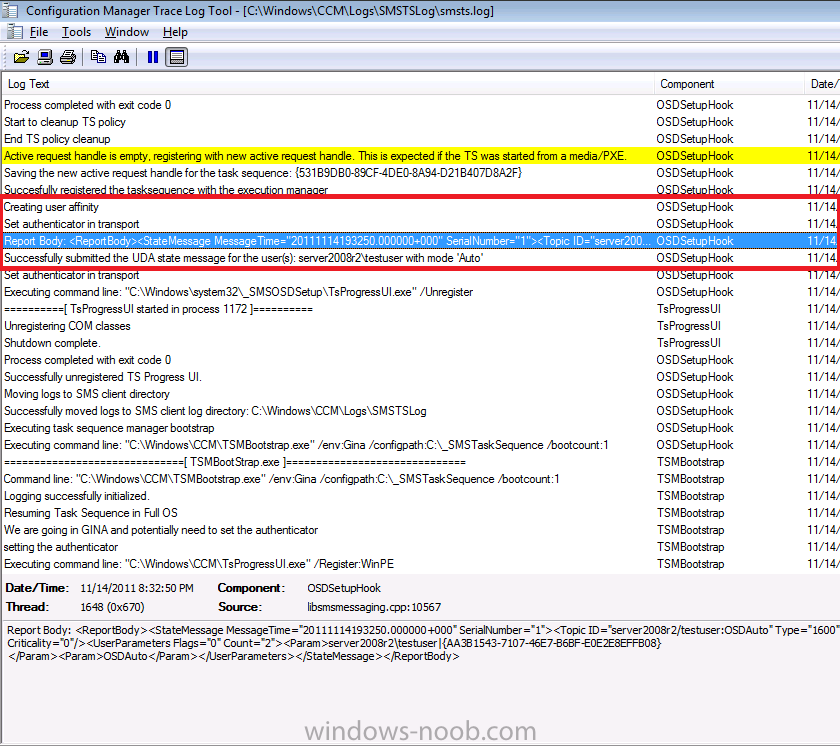
meanwhile on the client we can see the UDA actions in in our SMSTS.log
file (you may have to change the location of the SMSTS.log file to
C:\Windows\CCM\Logs\SMSTSLog\smsts.log)
Quote
Set Authenticator in transport
Report Body: <ReportBody><StateMessage
MessageTime=”20111114103250.000000+000″ SerialNumber=”1″><Topic
=”server2008r2/testuser:OSDAuto” Type=”1600″ IDType=”0″/><State
ID=”1″>
….
Successfully Submitted the UDA state message for the user(s): server2008r2\testuser with mode ‘Auto’
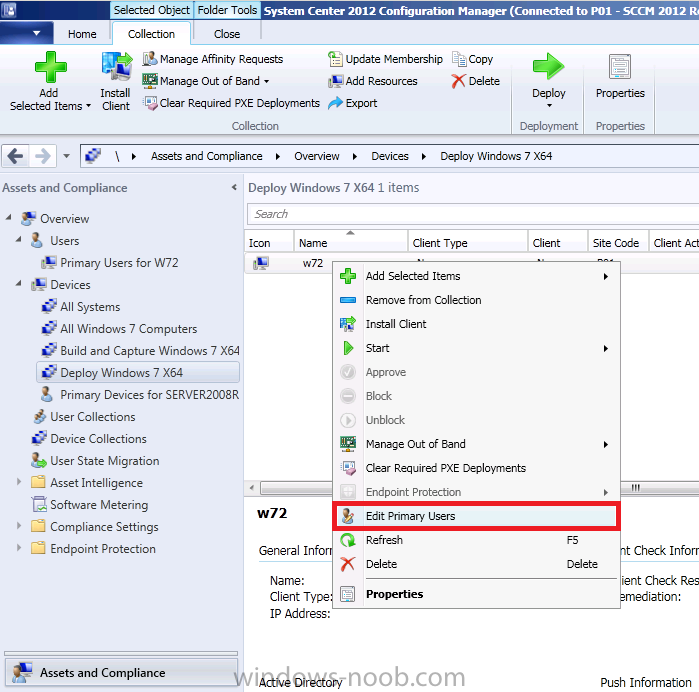
Meanwhile.. back in the ConfigMgr console, click on Assets and Devices, and select our Deploy Windows 7 X64 collection, in there you’ll see our W72 computer, right click it and choose Edit Primary Users
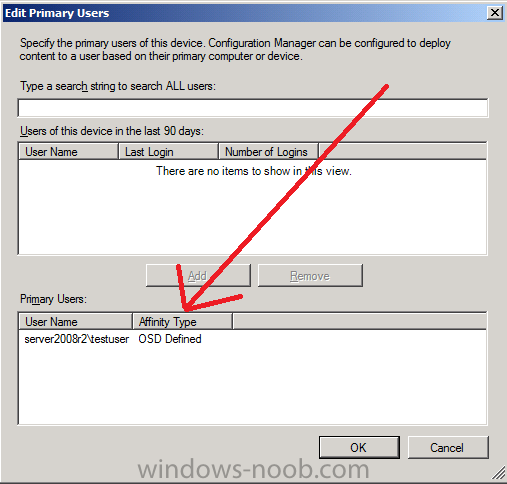
you should see the following, Affinity Type=OSD Defined.
ok, now that you’ve seen what happens, close the CMtrace tool and the command prompt in your Deploy Windows 7 X64 session and let it finish it’s job (it’ll jump to the login screen very quickly)
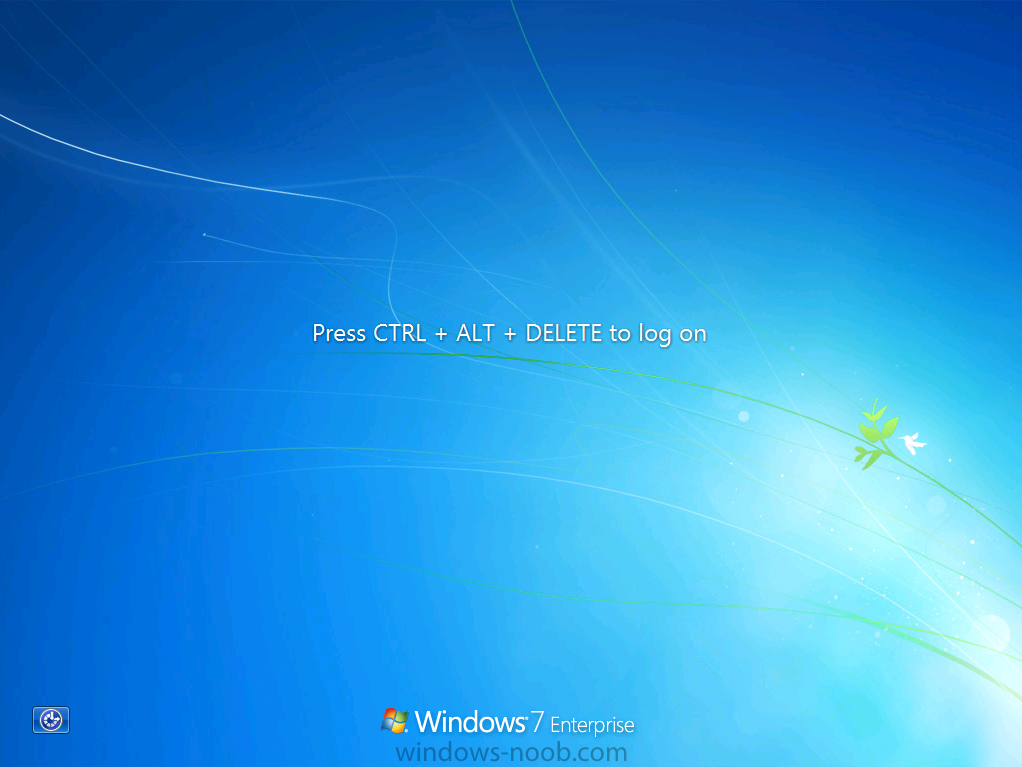
so login and we can review some new logs !
Step 2. Review the Deployed Windows 7 X64 computer
Perform the following on your Windows 7 client as testuser.
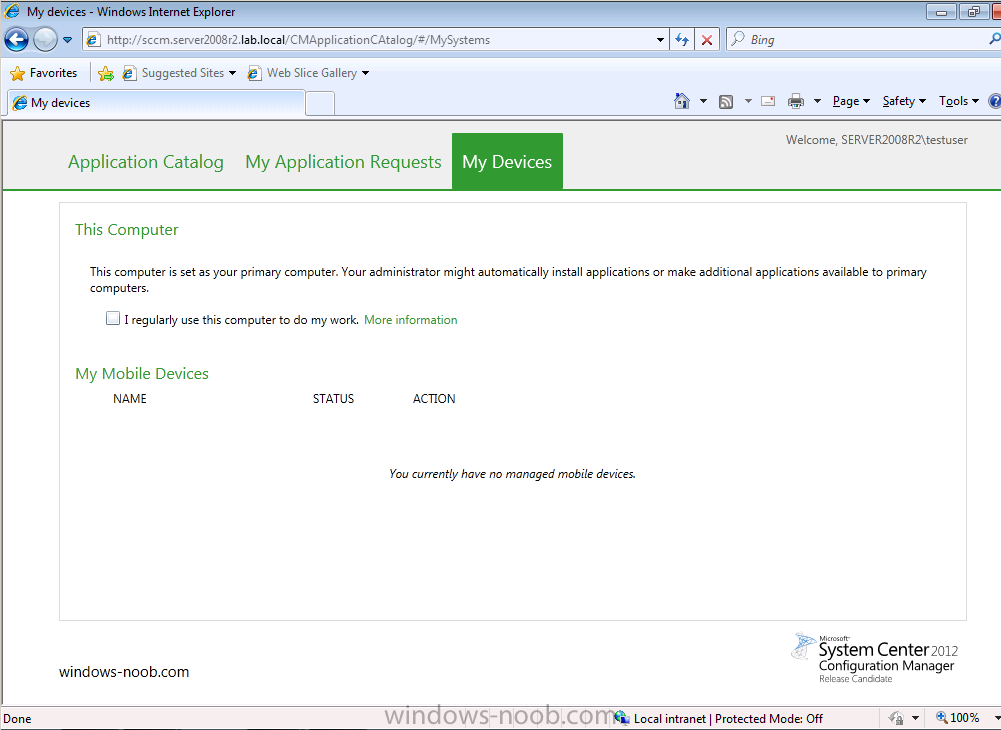
Login to the desktop and start Internet Explorer and browse to the Application Catalog , review the My Devices tab, it should say:-
Quote
computer is set as your primary computer. Your administrator might
automatically install applications or make additional applications
available to primary computers.
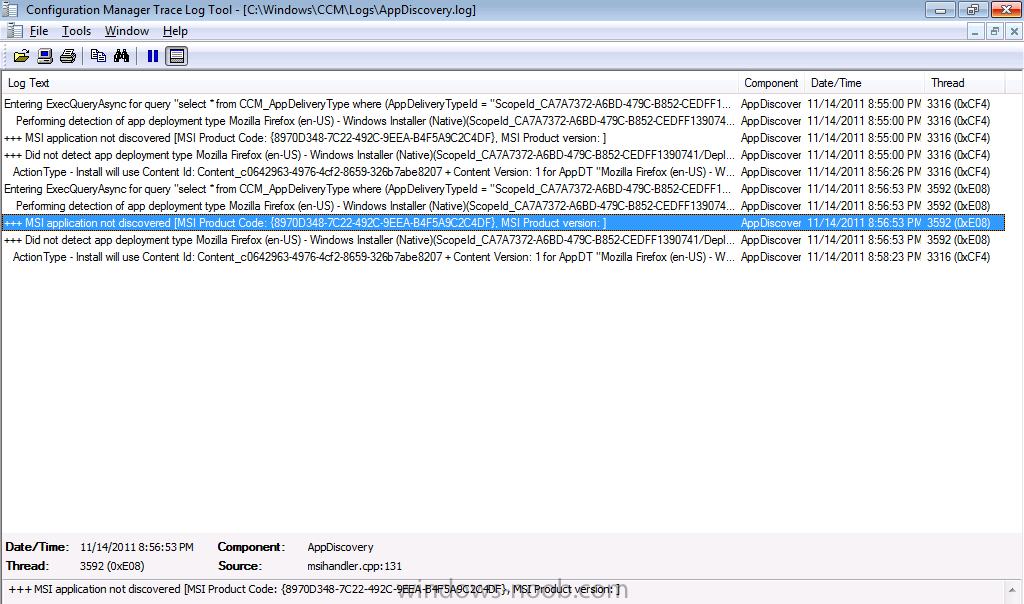
Next, using Windows Explorer, start up CMTrace.exe (located in C:\) and browse to C:\Windows\CCM\Logs, open the AppDiscovery.log file, as we can see it’s logging about detecting wether Mozilla FireFox is installed or not and it reports msi application not discovered
next open C:\Windows\CCM\Logs\AppEnforce.log, you should see it
referencing wether or not a user is logged on (we are logged on now, but
if we had waited 30 minutes or so and then logged on it would have
reported things differently), and how it tries to Enforce installing the
app
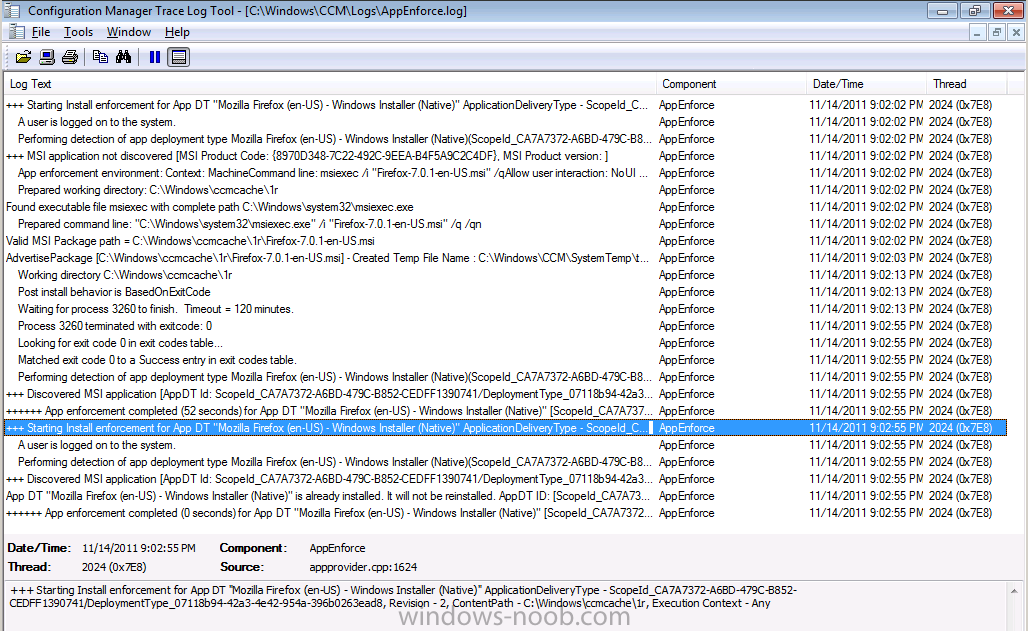
cool stuff indeed, oh and if we minimise CMTrace what do we see ? yup the Firefox icon on the desktop, installed using User Device Affinity variables and by configuring our Deployment Type rules, cool huh ?
Step 3. Modify the boot wim to include prestart and Extrafiles
Perform the following on your SCCM 2012 server as SMSadmin.
Now that we’ve proven that we can use UDA to install apps for our
Primary User, let’s edit the task sequence to prompt us for a Primary
User instead of forcing it via a collection variable. To do this we need
to edit our boot.wim files first of all.
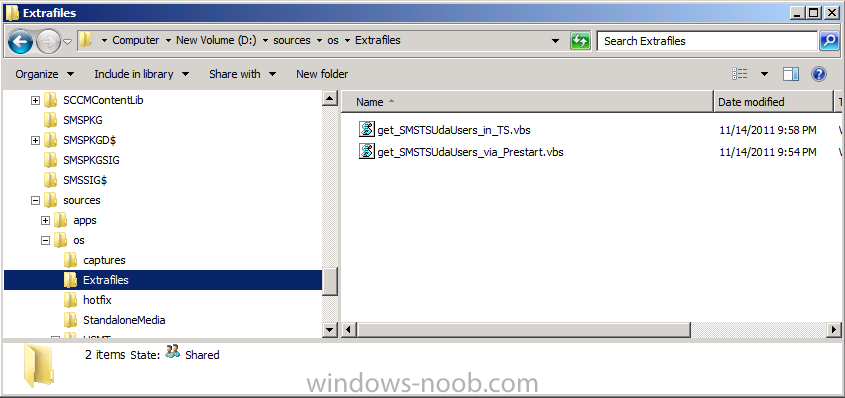
We need a few files, so please download the following zip file

Extrafiles.zip (1.05K)
Number of downloads: 0
and uncompress it to D:\Sources\OS\Extrafiles
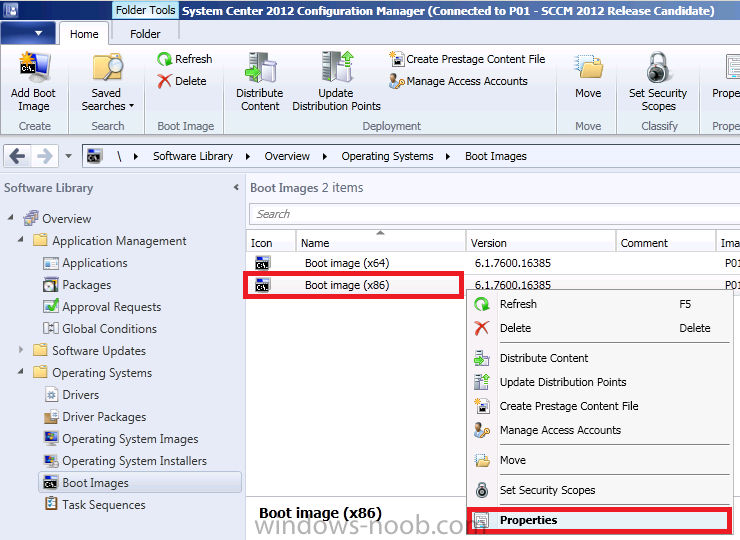
In the ConfigMgr console, locate our Boot image (X86) and right click it, choose Properties
click on the Customization tab and place a checkmark in Enable Prestart Command, place another checkmark in Include files for the prestart command
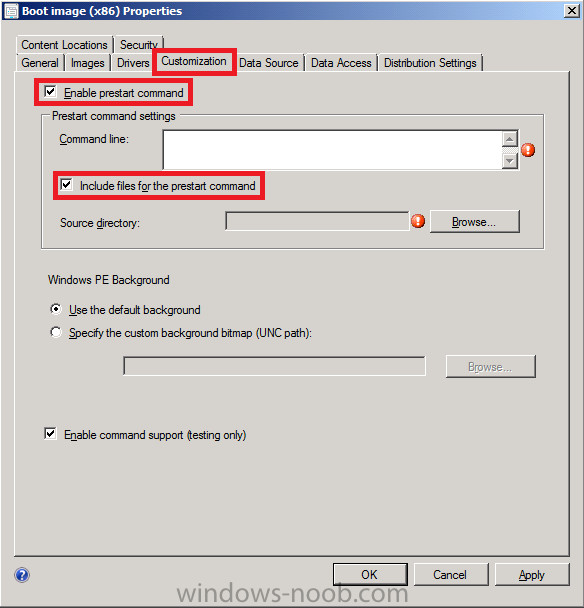
click browse and browse to the UNC path of our Extrafiles
eg: \\sccm\sources\os\Extrafiles
in the command line type the following
cscript.exe get_SMSTSUdaUsers_via_Prestart.vbs
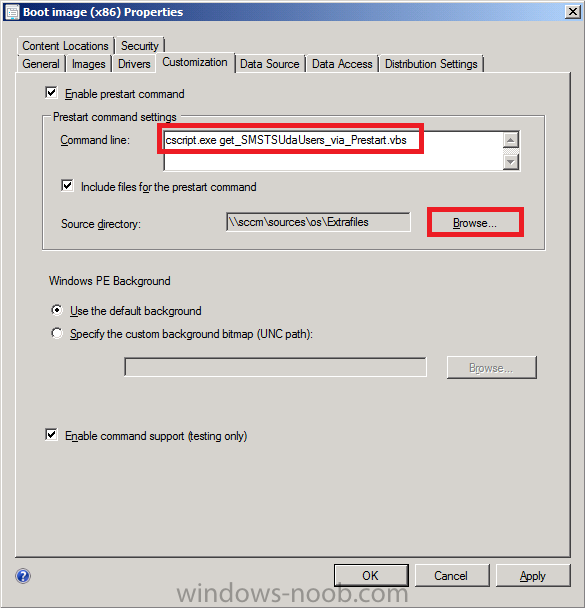
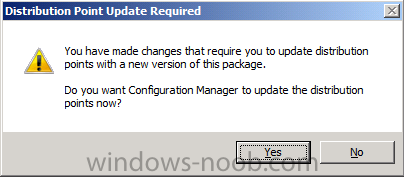
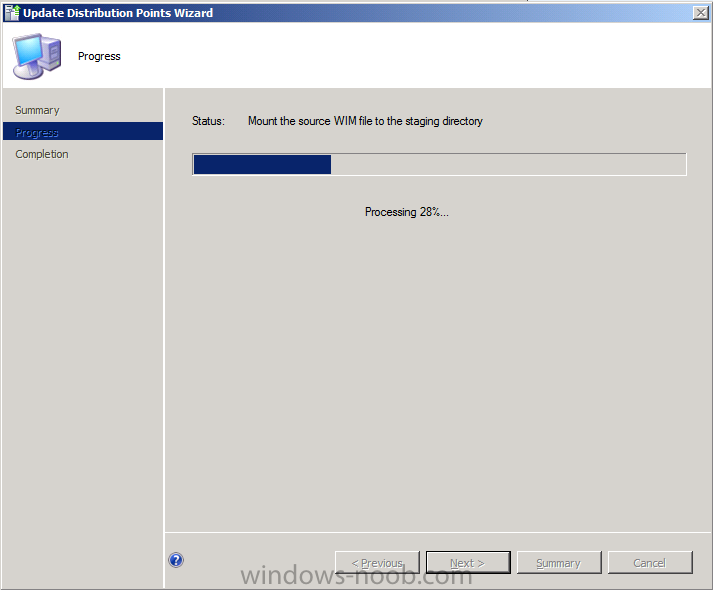
click apply and answer yes when prompted about distribution point update required
it starts to inject the changes
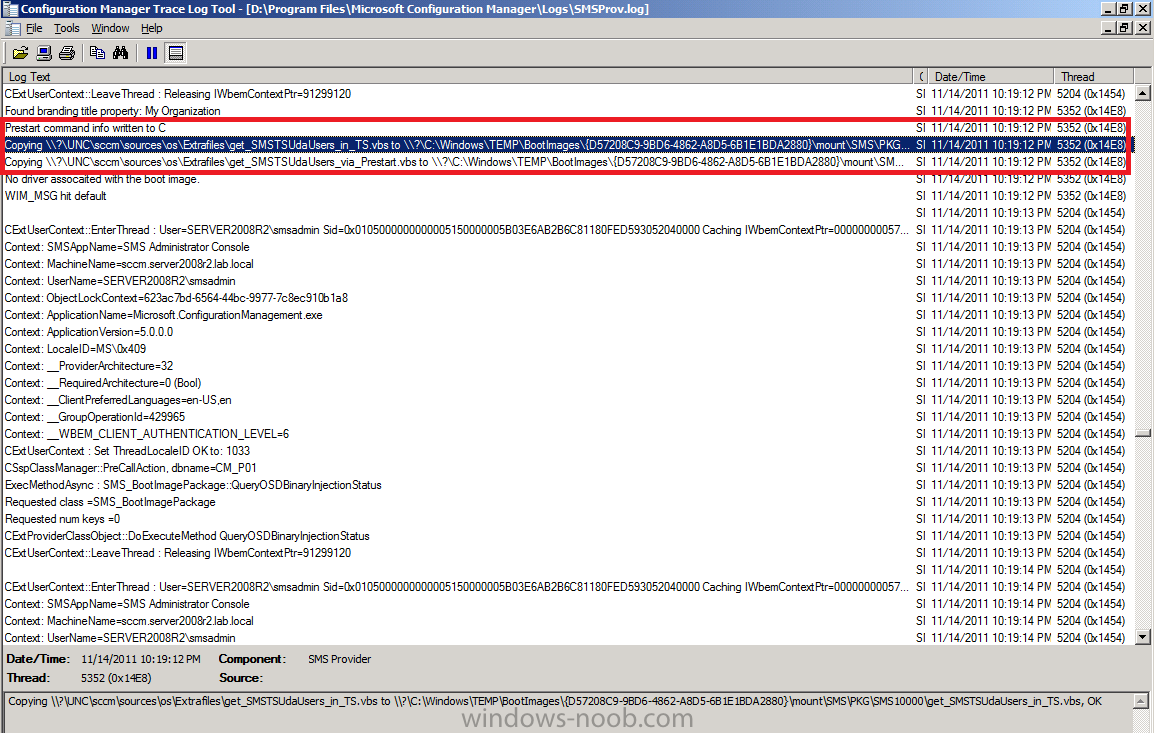
Tip: you can open the SMSProv.log to monitor the files being injected into your boot.wim files.
Step 4. Modify our Collection Variables
Perform the following on your SCCM 2012 server as SMSadmin.
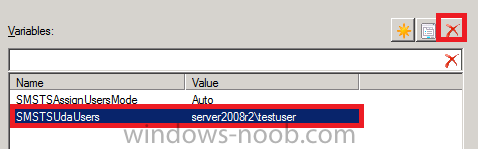
In the ConfigMgr console, click on Assets and Compliance and locate our Deploy Windows 7 X64 collection, right click, choose properties, select the Collection Variables tab

remove the SMSTSUdaUsers variable we set earlier by highlighting it and clicking on the red X, answer yes when prompted.
Step 5. PXE boot and test the prestart command
Add a new virtual machine to our Deploy Windows 7 X64 collection (or
delete the one we used previously, and then import it back again, verify
it’s in the collection after the import before pxe booting).
PXE boot and you’ll get to the Task Sequence password screen..
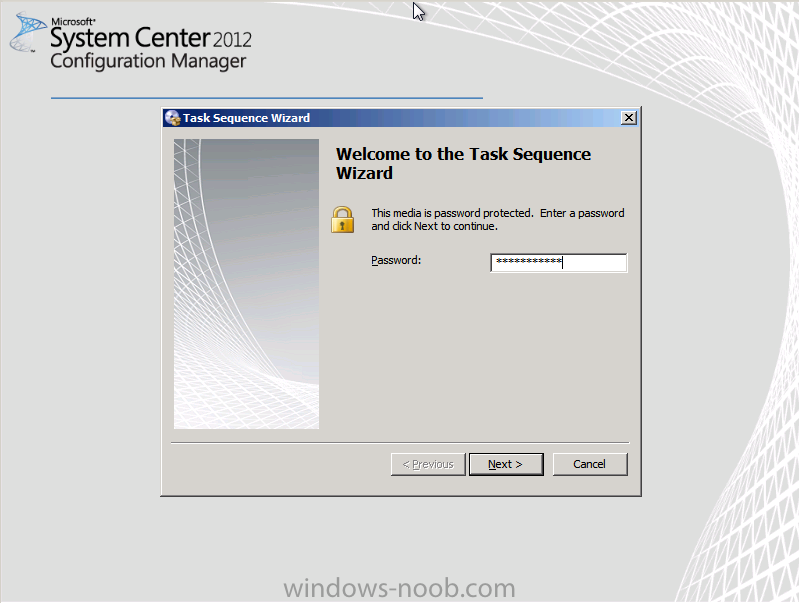
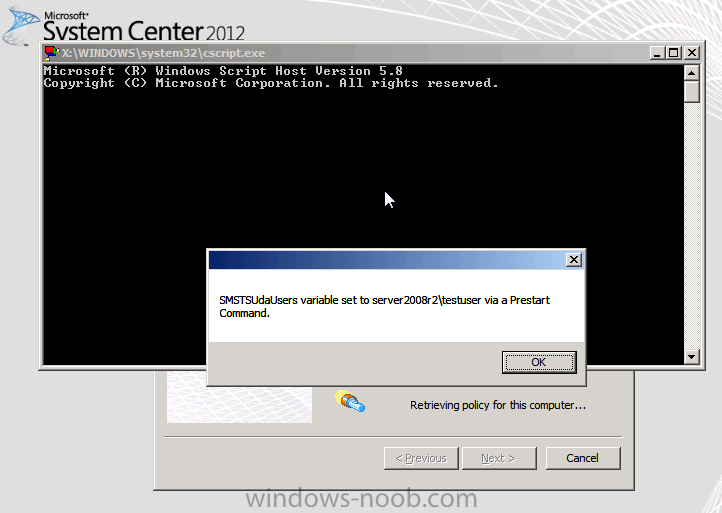
press next and Voila, you get to see your Prestart command in action !

so enter the primary user name and click ok
and our SMSTSUdaUsers variable is now set via a Prestart command,
in the next part of this series, we will see how we can set this via the
task sequence itself and also look at setting the Task Sequence
Deployment ID via a variable to override what’s targetted to our
computer.
Original post here on windows-noob.com
