
In Part 1. of this series we Installed SCCM 2012, in Part 2 we started to configure it. In Part 3, we configured Beta 2 some more by enabling Active Directory discovery methods, adding some site system roles, configuring the computer client agent and client push settings and finally doing a manual client installation to verify it all worked, in Part 4 we looked at installing an application using Application Management and the Software Catalog and the Software Center features of SCCM 2012, and in Part 5, we added the FSP, SLP, SMP, SUP.
In Part 6 we got our SCCM 2012 server ready for Deploying Windows 7 Enterprise SP1 so that we could start deploying some Windows 7 clients to enhance our LAB, then in Part 7 we created a Build and Capture Task Sequence and deployed it to our Build and Capture collection.
In Part 8 we created our Network Access Account and captured our Windows 7 SP1 image (and Windows 7 RTM). Now we will deploy that captured image to a new Virtual Machine, in Part 9 we imported our captured images, created a new Deploy Task Sequence and Deployed Windows 7. Now we will Synchronize Software Updates and verify that they are synchronising using logs.
Note: I will assume you
have internet access in your lab, if not you’ll need to set that up. In
addition you must have completed Part 5 where we installed the Windows Server 2008 WSUS role and we installed the SUP role in Configmgr.
Quote
in Microsoft System Center Configuration Manager 2012 provides a set of
tools and resources that can help manage the complex task of tracking
and applying software updates to client computers in the enterprise. An
effective software update management process is necessary to maintain
operational efficiency, overcome security issues, and maintain the
stability of the network infrastructure. However, because of the
changing nature of technology and the continual appearance of new
security threats, the task of effective software update management can
be challenging.
Technet recommended reading:
Introduction to Software Updates – http://technet.micro…y/gg682168.aspx
Planning for Software Updates in Configuration Manager – http://technet.micro…y/gg712696.aspx
Prerequisites for Software Updates in Configuration Manager – http://technet.micro…y/hh237372.aspx
Configuring Software Updates in Configuration Manager – http://technet.micro…y/gg712312.aspx
Step 1. Trigger a Software Updates Synchronization.
In the Wunderbar click on Software Library, then select Software Updates, right click on All Software Updates and choose Synchronise Software Updates.
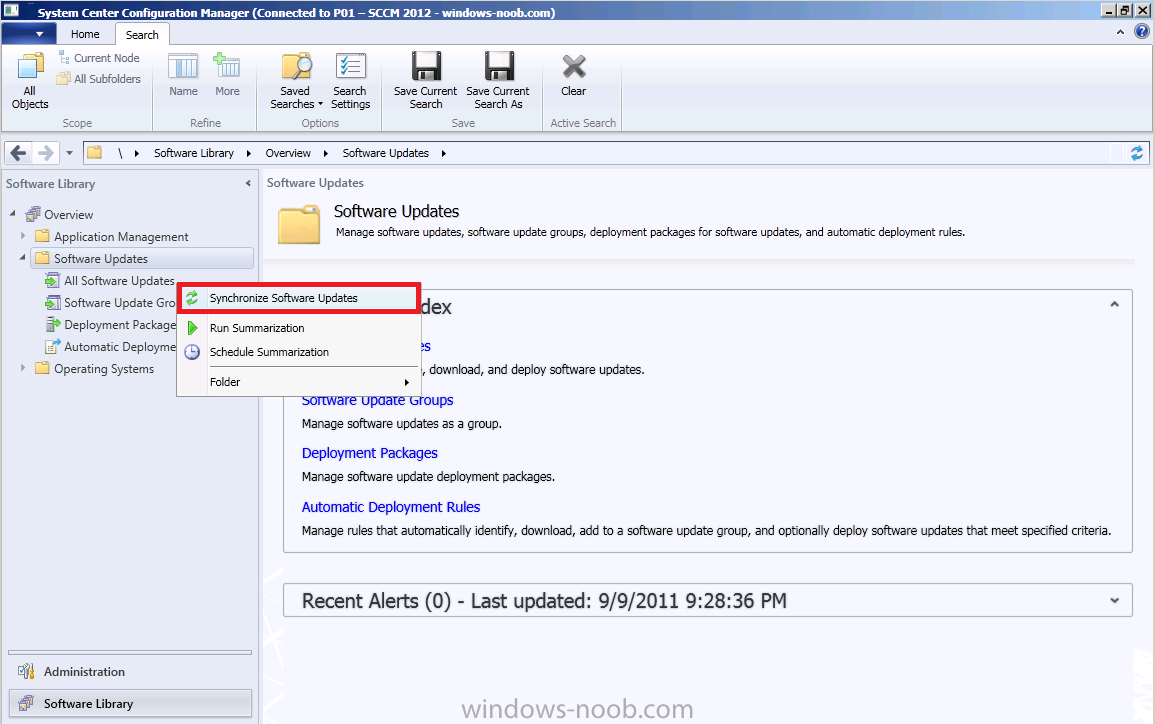
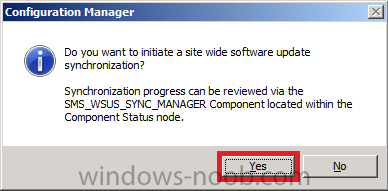
You will be prompted about the action, answer Yes.
Step 2. Monitor it’s progress.
Monitoring the progress using the Wsyncmgr.log file.
Using windows explorer, open the wsyncmgr.log file located in D:\Program Files\Microsoft Configuration Manager\Logs in Trace64.
You should see the sync is starting with the following line in the Log, Performing Sync on local request.
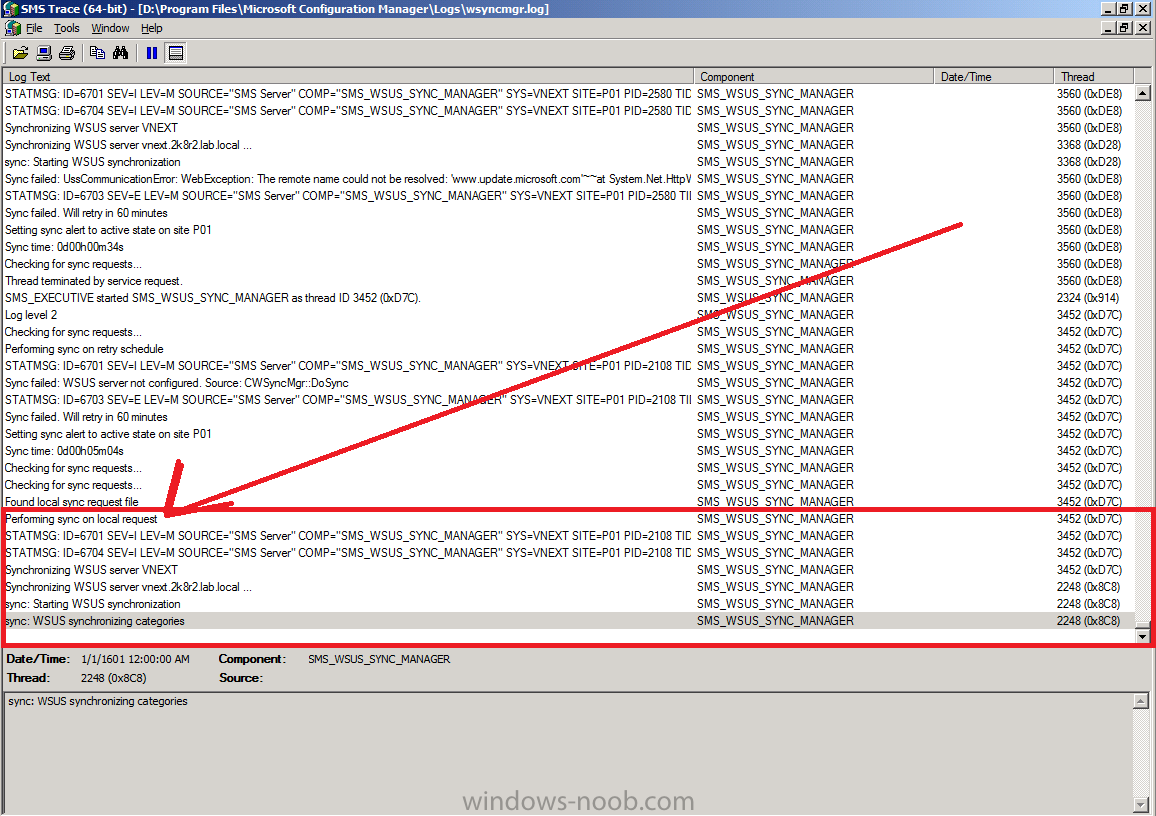
If your internet connection is slow like in my lab this will take 10 or
more minutes to fully sync, so go ahead and have a cup of coffee or
stretch your legs. If you want to monitor the entire process you can
view this log in Trace and you’ll see it progressing along, if it fails,
try and force the sync again.
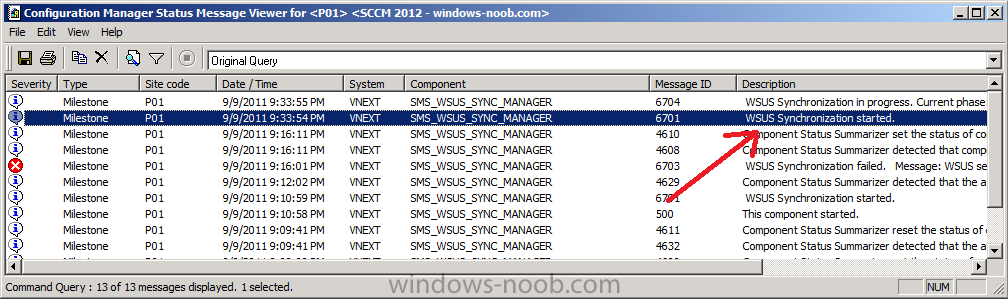
Monitoring the Process using the SMS_WSUS_SYNC_MANAGER component status log.
You can also follow the progress of the sync by monitoring a component
status log called SMS_WSUS_SYNC_MANAGER. To find this, click on Monitoring, System Status, Component Status and locate the log. Right click the log, choose Show Messages, Choose All.
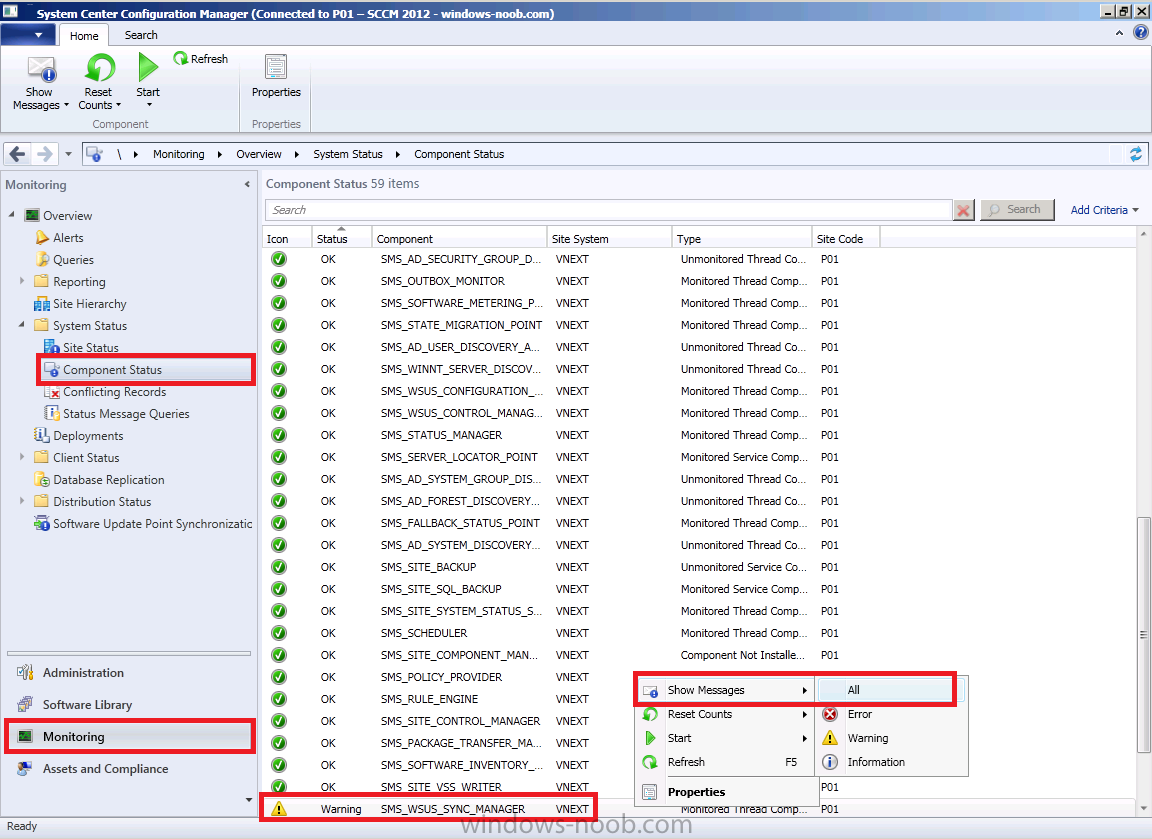
look for WSUS Synchronization Started
At this point lets go back to our Trace log and see how it’s progressing,
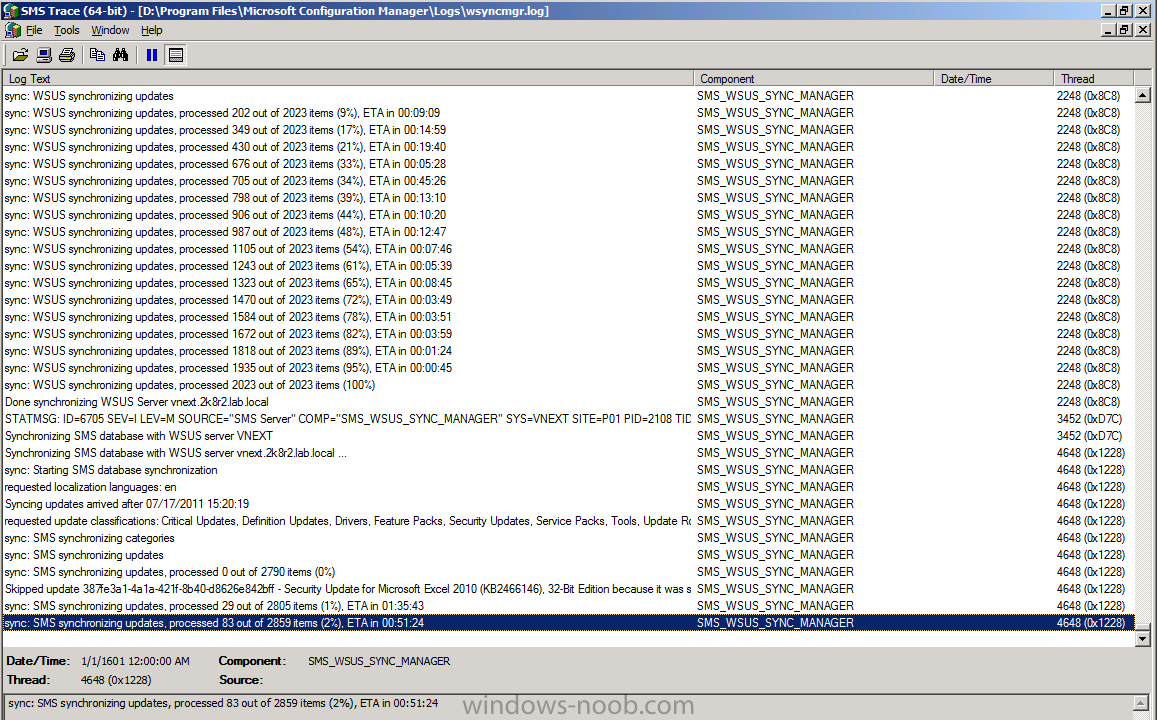
As we can see it’s progressing nicely and currently syncing with the site database,
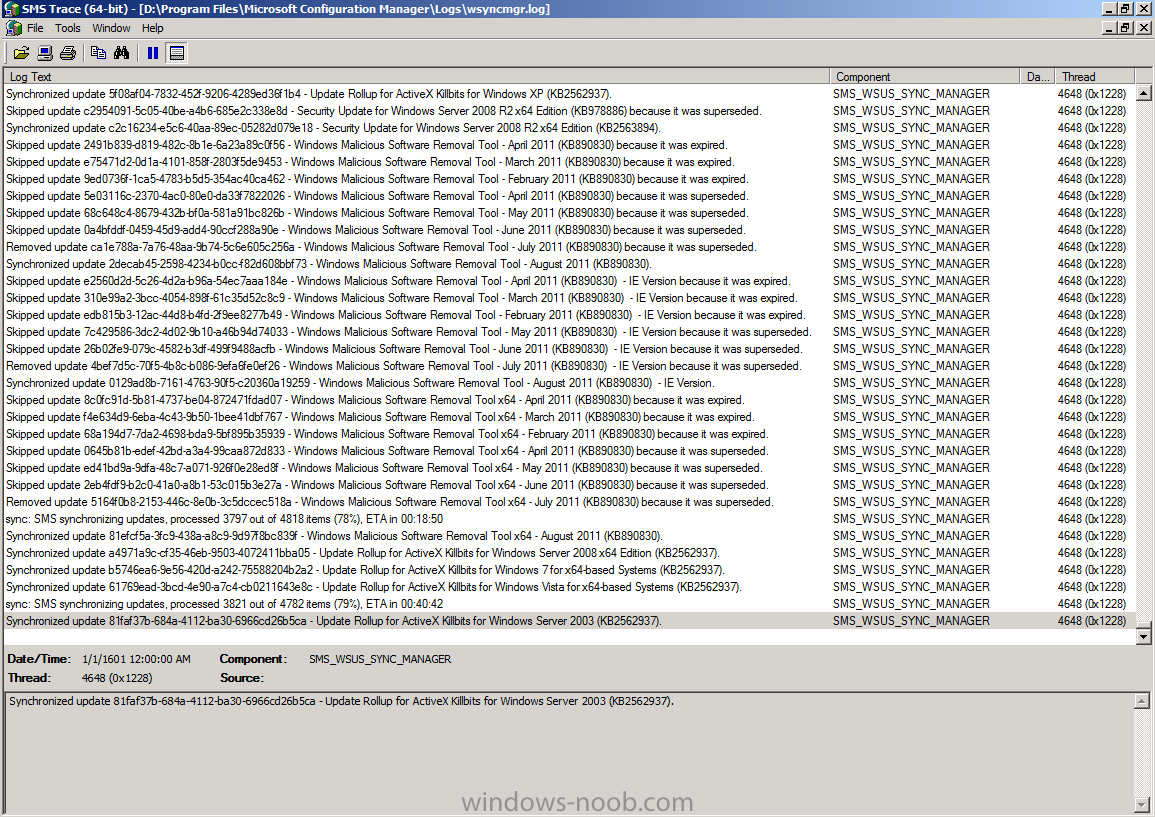
after some more time we get even further into the sync process (79%
done) here you can see some updates getting removed because they are expired or superseded (you probably won’t see this unless you’ve done a successful sync before)
and finally the sync is done !
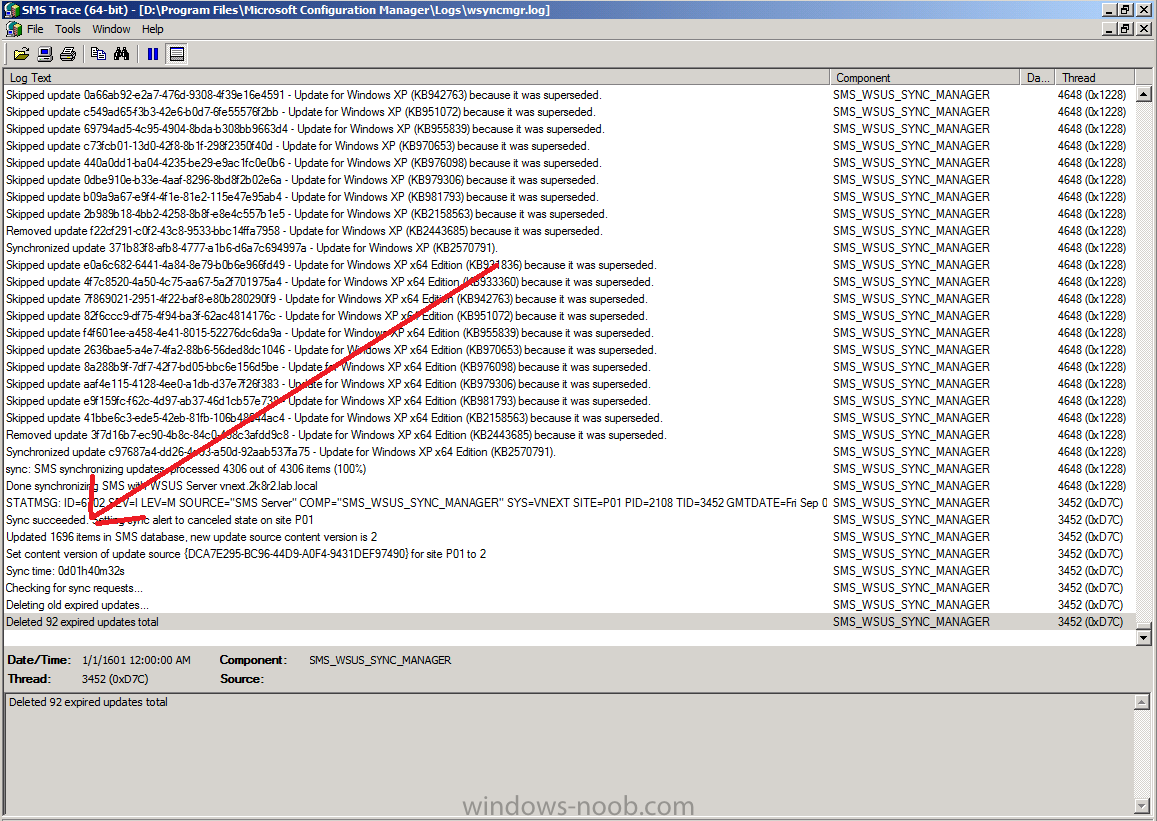
In our Status Component Log (SMS_WSUS_SYNC_MANAGER) we see the following (Refresh by pressing F5), look for the line WSUS Synchronization done

Step 3. Review the new updates
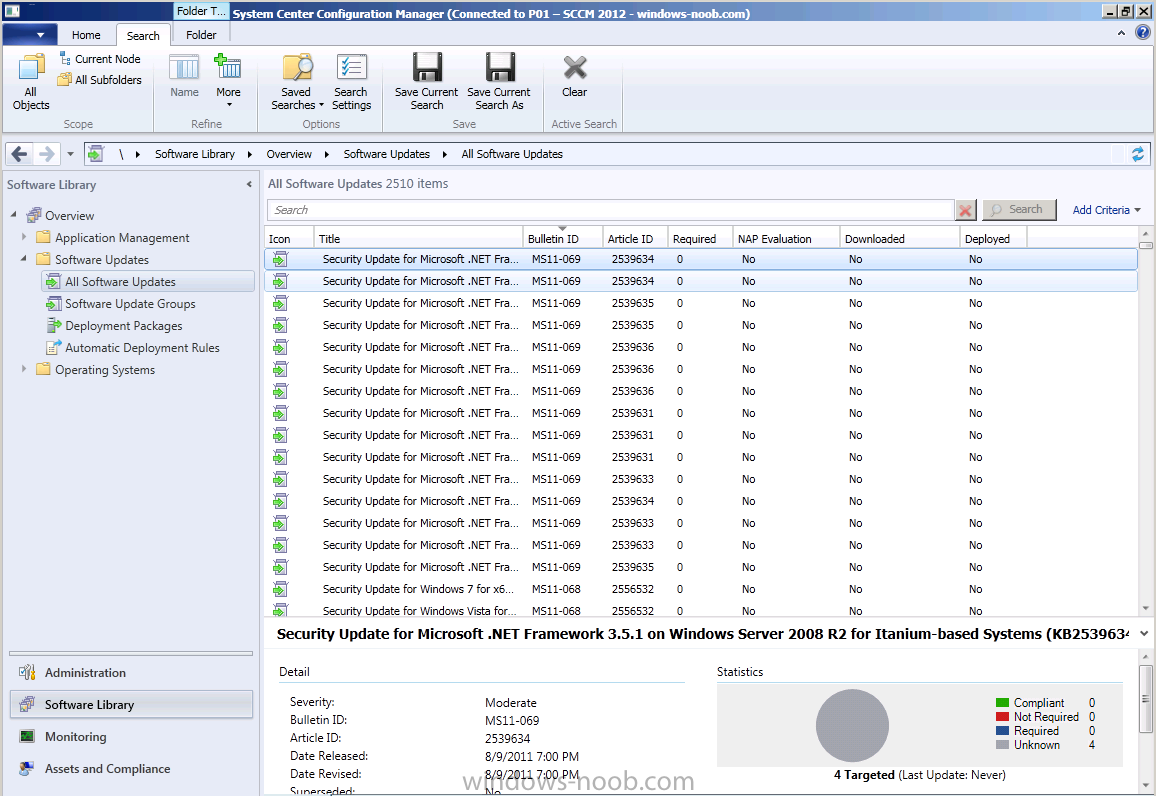
In the Configuration Manager console, click on Software Library, then select Software Updates, click on All Software Updates, click on Bulletin ID and sort by Bulletin Id. You should see something like this
In the next part we will Deploy Software Updates to our Windows 7 Clients.
