
Now that we have Configuration Manager 2012 SP1 beta to test, there is a new BitLocker step in the default task sequences that allows us to enable BitLocker during the deployment and it is called pre-provision BitLocker. Pre-provision BitLocker gives us the ability to Encrypt the data on the disc (not the free space, just the used space) on the fly and that means you end up with an encrypted disc much faster than we are currently used to.
Before you undertake this task though you’ll need a few things in place, namely you need Configuration Manager 2012 Service Pack 1 installed and you’ll need to be familiar with Deploying Windows 8 and BitLocker itself. WinPE 4 is a key part of pre-provisioning BitLocker, so if you don’t have that version of WinPE you can forget about trying this. Installation of the ADK will upgrade your default WinPE boot images to the correct version.
In this guide I’m assuming that you have already upgraded to Configuration Manager 2012 Service Pack 1 and that you have imported a Windows 8 install.wim image as described here.
Step 1. Verify that Active Directory is ready for BitLocker
perform the following on your Active Directory domain controller as a domain administrator.
As part of our task sequence we will use the built-in Enable BitLocker which is configured by default to store the recovery key in Active Directory.
Note: You can save BitLocker recovery information in AD DS if your domain controllers are running Windows Server 2003 with Service Pack 1 (SP1) or Service Pack 2 (SP2), Windows Server 2003 R2, Windows Server 2008, or Windows Server 2008 R2. You cannot save recovery information in AD DS if the domain controller is running a version of Windows Server earlier than Windows Server 2003 with SP1. In this guide I’m using a domain controller running Windows Server 2008 R2 Service Pack 1.
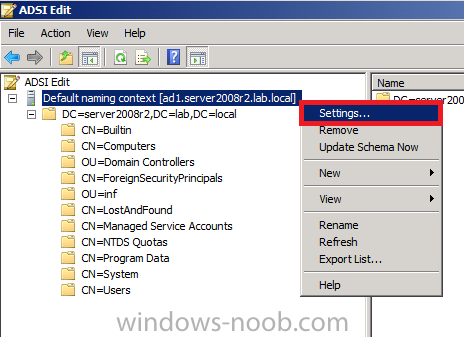
On your active directory domain controller start up AdsiEdit, right click on Default naming context and select settings
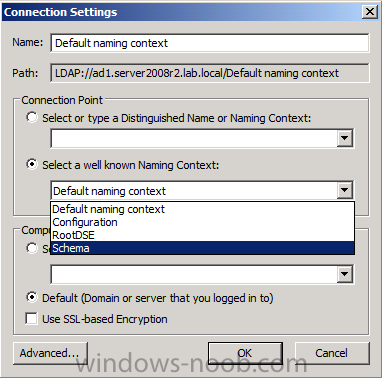
The Connection Settings window appears, in the Select a well known naming context section click on the drop down menu and select Schema.
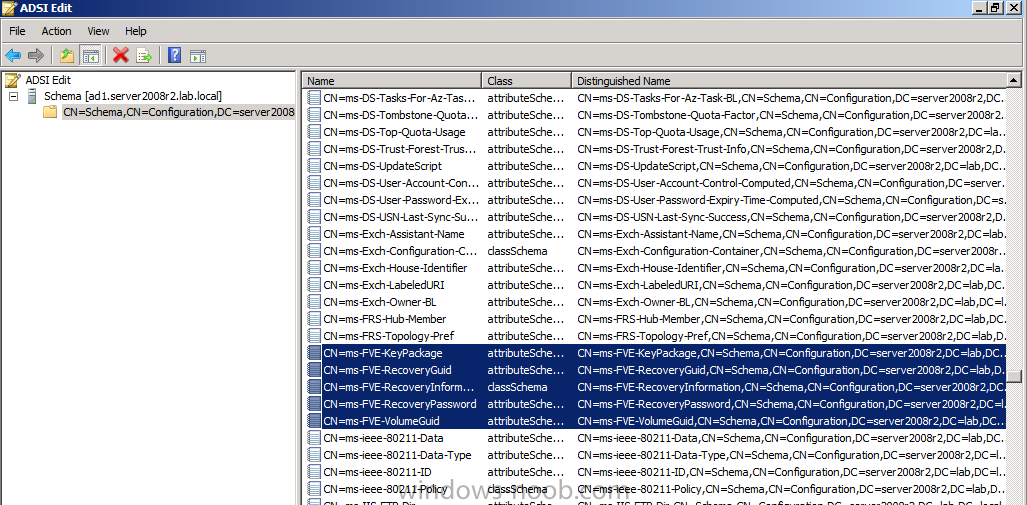
you should see a bunch of values starting with ms-FVE (scroll down to see them, it’s a long list). The common name (CN) for the BitLocker recovery object is ms-FVE-RecoveryInformation. You have now verifiedthat the Active directory Schema has the nescessary objects to store the keys.
- CN=ms-FVE-KeyPackage – attributeSchema object
- CN=ms-FVE-RecoveryGuid – attributeSchema object
- CN=ms-FVE-RecoveryInformation – classSchema object
- CN=ms-FVE-RecoveryPassword – attributeSchema object
- CN=ms-FVE-VolumeGuid – attributeSchema object
- CN=ms-TPM-OwnerInformation – attributeSchema object
If the above objects are not present and you are running an earlier version of Windows Server then you may need to extend the Active Directory Schema to support Bitlocker, please review this page on Technet for information on that.
Step 2. Create a BitLocker Policies Group Policy Object
perform the following on your Active Directory domain controller as a domain administrator.
Start up Group Policy Management and right click on your domain name, choose Create a GPO in this Domain and link it here.
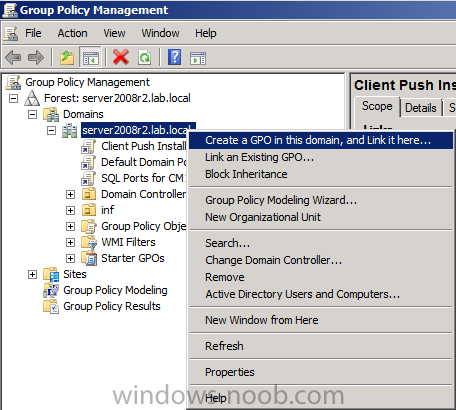
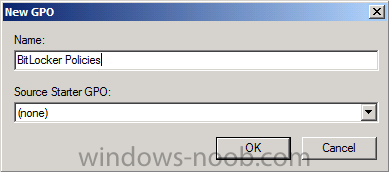
give the new GPO a name, call it BitLocker Policies as per the screenshot below.
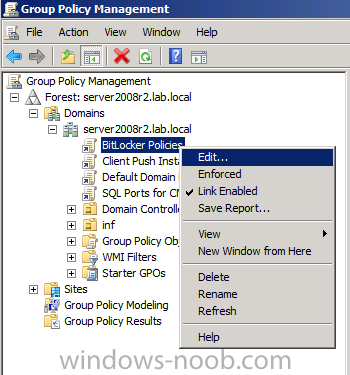
Right click on the newly created GPO and choose Edit
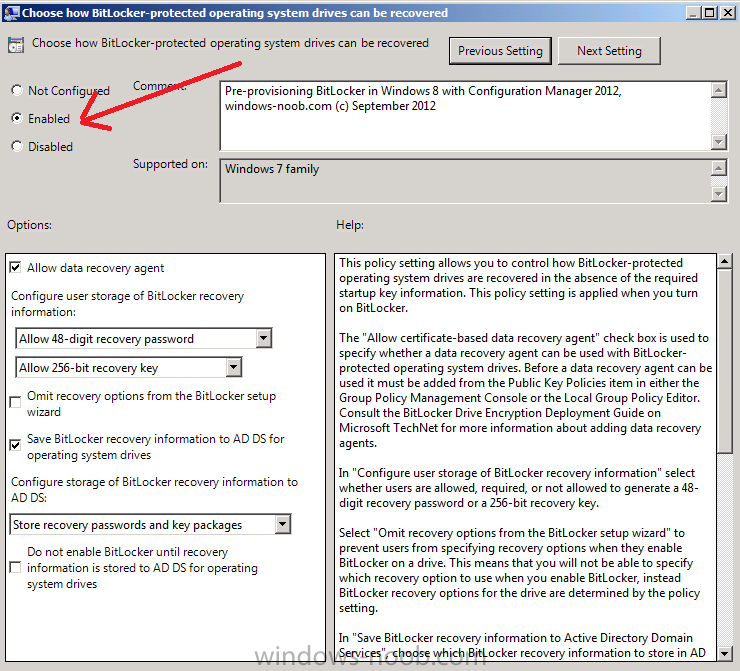
navigate to Policies, Administrative Templates, Windows Components, BitLocker Drive Encryption, Operating System Drives and select the following policy, Choose how BitLocker-protected operating system drives can be recovered.

Right click on the policy, choose edit, then Enable the setting and apply your changes.
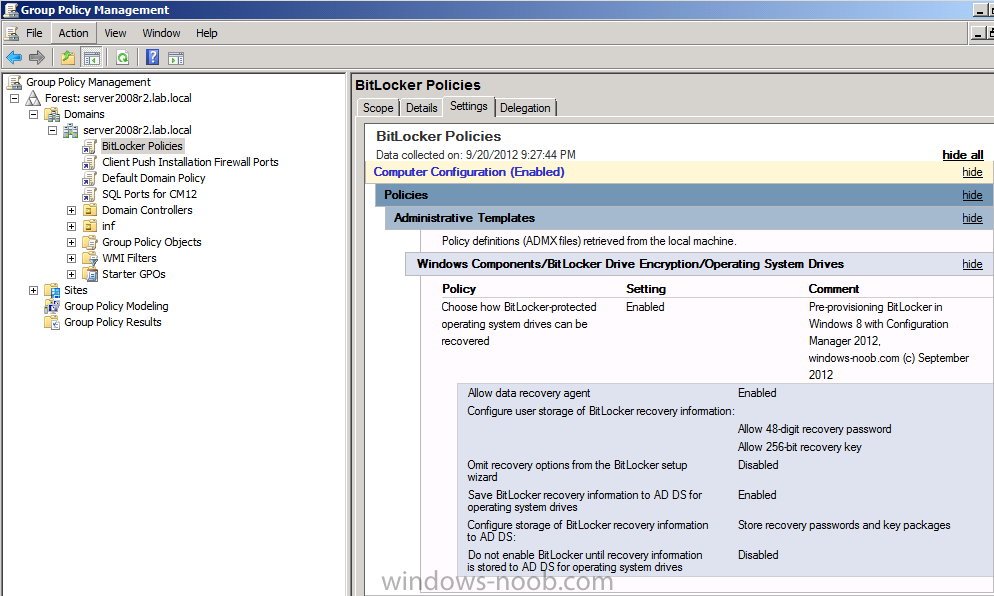
At this point our Group Policy is complete.
Step 3. Create a new deploy task sequence with Bitlocker enabled
perform the following on your Configuration Manager Server as SMSadmin
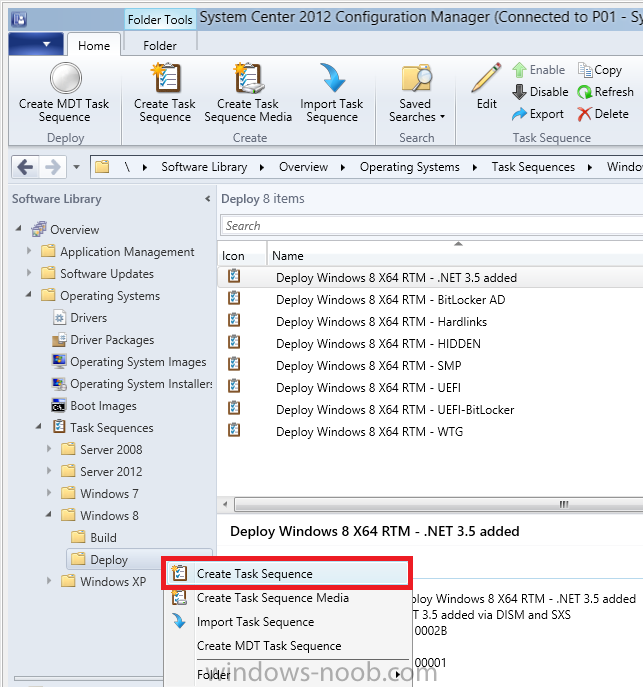
BitLocker options get dynamically added to your task sequence during the create task sequence wizard based on the choices you make during the wizard. In the operating system deployment workspace of ConfigMgr right click on task sequences and select Create Task Sequence.
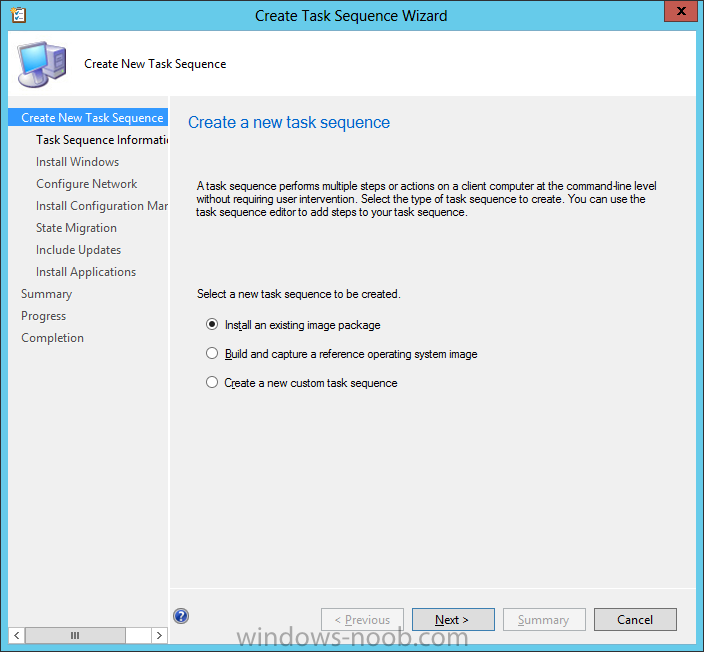
The Create Task Sequence wizard appears, choose the first option Install an existing image package.
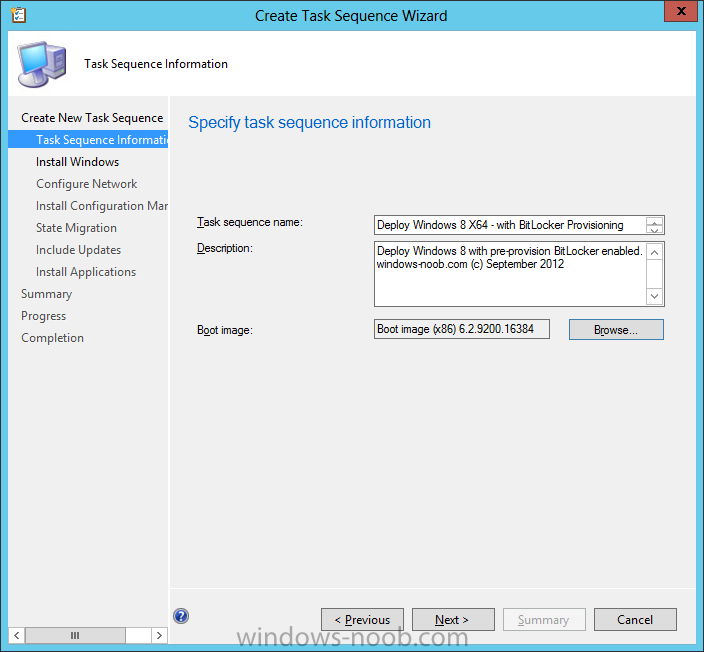
fill in the Task Sequence Information, be specific, and select a boot image, we are deploying Windows 8 X64 in this example with BitLocker, however we select an X86 boot image.
Note: If you are deploying Windows 8 X64 in UEFI mode in combination with BitLocker then you need to select a X64 boot image in this step otherwise it will not boot.
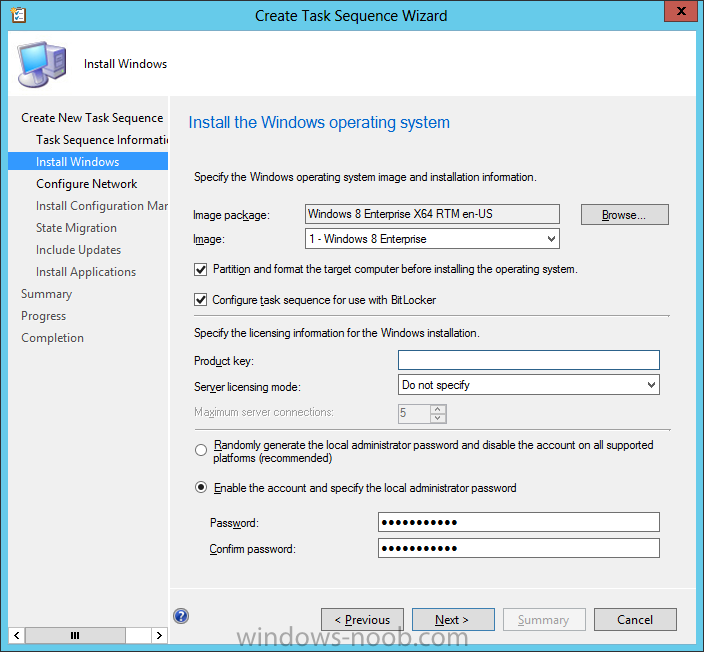
The Install the Windows Operating System step decides whether or not we’ll get the BitLocker steps added to our task sequence. By default the Bitlocker options are greyed out until we add an image that is BitLocker capable. (Windows Vista, Windows 7, Windows 8, however pre-provisioning with Vista is not supported).
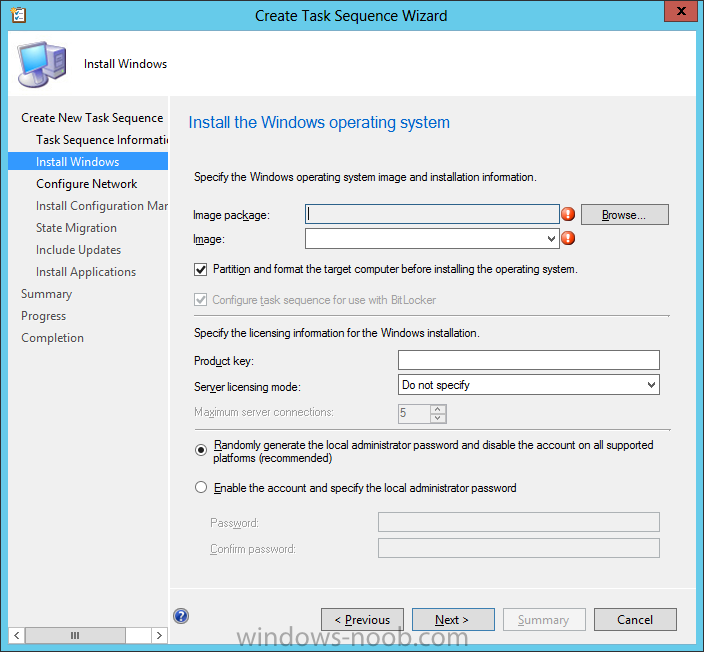
so select a Windows 8 image that you’ve added earlier and enter the product key and set an administrative password. Now you can see the BitLocker option is available, make sure that Configure Task sequence for use with BitLocker is selected.
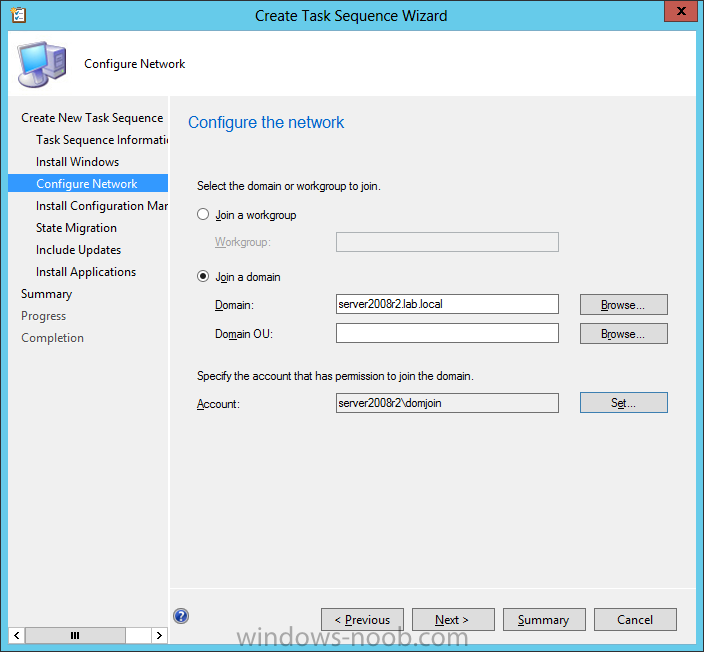
enter your domain join user credentials in the Configure Network step
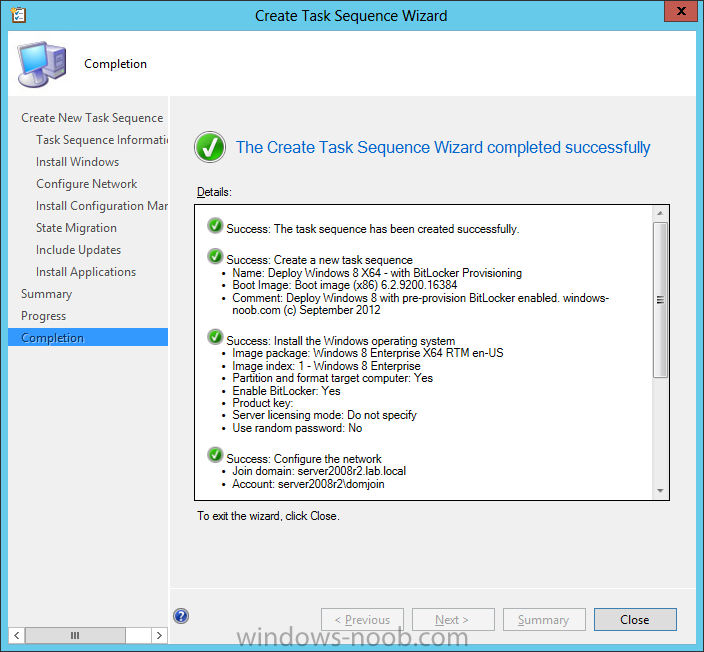
we can click through the next few screens (with the default settings) as we are only interested in BitLocker operations for the purpose of this guide
Step 4. Add support for TPM operations in WinPE
perform the following on your Configuration Manager Server as SMSadmin
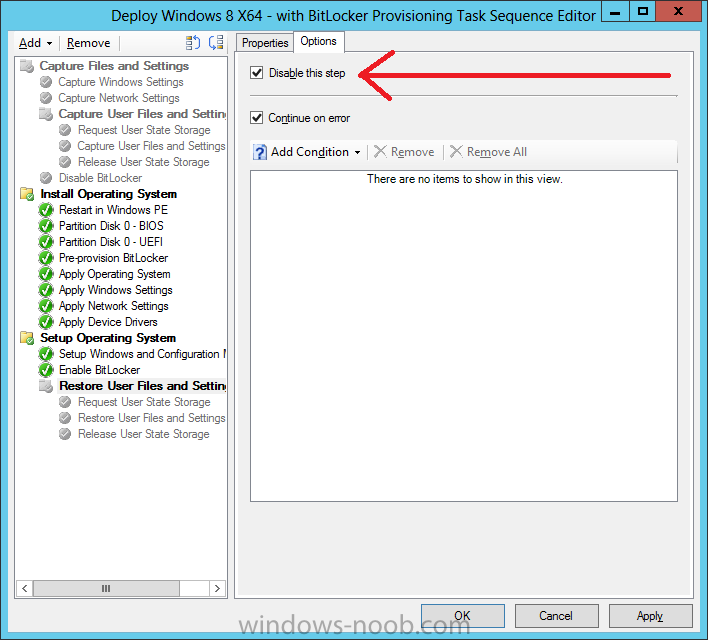
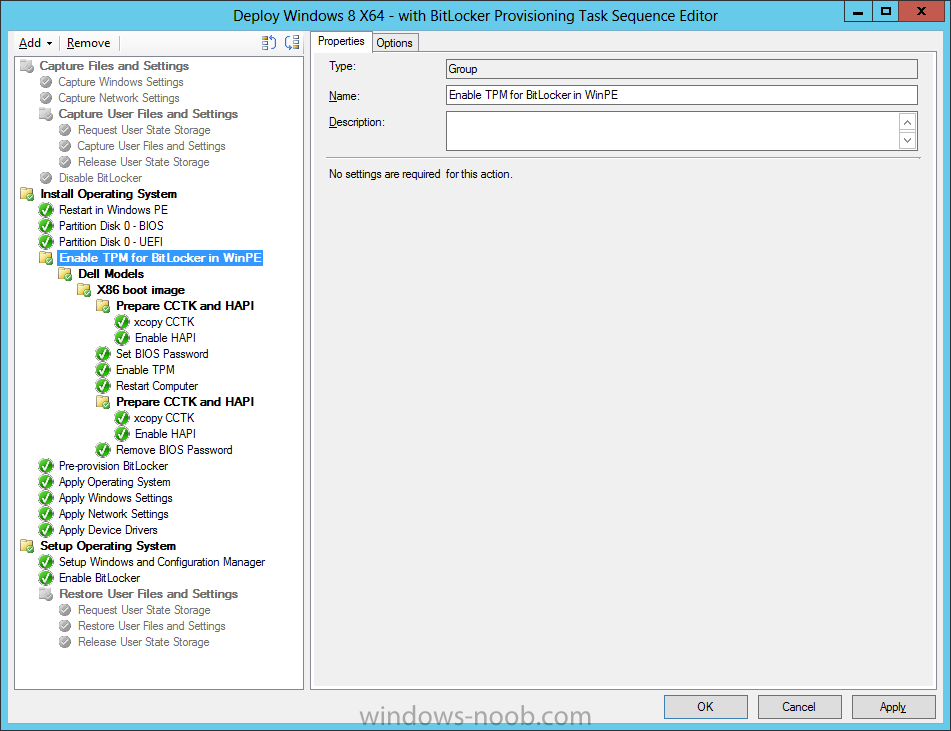
For the purposes of this guide we need to edit the task sequence to remove some un-needed functionality and add required functionality. We will disable all Capture and Restore User State Groups in the task sequence, we don’t need those steps for verifying Pre-Provisioning of BitLocker, so right click on our newly created task sequence, choose Edit and disable the Capture and Restore User state sections as per the screenshot below. You can always re-enable these sections later to complete your deployment solution but for now, disable them.
Next we need to add support for the hardware in question in terms of enabling the TPM in WinPE, I’ve covered this in great detail in the following post and in this task sequence we will use the exact same steps and software (I’ve tested and verified this on Dell Latitude E4200, E5510, E6320, should newer models require a newer version of CCTK for WinPE or a different method of doing this in Windows PE then i’ll update this post with that information).
Below is the same task sequence with the Enable TPM for BitLocker in WinPE section added from the post referenced above. Failure to add this section to your task sequence will mean you cannot do any TPM operations in WinPE.
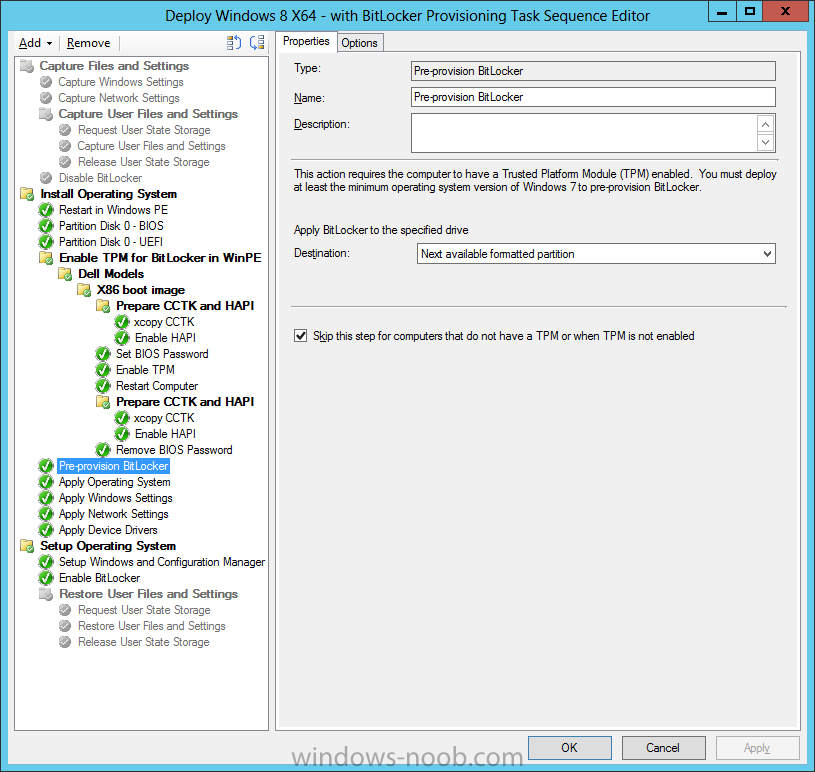
The Pre-Provision Bitlocker step looks like so in the task sequence
and the Enable BitLocker step is already set to store the recovery key in active directory domain services as you can see here
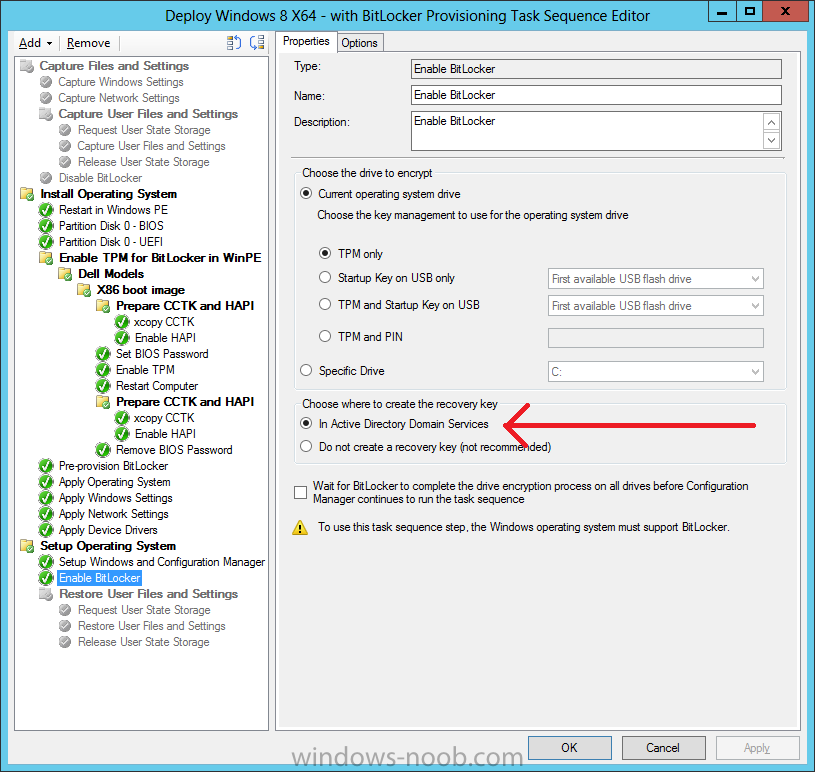
Tip: If you have no access to your AD environment and really want to test pre-provisioning BitLocker you can select the second option (do not create a recovery key) which will allow your Task sequence to complete but it of course won’t store the recovery key anywhere and data could get lost if you don’t know what you are doing. Be warned.
Step 5. Deploy the task sequence
perform the following on your Configuration Manager Server as SMSadmin
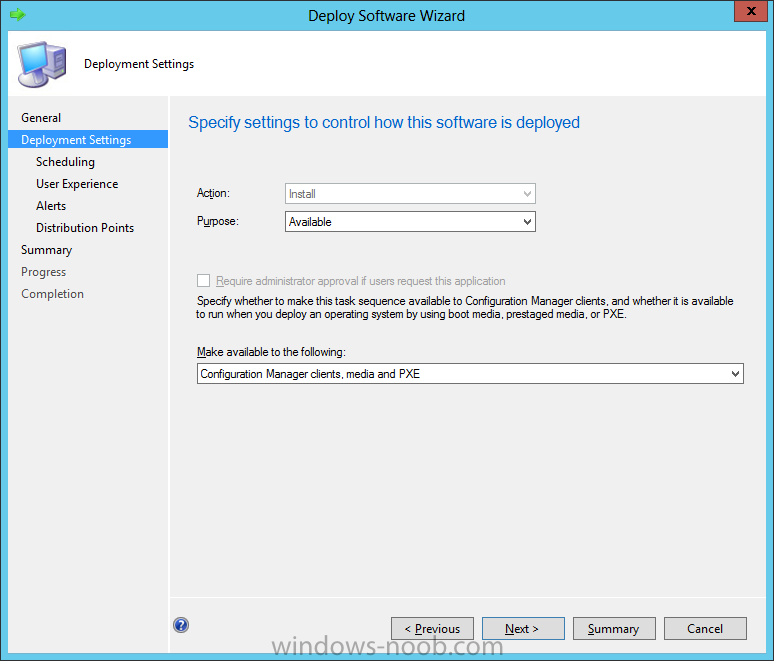
Right click your new task sequence and choose Deploy, deploy it to a suitable collection as an Available deployment.
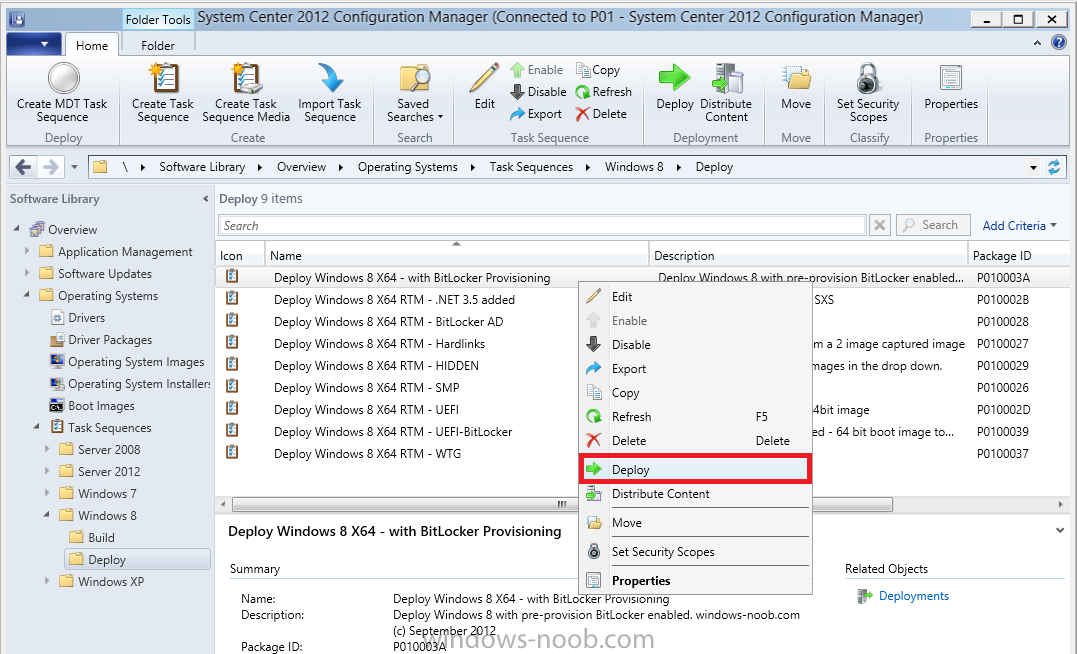
for Deployment Settings choose Configuration Manager Clients, media and PXE
click your way through to the end of that wizard.
Step 6. PXE boot and monitor the deployment
perform the following on your client computer
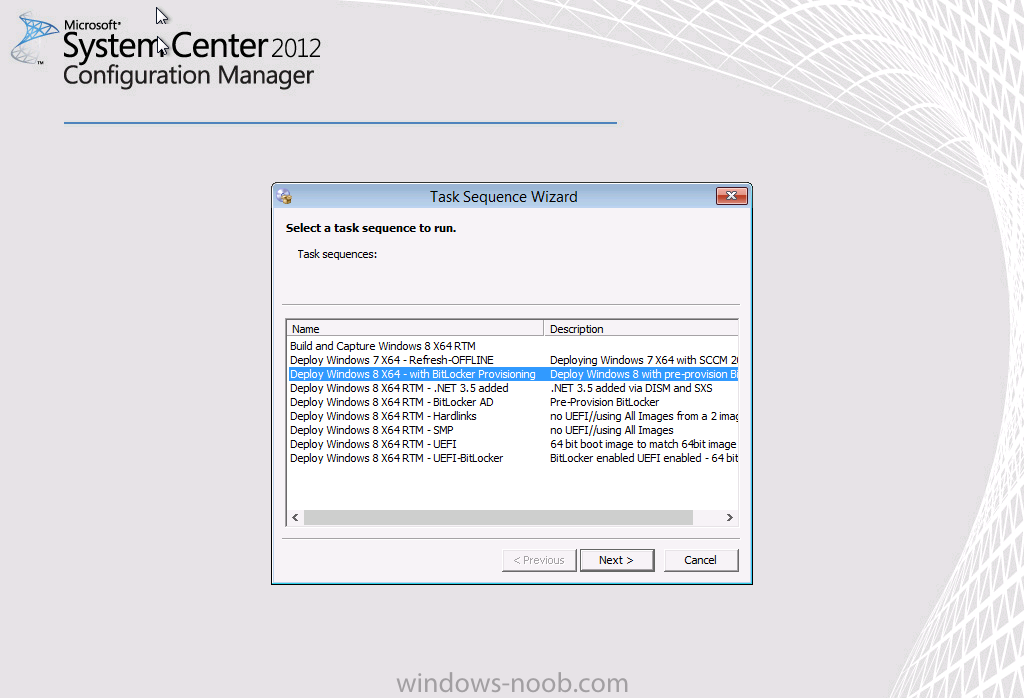
PXE boot the computer and select our newly deployed Available (optional) task sequence (Deploy Windows 8 X64 – with BitLocker Provisioning)
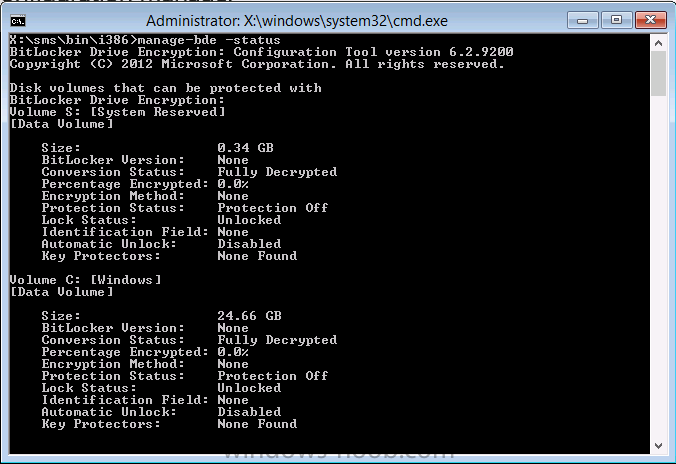
and off it goes….if you have a chance press F8 and type the following line
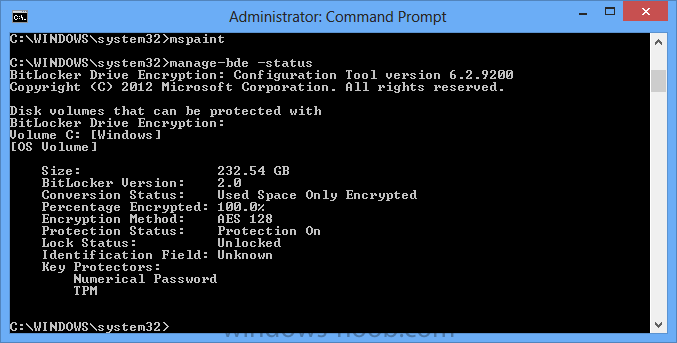
manage-bde -status
this should reveal something similar to the following saying that it’s fully decrypted
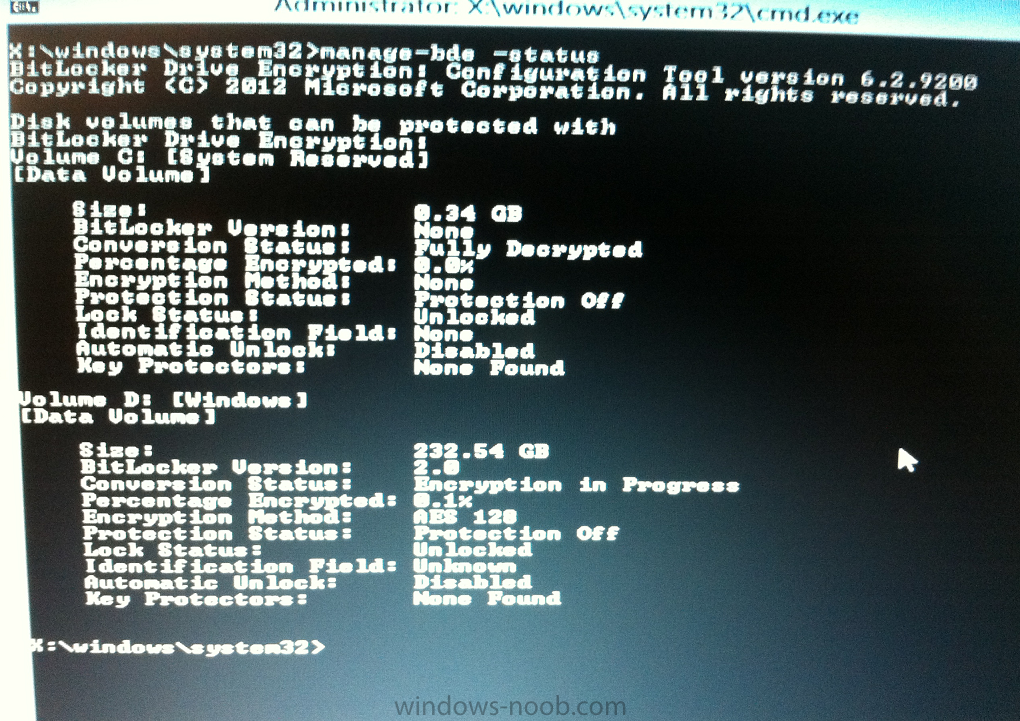
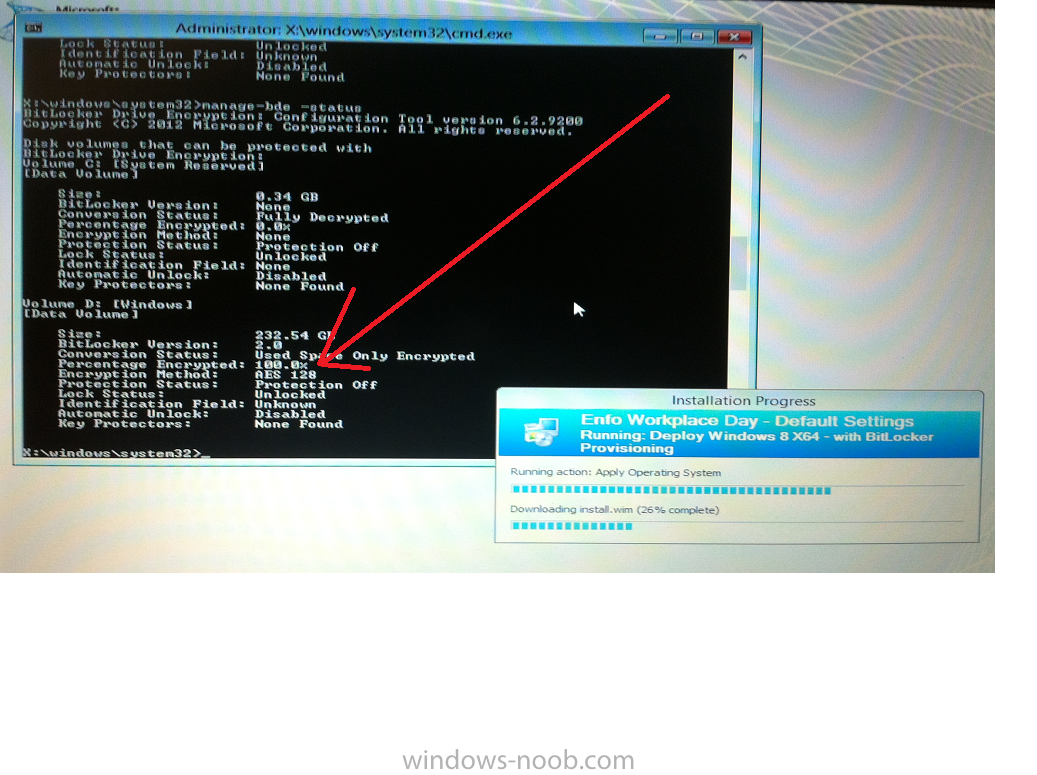
in order to set TPM options in Windows PE we use CCTK on Dell hardware, and these actions will reboot the computer, after the reboot it’ll fly through the Pre-Provision BitLocker step so the thing to remember here is the Pre-Provision BitLocker is FAST, really FAST, so in order to see it you have to be fast, press F8 after that reboot and keep cycling through the manage-bde -status command while it gets to the Pre-Provision Bitlocker step and just after, you’ll see something like this (sorry for the screenshots, it’s on real hardware so difficult to take photos)
here directly after the Pre-Provision BitLocker step we see encryption in progress
seconds later it’s up to 7.5%, yes that was seconds later !! you’ll also note it’s applying the operating system and it’s referring to Enfo Workplace day, so if you are in the South of Sweden on September 28th drop by and say hi and i’ll demo this in action. Let me know you are coming ok ?
a few seconds later and it’s done, yup 100% used space only encrypted !
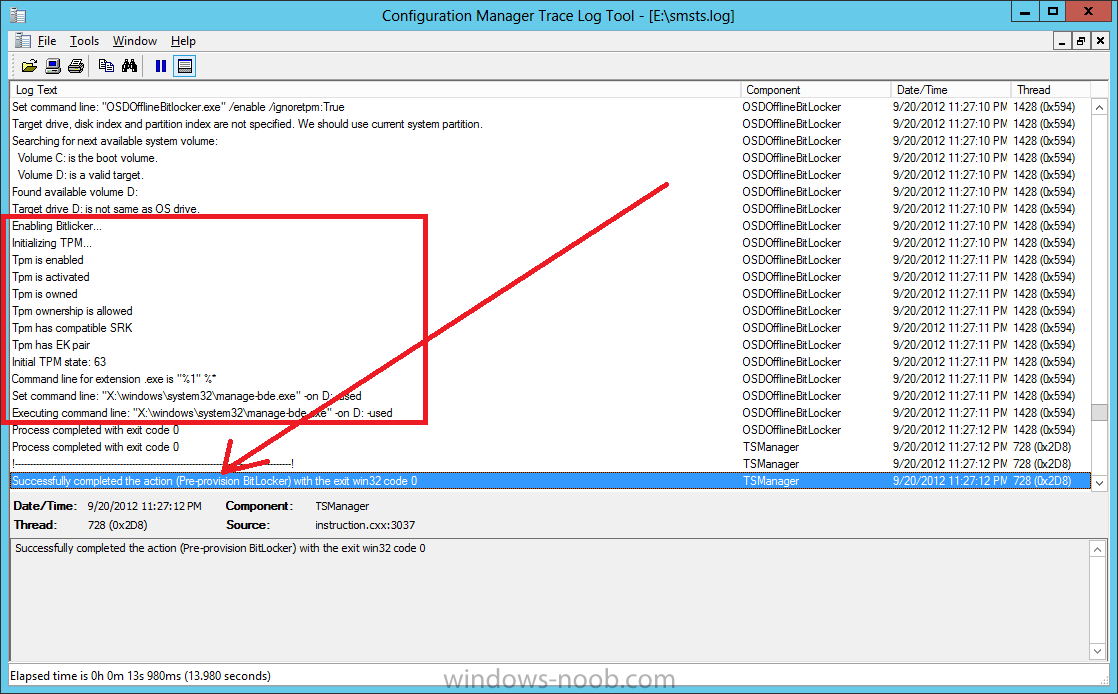
while you are waiting for Windows 8 to deploy you can review SMSTS.log in X:\windows\temp\smstslog\smsts.log
here’s what mine looks like during the apply operating system step right after it has successfully Pre-Provisioned BitLocker, the screenshot below shows the step from the log on another computer just to highlight the step for you and what the TPM actions above it should look like.
 smsts.log 120.47K 3 downloads
after the Setup Windows and ConfigMgr step is complete the Enable Bitlocker step will take place and if you configured Active Directory correctly it will store the recovery key in AD, look for the line creating recovery password and escrowing to active directory.
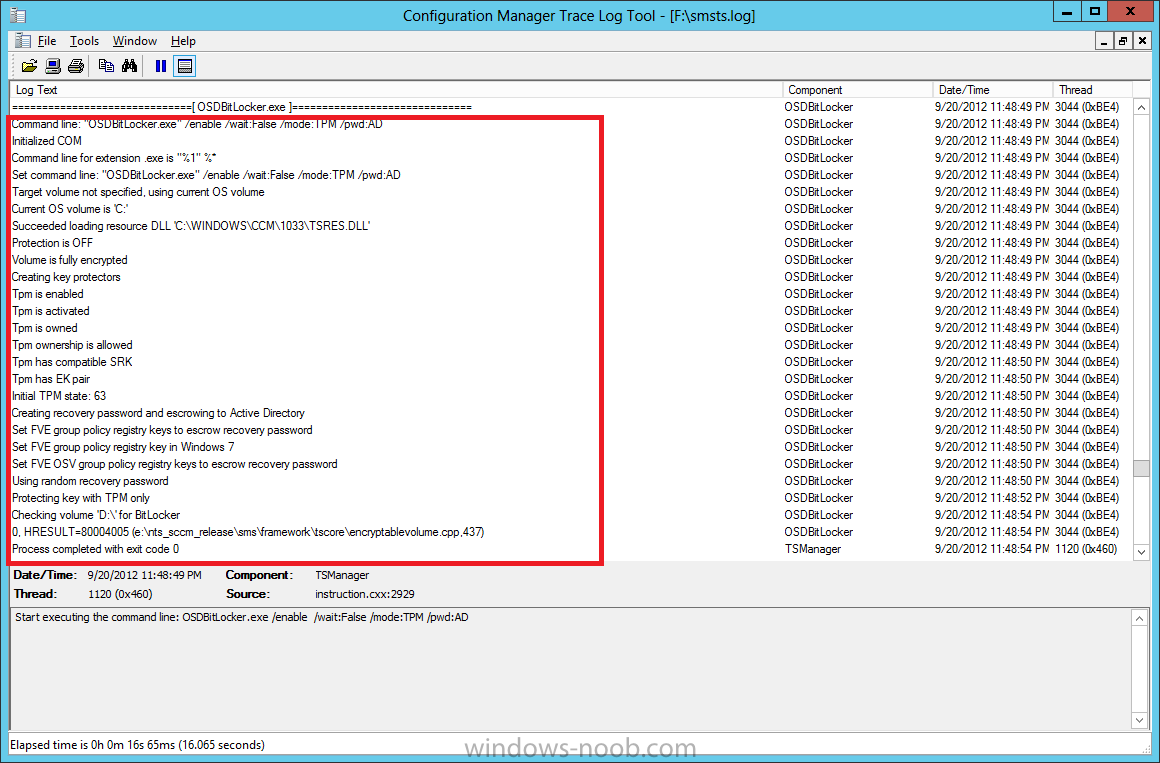
Below is the SMSTS.log file after the task sequence has completed…
smsts.log 209.76K 3 downloads
At this point you can check Active Directory, in Active Directory Users and Computers right click n the computername in question and choose the BitLocker Recovery tab
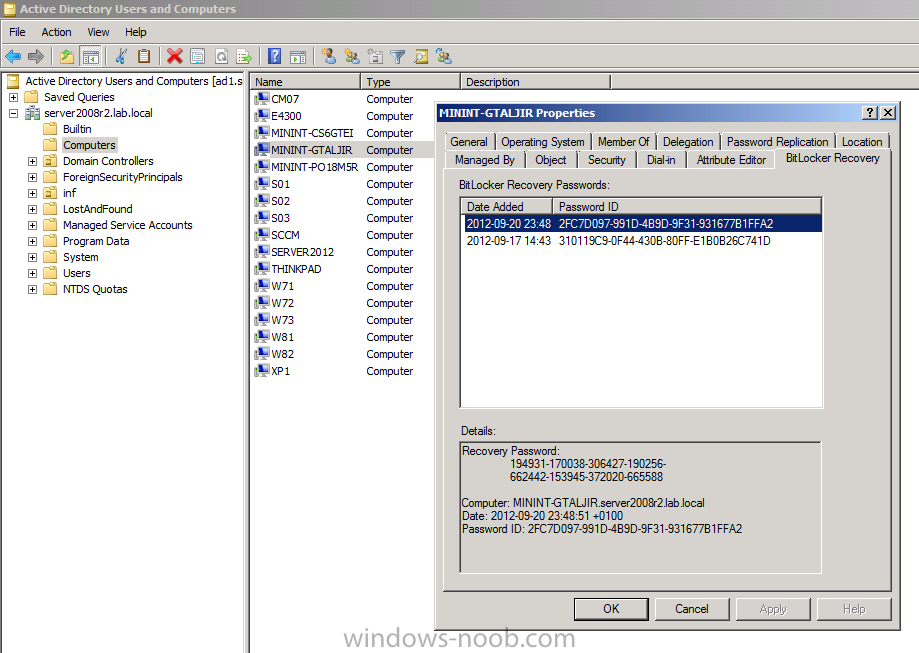
and that’s it, you can verify it on the computer in question by opening a command prompt in Windows 8 and typing the following line
manage-bde -protectors -get c:
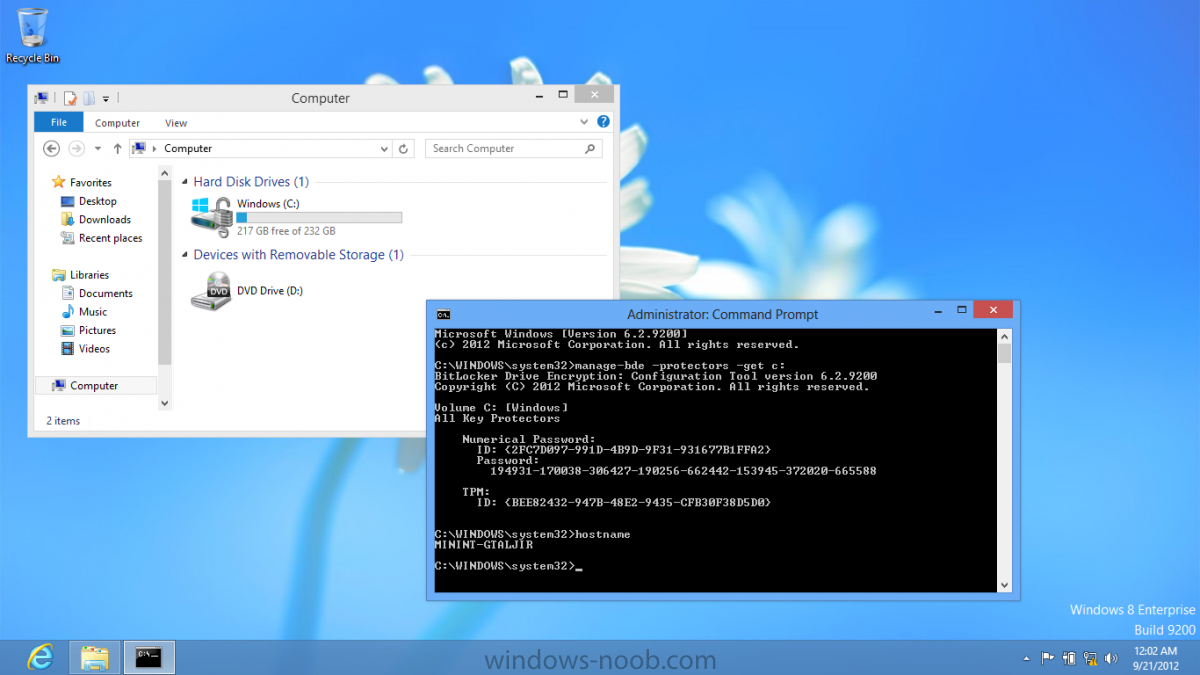
and finally, even though we already saw that Encryption was at 100% while in WinPE you’ll notice that your hard disc is NOT busy encrypting because it’s already DONE.
Recommended Reading
What’s New in BitLocker – http://technet.micro…y/hh831412.aspx
Bitlocker Changes in Windows 8 – http://www.windowsit…indows-8-142661
Backing Up BitLocker and TPM Recovery Information to AD DS – http://technet.micro…529(WS.10).aspx
Verify BitLocker and TPM Schema Objects – http://technet.micro…3(v=ws.10).aspx
Requirements to save Bitlocker Recovery Key to AD using MDT – http://blogs.technet…-using-mdt.aspx
Understand and Troubleshoot BitLocker in Windows Server “8” Beta – http://www.microsoft…n.aspx?id=29032
So there you have it, Pre-Provisioning BitLocker in WinPE during a Windows 8 deployment is possible right now using Configuration Manager 2012 SP1. And doesn’t it just rock ? oh yeah 🙂
Enjoy !
cheers
niall

Great write up. Can you perhaps help me out with: http://social.technet.microsoft.com/Forums/en/mdt/thread/3408e924-0f54-4073-bae5-fd9a9b7ffaa3
I’m only using MDT 2012, without SCCM.
Pingback: How can I deploy Windows 8 X64 to the Microsoft Surface Pro using Configuration Manager 2012 SP1 | just another windows noob
Pingback: BitLocker 有効化スクリプトの Windows 8.1 への対応 | SE の雑記
Niall – have you tested the latest CCTK V2.2.1 ?
http://en.community.dell.com/techcenter/systems-management/w/wiki/1952.dell-client-configuration-toolkit-cctk.aspx
The below whitepaper
http://en.community.dell.com/techcenter/extras/m/white_papers/20209083.aspx
shows how to create config files to set password and activate TPM. Therefore it should be possible to simply call these files within the task sequence (or include in WinPE) to turn on the TPM chip
I have not tested that jet Ian, feel free to let us know how it works.
I have CM 2012 SP1 CU3 with a WINPE 5.0 Boot Disk and I am trying to deploy Windows 8.1 with pre-provision BitLocker and UEFI. I created a vanilla TS like in your example and when it gets to the Pre-Provision step it bombs out with manage-bde.exe – Application Error. The instruction at 0x26d1fa3b referenced memory at 0x0000013d. The memory could not be read. I read that it is caused by the EFI partition but I do not understand how to work around it. Any ideas?
Thanks,
Mike
hi Mike
i’m using CM12 r2 CU2 with no issues, any reason you havent upgraded yet ? what version of manage-bde are you using here, if you try the command in winpe what does it tell you?
as regards the efi partition, are you deploying UEFI machines here or legacy ?
The upgrade is in the near future but we are currently using SCSM and the connector to pull data from CM12. We are moving away from SCSM so we aren’t going to spend the cycles to upgrade SCSM. SCSM has to be upgraded before CM12. As soon as we are on the replacement product for SCSM we no longer need the connector into SCCM and I can upgrade to R2.
Thanks,
Mike
Also, when I run the bde command in the F8 prompt I get the same error. I am deploying Lenovo Yoga and X1 with UEFI only, no legacy.
ok can you send me your smsts.log so i can take a look please ? niall AT windows-noob DOT com
Can you tell me how when doing Pre-Provisioning we can get the drive label to be the serial number and not the default Random Name MININT-XXXXX. Also any idea why when I try to run CCTK.exe in Task sequence it would error?