

In Part 1 of this series we created our new LAB, we got the System Center 2012 Configuration Manager ISO and extracted it, then copied it to our Active Directory server. We then created the System Management container in AD, delegated permissions to the container, extended the Schema for Configuration Manager. We then opened TCP ports 1433 and 4022 for SQL replication between sites, installed some prerequisites like .NET Framework 4.0, added some features and then downloaded and installed SQL Server 2008 R2 SP1 CU6. We then configured SQL Server using SQL Server Management Studio for security and memory configurations prior to running the Configuration Manager 2012 setup to assess server readiness. Finally we installed a central administration site (CAS).
In Part 2 we setup our Primary server with SQL Server 2008 R2 SP1 CU6. We then installed Configuration Manager 2012 on our primary server (P01) and verified that it was replicating to our central administration site (CAS) server. Now we will configure Discovery methods for our Hierarchy and then configure Boundaries and Boundary Groups.
Planning for discovery in Configuration Manager
Note: Planning for discovery in Configuration Manager is an important step, you need to discover objects that you want to manage (computers/users) so that you can target them with software and/or use client push. Please review the following information on Technet which is summarised below.
The discovery types that we will use are listed below:-
- Active Directory Forest Discovery
- Active Directory Group Discovery
- Active Directory System Discovery
- Active Directory User Discovery
System Center 2012 Configuration Manager discovery identifies computer and user resources that you can manage by using Configuration Manager. It can also discover the network infrastructure in your environment. Discovery creates a discovery data record (DDR) for each discovered object and stores this information in the Configuration Manager database.
When discovery of a resource is successful, discovery puts information about the resource in a file that is referred to as a discovery data record (DDR). DDRs are in turn processed by site servers and entered into the Configuration Manager database where they are then replicated by database-replication with all sites. The replication makes discovery data available at each site in the hierarchy, regardless of where it was discovered or processed. You can use discovery information to create custom queries and collections that logically group resources for management tasks such as the assignment of custom client settings and software deployments. Computers must be discovered before you can use client push installation to install the Configuration Manager client on devices.
Decide Where to Run Discovery
When you plan to use discovery in Configuration Manager, you must consider where to run each discovery method. After Configuration Manager adds discovery data to a database, it is quickly shared between all sites in the hierarchy. Because there is no benefit to discovering the same information at multiple sites in your hierarchy, consider configuring a single instance of each discovery method that you use to run at a single site instead of running multiple instances of a single method at different sites.
However, periodically it might help assign the same discovery method to run at multiple sites, each with a separate configuration and schedule. This is because at each site, all configurations for a single discovery method are evaluated every time that discovery method runs. If you do configure multiple instances of a single discovery method to run at different sites, plan the configuration of each carefully to avoid having two or more discovery processes discover the same resources. Discovering the same locations and resources at multiple sites can consume additional network bandwidth and create duplicate DDRs for resources that add no value and must still be processed by your site servers.
Consider the following when you plan where to run discovery. When you use an Active Directory Discovery method for systems, users, or groups:
- Run discovery at a site that has a fast network connection to your domain controllers.
- Consider the Active Directory replication topology to ensure discovery can access the latest information.
- Consider the scope of the discovery configuration and limit discovery to only those Active Directory locations and groups that you have to discover.
Step 1. Enable Active Directory Forest Discovery
Note: Perform the following on the Central Administration Site server (CAS) as SMSadmin
In the Configuration Manager console, click on Administration and select Hierarchy Configuration, click on Discovery Methods.

The first discovery method listed is Active Directory Forest Discovery and this can be enabled on the CAS or Primary site(s), however we want to limit the discovery instances to one, and we also want this discovery method to occur at the top site in our hierarchy so we will enable this discovery method on our Central Administration Site (CAS). Unlike other discovery methods, Active Directory Forest Discovery does not discover resources that you can manage. Instead, this method discovers Active Directory network locations and can convert those locations into boundariesfor use throughout your hierarchy. This is a cool new benefit of Configuration Manager 2012. You can use Active Directory Forest Discovery to do the following:
- Discover IP subnets in an Active Directory forest
- Discover Active Directory sites in an Active Directory forest
- Add the IP subnets and Active Directory sites that are discovered as boundaries in Configuration Manager
- Publish to the Active Directory Domain Services of a forest when publishing to that forest is enabled, and the specified Active Directory Forest Account has permissions to that forest
Select Active Directory Forest Discovery for the Site CAS and right click, choose Properties.

The General window appears with one option, Enable Active Directory Forest Discovery. Select it and two more choices are revealed:
- Automatically create active directory site boundaries when they are discovered
- Automatically create IP address range boundaries for IP subnets when they are discovered.
Select both options and leave the default schedule for every 1 weeks.

Tip: Selecting both options above is fine in a LAB. In Production you should consider only selecting the second option (IP Address range boundaries) as it will make troubleshooting boundary issues much much easier than if you have AD Site boundaries (which themselves can have several subnets attached making over-lapping a distinct possibility)
click Apply and answer yes when prompted to Run a discovery as soon as possible. Click ok to exit that discovery method.
You can now see that the Active Directory Forest Discovery method is enabled on our CAS site server.
Remember that we mentioned that this discovery method can enable publishing of information to AD ? When publishing is enabled for a forest and that forests schema is extended for Configuration Manager, the following information is published for each site that is enabled to publish to that Active Directory forest:
- SMS-Site-<site code>
- SMS-MP-<site code>-<site system server name>
- SMS-SLP-<site code>-<site system server name>
- SMS-<site code>-<Active Directory site name or subnet>
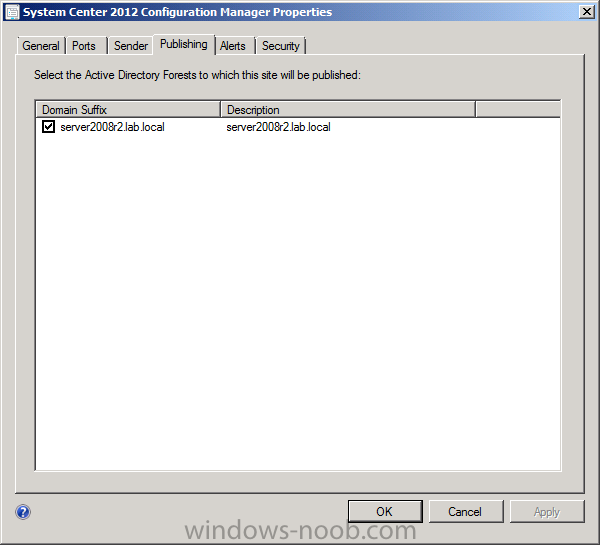
To verify that you’ve enabled publishing browse to Administration, Site Configuration, Sites, and check the properties of your CAS site server. Click on the Publishing tab.
Step 2. Enable Active Directory Group Discovery
Note: Perform the following on the Primary Site server (P01) as SMSadmin
Use Configuration Manager Active Directory Group Discovery to search Active Directory Domain Services (AD DS) to identify the group memberships of computers and users.
This discovery method searches a discovery scope that you configure, and then identifies the group memberships of resources in that discovery scope. By default, only security groups are discovered. However, you can discover the membership of distribution groups when you select the checkbox for the option Discover the membership of distribution groups on the Option tab in the Active Directory Group Discovery Properties dialog box. When you discover a group, you can also discover limited information about its members. This does not replace Active Directory System or User Discovery and is usually insufficient to build complex queries and collections or serve as the bases of a client push installation.
Use Active Directory Group Discoveryto discover the following information:
- Groups
- Membership of Groups
- Limited information about a groups member computers and users, even when those computers and users have not previously been discovered by another discovery method
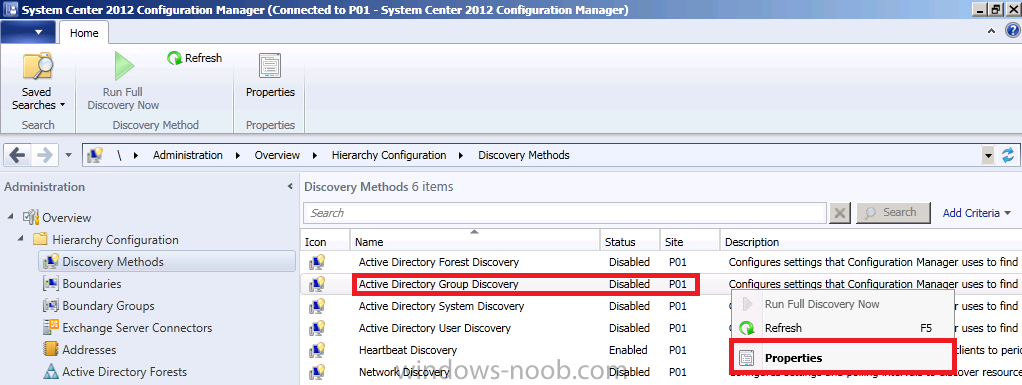
On our Primary server (P01) right click on Active Directory Group Discovery and choose properties.
Select the option to Enable Active Directory Group Discovery and click on Add to see two more choices, Groups and Location.
- Location: Use a location if you want to search one or more Active Directory containers. This scope option supports a recursive search of the specified Active Directory containers that also searches each child container under the container you specify. This process continues until no more child containers are found.
- Groups: Use groups if you want to search one or more specific Active Directory groups. You can configure the Active Directory Domain to use the default domain and forest, or limit the search to an individual domain controller. Additionally, you can specify one or more groups to search. If you do not specify at least one group, all groups found in the specified Active Directory Domain location are searched.
Note: When you configure a discovery scope, select only the groups that you must discover. This is because Active Directory Group Discovery attempts to discover each member of each group in the discovery scope. Discovery of large groups can require extensive use of bandwidth and Active Directory resources.
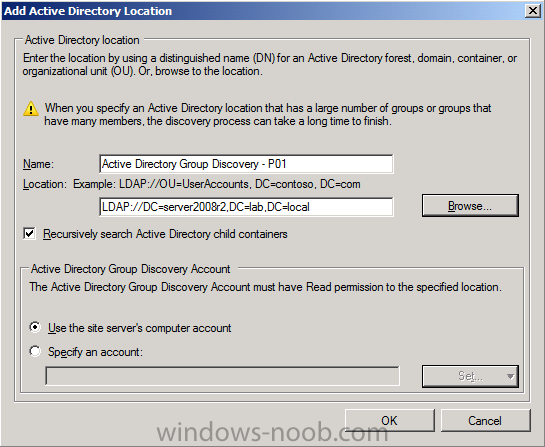
Select Location from the drop down menu. Give it a name like Active Directory Group Discovery – P01 and select browse to decide where to recurisively search.
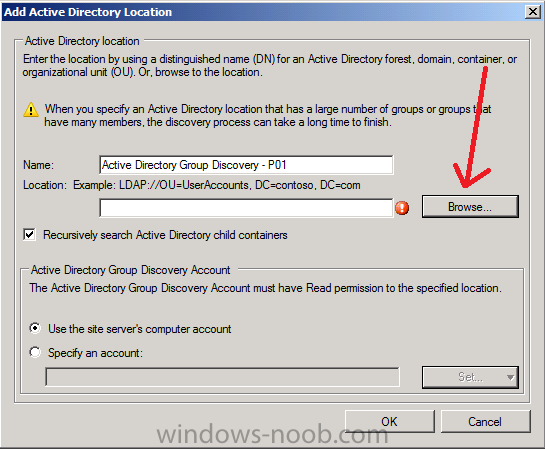
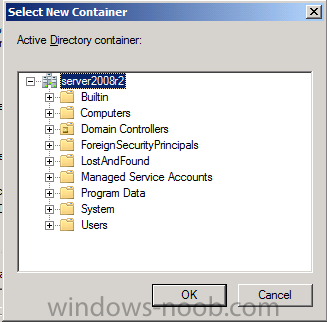
Now you get to select a container, in our LAB we have nothing interesting to select, but in production you probably have your Active Directory Security Groups neatly organised in specific containers, in that case select the top most container that contains your Active Directory Security Groups to narrow your search criteria.
review your choices and click ok when you ready.
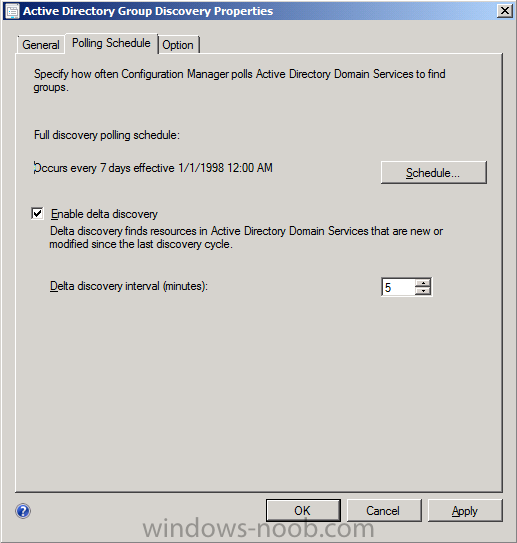
Click on the Polling schedule tab and decide what is appropriate for your setup, the default is 7 days for a full Active Directory Group Discovery and you can enable Delta Discovery (enabled by default). This discovery method finds resources in Active Directory Domain services that are new or modified since the last discovery cycle in the time interval specified (default is 5 minutes).
and select the Option tab, select all three options if appropriate.

click Apply and when asked about running a full discovery as soon as possible click yes.

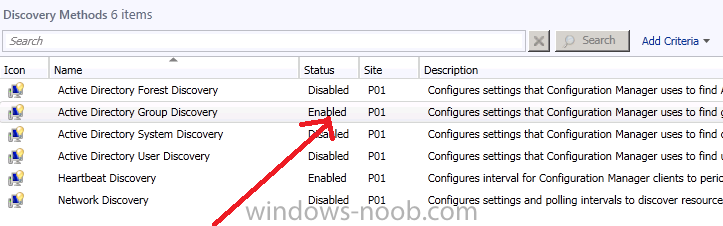
The Active Directory Group Discovery method is now enabled on site P01.
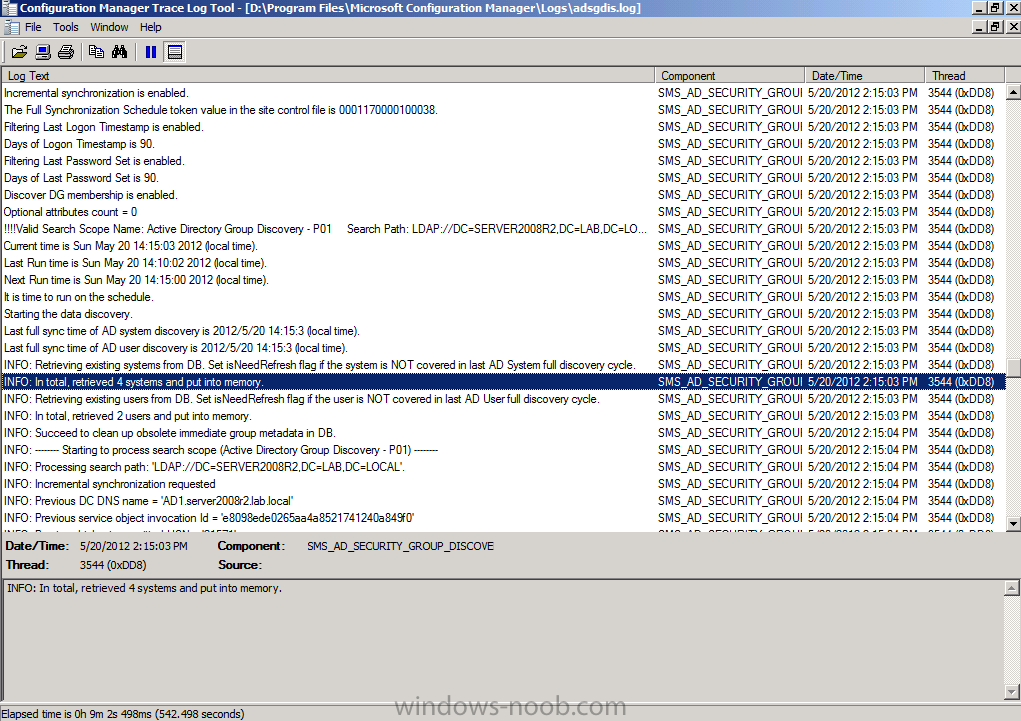
Tip: If you want to review what is happening in realtime in relation to this discovery method, you can review the adsgdis.log file on D:\Program Files\Microsoft Configuration Manager\Logs folder.
Step 3. Enable Active Directory System Discovery
Note: Perform the following on the Primary Site server (P01) as SMSadmin
Use Configuration Manager Active Directory System Discovery to search the specified Active Directory Domain Services (AD DS) locations for computer resources that can be used to create collections and queries. You can then install the client to discovered computers by using client push installation. To successfully create a discovery data record (DDR) for a computer, Active Directory System Discovery must be able to identify the computer account and then successfully resolve the computer name to an IP address.
By default, Active Directory System Discovery discovers basic information about the computer including the following:
- Computer name
- Operating system and version
- Active Directory container name
- IP address
- Active Directory site
- Last Logon Timestamp
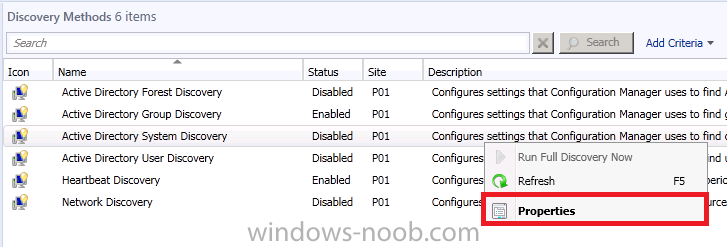
Right click Actve Directory System Discovery and choose Properties
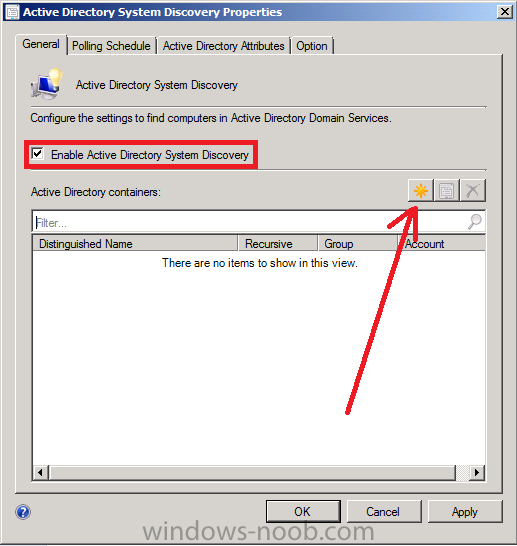
Place a checkmark in Enable Active Directory System Discovery and click on the yellow starburst to add some Active Directory containers.
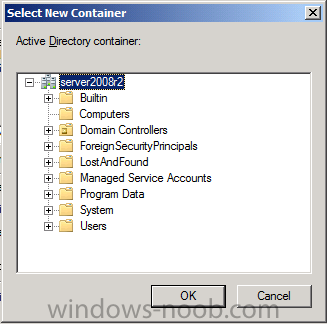
For path click on browse and browse to the container you want to discover systems in, in production you’d probably have your computers moved from the default Computers container to a custom container.
Tip: You can add several containers by repeating this process and selecting different containers, but only add the containers you need to add as you don’t want to generate un-needed network and cpu bandwidth.
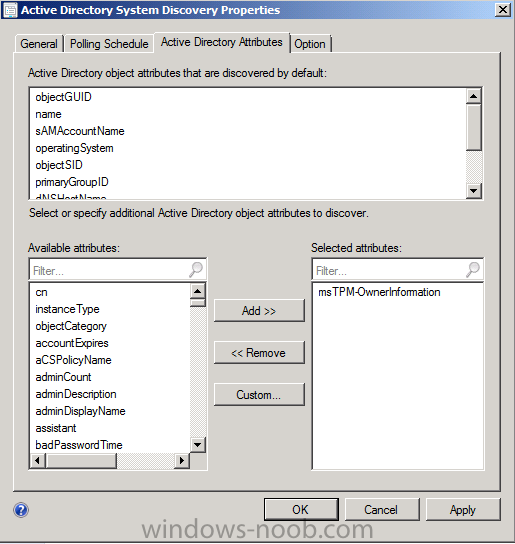
On the Polling schedule tab, stick to the defaults and then select the Active Directory Attributes tab, if you want to add an attribute to discover select one from the list and choose Add >> in the example below i’m adding an Active Directory attribute called msTPM-ownerinformation. There are many attributes to choose from, use only the ones you need to get your job done.
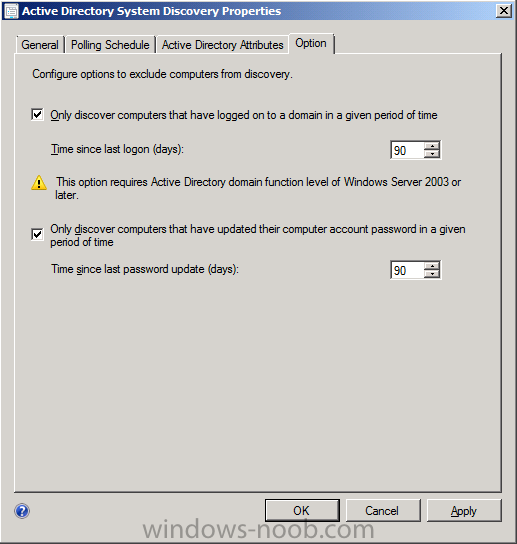
click on the Option tab and select the options listed
and click Apply and Ok and answer Yes to run a full discovery as soon as possible.
Tip: At this point you can monitor the Active Directory System Discovery in the adsysdis.log file in D:\Program Files\Microsoft Configuration Manager\Logs folder.
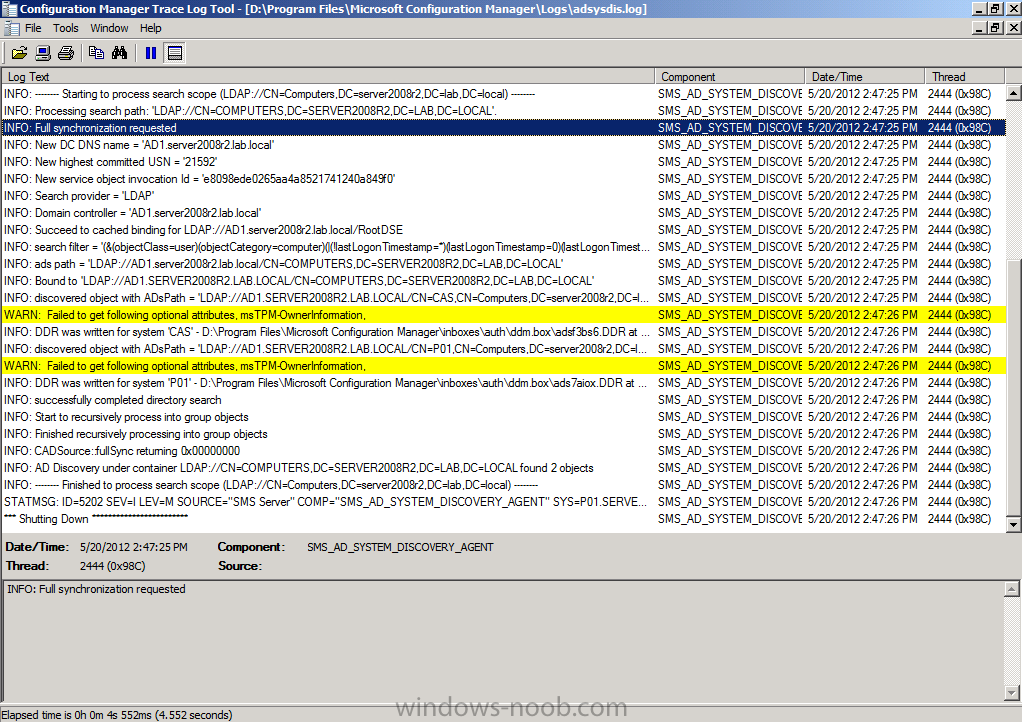
You can see when it writes DDR’s by looking for the following line
Quote
where XXX is some computername.
Step 4. Enable Active Directory User Discovery
Note: Perform the following on the Primary Site server (P01) as SMSadmin
Use Configuration Manager Active Directory User Discovery to search Active Directory Domain Services (AD DS) to identify user accounts and associated attributes.
You can view the default list of object attributes returned by Active Directory User Discovery, and configure additional attributes to be discovered in the Active Directory User Discovery Properties dialog box on the Active Directory Attributestab. By default, Active Directory User Discovery discovers basic information about the user account including the following:
- User name
- Unique user name (includes domain name)
- Domain
- Active Directory container names
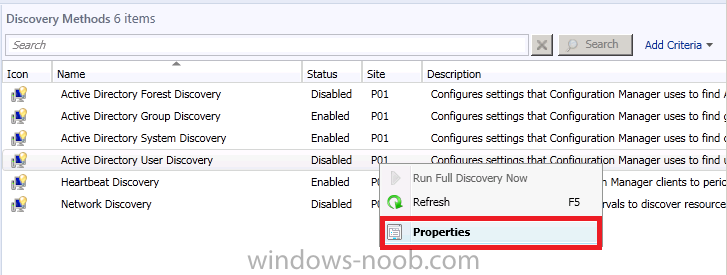
Right click Actve Directory User Discovery and choose Properties
select the Enable Active Directory User Discovery box and click on the yellow starburst to add some active directory containers to search for users
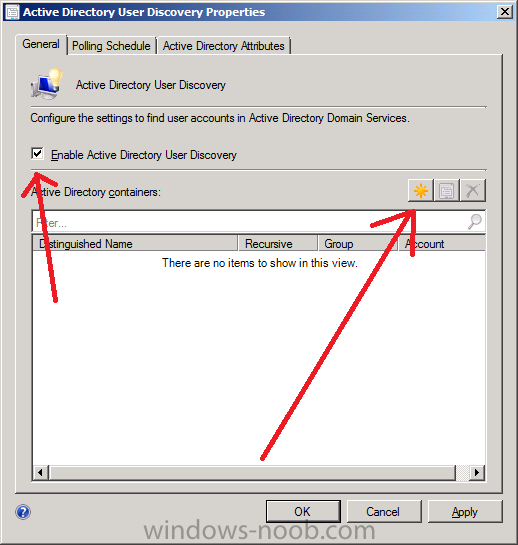
browse to the location in AD where you want to discover users, you can repeat this process to add several containers if you wish
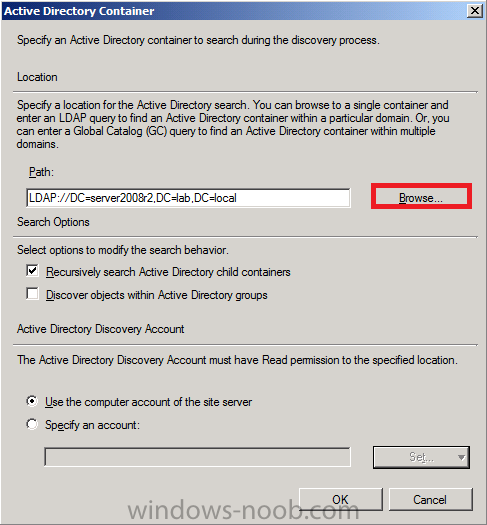
You can configure the Polling tab and Active Directory Attributes tab settings if you wish, then click apply and answer yes to Run a Full Discovery now.
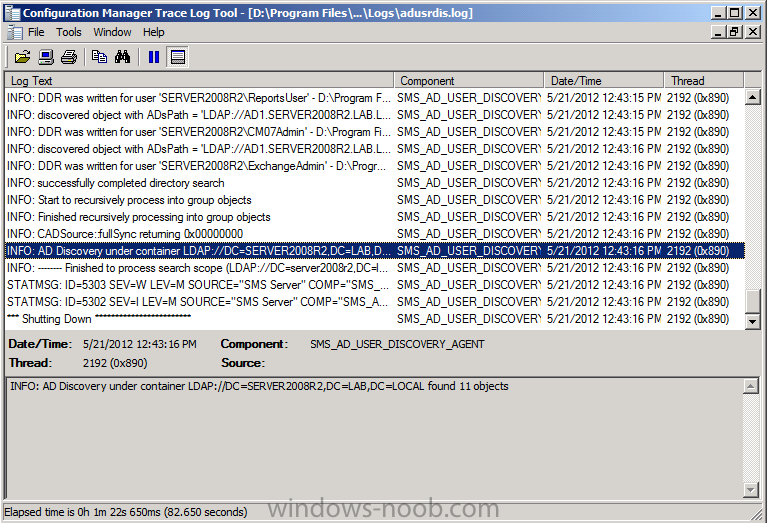
Tip: At this point you can monitor the Active Directory System Discovery in the adusrdis.log file in D:\Program Files\Microsoft Configuration Manager\Logs folder.
Step 5. Configure Boundaries and Boundary Groups
Note: Perform the following on the Primary Site server (P01) as SMSadmin
In System Center 2012 Configuration Manager, a boundary is a network location on the intranet that can contain one or more devices that you want to manage. Boundaries can be an IP subnet, Active Directory site name, IPv6 Prefix, or an IP address range, and the hierarchy can include any combination of these boundary types. To use a boundary, you must add the boundary to one or more boundary groups. Boundary groups are collections of boundaries. By using boundary groups, clients on the intranet can find an assigned site and locate content when they have to install software, such as applications, software updates, and operating system images When clients are on the Internet, or they are configured as Internet-only clients, they do not use boundary information. These clients cannot use automatic site assignment and always download content from any distribution point in their assigned site when the distribution point is configured to allow client connections from the Internet.
- Boundaries are no longer site specific, but defined once for the hierarchy, and they are available at all sites in the hierarchy.
- Each boundary must be a member of a boundary group before a device on that boundary can identify an assigned site, or a content server such as a distribution point.
- You no longer configure the network connection speed of each boundary. Instead, in a boundary group you specify the network connection speed for each site system server associated to the boundary group as a content location server.
As we want our resources to use Automatic Site Assignment and Content Location we will configure our boundaries. This is quite easy for us as Active Directory Forest Discovery has already created a boundary for us to use, our Active Directory Site. In production you’ll probably have several subnets and ip ranges listed in here, and that’s a good thing as you didn’t have to enter them manually.
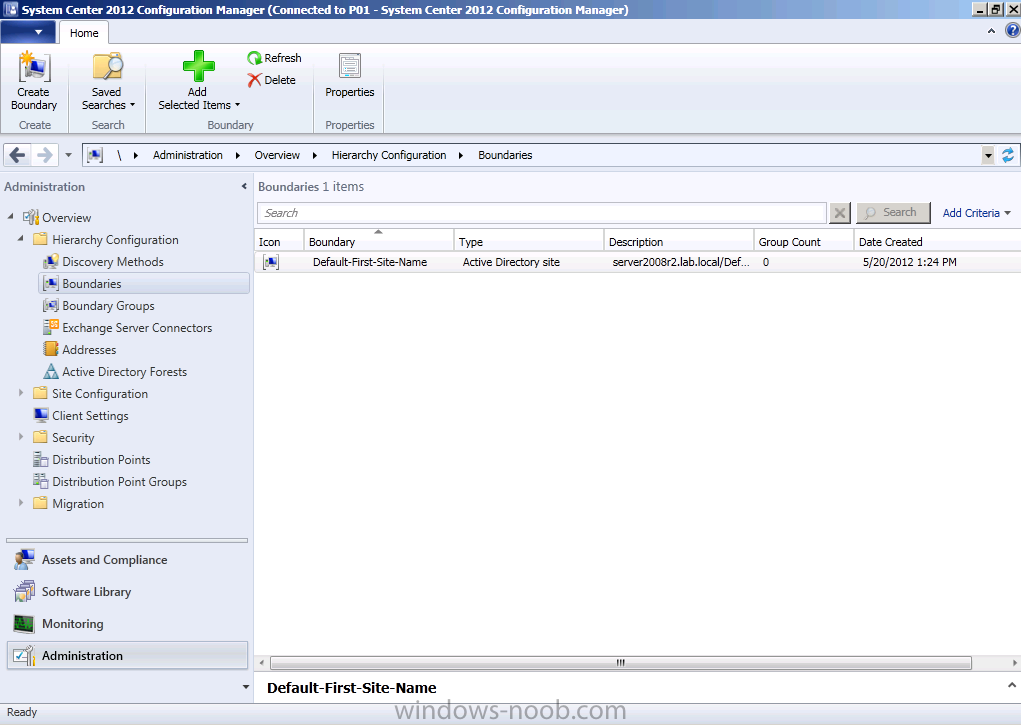
right click on our Default-First-Site-Name (active directory default name..) and choose properties,
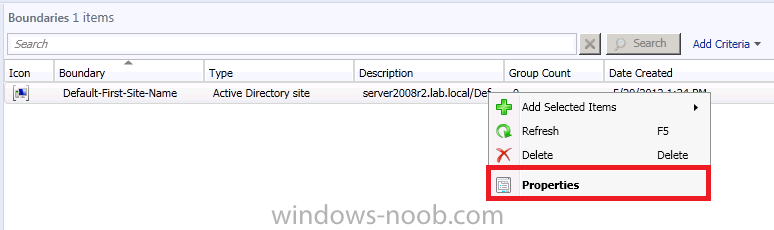
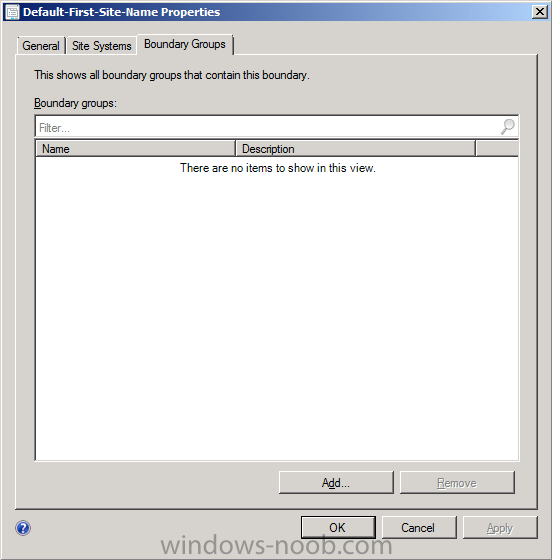
This boundary was added automatically via Forest discovery so we don’t need to change it, however we do want to add it to a Boundary Group so that we can use it. Click on the Boundary Groups tab, it will appear empty and clicking on the Add button will show you an empty list, that tells you that you need to create a boundary group, so close the Boundary Properties window.
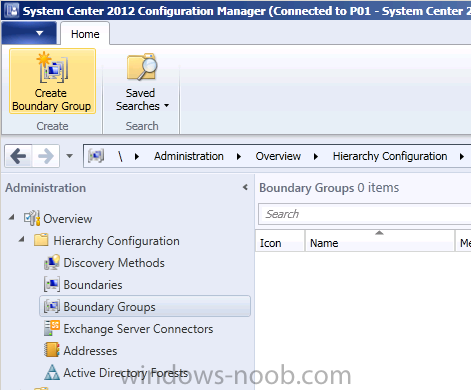
Click on Boundary Groups and select Create Boundary Group in the ribbon.
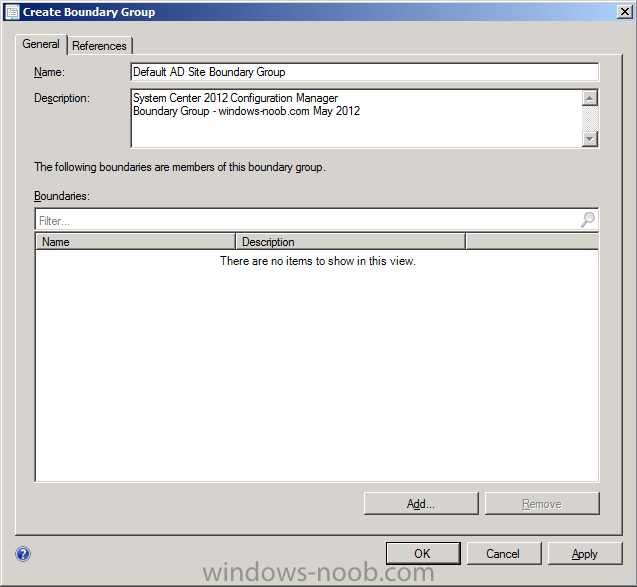
when the Create Boundary Group wizard appears, fill in some useful details and click on Add to add our boundary to our boundary group
Tip: To make it easier to visualize where boundary groups are (for later exercises) you could make the name descriptive of the Geographical location, eg: change the name of the boundary group to Skane, Sweden, Europe, another boundary group could be Paris, France, Europe and so on.
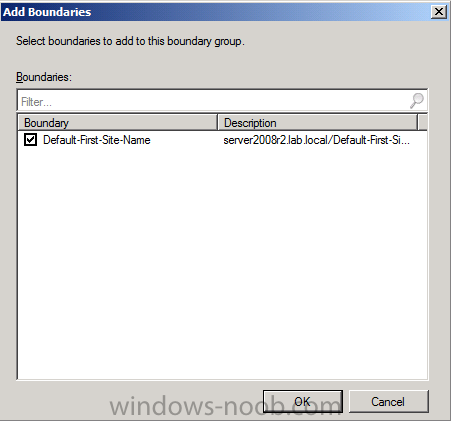
the Add Boundaries window appears, select our AD site name and click ok
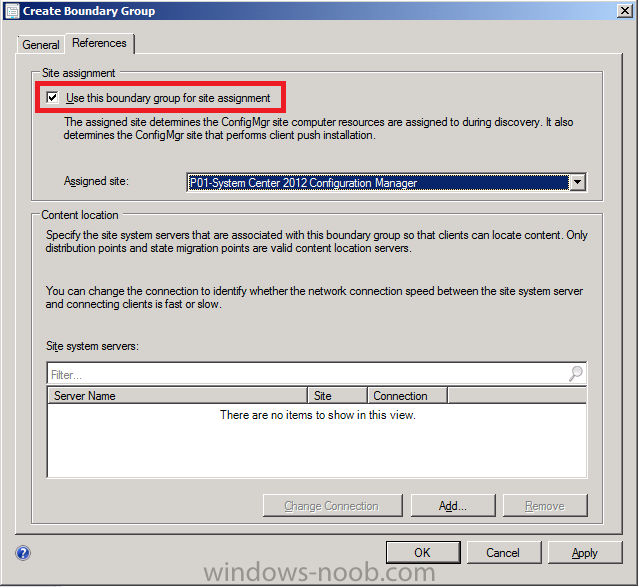
next click on the Referencestab, in here you have two main options,
- Automatic Site Assignment
- Content Location
Note: When you plan for boundary groups, consider creating one set of boundary groups for content location and a second set of boundary groups for automatic site assignment. This separation can help you avoid overlapping boundaries for site assignment. When you have overlapping boundaries and use automatic site assignment, the site to which a client is assigned, might be to is nondeterministic.
As we only have a LAB we will use both Automatic Site Assignment and Content Location in our boundary group, select the checkbox beside Use this boundary group for site assignment and you can pick an assigned site from the drop down menu. (we only have one primary so it’s the only one listed, if you have more than one primary they will be listed in the drop down menu).
Next we will configure Content Location for this Boundary Group, click on Add and place a checkmark in our site system that is listed. This will associate this site system with our boundary group.

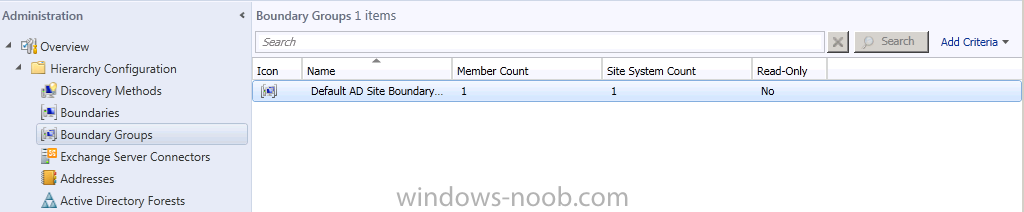
Click ok, apply and ok. All Done. Our boundary group is defined and our boundary has been added to it
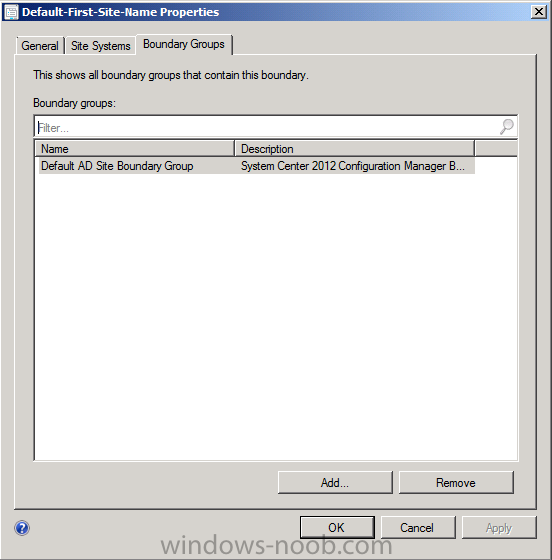
to verify this double click on our boundary and review it’s properties, then click on the Boundary Groups Tab, this time you’ll see our Boundary Group is listed.
By doing the above we have defined which site our clients get assigned to via Automatic client assignment and we have defined their content location. In the next part we will configure Client Push to our discovery resources.

Pingback: using System Center 2012 Configuration Manager « MS Tech BLOG