
Introduction
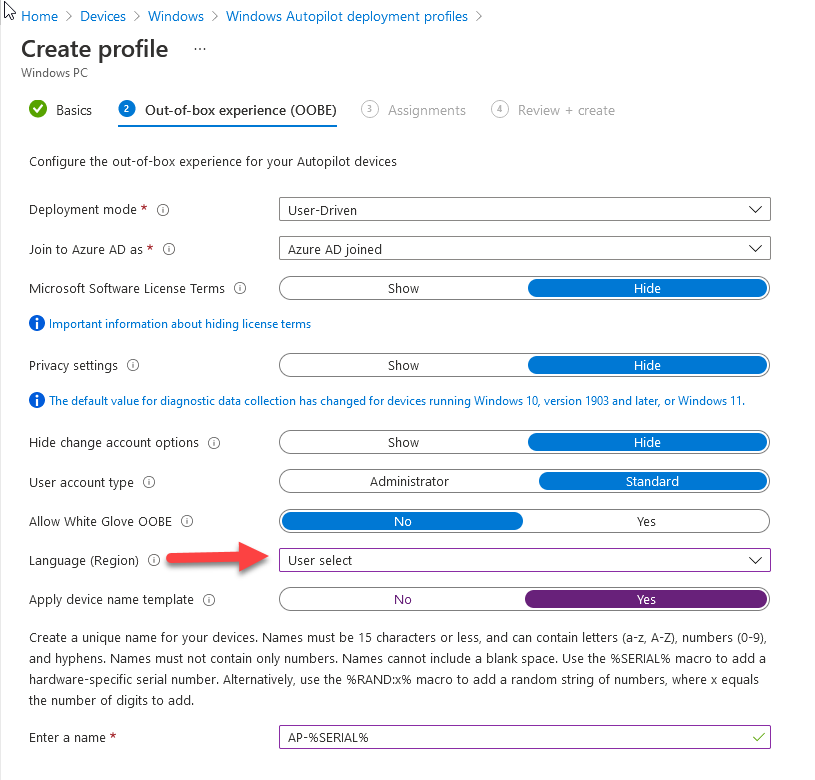
When users complete Windows Autopilot Out of Box Experience (OOBE), they can be asked to confirm Country and Keyboard settings, based on what is configured in the following Windows Autopilot Deployment Profile settings. Below is the Windows Autopilot deployment profile settings used for this blog post, notice how the User account type is set to Standard. Notice also that the Privacy settings setting is set to Hide.
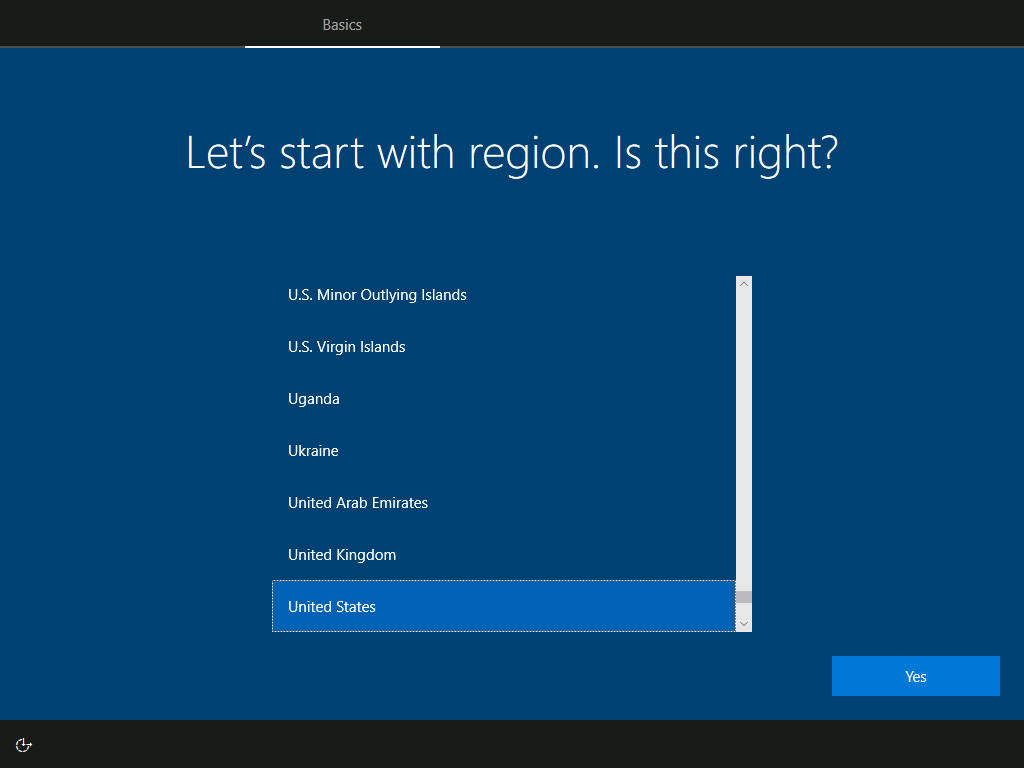
Your users will most likely be used to seeing the region related screens during OOBE, for example:
However if you disable Privacy Settings in the Windows Autopilot Deployment profile, even though you might allow users to select Country and Keyboard settings, Windows Autopilot still sets the Time Zone to Pacific Standard Time.
You can confirm this behavior by pressing left shift+F10 and typing PowerShell then Get-TimeZone.
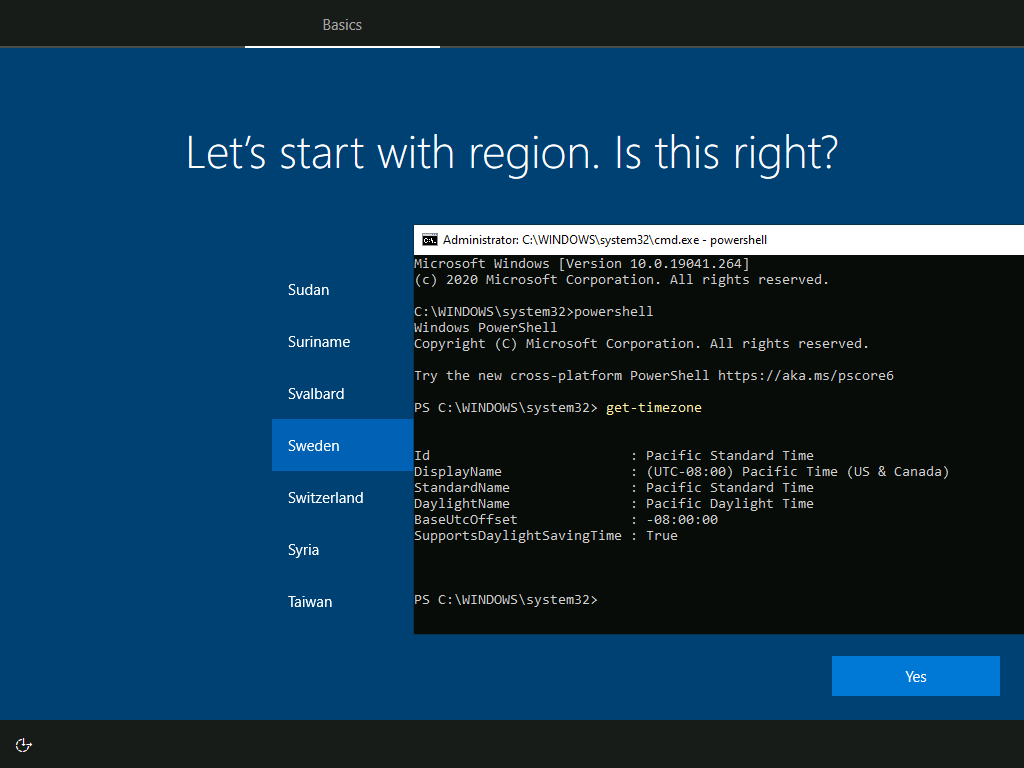
This Time Zone will apply regardless of what country the user selects.
Even if your users are tech-savvy enough to find out where in Windows Settings they need to change these region based settings, if they are a standard user (which they should be in today’s security conscious world), changing the timezone may leave them with incorrect time and incorrect regional format settings in the operating system.
To fix this you could use Geo location and Azure services as per Nickolaj’s post here, provided of course that:
- Your company allows Geo location
- Your company is not using any proxies or VPN’s that mask the users actual location.
This solution is not affected by either of these things, doesn’t need local administrative permissions and does not require enabling privacy settings. This solution prompts the end user to confirm (or change) the detected settings, and then uses some back end magic to set everything in place including triggering a time sync.
This method works even for standard (non administrator) users.
Requirements
The method requires that you use the English (En-US) version of Windows 10 as delivered from your OEM. If any other language is applied from the factory then it might cause some of the logic to fail. If you do go down that route, then you’ll need to prepare language specific versions of the zonemapping.csv and other files as necessary. So let’s get started. You can always install language packs later.
Step 1. Get the scripts
Note: You can only download these files when logged on as a member of https://www.windows-noob.com
Note: Intune has a hard block of 200,000 bytes per PowerShell script. To get around this limit, I’ve removed most of the original comments from the Powershell scripts. The resulting script can be uploaded to Intune as it’s less than the 200,000 bytes limit even with all the files encoded. If you’d like a copy of the version with comments included to help with troubleshooting, scroll to the very bottom of this blog post.
Download the condensed ZIP: win.ap.CreateScheduledTask.SetTimeZone_CONDENSED_VERSION.zip
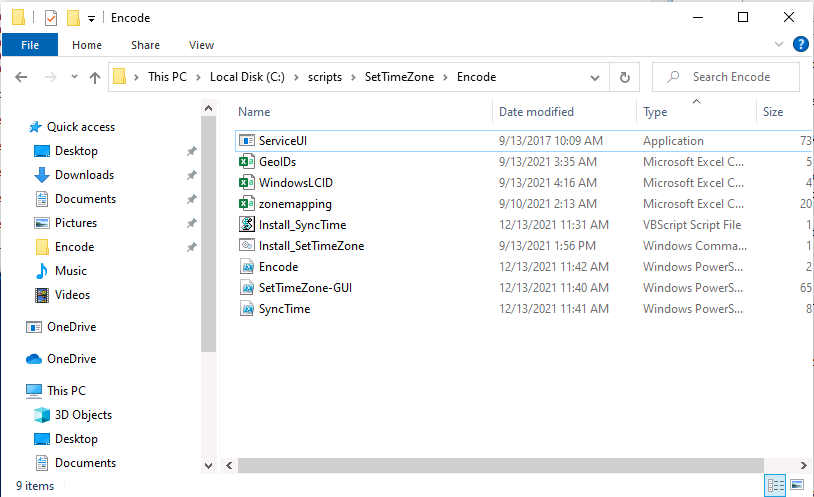
Extract the condensed ZIP file to C:\Scripts\SetTimeZone
Step 2. Get ServiceUI.exe from MDT
You’ll need the ServiceUI.exe executable file to display user interfaces (UI) to end users when operating in SYSTEM context. To get the file, download and install MDT somewhere and navigate to C:\Program Files\Microsoft Deployment Toolkit\Templates\Distribution\Tools\x64. To download MDT click here.
Copy the ServiceUI.exe file to your extracted SetTimeZone\Encode folder so it looks like this.
Step 3. Modify the scripts
Open SetTimeZone-GUI.ps1 and SyncTime.ps1 in PowerShell ISE and make changes as appropriate. Once done editing those scripts to suit your needs save the changes. Then run the Encode script to generate the encoded txt files which you will paste into the variables highlighted below.

you can do that by locating the appropriate TXT file for each encoded file, for example for ServiceUI.exe it’ll be the ServiceUI.txt file, open it in notepad,
copy the contents of that file using CTRL+A and CTRL+C

and paste the results using CTRL+V into the associated variable, once you’ve done all 5 encoded files it’ll look something like this
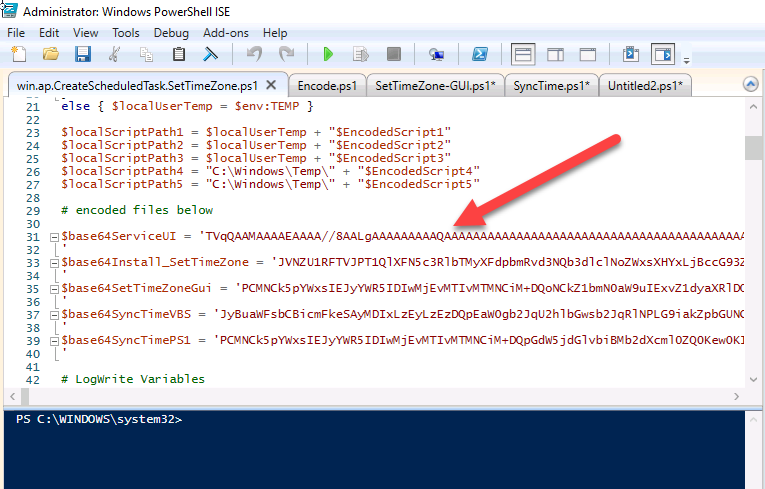
If you are happy with all the changes in win.ap.CreateScheduledTask.SetTimeZone.ps1, save the changes.
Step 4. Deploy it from Intune
In Microsoft Endpoint Manager, select devices, scripts and add a new PowerShell script. Fill in some details like so.
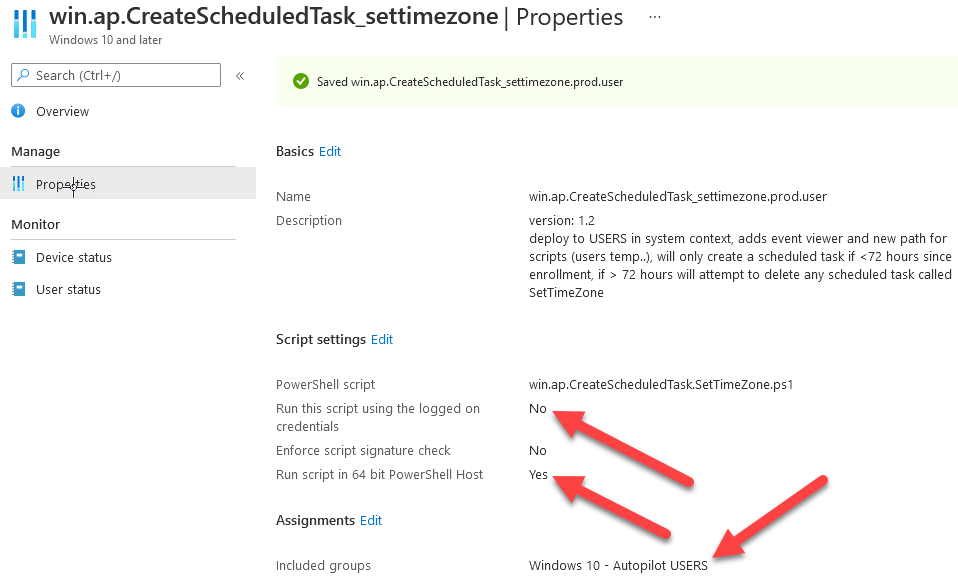
Deploy it to your Windows Autopilot users (start with a small group of users to test…), note that if you deploy this script to users that have already enrolled, the script checks if the enrollment was within the last 72 hours and if it was it will run, but if the enrollment was more than 72 hours ago, it’ll do nothing.
Step 5. Test it out
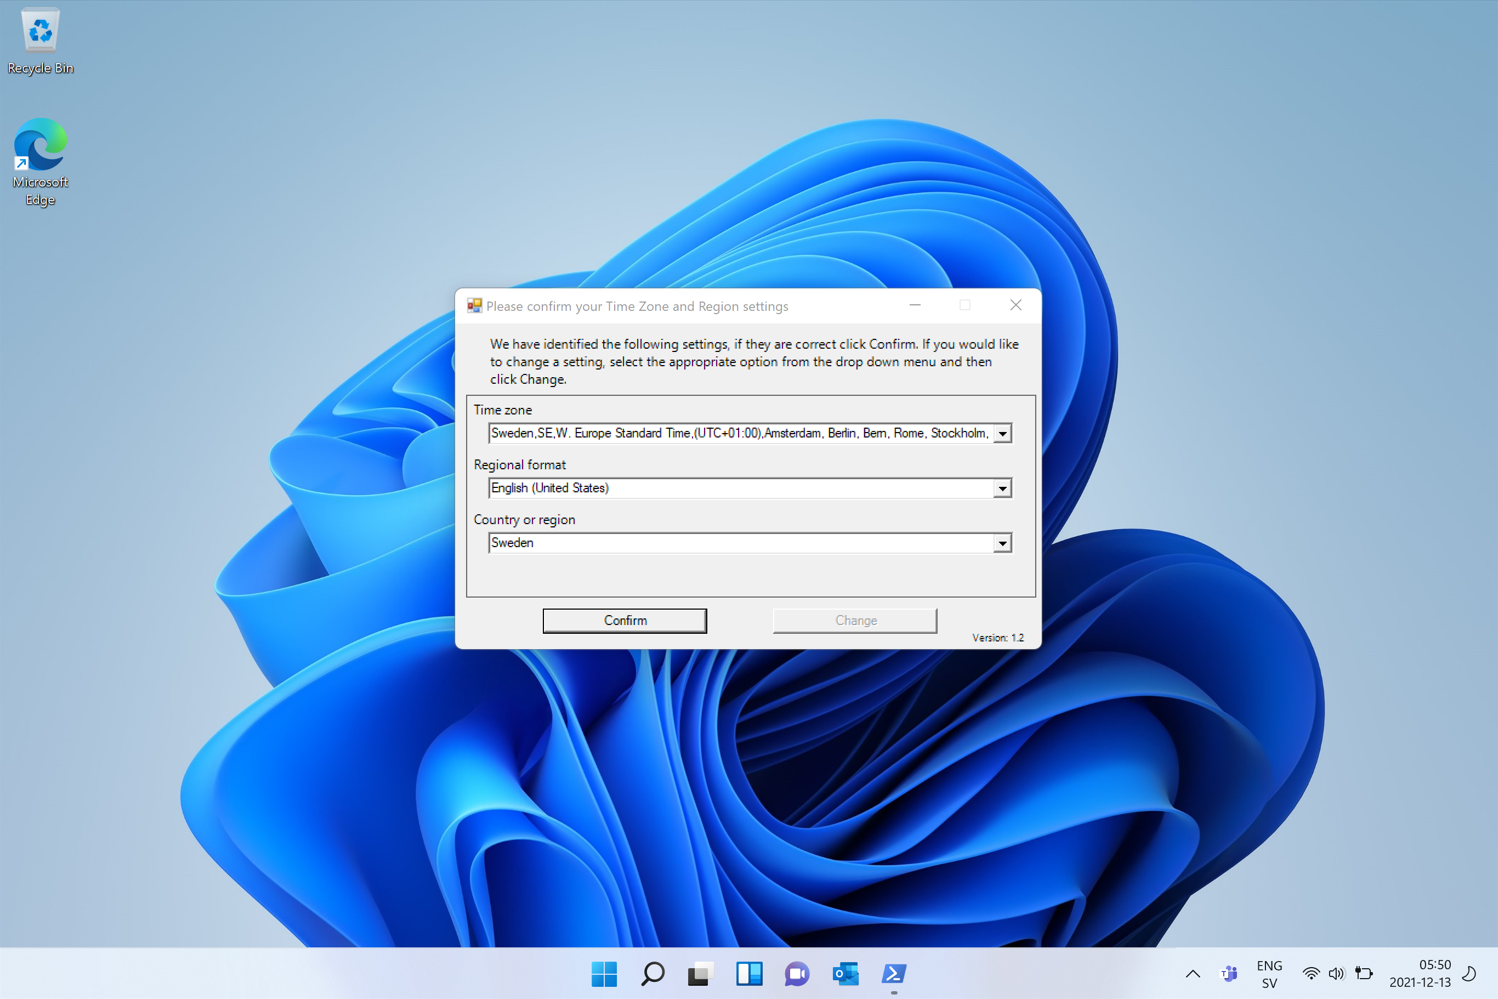
First off, let’s see what the expected outcome is. After Windows Autopilot enrollment is complete, and the user has logged on to the desktop, shortly after they login they will see a popup window asking them to Confirm or Change their Time Zone and Region settings. Below is an example of that.
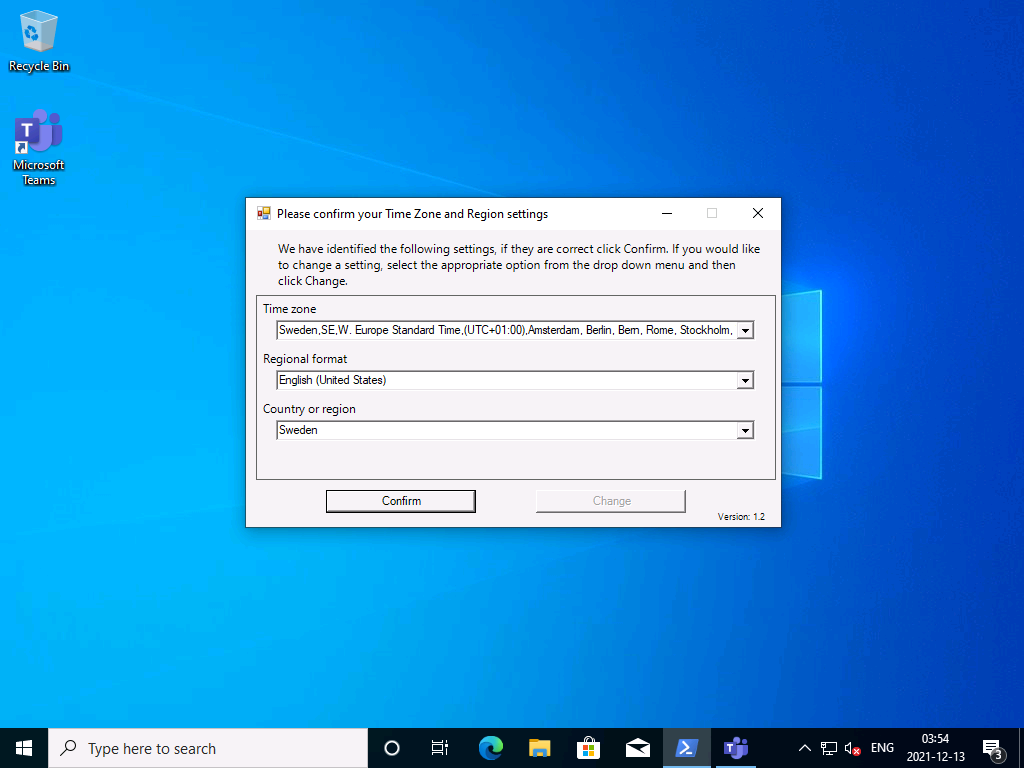
The user can confirm the settings by simply clicking Confirm, or if they want to change any of the options they can do so by clicking the relevant drop down menu.
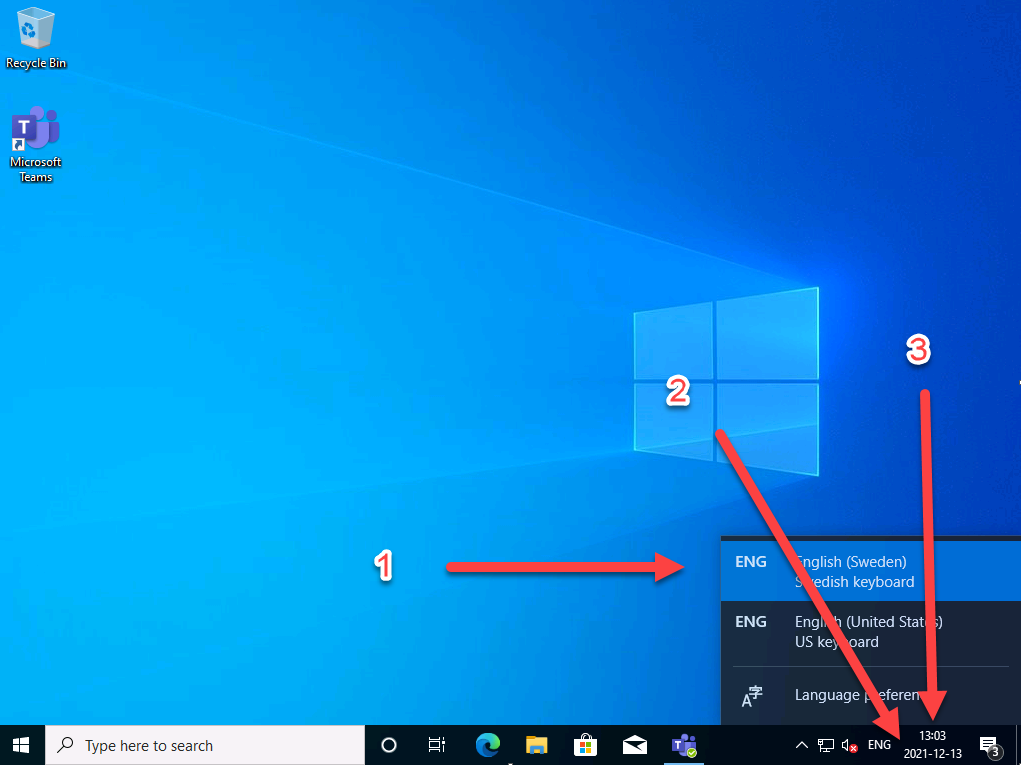
In this example the user changed the Regional format to English (Sweden), from English (United States) and after clicking Change the settings are applied.
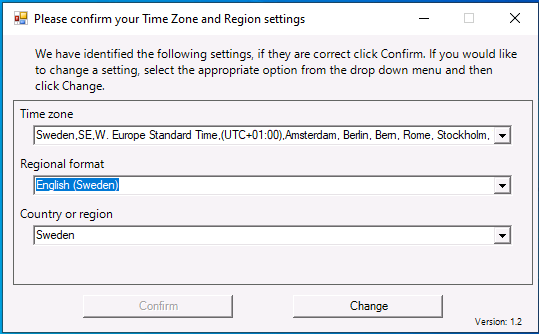
The following will occur when Confirm or Change is clicked.
The keyboard layout is set (1), the regional format is in the chosen format (2) and the time will change to the selected timezone within one minute (3). The time sync takes place via an event generated in event viewer by the SetTimeZone-Gui script.
Windows 11 support
Does it work with Windows 11 ? absolutely !
see here:
Job done !
Troubleshooting
Note: If you are testing this on a hyper-v virtual machine, please disable enhanced mode.
There are three log files generated by this solution
- win.ap.CreateScheduledTask.SetTimeZone.log located in C:\Windows\Temp
- win.ap.SetTimeZone-GUI.log located in C:\Users\<username>\appdata\local\Temp
- win.ap.synctime.log located in C:\Windows\Temp
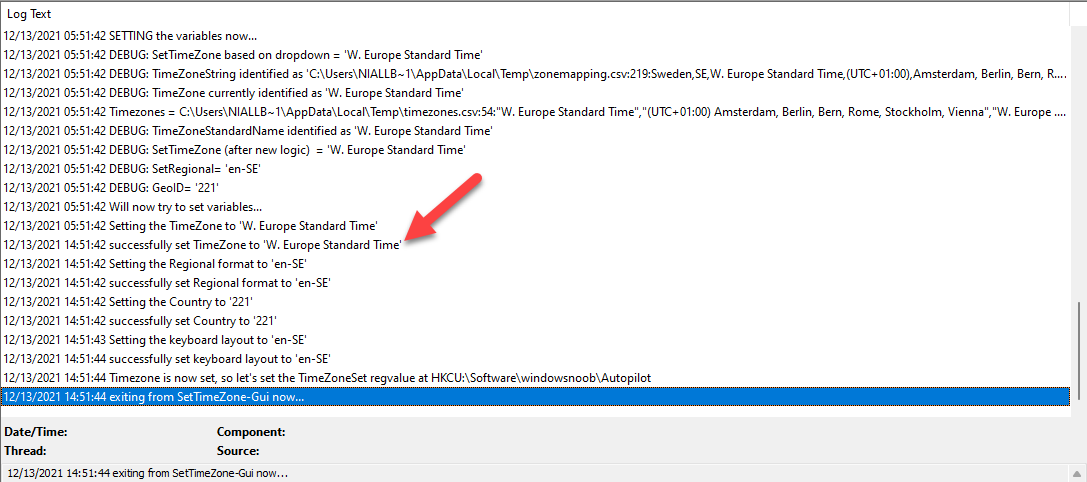
Here you can see it changing the time zone as revealed in the log file time change…
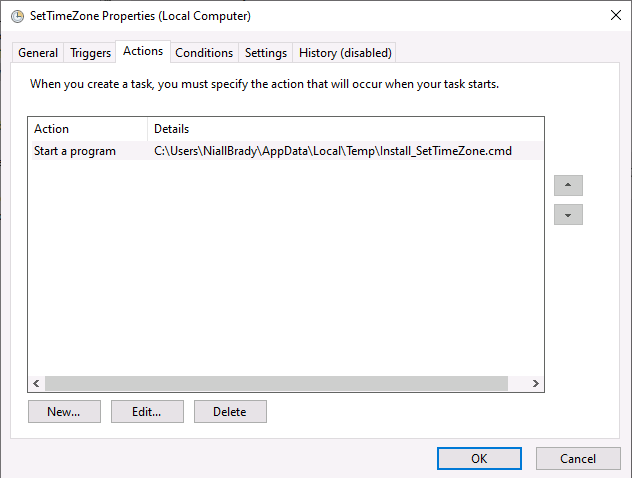
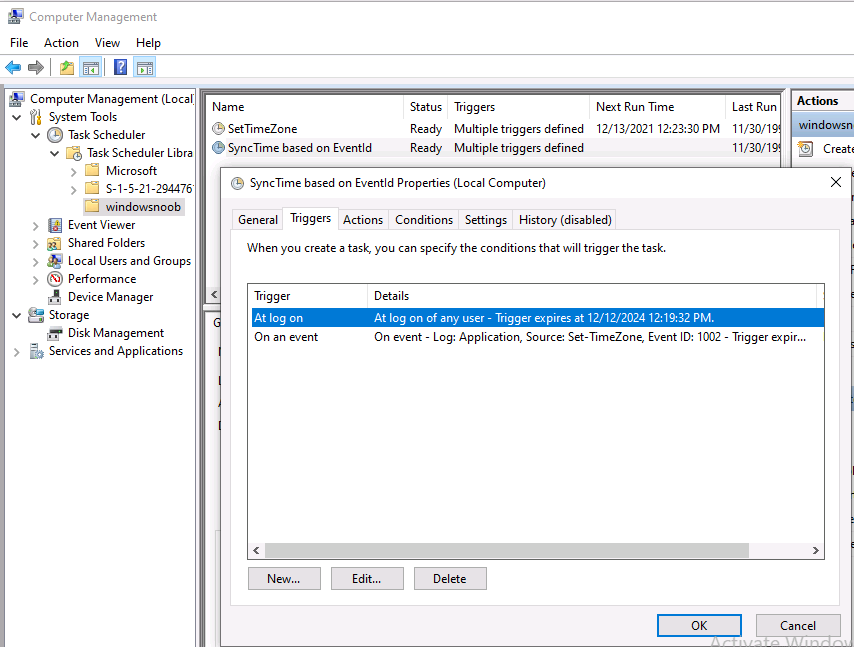
the following scheduled tasks are created.

The SetTimeZone scheduled task will run within a few minutes of the user logging in, it runs the following script.
which in turn launches Powershell and our SetTimeZone-Gui.ps1 script
%SYSTEMROOT%\System32\WindowsPowerShell\v1.0\powershell.exe -NoProfile -WindowStyle Hidden -ExecutionPolicy Bypass -File %temp%\SetTimeZone-Gui.ps1
That will launch the UI shown previously, allowing the end user to confirm or change the detected settings. Once the user confirms or changes the timezone settings an event ID will be generated which will in turn launch the Synctime Based on EventId task.
Magic ?
If the user ignores the popup and restarts the computer, it will appear again after logging on every time they logon for 7 days. You can change that behavior via the scripts settings.Ok that’s it for this blog post, see you next time,
cheers
niall
