
Introduction
This is part 6 in a series of guides about cloud attach in Microsoft Endpoint Manager, with the aim of getting you up and running with all things cloud attach. This part will focus on enabling the compliance policies workload. This series is co-written by Niall & Paul, both of whom are Enterprise Mobility MVP’s with broad experience in the area of modern management. Paul is 4 times Enterprise Mobility MVP based in the UK and Niall is 10 times Enterprise Mobility MVP based in Sweden.
In part 1 we configured Azure AD connect to sync accounts from the on premise infrastructure to the cloud. In part 2, we prepared Azure resources for the Cloud Management Gateway, in part 3 we created the cloud management gateway and verified that everything was running smoothly. In part 4 we enabled co-management. With co-management, you retain your existing processes for using Configuration Manager to manage PCs in your organization and you gain the additional advantage of being able to transfer workloads to the cloud via Endpoint Manager (Intune). In part 5 we enabled the compliance policies workload and reviewed how that affected a co-managed computer. In this part we will enable conditional access and see how that can be used to deny access to company resources.
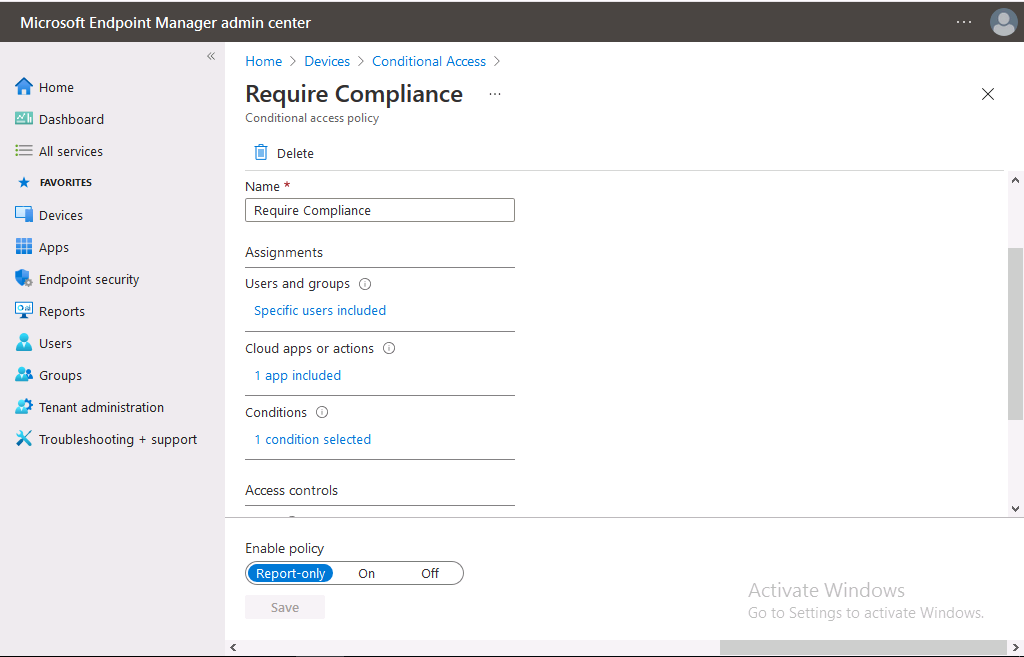
Conditional access is easy to use when you enable co-management. It requires moving the Compliance Policies workload to Intune. We’ve already completed both of those activities in the previous 2 parts. Now we will configure conditional access and we’ll use it to deny access to company resources unless the device is encrypted with BitLocker.
Conditional Access makes sure that only trusted users can access organizational resources on trusted devices using trusted apps. It’s built from scratch in the cloud. Whether you’re managing devices with Intune or extending your Configuration Manager deployment with co-management, it works the same way. Source: https://docs.microsoft.com/en-us/mem/configmgr/comanage/quickstart-conditional-access
- Cloud attach – Endpoint Managers silver lining – part 1 Configuring Azure AD connect
- Cloud attach – Endpoint Managers silver lining – part 2 Prepare for a Cloud Management Gateway
- Cloud attach – Endpoint Managers silver lining – part 3 Creating a Cloud Management Gateway
- Cloud attach – Endpoint Managers silver lining – part 4 Enabling co-management
- Cloud attach – Endpoint Managers silver lining – part 5 Enabling compliance policies workload
- Cloud attach – Endpoint Managers silver lining – part 6 Enabling conditional access
License requirements
Using this feature requires an Azure AD Premium P1 license. To find the right license for your requirements, see Comparing generally available features of the Free, Basic, and Premium editions. Customers with Microsoft 365 Business Premium licenses also have access to Conditional Access features. Sign-in Risk requires access to Identity Protection
Step 1. Add some users to an Azure AD group
To test conditional access we’ll first create an Azure AD group and populate it with some test users. In Microsoft Endpoint Manager, select Groups, then select + New Group, give it a suitable name such as Conditional Access pilot users. Add some test users by clicking on No members selected, select the users you want to test conditional access with and then click on Create.

Step 2. Configure conditional access
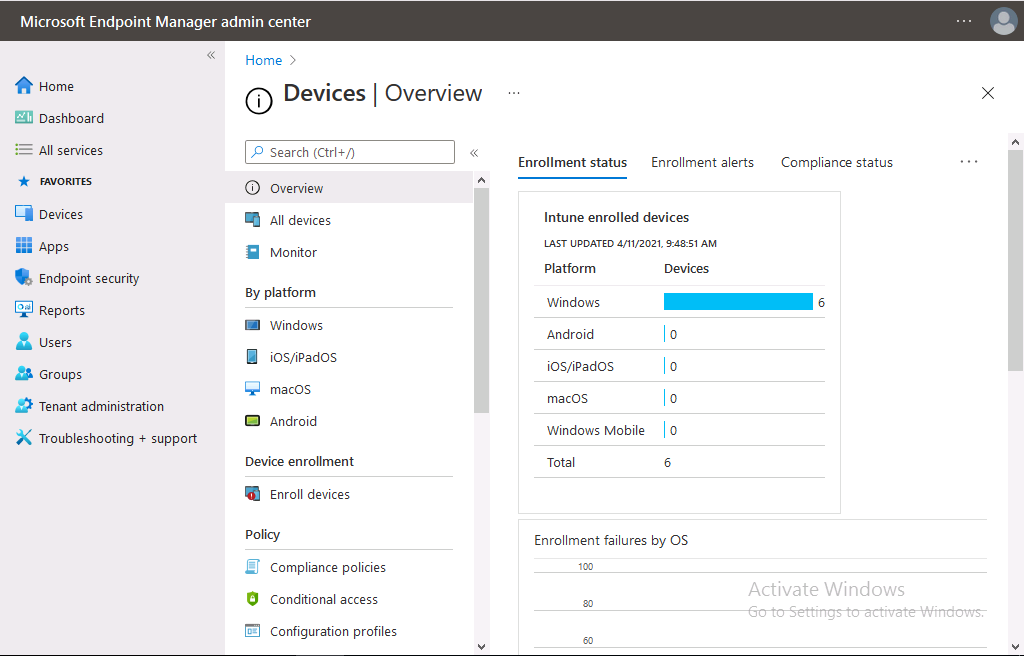
Now you’ll create your first conditional access policy, to do so in Microsoft Endpoint Manager, select devices and then select Conditional Access from the Policy node (shown below).
In the Conditional Access pane, click on + New Policy, give it a suitable name such as Require Compliance
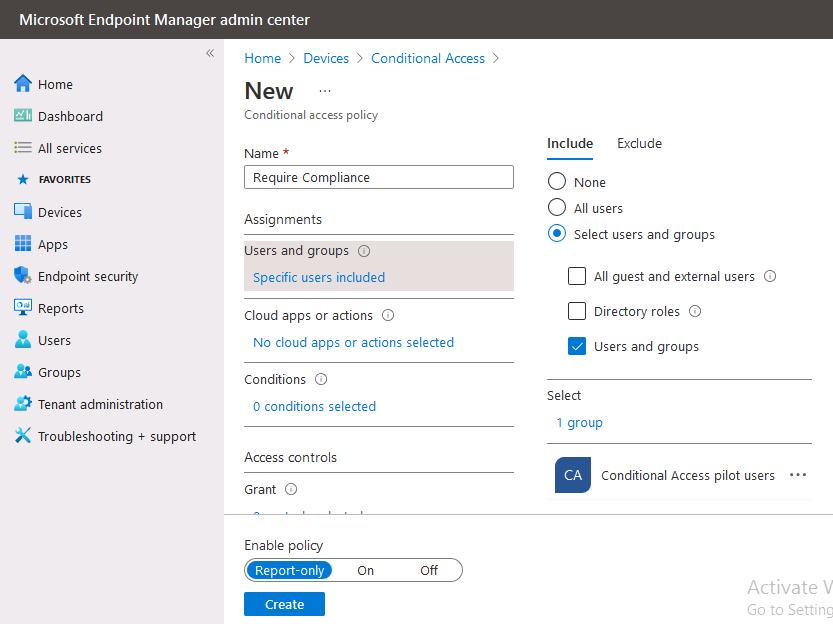
In the Assignments section click on 0 users and groups selected, in the pane that appears select Include, and select select users and groups and add the Azure ad group created in step 1.
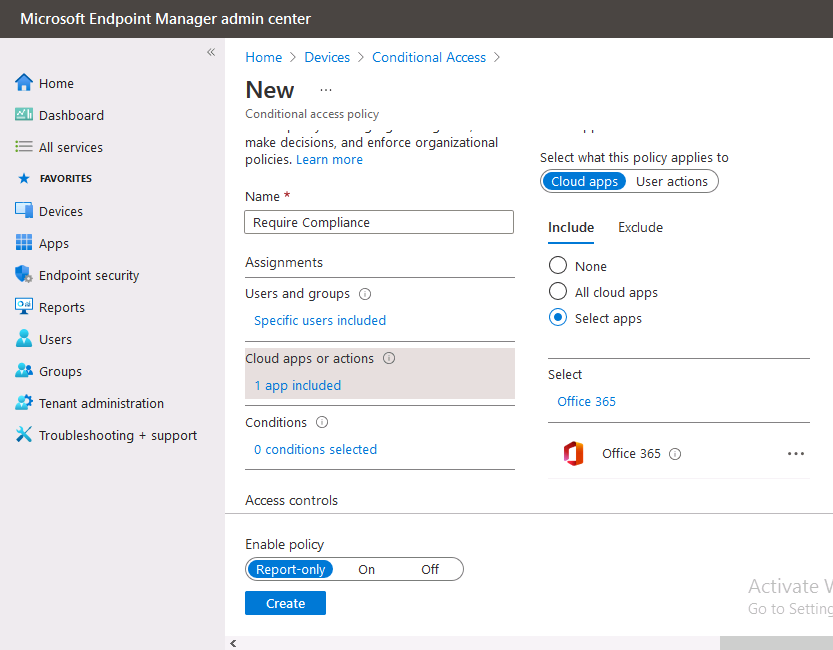
For the Cloud apps or actions selection, select No cloud apps or actions selected and then choose select apps and select a suitable app such as Office 365.
For the Conditions selection, select 0 conditions selected and select the following conditions, Device platforms, select select device platforms and select Windows as shown here and then select Done.
To read the rest of this blog post please click here.
