
Introduction
Windows Autopilot deployment profiles allow you to decide if the user is a local administrator or a standard user. With all the security concerns today, choosing an User account type of Standard as shown below is a logical choice, but it does have some downsides. Certain abilities within Windows are not available to the end user without elevating their status.

For example, as a standard user if you need to reset Windows when things take a nosedive (yes, it does happen), you cannot do it without elevating your session using Windows built in reset abilities, you could use the option in Company Portal, devices, but it doesn’t allow you to gather logs, or email the reason for the reset, and it’s troublesome to find.
As an Intune Admin you could of course trigger the reset from within the Endpoint Manager portal, but what if you want your users to be in control of when and where they make that choice. By providing the users with this self service ability means one less call to the help desk.
To give your users the ability to easily self reset Windows, and to do it in a way that your company can benefit from, you can provide an app that runs in SYSTEM context via the Company Portal and that’s what this blog post covers. It shows you how to display a simple UI to your end users which runs in SYSTEM context, yet can interact with the end users and gather important data prior to initiating the reset.
Step 1. Get the scripts
Note: You can only download these files when logged on to windows-noob.com
Extract the files.
Step 2. Get ServiceUI.exe from MDT
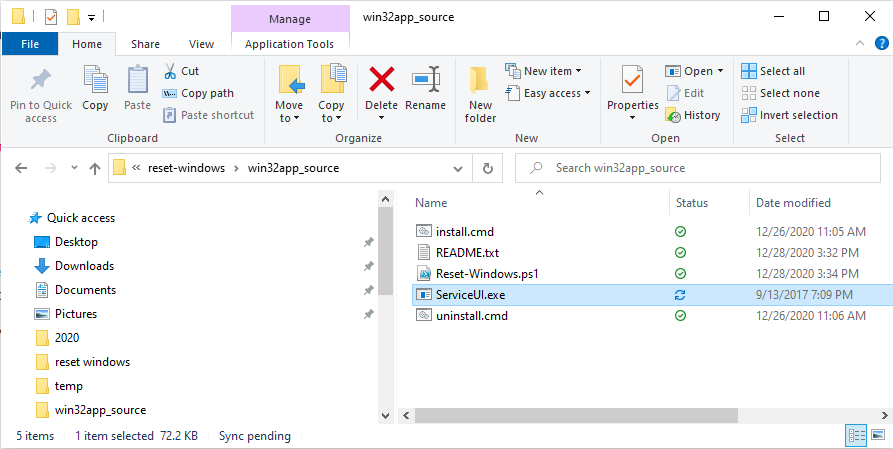
You’ll need the ServiceUI.exe executable file to display user interfaces (UI) to end users when operating in SYSTEM context. To get the file, download and install MDT somewhere and navigate to C:\Program Files\Microsoft Deployment Toolkit\Templates\Distribution\Tools\x64. To download MDT click here.
Copy the ServiceUI.exe file to your extracted win32app_source folder so it looks like this.
Step 3. Get the Win32 content prep tool
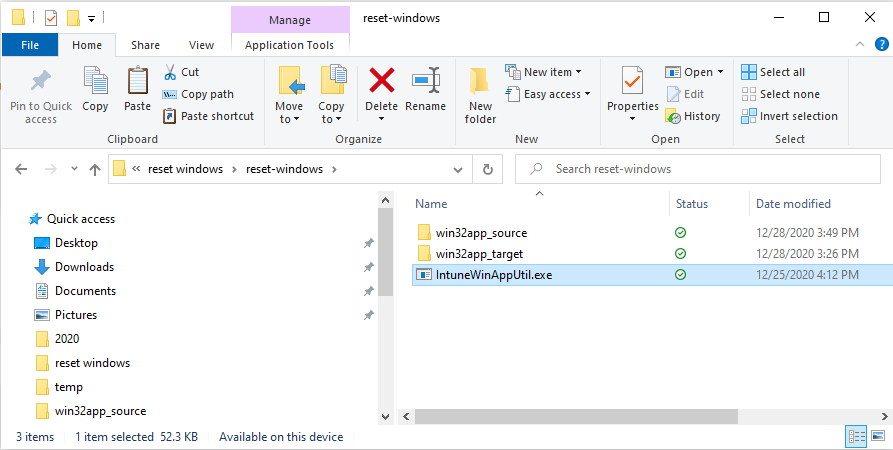
Download the Win32 content prep tool from here.
Copy the IntuneWinAppUtil.exe file to your reset-windows source folder, it should look like this.
Step 4. setup Sendgrid in Azure
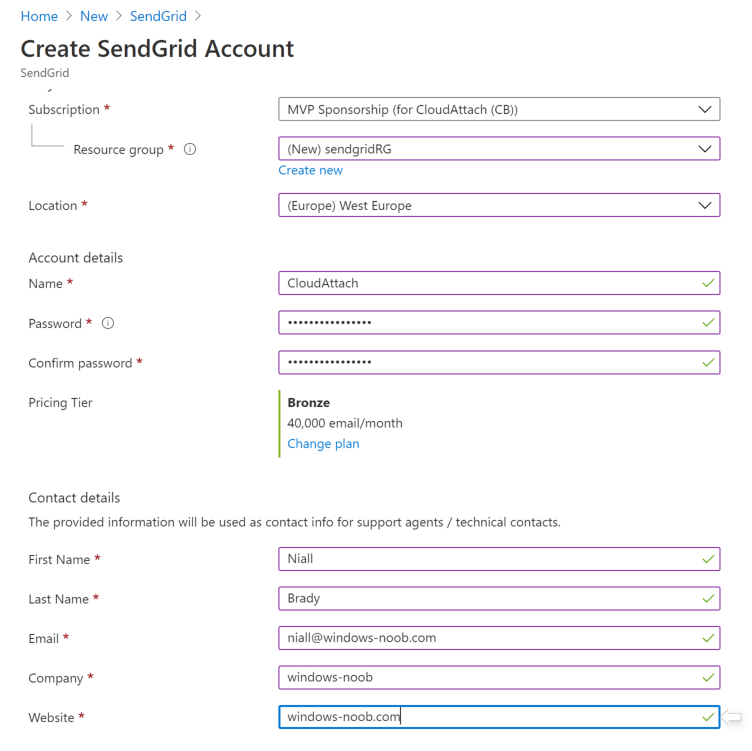
In https://portal.azure.com login and add a resource called Sendgrid.
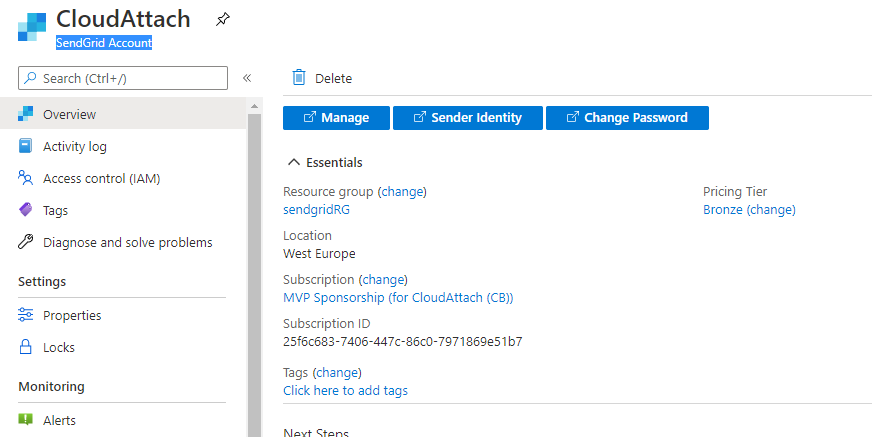
After creating the resource, click on Manage
In the sendgrid web site, choose to Create a sender.
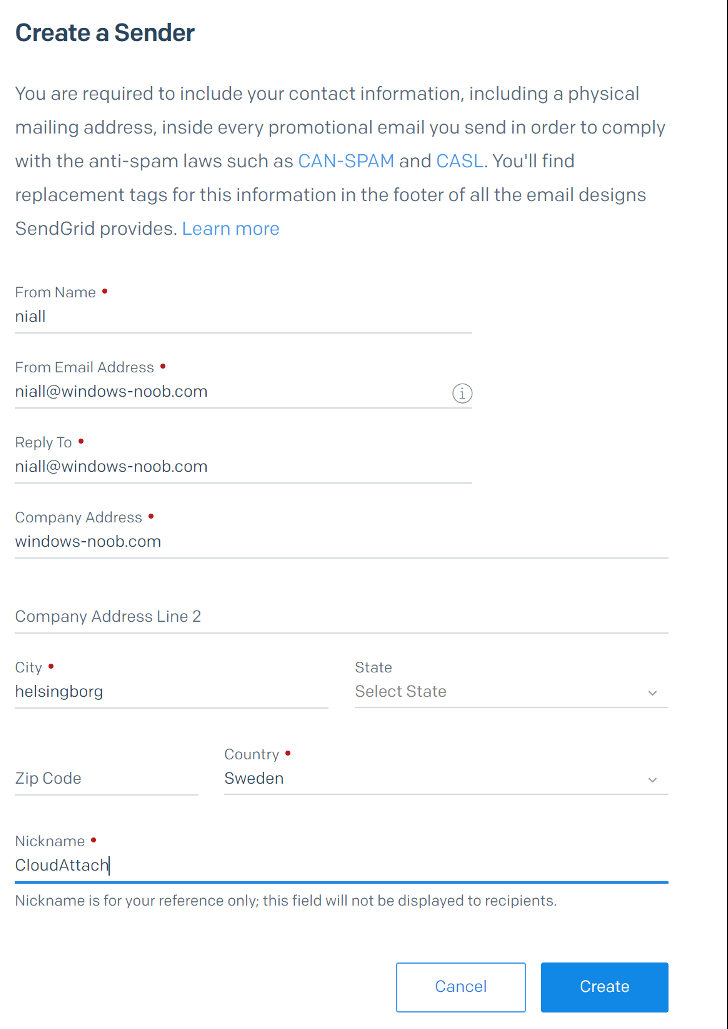
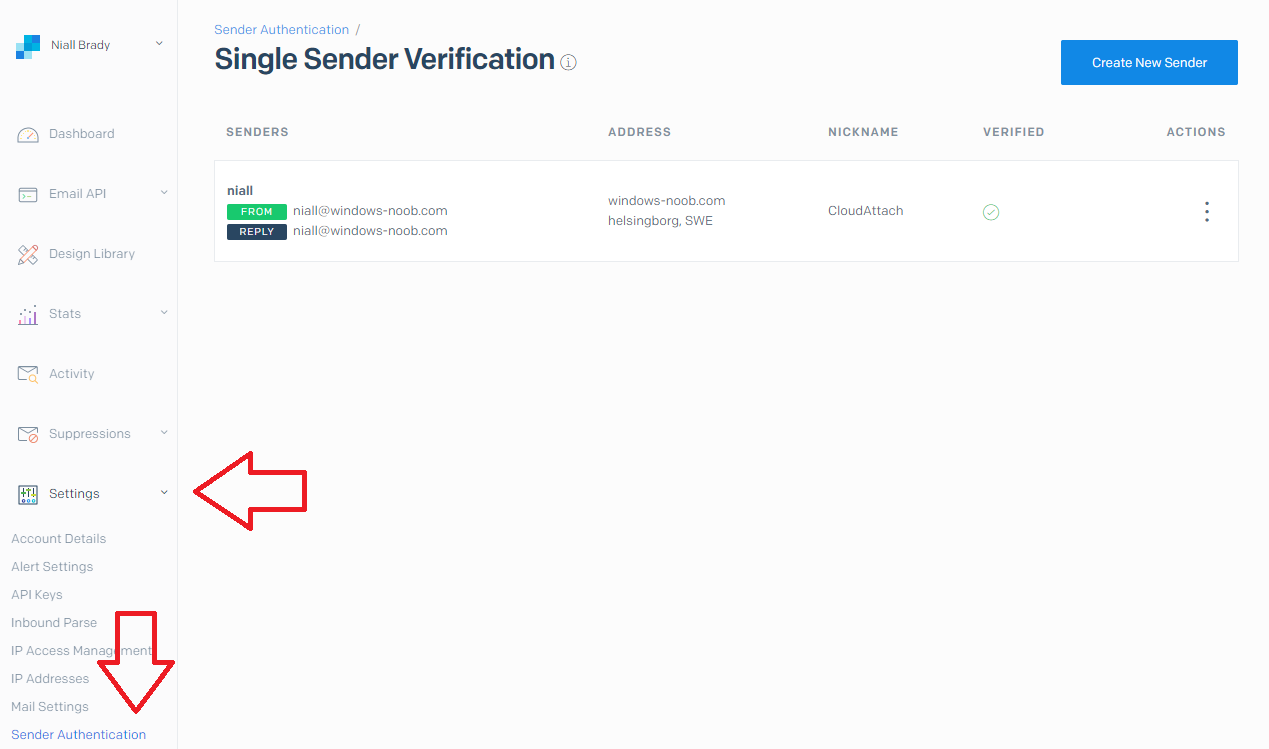
Once that is done and you’ve verified the sender, you can review your sender in the settings node in the sender authentication area.
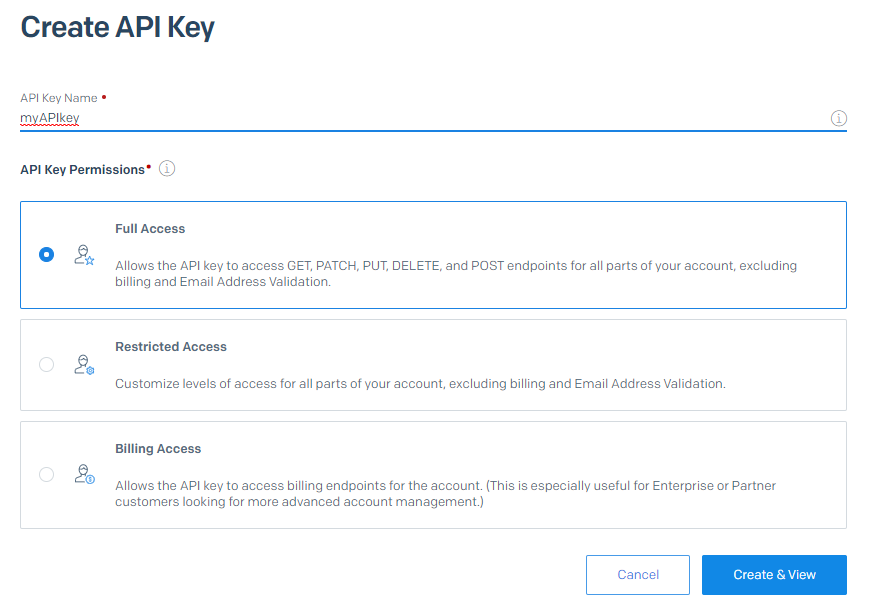
Next you should Create an API key, to create an API keysimply expand Settings in the left pane and choose API Keys followed by Create API Key, I chose full access.
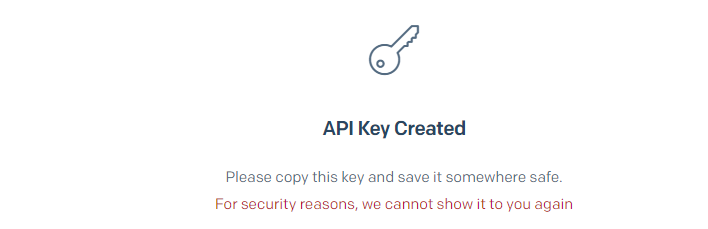
Make sure to copy your API key somewhere safe…
After all that is done, you can test sending your first email, there’s lots of help at sendgrids site. Do not continue until you’ve got confirmation that you can send email successfully.
continue reading this post over @ windows-noob.com here.
