
Introduction
Big Sur is the latest version of MacOS from Apple. I needed the Big Sur ISO (to create a virtual machine) to test various things like Intune and Jamf enrollment but doing so was tricky and these are my rough notes.
The method I used is detailed below, your mileage may vary. I did this on a Macbook Pro (13 inch, 2017) running Big Sur .
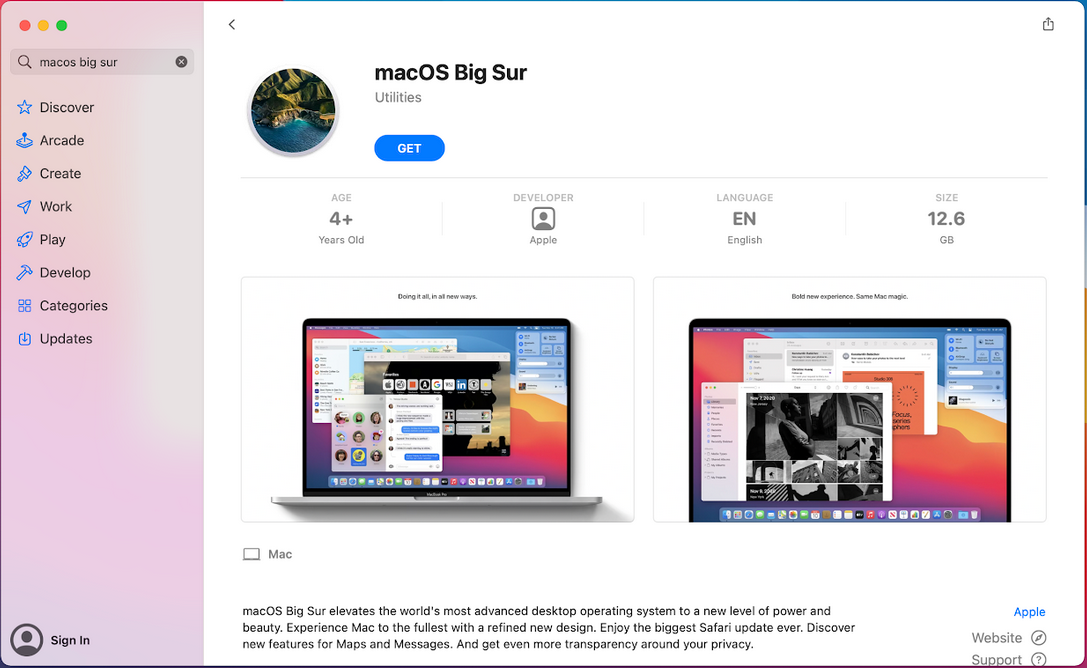
Step 1. Download Mac Os Big Sur from the AppStore
In the App Store search for Big Sur and when you find it click Get. It will take some time to download (12.18GB).
Step 2. Launch a terminal
Click on the magnifying glass (spotlight search) and type terminal. A terminal prompt will appear.
In the terminal, login to root (I used sudo -i as my user was a member of Wheel)
Last login: Wed Nov 18 08:35:21 on console

Niall@Nialls-MacBook-Pro ~ % sudo -i

Password:********
Step 3. Create Big Sur dmg
As root issue the following command
hdiutil create -o /tmp/bigsur -size 12685.1m -volname bigsur -layout SPUD -fs HFS+J
You should see:
created: /tmp/bigsur.dmg
Step 4. Mount DMG
As root, issue the following command
Nialls-MacBook-Pro:tmp root# hdiutil attach /tmp/bigsur.dmg -noverify -mountpoint /Volumes/bigsur
You should see:
/dev/disk3 Apple_partition_scheme
/dev/disk3s1 Apple_partition_map
/dev/disk3s2 Apple_HFS
Step 5. Create install media
As root enter the following command:
sudo /Applications/Install\ macOS\ Big\ Sur.app/Contents/Resources/createinstallmedia --volume /Volumes/bigsur --nointeraction
You should see:
Erasing disk: 0%… 10%… 20%… 30%… 100%
Copying to disk: 0%… 10%… 20%… 30%… 40%… 50%… 60%… 70%… 80%… 90%… 100%
Making disk bootable…
Install media now available at “/Volumes/Install macOS Big Sur”
Step 6. Detach created media
As root enter the following command:
hdiutil detach /volumes/Install\ macOS\ Big\ Sur
If it doesn’t unmount, unmout it in Finder.
Step 7. Convert media
As root enter the following command, replace my username with your own:
hdiutil convert /tmp/bigsur.dmg -format UDTO -o /Users/Niall/Desktop/bigsur.cdr
You should see:
Reading Driver Descriptor Map (DDM : 0)…
Reading Apple (Apple_partition_map : 1)…
Reading (Apple_Free : 2)…
Reading disk image (Apple_HFS : 3)…
……………………………………………………………………………………………………………………………..
Elapsed Time: 29.913s
Speed: 424.1Mbytes/sec
Savings: 0.0%
created: /Users/Niall/Desktop/bigsur.cdr
Nialls-MacBook-Pro:tmp root#
Step 8. Rename the bigsur.cdr to bigsur.iso
In finder, locate the bigsur.cdr file and rename it to bigsur.iso.
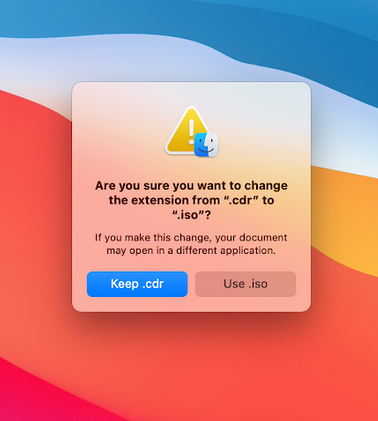
Choose Use .iso.
that’s it, you are done, you now have the Big Sur in ISO format, the size is approx 12.4GB after creation.
Virtualizing Big Sur with Vmware Workstation
After creating the ISO you can apply this hack to Vmware Workstation 15 pro to allow you to install Big Sur.
On Windows you will need to either run cmd.exe as Administrator or using
Explorer right click on the command file and select "Run as administrator".

win-install.cmd   - patches VMware
win-uninstall.cmd - restores VMware
win-update-tools.cmd - retrieves latest macOS guest tools
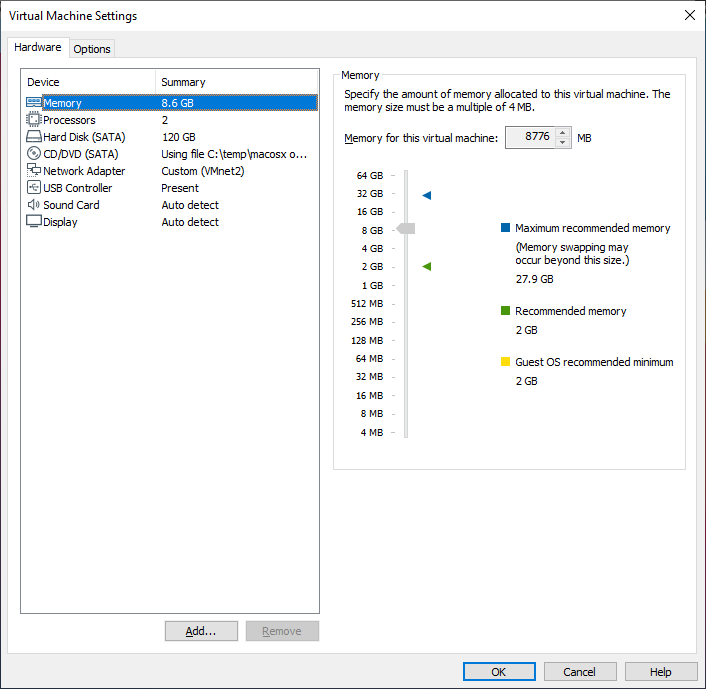
Here are the settings I used for the Big Sur Virtual Machine.
 Before powering on the VM add the following lines to your bigsur.vmx file (use notepad++ to edit)
smbios.reflectHost = "TRUE"
hw.model = "MacBookPro14,3"
board-id = "Mac-551B86E5744E2369"
smc.version = "0"
 Save the file and then power on the Virtual machine.
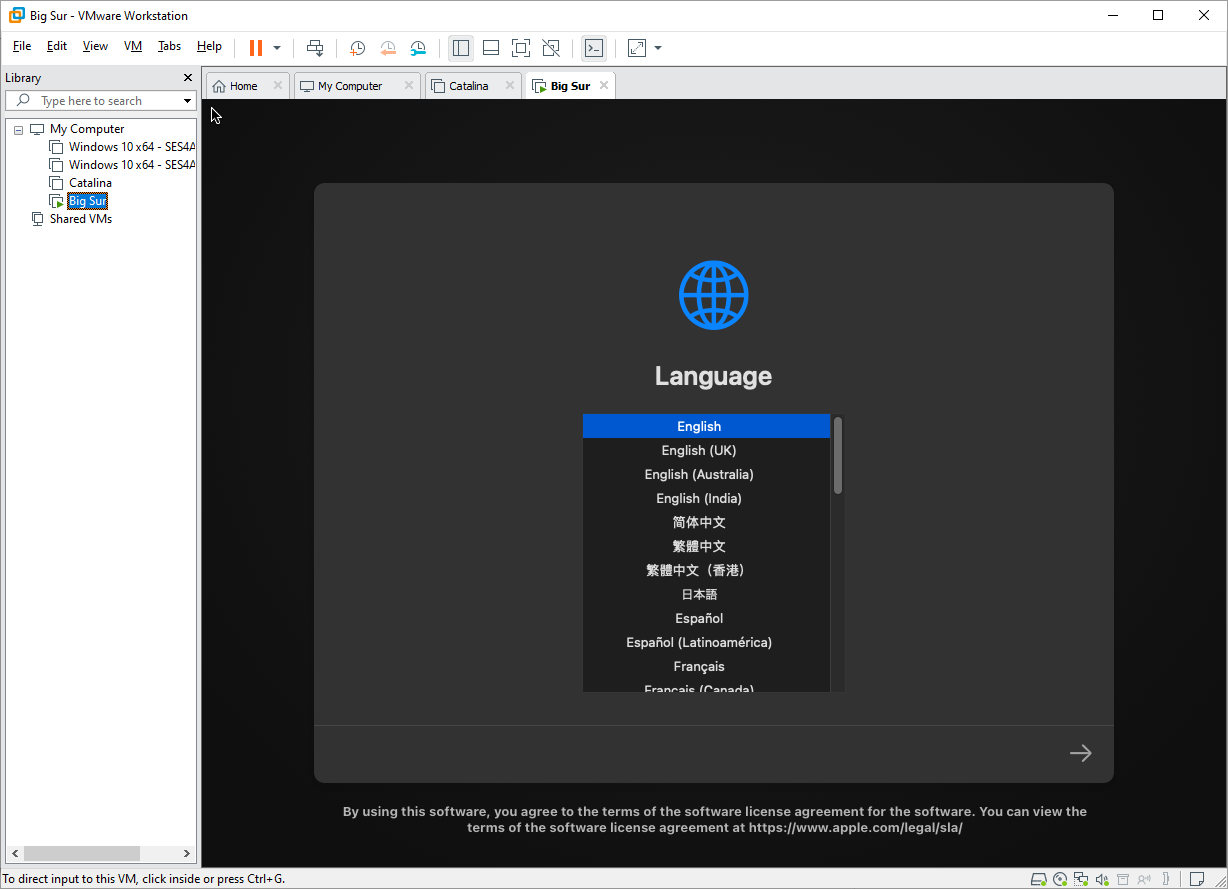 go through setup and after a while it’s all installed
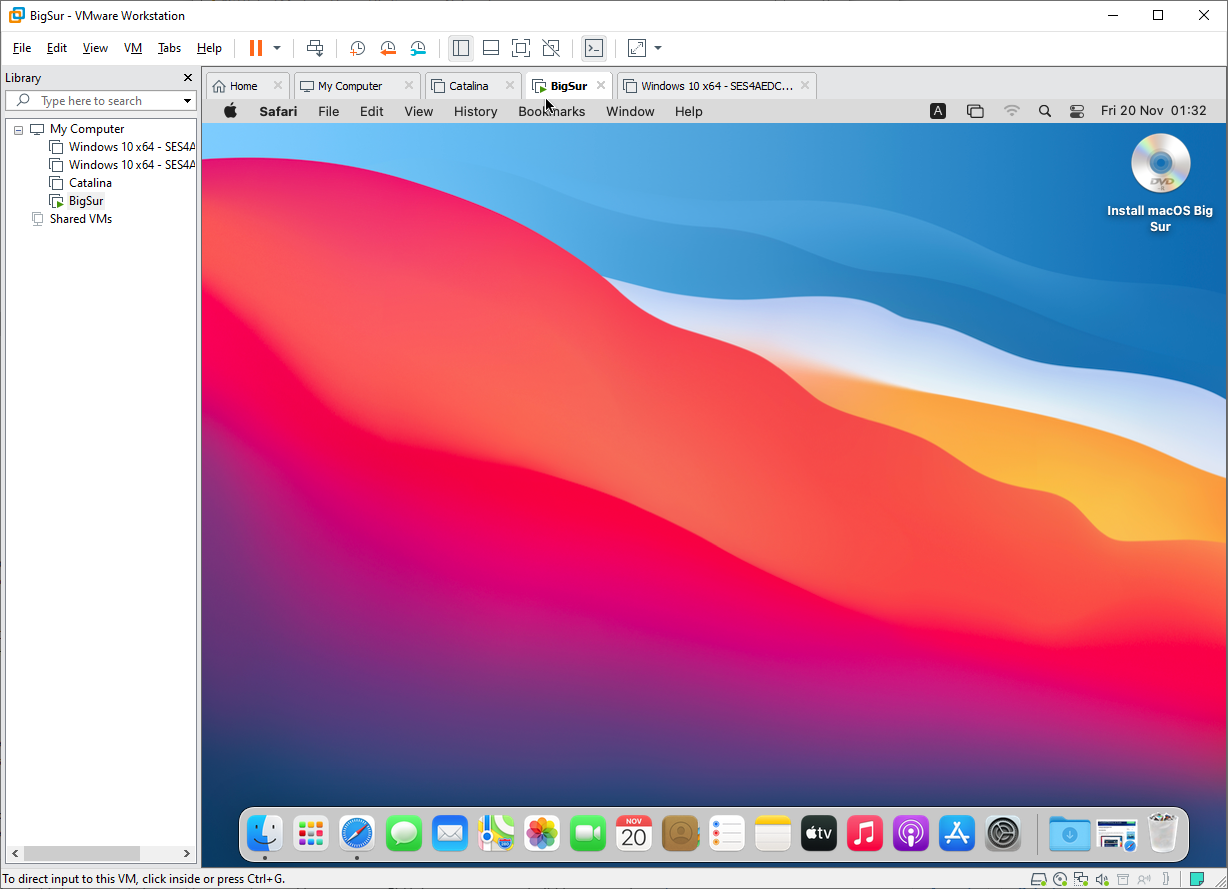 I hope this helped !
cheers
niall.

Pingback: Enrolling a Mac Book Pro (M1) into Jamf Pro | just another windows noob ?
Hi,
Do you have a full instruction on how to create Big Sur ISO using a Windows PC?
Thanks
i haven’t tried it, but you can try this https://techrechard.com/create-macos-big-sur-bootable-usb-on-windows/