
Introduction
This multi-part guide will show you how to install the latest baseline version of Configuration Manager from Microsoft. The latest available baseline version is System Center Configuration Manager (Current Branch) version 1902 as of April the 10th 2019. I blogged how to upgrade to 1902 here. This guide is aimed a new installations of SCCM. Baseline media is used to install new ConfigMgr sites or to upgrade from supported versions, for more information about baseline media please see my blog post here.
Note: The SCCM 1902 Current Branch media is not yet available on MSDN or VLSC. When the new baseline media is released I’ll update this note.
This series is broken down into the following parts:-
- Part 1 – Get the lab ready, configure ADDS
- Part 2 – Join CM01 to Domain, add users, create the Systems Management container, delegate permission
- Part 3 – Role and Feature installation, installation of WDS and ADK
- Part 4 – Configure and install SQL Server 2017 (This part)
- Part 5 – Configure and install SCCM 1902 Current Branch
- Part 6 – Post configuration
You can use this multi-part guide to get a hierarchy up and running on Windows Server 2019 using SQL Server 2017. The concept behind this is to guide you through all the steps necessary to get a working Configuration Manager Primary site installed (for lab use) using manual methods or automated using PowerShell. This gives you the power to automate the bits that you want to automate, while allowing you to manually do other tasks when needed. You decide which path to take. PowerShell knowledge is desired and dare I say required if you are in any way serious about Configuration Manager.
I will show you how to do most steps via two methods shown below, it’s up to you to choose which method suits you best but I highly recommend automating everything that you can, using PowerShell.
- Method #1 – Do it manually
- Method #2 – Automate it with PowerShell
Downloads
The scripts used in this part of the guide are available for download here. Unzip to C:\Scripts. The scripts are placed in the corresponding folder (Part 1, Part 2 etc) and sorted into which server you should run the script on (DC01 or CM01).
Step 1. Install SQL Server 2017
Note: Perform the following on the Configuration Manager server (CM01) as a Local Administrator, I’d suggest you logon as the username matching your name.
- Method #1 – Do it manually
In this section you will install SQL Server 2017 CU14 which is the latest supported version of SQL Server that is compatible with SCCM 1902 Current Branch as of 2019/4/16. For details about which versions of SQL Server are supported with different site systems in ConfigMgr, please see this page.
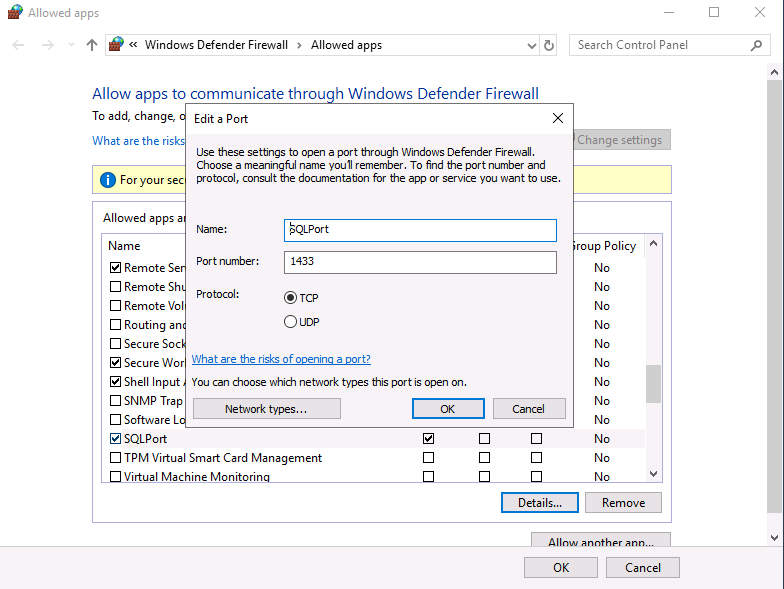
Before starting, please configure the firewall as described in https://go.microsoft.com/fwlink/?linkid=94001 to allow access to SQL Server through the firewall. You can do this by executing the following command as local administrator on the CM01 (ConfigMgr) server.
netsh advfirewall firewall add rule name = SQLPort dir = in protocol = tcp action = allow localport = 1433 remoteip = localsubnet profile = DOMAIN
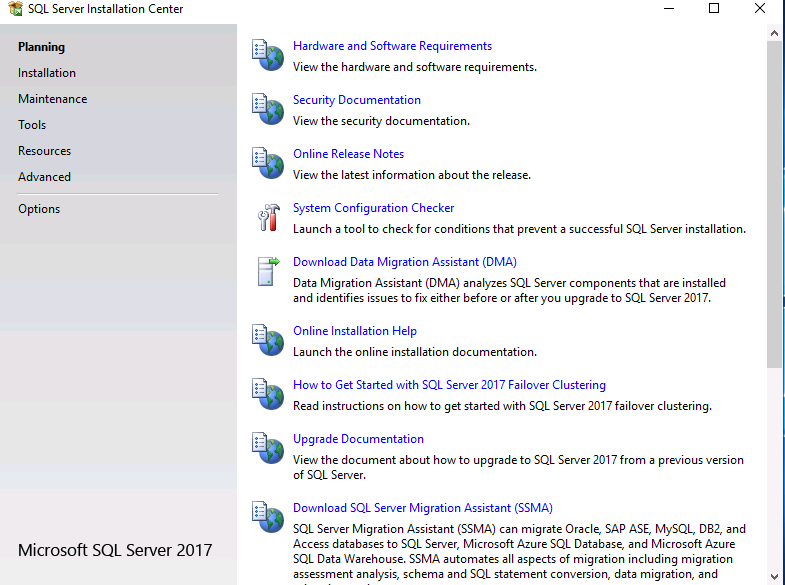
After configuring the firewall, browse to the drive where the SQL Server 2017 media is, and run setup.exe. The SQL Server Installation Center wizard will appear.
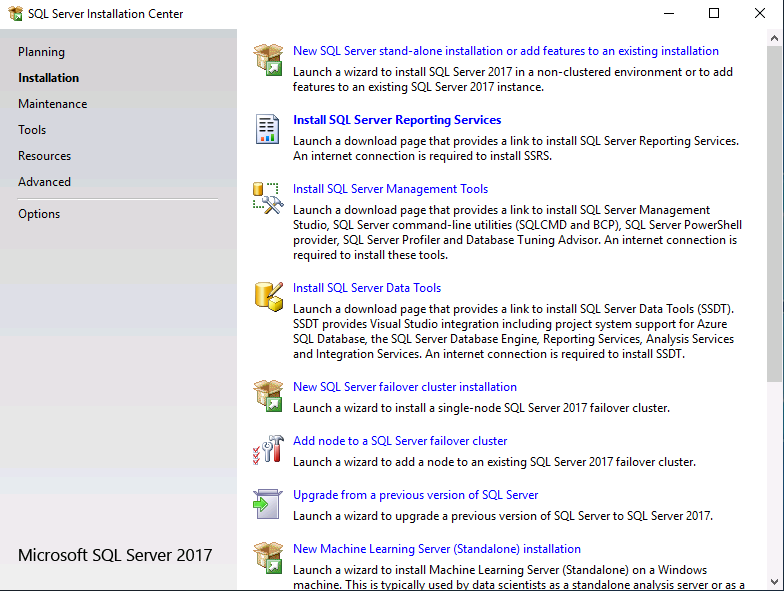
Click on Installation and then choose New SQL Server standalone installation or add features to an existing installation.
Enter the Product Key or use the evaluation version if that’s what you want to use.
Note: The product key will be automatically filled in for licensed media downloaded from Microsoft Volume Licensing Service Center.

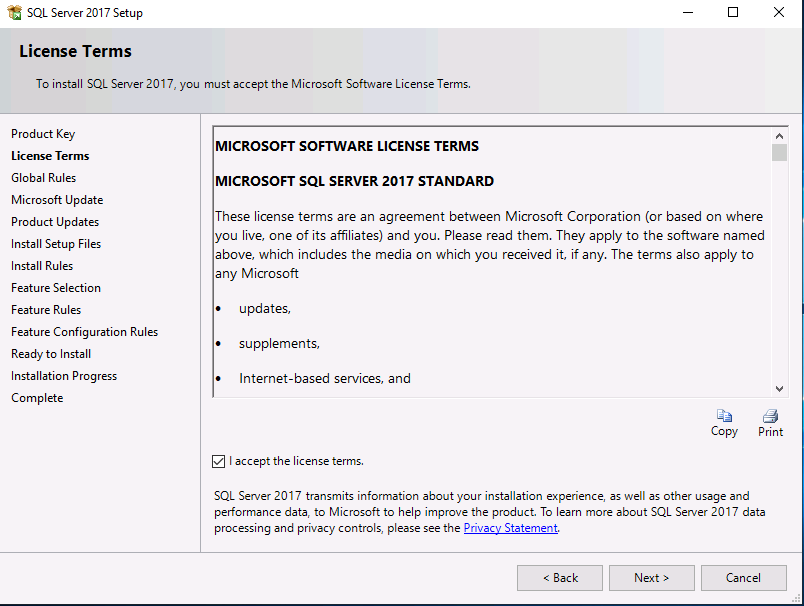
Accept the EULA
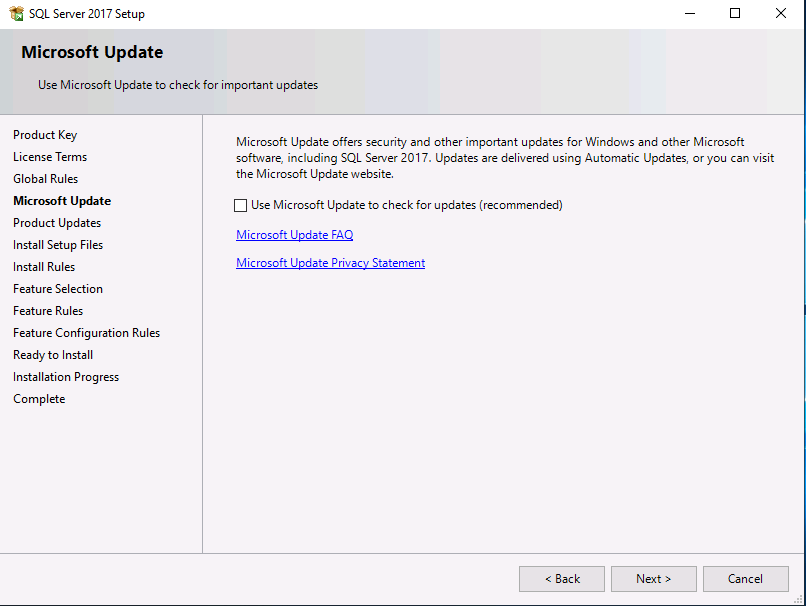
Make your Microsoft Update choices
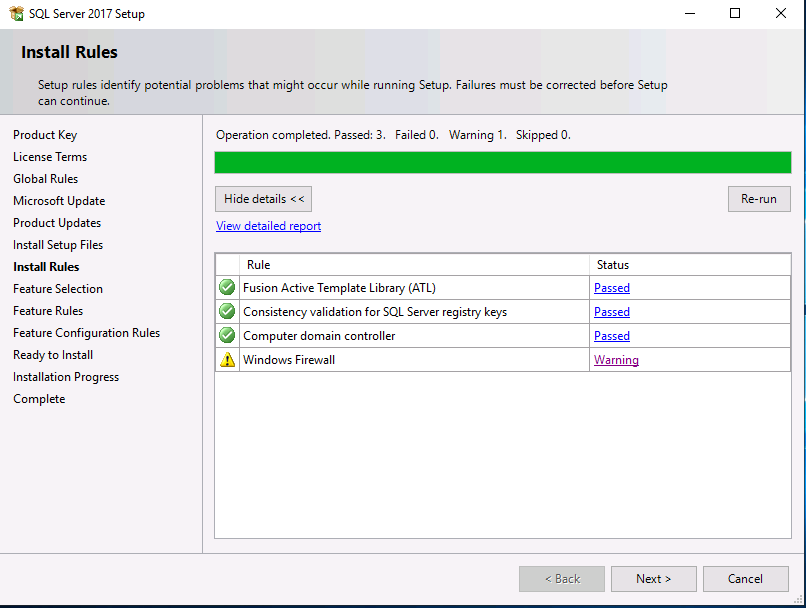
and review your Install rules, as long as you’ve opened the correct port for SQL you’ll be ok and can safely ignore the Warning about the Firewall.
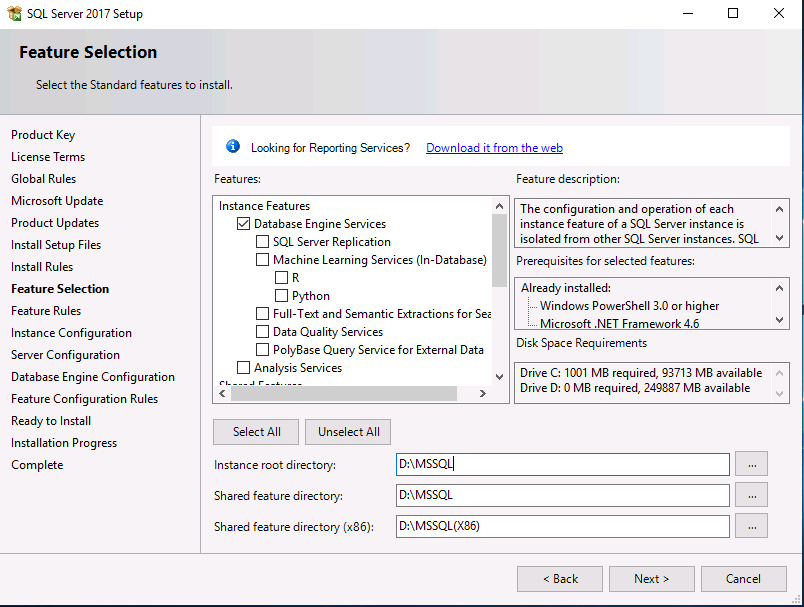
select the SQL server instance features you need (at least Database Engine Services) and if necessary change the drive letter where you intend to install it
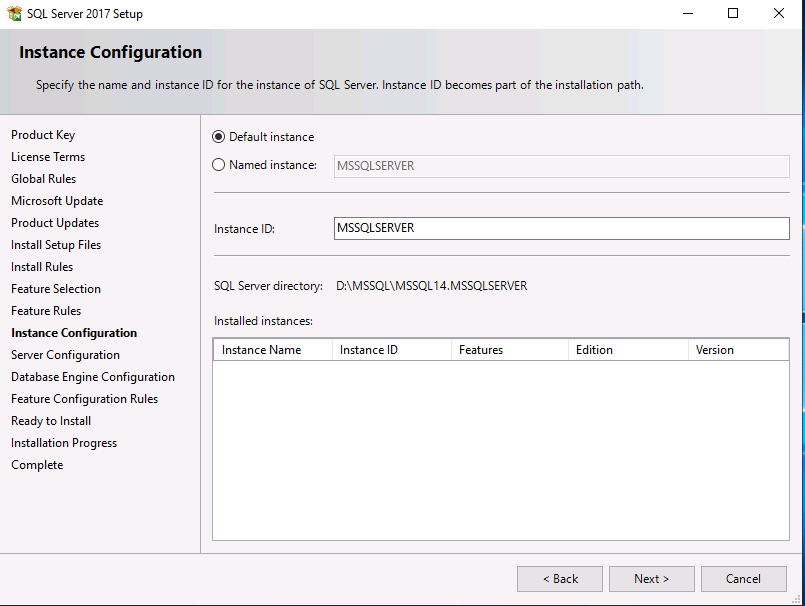
And configure the Instance Configuration or just leave it as default
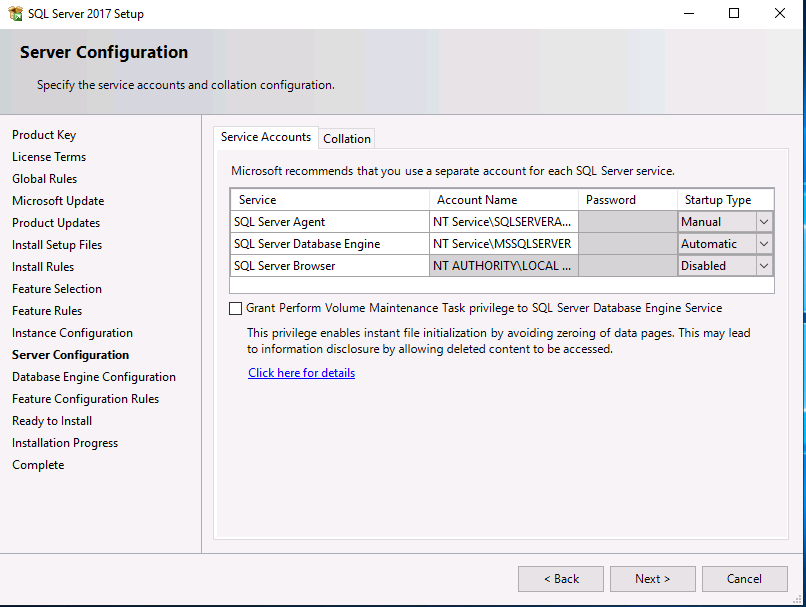
Verify the Service Accounts settings
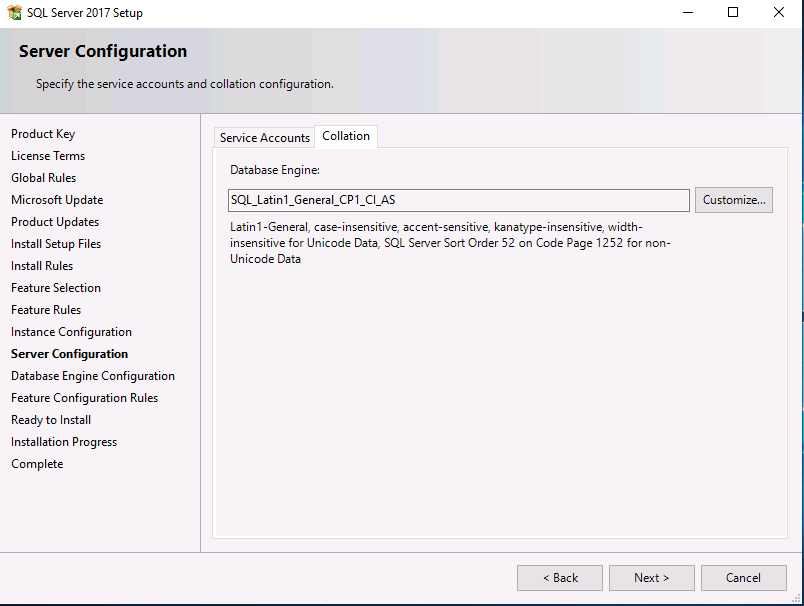
and for Collation (click on the Collation tab in Server Configuration), make sure the collation is set to SQL_Latin1_General_CP1_CI_AS
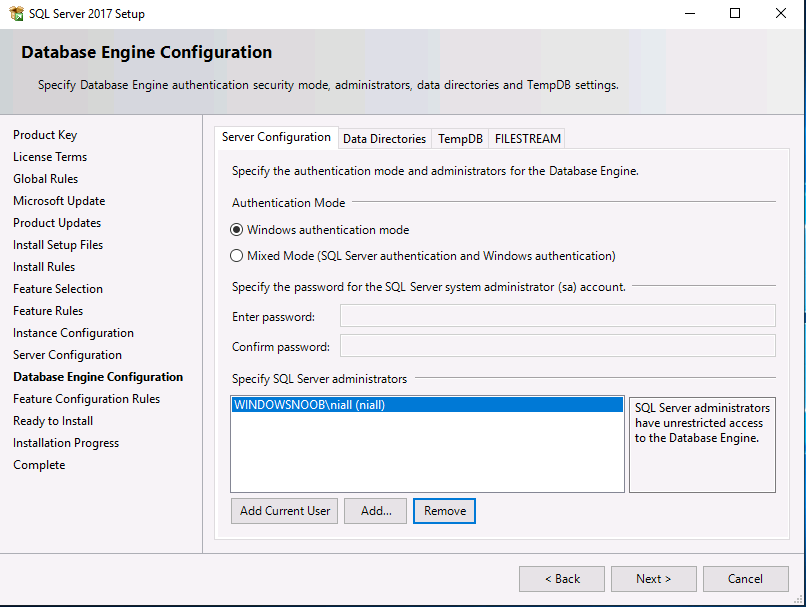
For Database Engine Configuration, click on Add Current User
After configuring Data Directories, TempDB and Filestream settings you are ready to install
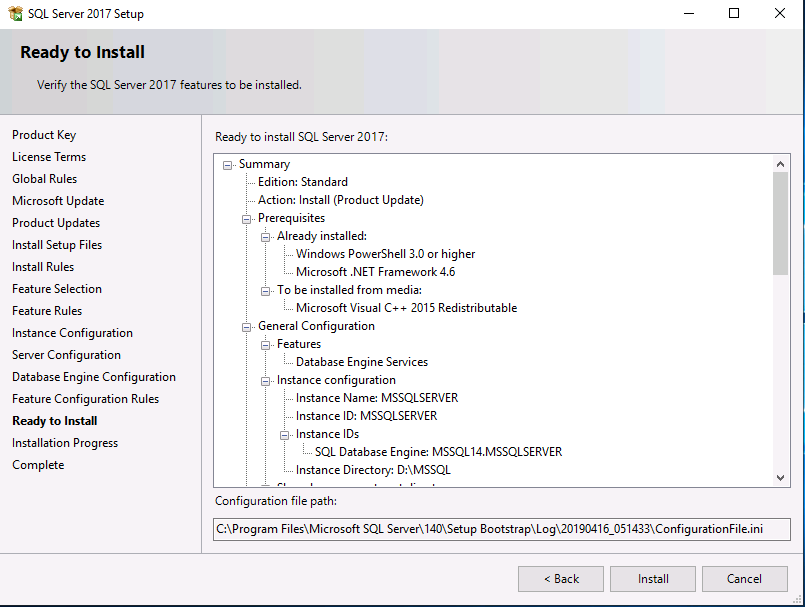
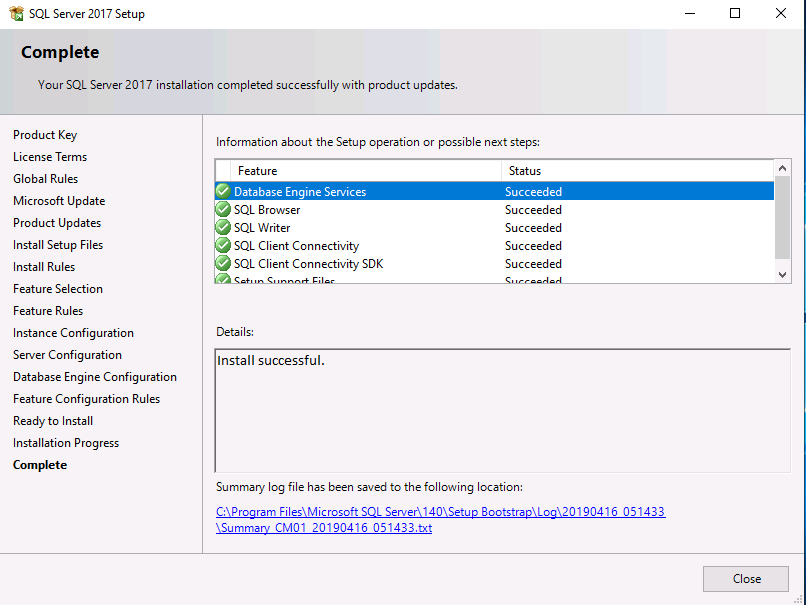
Click on Install to start the installation of SQL Server 2017, and once it’s completed, click Close.
Next download and install the following:
- SQL Server 2017 Cumulative Update 14.
- SQL Server 2017 SSMS here.
- SQL Server 2017 Reporting Services.
Read the rest of this post over at windows-noob.com here.
