
Introduction
This multi-part guide will show you how to install the latest baseline version of Configuration Manager from Microsoft. The latest available baseline version is System Center Configuration Manager (Current Branch) version 1902 as of April the 10th 2019. I blogged how to upgrade to 1902 here. This guide is aimed a new installations of SCCM. Baseline media is used to install new ConfigMgr sites or to upgrade from supported versions, for more information about baseline media please see my blog post here.
Note: The SCCM 1902 Current Branch media is not yet available on MSDN or VLSC. When the new baseline media is released I’ll update this note.
This series is broken down into the following parts:-
- Part 1 – Get the lab ready, configure ADDS
- Part 2 – Join CM01 to Domain, add users, create the Systems Management container, delegate permission (This part)
- Part 3 – Role and Feature installation, installation of WDS and ADK
- Part 4 – Configure and install SQL Server 2017
- Part 5 – Configure and install SCCM 1902 Current Branch
- Part 6 – Post configuration
You can use this multi-part guide to get a hierarchy up and running on Windows Server 2019 using SQL Server 2017. The concept behind this is to guide you through all the steps necessary to get a working Configuration Manager Primary site installed (for lab use) using manual methods or automated using PowerShell. This gives you the power to automate the bits that you want to automate, while allowing you to manually do other tasks when needed. You decide which path to take. PowerShell knowledge is desired and dare I say required if you are in any way serious about Configuration Manager.
I will show you how to do most steps via two methods shown below, it’s up to you to choose which method suits you best but I highly recommend automating everything that you can, using PowerShell.
- Method #1 – Do it manually
- Method #2 – Automate it with PowerShell
Downloads
The scripts used in this part of the guide are available for download here. Unzip to C:\Scripts. The scripts are placed in the corresponding folder (Part 1, Part 2 etc) and sorted into which server you should run the script on (DC01 or CM01).
Step 1. Join CM01 to the domain
Note: Perform the following on the ConfigMgr server (CM01) as Local Administrator
- Method #1 – Do it manually
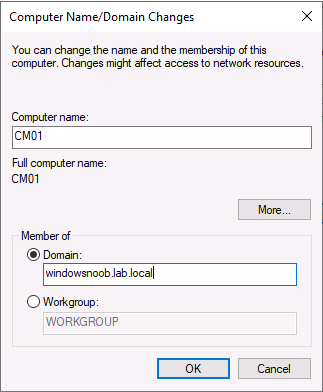
To join the domain manually, login to CM01. Start Windows File Explorer. Right-click on This-PC and choose Properties. The System screen will appear. Click on Change settings to the right of Computer name. For the option To rename this computer or change its domain or workgroup, click Change, click Change and for Member of select Domain, enter the Domain details used in Part 1 of this series and then click OK.
and enter domain join credentials as appropriate when prompted. Once done you’ll get notification that you’ve joined the domain.
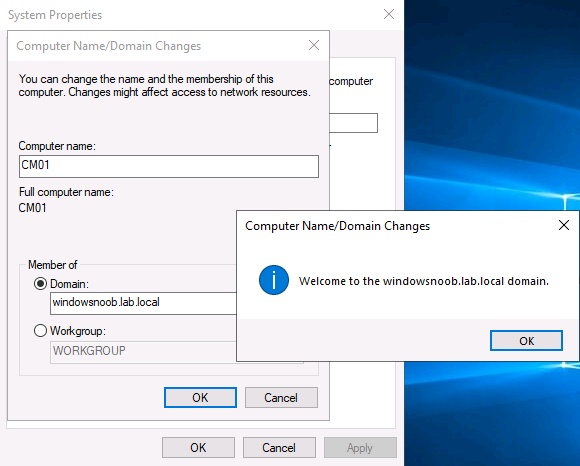
Click OK and click Restart Now when prompted.
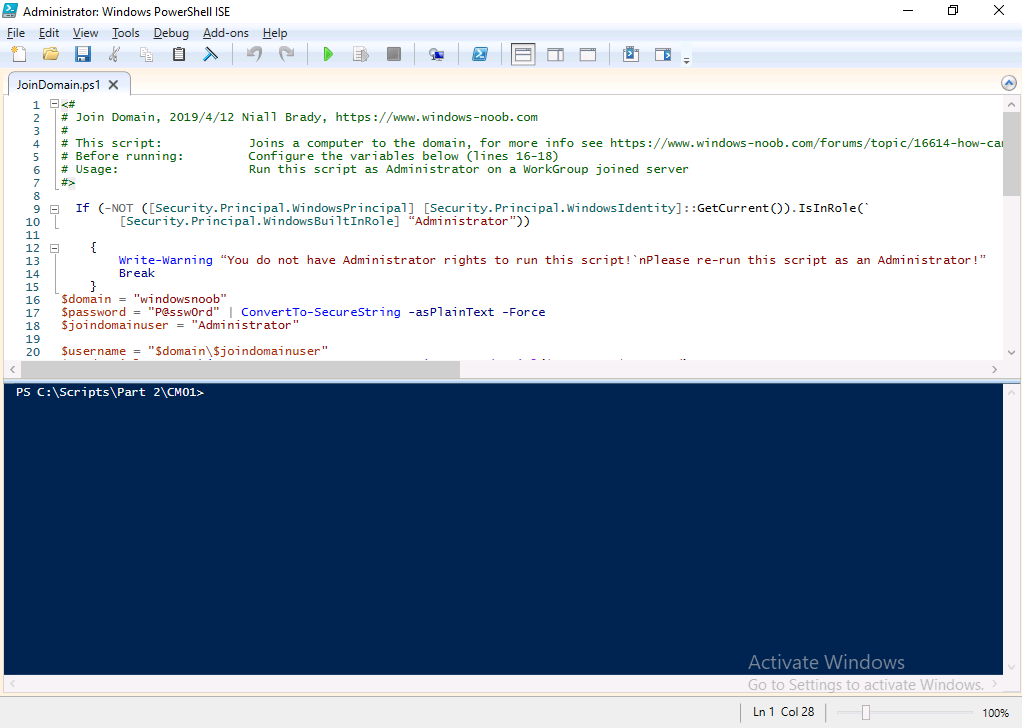
- Method #2 – Automate it with PowerShell
To join the domain automatically, use the joindomain.ps1 PowerShell script.
1. Copy the script to C:\Scripts on CM01
2. Edit the variables (lines 16-18) as desired before running.
3. Start Windows PowerShell ISE as Administrator and run the script by clicking on the green triangle.
Step 2. Add Users to Active Directory
- Method #1 – Do it manually
To create users manually, click on Start and choose Windows Administrative Tools and then select Active Directory Users and Computers. In Active Directory Users and Computers, add new users by expanding <domain name>, select Users and right click, choose New then select User.
You can continue reading the rest of this guide over @ windows-noob.com here.
