
Introduction
At the start of this series of step by step guides you installed System Center Configuration Manager (Current Branch), then you configured discovery methods. Next you configured boundaries to get an understanding of how automatic site assignment and content location works. After that you learned how to update ConfigMgr with new features and fixes using a new ability called Updates and Servicing and you learned how to configure ConfigMgr to use Updates and Servicing in one of these two modes:
To prepare your environment for Windows 10 servicing (this guide) you learned how to setup Software Updates using an automated method (via a PowerShell script) or manually using the ConfigMgr console. Next you used a PowerShell script to prepare some device collections, then you configured client settings for your enterprise and finally you’ll deployed the ConfigMgr client agent using the software updates method which is the least intensive method of deploying the Configuration Manager client agent.
As System Center Configuration Manager (current branch) is being delivered as a service now, version 1602 was made available (March 11th, 2016) and you used Updates and Servicing to do an in-place upgrade to that version as explained here. Next you learned about how to use the Upgrade task sequence to upgrade your Windows 7, Windows 8 (and 8.1) and even your Windows 10 devices to a later build of Windows 10.
You then learned about the new Windows 10 servicing features which use Servicing Plans in ConfigMgr (Current Branch). Next you integrated MDT 2013 update 2. MDT integration with ConfigMgr is useful as it provides additional functionality for operating system deployment scenarios such as Offline Language Package installation or User Driven Integration (UDI).
In this guide you’ll learn how to deploy Language Packs offline for Windows 10.
Step 1. Get the language packs
Each release of Windows 10 comes with it’s respective language packs, so a language pack released for Windows 10 x64 version 1507 (RTM) will not work with Windows 10 x64 version 1511 and vice versa. Therefore you should only download language packs that match the version of Windows 10 that you are deploying. In this guide, you will download language packs for Windows 10 x64 version 1511.
Below is how the language packs appear in MSDN for version 1511. For this guide I downloaded mu_windows_10_language_pack_version_1511_x86_x64_dvd_7224763.iso.

Once downloaded, go ahead and mount the iso in Windows File Explorer. When you mount the iso you’ll see two folders
- x64
- x86
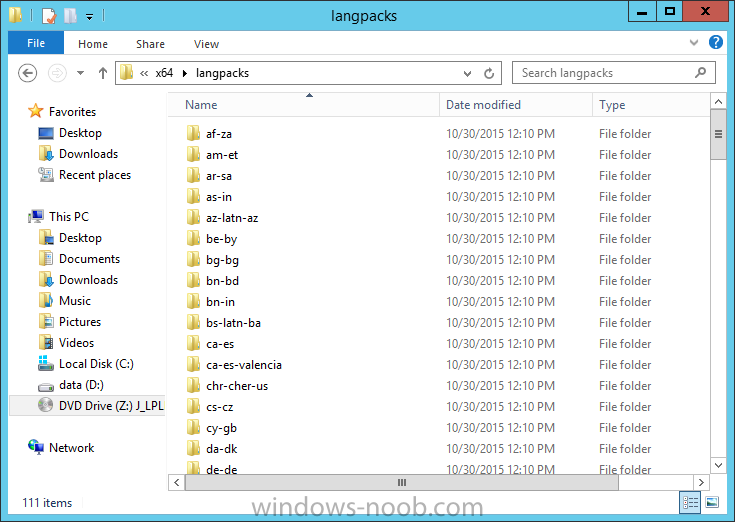
As you are deploying Windows 10 x64, browse the x64 folder and navigate to x64\languages. There are 111 language packs.
Step 2. Create individual Language Pack packages
From the 111 language packs shown above, select one language pack (for example Swedish or sv-SE) and copy it to it’s own folder like so:

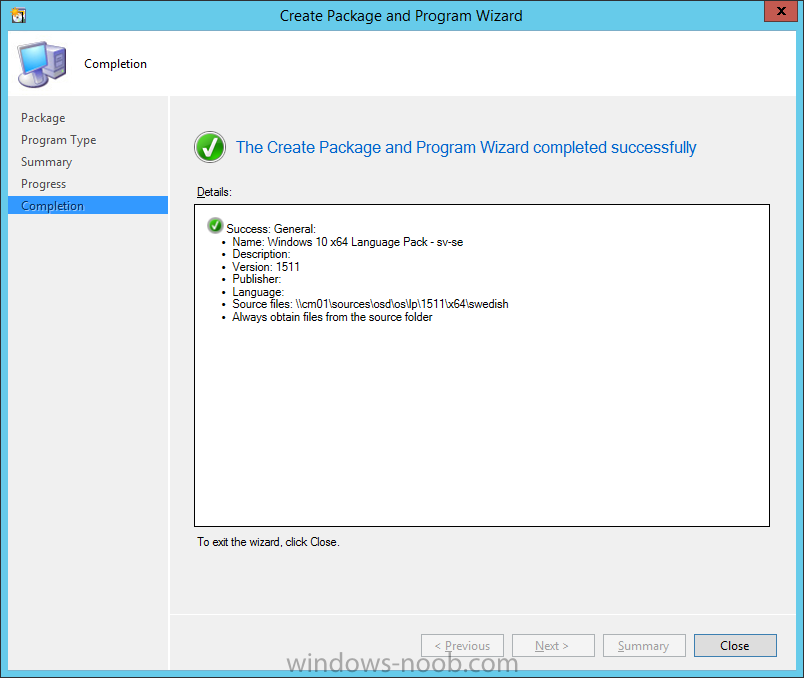
Now that you’ve copied the language pack files, create a package within ConfigMgr as follows:
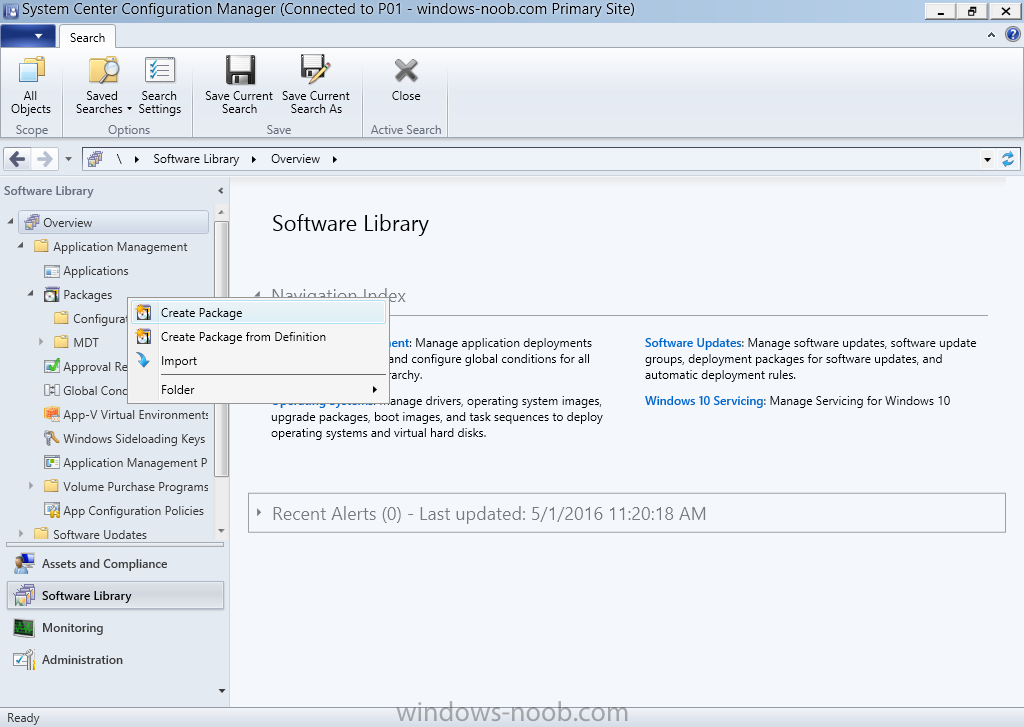
In the ConfigMgr console select Software Library, then Applications, right click on Packages and choose Create Package.
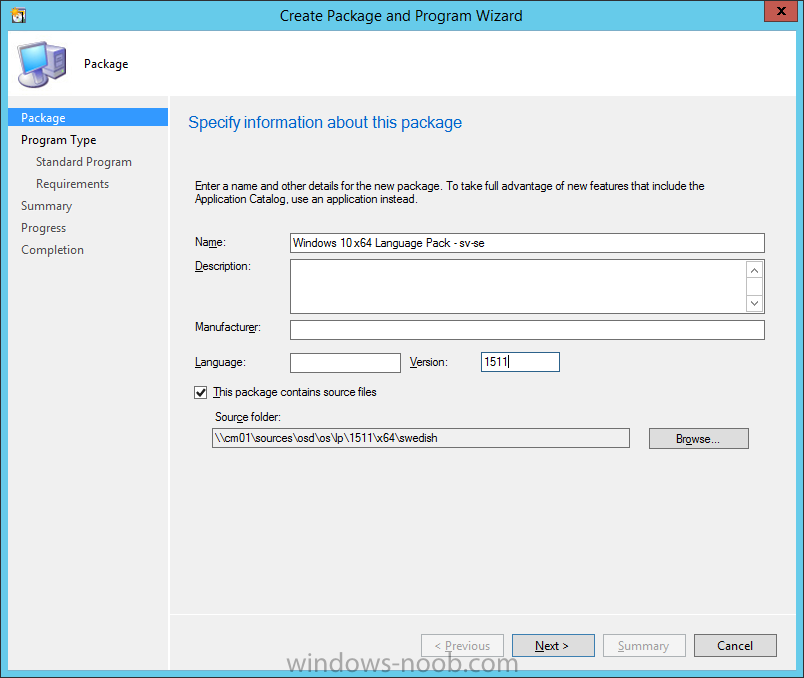
Fill in details about the actual package and include information about the operating system name and version, point the package source folder to the UNC path of the folder you created for that language pack
Choose Do not create a program
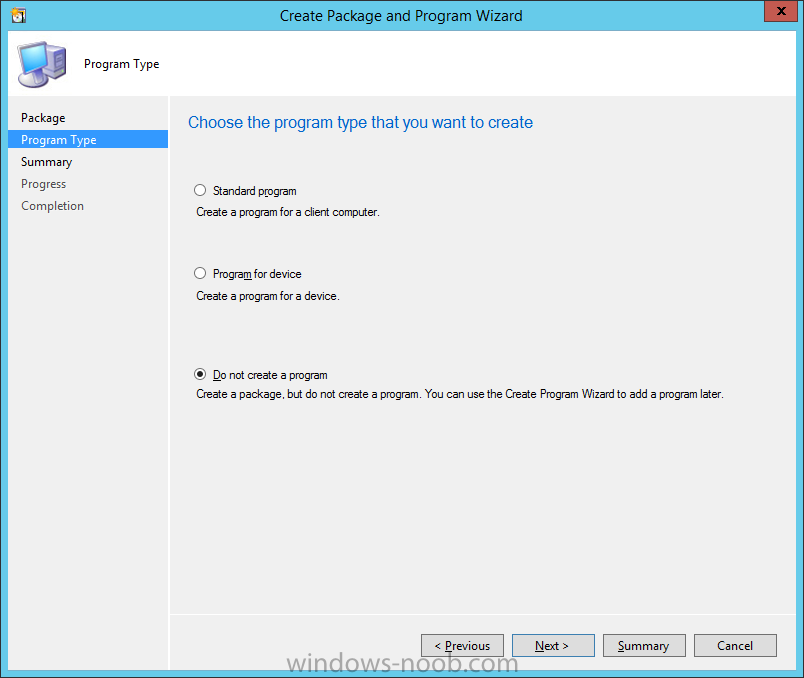
and continue through to the end of the wizard
Note:- If you add multiple language packs in the same package then they will be deployed together. If you want to deploy different combinations of language packs, create multiple packages containing one language pack each.
Repeat the above process for each language you intend to add support for in your environment, making sure that the folder containing the language pack is itself contained in a folder eg:
Swedish\sv-se
Step 3. Distribute the language packs
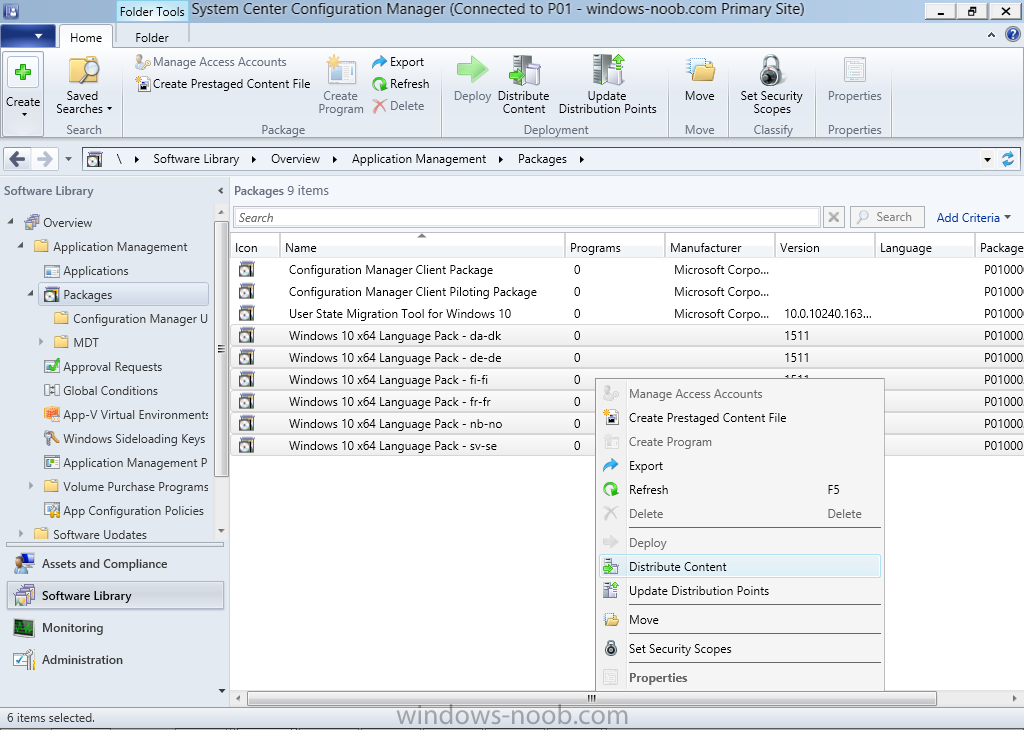
In order to install the language packs they need to be on a distribution point, so in the ConfigMgr console, select all the language packs you created in Step 2 and right click, choose Distribute Content.
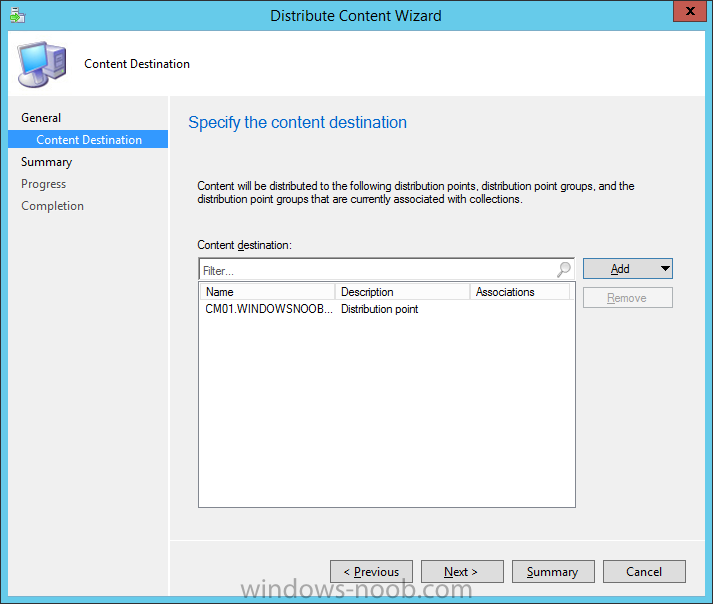
The Distribute Content Wizard appears and lists all the language packages you selected, click next

select one or more distribution points by clicking on the Add drop down and select Distribution Points
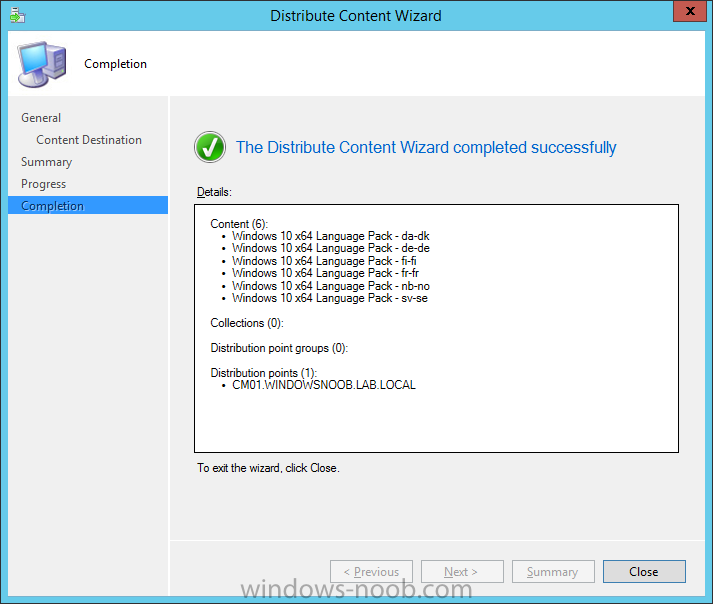
continue through that wizard until completion
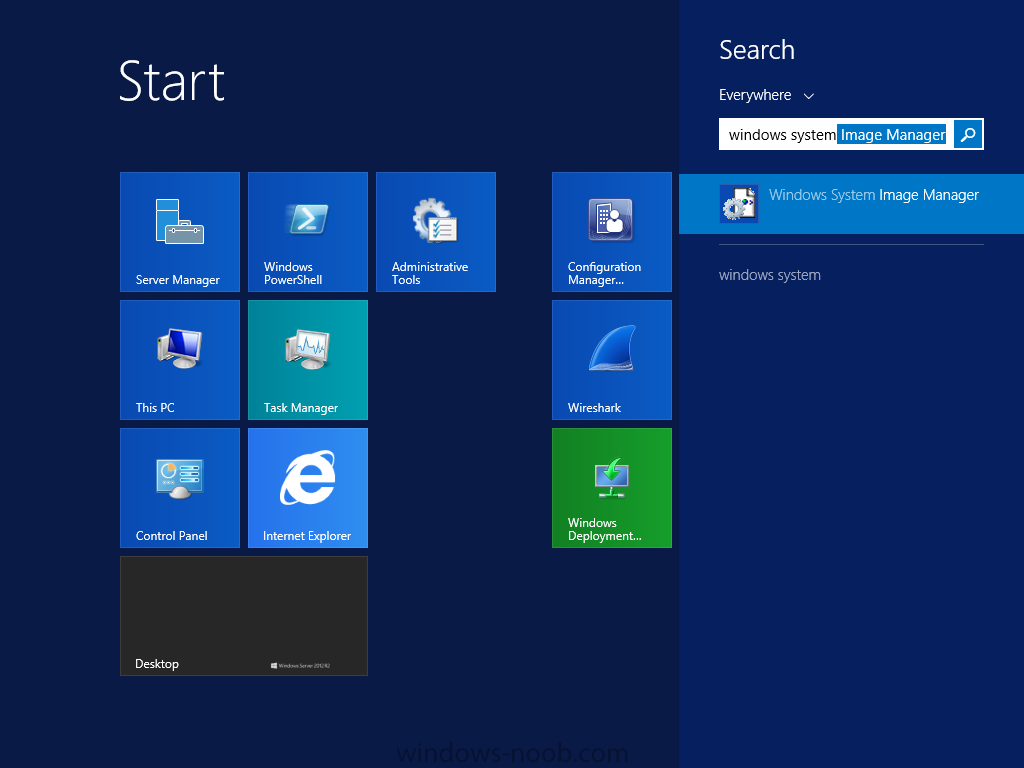
Step 4. Create an unattend.xml file
In this step you will create a custom unattend.xml file which will contain variables to help with installing the language packs. To do that use Windows System Image Manager (WSIM) which is part of the Windows ADK 10.
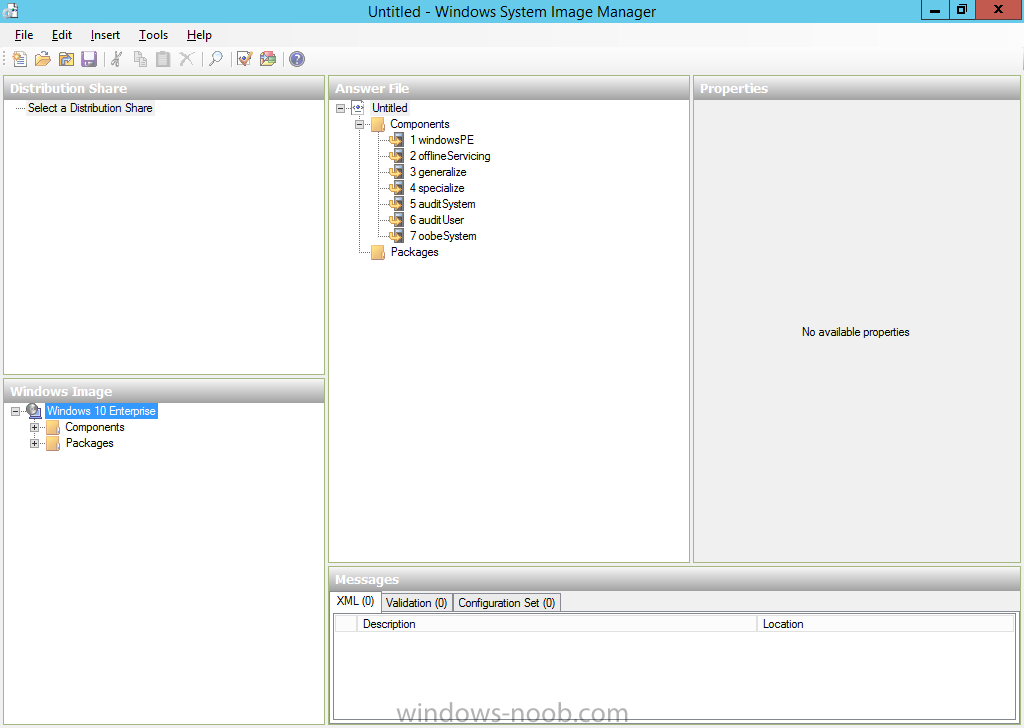
when WSIM starts you’ll see the interface
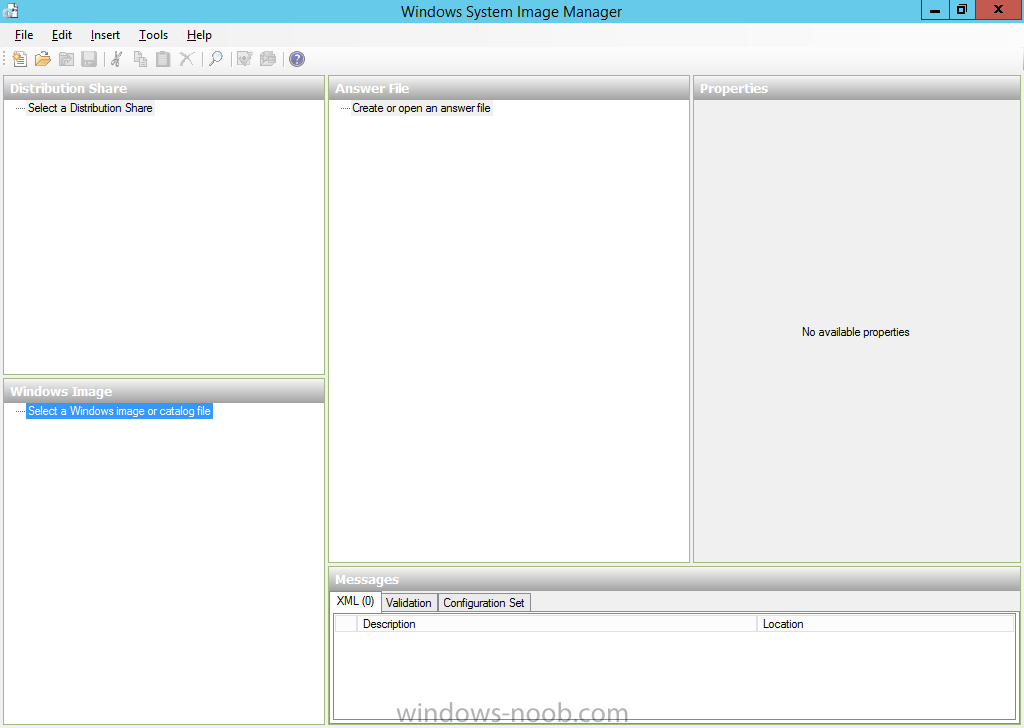
Click on File and select New Answer File, you’ll be prompted to open a Windows Operating system image file.
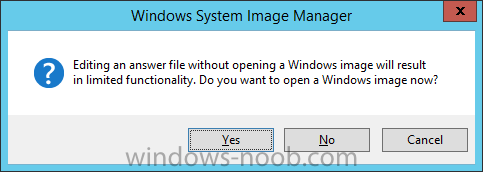
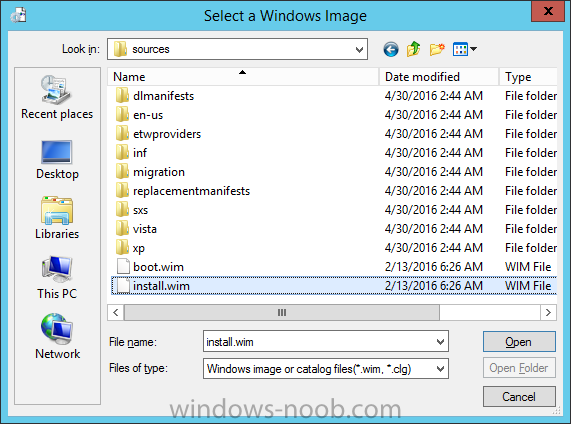
click on Yes and browse to the sources folder containing install.wim of the same version of Windows 10 that you downloaded language packs for, in this guide that’s Windows 10 x64 version 1511
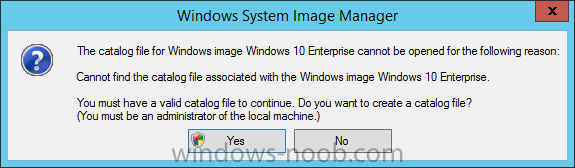
If it’s the first time you’ve used WSIM on this image, you’ll be prompted about creating a Windows catalog file, answer yes
this process will take a few minutes, but once it is done you’ll see the following
Expand the Components node in the Windows image pane in the lower left pane, scroll down until you see x64_Microsoft-Windows-International-Core_10.0.10586.0_neutral right click on it and choose Add setting to Pass 7 oobeSystem
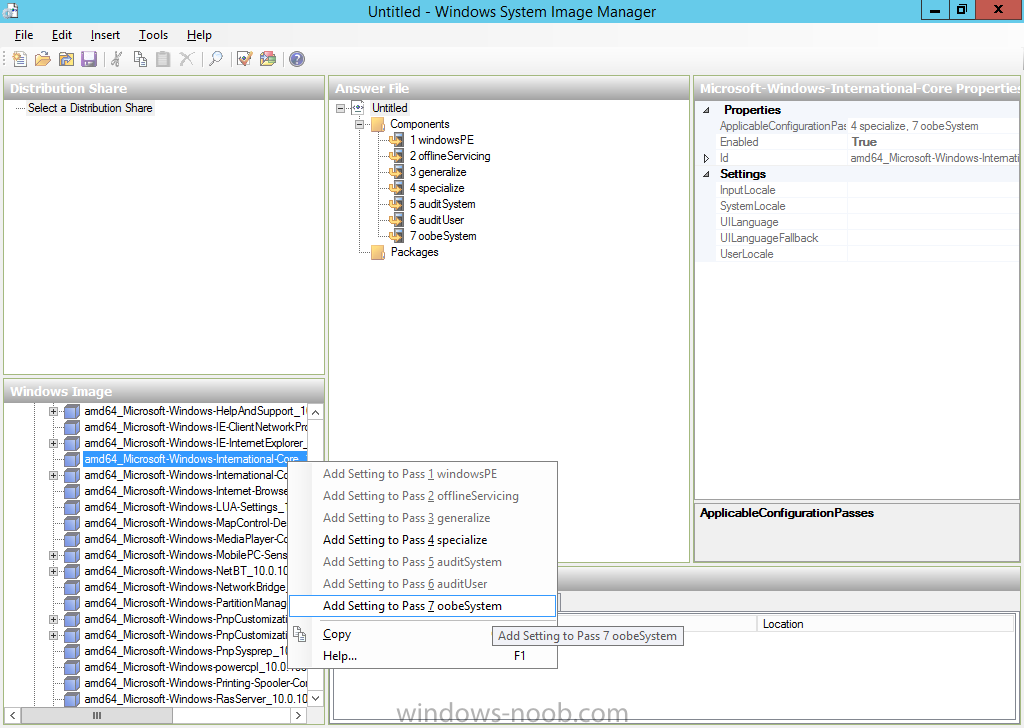
Fill in the following variables in the corresponding settings fields in the Microsoft-Windows-International-Core Properties node
- %OSDInputLocale%
- %OSDSystemLocale%
- %OSDUILanguage%
- %OSDUILanguageFallback%
- %OSDUserLocale%

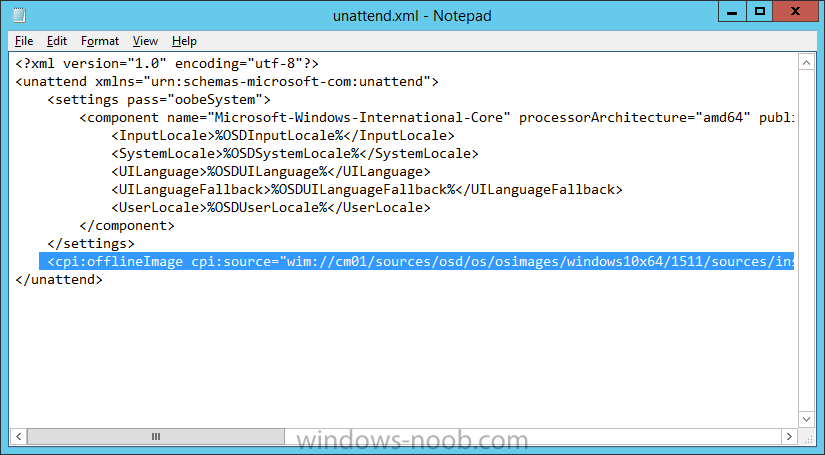
To verify the changes, click on Tools, Validate Answer File and verify that there are no errors reported in the Messages pane. Finally save the Unattend.xml file by clicking on File, Save Answer File As and give it a suitable name such as unattend.xml. Close Windows System Image Manager.
Note: Open the Unattend.xml file using Notepad and verify that the line containing <cpi:offlineImage cpi:source=”wim: does not contain any %20, if it does, remove them and save the file. See this post for more details.
Create a folder in your ConfigMgr sources path, and drop the unattend.xml file into it.
Step 5. Create a unattend.xml package and distribute it
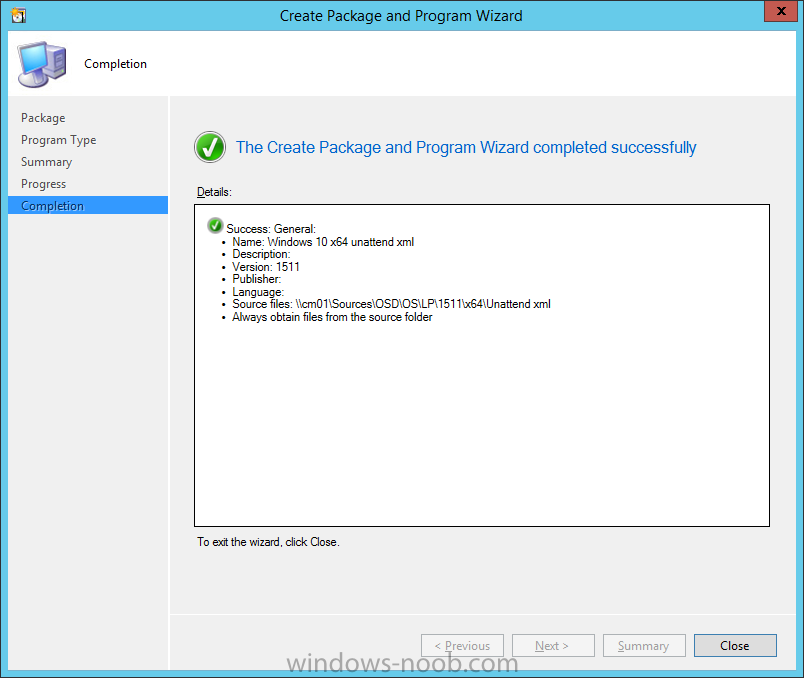
In Software Library, Application Management, Packages, right click and choose Create Package, give the package a suitable name and point it to the folder that you copied the unattend.xml file into.
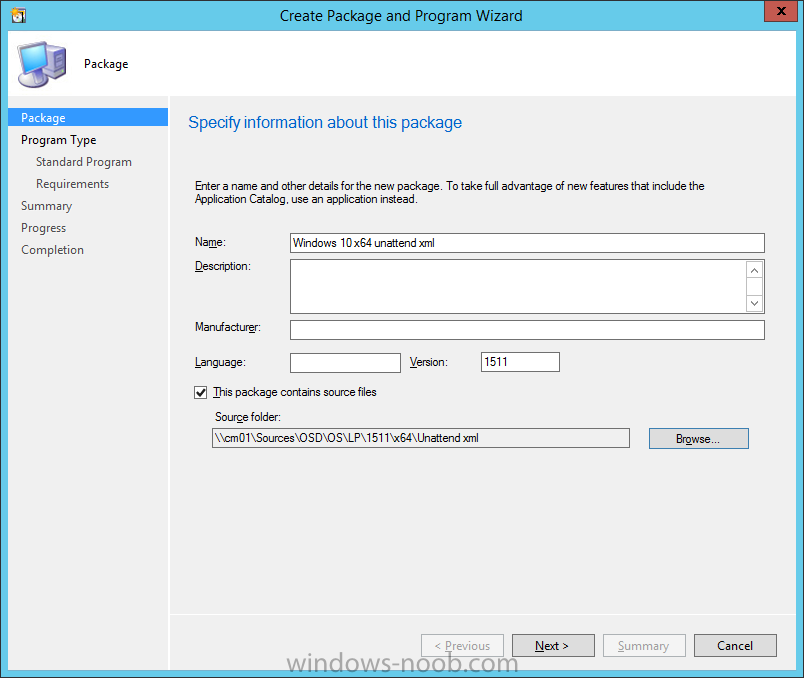
do not create a program
and continue through the wizard until completion.
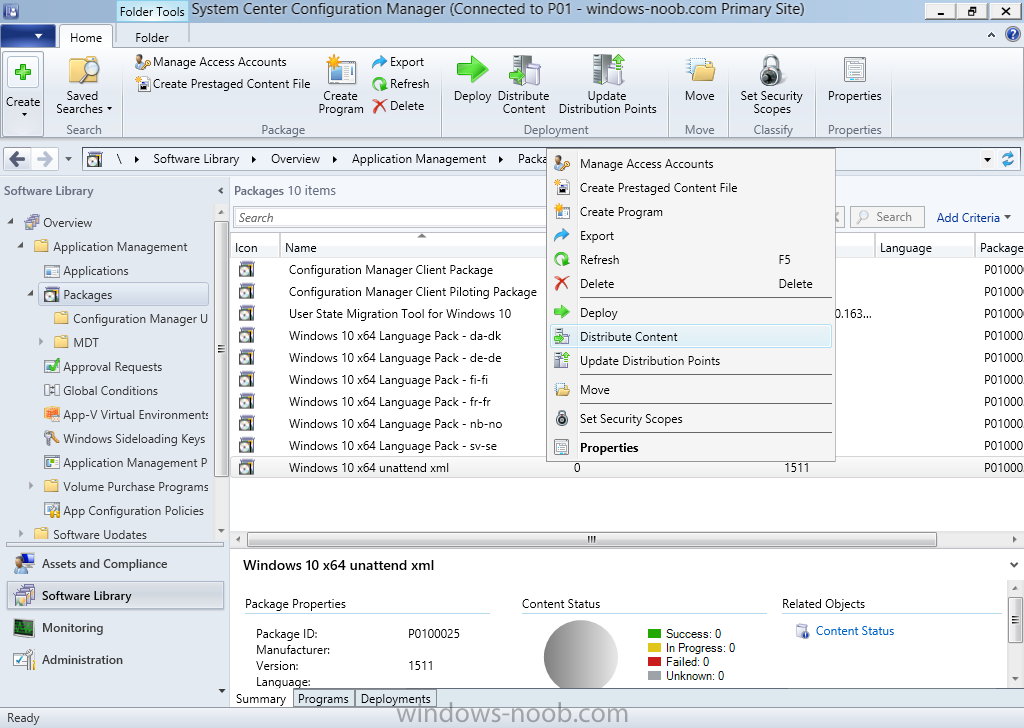
Right click the package and choose Distribute Content, and distribute it to your distribution points.
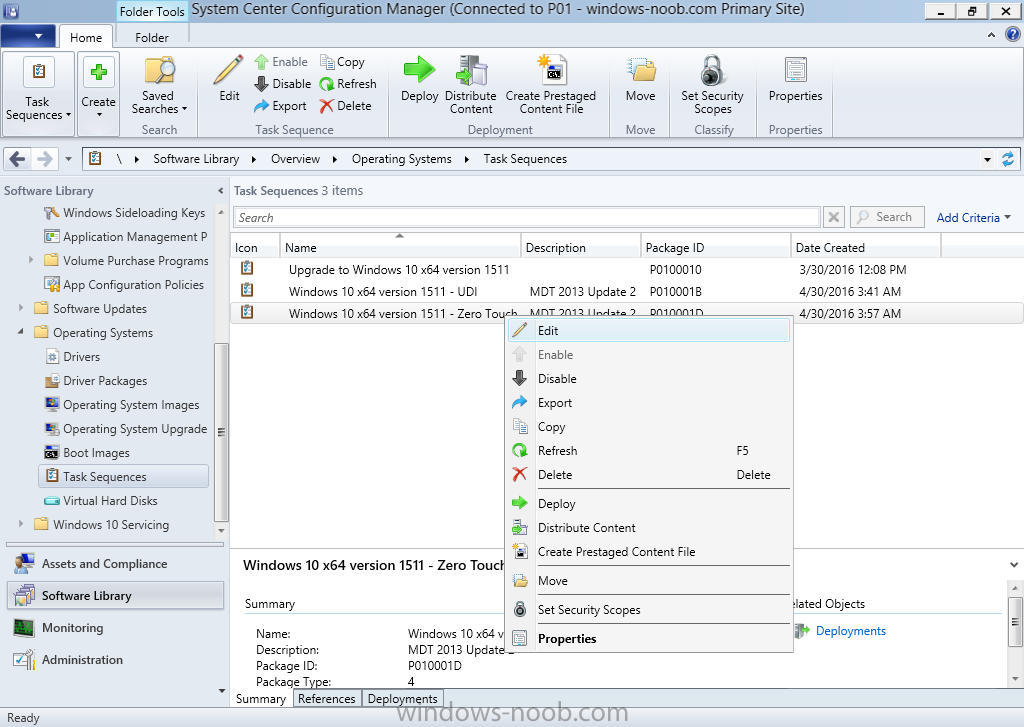
Step 6. Edit a task sequence
Edit a previously created MDT task sequence by right clicking it and choose Edit.
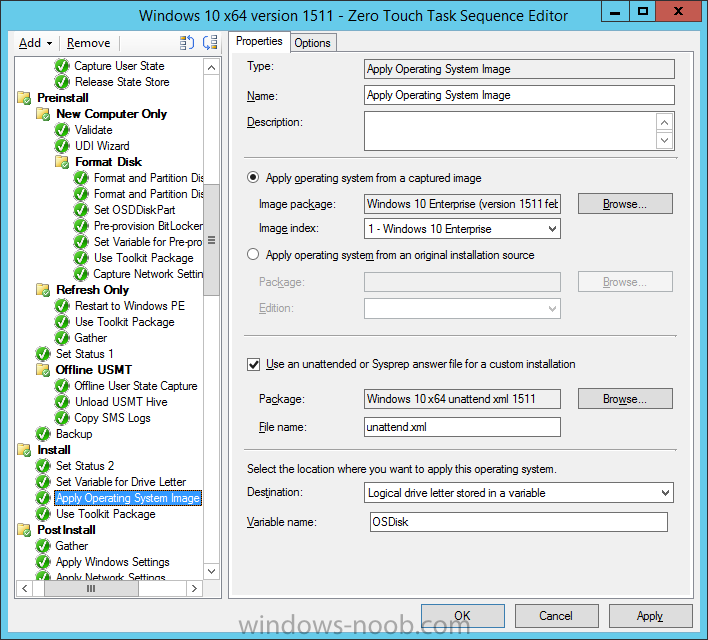
Locate the Apply Operating System Image step and modify it so that it uses the unattend.xml file created above
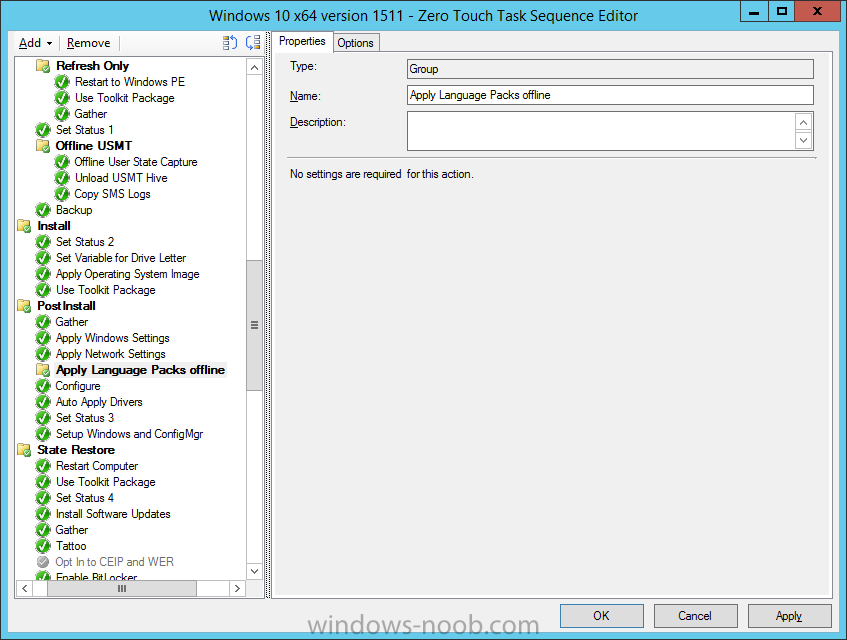
Create a New Group called Apply Language Packs offline in the PostInstall section after that Apply Windows Settings and Apply Network Settings Steps. This group must go before the Setup Windows and ConfigMgr steps otherwise the Install Language Pack offline steps will fail.
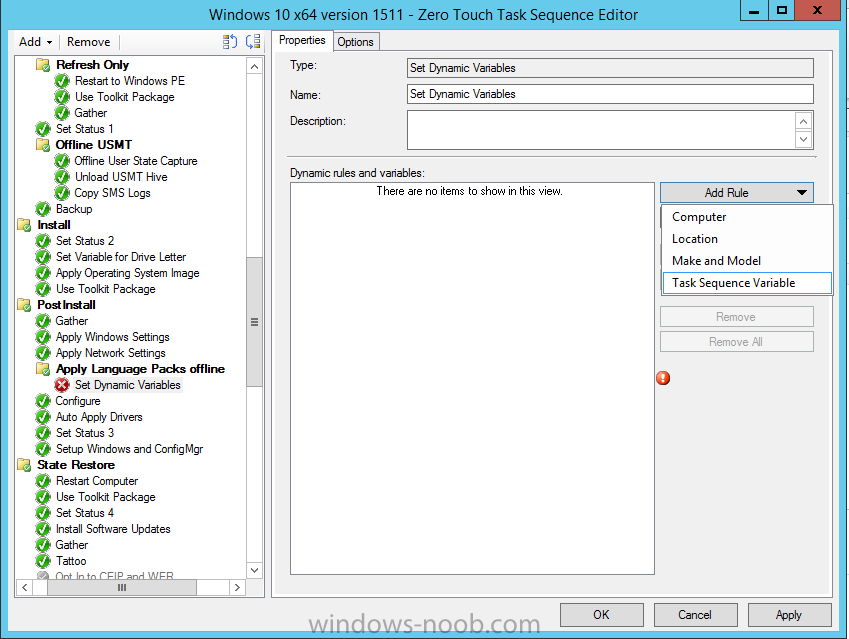
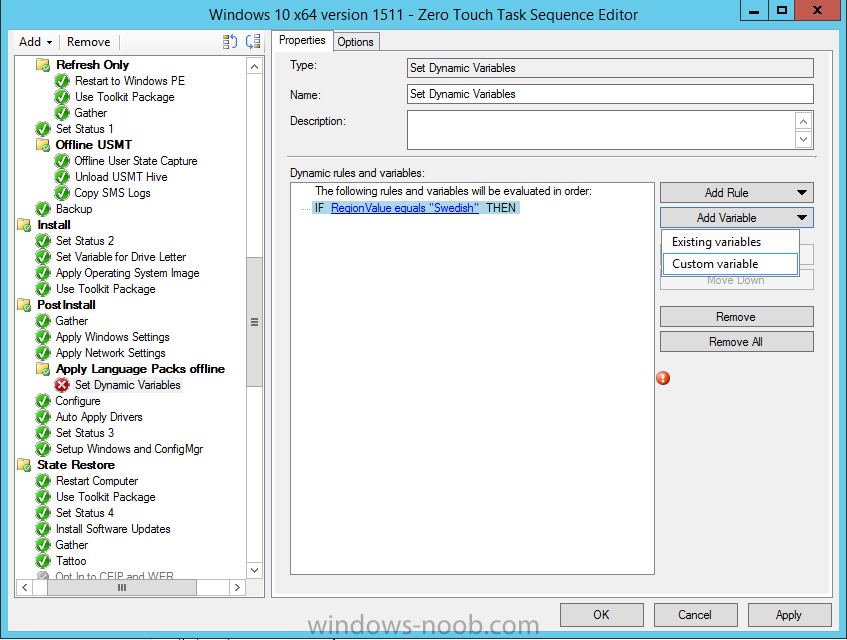
Create a new Set Dynamic Variables step called Set regional options using Dynamic Variables, click on Add Rule and choose Task Sequence Variable from the options
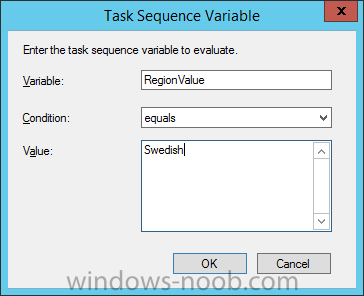
Fill in the following values:
Variable: RegionValue
Condition: Equals
Value: Swedish
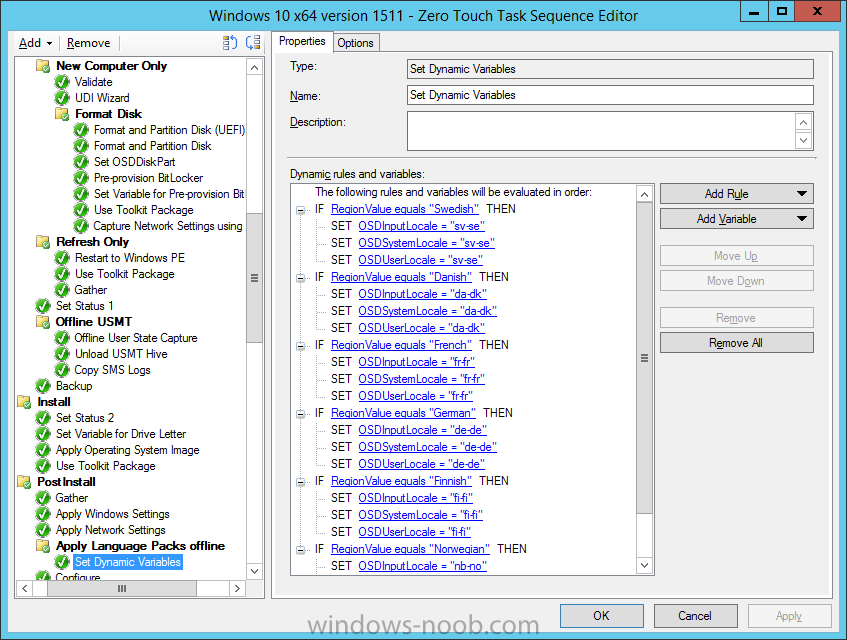
Click OK then select Add Variable, and Custom Variable from the menu
Fill in the following values:
Variable: OSDInputLocale
Value: sv-se
click OK then add another Custom Variable
Variable: OSDSystemLocale
Value: sv-se
click OK then add another Custom Variable
Variable: OSDUserLocale
Value: sv-se

repeat the above process for each language pack you intend to support
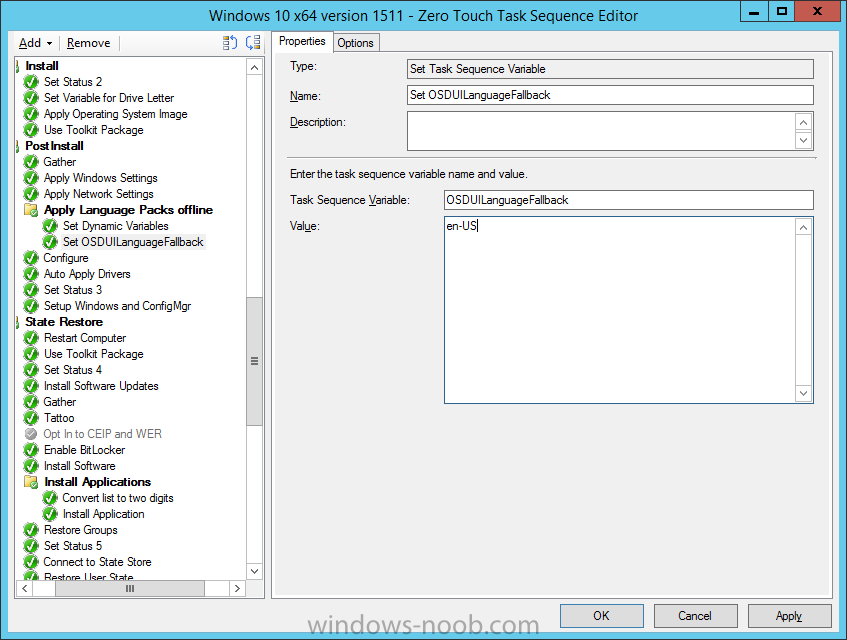
Create a new Set Task Sequence Variable step called Set OSDUILanguageFallback and fill in the following values:
Task Sequence Variable: OSDUILanguageFallback
Value: En-US
Create a New Group with the name of the Language pack you are offering to install
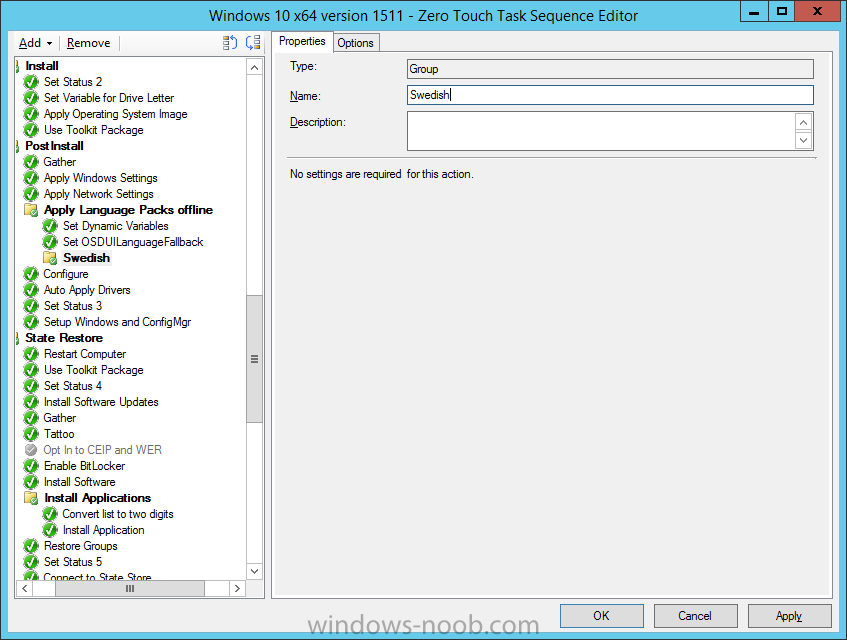
click on the Options tab of that group and add a task sequence variable LanguageValue = Swedish
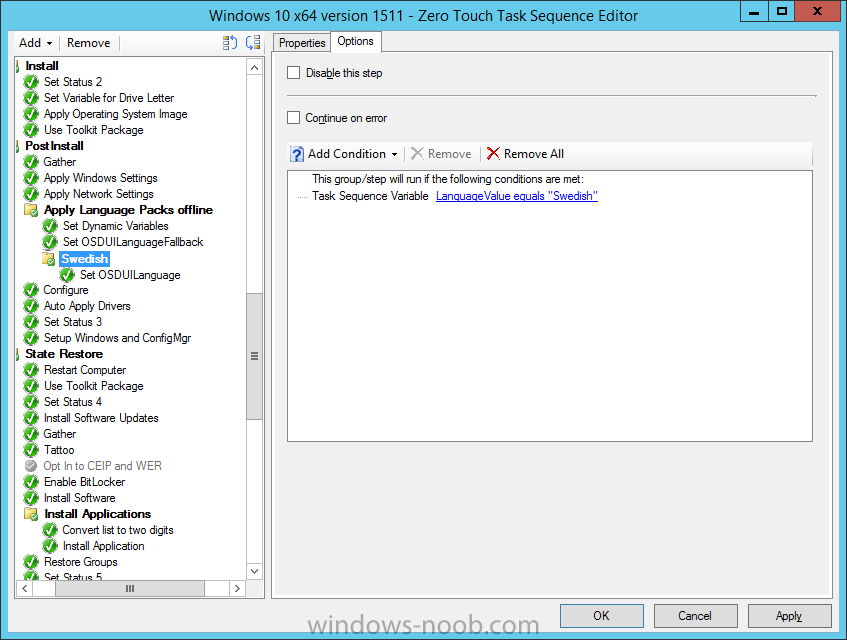
In that group, create a new Set Task Sequence Variable step called Set OSDUILanguage and fill in the following values:
Task Sequence Variable: OSDUILanguageFallback
Value: En-US
And next, add an MDT task sequence step called Install Language Packs Offline
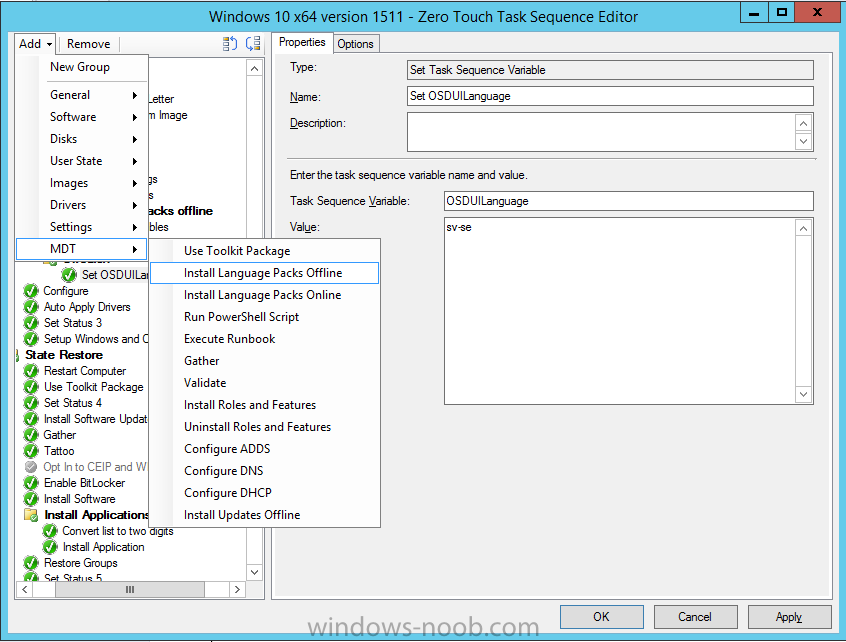
and select the corresponding language package, Windows 10 x64 Language Pack – sv-se
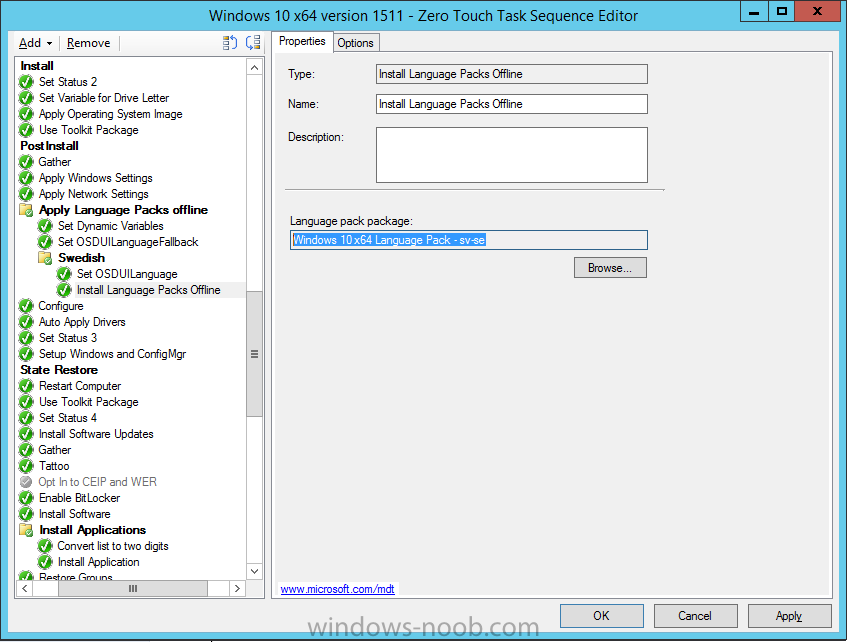
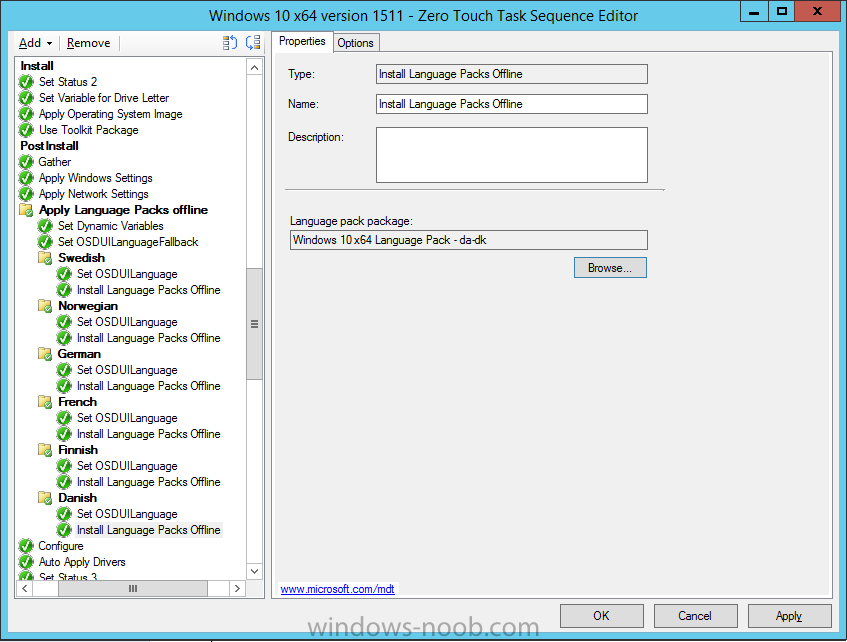
Repeat the above process for each language that you intend to make available and Apply your changes when done.
Step 7. Set variables on a collection
To decide what language packages get installed on a computer you only need to set two variables
- RegionValue (for the keyboard layout)
- LanguageValue (for the language pack)
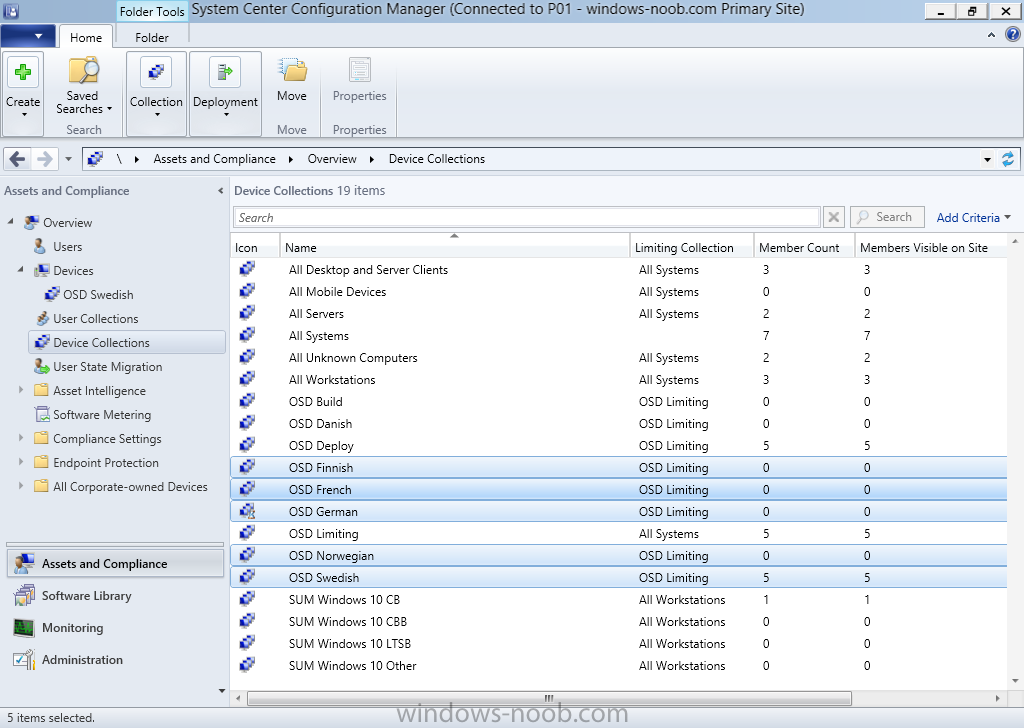
You can set these variables on a computer, on a collection, via a HTA frontend (like this one) or whichever method suits you best, In this guide we’ll set the variables via a collections properties. Create a device collection called OSD <language> and replace <language> with the name of the language pack you intend to install.
Right click on the newly created collection and choose Collection Variables, add the two values below
RegionValue=Swedish
LanguageValue=Swedish
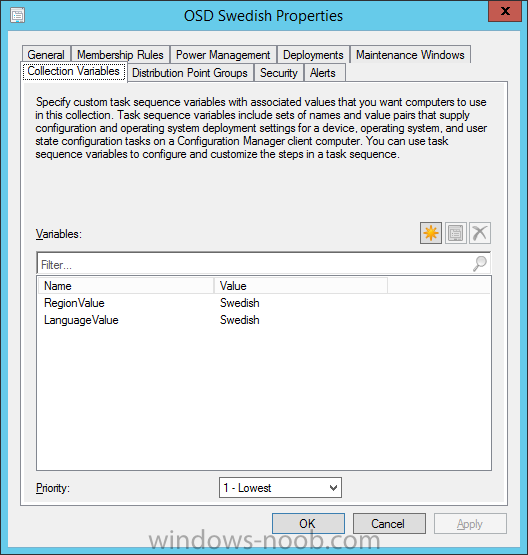
Modify the Membership Rules of the Collection Properties to add any computers that you want installed with that language pack and regional settings
Repeat this process and create a new Device Collection for each language you intend to support
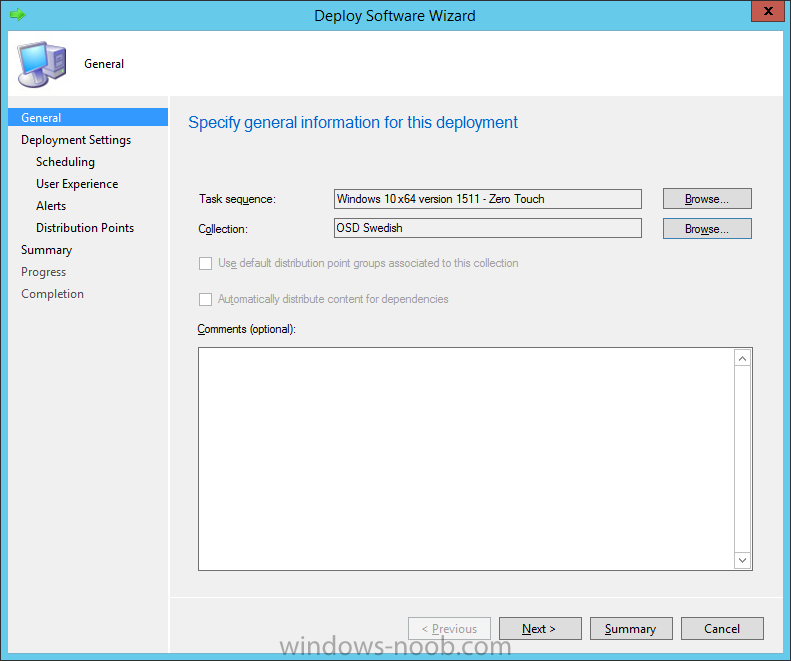
Step 8. Deploy the task sequence to the language specific collections
Deploy the task sequence with a purpose of Available, and available to media and PXE to each of the collections you create for Language Pack usage.
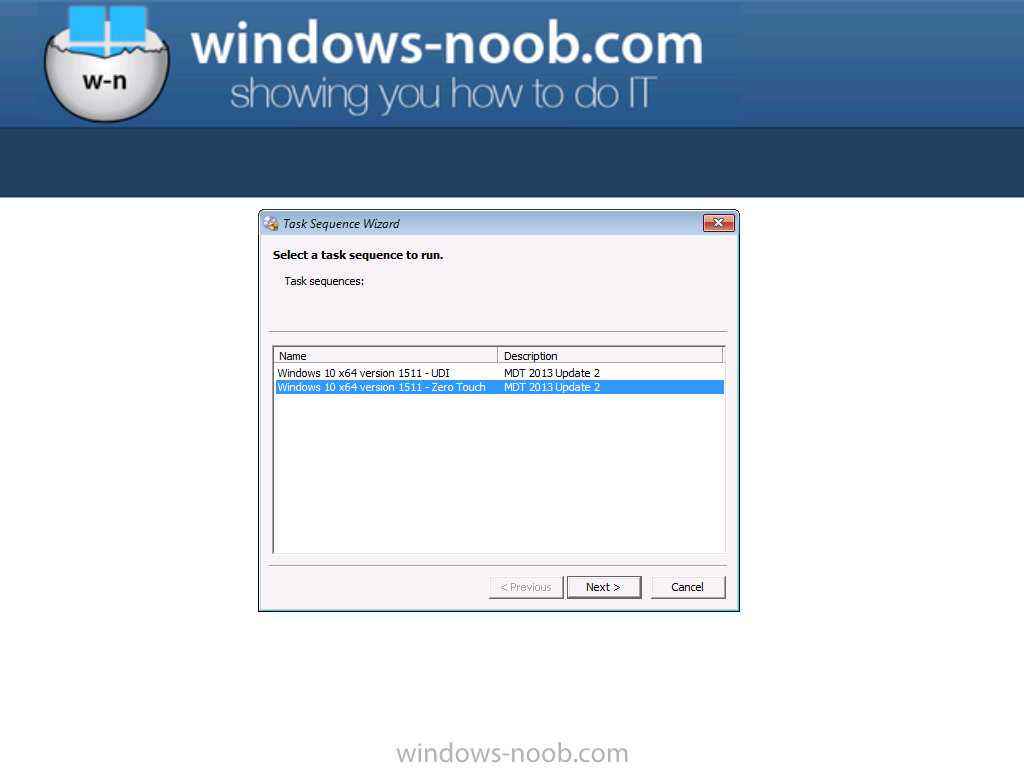
Step 9. Review the changes
Start a new OSD deployment using the task sequence you just edited.
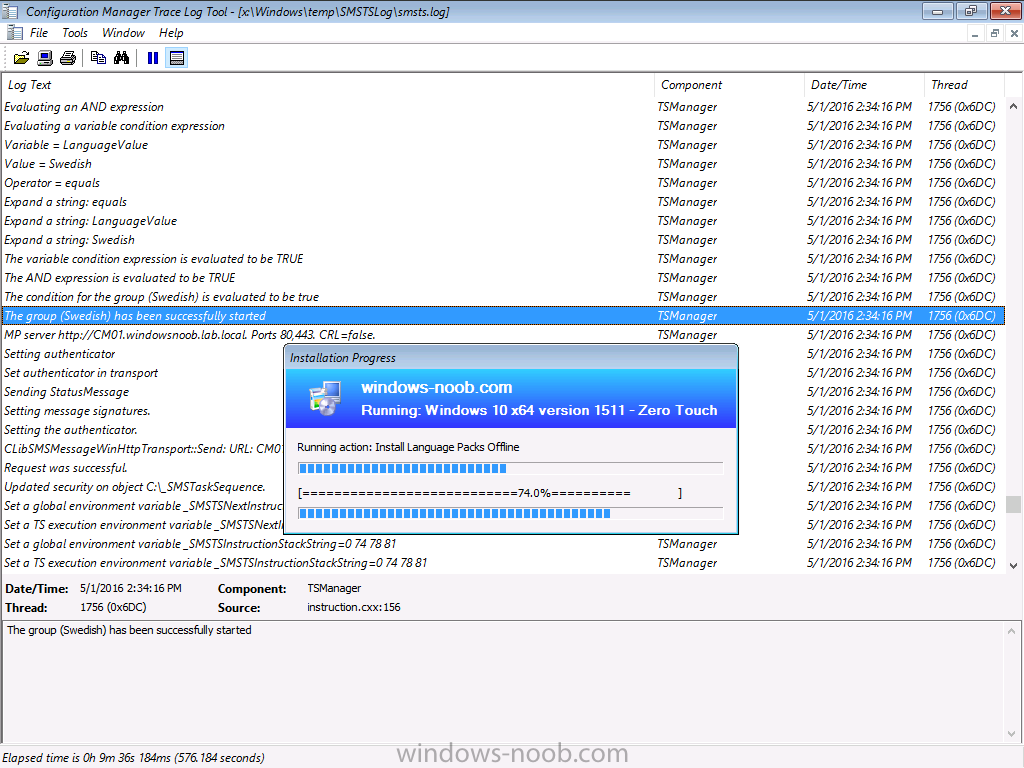
after the task sequence starts you can open smsts.log in CMTrace and see the variables are set

the install language packs offline step is in progress (and revealed in the smsts.log file)
and after a while, all is done !

Troubleshooting
- Use the log files, in particular ztipatches.log which documents what happens when the process uses DISM to inject the changes
- Use at least 2 GB ram in your virtual machines otherwise the step will fail to install any language packs (may run out of ram).
- If regional settings (keyboard layout) are not being applied, make sure you added the unattend.xml file to your Apply Operating System Image step
After the Install Language Pack Offline step the following will be created in C:\_SMSTaskSequence\
- Packages<dir>
- ZTIPatches.tmp
- packageGroups.xml
in the Packages directory you’ll have more sub-directories based on how many language packs’s you included, one language pack, one dir, 4 language packs in your Language Package, 4 dirs…
You may also see a directory called C:\_SMSTaskSequence\SMSOSD\OSDLOGS and in there are three files including a log file called BDD_PKGMGR.LOG, analyze it if you are having issues deploying Language packs offline as it will reveal the success or failure of the DISM operations.
You can press F8 in WinPE and browse to the locations below and use notepad to examine the changes to the unattend.xml file.
Note: The unattend.xml file and/or C:\Windows\Panther\Unattend folder may not appear in your image until directly after the Apply Operating System Image step and the contents of that file depends on whether or not an unattend.xml file was specified in that step.
Before the Setup Windows and ConfigMgr step is complete you can monitor C:\Windows\Panther\Unattend\unattend.xml to see what is happening in relation to your modifications taking place or not
After the Setup Windows and ConfigMgr step is complete, you’ll see the following has been added to your C:\Windows\Panther\unattend.xml file. If it is not added or if there are no changes to the %OSD…% variables then something has failed and it’s time to troubleshoot.
Note: The above locations are during the WinPE phase. After the Setup Windows and ConfigMgr step is complete it will reboot your computer (unless you have a command prompt open in WinPE), and after that reboot, the unattend.xml file will have been removed (by the Setup Windows and ConfigMgr step).
Summary
Using MDT integrated task sequences gives you new abilities in System Center Configuration Manager (Current Branch) such as the ability to install language packs offline.
Related Reading
- How can I deploy Windows 10 with MDT 2013 Update 2 integrated with System Center Configuration Manager (Current Branch)
- Why does Windows 10 setup prompt to choose a language when deploying language packs offline using System Center Configuration Manager ?
- Features On Demand V2 (Capabilities)
Downloads
You can download a Microsoft Word copy of this guide here dated 2016/05/01  Installing language packs offline with MDT integrated task sequence in System Center Configuration Manager (Current Branch).zip 2.47MB 3 downloads
Here is a copy of the unattend.xml file I created above  unattend.xml 946bytes 2 downloads
