
Now that App-V version 5 is available and Configuration Manager 2012 Service Pack 1 beta is out there’s more reason then ever to learn how to sequence applications with App-V and then deploy them with Configuration Manager 2012 Service Pack 1.It’s cool, it’s fun and it’s about time you got started !
Tip: This guide is long and detailed, make sure to give yourself plenty of time to go through it all.
Step 1. Fulfill the requirements for Sequencing applications
Before starting this, you’ll need to setup your lab, and for that you’ll need a good environment to sequence apps, I’d recommend using a virtual machine (that way you can take snapshots before adding an application, highly recommended) and in my guide I’m using a Windows 7 X64 Service Pack 1 virtual machine running in HyperV.
Tip: Windows 8 also works fine for sequencing apps however as some applications don’t yet support that Operating System it might be a better idea to sequence your apps in Windows 7 until Windows 8 gains more traction.
The following requirementsmust be met otherwise you’ll get an error as soon as you attempt to install the Sequencer.
- Windows 7 Service Pack 1 or later
- .NET 4 Framework Full Version
- PowerShell 3.0
Download the requirements from here.NET 4 Framework Full Version from here.
PowerShell 3.0 (contained in Windows6.1-KB2506143-x64.msu) from here.
Step 2. Download the MDOP ISO
To sequence applications you’ll need to download App-V version 5 and it’s included in the newly released Microsoft Desktop Optimization Pack (MDOP) which is available for download to Microsoft Volume License customers and on Technet.To find it on Technet choose Desktop Optimization Pack under Product categories.
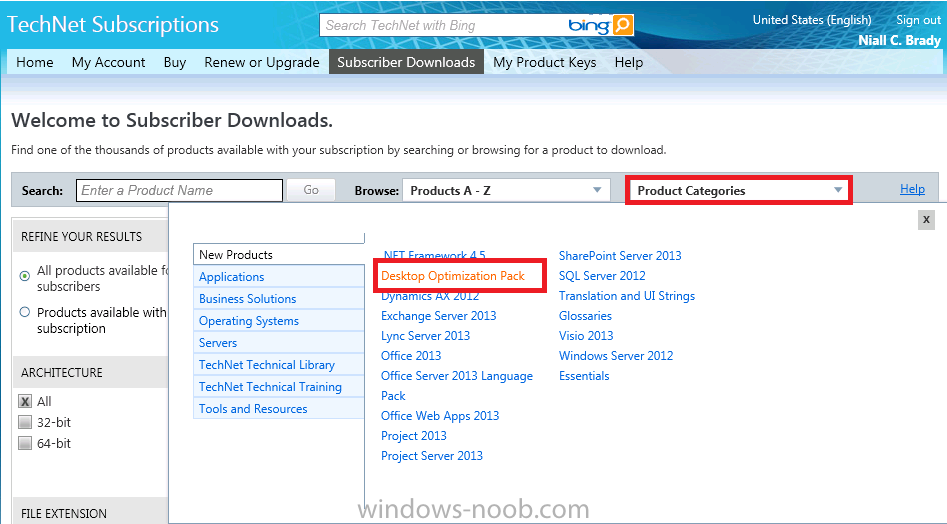
Download the 2012 MDOP iso, the one I downloaded was called en_desktop_optimization_pack_2012_x86_x64_1100291.iso (1.29GB).

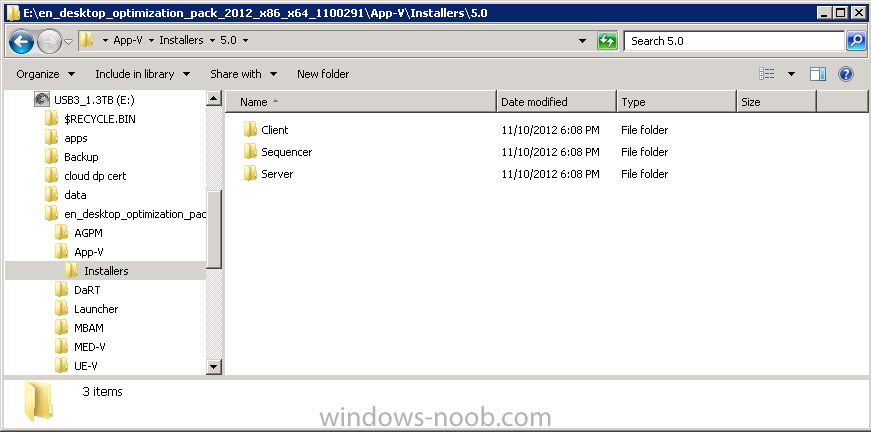
Extract the ISO and locate the App-V content, it is located in \App-V\Installers\5.0
Step 3. Install the Sequencer
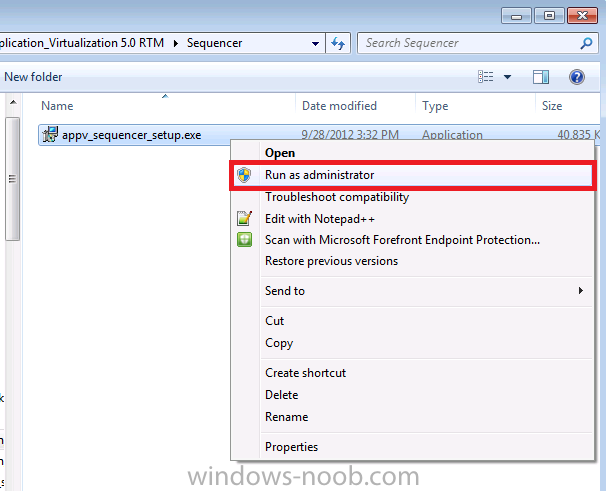
On your Windows 7 (or Windows 8) client computer, browse to \App-V\Installers\5.0\Sequencer and right-click on the appv_sequencer_setup.exe file and choose Run as Administrator.
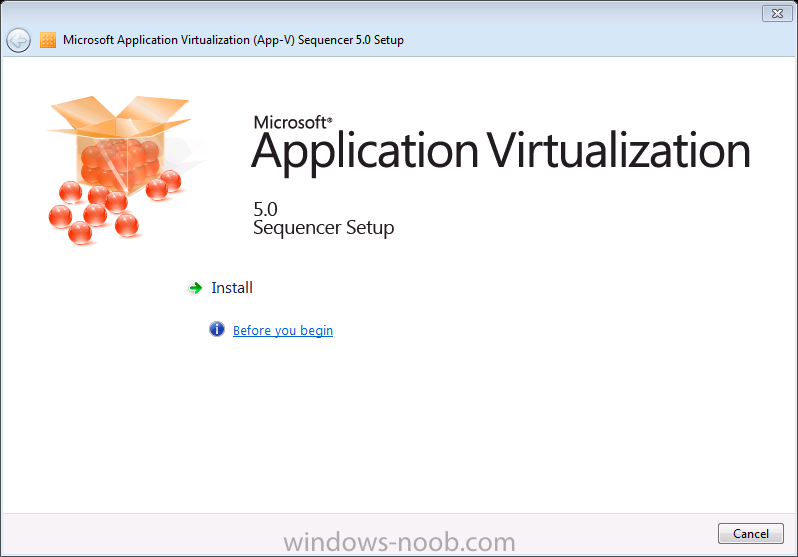
The App-V Sequencer setup appears, you can click on the Before you begin link to bring you to an App-V website (which still refers to App-V 4 strangely enough) or you can click on Install to start the installer.
accept the license aggreement

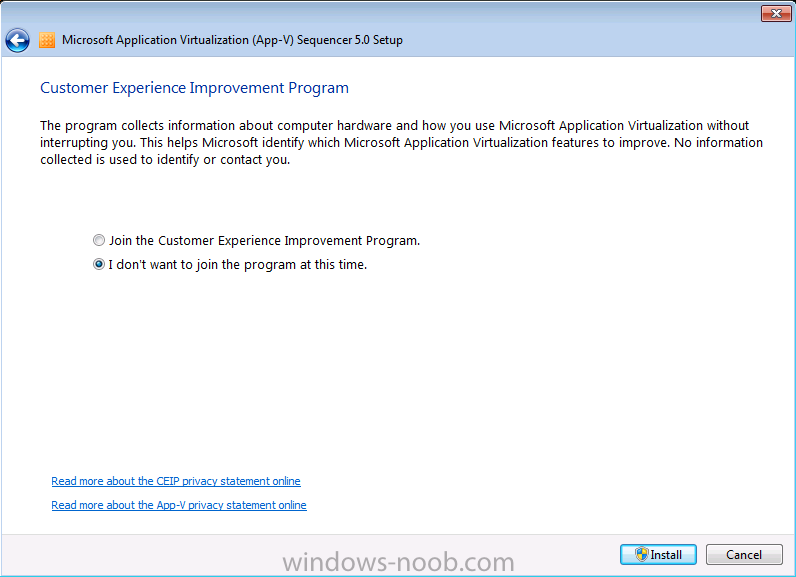
decide if you want to join the CEIP or not
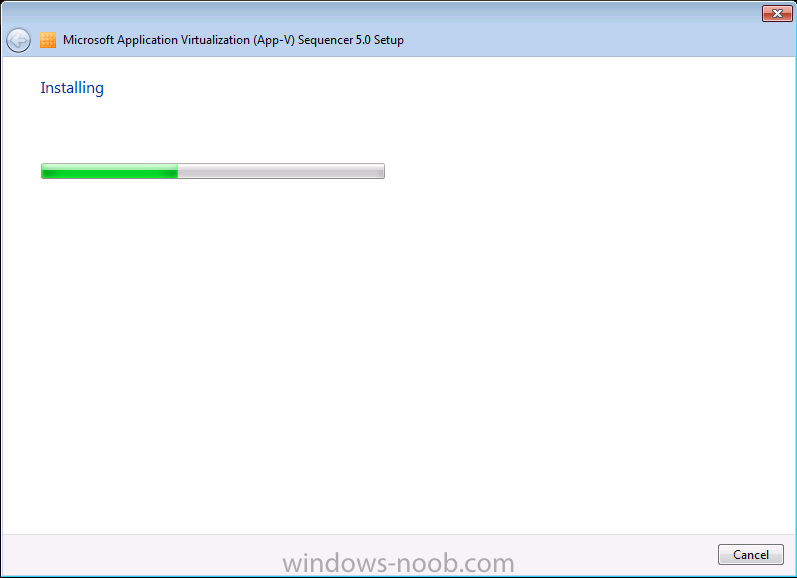
click install and it will begin the installation
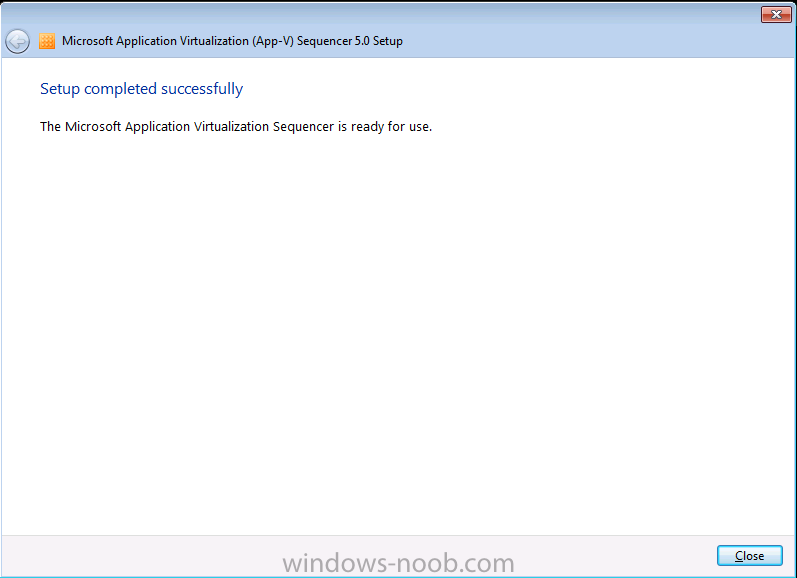
 and after some installing it’s all done.
Step 4. Sequence an Application
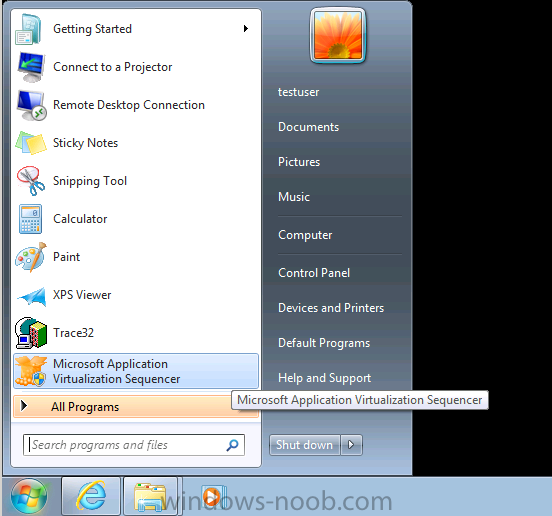
In the start menu locate the Microsoft Application Virtualization Sequencer and it will start, if you are not a local administrator it will prompt you for administrative credentials.
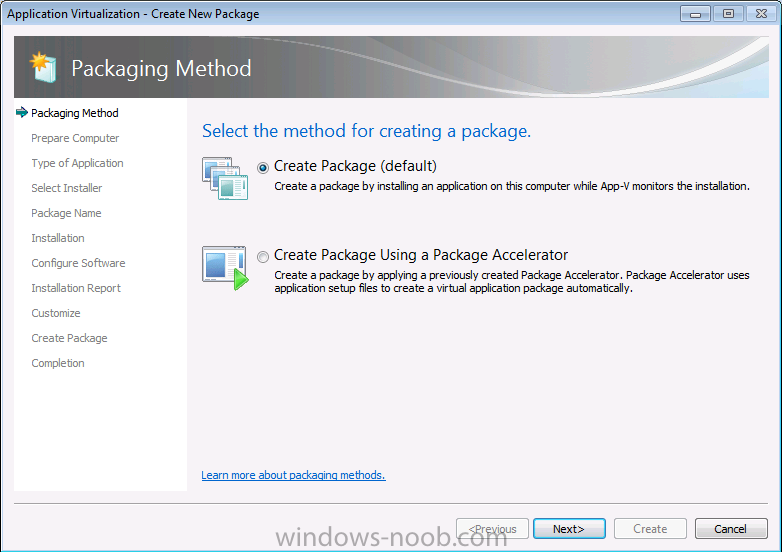
The Sequencer wizard appears, select the first option, Create a New Virtualization Package

select Create Package (default) the other option is for Packages that have already been created using a Package Accelerator.
at this point you’ll probably see something like this (I do indeed have Forefront Endpoint Protection Antivirus software and the Configuration Manager client is installed). Take note of the warnings and restart the computer, after the restart you can stop those services when the computer has restarted (run services.msc as administrator).
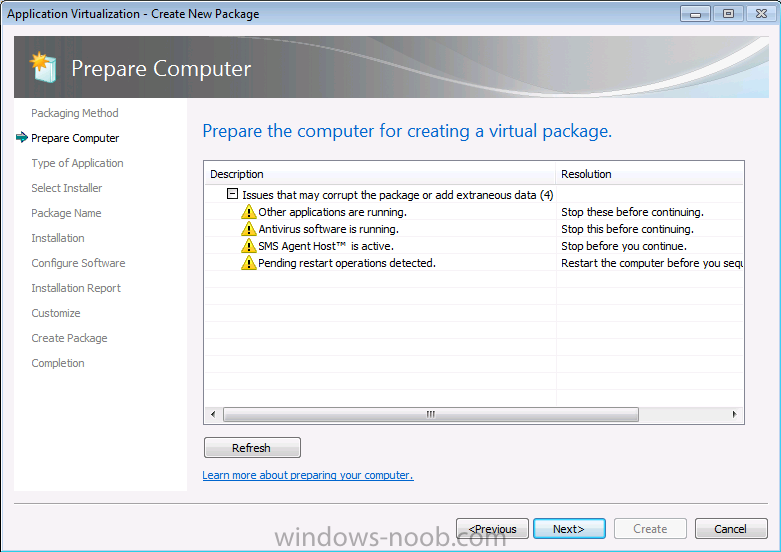
Tip: If after the restart you still see restart operations pending then you can try restarting again or use a tool such as Why Reboot (download it here) to see what is requiring the reboot. Run that application as administrator otherwise it won’t be able to view all parts of the Registry.
If you are still seeing Pending Resetart Operations detected, then check the following registry keys, export them if present and remove any entries listed in them, you can restore the keys later by simply double-clicking on the exported registry key *.REG files.
- HKEY_LOCAL_MACHINE\System\CurrentControlSet\Control\Session Manager\PendingFileRenameOperations
- HKEY_LOCAL_MACHINE\Software\Microsoft\Windows\CurrentVersion\RunOnce
- HKEY_LOCAL_MACHINE\Software\Microsoft\Windows\CurrentVersion\RunOnceEx
- HKEY_LOCAL_MACHINE\Software\Microsoft\Windows\CurrentVersion\RunServicesOnce
- HKEY_CURRENT_USER\Software\Microsoft\Windows\CurrentVersion\RunOnce
Note: Please make sure that all problems found are cleared before continuing otherwise you’ll end up risking problems with your Application Virtualization process.
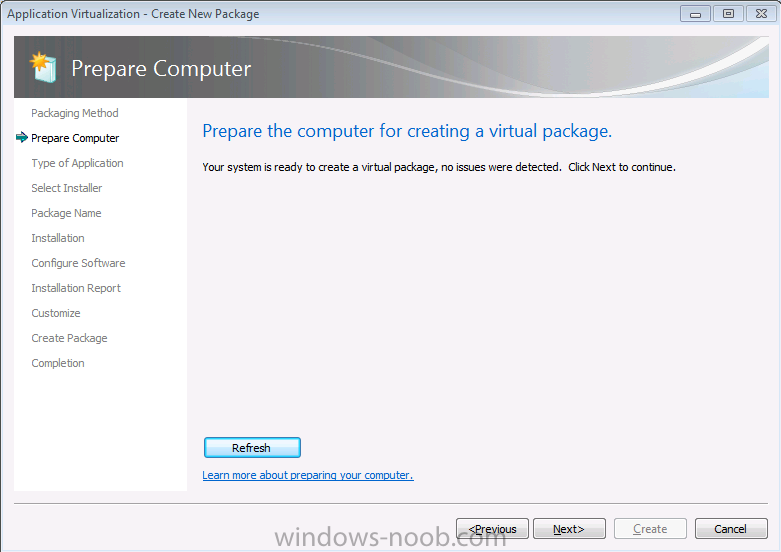
When your system is ready to create a virtual package is displayed click next
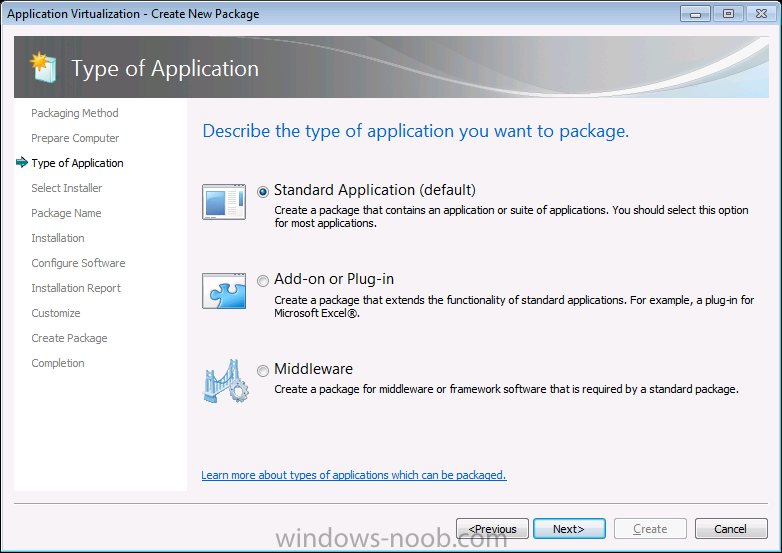
select standard application (default)
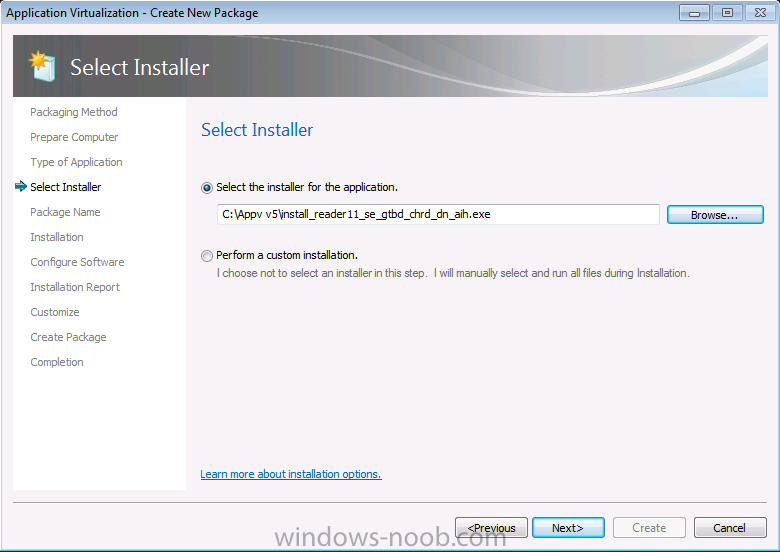
when the Select the installer for the application appears click on browse and select an application you want to virtualize, in this example I will use Adobe Reader.
Next you input the Package Name and Primary Virtual Application directory

Note: The Primary Virtual Application Directory is the directory that will contain all files for the sequence. It is recommended to define the application’s default installation directory (example C:\Program Files\directory) as the Primary Virtual Application Directory.
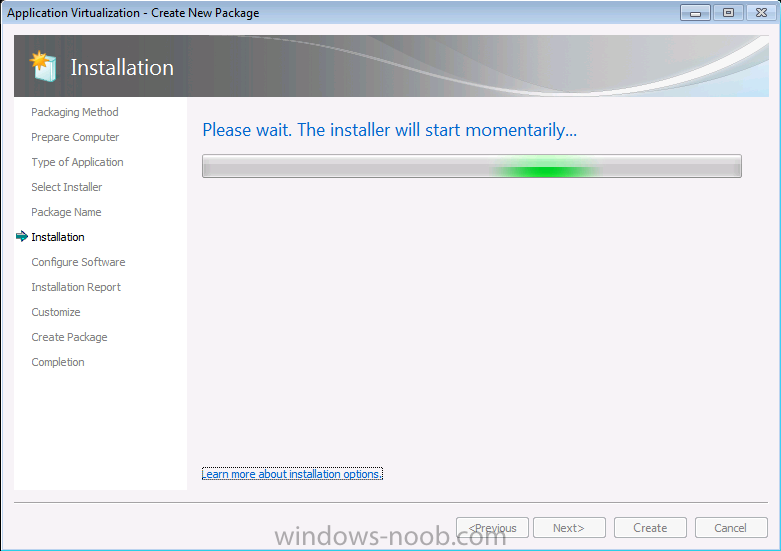
Next you will see a Please wait… before the application itself starts
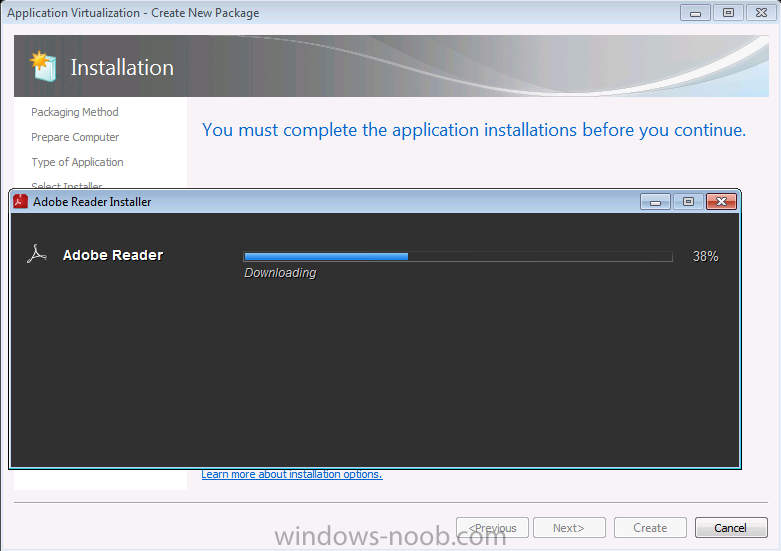
once the application starts you’ll need to complete the installation actions
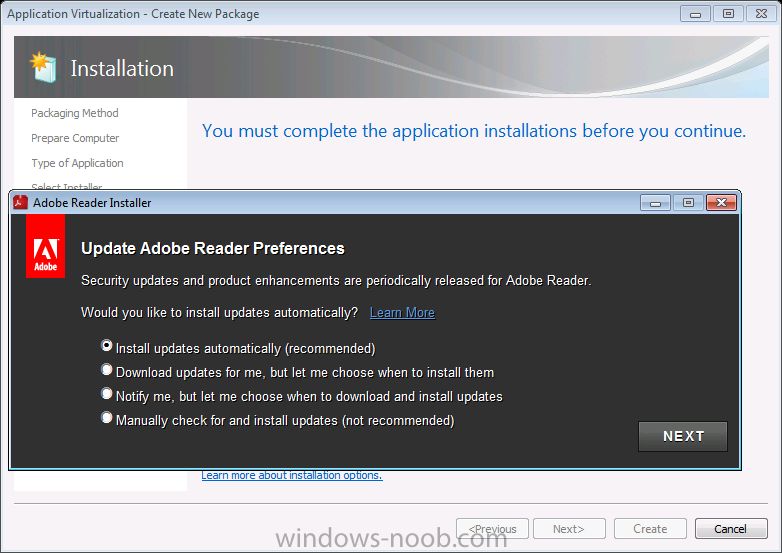
so click next on the Adobe Reader wizard (your chosen app will obviously have different steps for its installation which you must deal with, this guide is only for Adobe Reader)
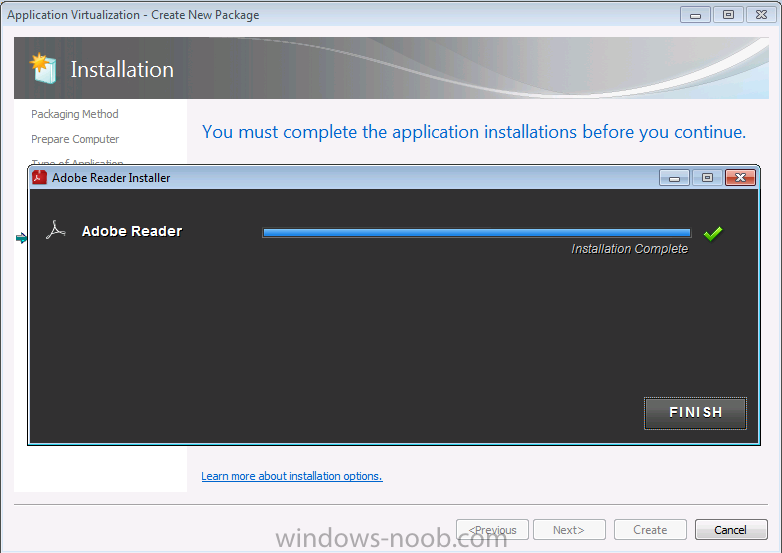
after a while you should see your application complete its Installation, click on Finish.
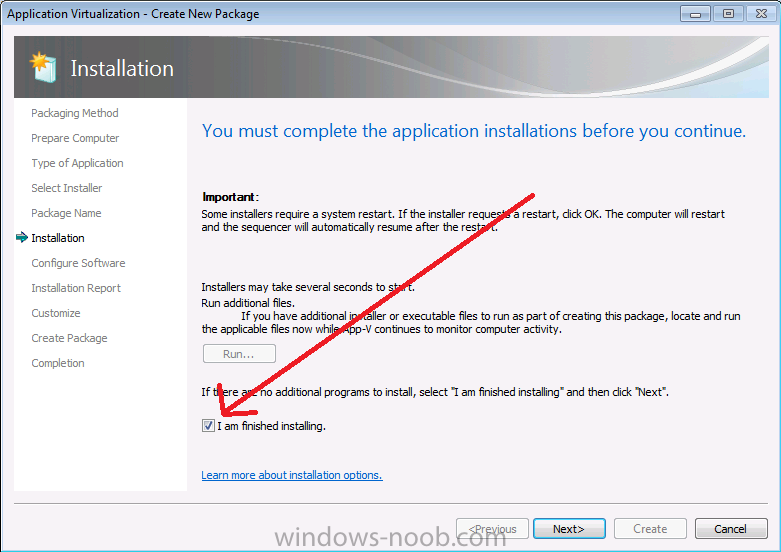
when you are done with your application, place a checkmark in I am finished installing.
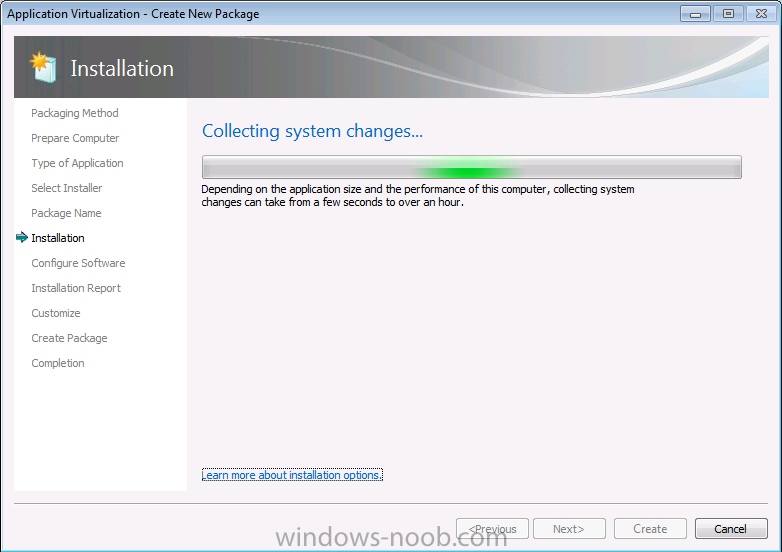
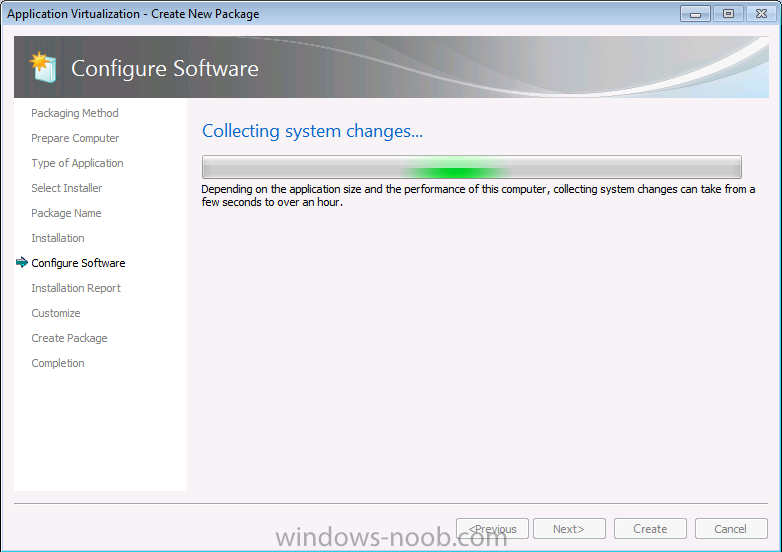
once you click next the App-V sequencer will gather the changes made by the application installation
before being presented with a Configure software step which allows you to run the app in order to configure it for any update requirements or license agreements etc.
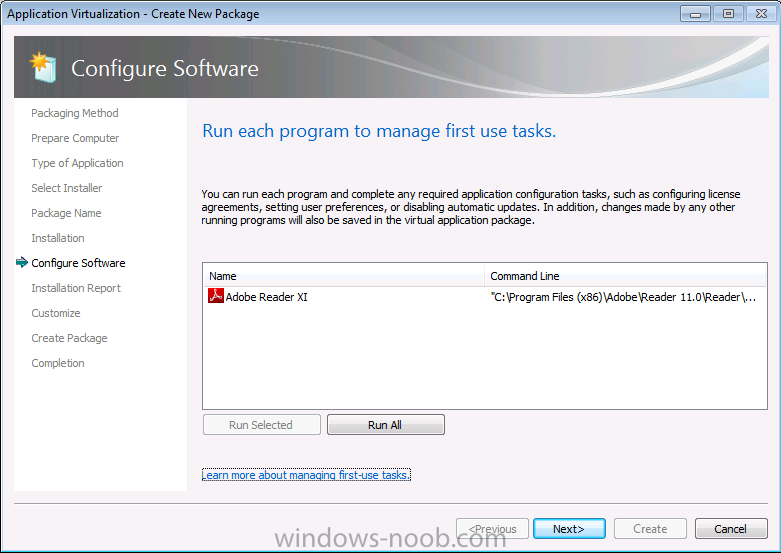
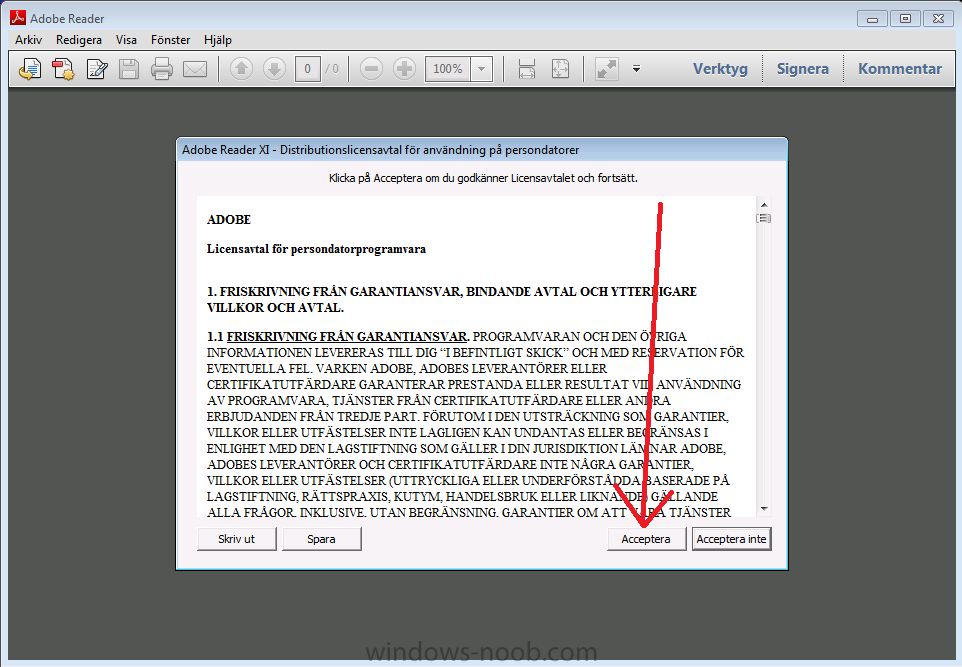
You can select the application and click Run, the application starts and in this example a License screen is presented (in Swedish), accept it so that your users won’t be prompted with the License Agreement when they run the application.
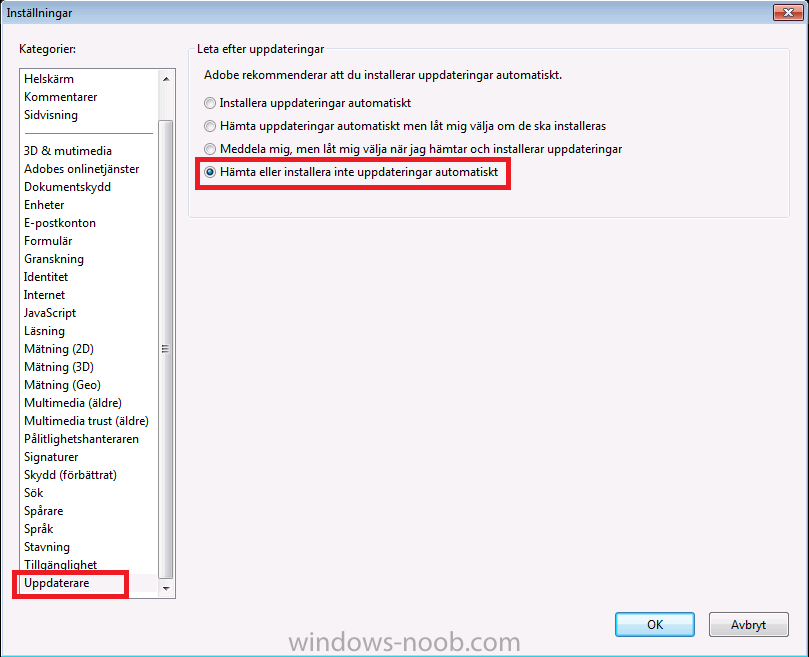
Next configure the application settings to not automatically check for updates, you don’t want your App-V application annoying your users by prompting them to update it once they run it… again this screenshot is in Swedish but you’ll figure it out won’t you ?
once you are done making your configuration changes click on next and the sequencer will gather your changes again…
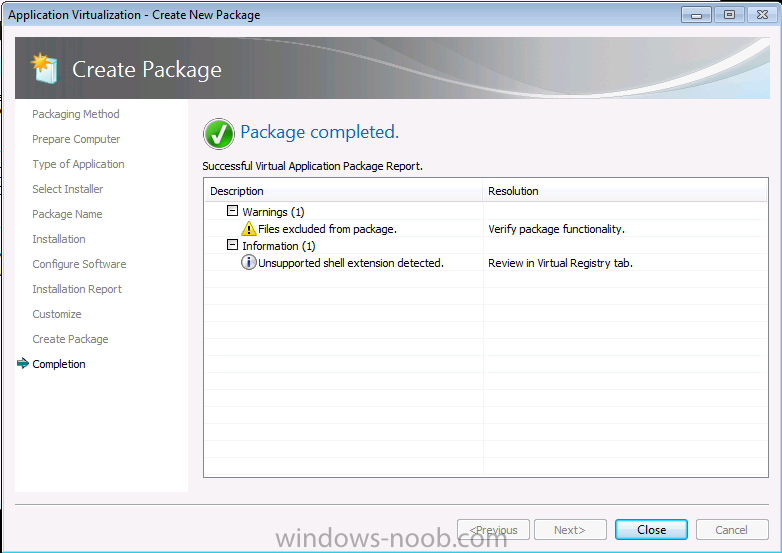
and then you get to review the installation report
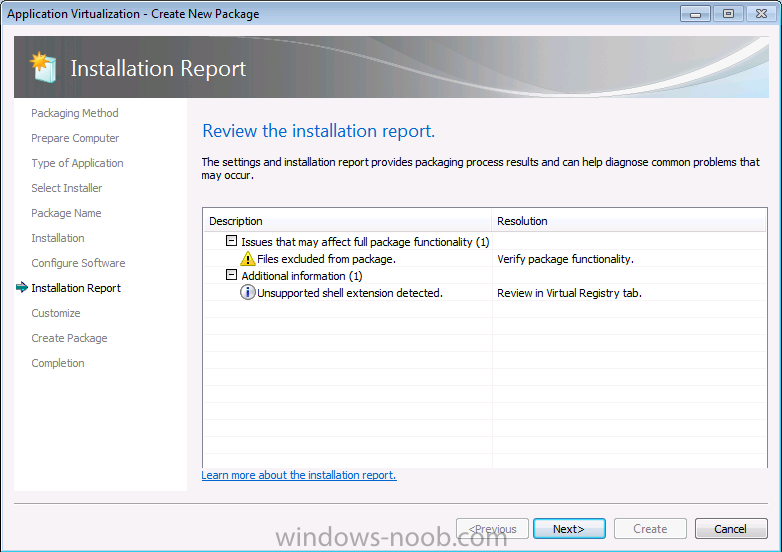
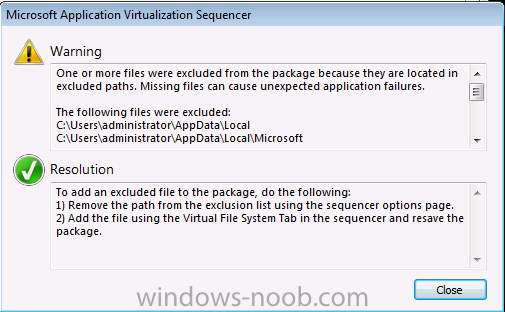
in the screenshot above it mentions some files were excluded that may be required, if you double click on this it will tell you why they were excluded and how to resolve it
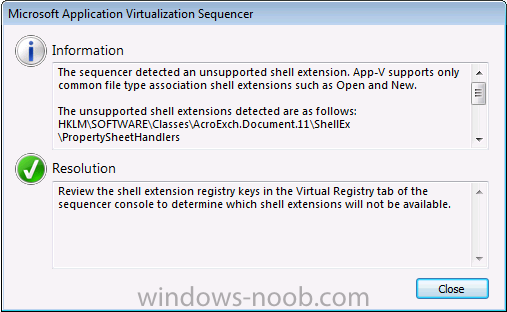
in addition it referred to some unsupported shell extension, again double-clicking the warning will give you tips to resolve it
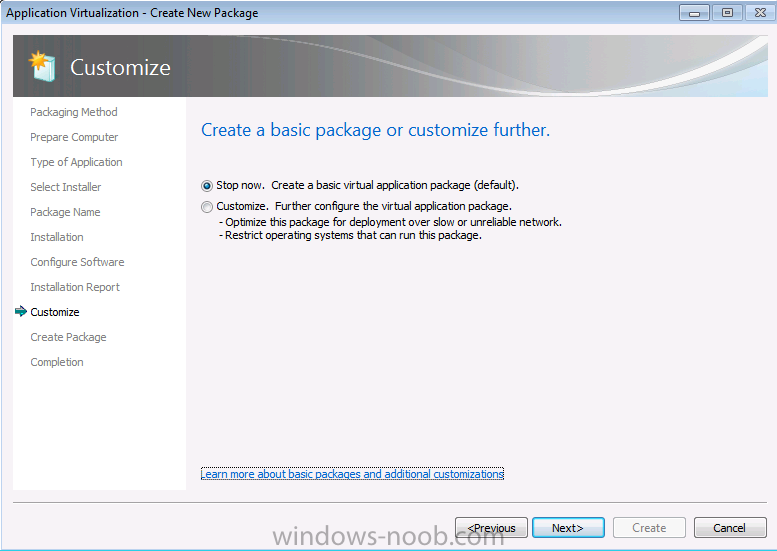
let’s assume all is OK and continue by clicking Next, once you do you have the option to Stop now or Customize. In this example we’ll stop now as we don’t want to restrict the package on any operating systems and we are not concerned with network latency.
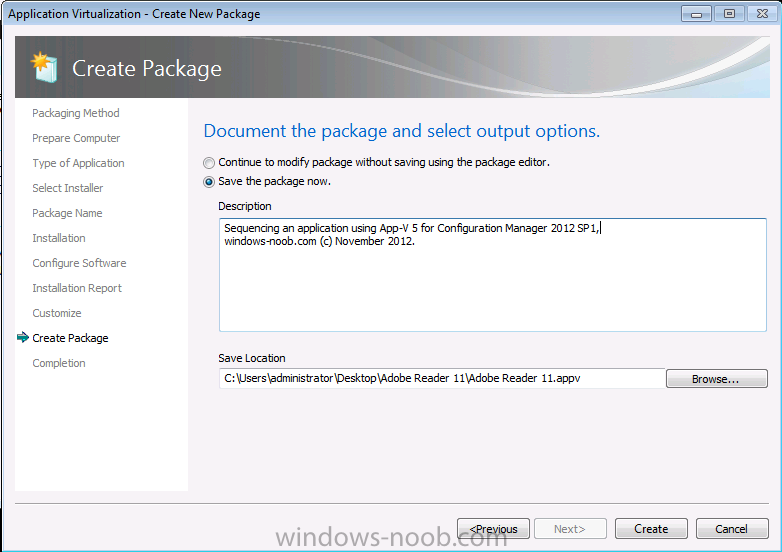
next you get to save the package somewhere useful, give the package some description as well, fill in the info and click on create
your virtual application package is created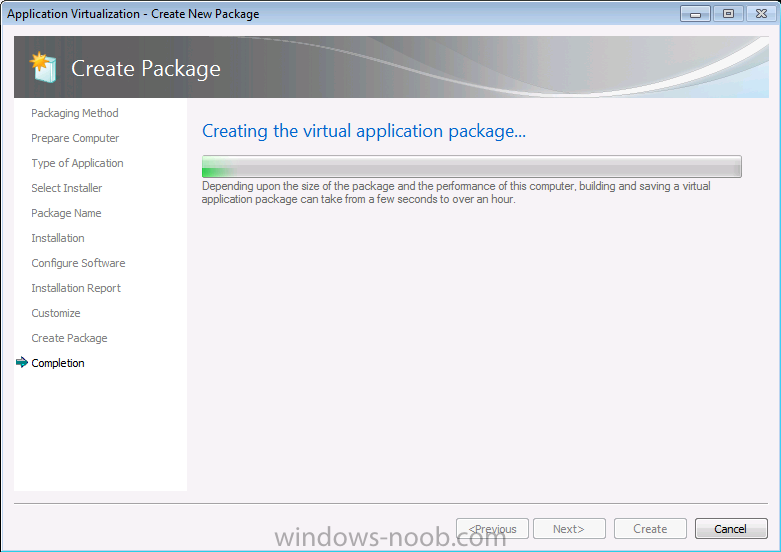
and your package is completed, any warnings are listed, you can double click on them for more info, once done click close
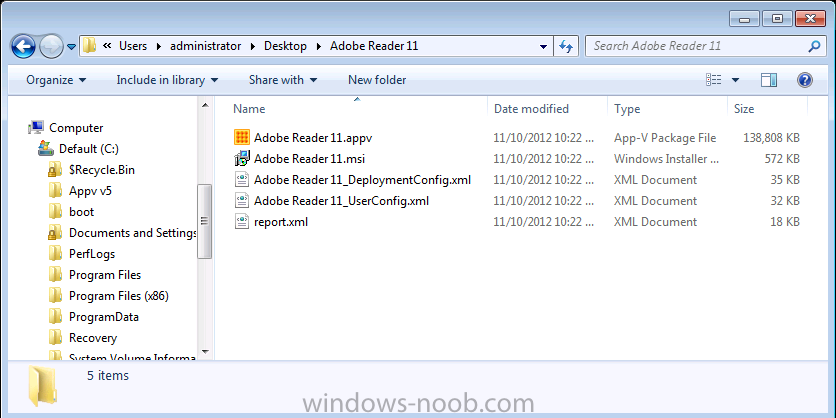
You can now browse to the path where you saved the App-V package and you’ll see the files are all there waiting for you, congratulations you’ve just sequenced your first App-V 5 package !
Step 5. Add your App-V5 application to Configuration Manager 2012 SP1
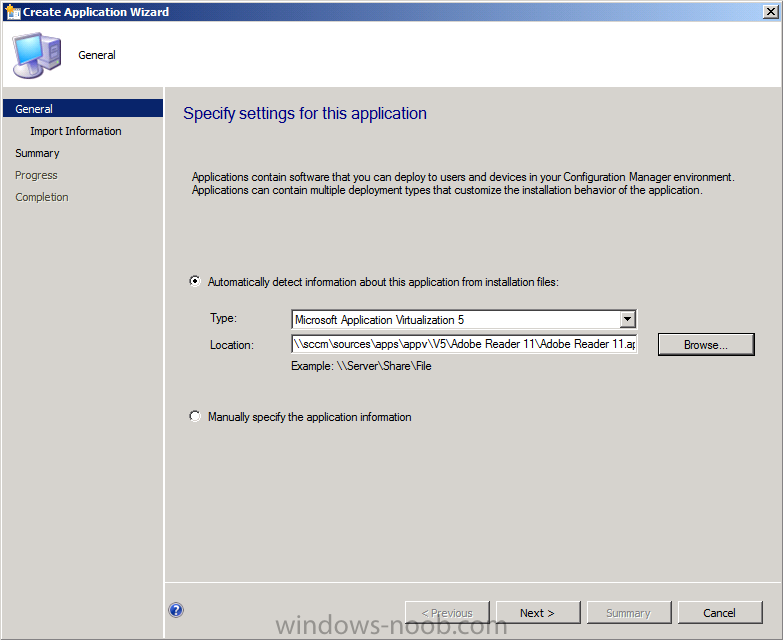
Now that we’ve sequenced our first app, we want to deploy it, but before doing so we need to add it to Configuration Manager 2012 Service Pack 1.In the Software Library workspace right click on Applications and choose Create Application, when the menu appears select Microsoft Application Virtualization 5
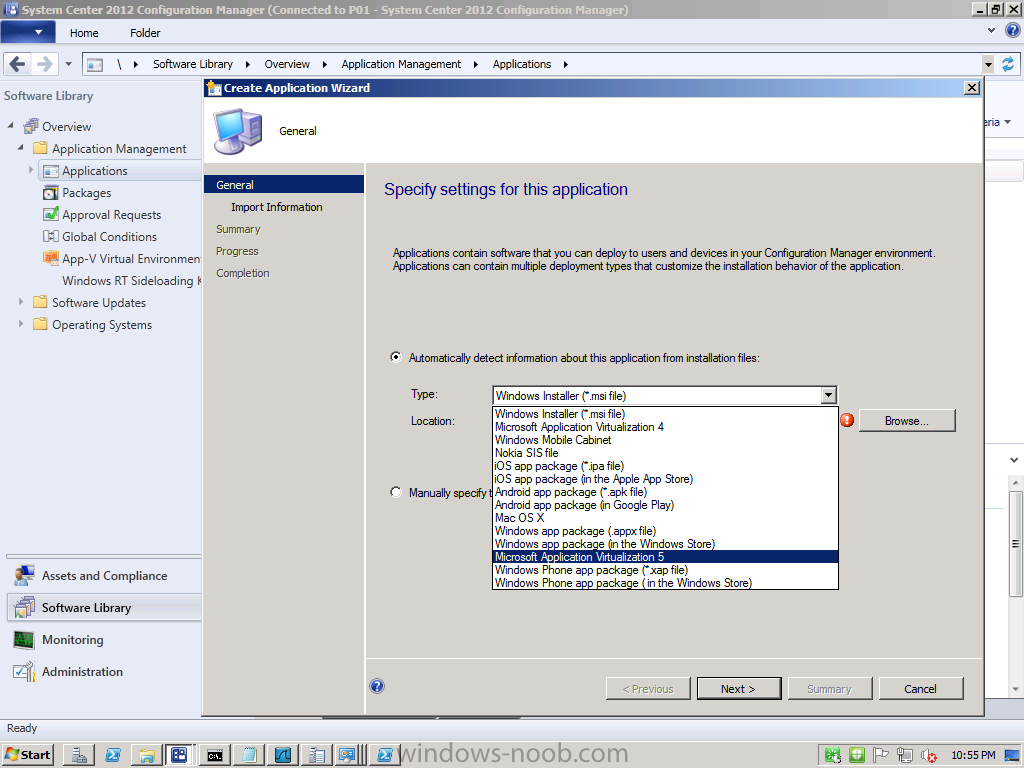
and select the location of the App-V package by pointing to the .appv file in your App-V package
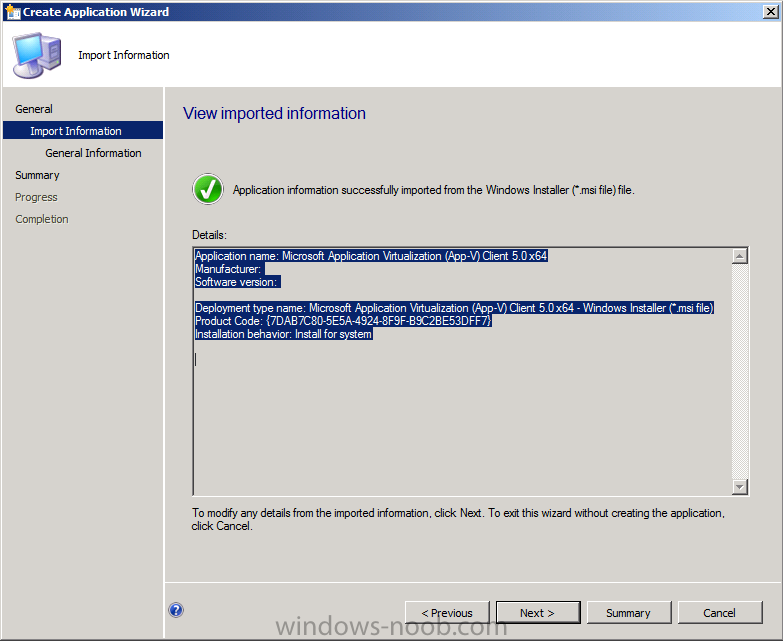
if all goes well you will be displayed with the View Imported Information screen
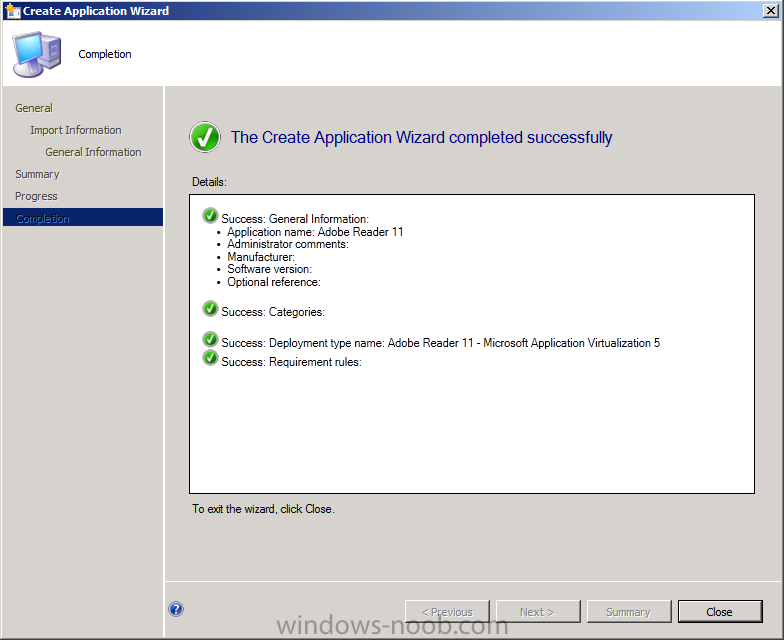
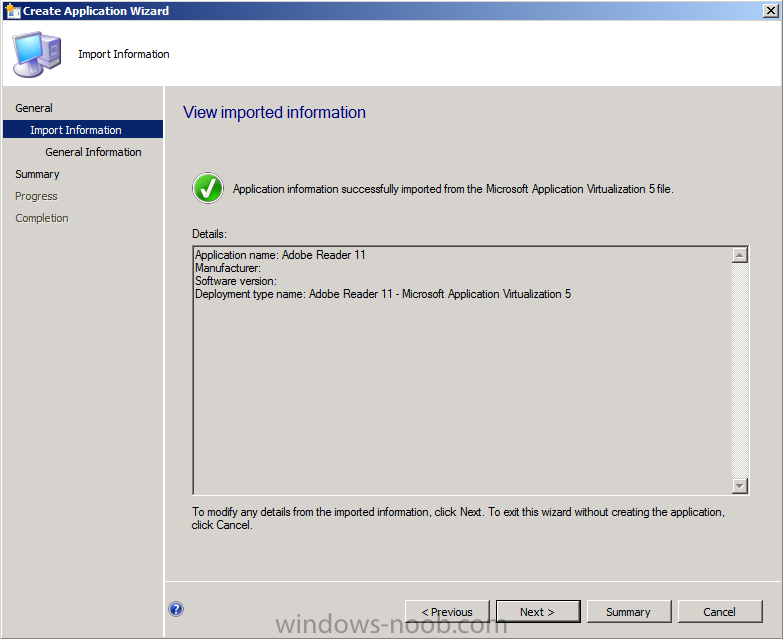 click your way through that wizard until completion.
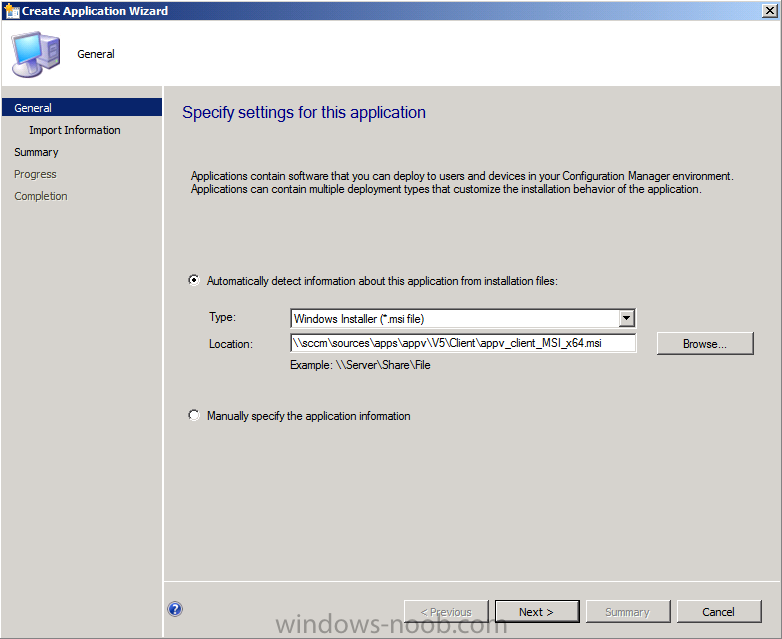
Step 6. Add the App-v client
In order to deploy App-V applications we need to have the App-v client installed on our target computers, the client installation files are located on the extracted ISO in \App-V\Installers\5.0\Client, copy them to your sources folder (\\server\sources\apps\appv\v5\client) on the Configuration Manager server.
Note: In this guide I will not go into details of fulfilling the prerequisites for the App-V client package (that’ll come in a later blog). However you must ensure that your client computers meet the prerequisites or the app-v client will fail to install. If you want to keep it easy then test with Windows 8 as that has most of the prerequisites built in (you may still need to install the Microsoft Visual C++ 2005 SP1 Redistributable and the Microsoft Visual C++ 2010 Redistributable) as described below…
Below are the prerequisites for the App-V Client:
- Microsoft Windows .NET Framework 4 (Full Package) (http://www.microsoft…s.aspx?id=17718)
- Windows PowerShell 3.0 (http://www.microsoft…s.aspx?id=29939)
- Download and install KB2533623 (http://www.microsoft…s.aspx?id=26746)
- The client installer will detect if it is necessary to install the following prerequisites, and it will do so accordingly:
- The Microsoft Visual C++ 2010 Redistributable(http://go.microsoft…./?LinkId=268896)
- The Microsoft Visual C++ 2005 SP1 Redistributable
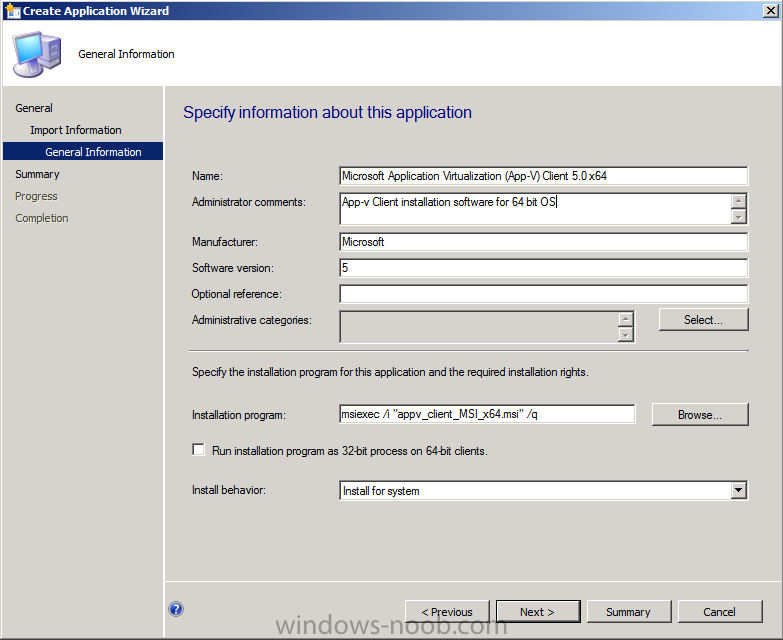
Create a new application and point it to your App-v Client folder
it gets imported
add some info, take note that this is the 64 bit MSI for 64 bit operating systems, you’ll have to repeat this process for the other 32bit msi.
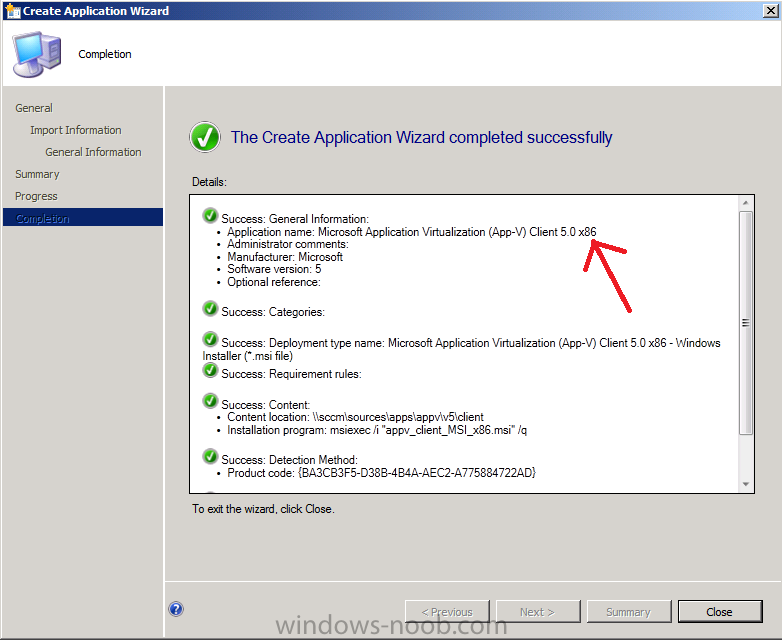
continue the wizard until completion
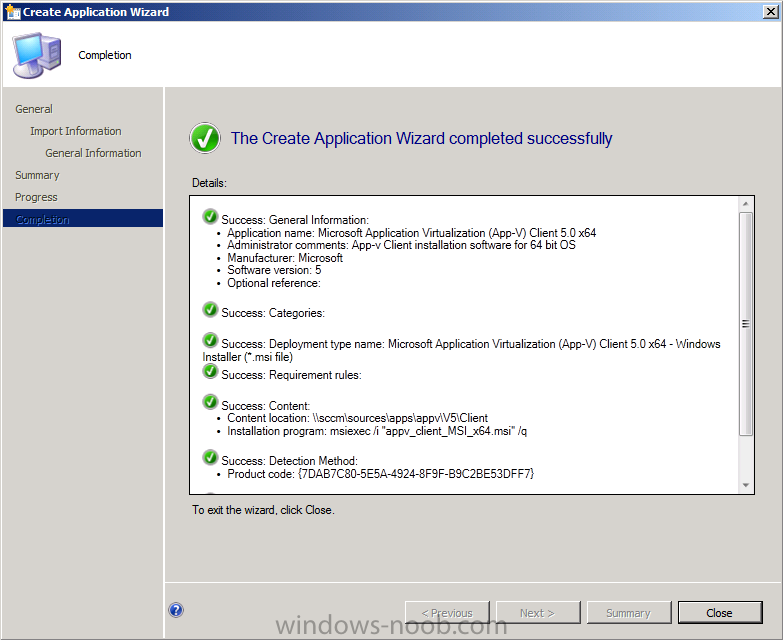
and then repeat the above for the 32bit client msi.
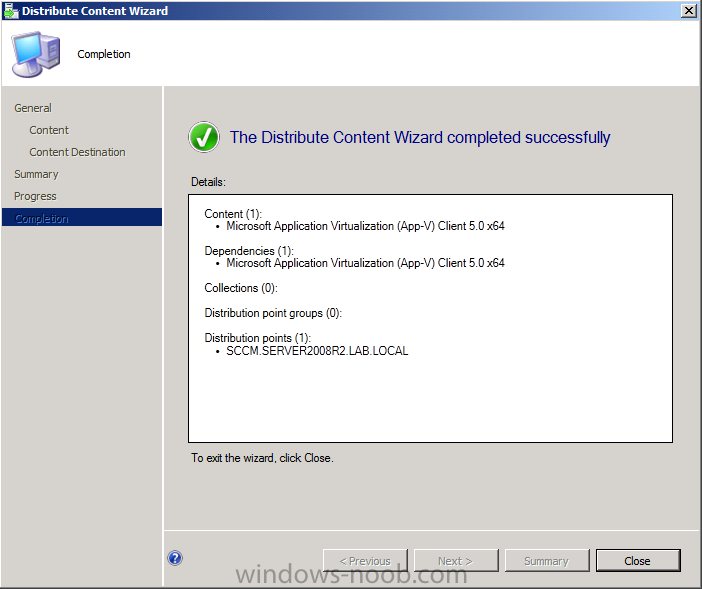
once done, don’t forget to add the client applications to your Distribution Points
Step 7. Edit your Application to add a dependency for the App-v Client
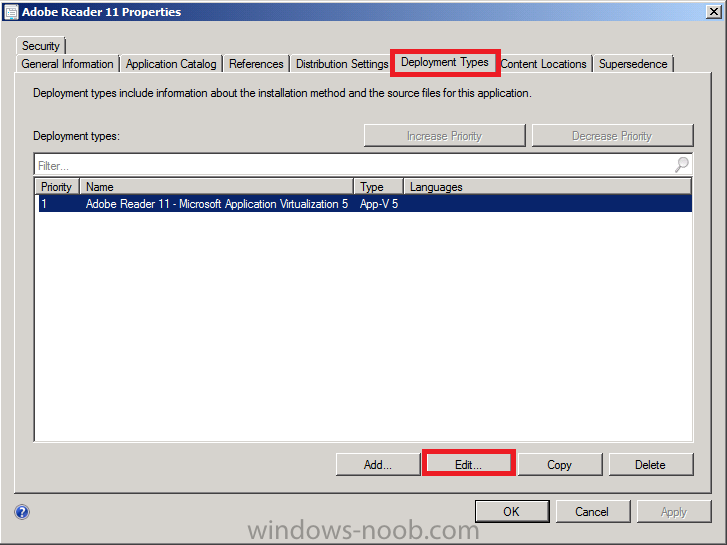
Locate your previously added application (Adobe Reader) and right click it, select properties and navigate to the Deployment Types tab, select the listed Deployment Type and click Edit
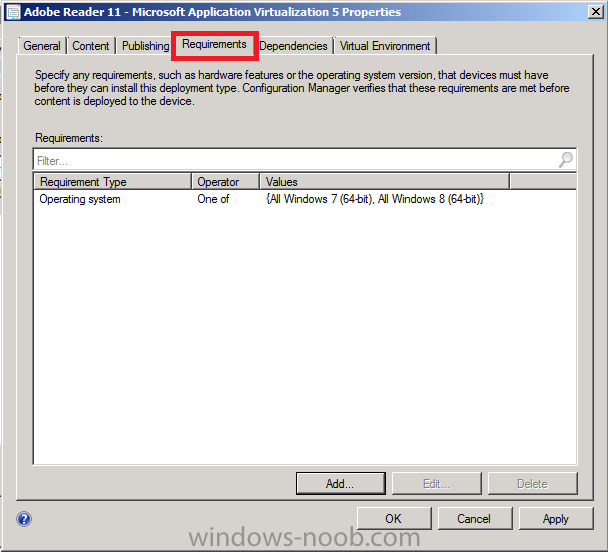
On the requirements tab select both Windows 7 X64 and Windows 8 X64 as per the screenshot below
Next select the Dependancies tab of our Deployment Type and give it the name App-V X64 Client, click on Add and point it to our previously created App-V X64 Client, select that deployment type so that it’s like the screenshot below
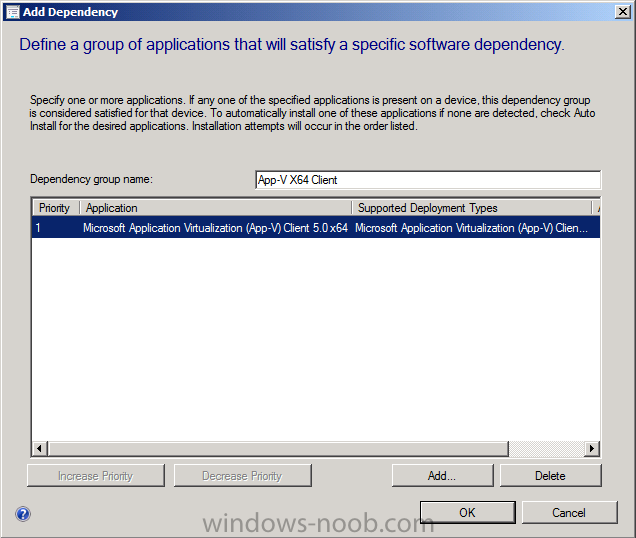
and click ok then apply to apply the changes to our Deployment Type and ok + apply…Once done you can create a new Deployment type with a requirement for the X86 Operating systems and a dependency for the 32bit client.

so now we have two deployment types for our Adobe Reader application to deal with both 32bit and 64 bit operating systems.

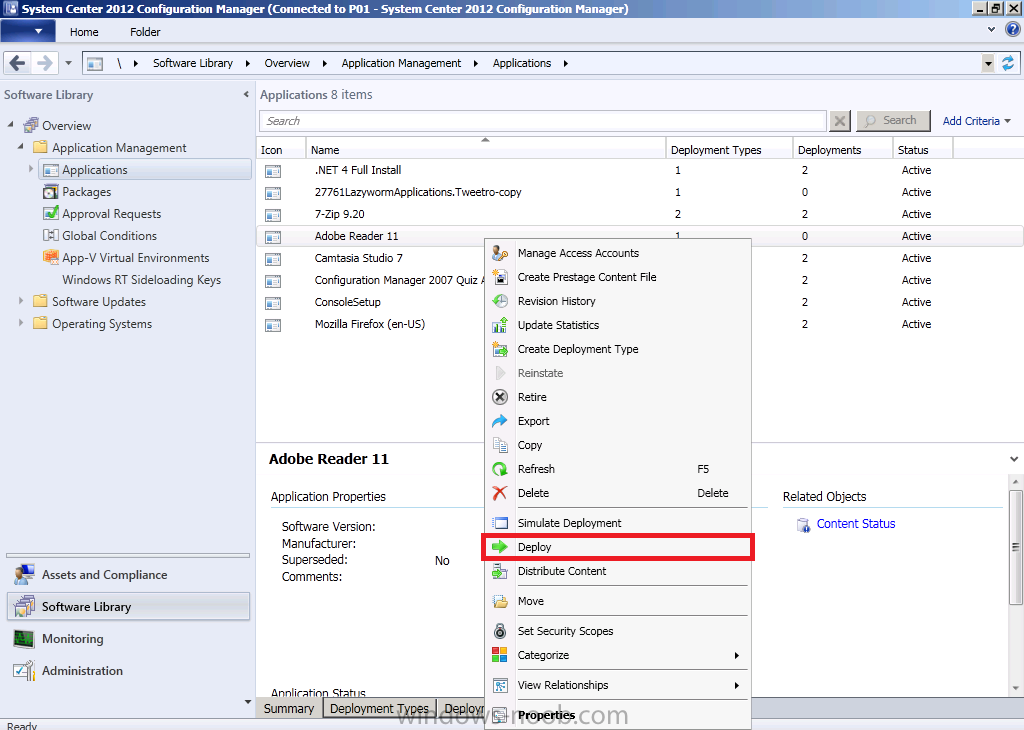
Step 8. Deploy your app-v application
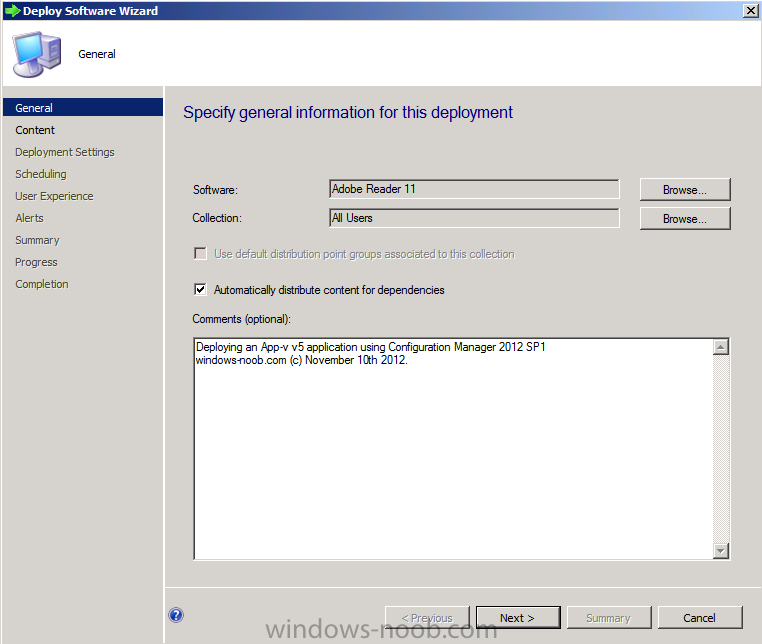
Right click on your newly added application and choose Deploy.
point it to your desired collection
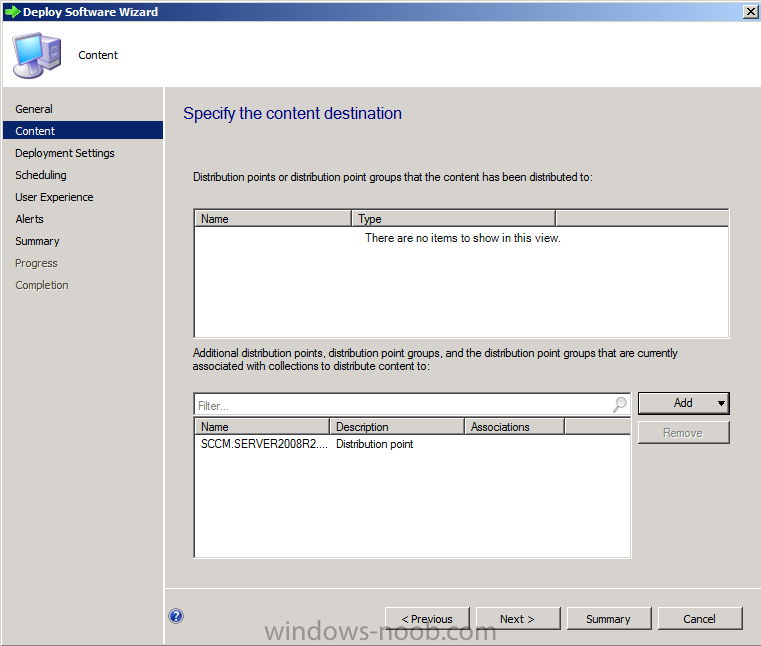
next you can add your distribution points by clicking on Add and selecting the distribution points you want to have the content available on
in this guide we are not forcing the installation therefore we’ll set the purpose to available (optional)
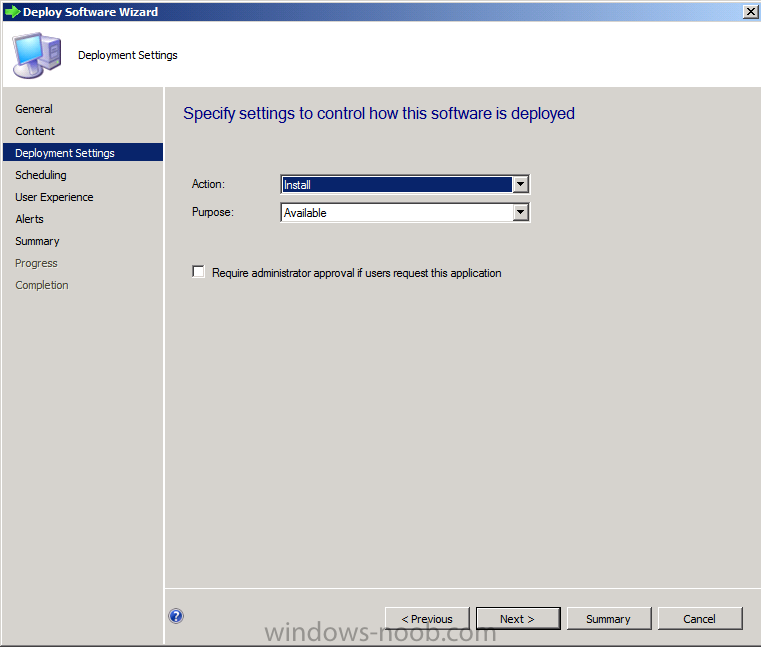
click your way through the rest of the wizard until completion
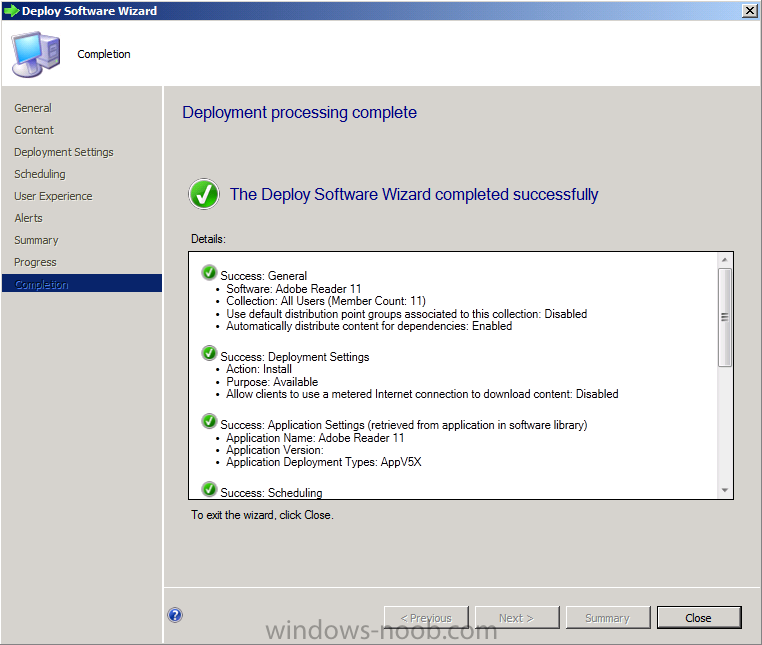
Step 9. Review the App-V application installation
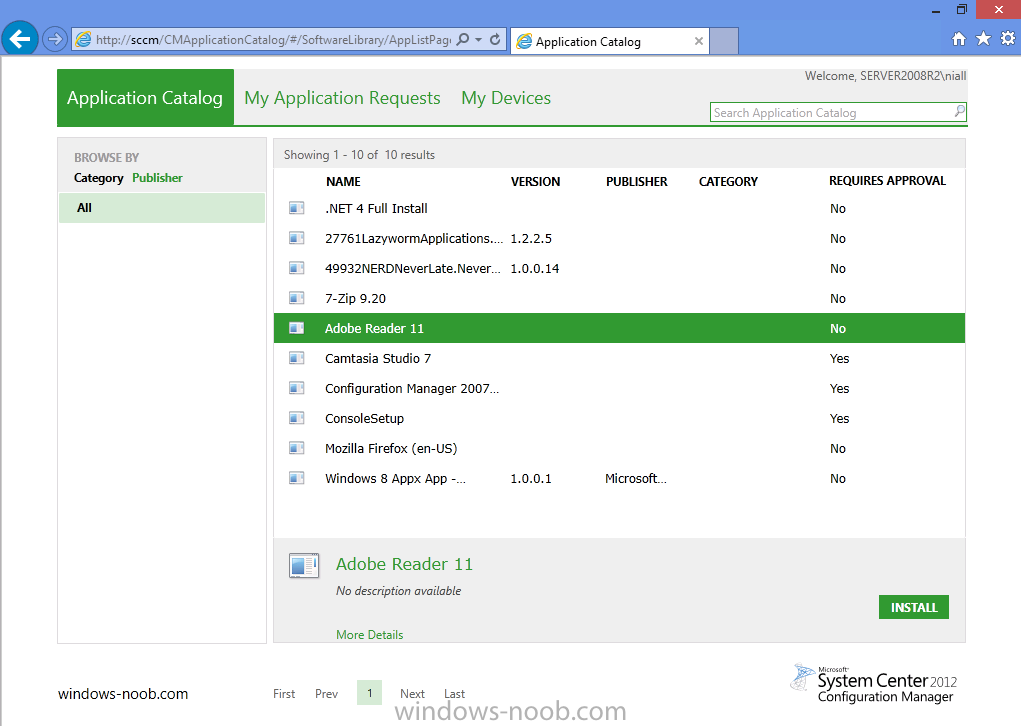
Now that you’ve done the hard work, logon to a client computer and wait until it retrieves policy or trigger a policy update to speed things along.Open the Application Catalog and you’ll see your new App-V application listed there, select it and click on Install
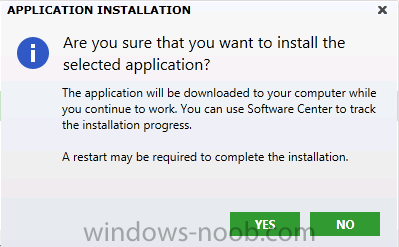
you might be asked if you are sure you want to install the application, answer yes..
and off it goes installing…if you get any failures then it’s most likely due to missing prerequisites for the App-V client software, refer to a MSI*****.log file present in C:\Windows\Temp for details of the missing prerequisites.

fix the missing prerequisite problems before continuing..

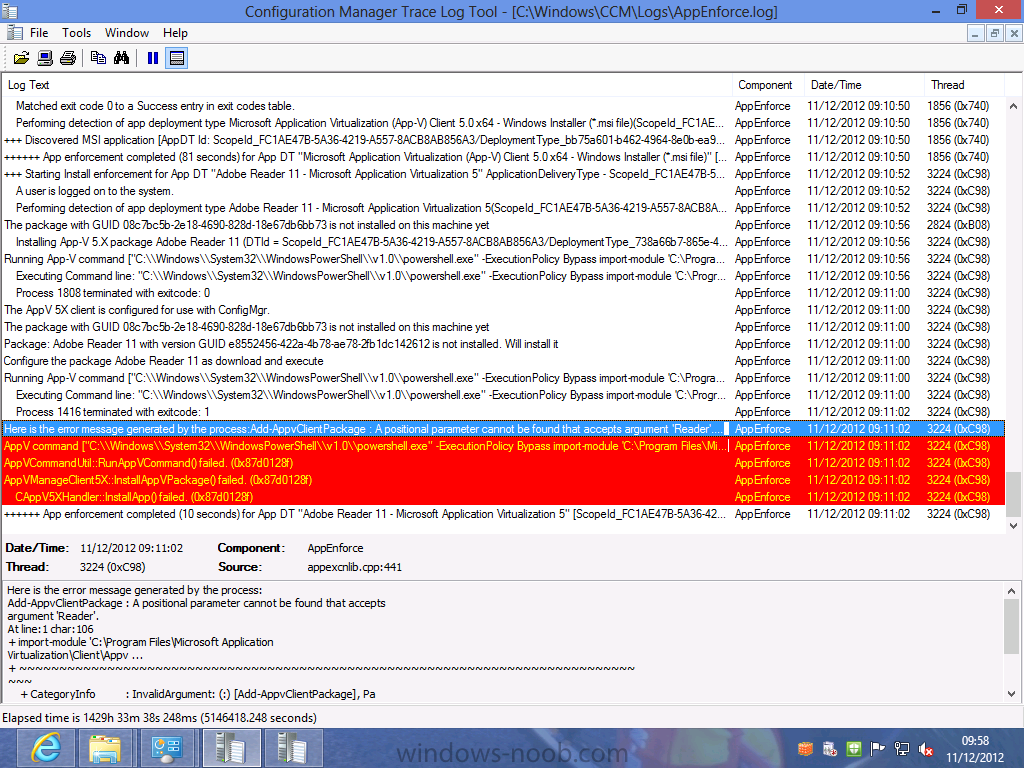
Note: at this point if you get any errors about the installation of Adobe Reader (or your virtual application) it may be due to a feature in this version, unfortunately this is due to having spaces in the App V application name. To resolve this please edit the Appv package using the sequencer and remove the spaces or replace them with underscores like in the screenshots below. I’ll update this post once I know more about that feature…
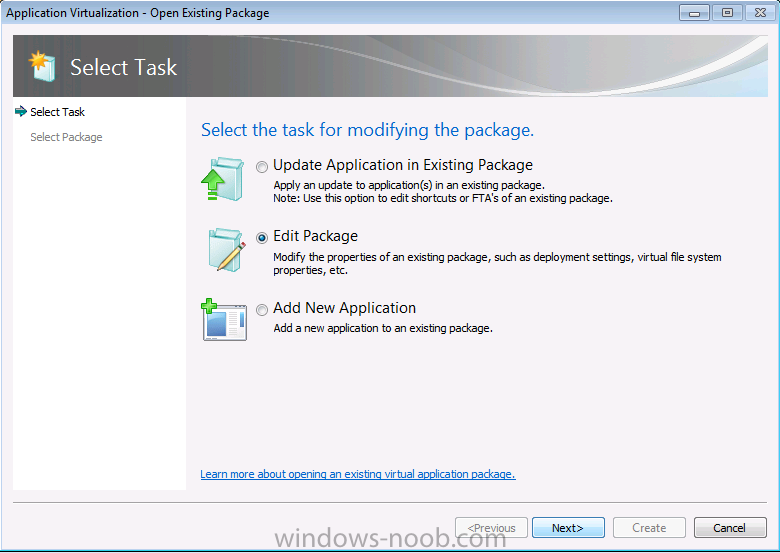
Simply start the sequencer and choose Modify an existing virtual package followed by Edit, then change the name and save the result.Here’s what that problem looks like, notice how it’s trying to determine what arguments ‘reader’ are…
to resolve it, go back to your sequencer and modify your App-V package
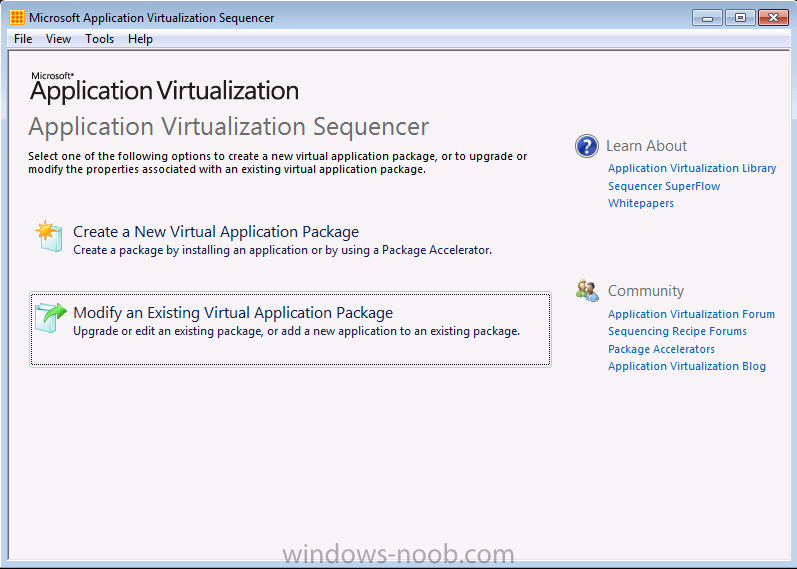
then choose Edit
select your existing virtual application package
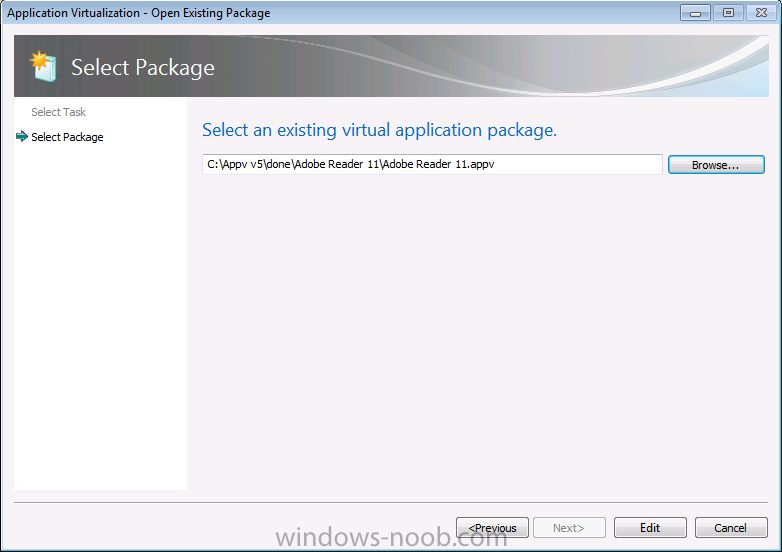
change the name and click on File then Save As (without spaces…)
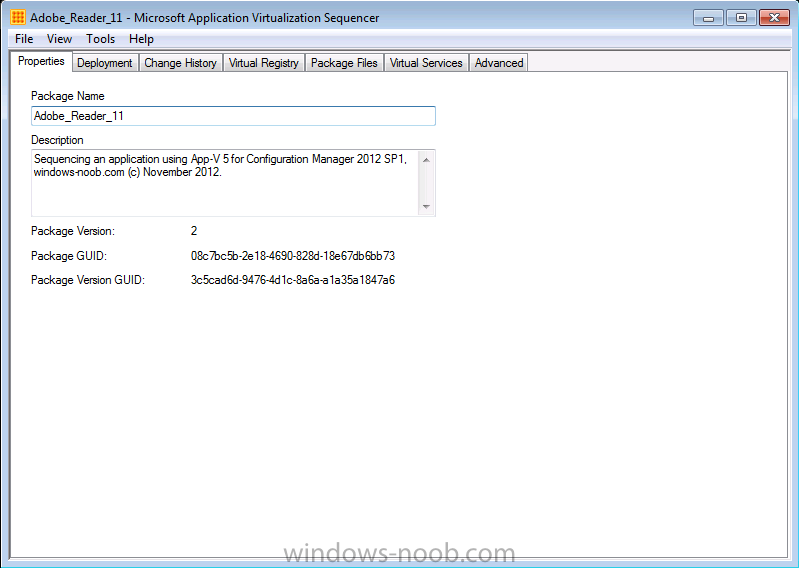
Once done, create a new app exactly as before in Configuration Manager as described above, except this time use the Adobe_Reader_11 application instead.Once done don’t forget to Deploy it, then logon back on to your client and select the new application in the Application Catalog. and you should see the App-V client gets installed happily and pops up in the system tray

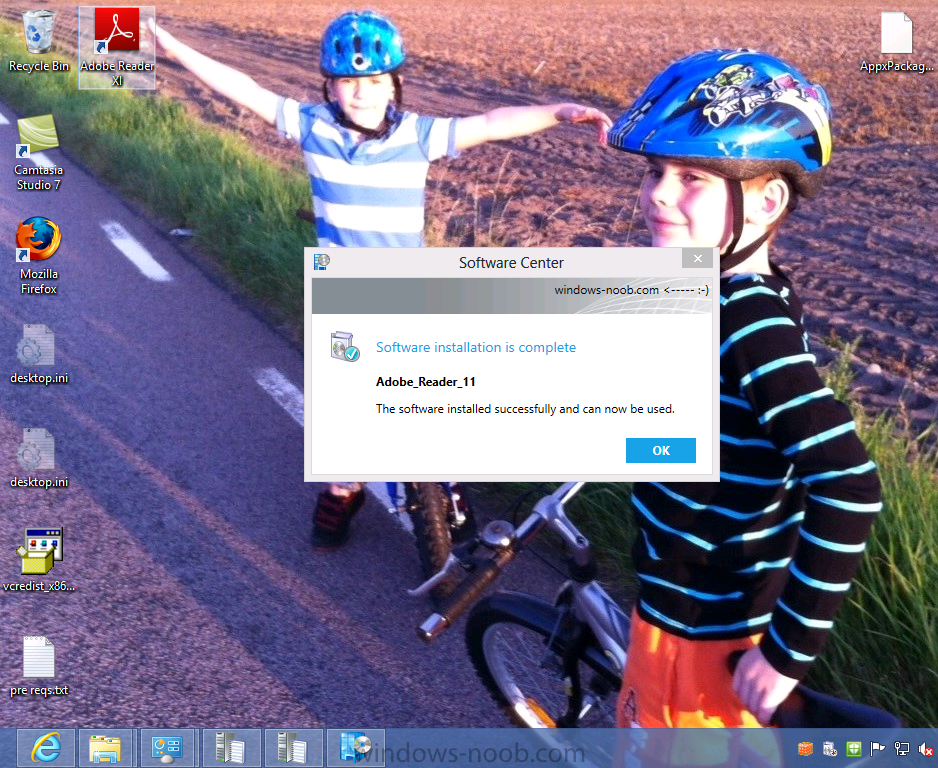
and our Virtual Application is installed! success, finally… 🙂
Further Reading
I’d highly recommend you checkout the following websites for great information about App-V and beyond.
- http://www.applepie….s-behind-it-all
- http://www.applepie….nnection-groups
- http://www.stealthpuppy.com/
until next time,adios
niall.

Pingback: RONNIPEDERSEN.COM » HOW-TO: Sequence applications using App-V 5 for CM2012
Pingback: How can I sequence applications using App-V version 5 for Configuration Manager 2012 SP1 « MS Tech BLOG