
In Part 1 of this series we got our AD and SCCM servers ready, and then we installed System Center 2012 Configuration Manager as a standalone Primary site. In Part 2 we configured the SCCM server further by adding some Windows Server roles necessary for the following Configuration Manager 2012 functionality, Software Update Point (SUP) and Operating System Deployment. In Part 3 we configured the server further by Enabling Discovery methods and creating Boundary’s and Boundary Groups. In Part 4 we configured Client Settings, Added roles and Distributed the Configmgr Client to our Computers within the LAB, then in Part 5 we enabled the Endpoint Protection Role and configured Endpoint Protection settings and targeted a collection called All Windows 7 Computers with these settings and policies.
In Part 6 we configured our SUP further to Deploy software updates to our All Windows 7 Computers and Build Windows 7 X64 collections. In Part 7 we used the Build and Capture process to create our Base Windows 7 X64 wim image. In Part 8 we created a USMT 4 package to migrate the users data using hardlinking and then we imported the captured image into ConfigMgr and created a Deploy Windows 7 X64 task sequence. We created a Deploy Windows 7 X64 Collection and set some User Device Affinity collection variables.
In Part 9 we created an Application, and created a deployment type for that application to only install if the Primary User was True for that device (User Device Affinity), we then copied our Task Sequence (duplicated it), deployed the new Task Sequence, added a computer to the new collection and then PXE booted the computer to the Deployment Menu. In Part 10 we monitored the Deployment process in a lot of detail to how UDA sent state messages and we verified that our application installed on the users Primary Device, in addition we modified our collection variables, and added a prestart command to our boot image to prompt for the SMSTSUdaUsers. In Part 11 we setup the Reporting Services Point Role and verified that reporting was working.
In Part 12 we demonstrated a new feature in ConfigMgr which allows us to Patch operating system WIM images using Offline Servicing. This means that you can apply Windows Updates by using Component-Based Servicing (CBS) to update the your previously captured WIM images. In Part 13 we looked at how Role Based Administration is used within ConfigMgr and we created a new custom role to allow a user (or users within a Security Group) to view Software Update Reports. This is useful because you will probably want one team to take care of configuring and deploying software updates, and to grant another (Management etc) the capability of reviewing Compliance Reports. In Part 14 we performed a side-by-side migration from Configuration Manager 2007.
In Part 15, we deployed Windows 8 Consumer Preview to see if it was possible, and indeed it was (it’s not supported by Microsoft however). In Part 16 we integrated MDT 2012 RC1 with Configuration Manager 2012 RC2. In Part 17 we configured MDT 2012 and used the UDI Wizard designer to configure the default Custom XML file used in a UDI task sequence. Now we will configure that XML file some more before creating a new MDT Task sequence to Deploy a User Driven Installation Client Task Sequence. We will then edit that task sequence to add Offline Language support and finally deploy it and monitor a client progress.
Note: This post is long and may take you some time to complete so do please give yourself plenty of time to go through it all.
Step 1. Remove the prompt for Computername in our MDT boot image
Note: Perform the following on the ConfigMgr 2012 server as SMSadmin
In it’s current state, when we boot our MDT boot image it will prompt the end user to enter a computername as you can see in the screenshot below
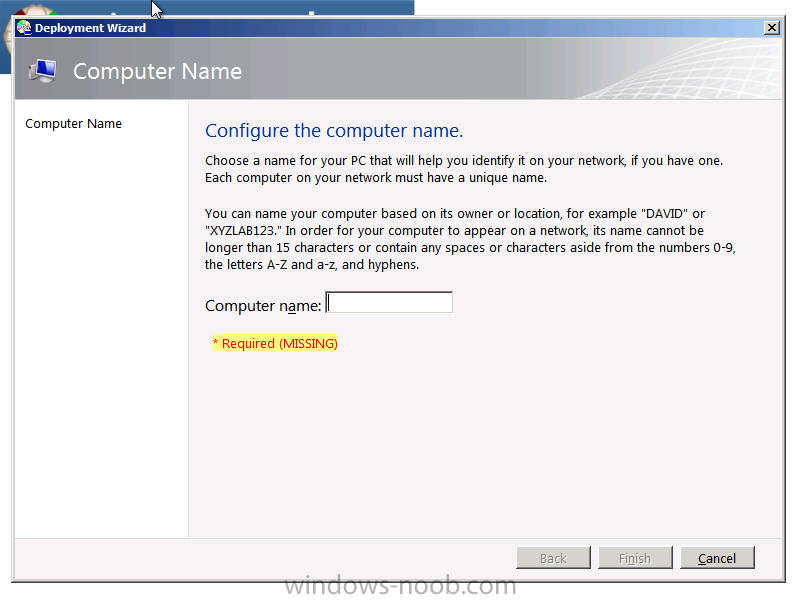
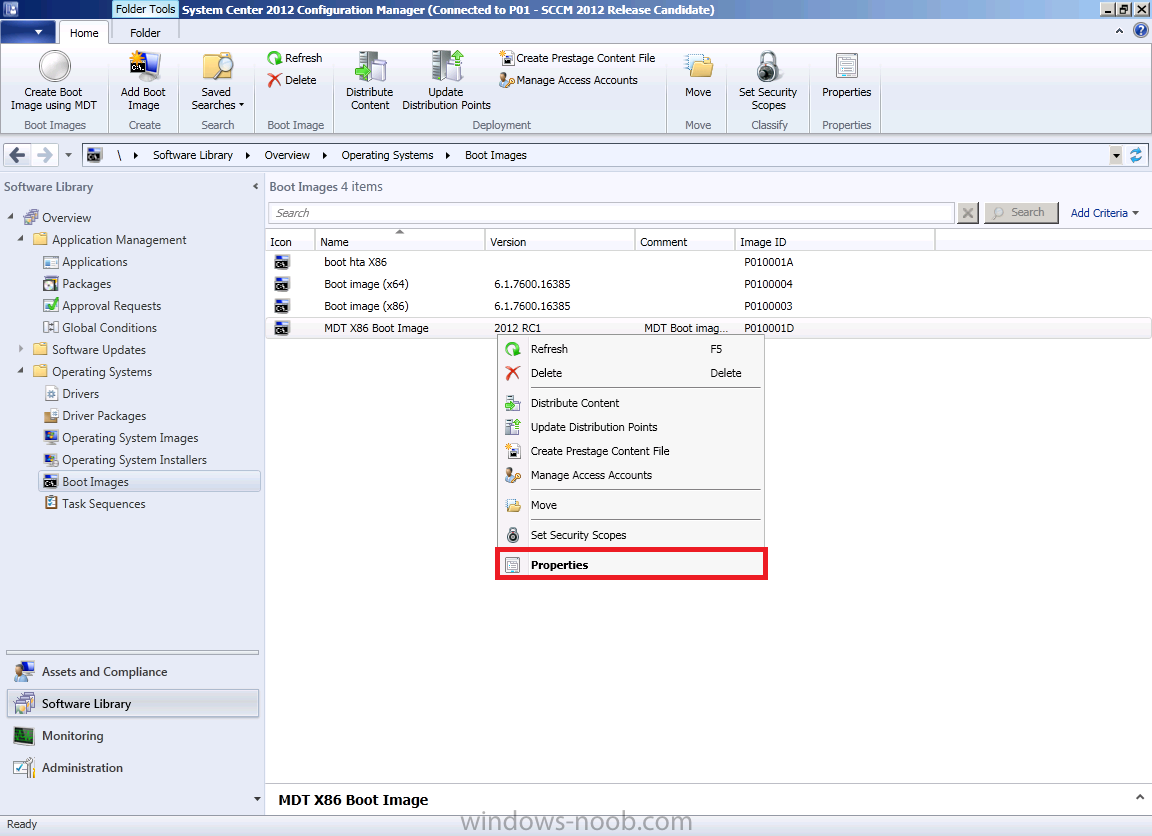
we don’t need this functionality as we will use the computer naming ability within the UDI wizard itself, so let’s disable this. To remove the prompt locate your MDT Boot image in the boot images node, right click and choose properties
Click on the Customization tab,the prestart command will look like this
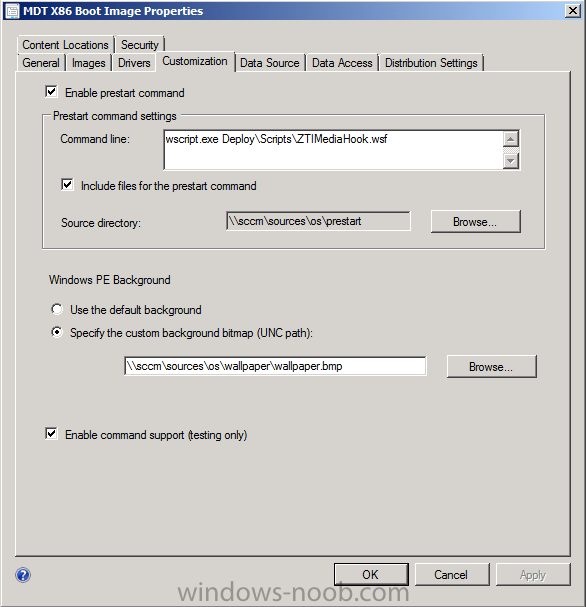
edit it so that it just reads
WScript.Quit(0)
then click apply as in this screenshot

answer yes to update the boot image to your distribution points, continue through that wizard to completion.

Step 2. use the UDI Wizard Designer to configure network settings and other changes
Note: Perform the following on the ConfigMgr 2012 server as SMSadmin
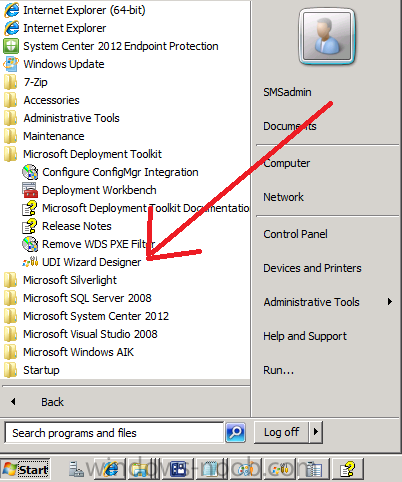
We already edited our UDIWizard_Config.XML file in the previous part but we need to make some additional changes to make it more user friendly and functional, so let’s start up the UDI Wizard Designer again (start, programs, Microsoft Deployment Toolkit, UDI Wizard Designer).
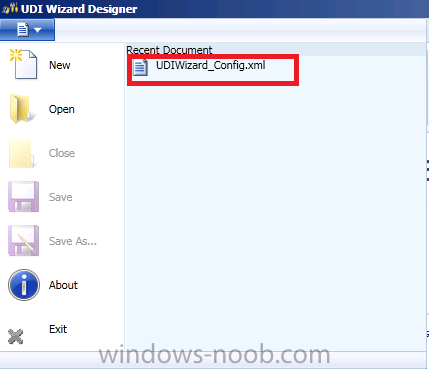
when the UDI Wizard Designer starts, click on the file ribbon and select our recently edited UDIWizard_Config.XML file.
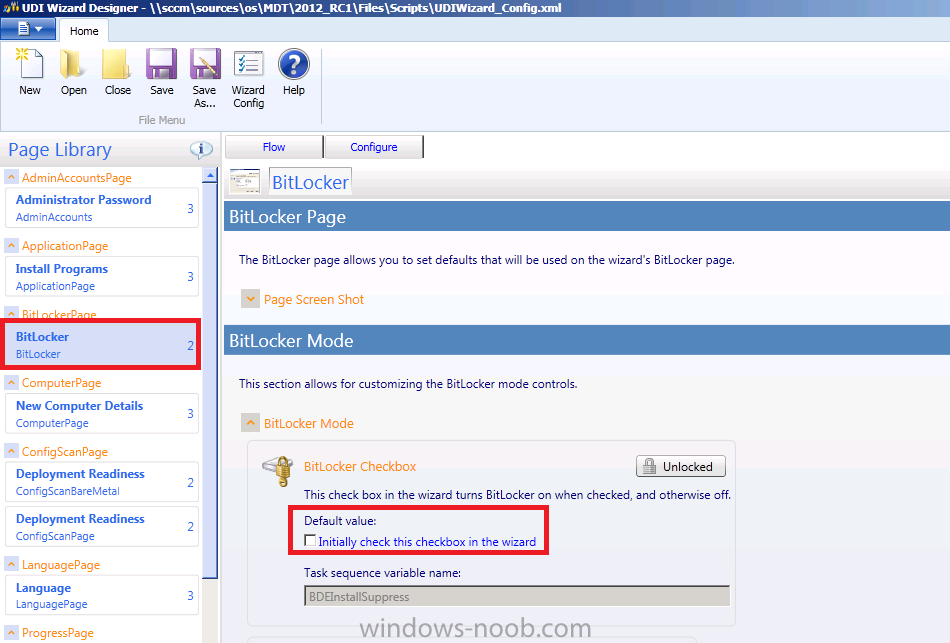
Select the BitLockerPage and remove the checkmark so that we are not prompted to enter any BitLocker info
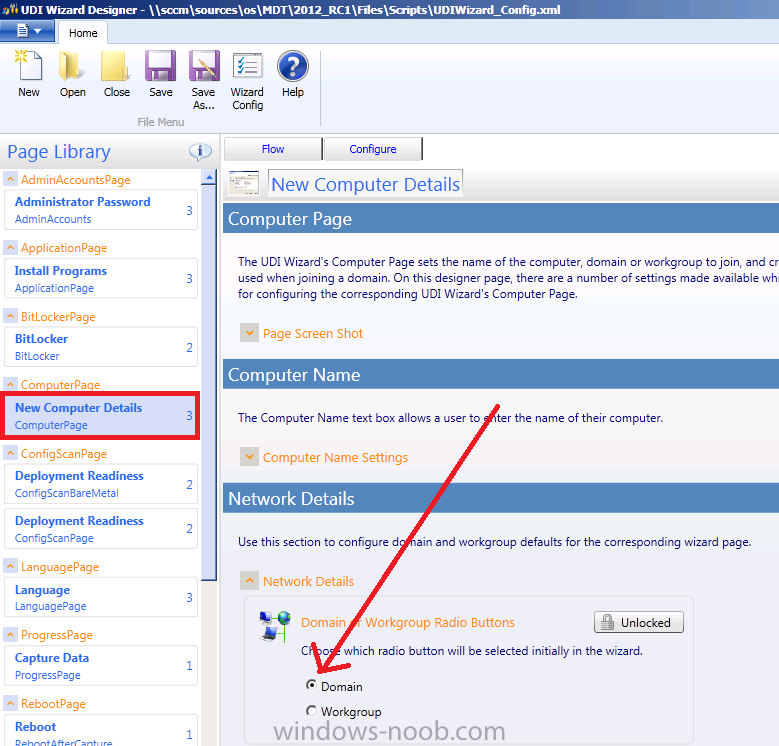
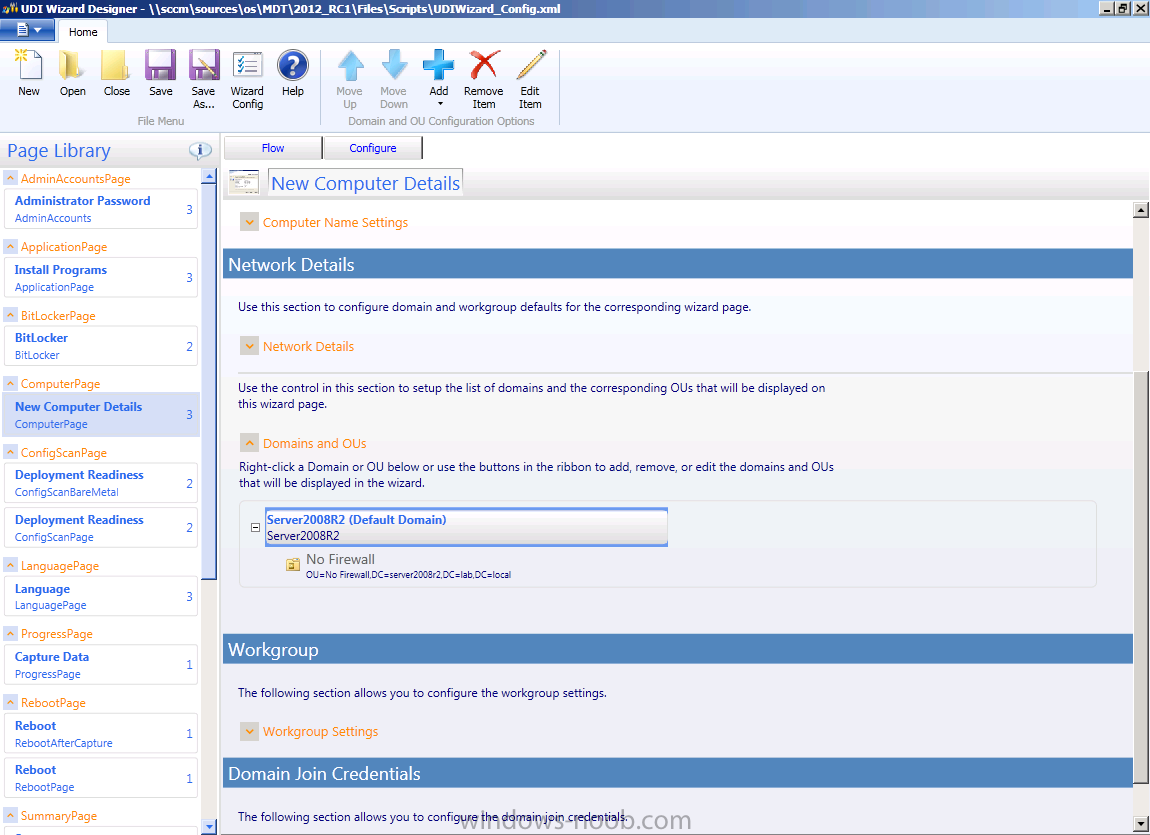
Next, double click on the New Computer Details Page and expand Network Details, select Domain
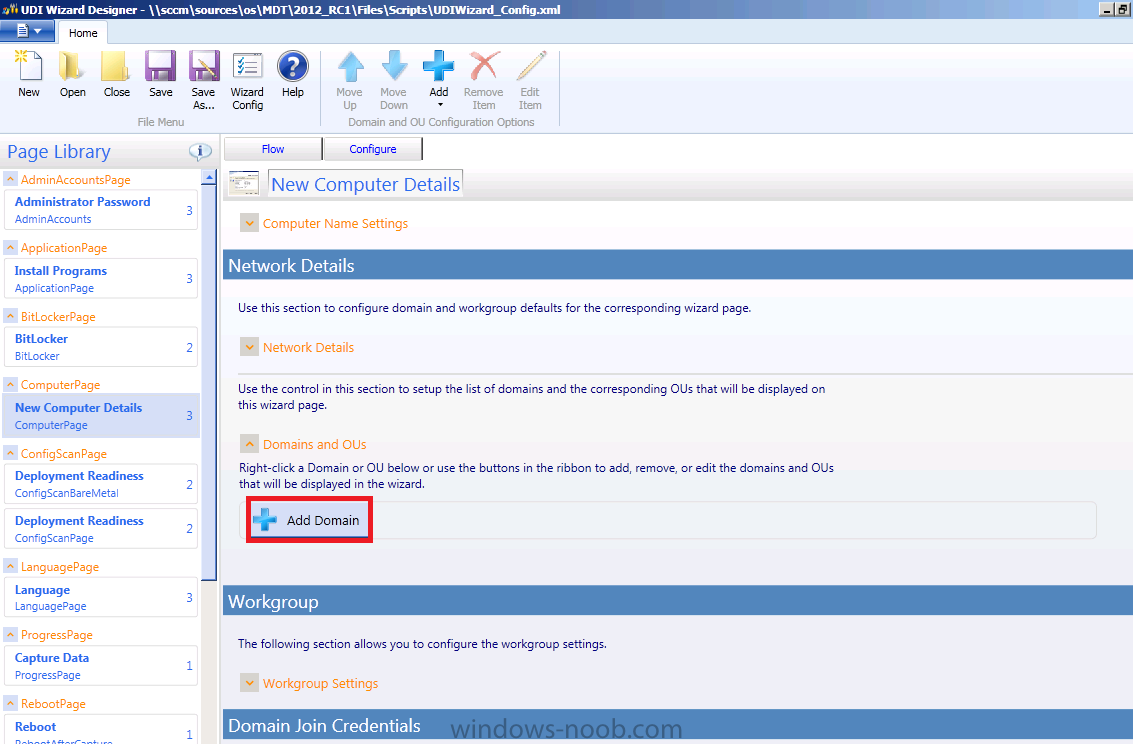
scroll down further to Domains and OUs, click on the blue Plus symbol to add a domain
when the Create or edit Domain Information window pops up
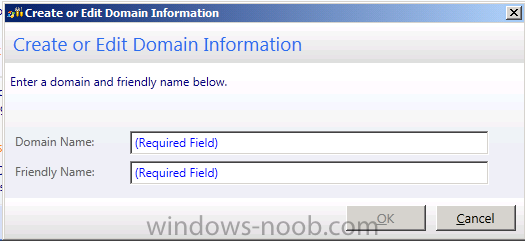
enter your domain info and friendly text something like below..
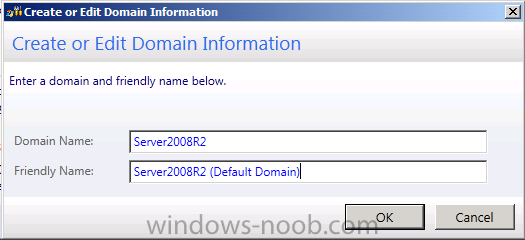
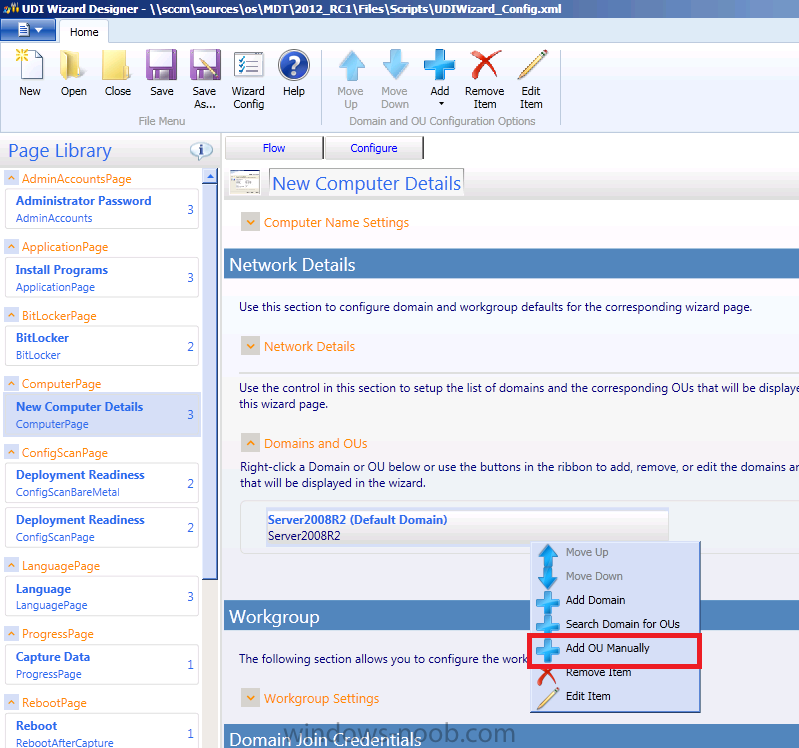
click ok when done, to add a default OU right click on the added domain and choose Add OU Manually
now you get the chance to add your OU information, so add it using the Distinguished name (which you can get from Active Directory)
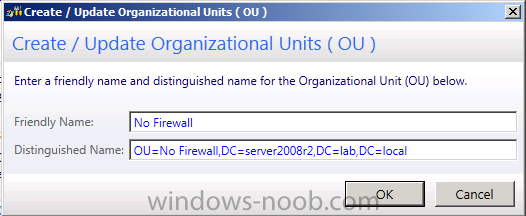
click ok when done, it should now appear something like this
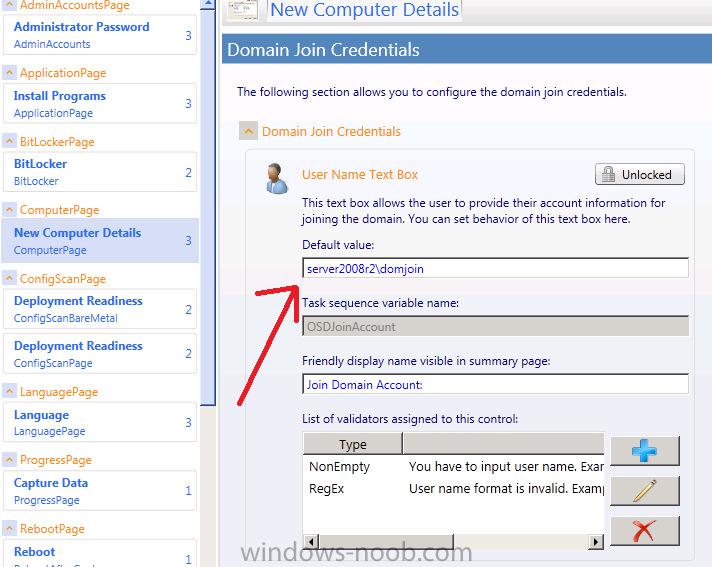
scroll down to Domain Join Credentials and add your domain join user account (I use one called Domjoin)
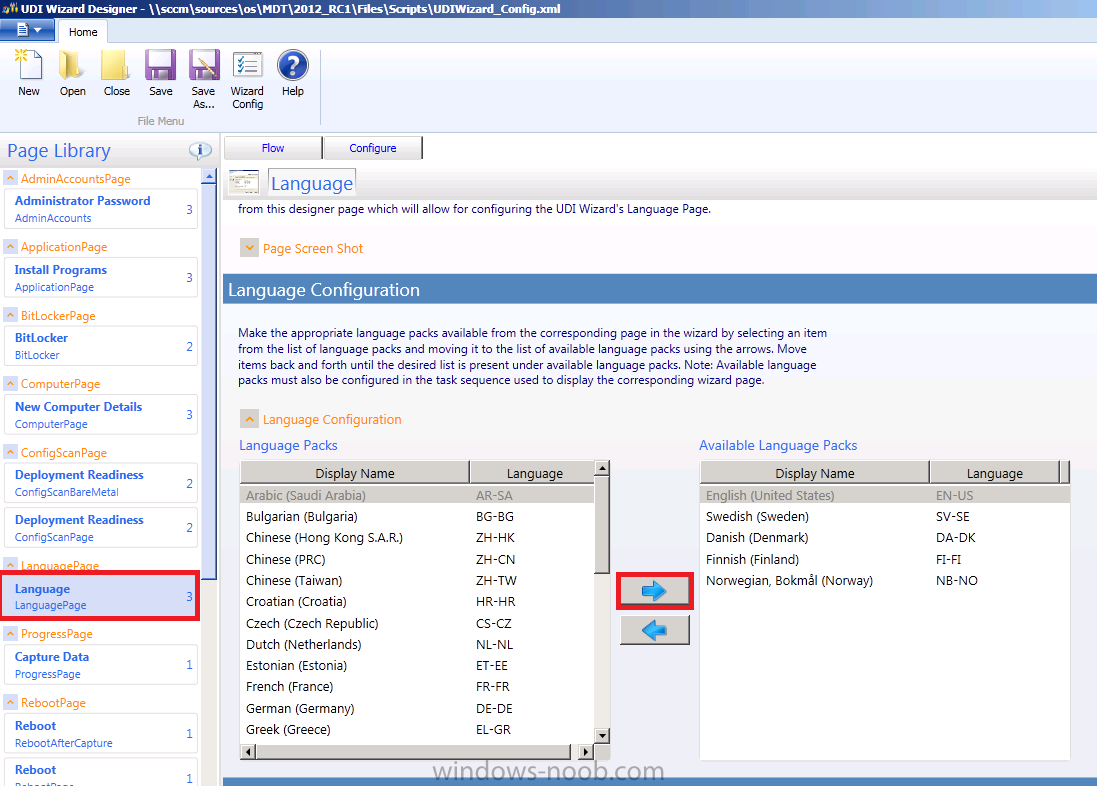
Next open the Languages Page and add a few more languages (i’m using the scandinavian ones…) if you want,
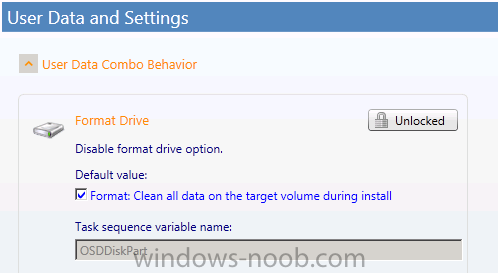
and then scroll down to the Volume page and select the User data and settings option, place a checkmark in the Format box…
ok that’s us done in the UDI Wizard designer so save your XML file and don’t forget to Update your distribution points for the MDT Toolkit Files package.

Step 3. Create Language Packs
Note: Perform the following on the ConfigMgr 2012 server as SMSadmin
If you have read my Customizing Windows 7 series you’ll have seen that we added language packages offline using MDT 2010 update 1 in Configuration Manager 2007, we will use similar functionality here in Configuration Manager 2012 RC2 but with MDT 2012 RC1. But before we do, we need some language packages added. I will add Danish here and I expect you to add whatever languages you are interested in.
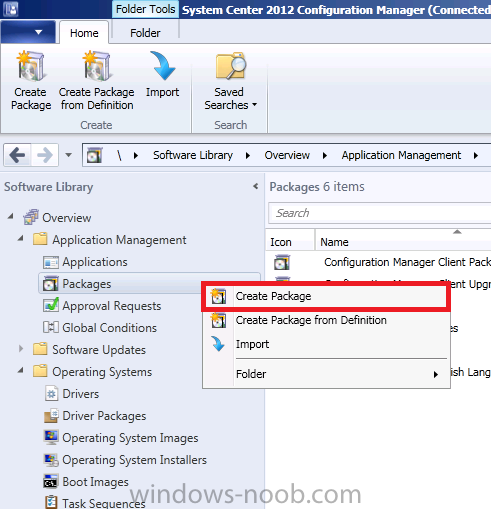
In the ConfigMgr console click on Packages , select Create Pacakge from the ribbon or right click and select Create Package.
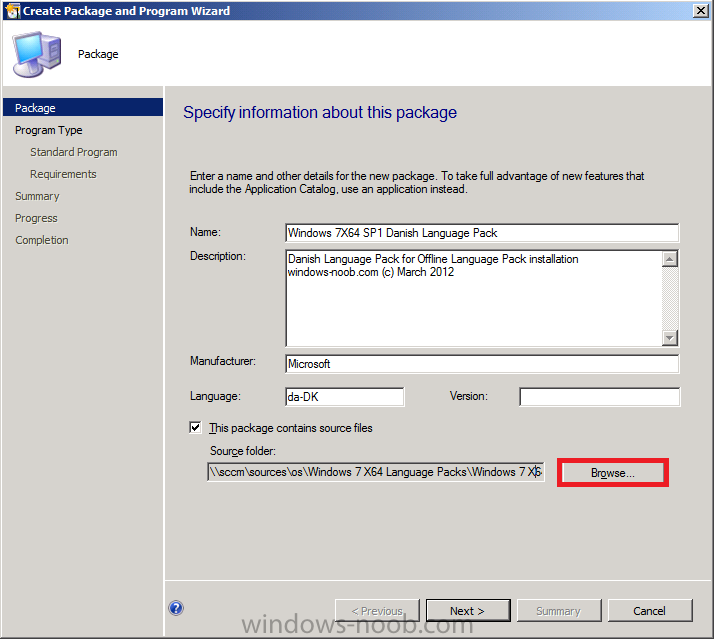
give the language pack some useful name like Windows 7 X64 SP1 Danish Language Pack and details so that it’s easy to find in the task sequence later on…click on Browse and select the folder where you have your Danish langauge pack (eg: \\sccm\sources\os\Windows 7 X64 Language packs\Windows 7 X64 – Danish)
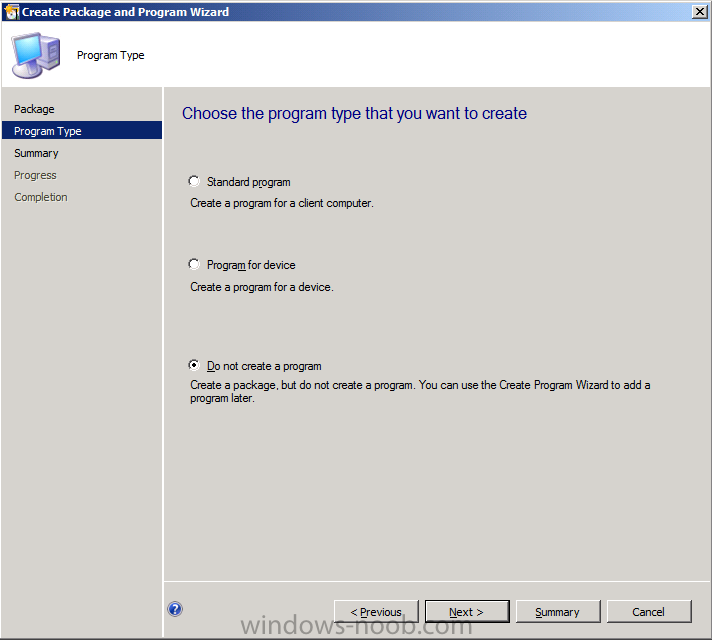
click next and then select Do not create a program
click your way through the rest of that wizard.
Note: when the package is created add it to your distribution points and update it to the dp’s. Repeat the above for all language packs you intend to use in your UDI task sequence.
once done we should have all the Language Packages we need and intend to use created and distributed like below:-

Step 4. Create a MDT UDI Client Task Sequence
Note: Perform the following on the ConfigMgr 2012 server as SMSadmin
We need to create a new MDT Task Sequence which leverages a User Driven Installation template, we will then edit it slightly before deploying to a Deploy Windows 7 X64 collection.
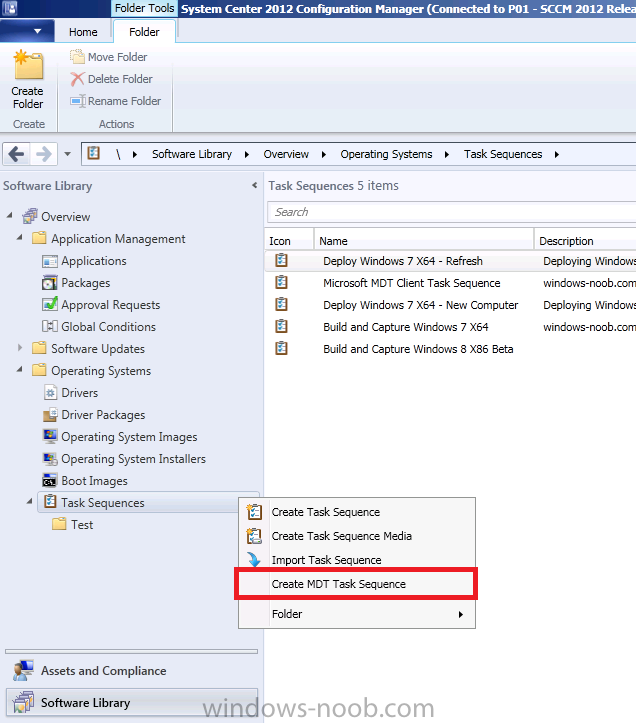
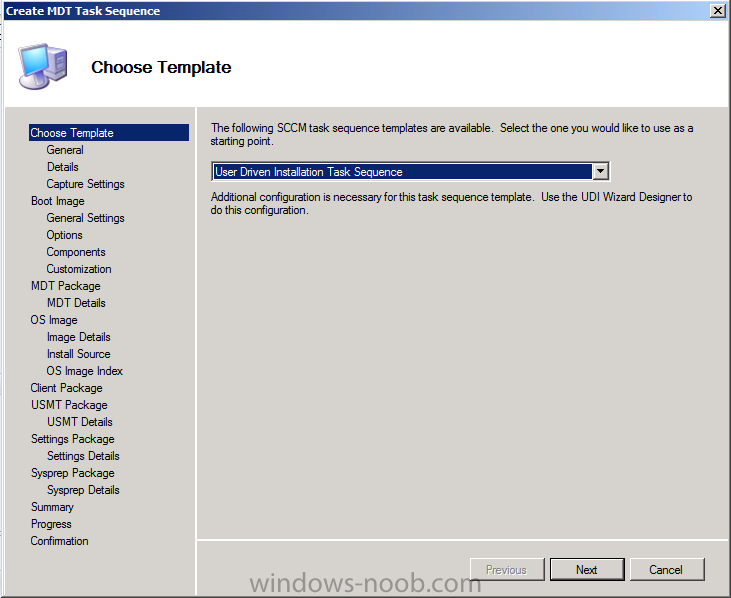
So right click on Task Sequences and choose Create MDT Task Sequence
when prompted to choose a template, select User Driven Installation Task Sequence from the drop down menu
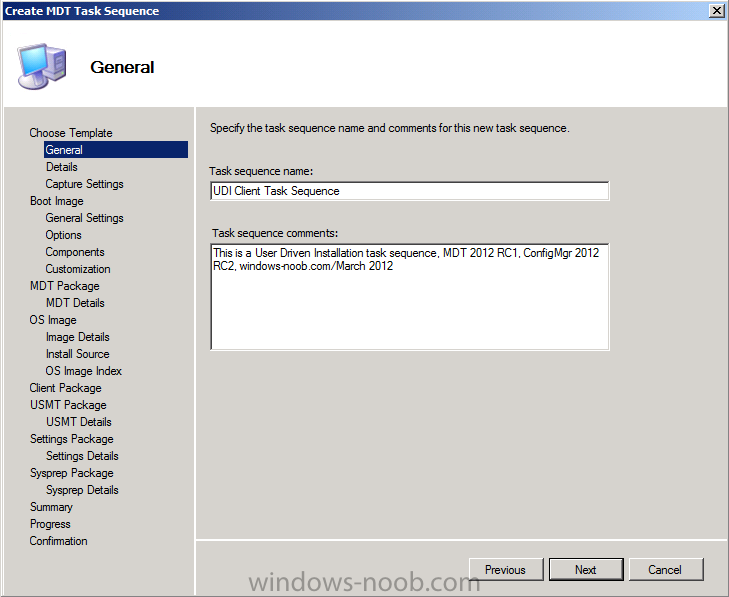
give the task sequence a name like UDI Client Task Sequence
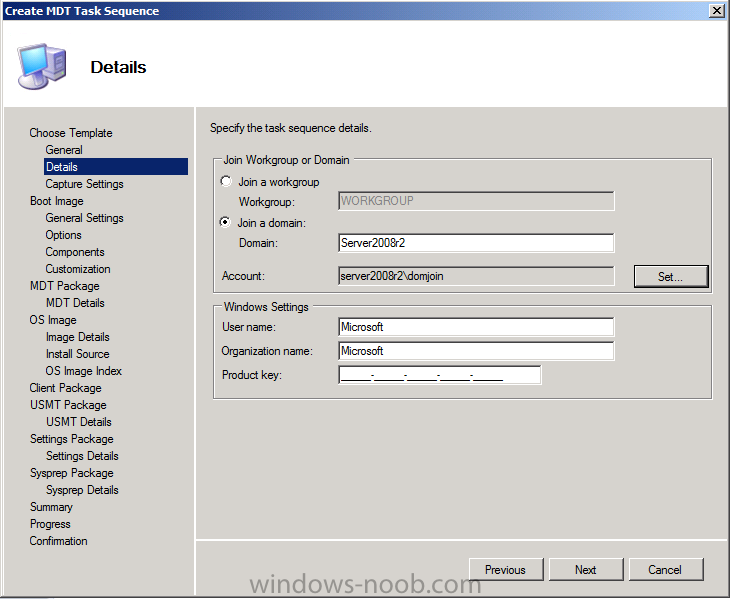
Enter domain details and Windows settings, nothing new here in fact we’ll be using our UDI xml file to replace the network settings later…
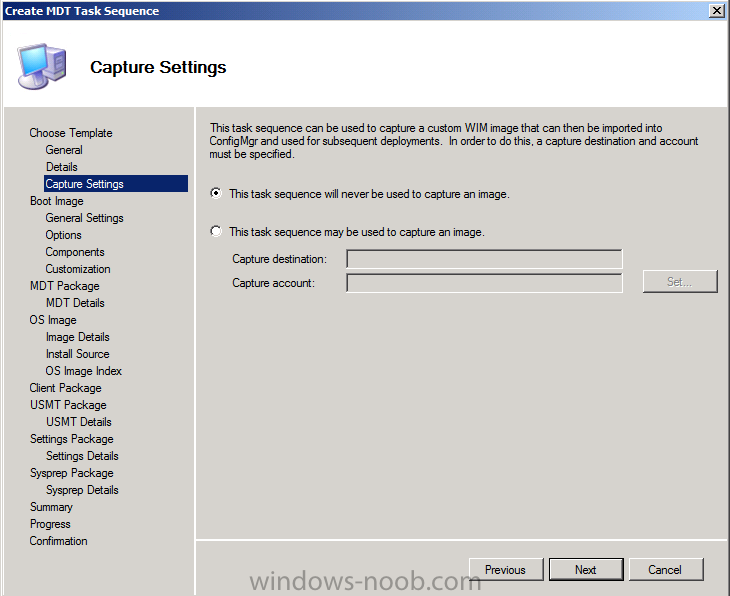
Select This task sequence will never be used to capture an image…
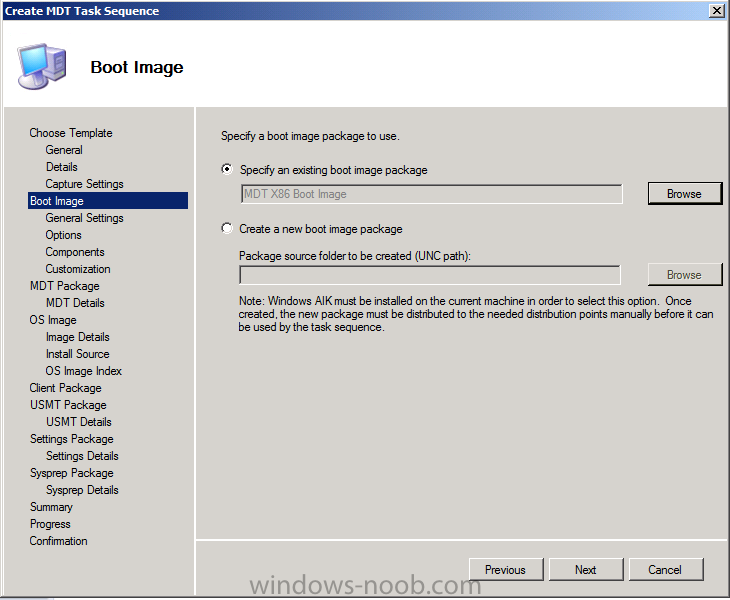
select our previously created MDT boot image
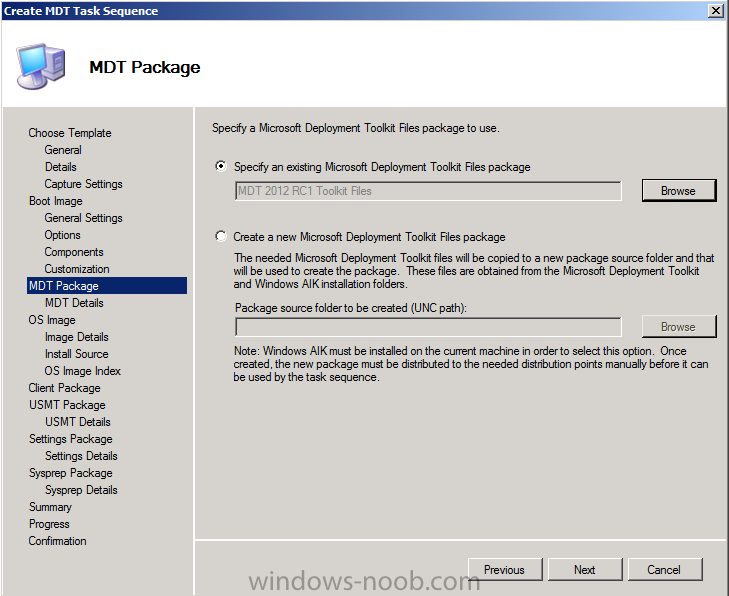
and our previously created MDT Toolkit Files package
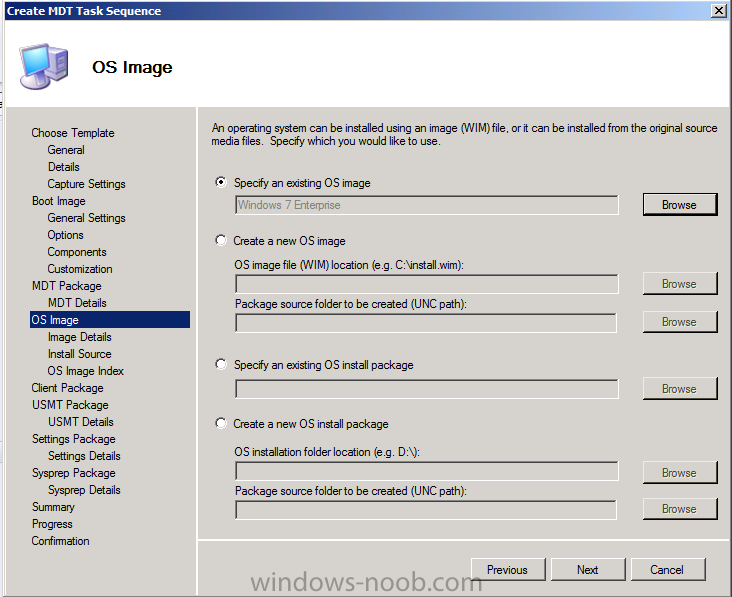
Next you get to specify the Windows 7 X64 image we captured in Part 7.
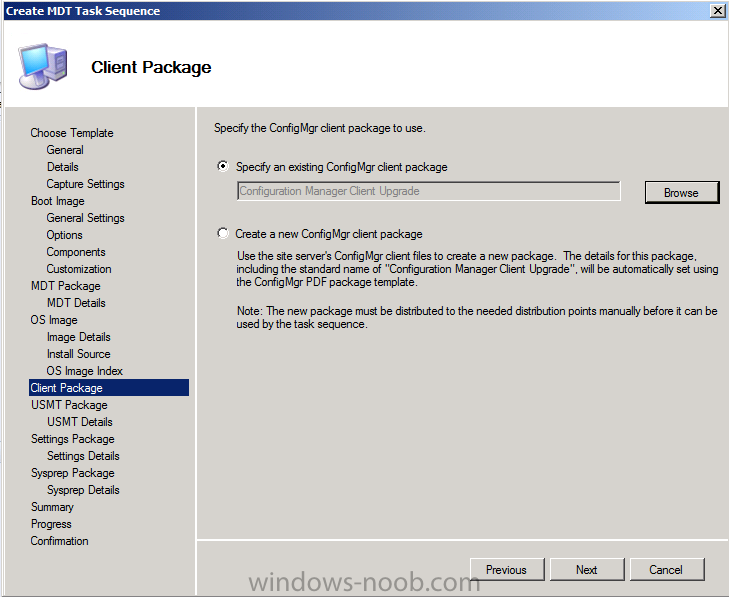
specify the Configuration Manager Client upgrade package which we also created in Part 7 (Step 5.).
and then specify the USMT 4 package
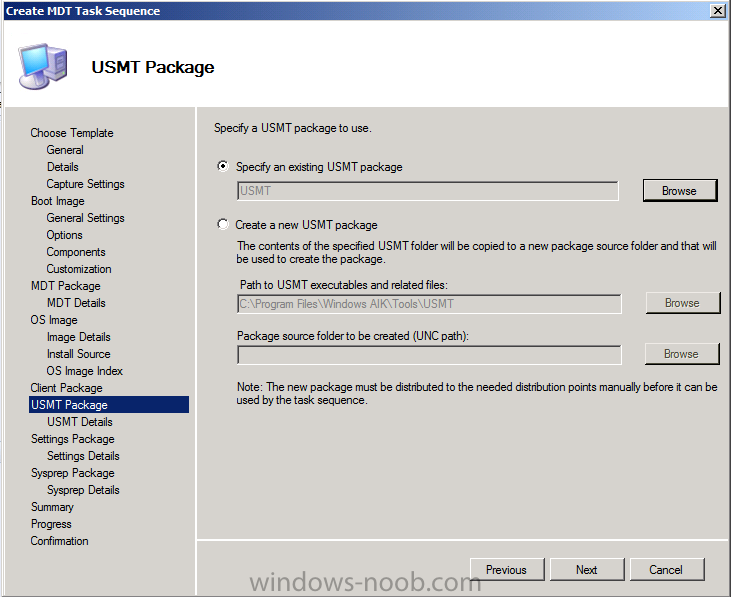
and next we specify our MDT Settings package, have patience we are getting there 🙂
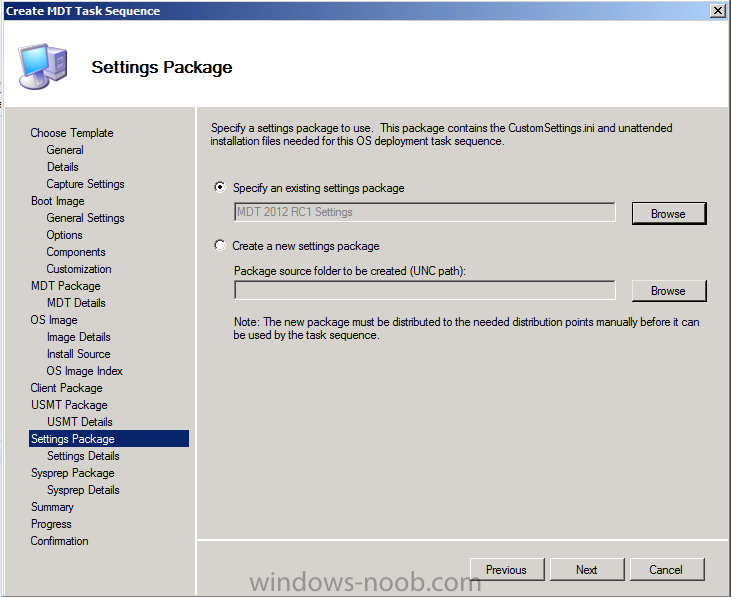
click next through to the confirmation message
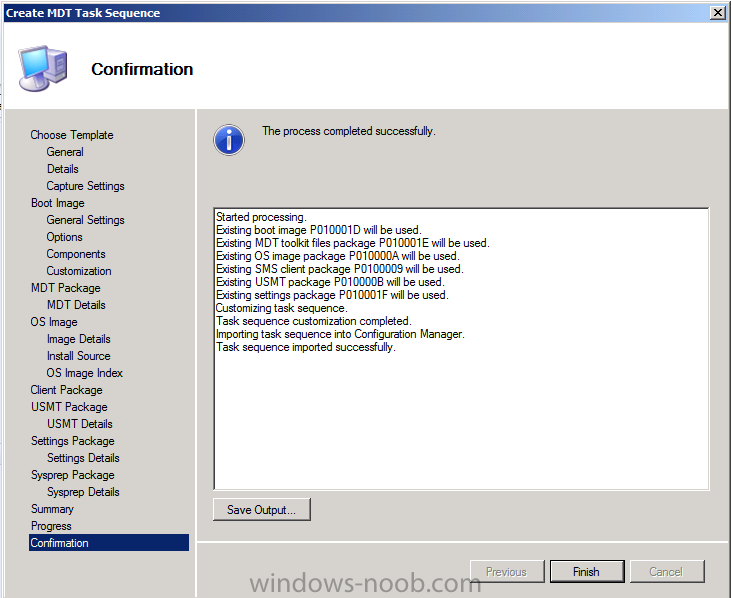
click Finish
Step 5. Edit the Task Sequence to add Language packs
Note: Perform the following on the ConfigMgr 2012 server as SMSadmin
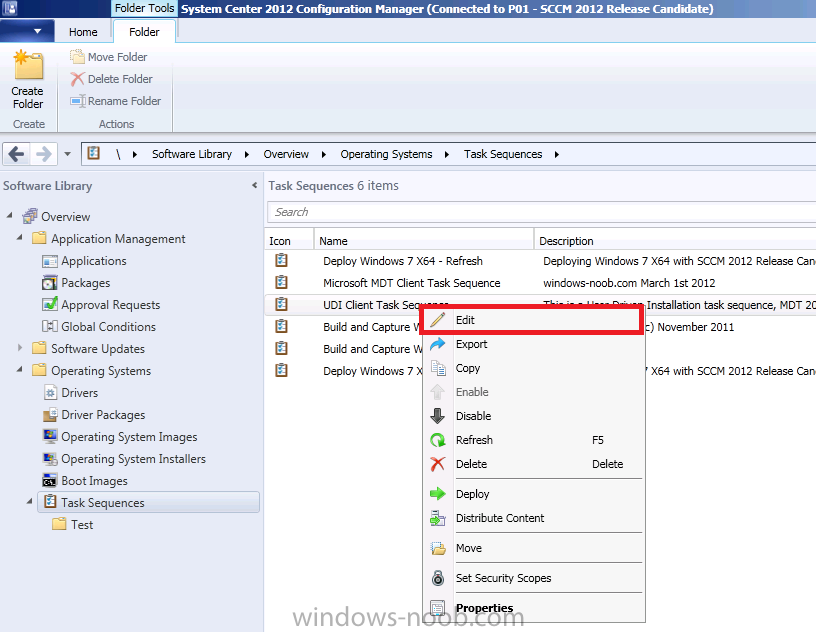
Language pack installation steps are not included in our UDI task sequence, so we have to add those steps, to do so right click on our newly created task sequence and choose Edit
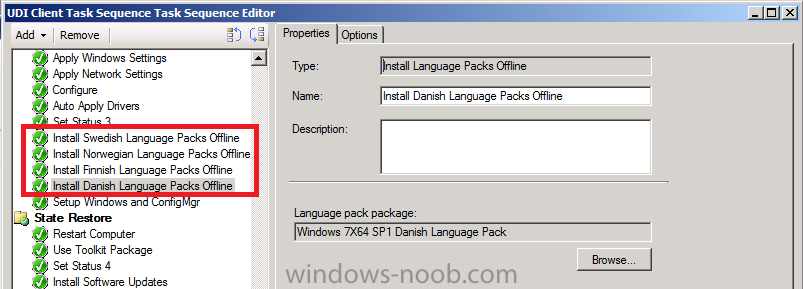
scroll down to the Post Install stage and to the Set Status 3 step (which occurs just before the Setup windows and configmgr step). This is where we need to add our new step(s) to install language packs offline.
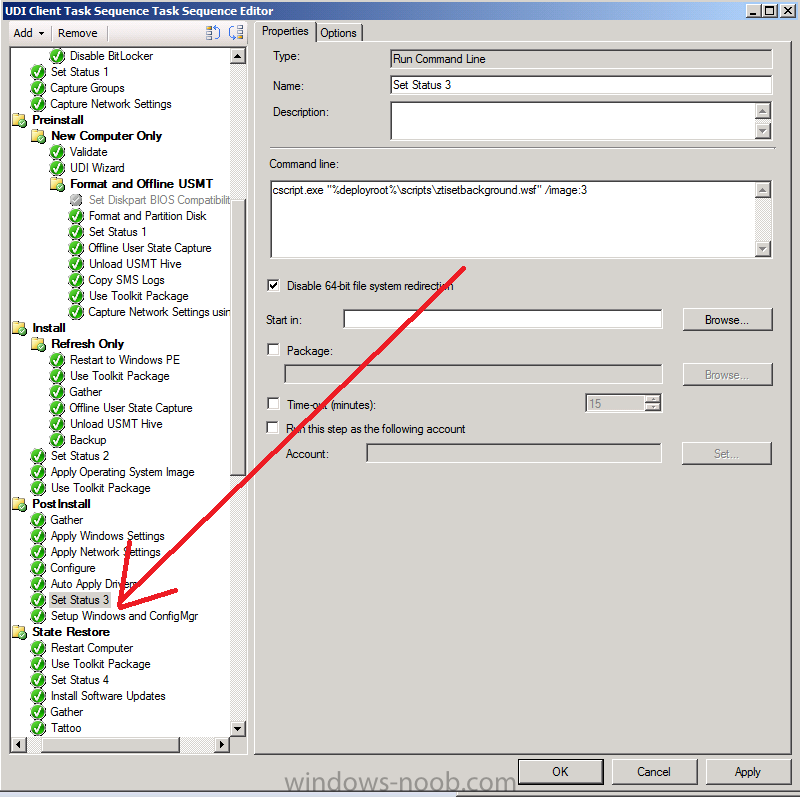
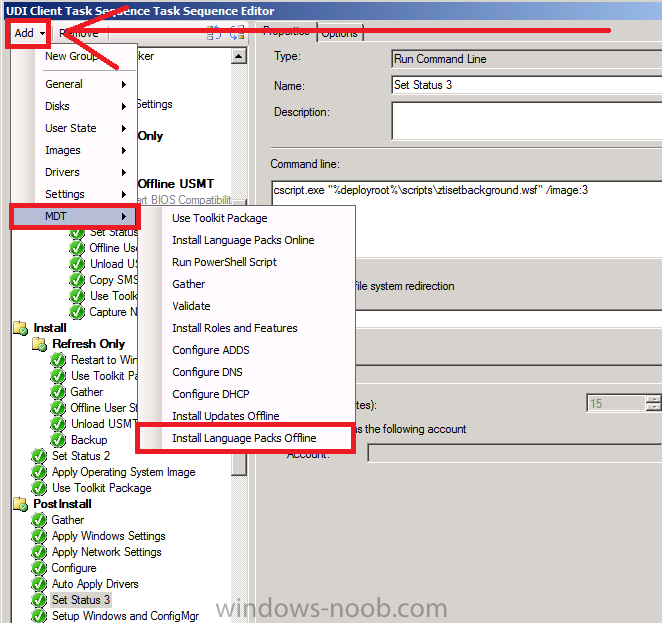
In the top left corner of your task sequence, click on Add, scroll down to MDT and choose Install Language Pack offline, these options are only available after MDT is integrated with ConfigMgr
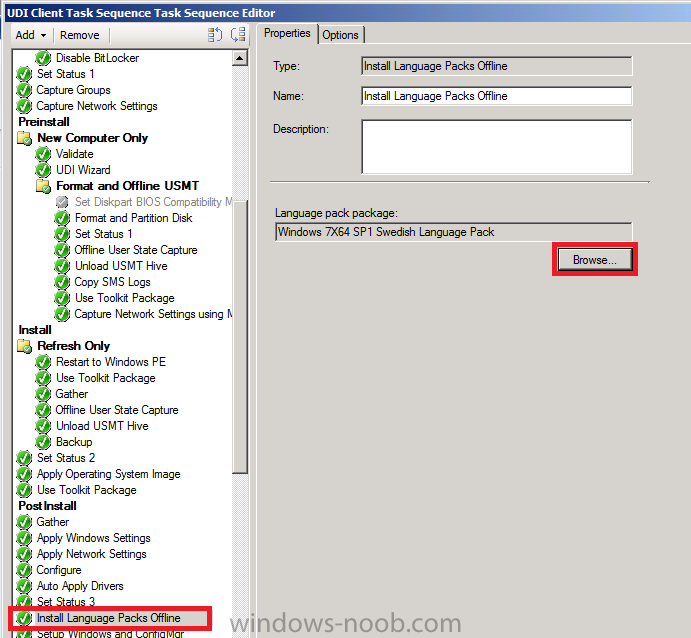
click on Browse and select your Swedish Language pack (or whatever language you are adding)
click on the options tab for that step and add the following options, Task Sequence variable UIlanguage equals SV-SE
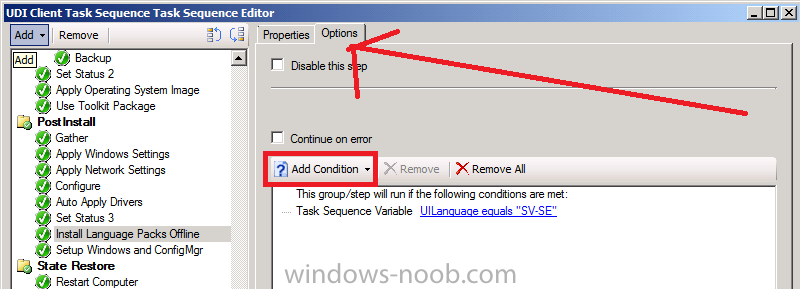
Note: repeat the above process to add a new Install Language Pack Offline step for each Language you want to add, rename each step to correspond to the language you are installing and obviously the SV-SE task sequence variable in the options tab will have to correspond to the correct language, eg DA-DK for Danish etc..
click Apply and then ok the save the changes to your Task Sequence.
Step 6. Deploy the Task Sequence
Note: Perform the following on the ConfigMgr 2012 server as SMSadmin
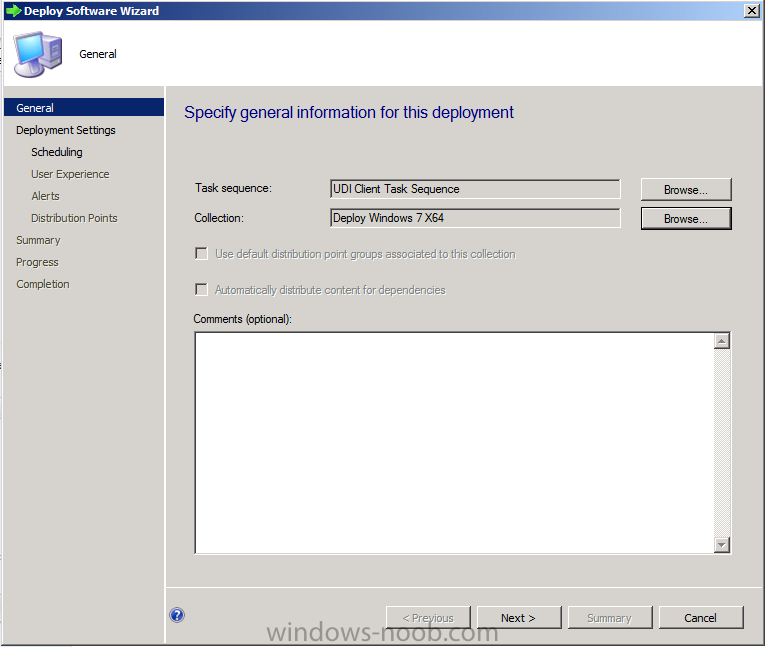
Right click the Task Sequence, choose Deploy

choose the Deploy Windows 7 X64 collection
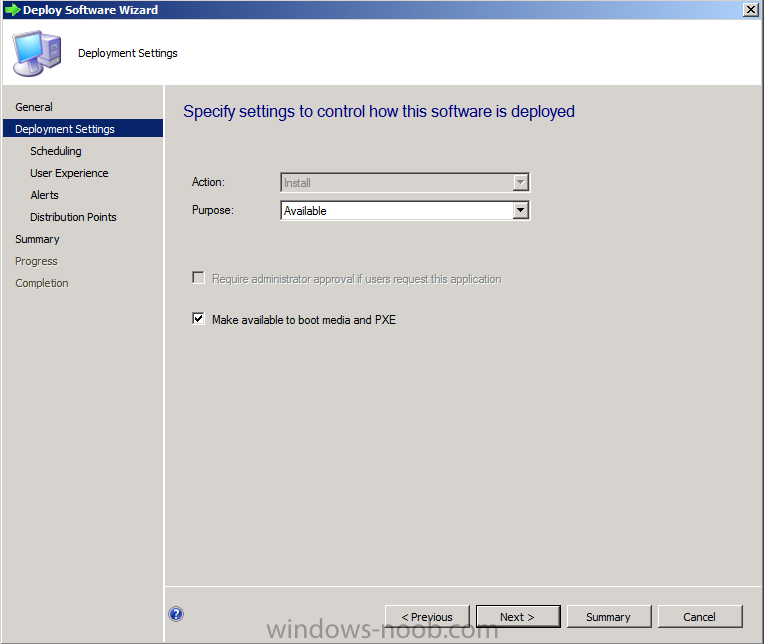
set it to Available and make it available to boot media and PXE, continue through the rest of the wizard.
once done, add a new virtual machine to your Deploy Windows 7 X64 collection, you can use this process if you wish.
Step 7. PXE Boot a client and review the UDI process
Note: Perform the following on virtual machine as a testuser
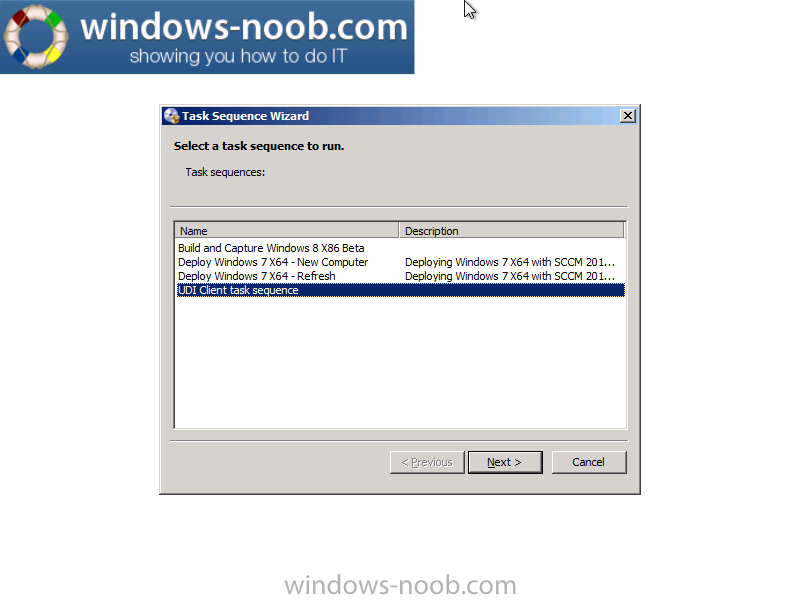
After PXE booting our new virtual machine
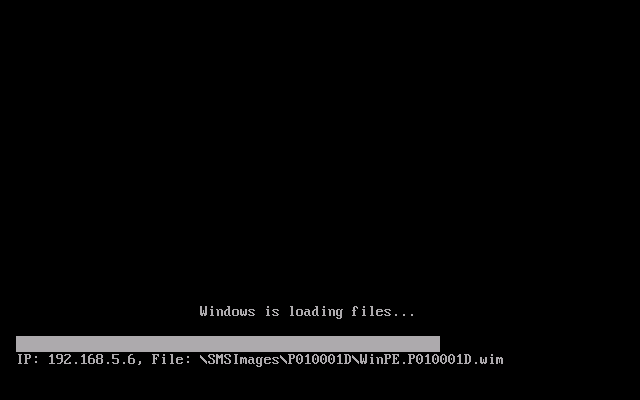
we get to see the list of available task sequences, note the really cool background 😉
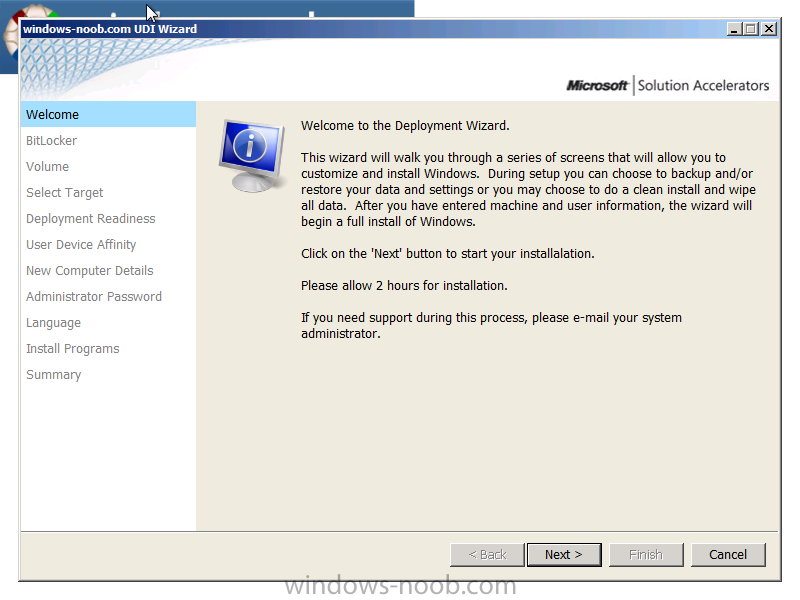
after some moments of downloading the MDT Toolkit package, the UDI wizard appears !
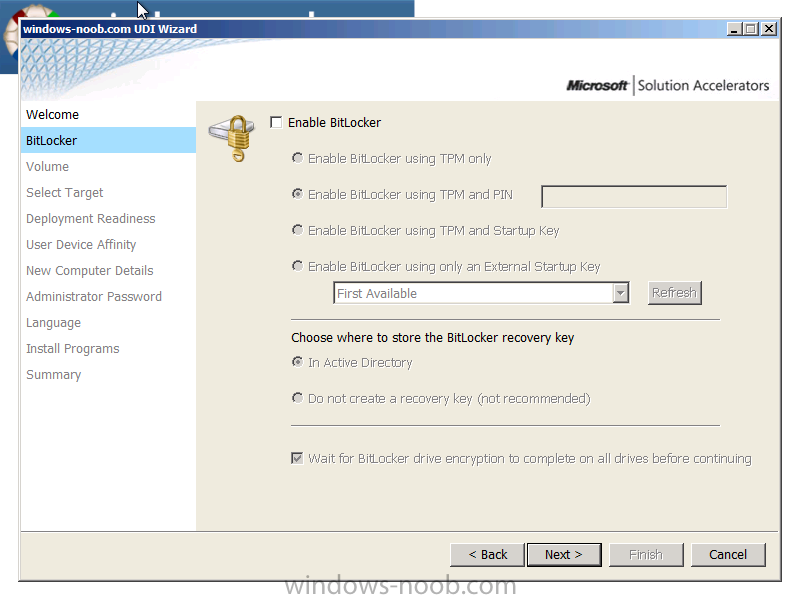
and you can click your way (as a user driven installation is supposed to be done, by the end-user) through the wizard, the first screen after the welcome screen is the BItlocker screen, it’s not enabled as we removed that option
next we see the Volume screen, notice that Partition and format disk is selected already, we did that in the UDI Wizard Designer above.
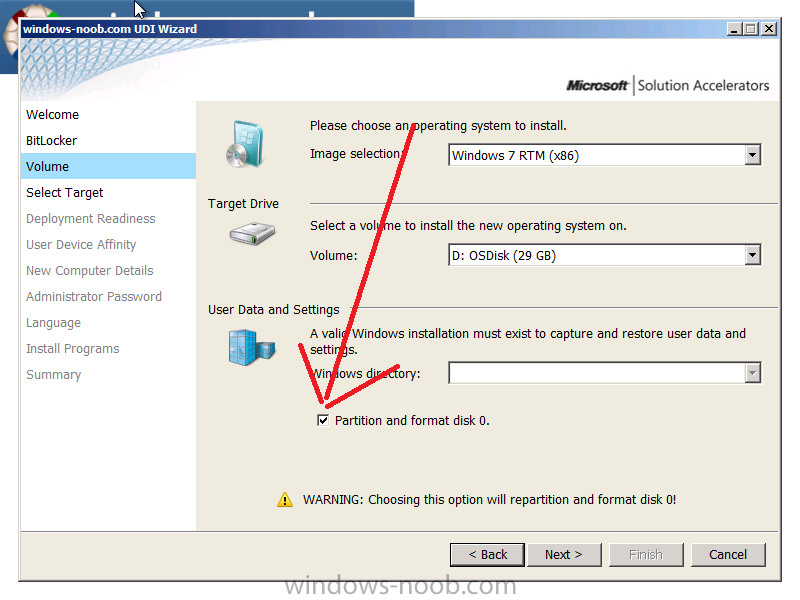
This is a new computer so we are not restoring any data, so click next at that screen
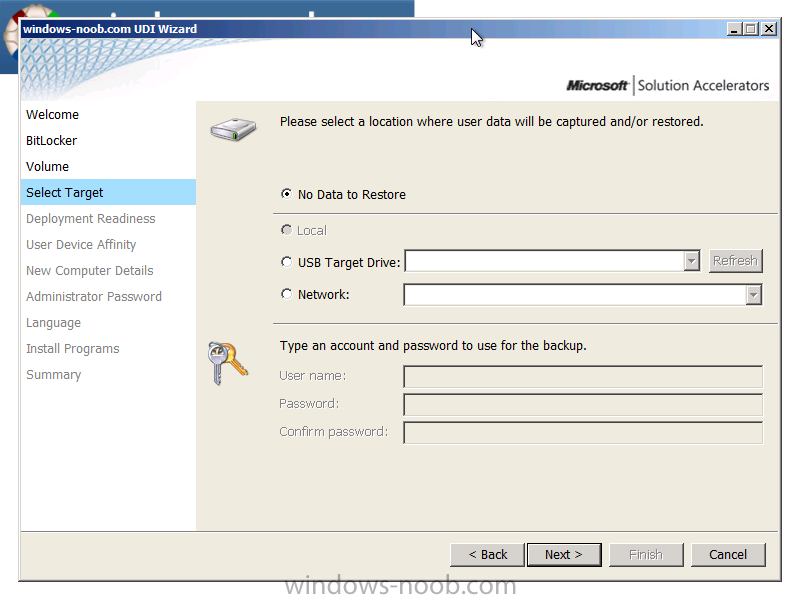
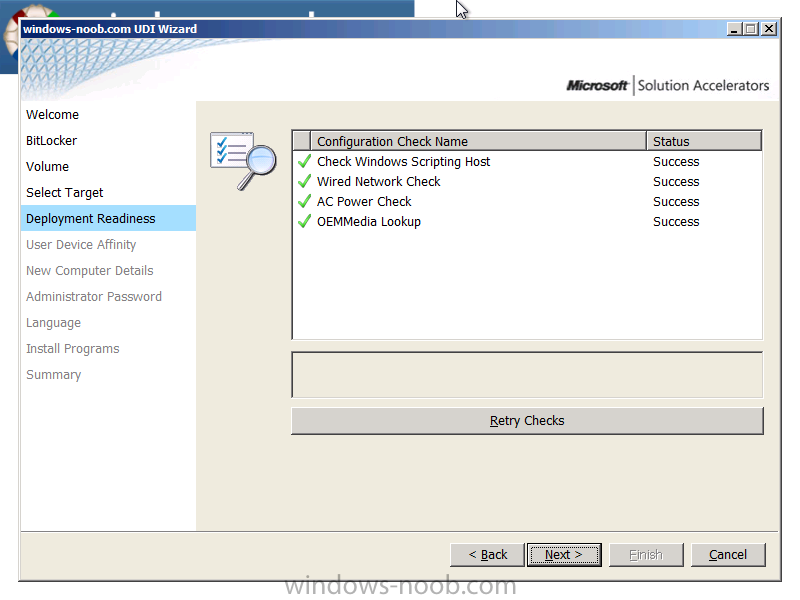
the Deployment Readiness screen appears, this changes depending on New computer or refresh scenario and just lists the checks it performs you can retry checks in the event that you forgot to connect power to a laptop or whatever..
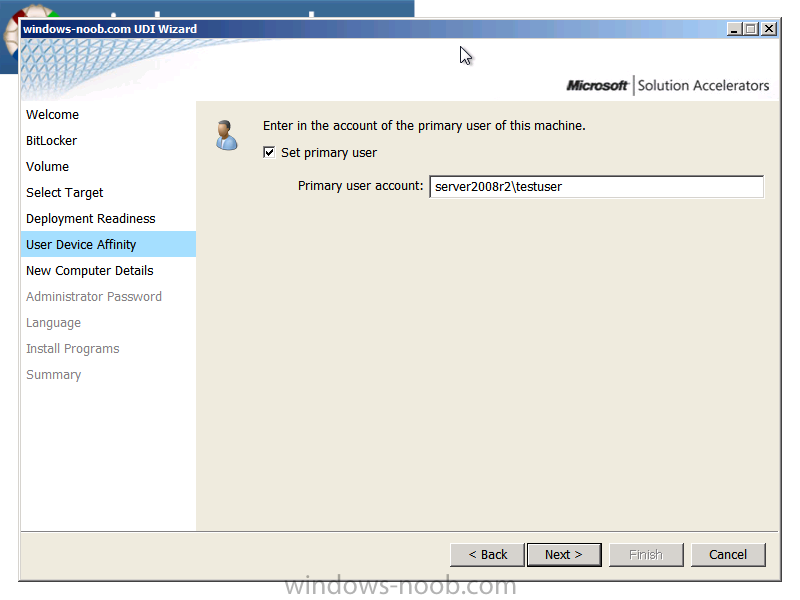
next you get the User Device Affinity screen, enter a primary user if you wish and click next, i guess you could call this the UDI UDA user screen
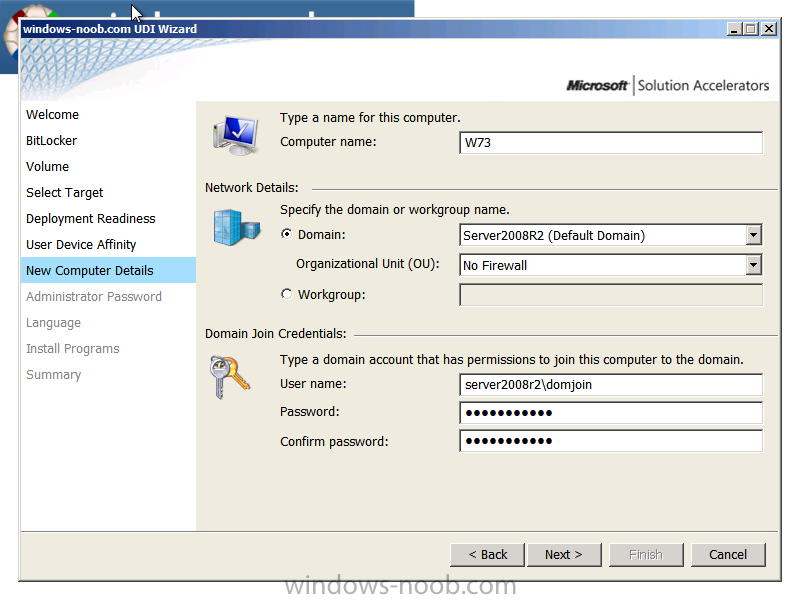
and we can choose domain/OU based on what we entered in our UDI Wizard designer, enter the Domain Join credentials (password) to continue..
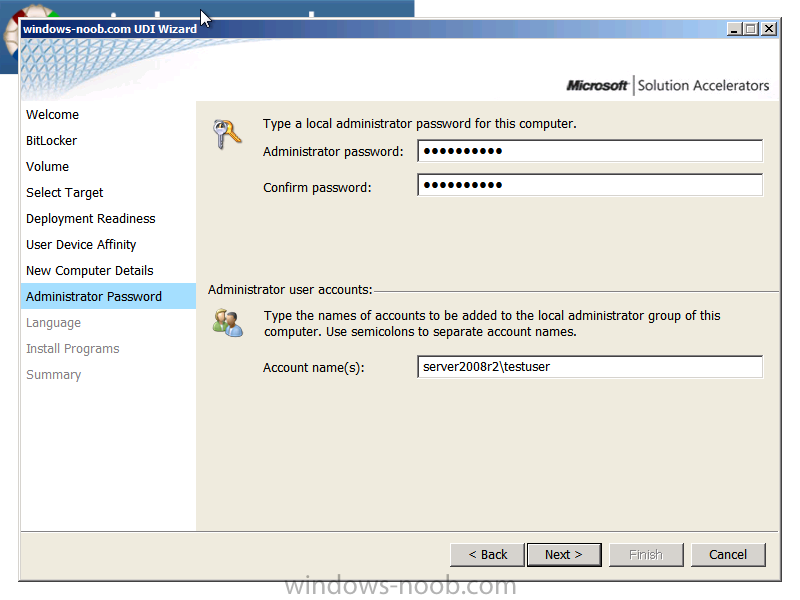
enter the local administrator password and specify a user (or users) to add to the local administrators group
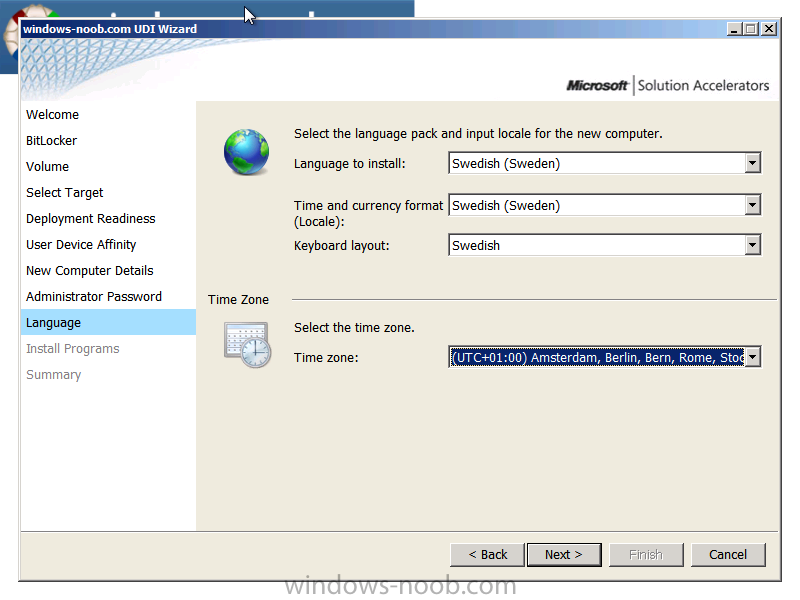
select your language and regional settings, notice how there are as many languages *listed to install* as you added in the UDI Wizard designer
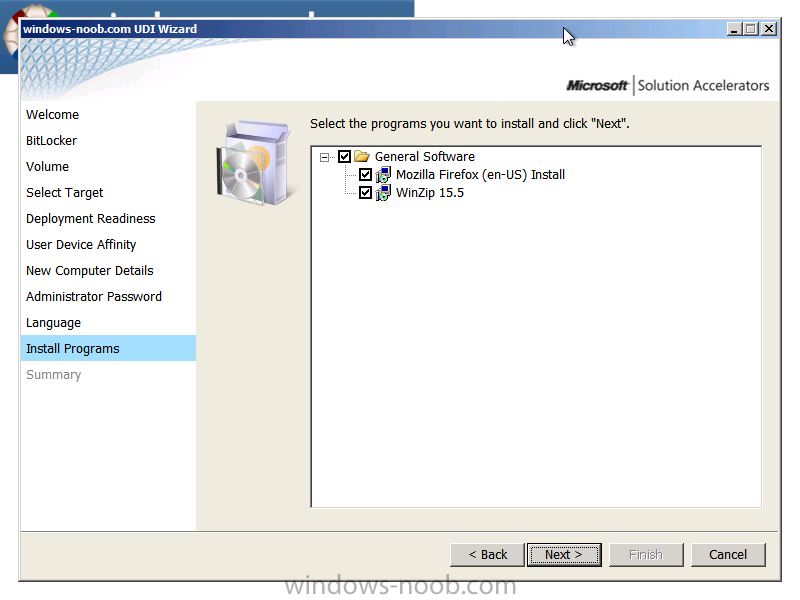
for the Install programs screen, you can see the apps we added earlier, you can select or deselect them and click next to continue, cool huh ?
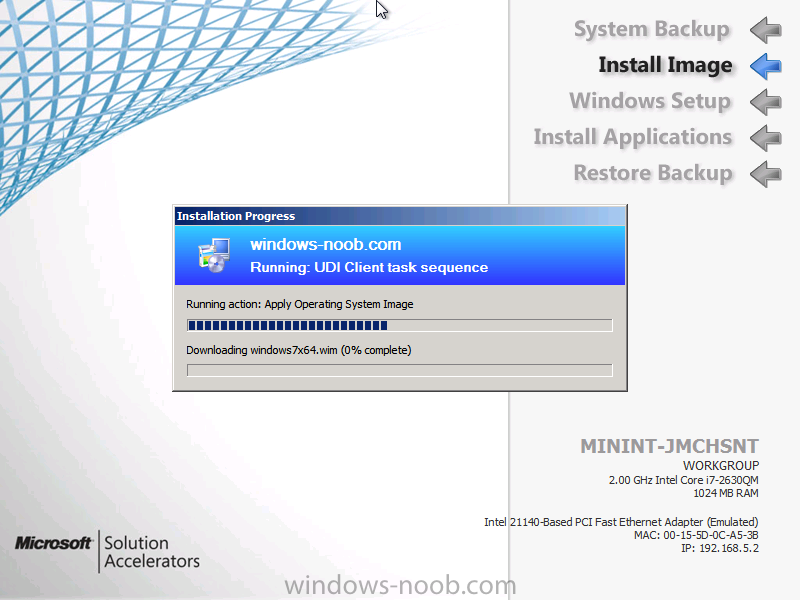
click next at the summary and let the installation begin, note how it shows you what stage it’s on via a changing background picture
In the next part we’ll review the deployed computer, verify that it is using the correct language settings and applications as defined in the User Driven Installation and see what else we can do with MDT integration in ConfigMgr.
until then, cheers !
niall
