
In Part 1 of this series we got our AD and SCCM servers ready, and then we installed System Center 2012 Configuration Manager as a standalone Primary site. In Part 2 we configured the SCCM server further by adding some Windows Server roles necessary for the following Configuration Manager 2012 functionality, Software Update Point (SUP) and Operating System Deployment. In Part 3 we configured the server further by Enabling Discovery methods and creating Boundary’s and Boundary Groups. In Part 4 we configured Client Settings, Added roles and Distributed the Configmgr Client to our Computers within the LAB, then in Part 5 we enabled the Endpoint Protection Role and configured Endpoint Protection settings and targeted a collection called All Windows 7 Computers with these settings and policies.
In Part 6 we configured our SUP further to Deploy software updates to our All Windows 7 Computers and Build Windows 7 X64 collections. In Part 7 we used the Build and Capture process to create our Base Windows 7 X64 wim image. In Part 8 we created a USMT 4 package to migrate the users data using hardlinking and then we imported the captured image into ConfigMgr and created a Deploy Windows 7 X64 task sequence. We created a Deploy Windows 7 X64 Collection and set some User Device Affinity collection variables.
In Part 9 we created an Application, and created a deployment type for that application to only install if the Primary User
was True for that device (User Device Affinity), we then copied our
Task Sequence (duplicated it), deployed the new Task Sequence, added a
computer to the new collection and then PXE booted the computer to the
Deployment Menu. In Part 10
we monitored the Deployment process in a lot of detail to how UDA sent
state messages and we verified that our application installed on the
users Primary Device, in addition we modified our collection variables,
and added a prestart command to our boot image to prompt for the
SMSTSUdaUsers. In Part 11 we setup the Reporting Services Point Role and verified that reporting was working.
In Part 12 we demonstrated a new feature in ConfigMgr which allows us to Patch operating system WIM images using Offline Servicing. This means that you can apply Windows Updates by using Component-Based Servicing (CBS) to update the your previously captured WIM images. In Part 13 we looked at how Role Based Administration is used within ConfigMgr and we created a new custom role
to allow a user (or users within a Security Group) to view Software
Update Reports. This is useful because you will probably want one team
to take care of configuring and deploying software updates, and to grant
another (Management etc) the capability of reviewing Compliance
Reports. In Part 14 we performed a side-by-side migration from Configuration Manager 2007.
In Part 15, we deployed Windows 8 Consumer Preview
to see if it was possible, and indeed it was (it’s not supported by
Microsoft however). Now we will integrate the recently released MDT 2012
RC1 with Configuration Manager to avail of new features (features and
enhancements which can help to make large-scale desktop and server
deployments smoother than ever) that it provides through MDT
Integration. Having MDT integrated with ConfigMgr will give you lots of
benefits and abilities so I would definitely recommend you integrate it.
Note that in order to download this build of MDT you have to be
registered with the MDT program on Connect.
Quote
Support for Configuration Manager 2012 RC2: This
update provides support for Configuration Manager 2012 RC2 releases.
MDT 2012 fully leverages the capabilities provided by Configuration
Manager 2012 for OS deployment. The latest version of MDT offers new
User-Driven Installation components and extensibility for Configuration
Manager 2007 and 2012. Users now also have the ability to migrate MDT
2012 task sequences from Configuration Manager 2007 to Configuration
Manager 2012.
Step 1. Download MDT 2012 RC1 and Install it.
Note: Perform the following on the ConfigMgr 2012 server as SMSadmin
MDT 2012 RC1 is available for Microsoft Connect customers from the following location.
As we are using Server 2008 R2 (64bit OS) we will download and install
the 64 bit version of the software
(MicrosoftDeploymentToolkit2012_x64.msi). Note that the connect site
requires a Microsoft Live Id to login. If your ConfigMgr console is
open, close it and then install the MSI by right clicking on the
downloaded MSI file and choose Install.
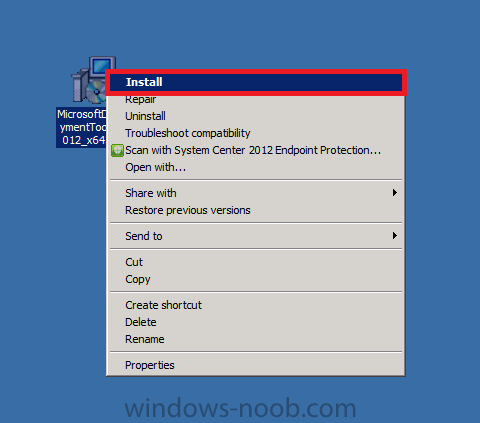
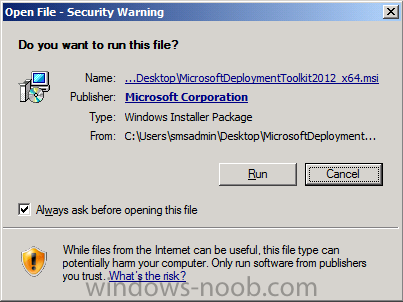
when the open file security window appears choose Run
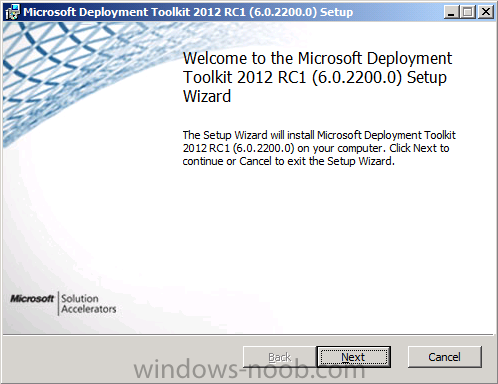
the Welcome to MDT wizard appears, click next
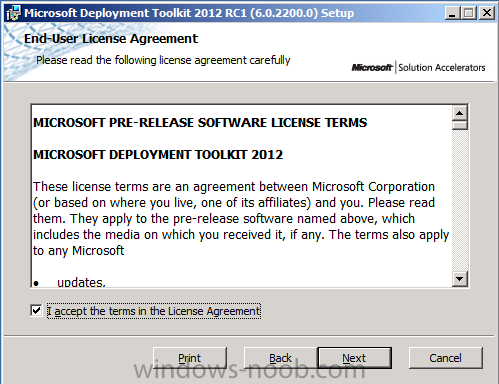
accept the EULA if you want to continue and click next
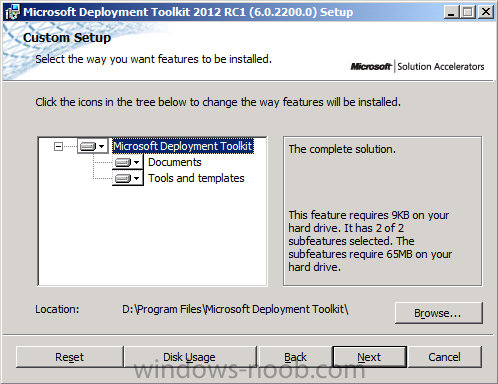
and next you get to choose where you want to isntall MDT, we will install it on D:\Program Files\Microsoft Deployment Toolkit\ so set your path accordingly
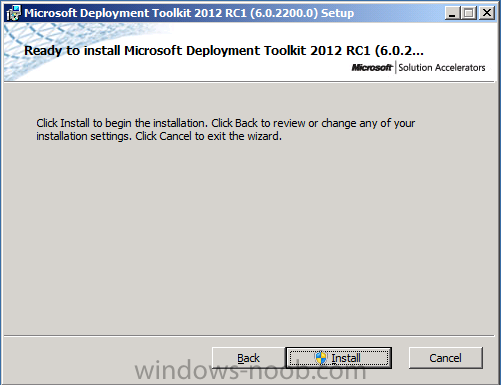
click next, and then click Install
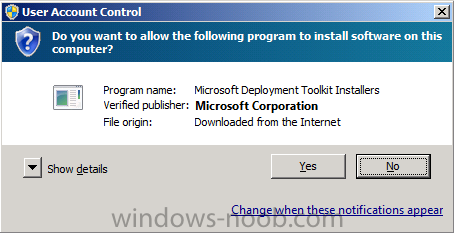
answer yes to the UAC prompt
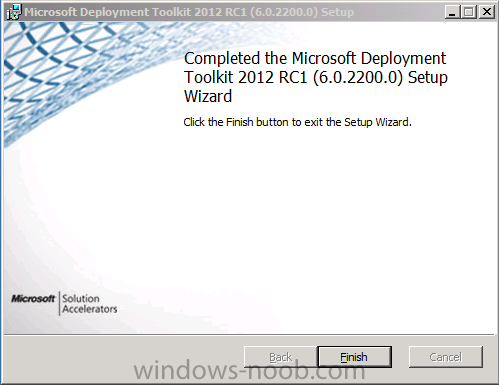
and finally it’s installed by clicking Finish.
Step 2. Integrating MDT with Configuration Manager
Note: Perform the following on the ConfigMgr 2012 server as SMSadmin
Now that you have installed MDT you want to integrate it (Configure
ConfigMgr Integration) with ConfigMgr. We do this to gain access to
tools and features that MDT provides from within the ConfigMgr console.
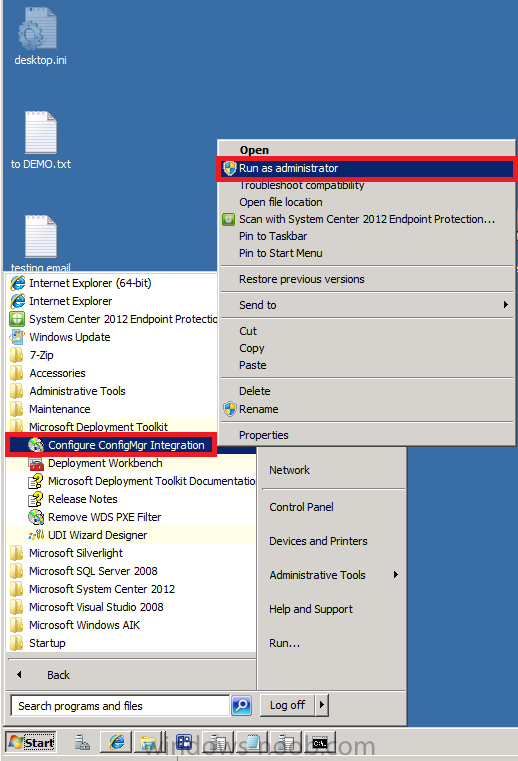
In the start menu, locate the newly installed Microsoft Deployment Toolkit application and expand it, locate the Configure ConfigMgr Integration shortcut and right click, choose Run as Administrator.
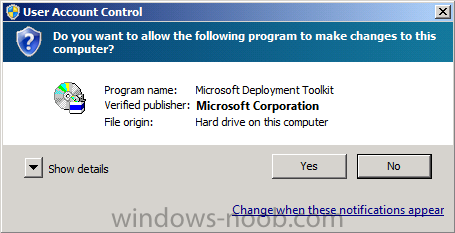
click yes when prompted by UAC
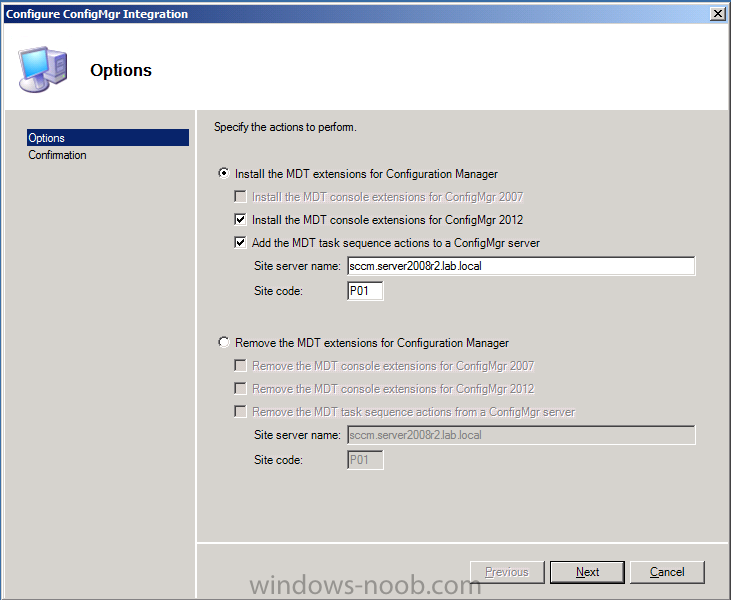
review the pre-populated options and click next
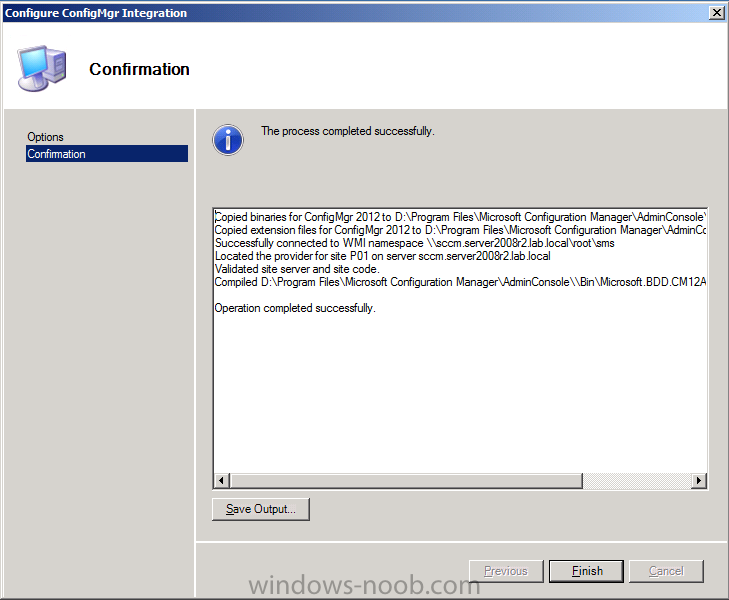
and review the Confirmation, make sure there are no issues reported otherwise your MDT Integration has failed
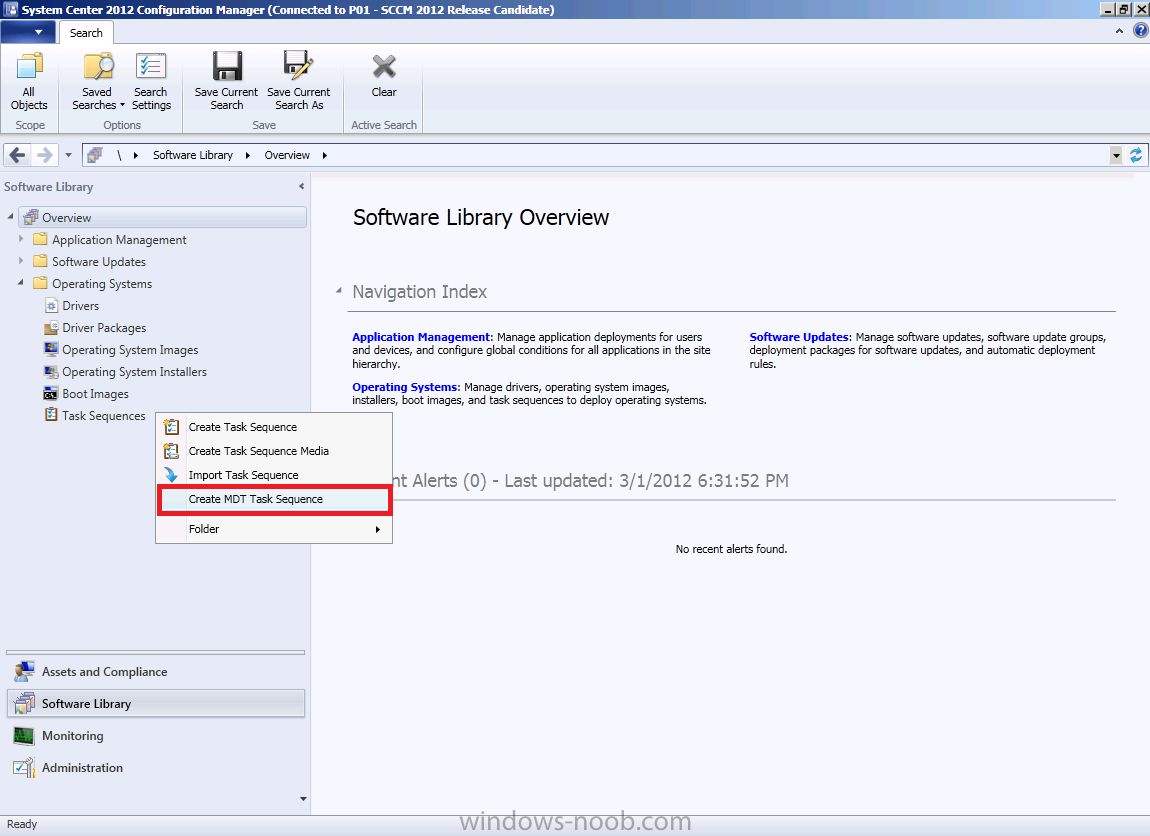
Step 3. Create a MDT Task Sequence in ConfigMgr
Note: Perform the following on the ConfigMgr 2012 server as SMSadmin
As we need the some MDT components such as MDT Boot image, MDT Toolkit
Files and MDT Settings packages created, we will go through creating an
MDT Task Sequence. Start up the ConfigMgr console and browse to Software Library, Operating Systems, right click on Task Sequences and choose Create MDT Task Sequence.
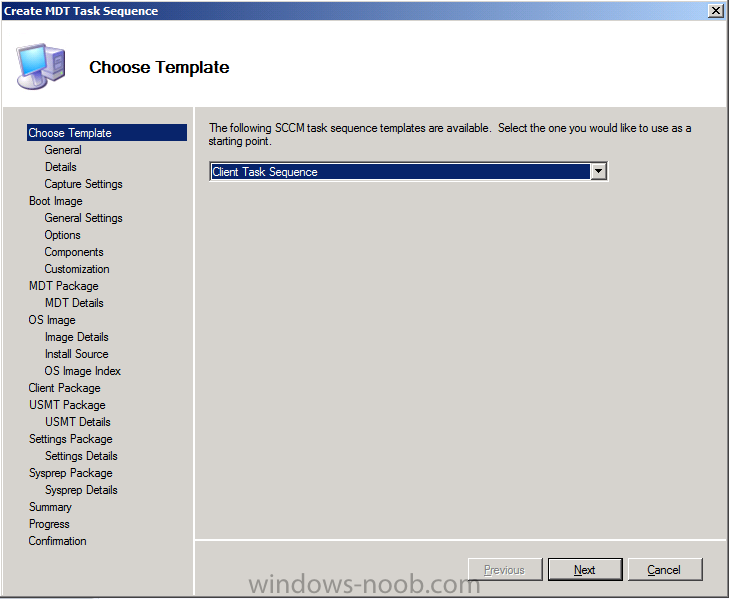
Choose a Template, there are several provided in the drop down menu, we will choose Client Task sequence
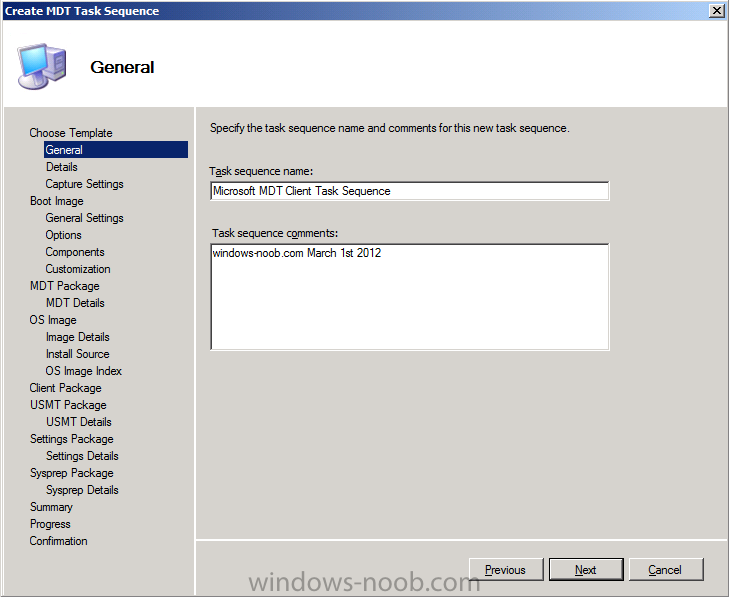
fill in the Task Sequence name and comments
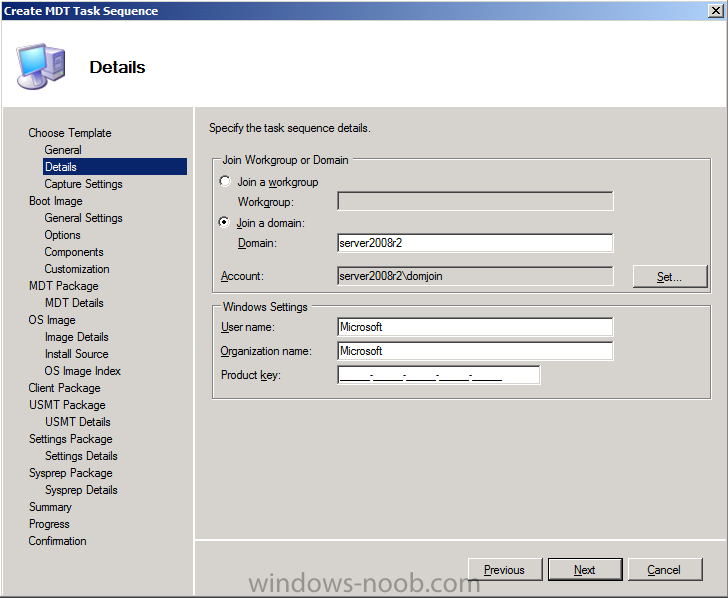
for Details, fill in your Domain Join credentials
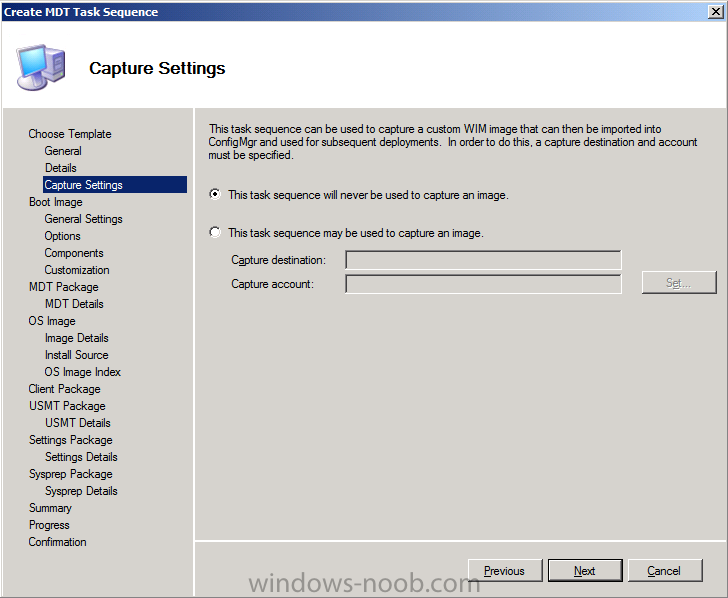
We are not going to catpure an image with this Task Sequence, as we are only using this Task Sequence to create the needed MDT Files and Settings packages…
for boot image, specify a previously created (empty folder) UNC path, eg: \\sccm\sources\os\boot\mdt\i386
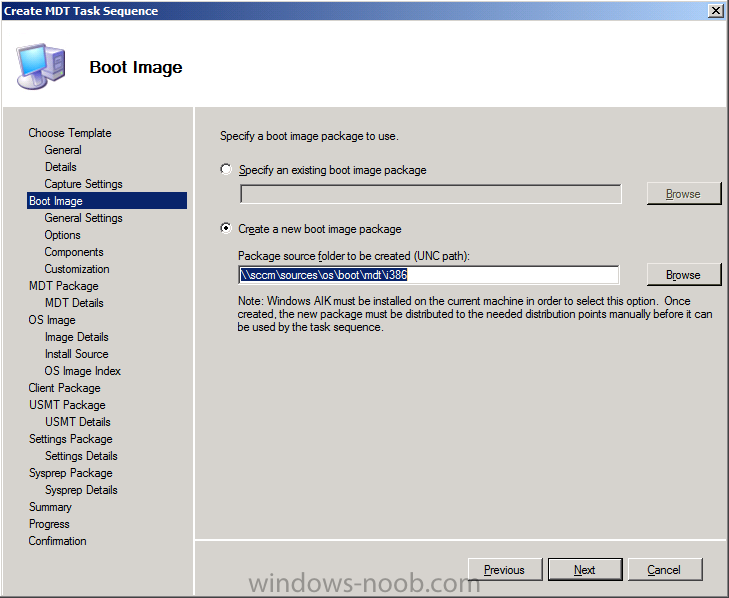
fill in some MDT boot image details

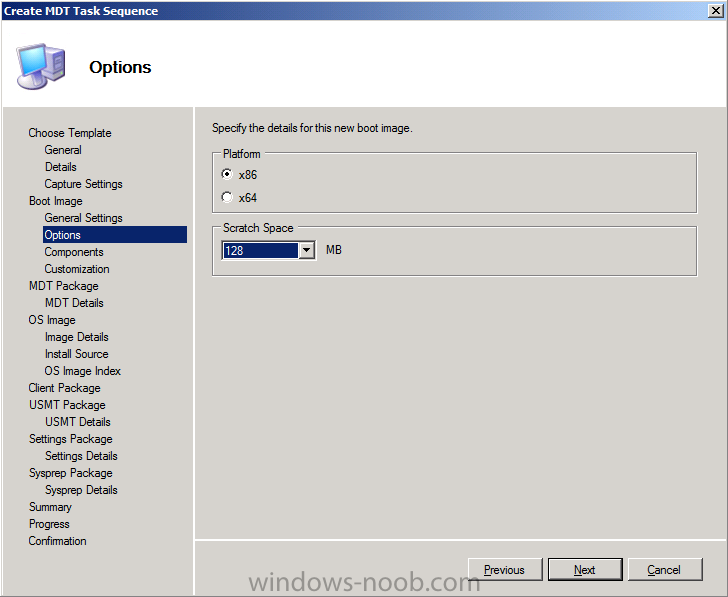
and for options specify the X86
architecture and set your scratch space (environment for MDT to use in
WinPE) to 128MB (to allow drivers etc…)
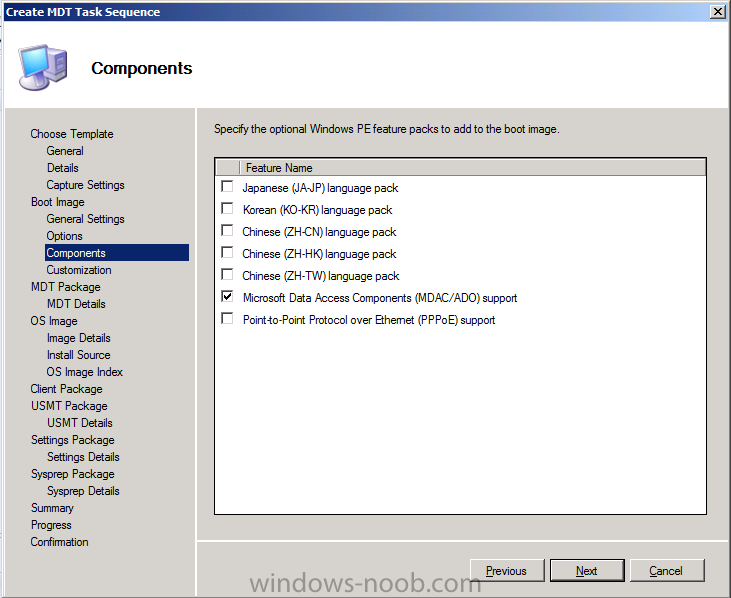
next select your optional WinPE components (language, MDAC/ADO support and PPoE)
and fill in your prestart, extrafiles and wallpaper options (all optional), make sure to leave F8 command prompt selected

Next we get to create our MDT Toolkit Files package, so select the Create a new Microsoft Deployment Toolkit Files package option, point it to a previously created path such as \\sccm\sources\os\mdt\2012_rc1\files
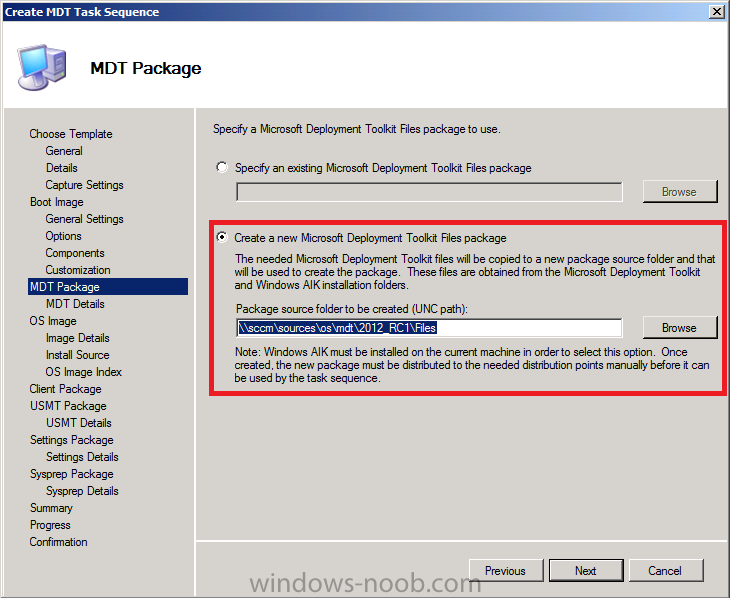
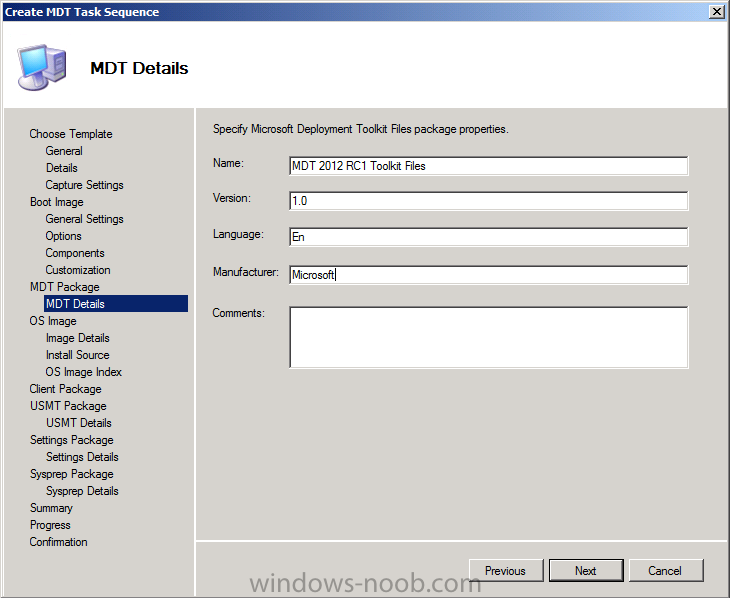
fill in details about the MDT Toolkit Files package..be descriptive as it’s common to have different versions of MDT Files in your lab (in the future)
for OS Image, specify an exiting image, select the Windows 7 X64 image we captured in part 7

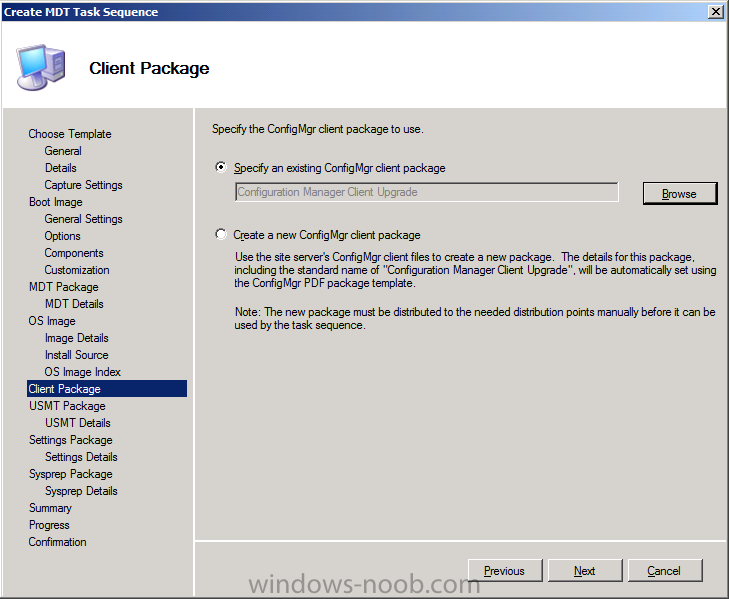
and then select our previously created Configuration Manager Client Package
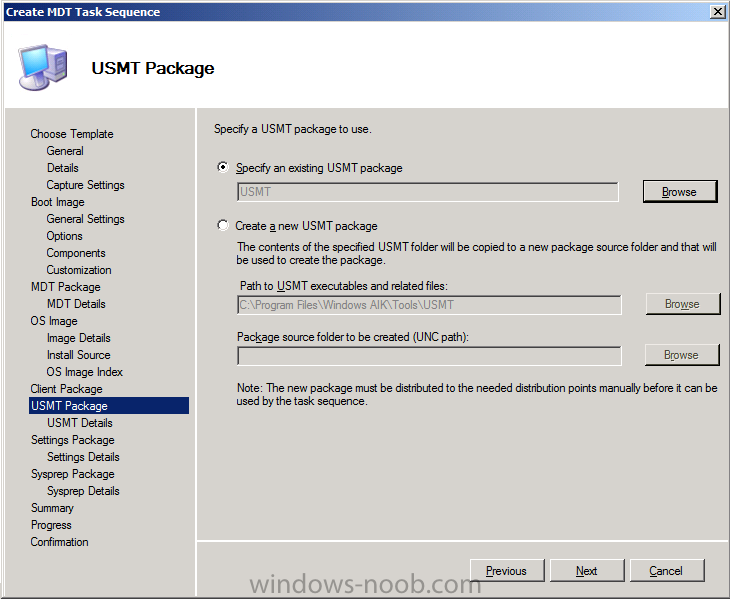
and our previously created USMT 4 package
for the Settings Package, we choose to create a new Microsoft Deployment Toolkit Settings Package, point it to \\sccm\sources\os\mdt\2012_rc1\settings
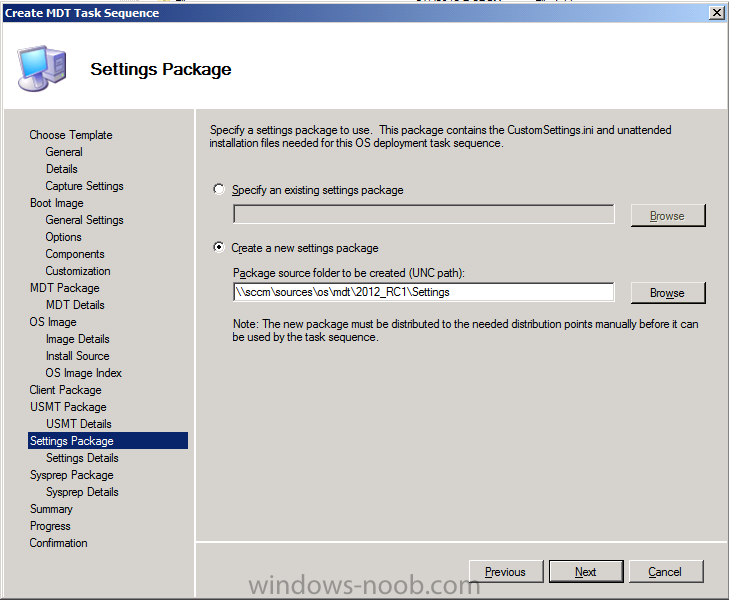
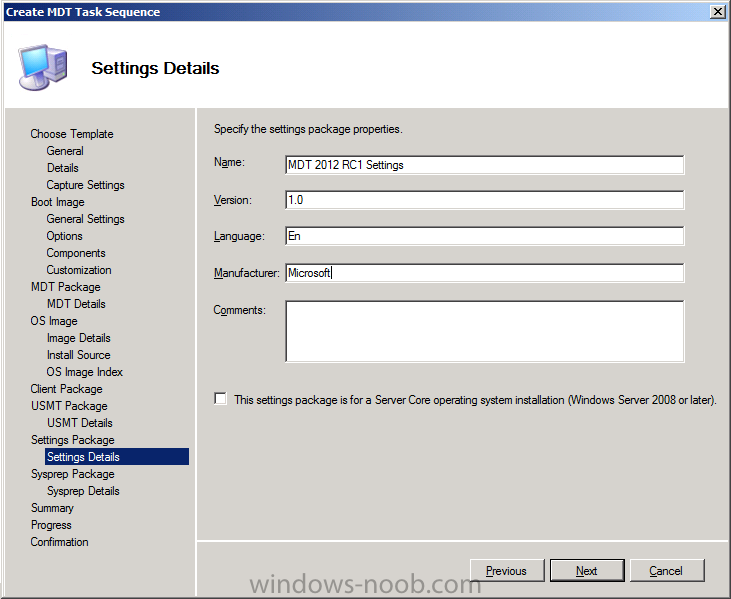
fill in the Settings Package details
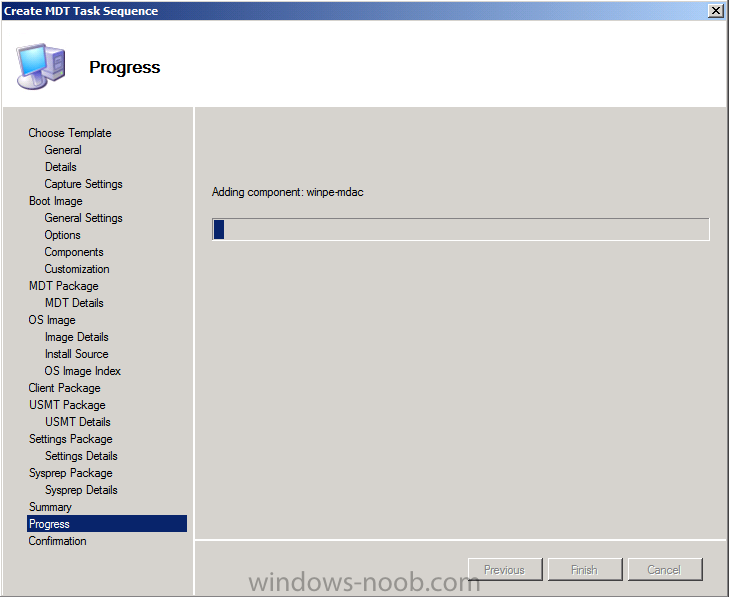
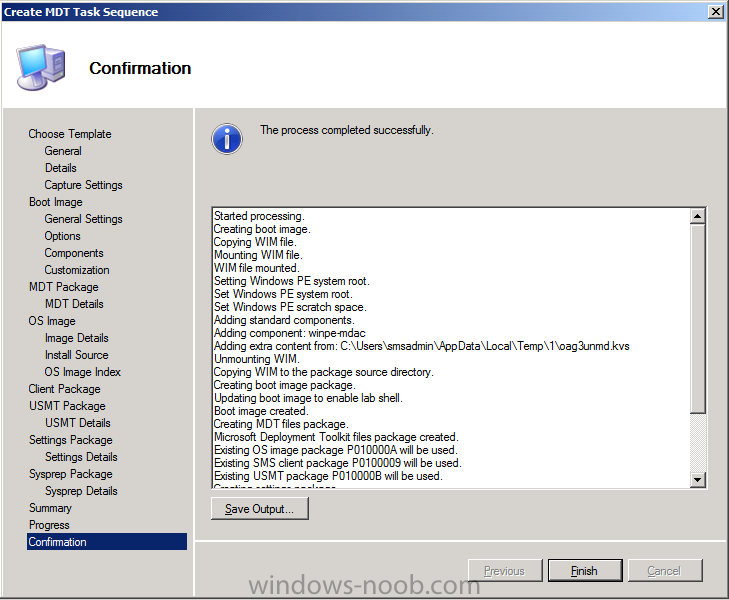
choose No Sysprep package and click next through the summary to Confirmation, answer Yes to any UAC prompt that may appear, at this point you can go take a long coffee break as this takes quite some time to mount the WIM image (boot) and create the packages and do it’s magic..
and finally it’s done !
Step 4. Distribute your new MDT packages and boot image to your distribution points
Note: Perform the following on the ConfigMgr 2012 server as SMSadmin
At this point, i’m sure we are all aware how to distribute content in
ConfigMgr, and now we have some new packages (MDT Files, MDT Settings)
and a new MDT boot image to distribute to our dp’s.
I’ll show you how to distribute one of these, you can do the rest.
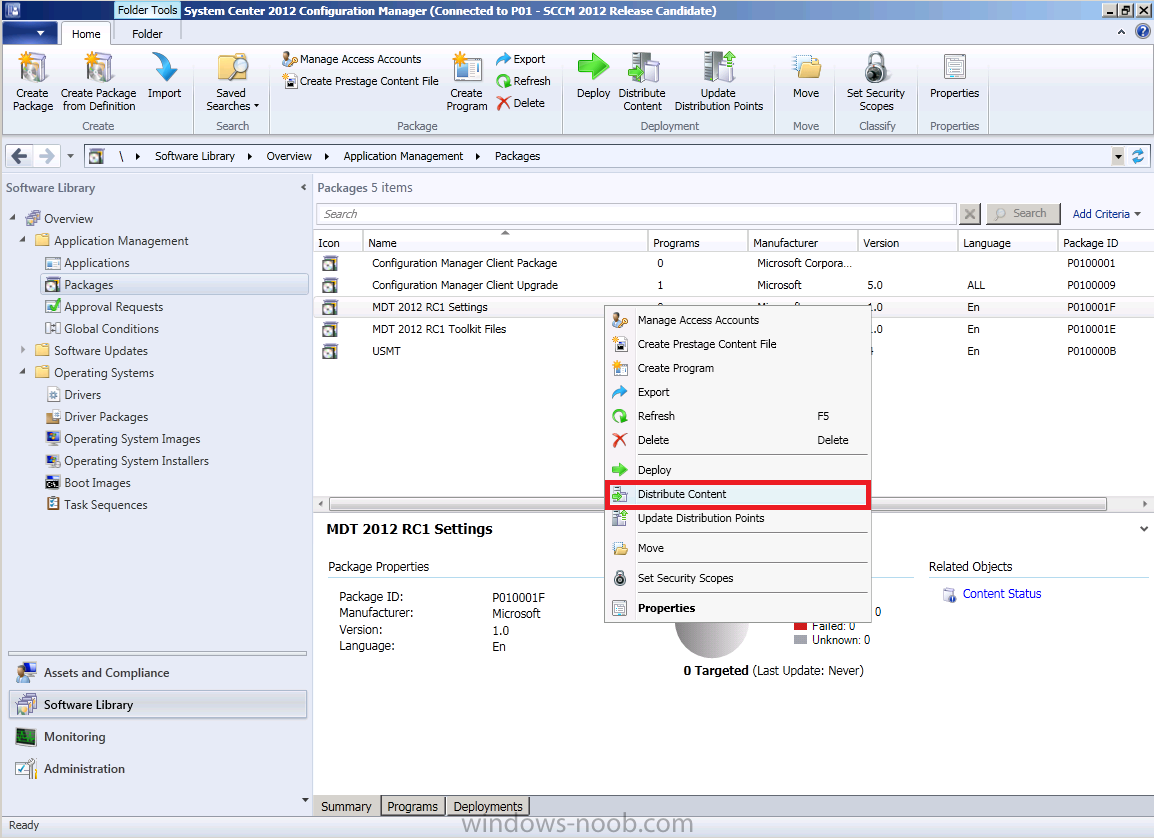
Select the MDT Settings package in Software Library, Packages, right click it and choose Distribute Content
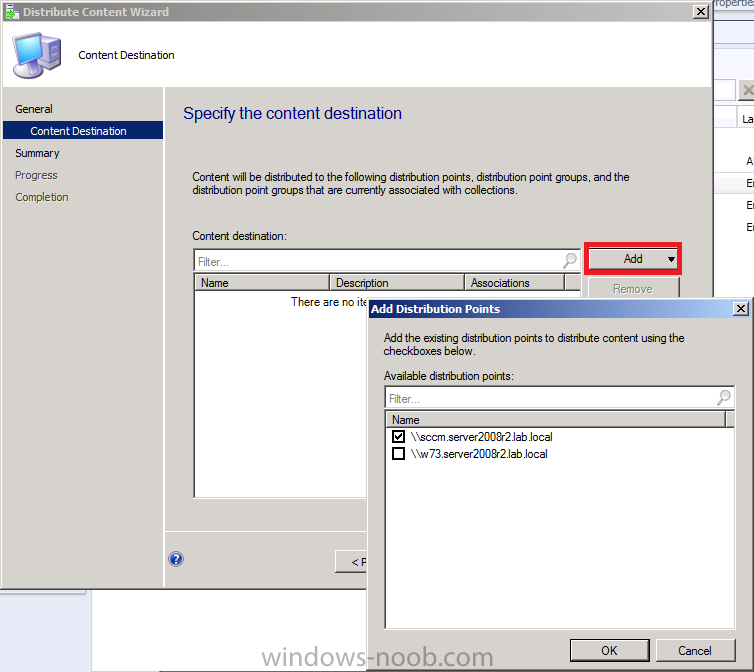
select your distribution point(s)
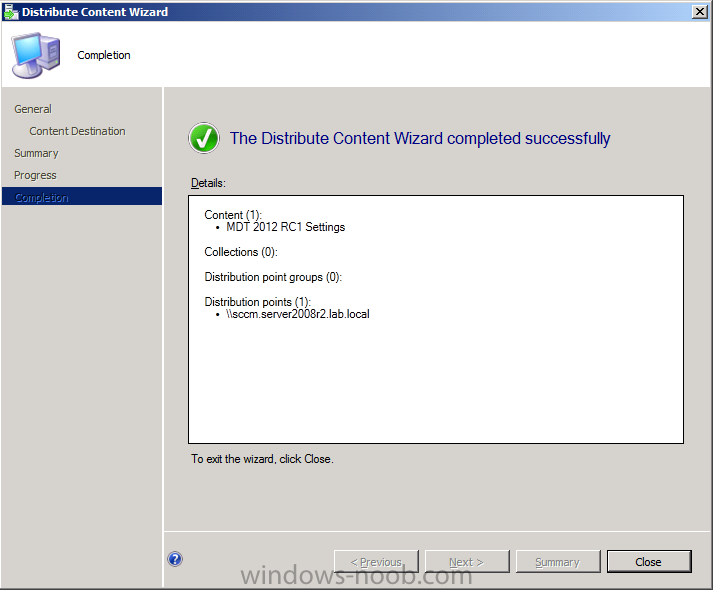
and continue through the wizard..
Note: Please don’t forget to repeat the above process for the MDT Files, and the MDT boot image.
In the next part of this series we’ll look at what we can do with MDT within ConfigMgr.
The original post is here on windows-noob.

hi Niall,
Thanks for the great articles they have been a huge help.
Is It possible to do this with SCCM 2007 and MDT2012.
When I get to the MDT Package screen Create a new microsoft Deployment Toolkit Package is greyed out. Any ideas why.
We have a deployment team currently rolling out Win7, do you think it would be easier to manage UDI than a frontend HTA, we want to them to be able to select software, dept, OU and new build or upgrade?