
In Part 1. of this series we Installed vNext, now we will start to configure it.
Quote
is a network location that can contain one or more devices that you
want to manage. Boundaries can be an IP subnet, Active Directory site
name, IPv6 Prefix, or an IP address range, and it can include any
combination of these elements. To use a boundary you must add the boundary to one or more boundary groups.
Boundary groups are collections of boundaries and they allow clients to
find an assigned site and to locate content when they need to install
software, such as applications, software updates, and operating system
images.
Boundaries are no longer site-specific. Instead, you define them one
time only for the hierarchy and they are available for all sites in the
hierarchy. Each boundary must be a member of a boundary group before a
device on that boundary can identify an assigned site or locate content
on a distribution point. Each boundary represents a network location in
Configuration Manager 2012 and it is available from every site in your
hierarchy. A boundary does not enable you to manage clients at the
network location. To manage a client, the boundary must be a member of a
boundary group.
Content Location
You can associate one or more distribution points with each boundary
group. You can also associate a distribution point with multiple
boundary groups. When a client requests content for a deployment,
Configuration Manager sends the client a list of distribution points
that have the content and that are associated with a boundary group that
includes the current network location of the client.
Configuration Manager 2012 supports overlapping boundary configurations for content location.
When a client requests content and the client network location belongs
to multiple boundary groups, Configuration Manager sends the client a
list of all distribution points that have the content. This behavior
enables the client to select the nearest server from which to download
the content.
You can configure the network connection speed of each distribution
point in a boundary group. Clients use this value when they connect to
the distribution point. By default, the network connection speed is
configured as Fast, but it can also be configured as Slow. The network
connection speed and the deployment configuration determine whether a
client can download content from a distribution point when the client is
on an associated boundary.
Step 1. Creating Boundaries and Boundary Groups
Perform the following on the vNext server as SMSadmin
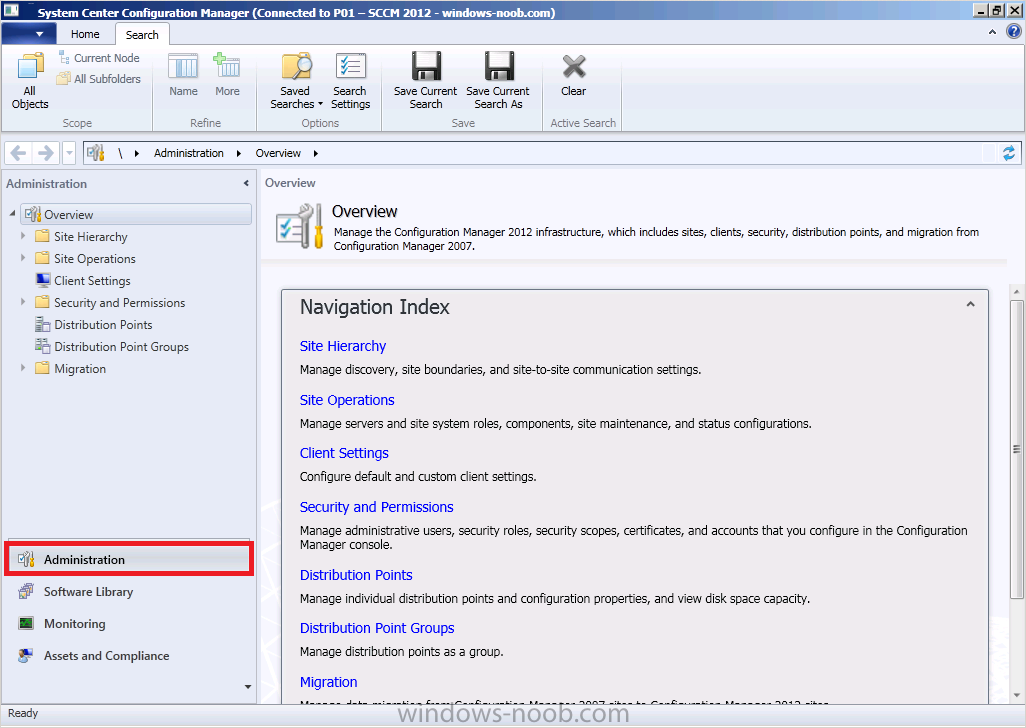
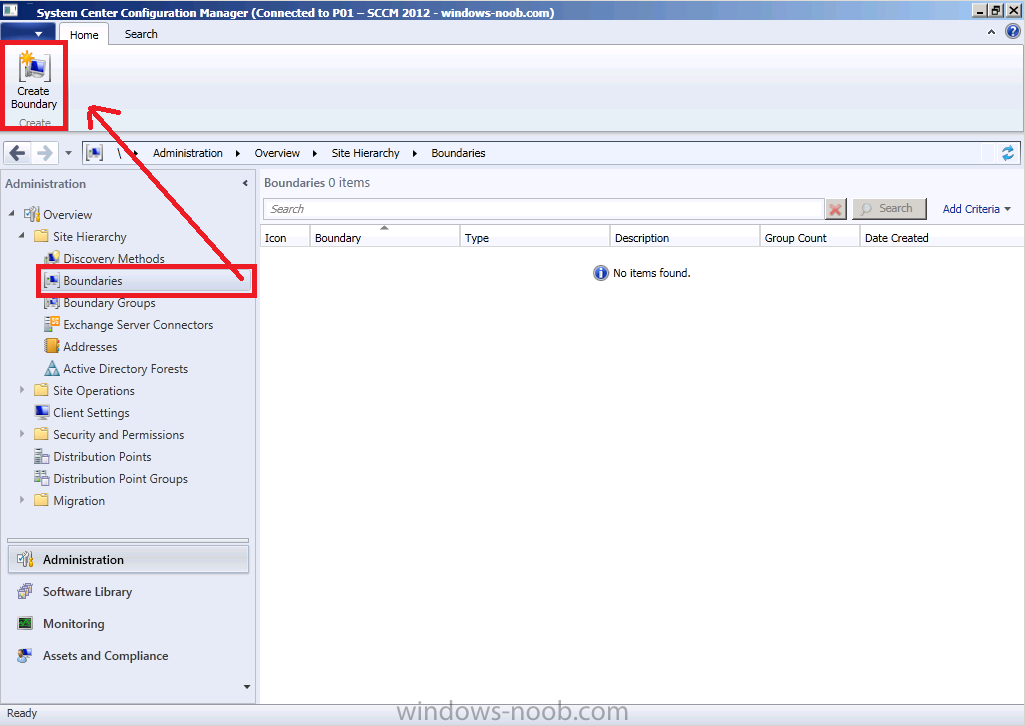
Click on the Administration workspace
In the navigation pane expand Site Hierarchy and then Boundaries, we havn’t created any yet so nothing will appear, click on Create Boundary in the ribbon on top.
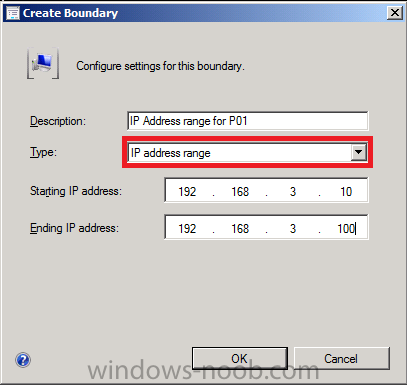
In the Create Boundary dialogue box, enter the following details, for Type box, choose IP address range from the drop down menu, and input 192.168.3.10 for the starting address and 192.168.3.100 for the ending address.
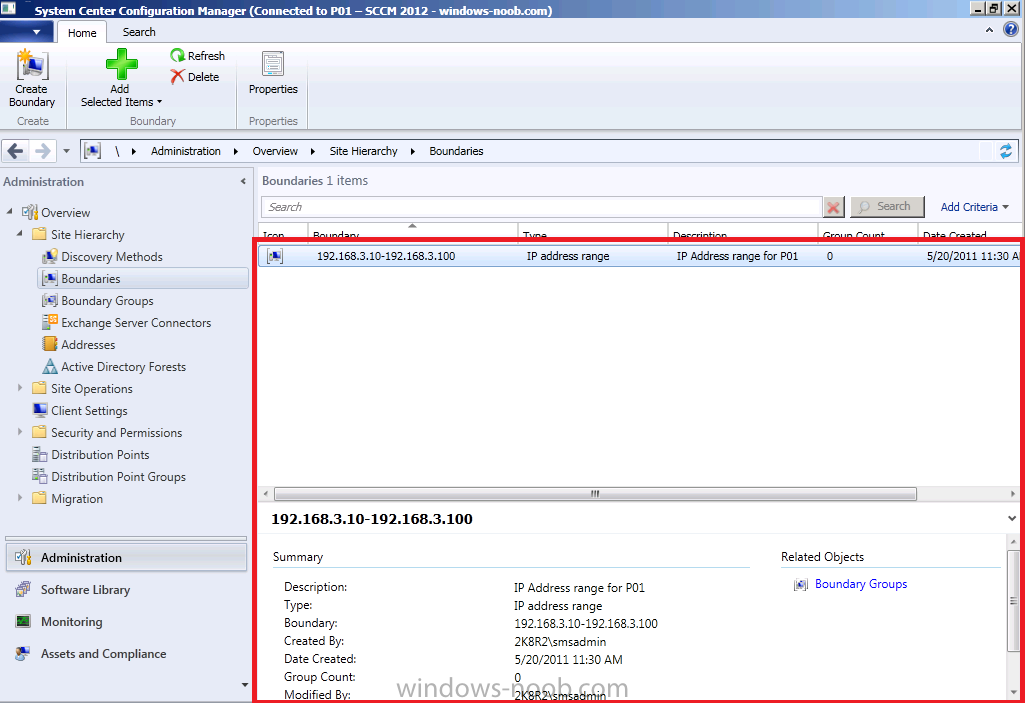
Click ok and your newly created boundary should appear.
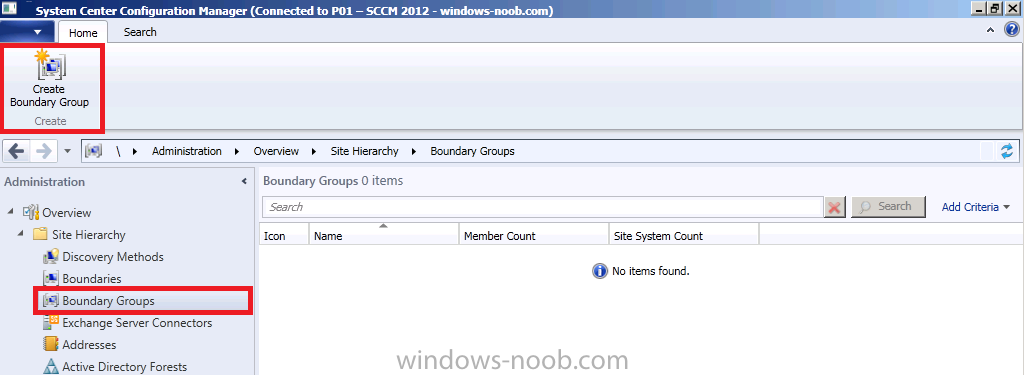
Boundaries in SCCM 2012 do nothing unless they are assigned to a Boundary Group so click on Boundary Groups,
nothing appears as we havn’t configured any Boundary Groups yet. In
order to assign clients to our site through discovery and for clients to
access content from distribution points we need to create a Boundary
Group with suitable boundaries.
Click on Create Boundary Group in the ribbon.
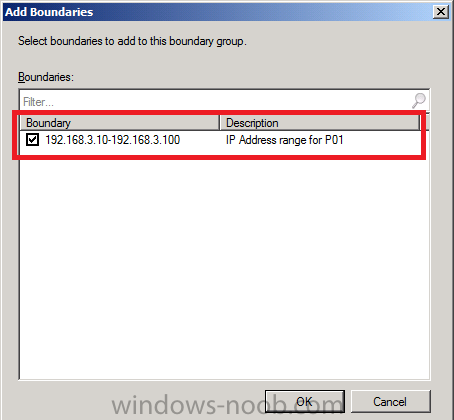
for Name type P01 Clients and click on Add to add our previously created boundary

when the Add boundaries dialogue box appears, select our previously created boundary and click ok.
Next click the References tab and select Use this boundary group for site assignment.
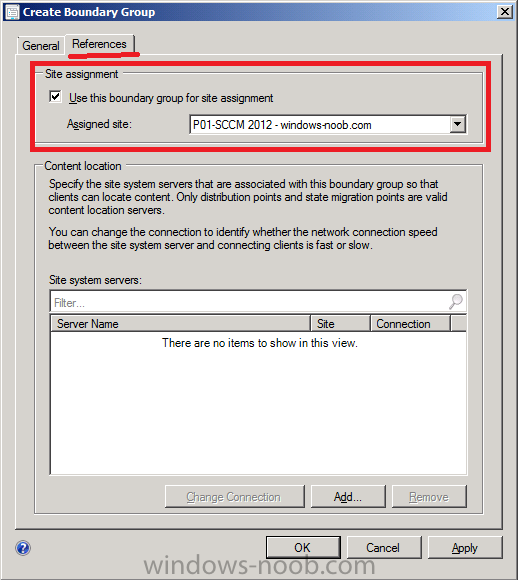
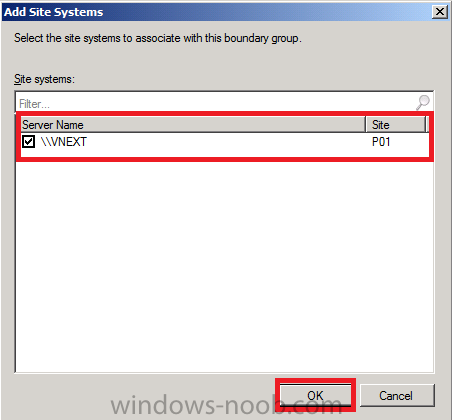
Click on Add to Add site systems
(distribution points and State Migration Poins) to our Boundary Group,
select our vnext server listed and click ok.
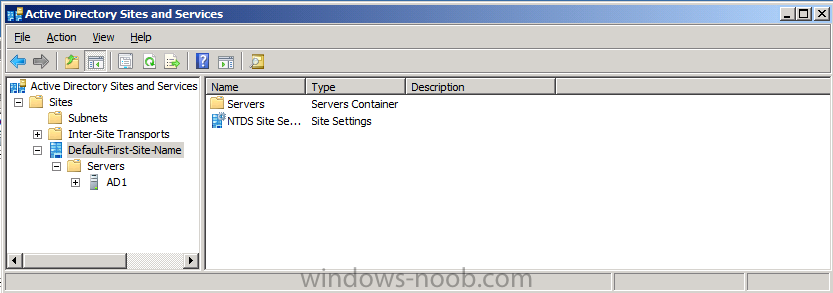
Step 2. Create an Active Directory Site
Complete this task on your Active Directory computer as Domain Admin.
Start up Active Directory sites and Services and click on Sites, the default site name of Default-First-Site-Name is listed.
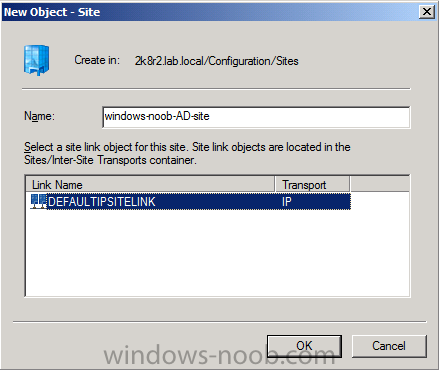
We will create a custom AD site which is unique from other AD sites in our heirarchy. Right click on sites and choose New Site, when the New Sites wizard appears give it a name windows-noob-AD-site, select the DEFAULTIPSITELINK and click ok.
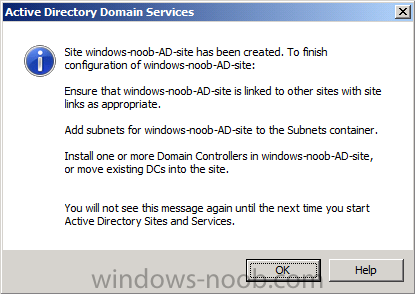
Note the message after creating the new AD Site
Right Click on Subnets, choose New Subnet
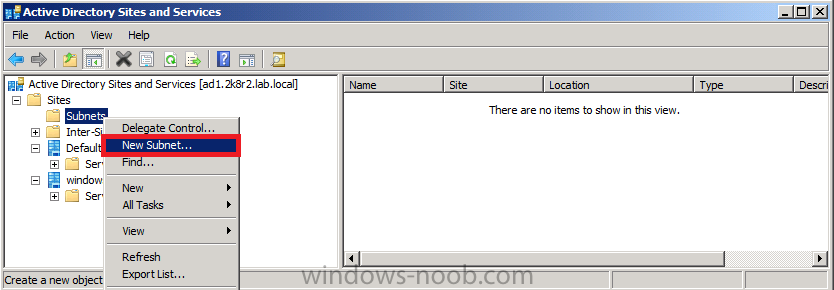
In the prefix box type 192.168.3.0/24 and select the windows-noob-AD-site
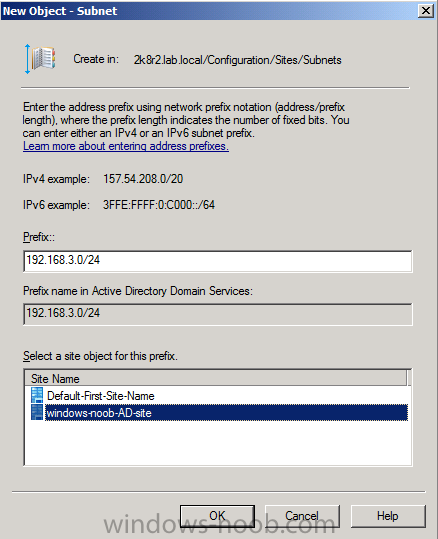
We have now assigned the 192.168.3.0/24 subnet to our newly created
site, now lets move our Domain Controller (AD1) to the new AD site.
expand Default-First-Site-Name until you see AD1 listed. Right click on AD1 and choose Move
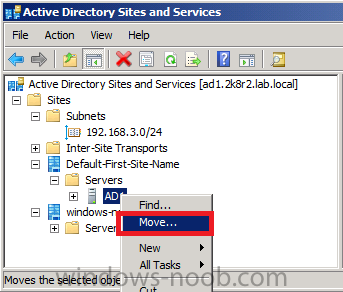
when prompted where to move the server, select the windows-noob-AD-site and click ok.

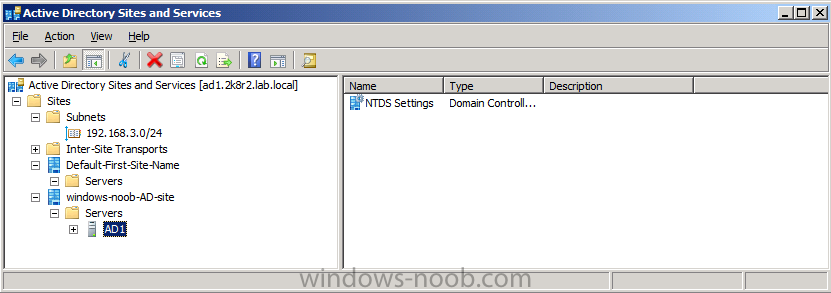
We have now moved our DC out of the Default AD site and to our custom AD site.
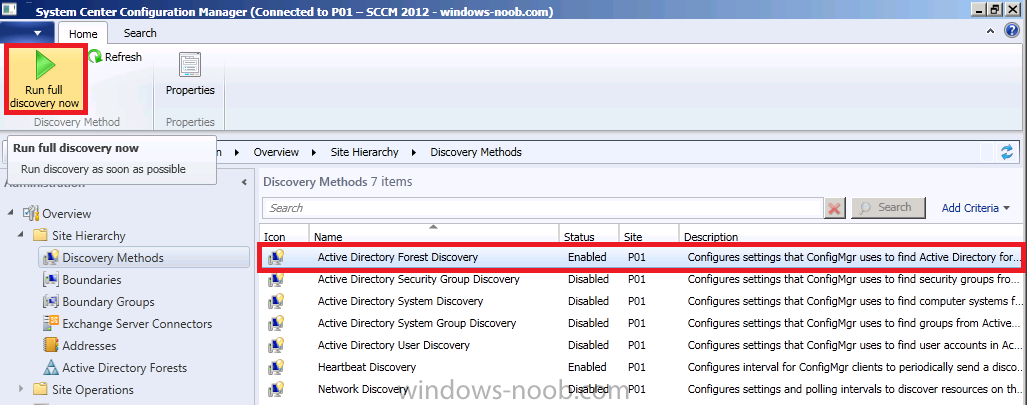
In the console click on Discovery Methods.
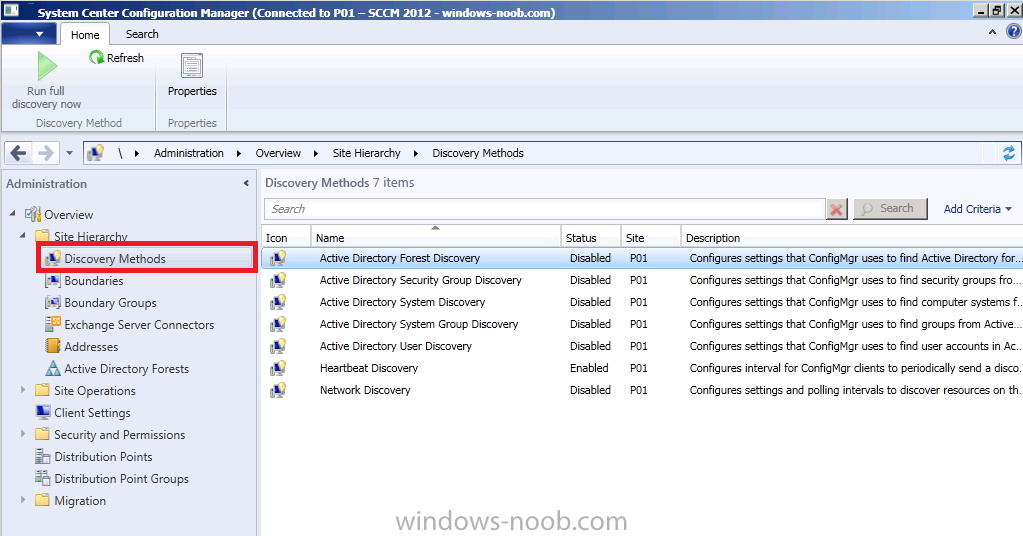
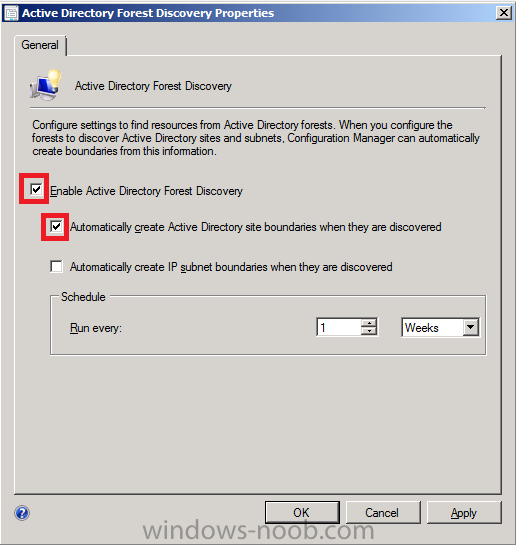
Double click on Active Directory Forest Discovery, note that this is a new feature in SCCM 2012. Select the following options
- Enable Active Directory Forest Discovery
- Automatically create Active Directory site boundaries when they are discovered
and click ok.
The discovery will be run every week by default, but we want to trigger
it now, so click on Run Full Discovery now in the ribbon.
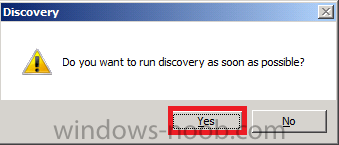
answer Yes when prompted
Click on Boundaries and click on the
refresh icon to the right (refresh “boundaries”), after some moments the
discovery has run and our Active Directory Site Boundary is listed
under our previously created Boundary.
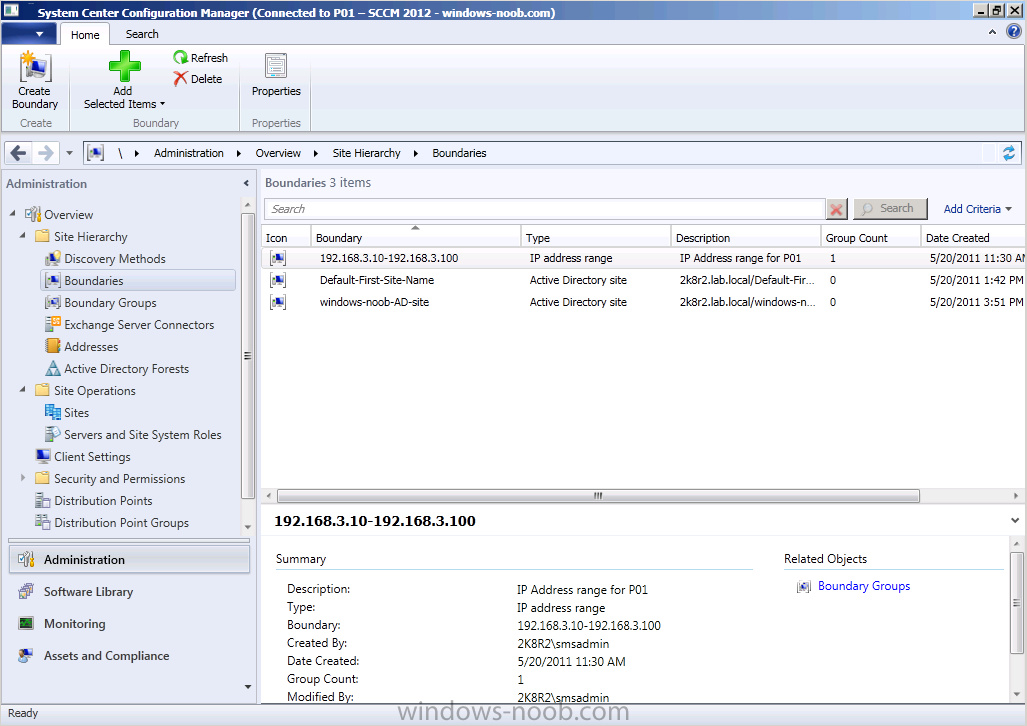
This discovery will create a new boundary for each Active Directory site
that is discovered in the site servers forest. Remember that boundaries
in SCCM 2012 do nothing unless added to a Boundary Group.
