
If you live in Europe you’ll most likely need to deploy some additional
languages on top of English Windows 7. To achieve this we can add them
at the Build and Capture stage or indeed in our Deploy Windows 7
Enterprise task sequence.
All installations of Windows® 7 contain at least one language pack and
the language-neutral binaries that make up the core operating system.
Licensing requirements state that Windows 7 can include only a single
language, with the exception of the Windows 7 Ultimate and the
Enterprise editions. These are referred to as single-language editions.
However, the Windows 7 Ultimate and Enterprise editions can include
multiple language packs. These are referred to as multilingual editions.
What do I need ?
You will need some things in place to add the languages offline, namely MDT 2010 Update 1 integrated into ConfigMgr 2007 SP2 and you’ll need to download the Language packs from MSDN.
Where can I find Windows 7 Language Packs ?
Download the language pack from MSDN which suits your architecture,
choose a language other than English (eg: Swedish) then choose the
Windows 7 operating system, in the downloads listed you’ll see these:-
Windows 7 Language Pack (x64) – DVD (Multiple Languages) 8/6/2009 – 2,200 (MB)
Windows 7 Language Pack (x86) – DVD (Multiple Languages) 8/6/2009 – 1,846 (MB)
How can I Add Language Packs to ConfigMgr?
Language packs are .cab files that you can add to System Center
Configuration Manager packages either offline or online. Before adding
language packs, however, create a System Center Configuration Manager
package that contains one or more language packs.
In our example here, we will add language packs using one language per
package, so for the Swedish Langauge pack, our SCCM package looks like
so:-
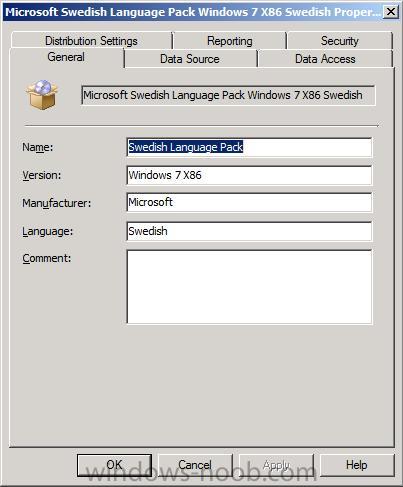
the Data Source points to the share with our Swedish Language Pack eg:-
\\sccm\sources\Windows 7 Language Pack – Swedish
and that path contains the following, a sub dr (eg: sv-se) which contains the lp.cab file and nothing more.

Note:- All
language packs in the same System Center Configuration Manager package
are deployed together. If you want to deploy different combinations of
language packs, create multiple System Center Configuration Manager
packages.
Get the Task Sequence
Download the following Task Sequence and import it into ConfigMgr.

Install Language Pack Offline.XML (6.14K)
Number of downloads: 0
Let’s look closer at this task sequence,
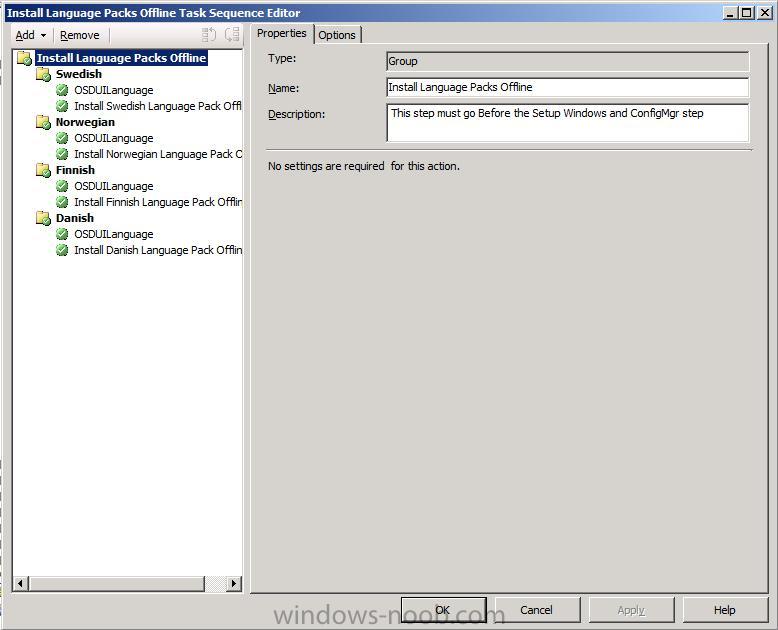
First you’ll notice that the entire section is separated into a Group, this is to keep things organised and to help you in adding it to your Deploy Task Sequence.
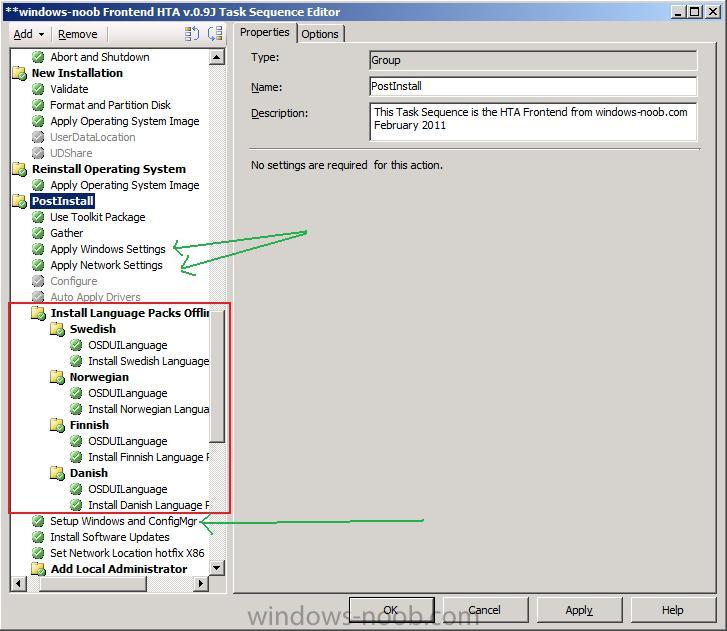
Important: This group must be placed in the PostInstall section of your Deploy Task Sequence, and preferably after that Apply Windows Settings and Apply Network Settings Steps, in addition this group must go before the Setup Windows and ConfigMgr steps otherwise the Install Language Pack offline step will fail.
Ok let’s look at the steps themselves and see what they do.
The Swedish sub Group is responsible for installing the Swedish Language pack if a variable called languageValue=Swedish. How you set that variable is up to you, you can set it via a FrontEnd HTA
(recommended) or by simply using a Set Task Sequence variable step
(before this Group) such as this (not included in the sample task
sequence):-
Task Sequence Variable: languageValue
Value: Swedish
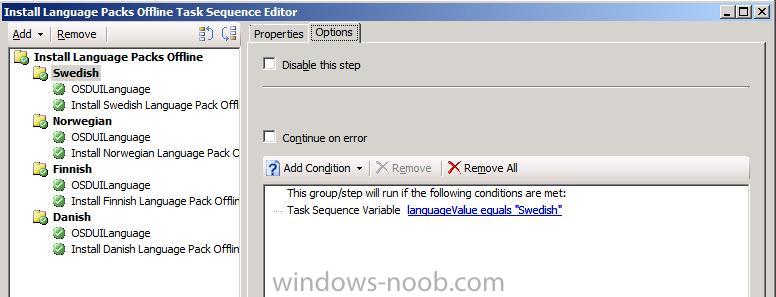
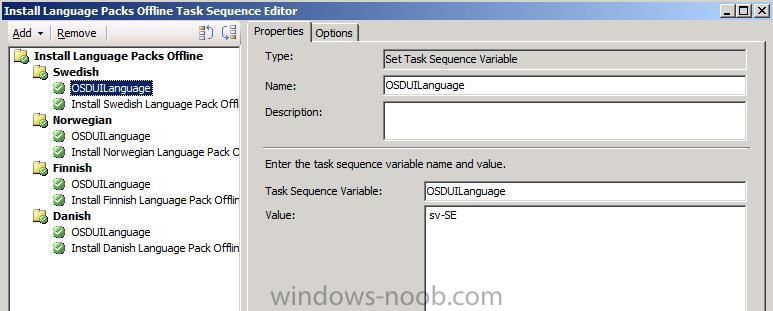
If languageValue is determined to = Swedish it then carries out two steps
Sets a task sequence variable called OSDUILanguage = sv-SE
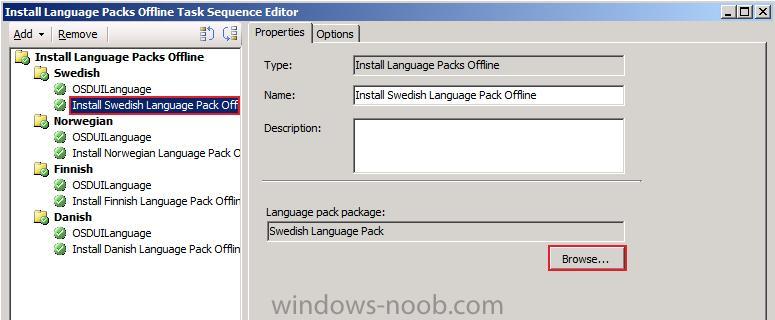
and then calls the built-in MDT Step, Install Language Packs offline
(which references the ZTIpatches.wsf script). This step points to our
previously made Swedish Language Package.
The actual step takes some minutes as it has to expand lots of files in
the cab, and inject them offline (using DISM) into our Windows 7 image.
How do we set OSDUILanguage in Windows
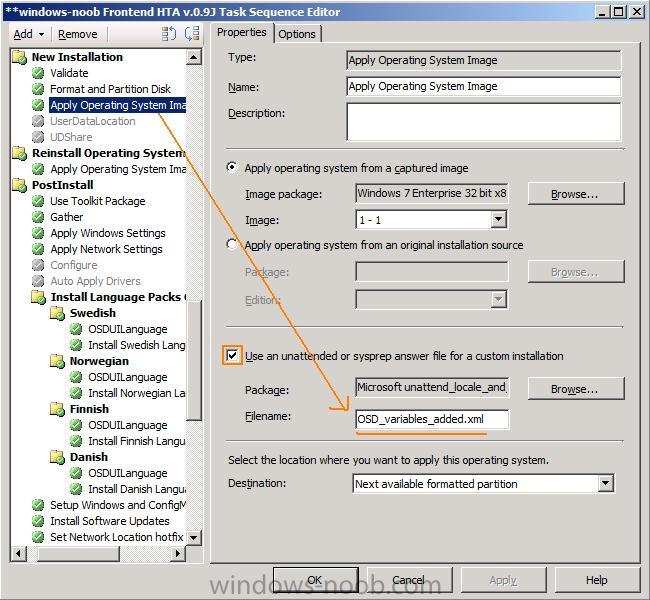
You’ll need to create an Unattend.xml file which specifically mentions the OSDUILanguage variable
<UILanguage>%OSDUILanguage%</UILanguage>
or use this one which I created earlier.
OSD_Variables_added.xml (922bytes)
Number of downloads: 0
This file must be referenced in the Apply Operating System Image step otherwise the Install Language Pack Offline step will fail as it won’t know what variable to set.
You can create this unattend.xml file yourself using Windows SIM
or use the sample i provide, just remember that the architecture must
match the image, and this sample is for 32bit Windows 7 Enterprise
(X86).
Ok I’ve done all the steps, now what ?
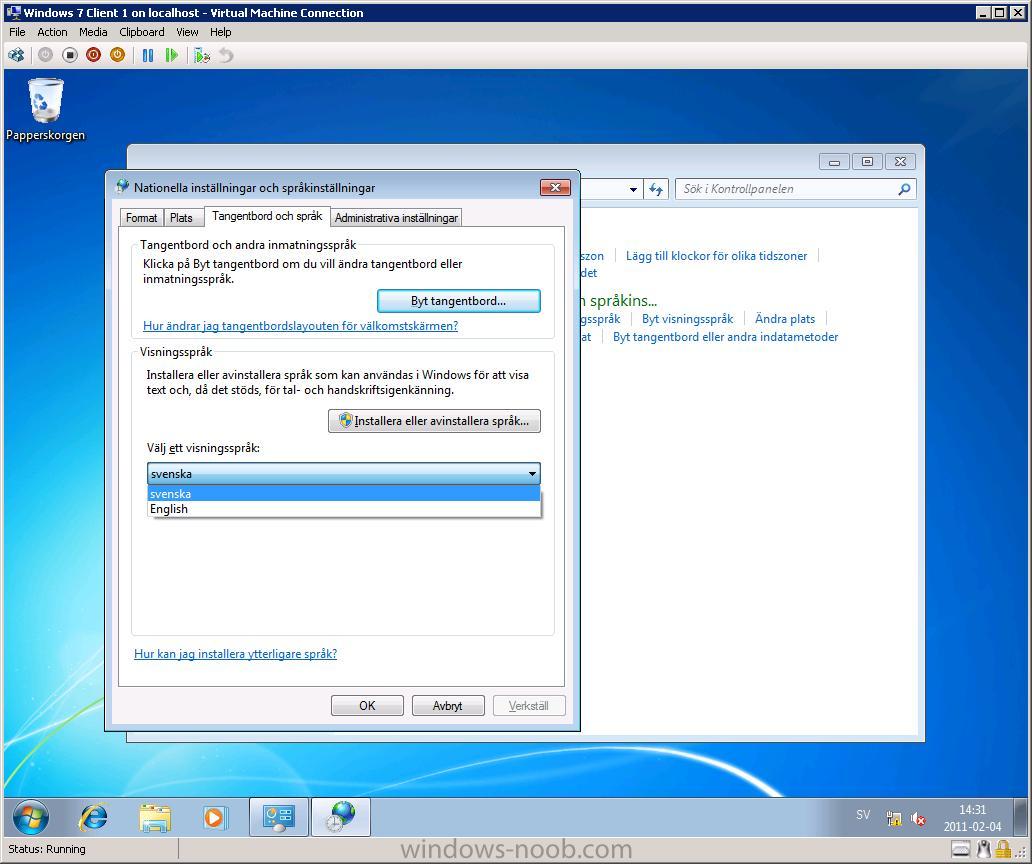
Deploy Windows 7, set the language pack variable either in the Task
Sequence or using a HTA, and the end result is that you get your
language pack installed as the default language within Windows.
Troubleshooting Notes
Use at least 1gb ram in your virtual machines otherwise the step will fail to install any language packs (will run out of ram).
After the Install Language Pack Offline step the following will be created in c:\_smstasksequence\
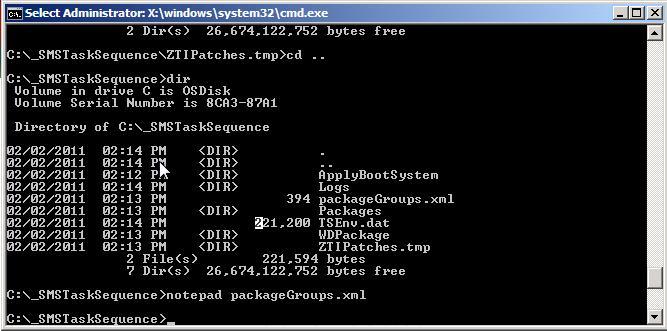
namely:-
Packages<dir>
ZTIPatches.tmp
packageGroups.xml
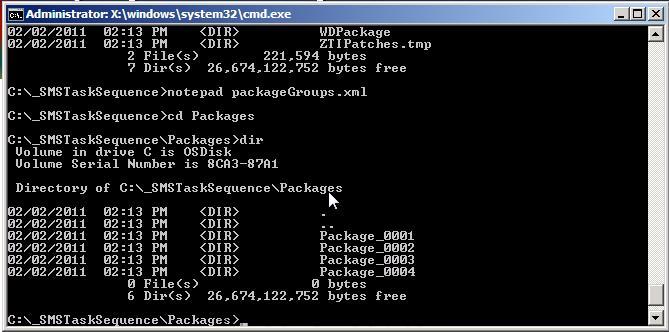
in the Packages directory you’ll have more
subdirectories based on how many lp’s you included, one language pack,
one dir, 4 language packs in your ConfigMgr Language Package, 4 dirs…
After the Setup Windows and ConfigMgr step is complete, you’ll see the following has been added to your c:\windows\panther\unattend.xml file
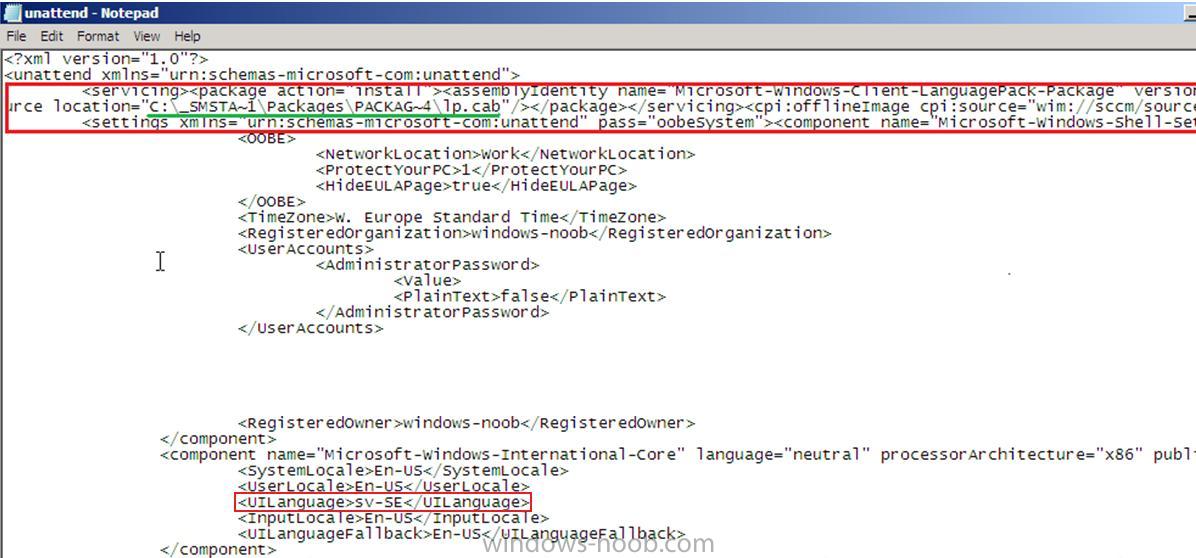
the other values (keyboard layout and so on) are added via separate steps in the Task Sequence which I’ll cover in another post.
cheers !
niall.
To view the screenshots and attachments for this post please click here
