
In Part 1. of this series we Installed vNext.
In Part 2., we then Configured vNext to use the New AD Site as a boundary and Configured Discovery Methods in vNext.
In Part 3, we installed the Reporting Point Role along with some additional roles and configured them.
In Part 4 we configured the client Agents and deployed the vNext Client.
In Part 5 we deployed an Application to All Users.
In Part 6
we added Windows Deployment Services, added the PSP role, added the
Windows 7 Enterprise image, and updated our boot image for Deploying
Windows 7.
In Part 7
we created our Build and Capture Task Sequence, enabled the Network
Access Account, Advertised (Deployed) the Task Sequence, and created a
new hyper-v virtual machine for capturing the wim on.
In Part 8 we installed WSUS and then the SUP and SLP roles.
Now we will configure add some products to get sync info about, and target some updates to collections.
Step 1. Select some Products.
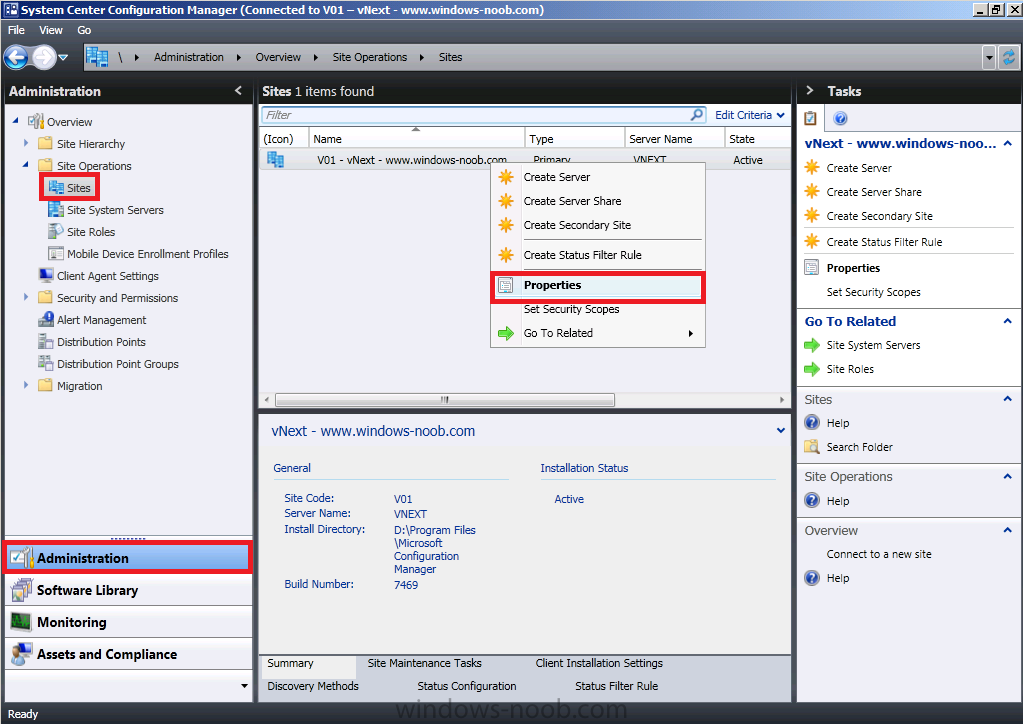
In the Wunderbar click on Administration. Select Site Operations, Sites and then Right click our Site Server and click Properties.
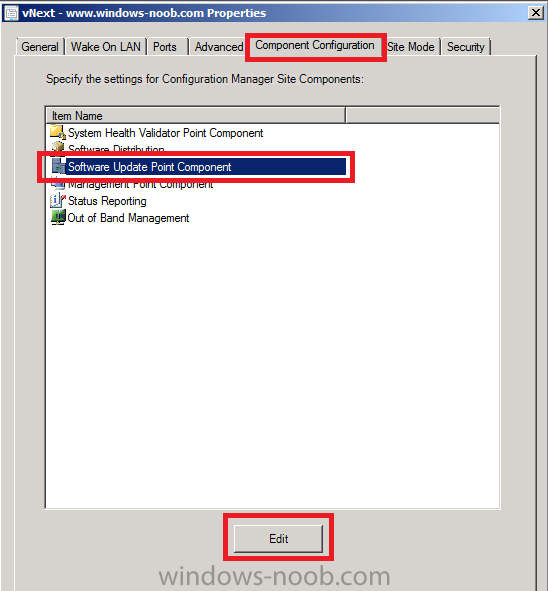
When the properties appear, select the Component Configuration Tab, Select Software Update Point and click on Edit.
Click on the Products tab and scroll down, select the following products.
- Windows 7
- Windows Server 2008 R2
- Windows Server 2008
Click Apply when done.
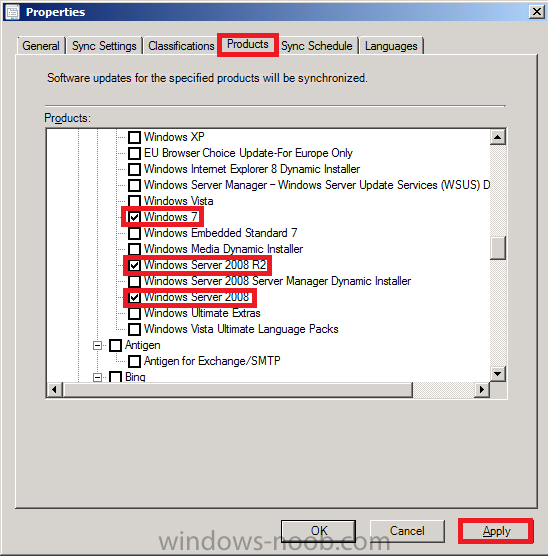
Then click Ok and Ok again.
read the rest of this post including screenshots here
