
hi all,
well this feature in USMT 4
is handy, as it allows you to do a scanstate while in Windows PE in
other words, not in the OS so no problems with services running or
applications running meaning that you get to backup everything you want
without any locked files stopping from doing so.
Great, but how is it done ?
according to Microsoft, we can use the /offlinewindir switch in USMT 4 with scanstate.
This option specifies the offline Windows directory that the ScanState
command gathers user state from. The offline directory can be
Windows.old when you run the ScanState command in Windows or a Windows
directory when you run the ScanState command in Windows PE. This option
is incompatible with the /offline option.
However, implementing it isn’t so straigtforward as you’ve probably
already discovered and documentation about getting it to work within
SCCM is as far as I can see pretty much non-existant,
so here courtesy of windows-noob.com is one way of doing it, feel free to show us other ways.
The theory behind this:-
As the Capture User State Step in a standard task sequence can only run
in Windows, we cannot use that step to do our scanstate while in
Windows PE, therefore we will use some tricks to run scanstate from
WinPE. To do this we create two special packages, the first package
contains a batch file which calls the scanstate.exe file and the second package is the entire USMT X86 scanstate files and folders, (note: in this example we are using scanstate from the X86 folder).
Get your lab ready
We need a Windows XP client machine to test scanstate on and you should enable the F8 command prompt option in your boot.wim (you’ll need it).
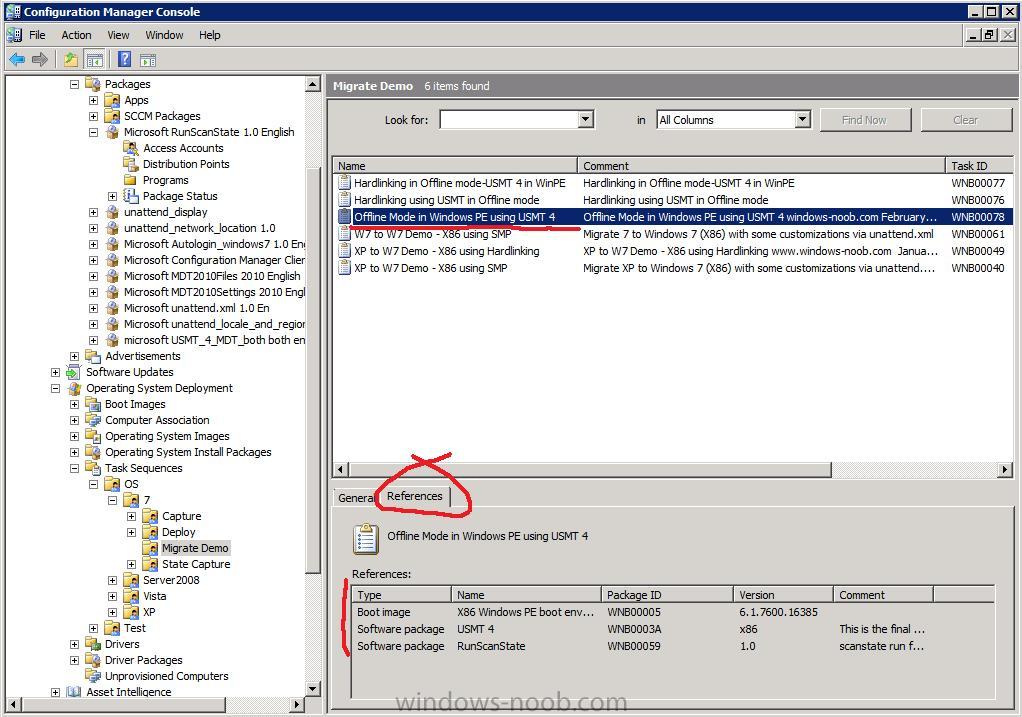
The Task Sequence
You can use this Task Sequence in SCCM by importing it.

Offline Mode in Windows PE using USMT 4.xml (6.62K)
The task sequence depends on three packages, the X86 bits from your USMT 4
(ie: copy everything in the X86 folder from C:\Program Files\Windows
AIK\Tools\USMT folder. There are two versions, one for 32bit (X86) and
one for 64bit (amd64), we are only using the X86 bits in this guide),
the Batchfile
I break up my task sequence into four distinct groups

Set, Create, xcopy and Run,
In the Set group I set two variables
namely SystemDrive to c: (otherwise it will try and do this on the
windows PE x: drive) and we set the OSDStateStorePath Task Sequence
Variable to %systemdrive%\USMToffline which translates to
c:\USMToffline, this directory will store our migration data during
scanstate operations and when the new os is being applied.
In the Create group we just create
two folders, c:\USMTbits\X86 and c:\USMToffline, the c:\USMTbits\X86
will store all our scanstate native files.
In the xcopy group we do the clever stuff, we copy the X86 USMT stuff
to the newly created folder, and then we copy our batch file for later
user. The batch file itself has the following contents
@set USMT_WORKING_DIR=%~2%\USMTbits\x86

"%~2\USMTbits\x86\scanstate.exe" "%~1" /c /o /hardlink /efs:hardlink /nocompress /offlinewindir:c:\windows /v:5 /l:%~2\windows\TEMP\SMSTSLog\scanstate.log /progress:%~2\windows\TEMP\SMSTSLog\scanstateprogress.log /i:%~2\USMTbits\x86\miguser.xml /i:%~2\USMTbits\x86\migapp.xml
You can download the batchfile below however you must rename it back to .bat

runscanstate-offlinewindir.bat.txt (320bytes)
The Run group does the actual running of the batch file and passes two variables to the file.
Testing Offline Mode.
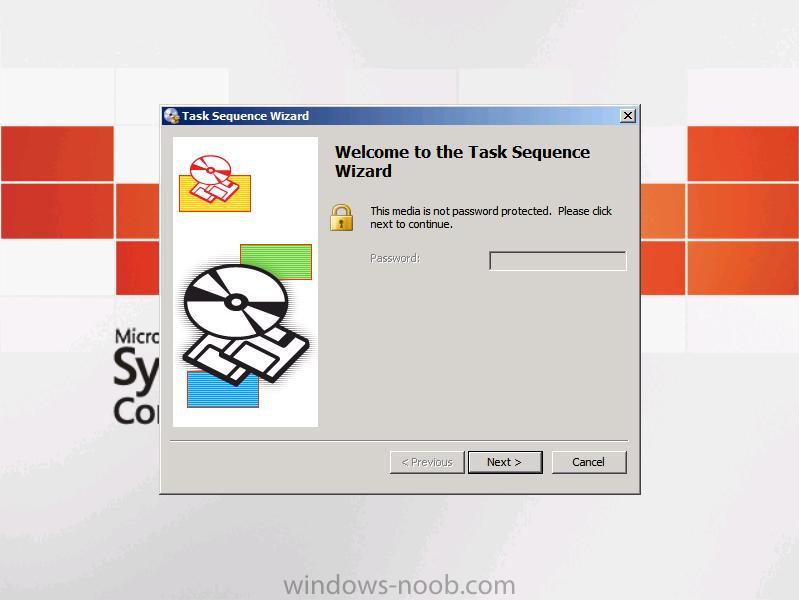
Create an optional advertisement to a Migrate XP to W7 X86
collection for the Task Sequence and PXE boot your XP client (press F12
first….), select the Task Sequence when the wizard appears,
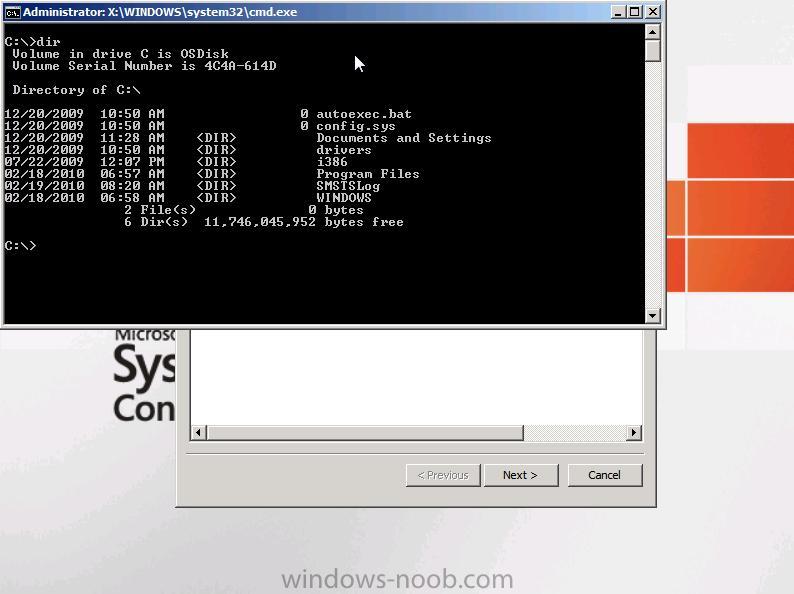
at this point press F8 to bring up
the command prompt, you are doing this to verify that your data is
getting migrated in OFFLINE mode. So here we can see the command prompt
is open.
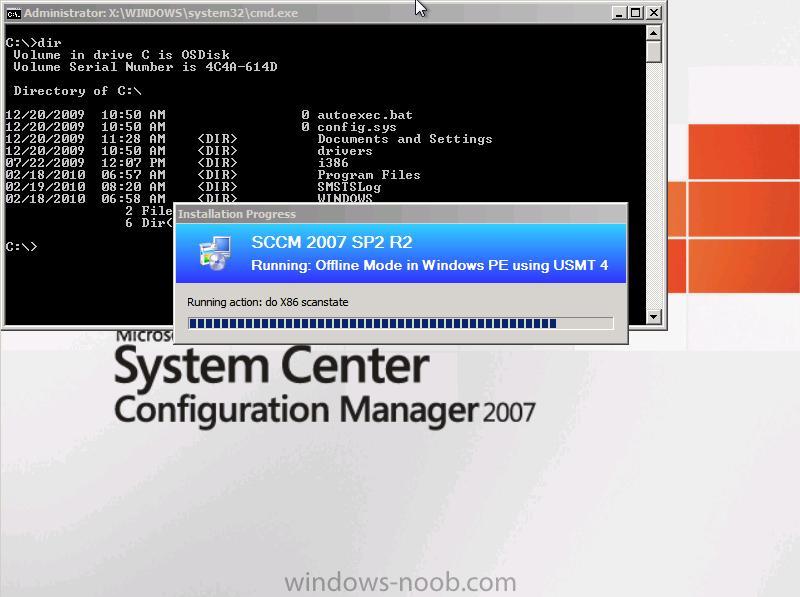
Ok switch back to the TS and start the task sequence. You will see it
starts creating the folders, copying the USMT stuff and our batch
file(s) and then actually running the scanstate command.

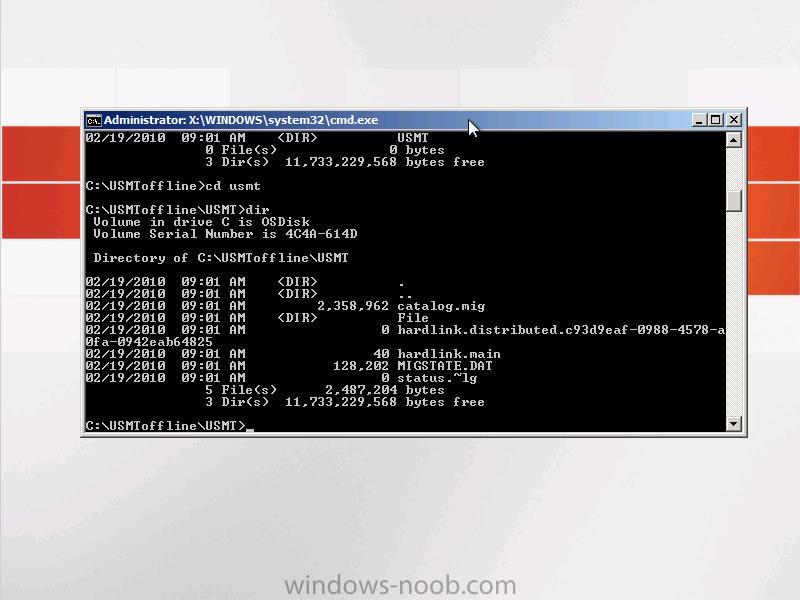
Once it is completed your migrated data will now be stored in C:\USMToffline\USMT
browse it and verify
If you want to see a working SMSTSl.log file from the above test see below
smsts.log (587.56K)
Ok now what ?
Migrate XP to Windows 7 using Offline mode in Windows PE
Ok now you know it works, use the above theory and task sequence within
a working Migrate XP to Windows 7 Task sequence. I’ll attach one
shortly.
To see the Full Post with screenshots visit > https://www.windows-noob.com/forums/index.php?/topic/1735-using-offline-mode-in-windows-pe-using-usmt-4-via-a-task-sequence-in-sccm-2007-sp2/
