
Introduction
This is Part 4 in a new series of guides about getting started with Windows 365. This series of guides will help you to learn all about Windows 365 in a clear and insightful way. This series is co-written by Niall & Paul, both of whom are Enterprise Mobility MVP’s with broad experience in the area of modern management. At the time of writing, Paul is a 6 times Enterprise Mobility MVP based in the UK and Niall is a 12 times Enterprise Mobility MVP based in Sweden. In this series we aim to cover everything we learn about Windows 365 and share it with you to help you to deploy it safely and securely within your own organization. In Part 1 we introduced you to Windows 365, selecting the right edition with the level of management that you need, choosing the plan that suits your users needs at a cost you can afford, or modifying the configuration to make it more suited to your individual needs, purchasing licenses and saving money for your organization via the Windows Hybrid Benefit. In Part 2 you learned how to provision an Azure Ad joined Cloud PC and take a look at the different network options available when provisioning an Azure Ad joined Cloud PC. In Part 3 you learned about the steps needed to successfully provision a Hybrid Azure Ad Joined Cloud PC.
Below you can find all parts in this series:
-
- Getting started with Windows 365 – Part 1. Introduction
- Getting started with Windows 365 – Part 2. Provisioning an Azure Ad Joined Cloud PC
- Getting started with Windows 365 – Part 3. Provisioning a Hybrid Azure Ad Joined Cloud PC
- Getting started with Windows 365 – Part 4. Connecting to your Cloud PC <- you are here
- Getting started with Windows 365 – Part 5. Managing your Cloud PC
- Getting started with Windows 365 – Part 6. Point in time restore
- Getting started with Windows 365 – Part 7. Patching your Cloud PCs with Windows Autopatch
- Getting started with Windows 365 – Part 8. Windows 365 boot
- Getting started with Windows 365 – Part 9. Windows 365 switch
- Getting started with Windows 365 – Part 10. Windows 365 offline
In this part we’ll cover the following:
- Connections available
- Windows 365 app
- Remote desktop client
- Web browser
- Windows
- Installing the Remote Desktop client
- Subscribe to the Cloud PC
- Accessing remote desktop features
- Windows 365 app
- macOS
- Installing the Remote Desktop client
- Adding a workspace
- Accessing remote desktop features
- iOS (iPad/iPhone)
- Installing the Remote Desktop client
- Adding a workspace
- Accessing remote desktop features
- Android
- Installing the Remote Desktop client
- Adding a workspace
- Accessing remote desktop features
- Linux
- Related reading
- Summary
Connections available
At the time of writing you can connect to your Windows 365 Cloud PC using the following methods:
- Using the Windows 365 app (Windows 11, Windows 10 coming soon)
- Using a Remote Desktop client (Windows, Mac, Android, iOS)
- Using a HTML 5 capable web browser (Windows, Mac, Android, iOS, Linux, ChromeOS)
Windows 365 app
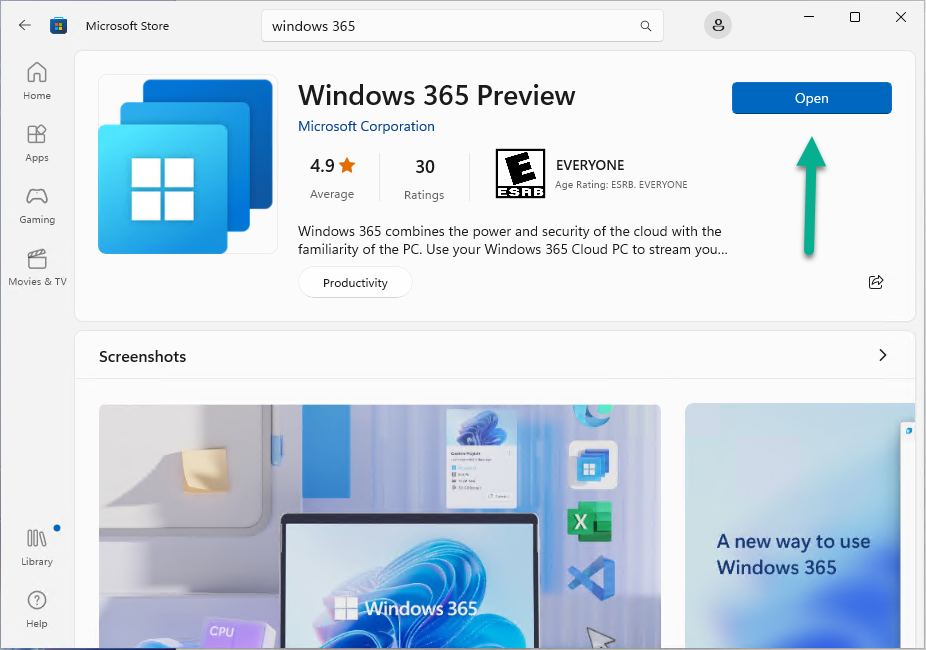
The Windows 365 app is currently Windows 11 only and available for download via the Microsoft Store. Search for Windows 365, get the app and click Open once done.
In later versions of Windows 11 it’ll come bundled as a built-in app and Windows 10 support is coming.
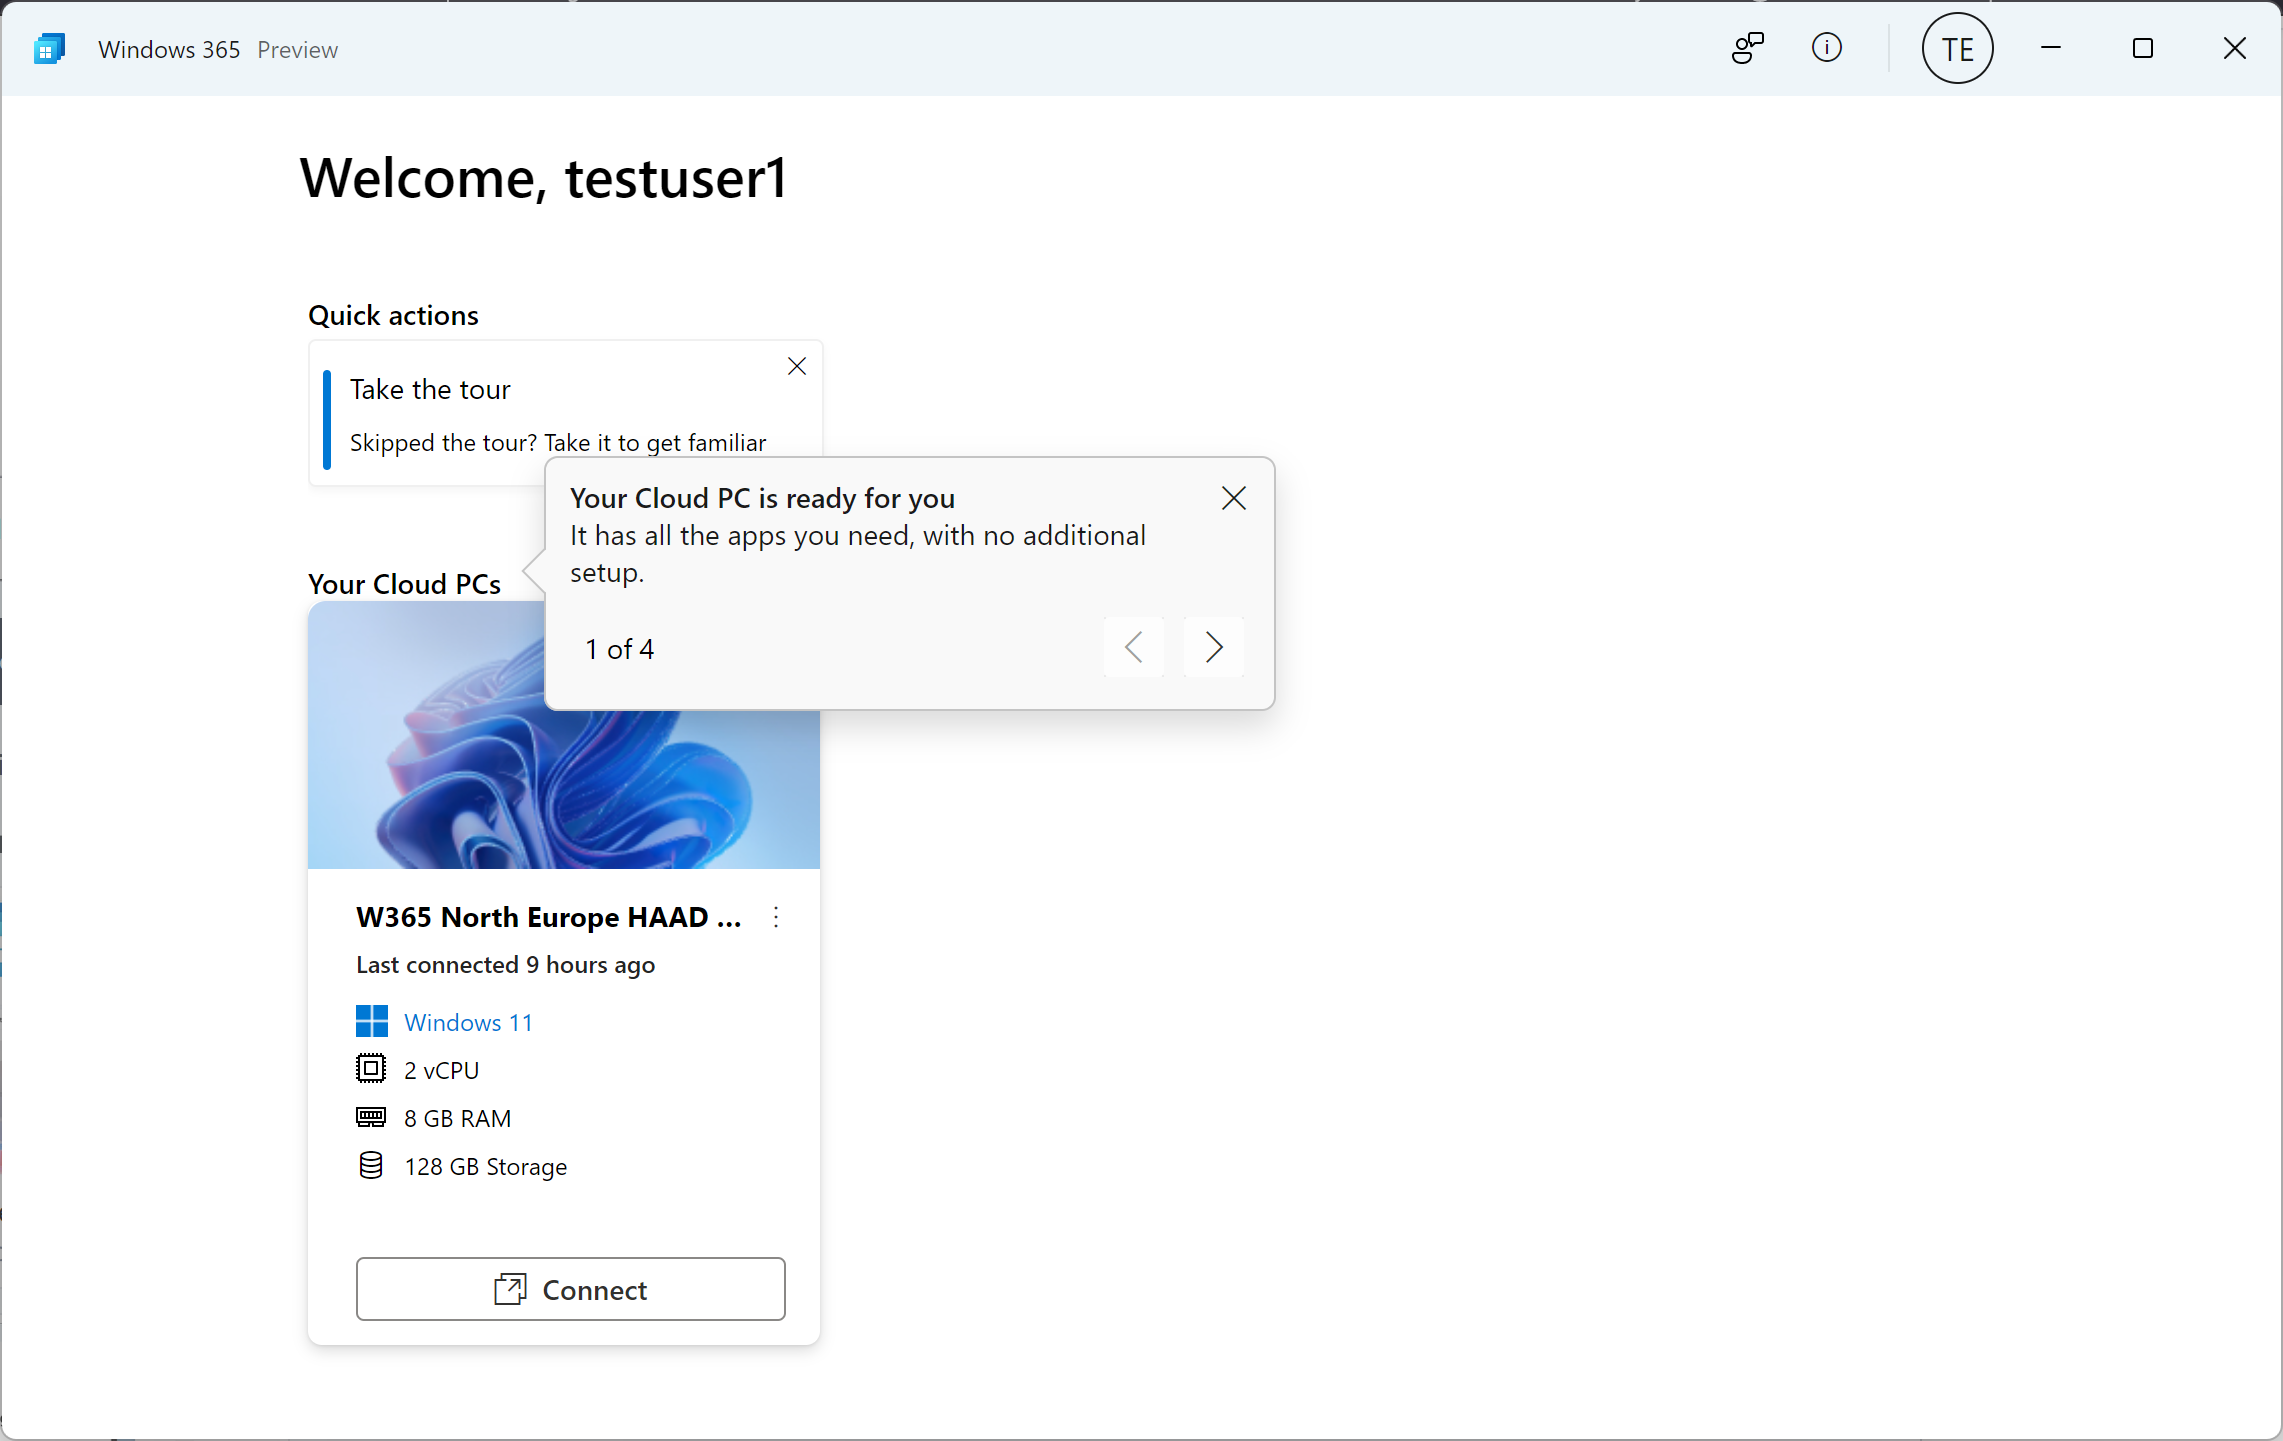
The Windows 365 app was introduced during the Microsoft Ignite 2022 Keynote (by Satya Nadella) and it allows a seamless way of connecting to your Cloud PC. There’s no need to copy a subscribe URL, just login and your Cloud PC is available. The app can be launched from your start menu or taskbar.
For a deeper look at the Windows 365 app (which is still in preview) please click here. Currently the capabilities are not yet on par with the Remote Desktop client but we think that’ll change soon.
Remote desktop client
If you are using Windows, macOS, Android or iOS device then there are remote desktop apps available to download for those devices. At the time of writing the Remote Desktop app is the most feature rich method of connecting to your Cloud PC but it’s not without issues, for example on iOS, macOS and Android, you have to copy the subscribed URL and add that to your workspace, it’s not automatic.
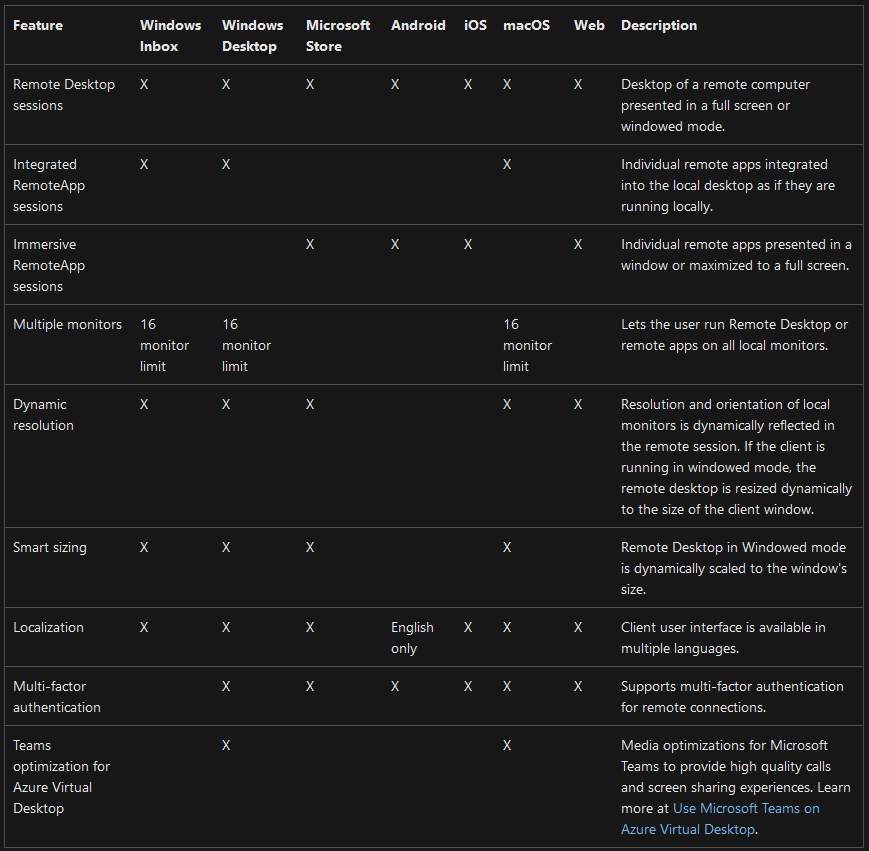
Using the Remote desktop agent will give you the power to use multiple monitors (up to 16 with Windows/macOS) and other hardware, as detailed in the following table.
Web browser
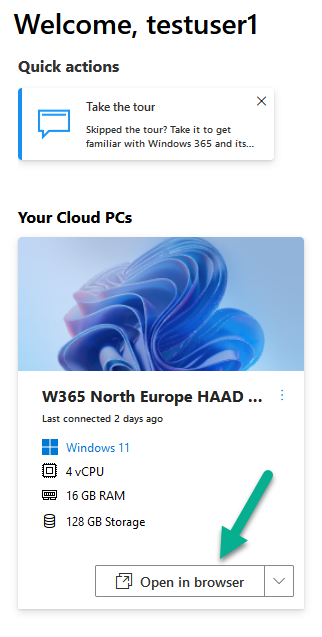
To access your Cloud PC from any device using a web browser, navigate to https://windows365.microsoft.com using the credentials of a user that has been assigned a provisioned Cloud PC. Click on Open in browser to launch the connection using your web browser.
Even though the web browser connection method allows you to connect to your Cloud PC from practically any device, your abilities in that session are limited. Below is a table showing redirection of various devices using different connection methods, look at what the web browser is missing compared to the remote desktop app.
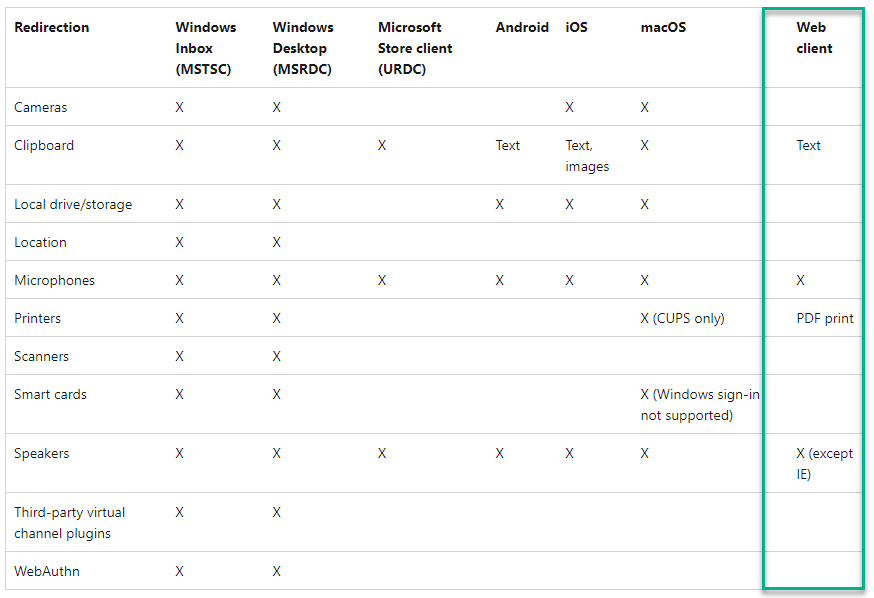
For example, when using a web browser, you won’t have the same fine control that you have with the Remote Desktop client or via the Windows 365 app. Not only that but things like multi-media redirection or multi-monitor support or using a web camera to enable video for Teams meetings won’t be an option if you choose the web browser as the method of connection.
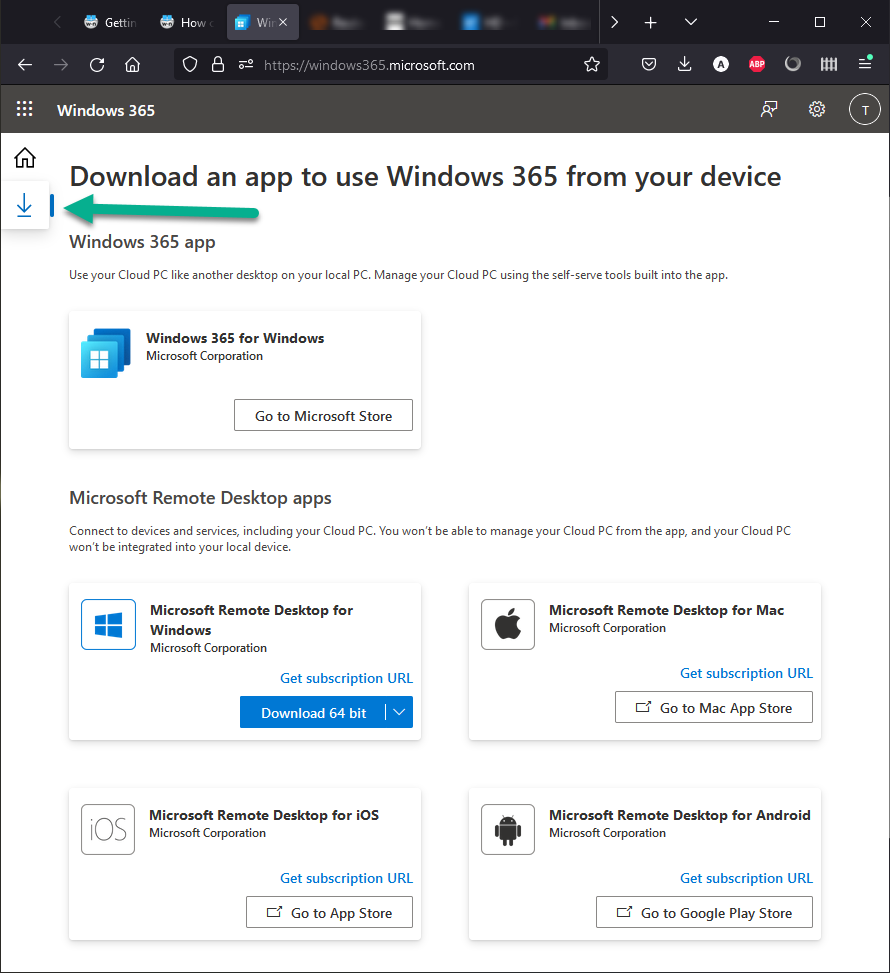
To get the most out of your Cloud PC and to use the hardware features of the computer (or tablet/phone) that you are accessing it from, you’ll need to install a Remote Desktop client agent or use the Windows 365 app (currently Windows 11 only). You can see the other available connection options by clicking on the download icon shown below. The web page automatically detects the operating system you are running and highlights a suitable client agent if one exists for that operating system.
You can read the rest of this blog post here.
