
Introduction
Microsoft released Technical Preview 2105 last week and with it came some CMG changes, one of which is the ability to decide the size of the CMG VM while creating the CMG. I covered that process in this blog post. But you also can now change the size of an already deployed VMSS (Virtual machine scale set) CMG and I’ll cover that in this post.
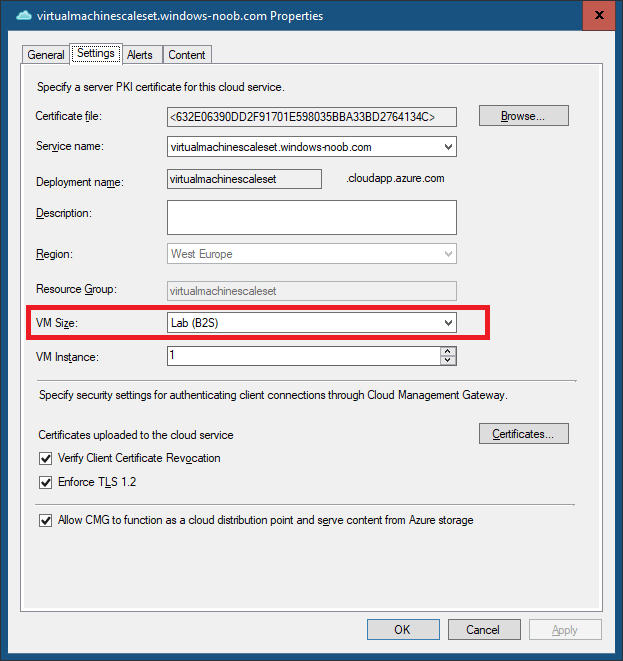
Let’s imagine I’ve created a Lab (B2S) CMG.
Verify current settings
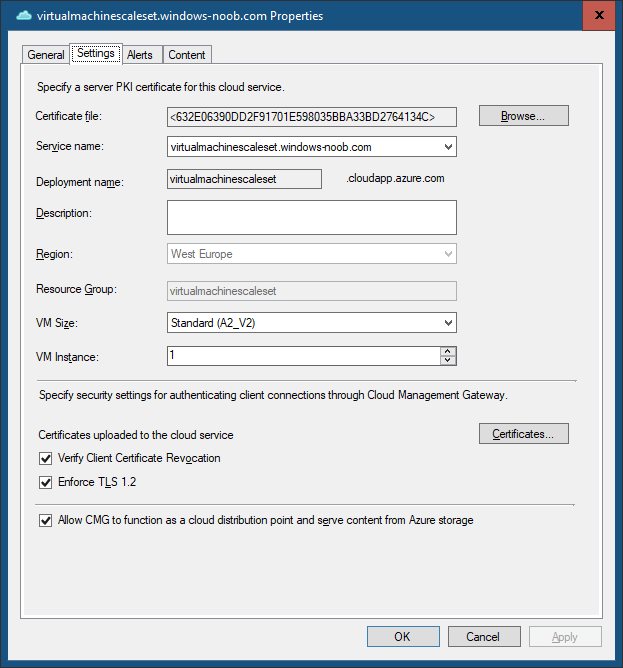
You can verify the current VM size settings in at least two places. In ConfigMgr, check the CMG properties, then select the Settings tab to see what size it’s configured to.
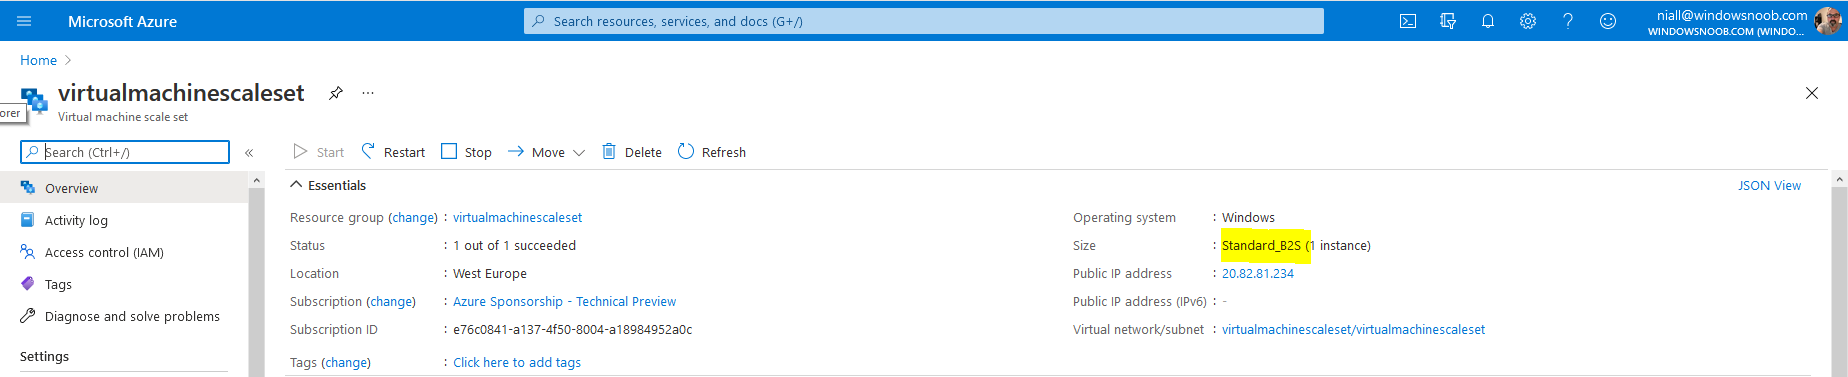
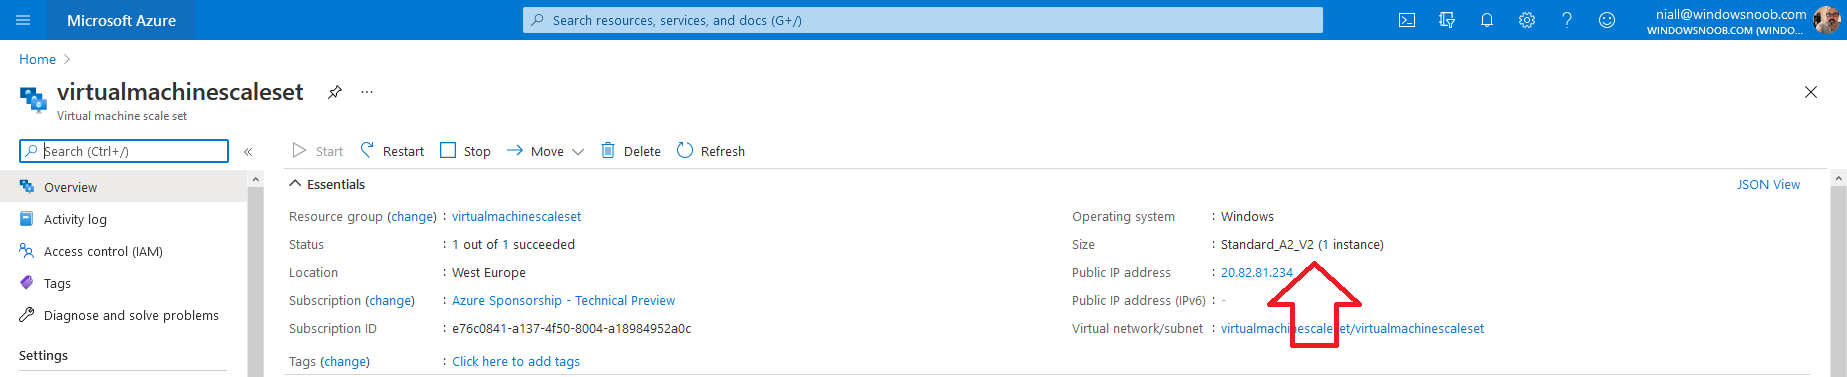
 And in Azure you can verify this in the Virtual Machine Scale Set properties.
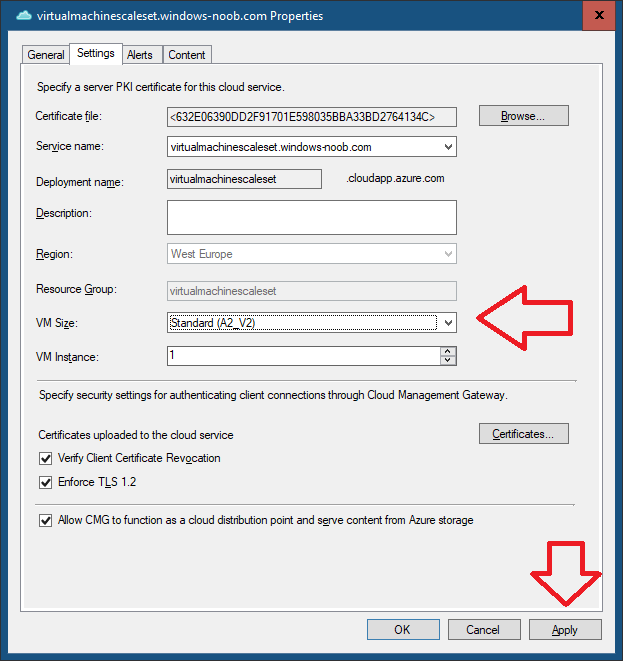
 Change VM Size
To change the VM Size simply click the drop down menu beside VM size in the CMG settings and change it to the setting you wish to move to and then click Apply.
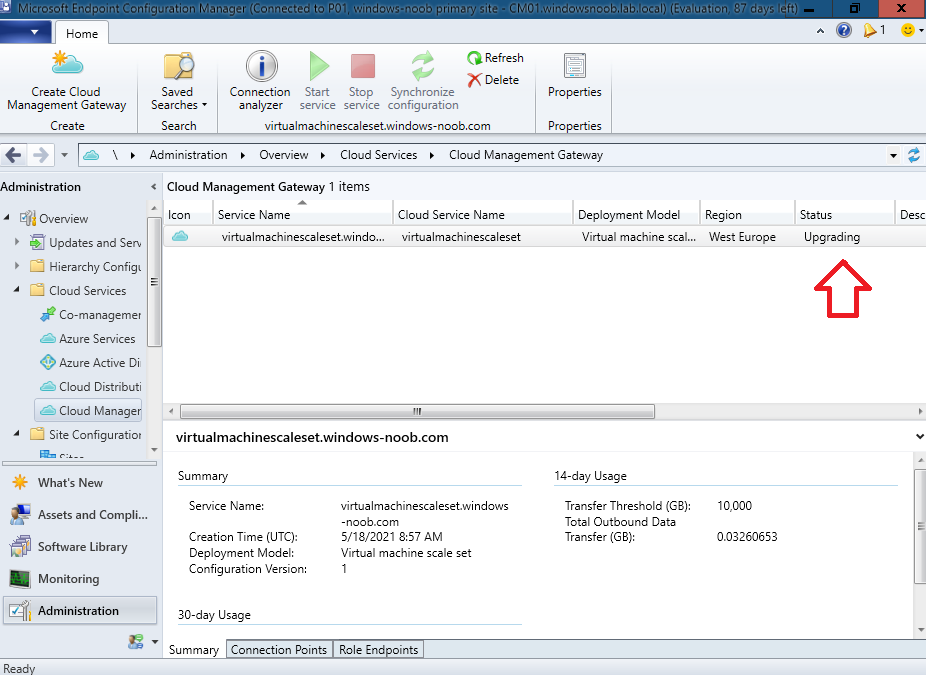
 Once it has been applied, the magic will start. The console will reflect this by changing the status to Upgrading.
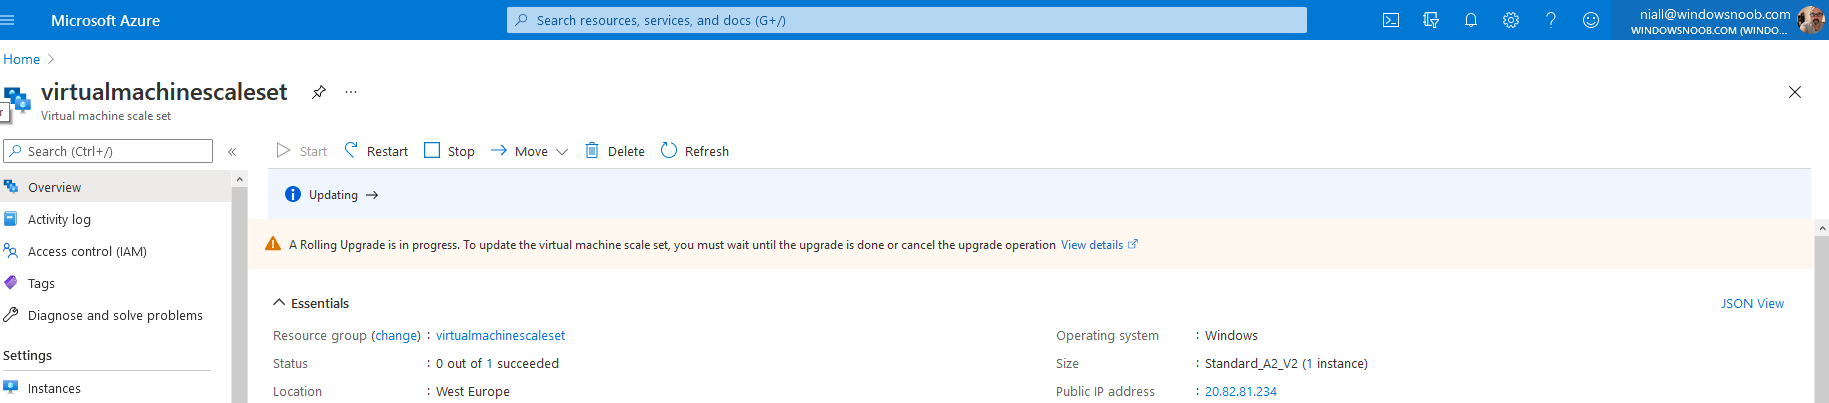
 And in azure you’ll see that it’s currently upgrading, it’ll state that a rolling upgrade is in progress (you may need to refresh the page).
This will be reflected in the CloudMgr.log
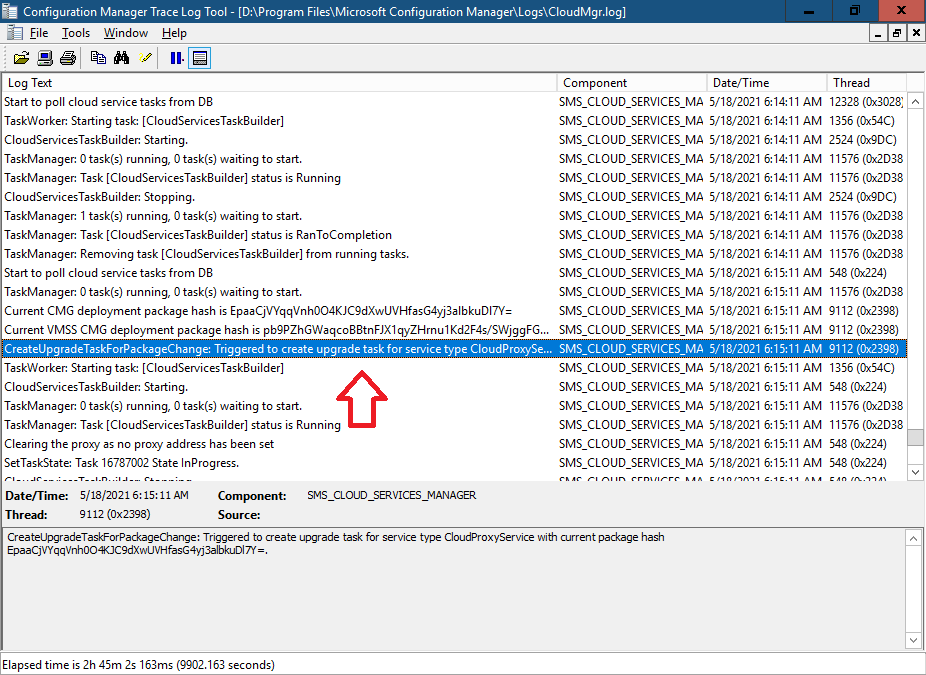 then a DSCCMG.zip is uploaded with the changes
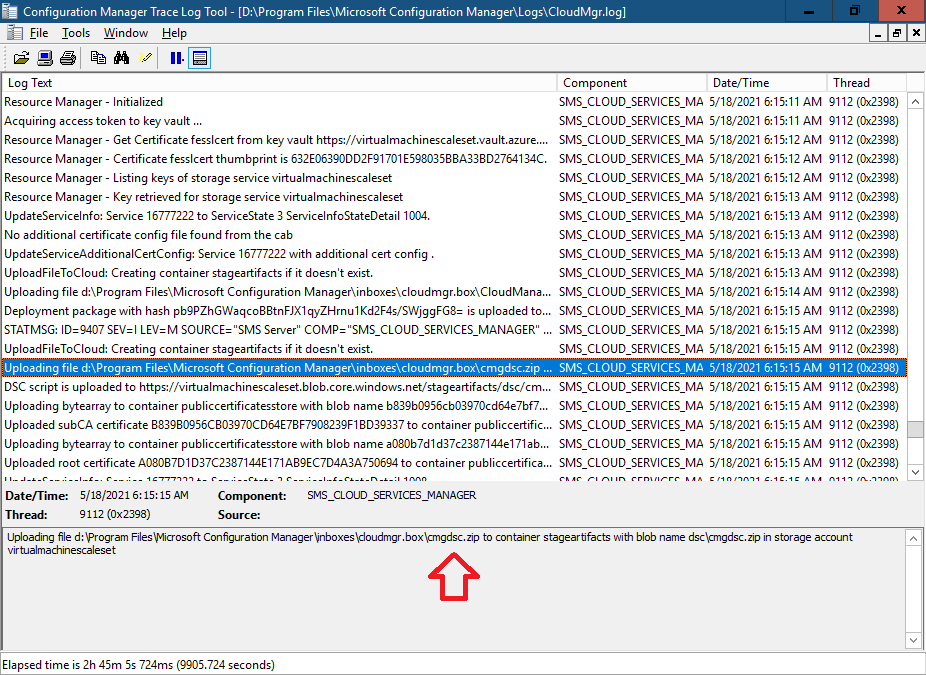 and after a few minutes it should hopefully succeed
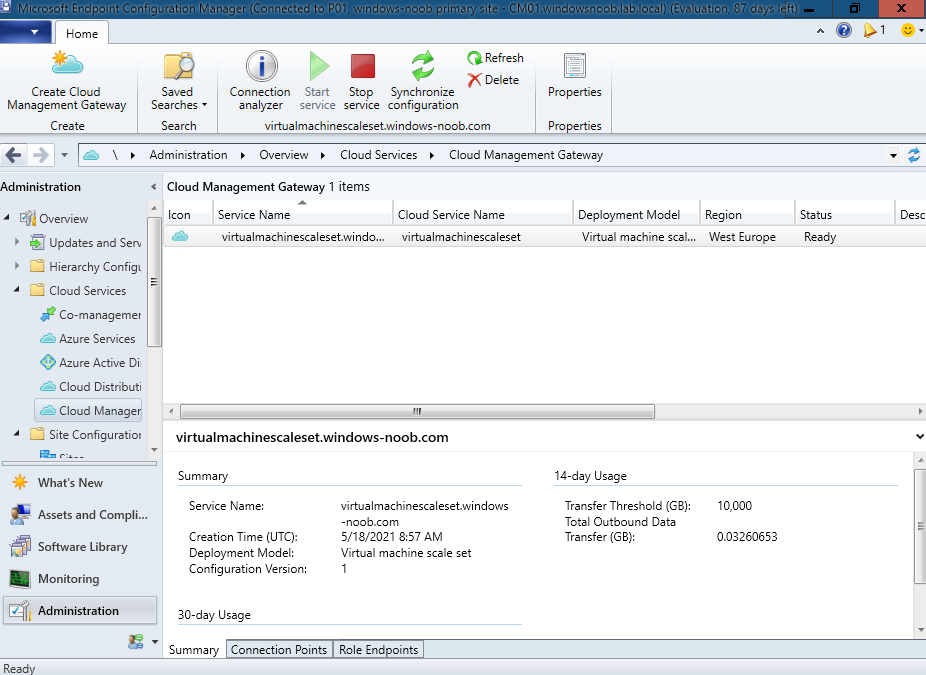
In the ConfigMgr console, the CMG should be listed with a status of Ready.
 and the CMG settings will list the new VM Size
Finally, in Azure, you’ll see the changes are applied.
 job done !
