
Introduction
This is part 2 in a series of guides about cloud attach in Microsoft Endpoint Manager, with the aim of getting you up and running with all things cloud attach. This part will focus on preparing your environment for a Cloud Management Gateway (CMG). This series is co-written by Niall & Paul, both of whom are Enterprise Mobility MVP’s with broad experience in the area of modern management. Paul is 4 times Enterprise Mobility MVP based in the UK and Niall is 10 times Enterprise Mobility MVP based in Sweden.
See below for previous parts:
- Cloud attach – Endpoint Managers silver lining – part 1 (Configuring Azure AD connect)
- Cloud attach – Endpoint Managers silver lining – part 2 (Prepare for Cloud Management Gateway)
In part 1 we configured Azure AD connect to sync accounts from the on premise infrastructure to the cloud. In this part we’ll prepare your environment for a Cloud Management Gateway. A Cloud Management Gateway gives you a whole bunch of new abilities for managing, imaging computers, escrowing BitLocker keys and delivering software, updates and policy to remote based internet enabled clients.
Prerequisites
Azure:
- Intune Tenant already created
- Azure Subscription (free trial)
- Licenses applied, you can grab a free trial of Enterprise Mobility plus Security which includes Intune and Azure AD Premium P2 here (free trial).
- Intune is configured to auto-enroll devices (guide)
Configuration Manager:
- PKI enabled (guide)
- Configuration Manager current branch, version 1810 or later.
- The MDM authority must be set to Intune
Permissions:
The following permissions are required to be able to set up the Cloud Management Gateway:
- An account that is a global administrator for Azure Active Directory
- An account that is a domain admin on your on-premises infrastructure
- An account that is a full administrator for all scopes in Configuration Manager
Step 1. Add Classic Compute and Storage
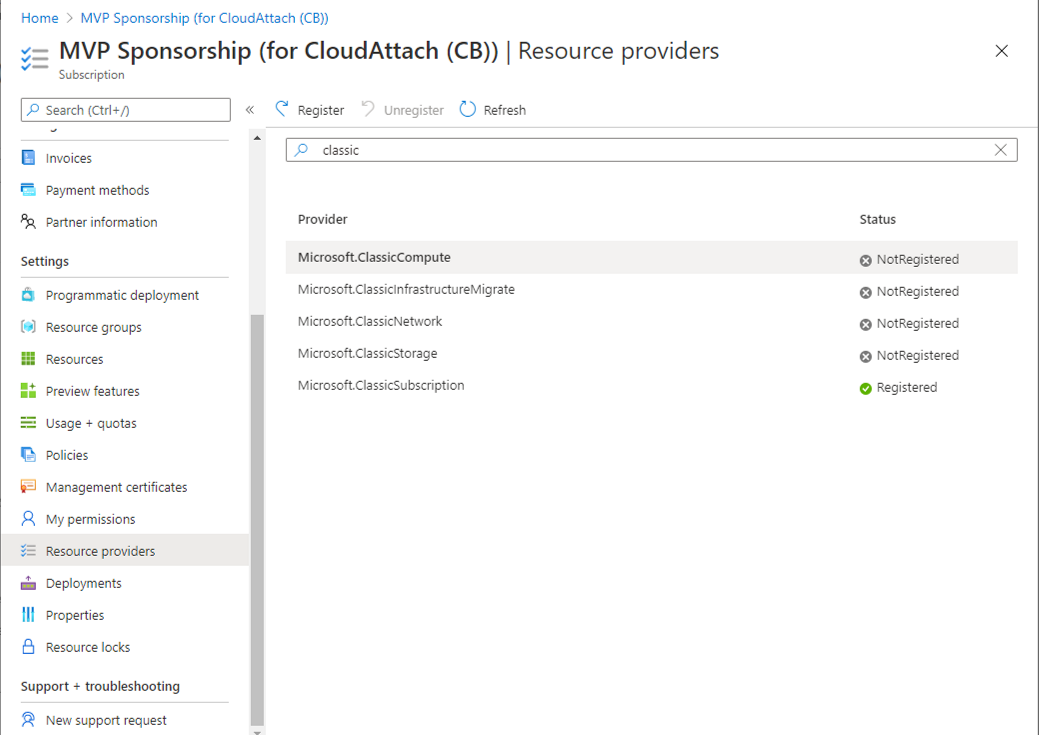
In order to setup the Cloud Management Gateway, you will need to register a couple of the resource providers in Azure (Microsoft.ClassicCompute & Microsoft.Storage). These resource providers may already be registered in your tenant, but you should check to ensure that they are and if not, act accordingly.
Launch the Azure port at https://portal.azure.com, go to Subscriptions, select your subscription, and choose Resource Providers in the Settings section.
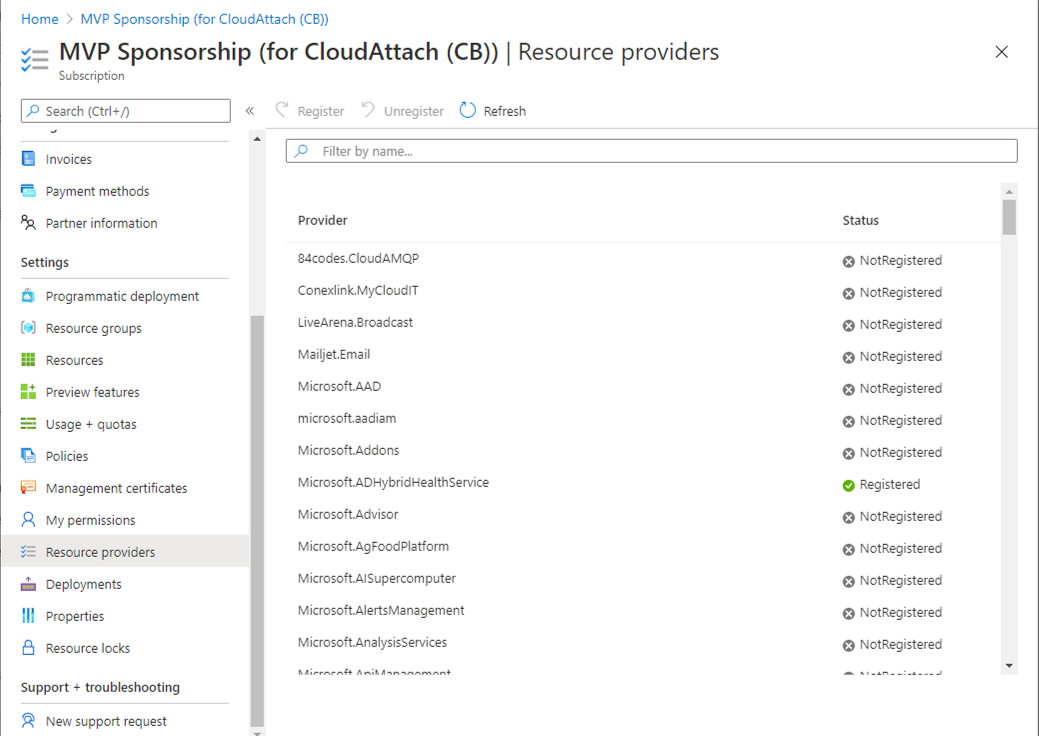
Search for Microsoft.Classic.Compute, select it and if it is listed with a status of NotRegistered then click Register. It will register the provider.
After a few moments the provider should appear as registered.

Repeat the above process for Microsoft.Storage so that both providers are listed as Registered.

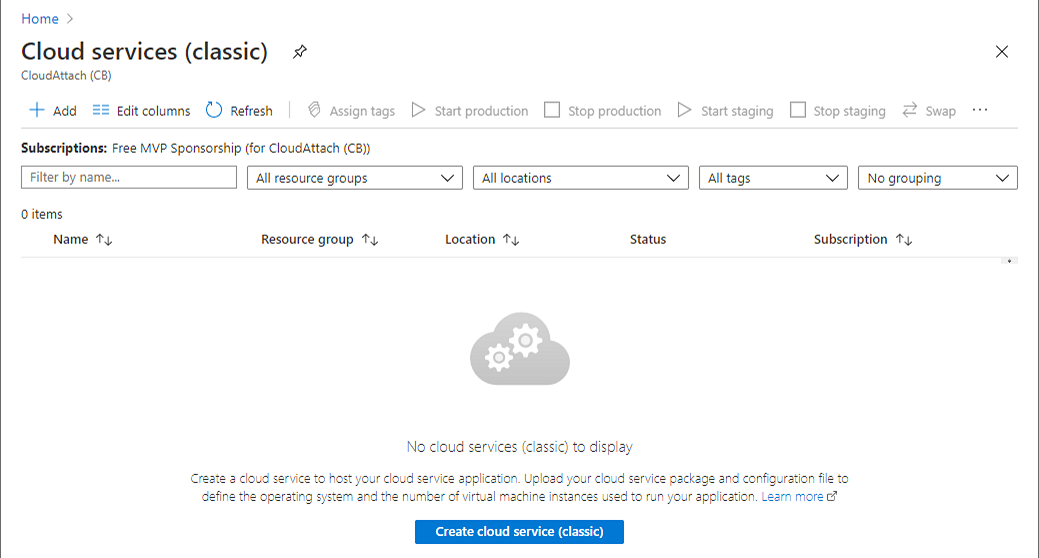
Step 2. Check for a unique name of your CMG instance
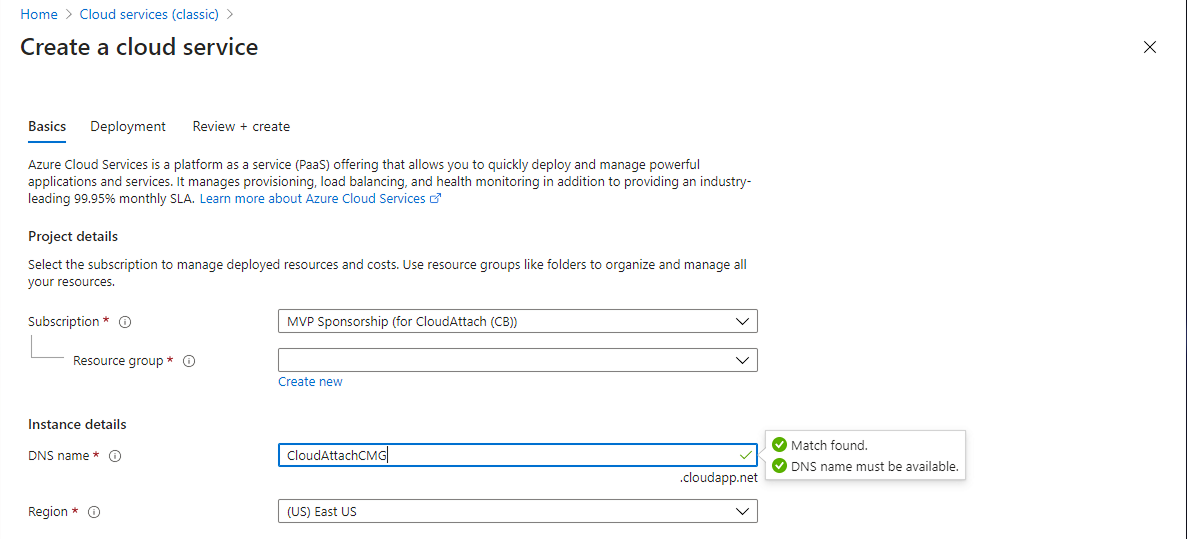
Verify in Azure that you have a unique name for your CMG, this is a unique name using Microsoft’s cloudapp.net namespace. You cannot reserve this name, only check for its availability. To do this, search for Cloud Service in the Azure portal and go to the Cloud service (classic) page. Click Add link.
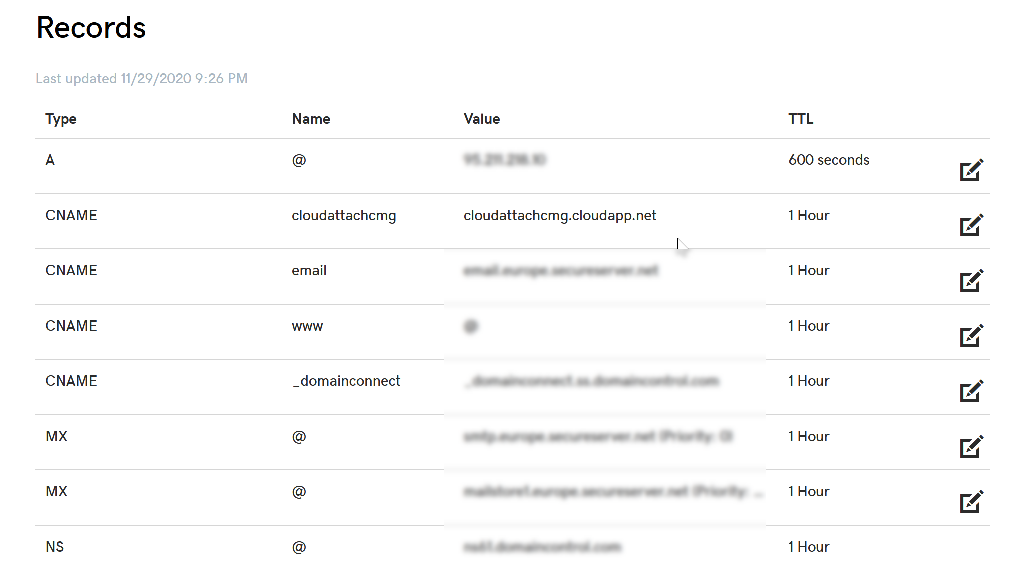
In the DNS name field, search for the name you want to use. Note that this name will not be visible to anyone on the outside world, so can be any available name you want. For our DNS name, we searched for CloudAttachCMG and as a result you want to see green ticks on both Match Found and DNS name. Both conditions must be met, if not you will get a red cross and you will need to search for another name.
Note the .cloudapp.net entry next to the DNS name field, the full name associated with the cloud management gateway VMs will be DNSName.cloudapp.net – so our CMG VM’s will be cloudattachcmg.cloudapp.net.
Do not save anything here, as mentioned you are just checking for availability.
Step 3. Create a CNAME record
You are going to request an external PKI certificate to secure communication to the CMG, but prior to that you need to reate a CNAME record at your external DNS provider. We cannot run through that process, as each provider is different, but you need to create a CNAME record to map to your chosen DNSName.cloudapp.net address.
We have mapped cloudattachcmg to cloudattachcmg.cloudapp.net.
A couple of things to note here:
- If you have an existing TXT record in your DNS you may need to delete this for the new CNAME to work, we saw issues in two tenants that would not properly create the CNAME record until we removed the previously created TXT record.
- You will need to add in a CNAME to your internal DNS servers if your internal DNS namespace is identical to your external namespace.
Below you can see the created CNAME record in the DNS provider of the custom domain name we added in part 1.
Tip: You can use dnschecker.org to see that your CNAME has propagated successfully.
To read the rest of this blog post please head over to windows-noob.com here.
