
Introduction
At the start of this series you installed System Center Configuration Manager (Current Branch), then you learned about configuring discovery methods. Next you configured boundaries to get an understanding of how automatic site assignment and content location works. After that you learned how to update ConfigMgr with new features and fixes using a new ability called Updates and Servicing and you configured ConfigMgr to use Updates and Servicing in Offline mode. In this post you’ll see how the Updates and Servicing process is done when it is in Online mode.
Note: This is an early release of this new technology so is quite likely to change/evolve in later versions. As a result I will amend this document to reflect those changes if and when they occur. Also to note there are no updates available for Current Branch yet (as of January 9th, 2016) so screenshots used in this guide are taken from Technical Preview 4.
Traditionally ConfigMgr would be updated via these 4 methods:
- Cumulative Updates
- Service Packs
- Hotfixes
- Extensions for Microsoft Intune
With Updates and Servicing, ConfigMgr can be updated ‘on the fly’ by the ConfigMgr administrator as soon as they are ready to install available and applicable updates. Updates and Servicing can be used to install available servicing content but this doesn’t mean that those methods will never be used again, for example, hotfixes may be released via the normal channel (here is an example of that) but not made available via Updates and Servicing at the same time.
The ConfigMgr server with the Service Connection Point role contacts Microsoft daily to see if any applicable updates are available, and if they are, the ConfigMgr admin is alerted to the fact via the Updates and Servicing section of the ConfigMgr console in conjunction with an informative popup when starting the console.
Step 1. Verify online mode is enabled in Updates and Servicing
Setting Updates and Servicing to online mode is easy, and it’s more than likely already enabled as it is the default setting when installing ConfigMgr using recommended settings.
Note: Online mode requires an internet connection on the server hosting the Service Connection Point role. Updates are checked for daily in and telemetry data is sent to Microsoft weekly.
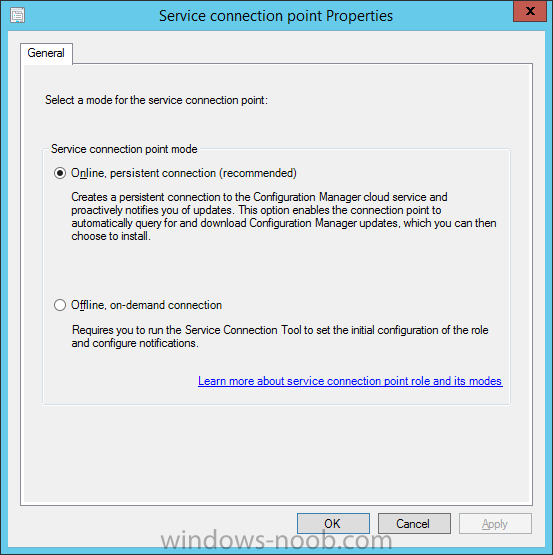
To verify whether the Service Connection Point role is set to online mode, check how the Service Connection Point role is configured. To do that, start the ConfigMgr console and select the Administration workspace, select Servers and Site System Roles, and select your site, Next locate the Service connection point role, right click it and select Properties.
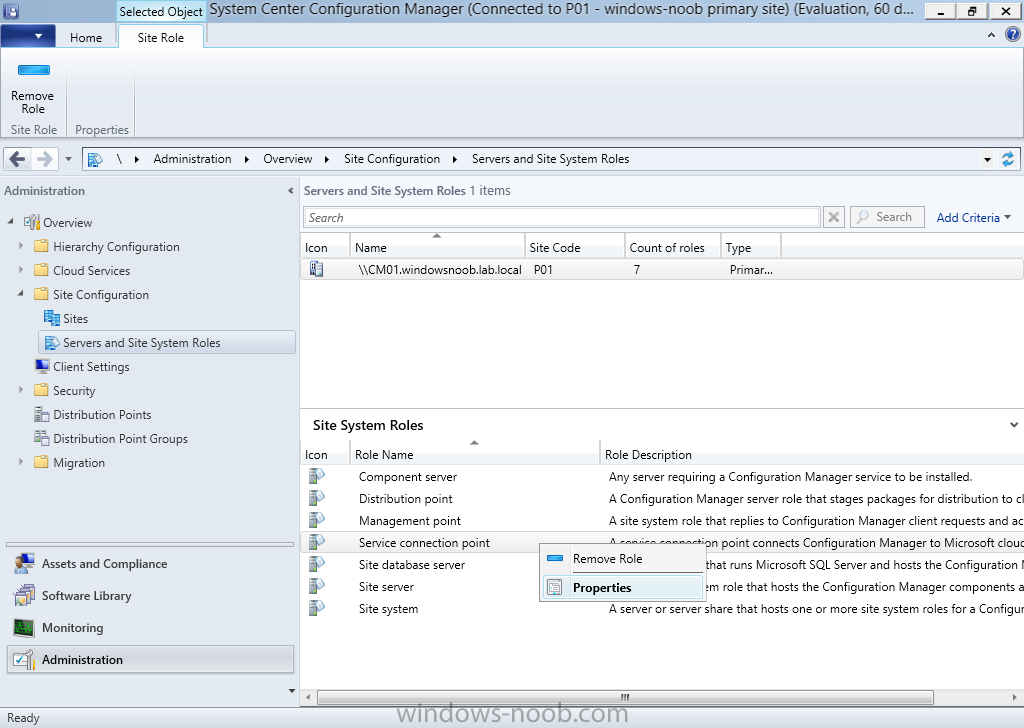
Verify that it is set to Online, persistent connection (recommended) as shown in the figure below.
Close the Service connection point properties window.
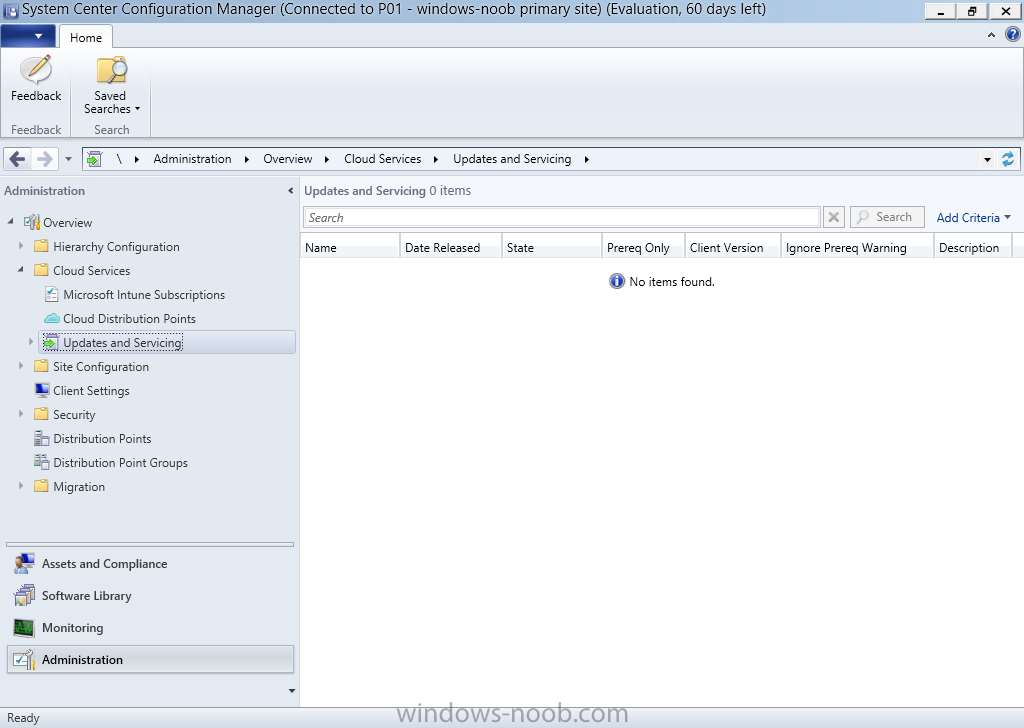
Step 2. Check if any servicing updates are listed in the console
To verify if any updates are available open the ConfigMgr console, select the Administration workspace, select Cloud Services, and then expand Updates and Servicing. Previously installed or available updates will be listed. If no updates are available yet (or applicable), or if the Service Connection Point role has not contacted Microsoft yet then it will appear blank as shown below.
Step 3. Manually checking for updates
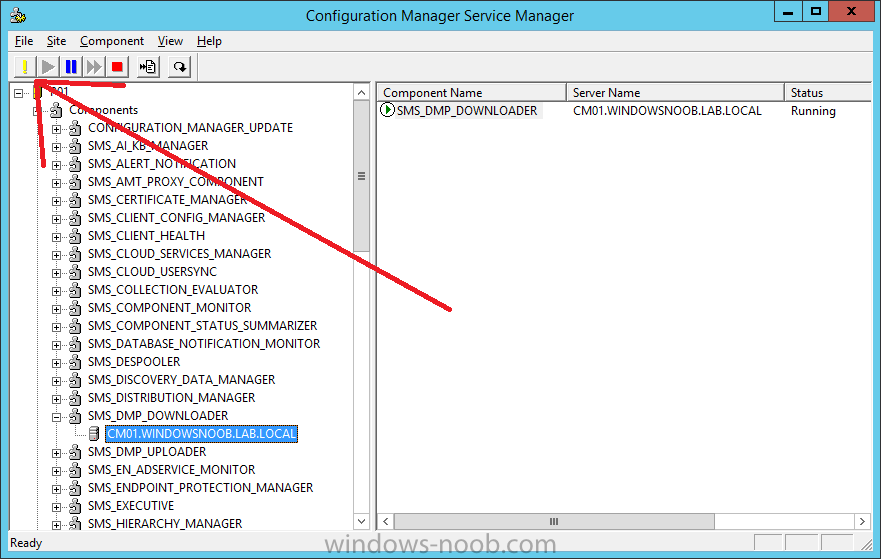
To manually force a check for updates you can restart the SMS_DMP_Downloader component. To restart this component, you can use the Configuration Manager Service Manager tool available in the Monitoring, System Status, Component Status section of the ConfigMgr console. To start the Configuration Manager Service Manager right click on any component, choose Start, then select Configuration Manager Service Manager.
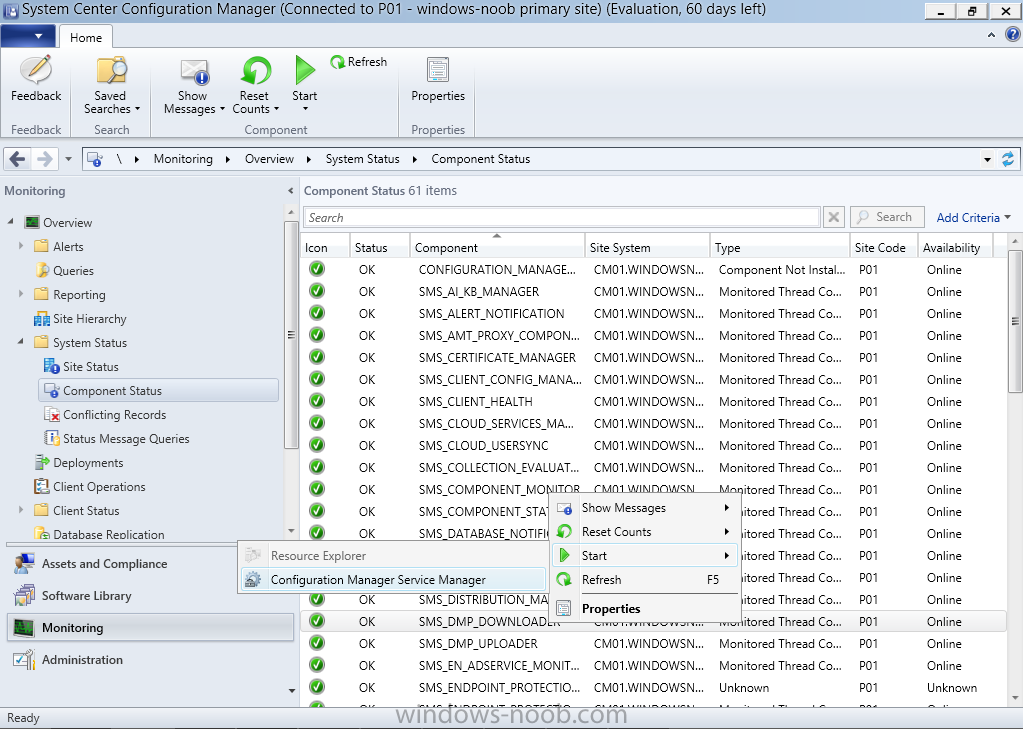
In the Configuration Manager Service Manager expand components under your site code, and select and expand the SMS_DMP_DOWNLOADER component.

Querying the component
Click on the yellow exclamation mark to query the status of the component. It should be listed as Running.
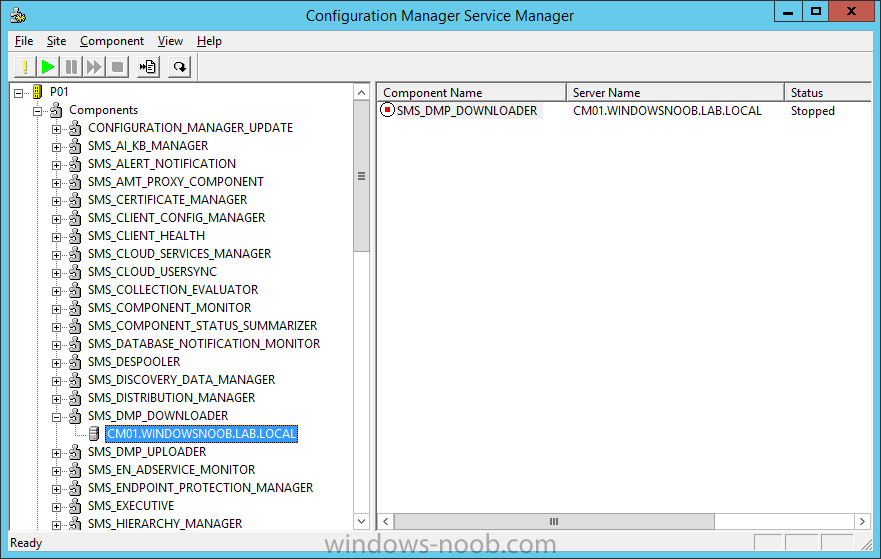
Stopping the component
Press the red square to stop the component and once again click on the yellow exclamation mark to query the status of the component. It should now be listed as Stopped. If not, query it again until it is stopped.
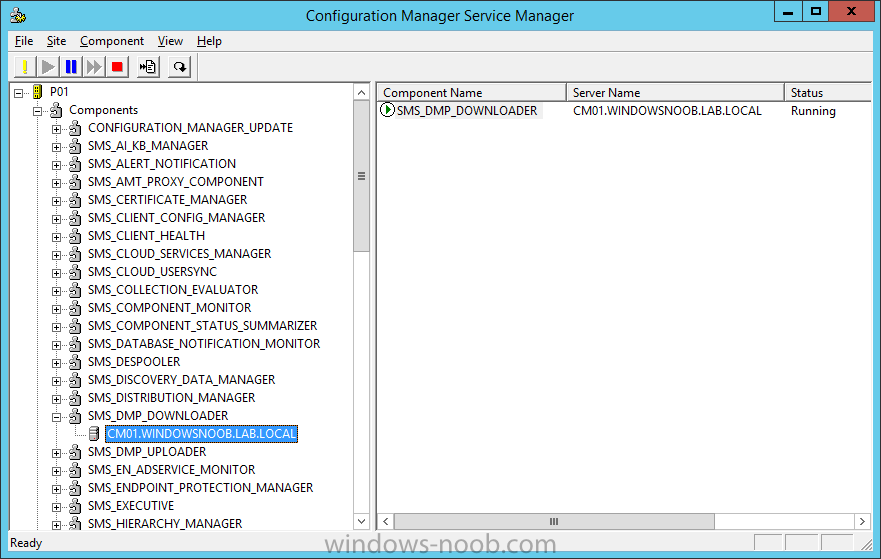
Starting the component
To start the component again, click on the green triangle icon and then query the component to verify it has started.
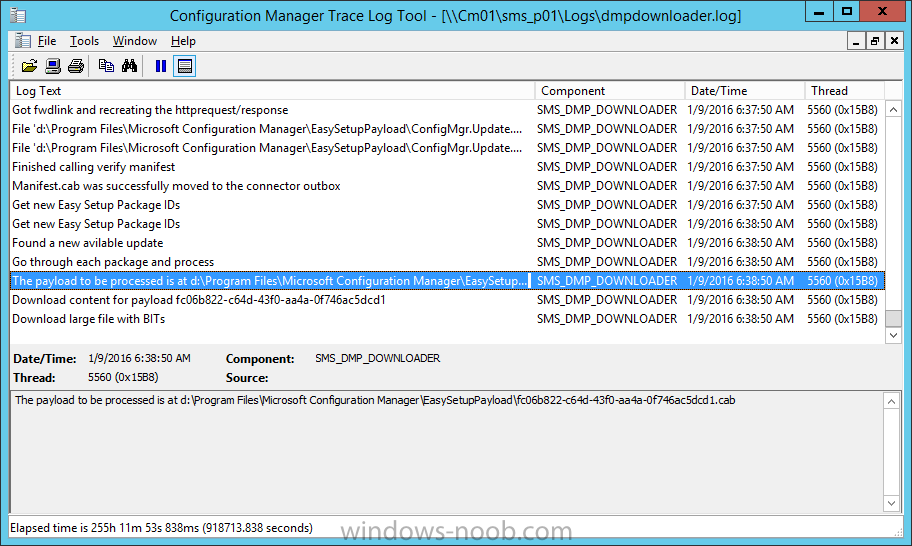
Step 4. Monitoring the download process
You should use CMTrace to open the dmpdownloader.log available in <ConfigMgr installation path>\Microsoft Configuration Manager\Logs. This log file logs the entire process which is made up of the following sections
- Applicability check
- Automatic download of main content
- Extraction of main content
- Check for redist content
- Automatic download of redist content
Note: Another log file, Hman.log available in <ConfigMgr installation path>\Microsoft Configuration Manager\Logs will also provide additional information about the update.
Applicability check and automatic download
In the dmpdownloader.log log file shown below you can see that it has found an applicable update and begins the download.
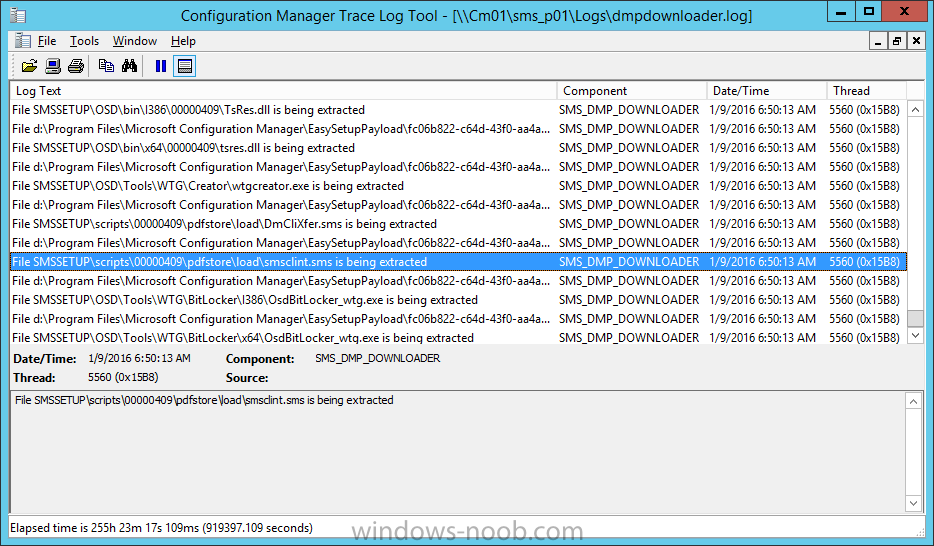
Extraction of main content
After downloading the content it is then extracted from the CAB file to the <installation path>\Microsoft Configuration Manager\EasySetupPayload folder as revealed in the dmpdownloader.log.
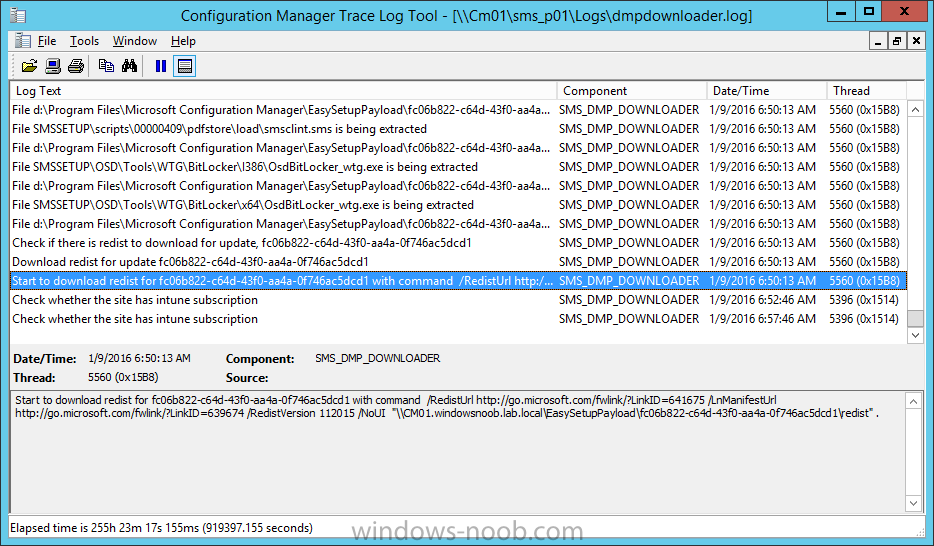
Checking for and downloading redist content
Next the process checks if a Redist is available for download, if one is available it will automatically download it.
Note: The Redist content is essentially similar to the prerequisite download’s you would normally download prior to running a site upgrade or installation.
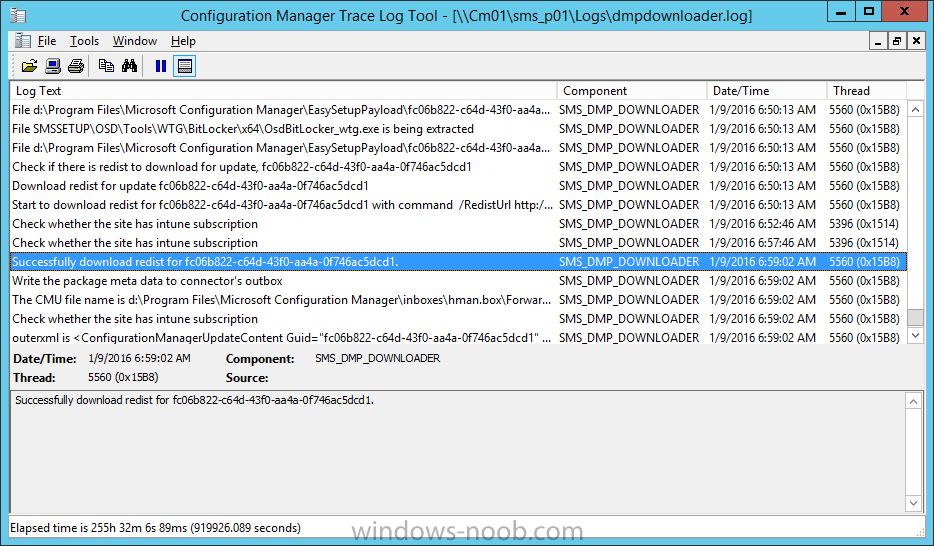
After the redist content is downloaded you can verify that by looking for the following line in dmpdownloader.log
"Successfully download redist for <GUID>."
where <GUID> is the GUID of the main content.
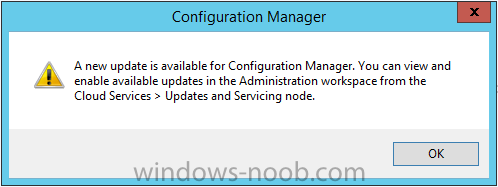
Once the main content and redist content are downloaded, the update is made available to ConfigMgr, this can be confirmed via the following line in dmpdownloader.log
"Successfully write the update meta into outbox for package <GUID>"

at this point, close the ConfigMgr console and then open it again. You should see is a notification that there’s an update available as shown below:
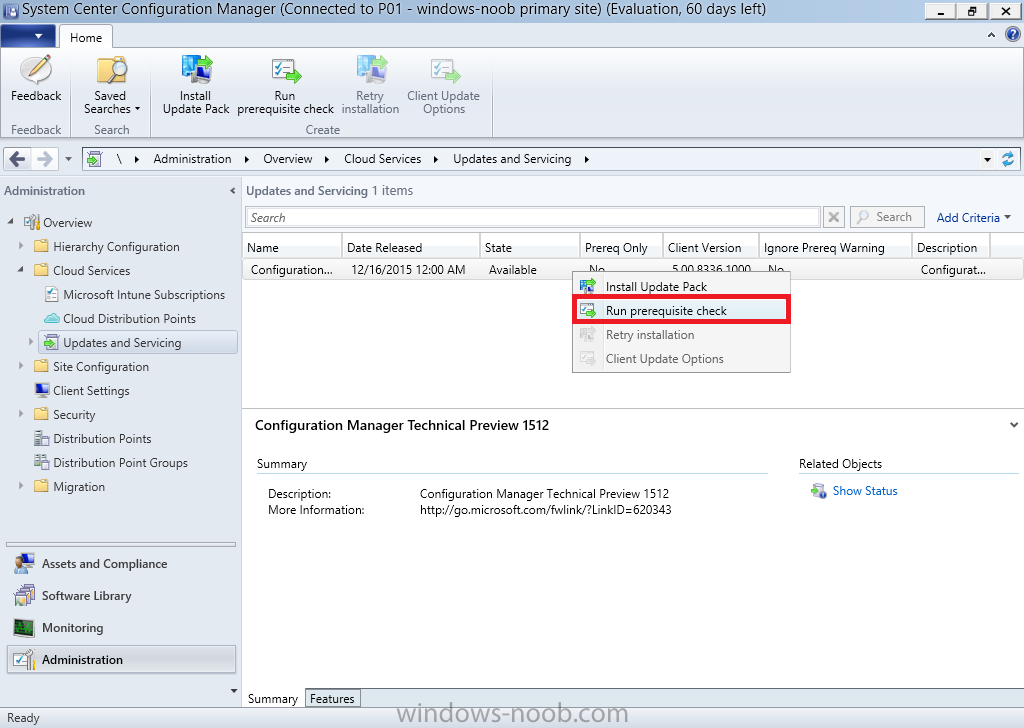
Step 5. Run the prerequisite check
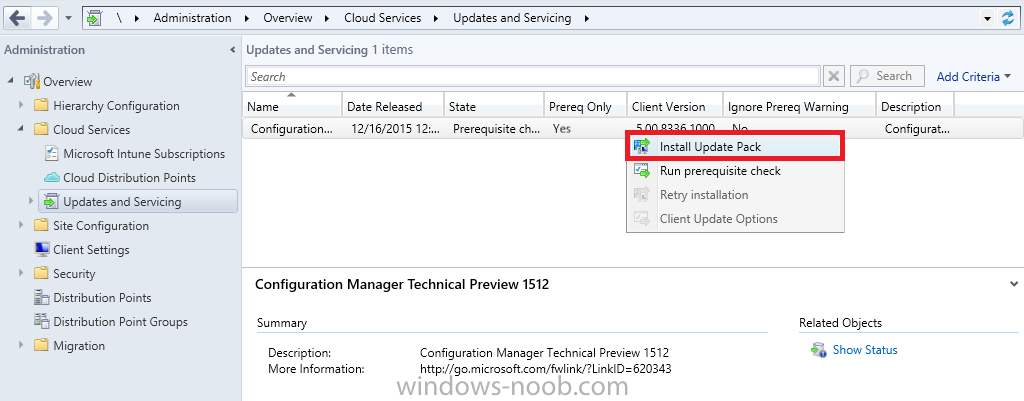
In the ConfigMgr console, navigate to Administration, Cloud Services , Updates and Servicing. Once an available update shows up in Updates and Servicing you have a few choices available to you, you can run a prerequisite check, install it or retry the installation in cases where an update fails to install for whatever reason.
It always makes good sense to run the prerequisite check before attempting to install any available update though, as it may highlight any problems with your environment. To run the prerequisite check, right click on an available update and select the option Run prerequisite check.
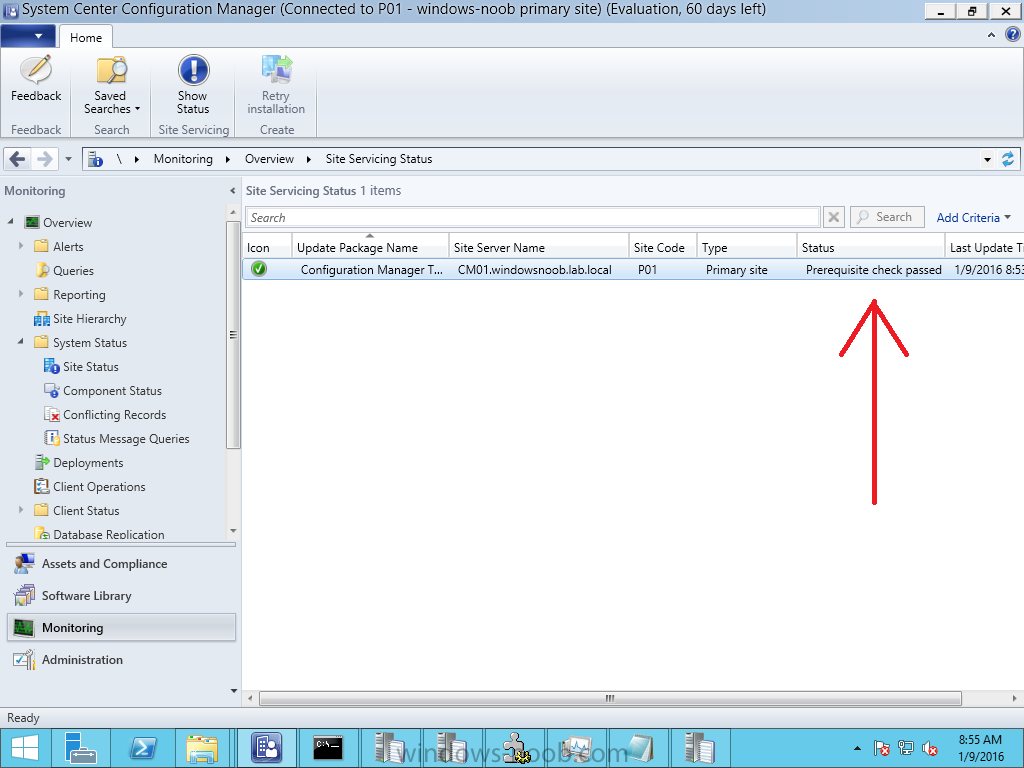
You can click on Show Status (bottom right) which will take you to the Monitoring workplace of the ConfigMgr console and to the Site Servicing Status section as shown below, this will list the status of the prerequisite check under the Status column.
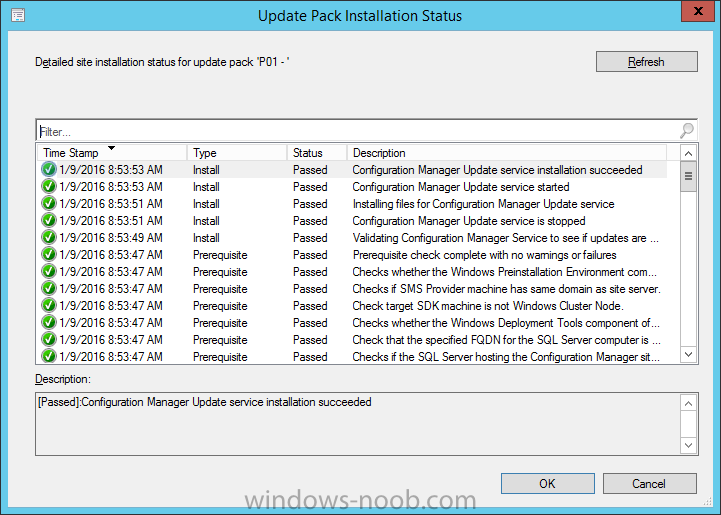
If you want more details you can right click on the update and choose Show Status as shown in the Update Pack Installation Status.
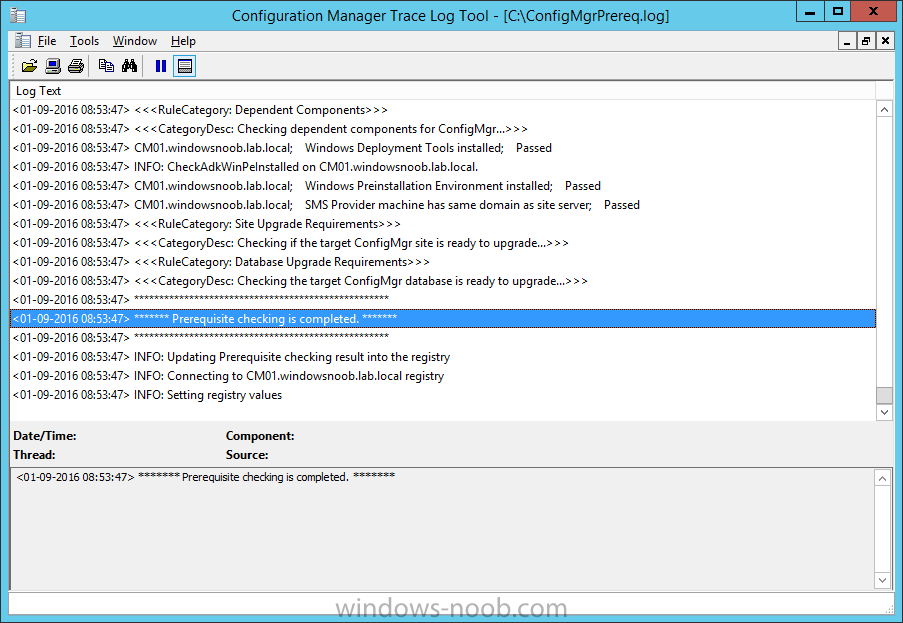
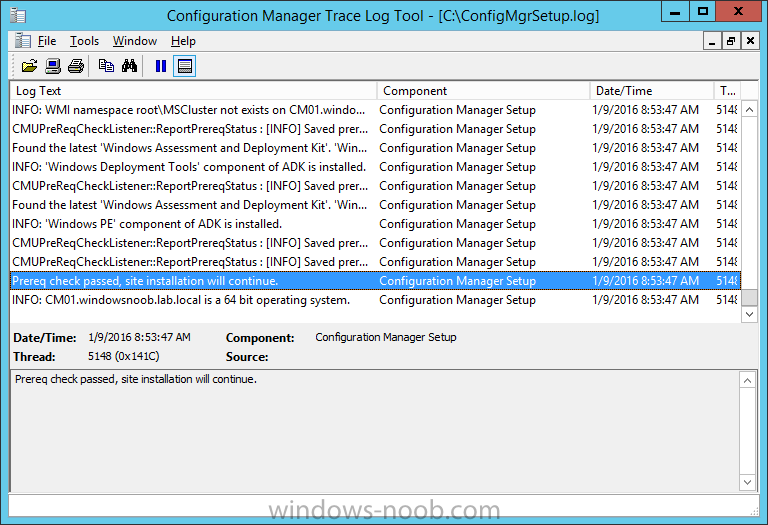
In addition you can check the following log files, ConfigMgrPrereq.log and ConfigMgrSetup.log in the root of C:\.
Step 6. Install an update
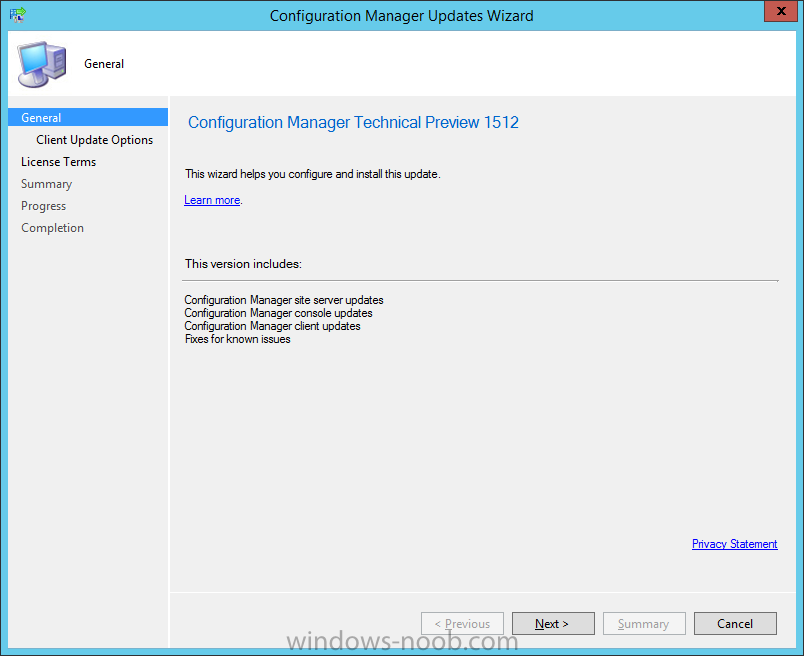
To Install an available update listed in Updates and Servicing, right click on it and choose Install Update Pack. The Configuration Manager Updates Wizard appears.
The Configuration Manager Updates Wizard appears.
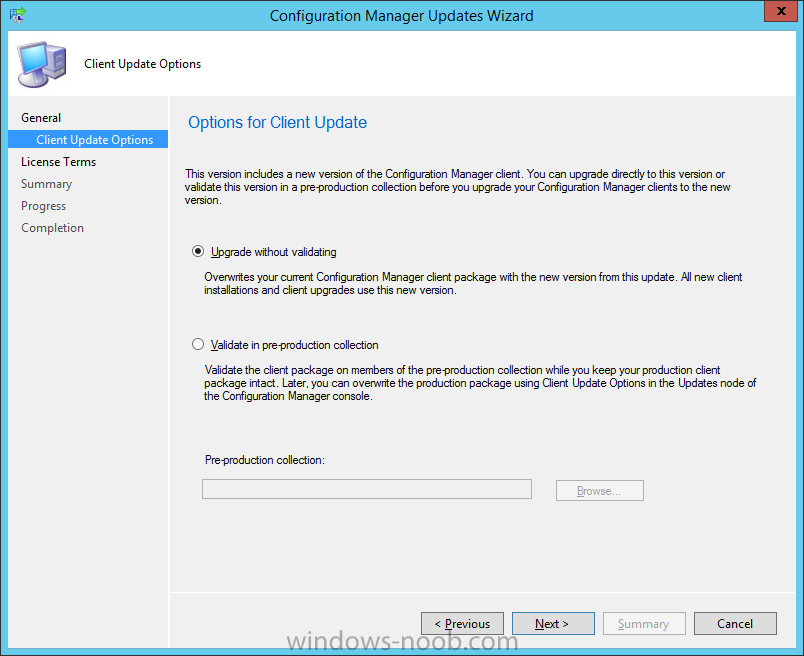
Click on Next to start the update, you’ll see a window asking you about your Options for Client Update settings. If you want to test the client in pre-production, point to a previously created device collection otherwise leave the default settings of Upgrade without validating and click next.
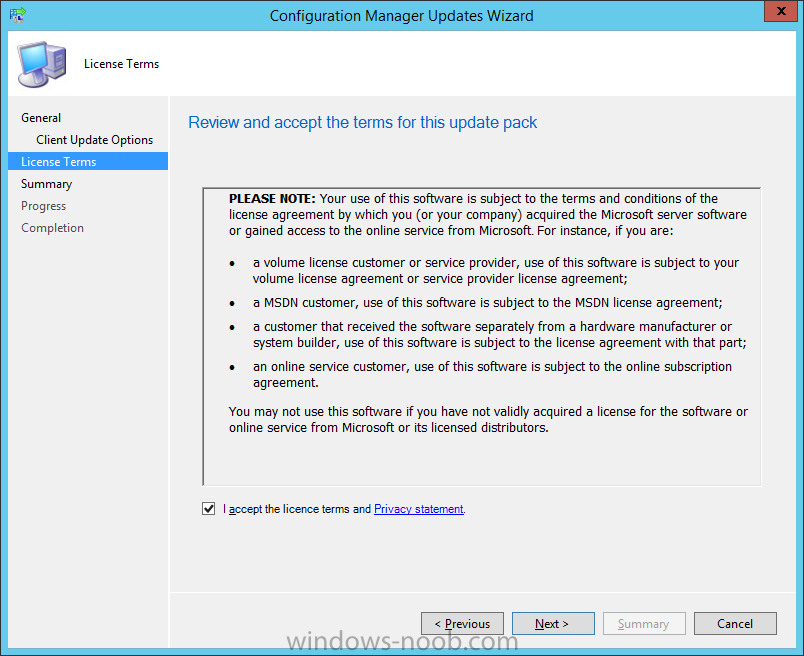
Accept the License terms to continue
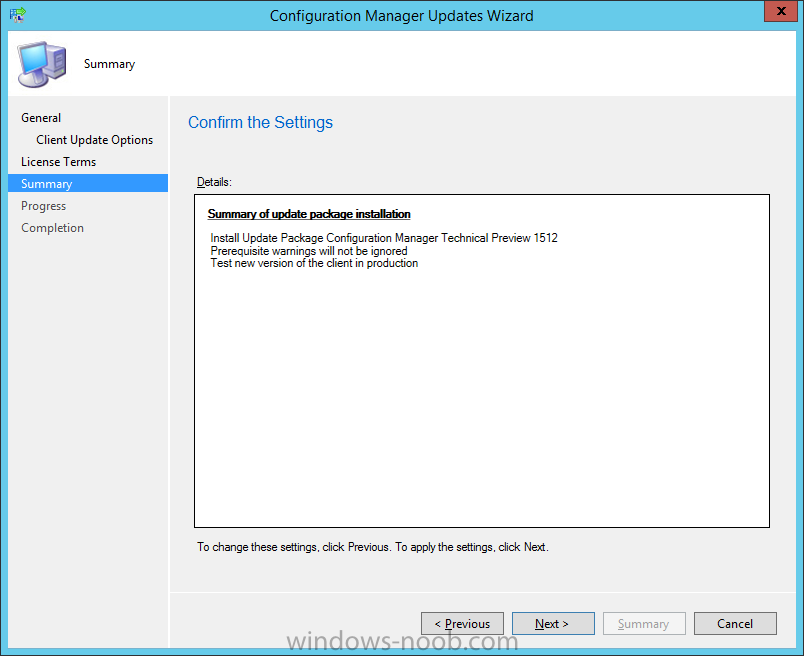
review the Summary of update package installation
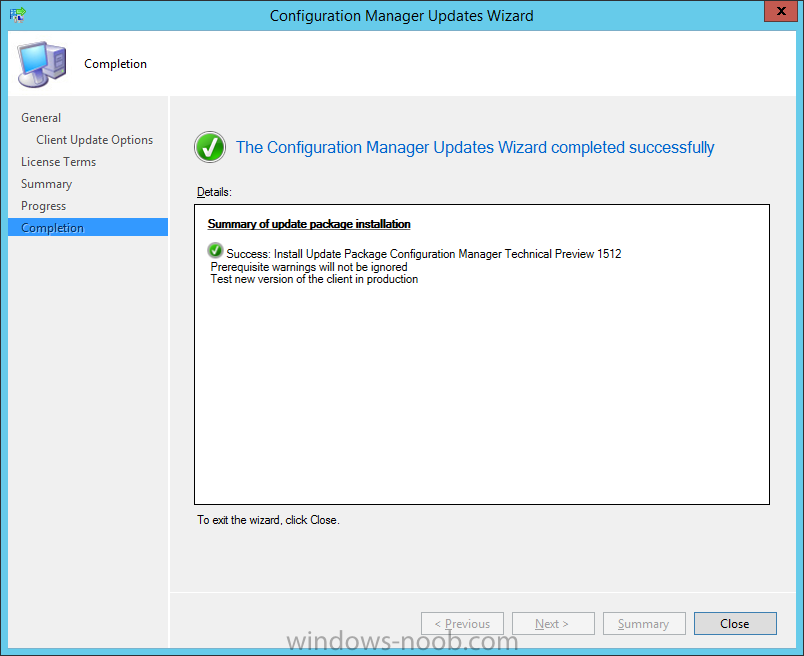
and at the completion screen click on Close.
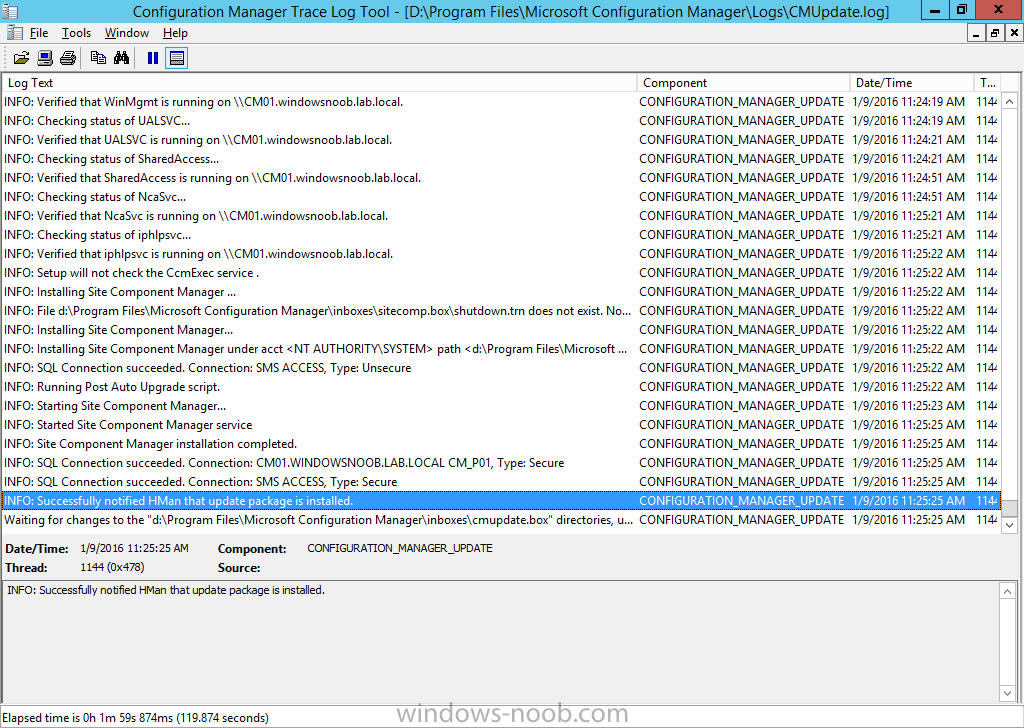
At this point, use CMTrace to check the CMUpdate.log file found in <ConfigMgr installation path>\Microsoft Configuration Manager\Logs for detailed info about the installation of the update.
Note: If you don’t see anything happening in the CMUpdate.log file then be patient and wait, go grab a coffee.
The CMUpdate log file shown below is highlighting a successful update.
Note: You can also refer to the hman.log available in <ConfigMgr installation path>\Microsoft Configuration Manager\Logs for details about the installation.
At this point close the console and then open it again.
You’ll get a new popup informing you that a new version of the console is available to be installed choose OK.
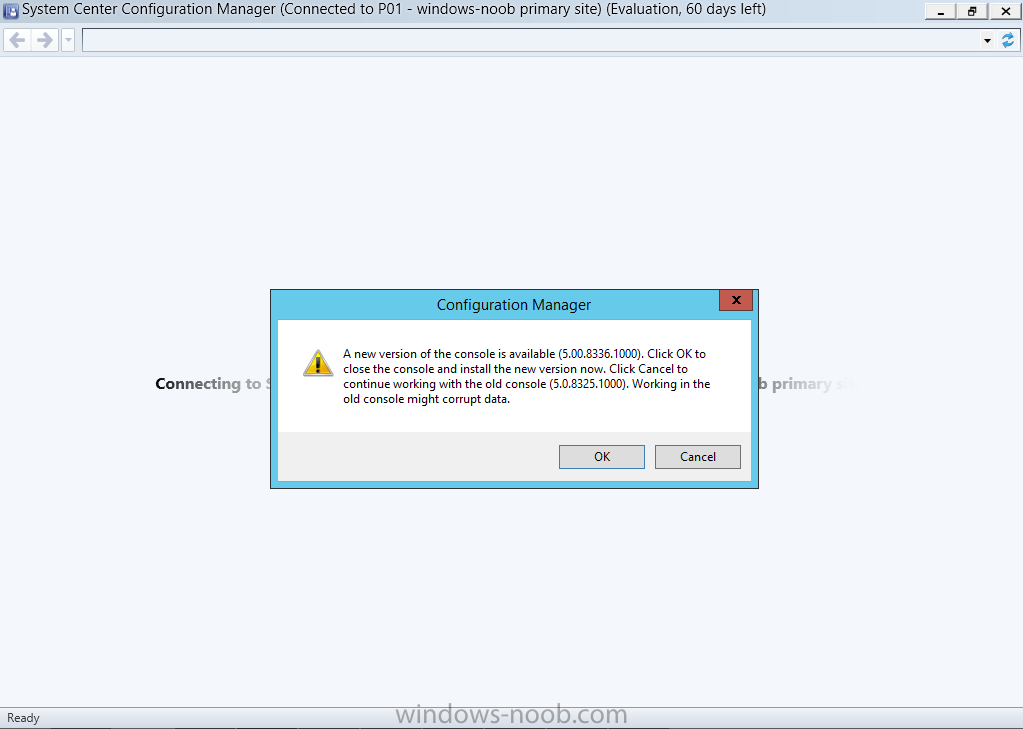
After it is installed, the console will reopen. Job done !
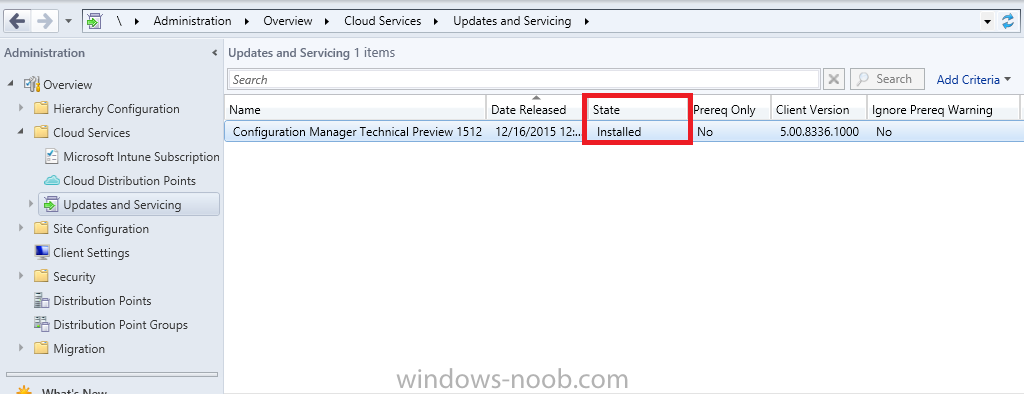
At this point you can browse back to Administration, Cloud Services, Updates and Servicing and you’ll see the update state has changed to Installed.
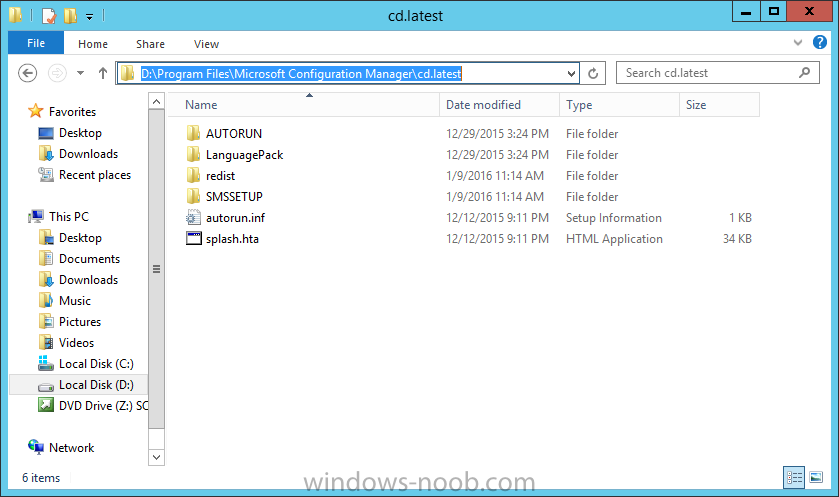
Note: Once the site is updated you can find a copy of the recently downloaded ConfigMgr installation software in ConfigMgr installation path>\Microsoft Configuration Manager\cd.latest in case you need it at a later date for a site reset or other related activities.
Summary
In this guide you learned about updating ConfigMgr with new features and fixes using a new feature called Updates and Servicing and you did it using the default method called Online mode.
Related Reading
- Installation of Current Branch – How can I install System Center Configuration Manager (Current Branch)
- Configuring Discovery – How can I configure discovery for System Center Configuration Manager (Current Branch)
- Configuring Boundaries – How can I configure boundaries in System Center Configuration Manager (Current Branch) ?
- Using Updates and Servicing in Offline mode – How can I use Updates and Servicing in Offline mode in System Center Configuration Manager (Current Branch) ?
- Install updates for System Center Configuration Manager – https://technet.micr…y/mt607046.aspx
- Diagnostics and usage data for System Center Configuration Manager – https://technet.micr…y/mt613113.aspx
- How to test client upgrades in a preproduction collection in System Center Configuration Manager – https://technet.micr…y/mt612863.aspx
- Installation of TP4 – How can I install System Center Configuration Manager and Endpoint Protection Technical Preview 4
Downloads
You can download a Microsoft Word copy of this guide here dated 2016/01/09.  Updates and Servicing in online mode in System Center Configuration Manager Current Branch.zip 1.72MB
