
Introduction
Microsoft recently released CU3 for System Center 2012 Configuration Manager SP1, this does add some support for Windows 8.1 for the following features:
- Software distribution
- Software update management
- Compliance Settings
but some things are not supported when it comes to Operating System Deployment such as driver provisioning.
Problem
If you try to deploy Windows 8.1 using System Center 2012 Configuration Manager SP1 CU3 drivers will fail to install, below is a sample error logged in smsts.log when it attempts to provision drivers for Windows 8.1 using the built in WinPE 4 boot wim that Windows ADK 8 provides.
Executing command line: “X:\windows\Pkgmgr\dism.exe” /image:”C:” /windir:”WINDOWS” /apply-unattend:”C:\_
Process completed with exit code 3221225781
Dism failed with return code -1073741515
Failed to add driver to driver store. Code 0xc0000135
Failed to provision driver. Code 0xc0000135
This is due to the fact that System Center Configuration Manager 2012 SP1 uses Windows ADK 8.0 and that means the provided boot images are based on WinPE 4 which does not natively support Windows 8.1 deployments.
To natively support Windows 8.1 deployments you’ll need WinPE 5 boot images and they are included in Windows ADK 8.1.
However Windows ADK 8.1 is not supported with System Center Configuration Manager 2012 SP1.
This post will help you to manually create a WinPE 5 boot wim and add it to Configuration Manager to aid with deploying Windows 8.1 until R2 becomes available (GA is October 18th) or maybe you just have to wait before adding R2 in your organization.
Solution
By manually creating a WinPE 5 boot image using the steps described below on a client computer and importing it into System Center 2012 Configuration Manager SP1 CU3 you can deploy Windows 8.1 operating systems. There are some caveats however listed below.
- Optional Components or Drivers you manually add to the boot wim file will not be reflected in the Configuration Manager console boot wim properties. This is a comestic issue.
- It is not advisable to make any changes to the boot image via the console other than to distribute it to your distribution points.
- All further changes to the boot wim should be done using the process below.
Please read the summary note at the end of this post for the Supported solution from Microsoft.
Step 1. Install ADK8.1
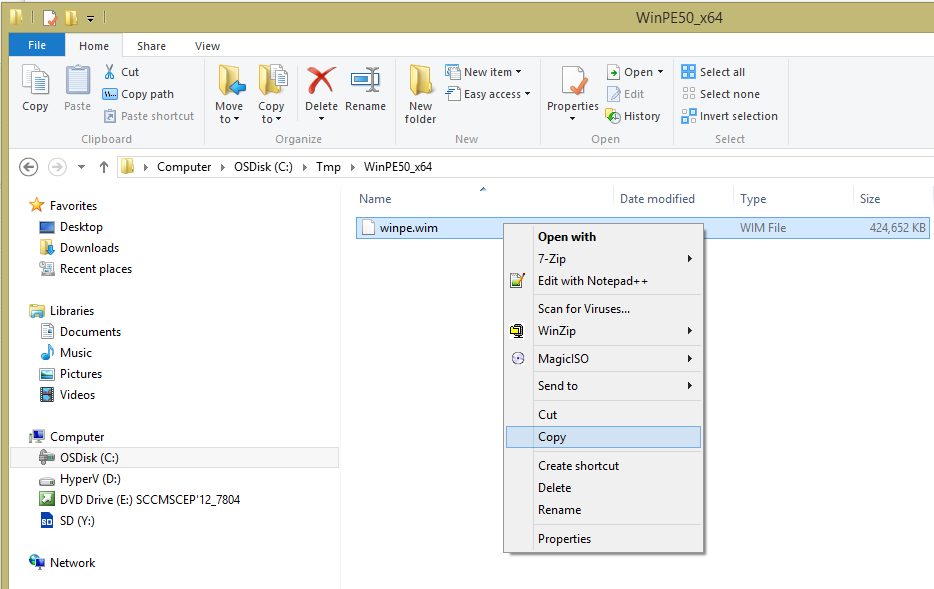
Download Windows ADK 8.1 using this link. On a Windows 8 client computer, install adk 8.1 as described in step 2 and step 3. Once done, copy both the 64 bit and 32 bit architecture boot wim files from:-
- C:\Program Files (x86)\Windows Kits\8.1\Assessment and Deployment Kit\Windows Preinstallation Environment\amd64\en-us
- C:\Program Files (x86)\Windows Kits\8.1\Assessment and Deployment Kit\Windows Preinstallation Environment\x86\en-us
to
- C:\Tmp\WinPE50_x64
- C:\Tmp\WinPE50_x86
Step 2. Make some directories for mounting operations
mkdir c:\WinPEMount\x86
mkdir c:\WinPEMount\x64
Step 3. Mount a boot wim
In the Windows 8 start menu, locate the newly Added Windows ADK 8.1 tiles, and select the Deployment And Imaging Tools tile, right click and choose Run as Administrator
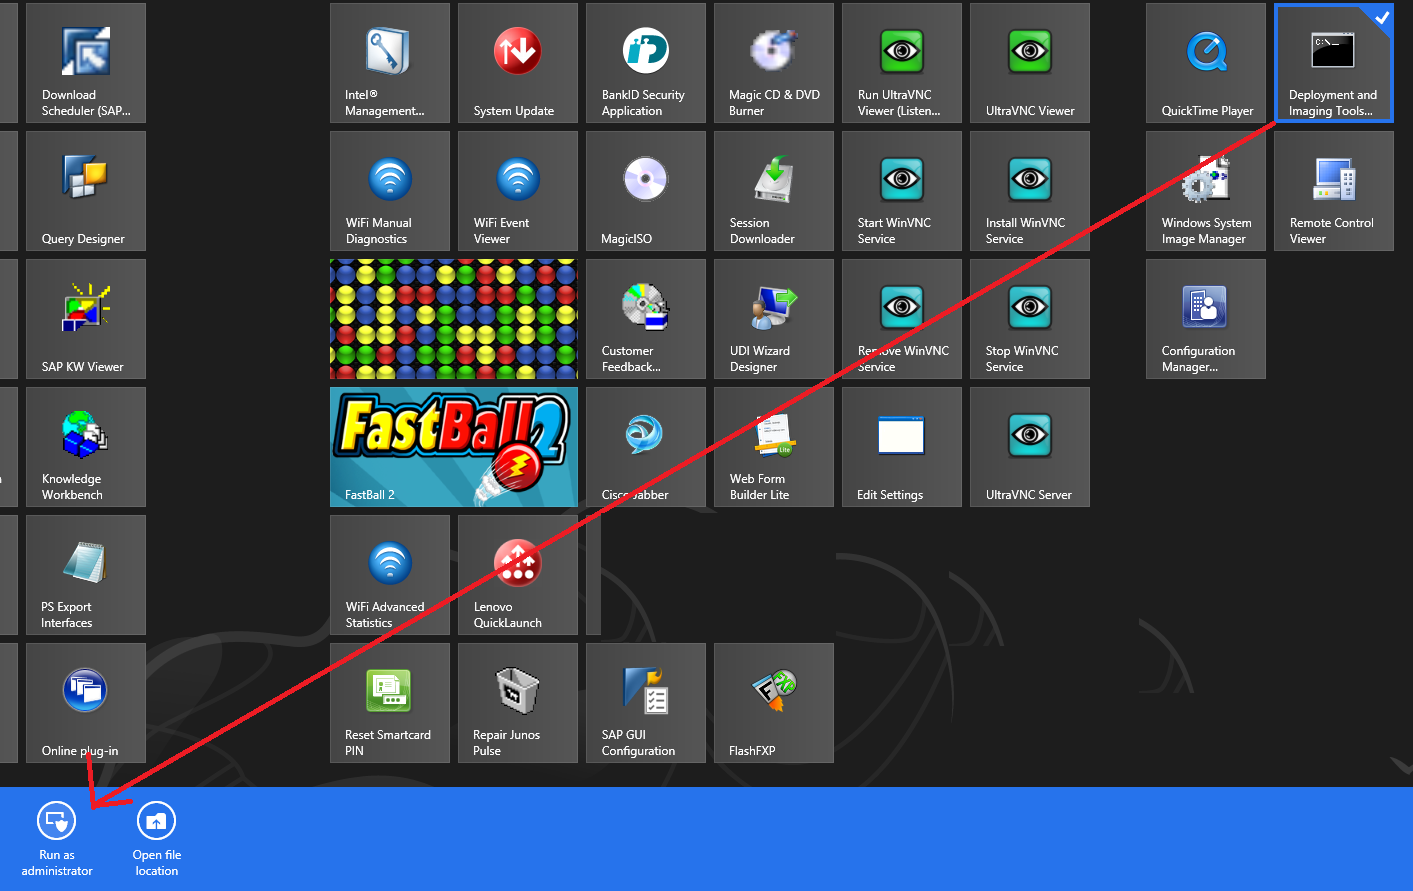 Note: Failure to do the above will mean you are using the wrong version of DISM (unless you are doing this in Windows 8.1).
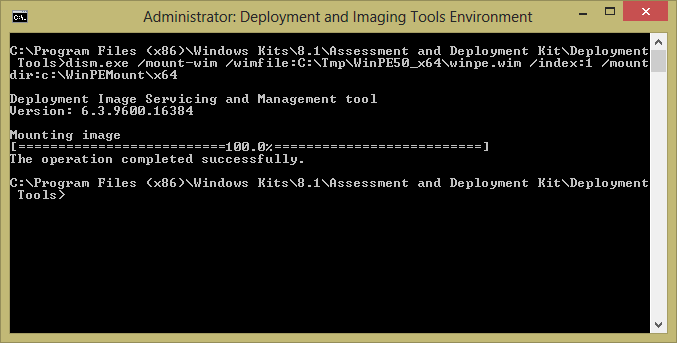
Mount one of your new boot wim files using DISM, note the version of DISM in my screenshot below, if your’s doesn’t match then the rest of this tutorial won’t work.
the correct version of DISM is listed below
Deployment Image Servicing and Management tool
Version: 6.3.9600.16384
and here’s the mount command:-
dism.exe /mount-wim /wimfile:C:\Tmp\WinPE50_x64\winpe.wim /index:1 /mountdir:c:\WinPEMount\x64
Step 4. Add Optional Components
You can add features to Windows PE, such as languages, hotfixes, and support for features like PowerShell and the HTML Application Language (HTA). In Windows PE, feature packages are known as optional components.
By default the following OC are usually added by Configuration Manager, you’ll want to add these and more…
- Scripting (WinPE-Scripting)
- Startup (WinPE-SecureStartup)
- Network (WinPE-WDS-Tools)
- Scripting (WinPE-WMI)
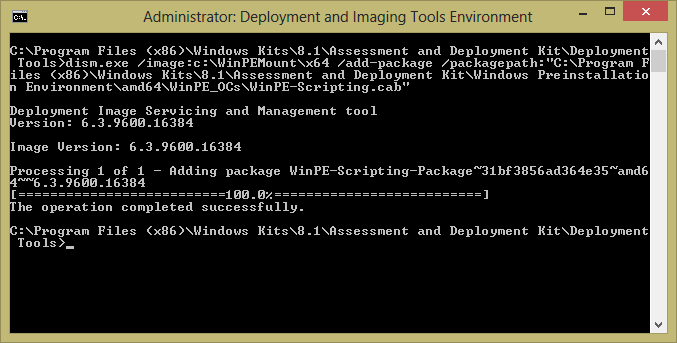
The commands for adding them are shown below, remove the ones you are not interested in.
dism.exe /image:c:\WinPEMount\x64 /add-package /packagepath:"C:\Program Files (x86)\Windows Kits\8.1\Assessment and Deployment Kit\Windows Preinstallation Environment\amd64\WinPE_OCs\WinPE-Scripting.cab"
dism.exe /image:c:\WinPEMount\x64 /add-package /packagepath:"C:\Program Files (x86)\Windows Kits\8.1\Assessment and Deployment Kit\Windows Preinstallation Environment\amd64\WinPE_OCs\WinPE-WDS-Tools.cab"
dism.exe /image:c:\WinPEMount\x64 /add-package /packagepath:"C:\Program Files (x86)\Windows Kits\8.1\Assessment and Deployment Kit\Windows Preinstallation Environment\amd64\WinPE_OCs\WinPE-HTA.cab"
dism.exe /image:c:\WinPEMount\x64 /add-package /packagepath:"C:\Program Files (x86)\Windows Kits\8.1\Assessment and Deployment Kit\Windows Preinstallation Environment\amd64\WinPE_OCs\WinPE-MDAC.cab"
dism.exe /image:c:\WinPEMount\x64 /add-package /packagepath:"C:\Program Files (x86)\Windows Kits\8.1\Assessment and Deployment Kit\Windows Preinstallation Environment\amd64\WinPE_OCs\WinPE-NetFx.cab"
dism.exe /image:c:\WinPEMount\x64 /add-package /packagepath:"C:\Program Files (x86)\Windows Kits\8.1\Assessment and Deployment Kit\Windows Preinstallation Environment\amd64\WinPE_OCs\winpe-securestartup.cab"
dism.exe /image:c:\WinPEMount\x64 /add-package /packagepath:"C:\Program Files (x86)\Windows Kits\8.1\Assessment and Deployment Kit\Windows Preinstallation Environment\amd64\WinPE_OCs\WinPE-WMI.cab"
Below is a sample OC being added via DISM
 Note: When booting this WinPE image later, the optional components are logged to
c:\_smstasksequence\logs\wpeinit.log
Step 5. copy SMSTS.ini file
I add SMSTS.ini to my boot images to increase the logging sizes for SMSTS.log files (and other log files created during WinPE OSD operations).
copy c:\Users\Niall\Desktop\smsts.ini c:\WinPEMount\x64\Windows
here’s a copy of my SMSTS,ini file, remove the .TXT extension before use.
Step 6. Add drivers to the boot wim
You’ll probably need to include some drivers in your boot wim, you cannot add them via the drivers tab in Configuration Manager as this boot image was created outside of Configuration Manager and with a different version of DISM.
Identify the drivers you need, copy them somewhere local and add them like below
dism.exe /image:c:\WinPEMount\x64\ /add-driver /driver:C:\Dongles\LANASIX\
The output should look something like this:-
Deployment Image Servicing and Management tool
Version: 6.3.9600.16384Image Version: 6.3.9600.16384
Searching for driver packages to install…
Found 1 driver package(s) to install.
Installing 1 of 1 – C:\Dongles\LANASIX\LenLan.inf: The driver package was succes
sfully installed.
The operation completed successfully.
Step 7. COMMIT CHANGES to the boot wim
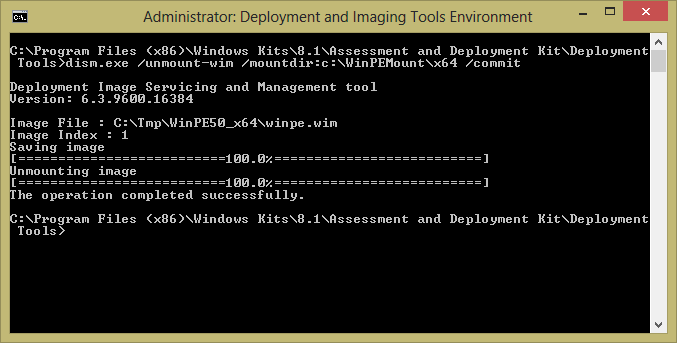
Now you are done creating the image, commit (write) the changes to it.
dism.exe /unmount-wim /mountdir:c:\WinPEMount\x64 /commit
 Step 8. Import boot wim into Configuration Manager
After creating your new WinPe 5 boot wim copy it to your Configuration Manager server source directory.
You now want to add it via your Configuration Manager console.
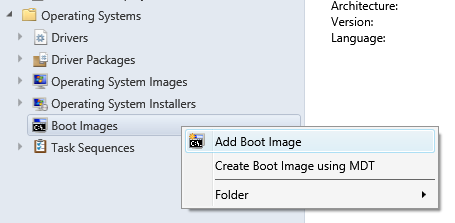
Right click on Boot images, choose Add Boot Image, follow the wizard.
Step 9 add command line support
You can enable a command shell in the boot image to debug and troubleshoot it in WinPE. Use the following steps to enable the command shell.
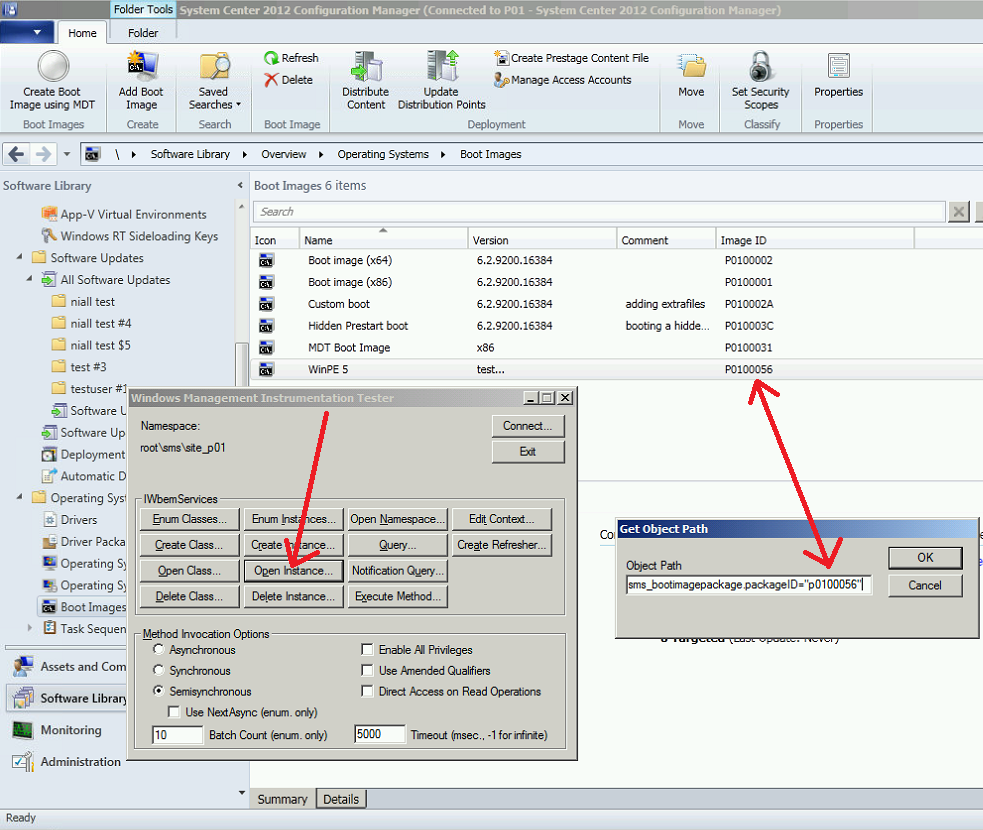
In the Configuration Manager console, click Software Library, expand Operating Systems, and then click Boot Images, locate the new boot image in the list and identify the package ID for the image. You can find the package ID in the Image ID column for the boot image.
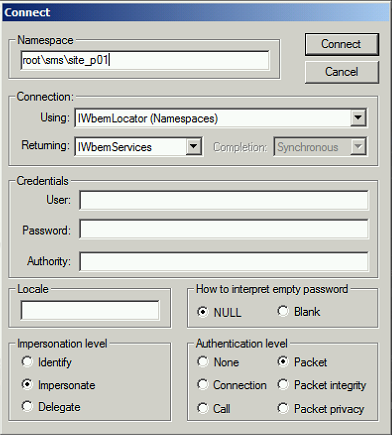
From a command prompt, type wbemtest to open the Windows Management Instrumentation Tester.

Click on connect and enter \root\sms\site_<sitecode> in Namespace, and then click Connect. So if your Site code is P01 enter \root\sms\site_p01
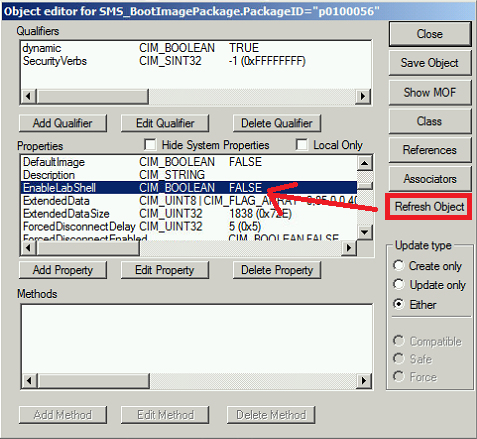
Click Open Instance, type sms_bootimagepackage.packageID=”<packageID>” where <packageID> is the package ID of your WinPE 5 boot wim.
 Click Refresh Object, and then scroll down until you can see EnableLabShell, select EnableLabShell in the Properties pane. It will be set to a value of FALSE.
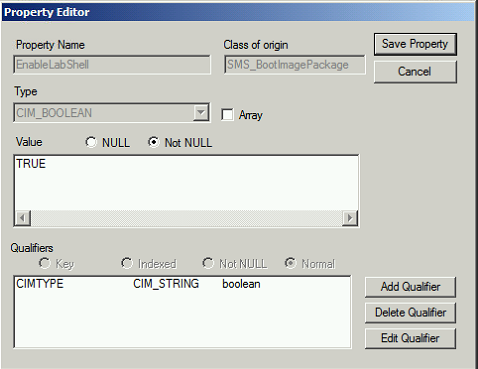
 Double click on the value and set it to TRUE, then click on Save Property
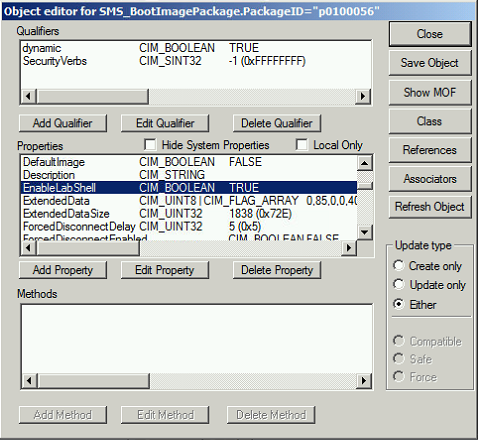
Once done you’ll see the value has indeed changed to True.
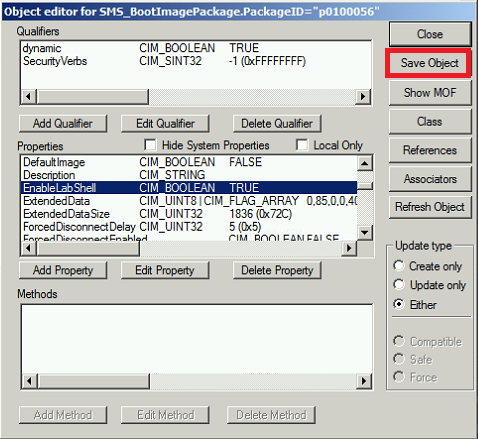
 click on Save Object otherwise your changes won’t be saved
 and then exit the Windows Management Instrumentation Tester by clicking on Close and then Exit.
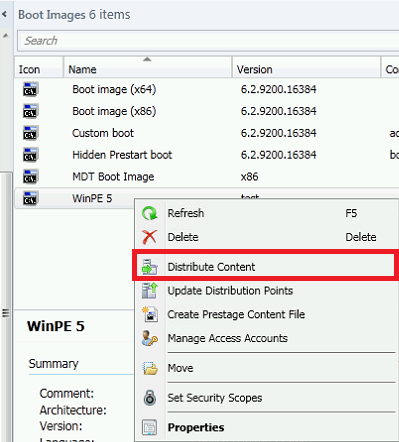
Step 10 Distribute the boot image to your Distribution Points
Right click your new boot image and choose distribute content, continue through the wizard
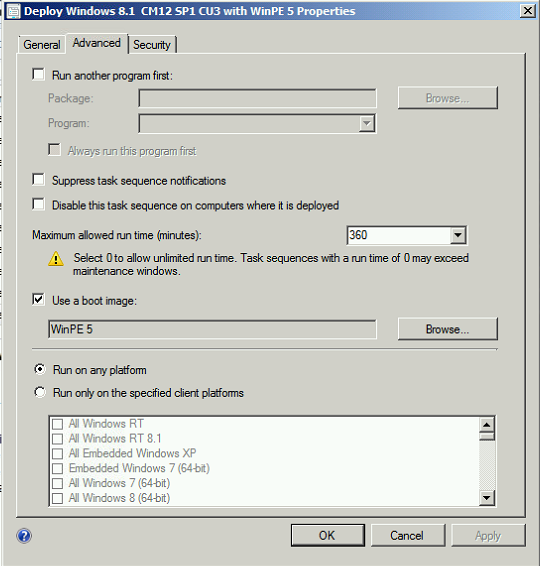
 Step 11. Add the boot image to your task sequence
Select your new Deploy Windows 8.1 Task sequence, right click choose properties and choose Advanced, for the Use a boot image section click on Browse and browse to your newly added WinPe 5 boot image.
 start deploying Windows 8.1 !!
Summary
Although the above does help you to Deploy Windows 8.1 today, the supported solution from Microsoft is to use System Center 2012 Configuration Manager R2. That is due October 18th, 2013.
enjoy !
cheers
niall
Related reading
- Description of Cumulative Update 3 for System Center 2012 Configuration Manager Service Pack 1 -http://support.microsoft.com/kb/2882125
- How to Customize Windows PE Boot Images to Use in Configuration Manager – http://technet.microsoft.com/en-us/library/dn387582.aspx
- Customize Windows PE: Add drivers, packages, and more – http://technet.microsoft.com/en-us/library/hh824972.aspx
- Support Questions about Windows 8.1 and Windows Server 2012 R2 for Configuration Manager and Endpoint Protection – http://blogs.technet.com/b/configmgrteam/archive/2013/09/16/support-questions-about-win-8.1-and-winsvr-2012-r2-for-configmgr-and-endpoint-protection.aspx
- Windows Assessment and Deployment Kit (Windows ADK) for Windows 8.1 – http://www.microsoft.com/en-us/download/details.aspx?id=39982

Pingback: Findings in System Center 2012 R2 ConfigMgr - What's really new?
Niall,
Do you have any instructions for building a 32-bit PE5 boot image?
Thanks,
Rob
hi Rob
simply replace the X64 references with X86 and you should achieve the desired result
Hi , Niall
I follow your steps to create the PE5.0 image, now the image is done, but can’t be added into a new Boot Images. Error shows “You cannot import this boot image – Only finalized boot images are supported”. Have any advices? Thanks a lot.
Check the smsprov.log, shows ERROR> Error -1073741515 returned to execute the command line: “……”;Failed to install required components into the boot image C:\Windows\TEMP\BootImages\{AED81C7E-F7F1-464C-913D-E2BA7D90BA35}\mount;*~*~e:\nts_sccm_release\sms\siteserver\sdk_provider\smsprov\sspbootimagepackage.cpp(3687) : Failed to insert OSD binaries into the WIM file~*~*
please double check all the steps I listed, you should not be seeing that error, perhaps you are not using the ADK tools (and correct version of DISM).
After reinstall cu3, the PE image worked, Thanks for the help.
Pingback: SCCM 2012 OSD System Partition not set
Pingback: System Center 2012 Configuration Manager Step By Step Guides | just another windows noob ?
Pingback: Model Technology Solutions – System partition not set – PXE Boot SCCM 2012 SP1 CU3
Pingback: Model Technology Solutions – System partition not set – PXE Boot SCCM 2012 SP1 CU3
Pingback: Model-Technology Capturing the Technician's Name that Executes an OSD Build - Model-Technology
Pingback: OSD links | sccm road
Pingback: How to create new boot images | Aazani
Hi,
I am a little bit confused. What did you mean when you wrote “After creating your new WinPe 5 boot wim copy it to your Configuration Manager server source directory”
My source dir is not a network path. What DIR are you referring to?
what I mean is you copy the new WinPE5 boot wim to a folder that contains your custom boot image (for example d:\sources\os\boot images\WinPE 5\X64)
does that help ?
Pingback: How To Add New Hardware In Windows 7 Manually | Information
Pingback: Deploying Surface 2 Pro with ConfigMgr 2012 SP1 CU3 – Deployment Research
Pingback: Deploy Windows 8.1 with ConfigMgr 2012 R2 - MSEndpointMgr