
In Part 1 of this series we created our new LAB, we got the System Center 2012 Configuration Manager ISO and extracted it, then copied it to our Active Directory server. We then created the System Management container in AD, delegated permissions to the container, extended the Schema for Configuration Manager. We then opened TCP ports 1433 and 4022 for SQL replication between sites, installed some prerequisites like .NET Framework 4.0, added some features and then downloaded and installed SQL Server 2008 R2 SP1 CU6. We then configured SQL Server using SQL Server Management Studio for security and memory configurations prior to running the Configuration Manager 2012 setup to assess server readiness. Finally we installed a central administration site (CAS).
In Part 2 we setup our Primary server with SQL Server 2008 R2 SP1 CU6. We then installed Configuration Manager 2012 on our primary server (P01) and verified that it was replicating to our central administration site (CAS) server. Then we configured Discovery methods for our Hierarchy and then configure Boundaries and Boundary Groups.
In Part 3 we configured Discovery methods and configured boundaries and created a boundary group, we then configured them for Automatic Site Assignment and Content Location.In Part 4 we added the Application Catalog roles to our Hierarchy. We then configured Custom Client Device Settings and then deployed those settings to the All Systems collection on site P01. After that we created Custom Client User Settings and deployed them to the All Users collection in order to allow users to define their own User and Device affinity settings.
Now we will install the WSUS server role (it is required for the Software Update Point role). We will then install the Software Update Point role on our CAS and Primary servers and we will configure the SUP to support ConfigMgr Client Agent deployment which is a recommended Best Practice method of deploying the Configuration Manager Client Agent.
Recommended Reading
Planning for Software Updates in Configuration Manager – http://technet.micro…y/gg712696.aspx
Prerequisites for Software Updates in Configuration Manager – http://technet.micro…y/hh237372.aspx
Configuring Software Updates in Configuration Manager – http://technet.micro…y/gg712312.aspx
Planning for Client Deployment in Configuration Manager – http://technet.micro…y/gg682136.aspx
Prerequisites for Client Deployment in Configuration Manager – http://technet.micro…y/gg682042.aspx
Best Practices for Client Deployment in Configuration Manager – http://technet.microsoft.com/en-us/library/gg681994.aspx
Step 1. Add the WSUS Update Services 3.0 SP2 role
Note: Perform the following on the CAS server as SMSadmin
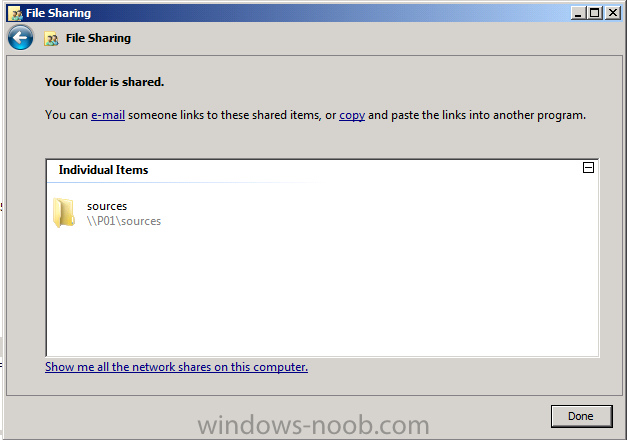
Before starting this step create a folder on D:\ called sources and share it as sources, give Everyone Read access.
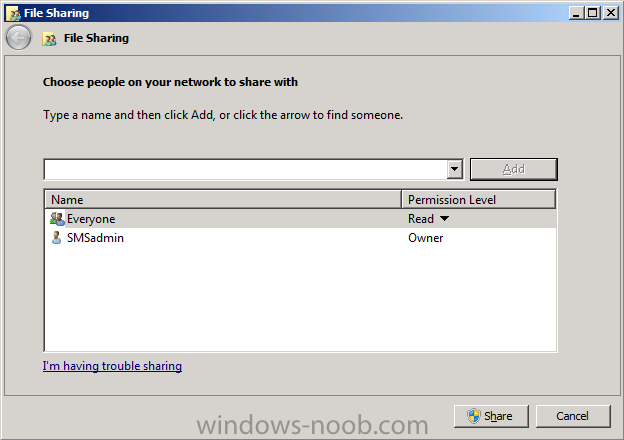
The share is created, click done when ready.

Note: Repeat the above on the Primary server P01.
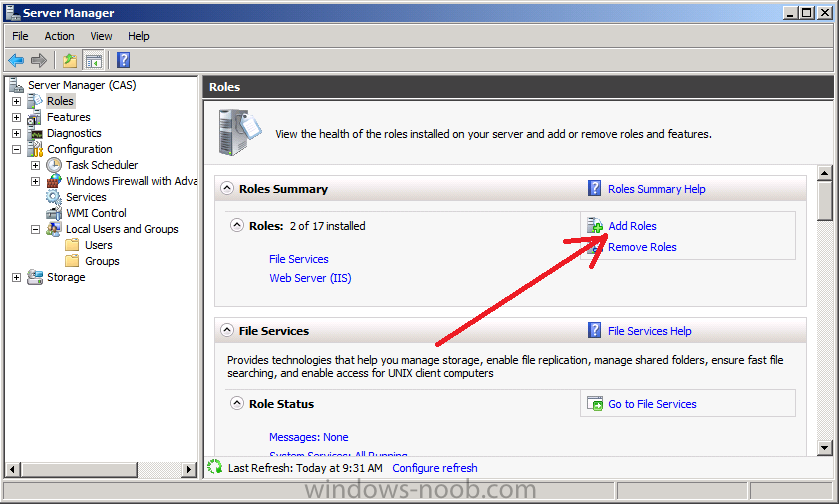
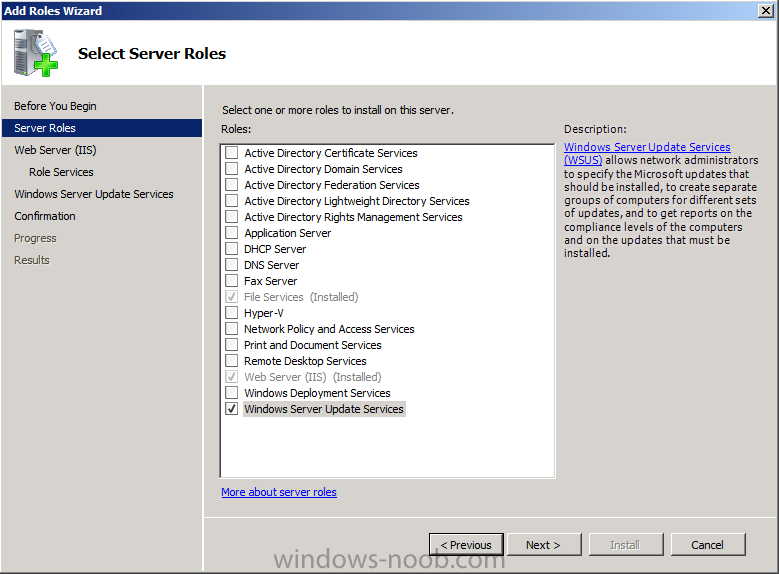
Start Server Manager and click on Roles. Click on Add Roles to Add the WSUS Server Role.
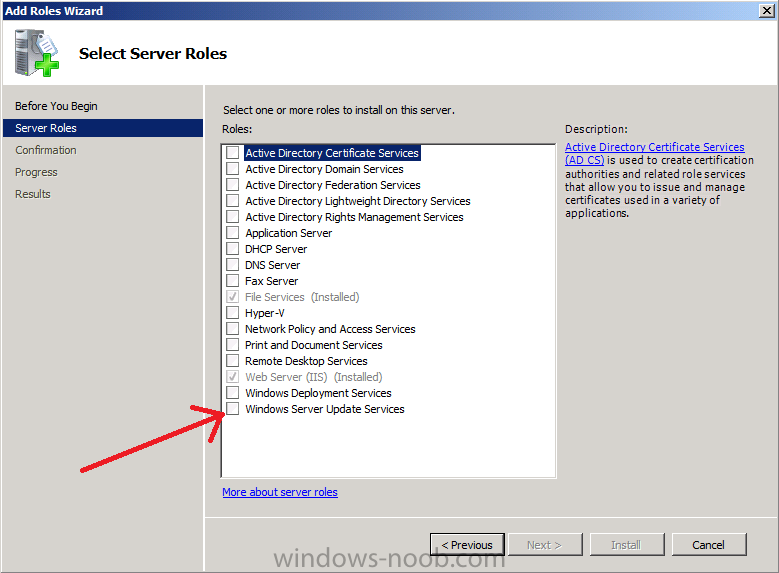
the Select Server Roles wizard appears, place a checkmark in Windows Server Update Services (WSUS)
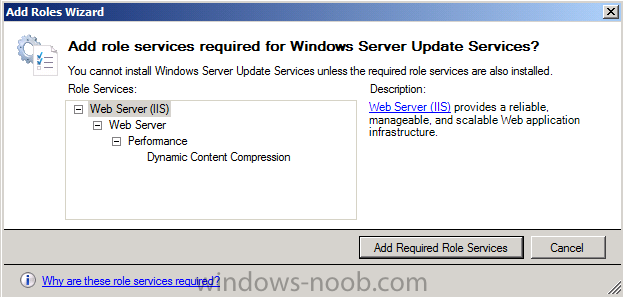
when prompted to add role services required for Windows Server Update Services click on Add Required Role Services to continue
now you can see WSUS is selected, click next..
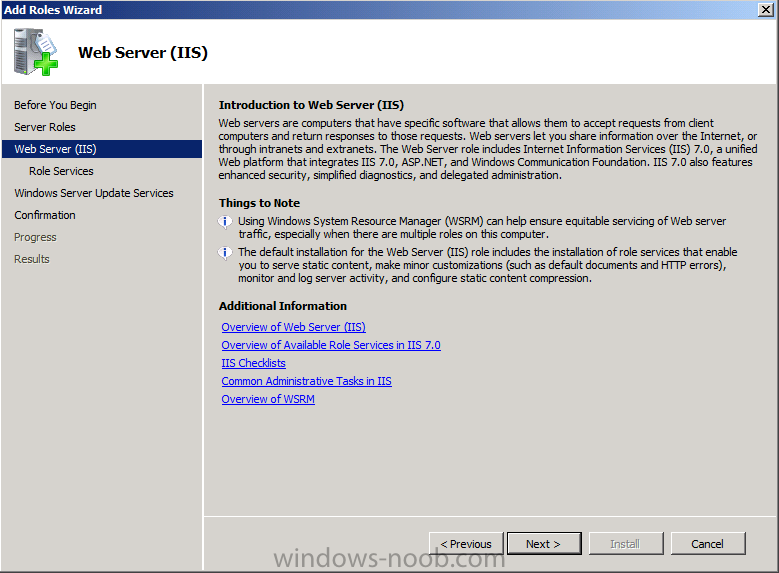
click next at the introduction to Web Server (IIS)
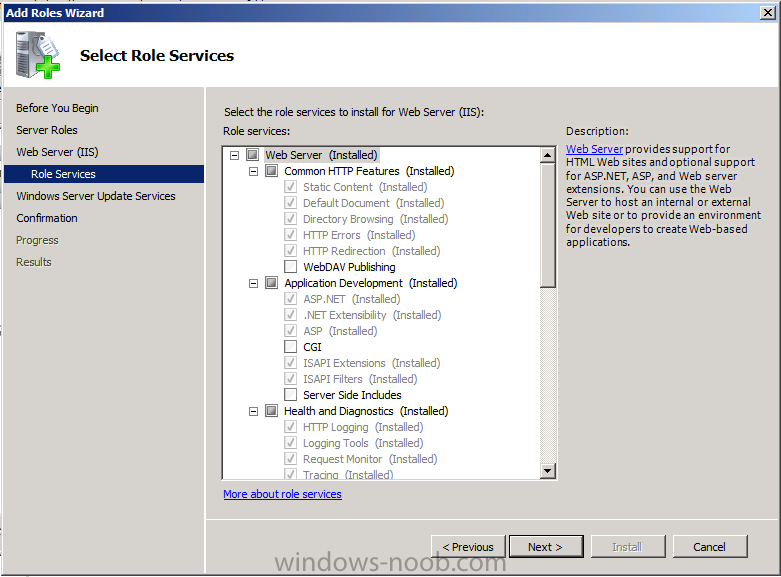
the IIS Role services will already be selected, click next
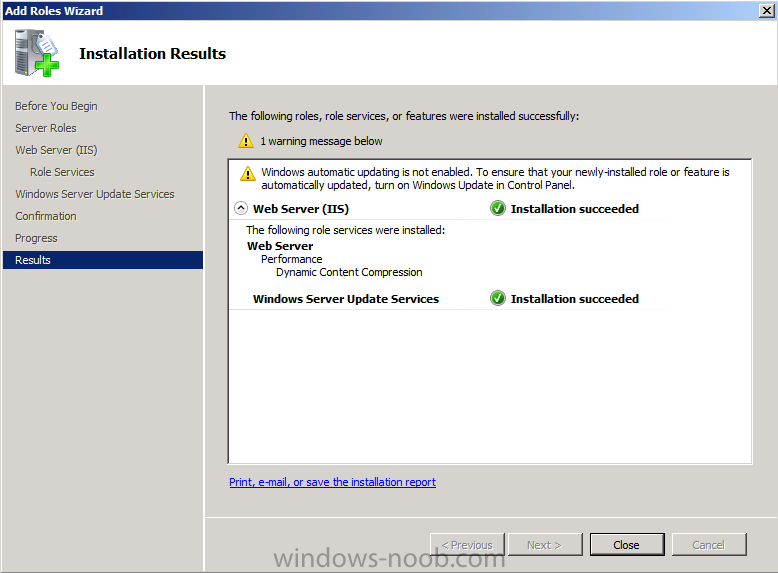
click next through the wizard and click Install to start installing the WSUS role, the role will be downloaded from the Internet so make sure you are connected to the internet before doing this step.
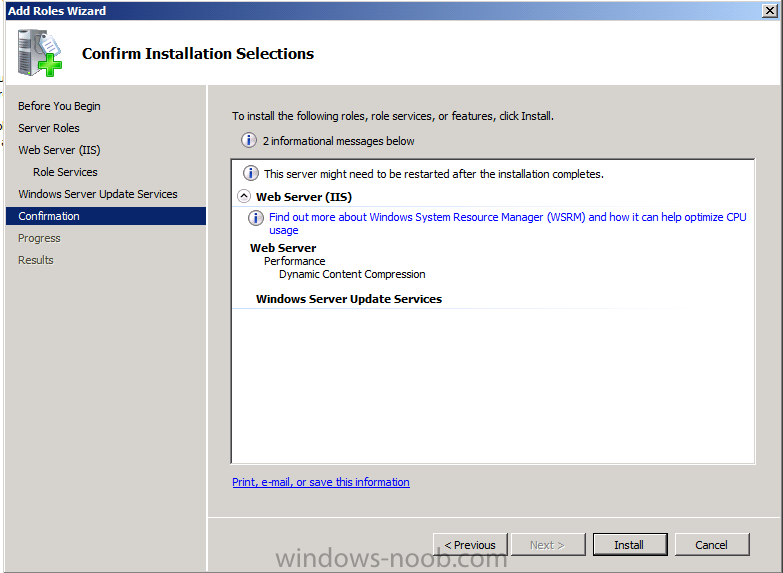
after downloading the role, the Welcome to the Windows Server Update Services 3.0 SP2 Setup Wizard appears
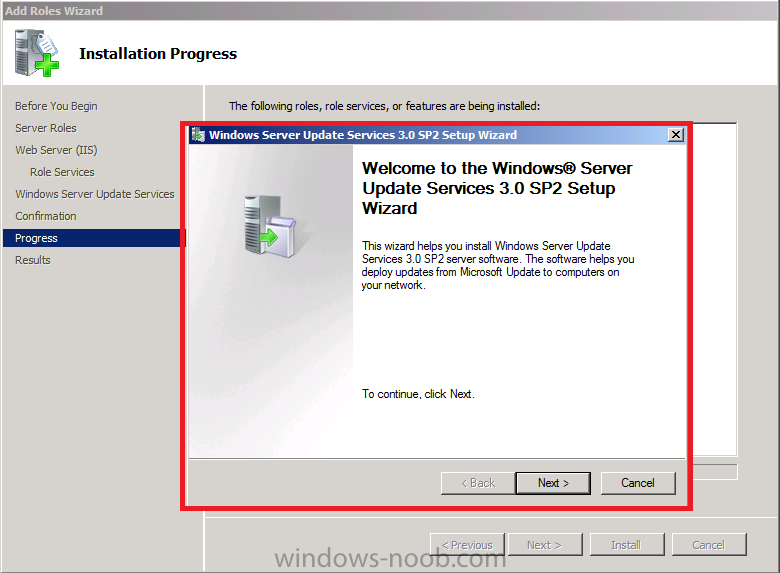
click next to start install the role, accept the EULA to continue

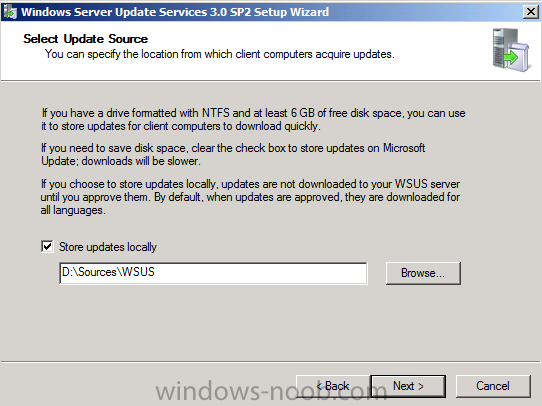
when prompted to Select Update Source, change the path to D:\Sources\WSUS, also make sure the Store Updates Locally option is selected.
Tip: In Production, as a best practice, select Store updates locally so that license terms that are associated with software updates are downloaded during the synchronization process and stored on the local hard drive for the WSUS server. When this setting is not selected, client computers might fail to scan for software updates compliance for software updates that have license terms. When you install the active software update point, WSUS Synchronization Manager verifies that this setting is enabled every 60 minutes, by default.
change the database option to Use and Existing Database on this computer and click next
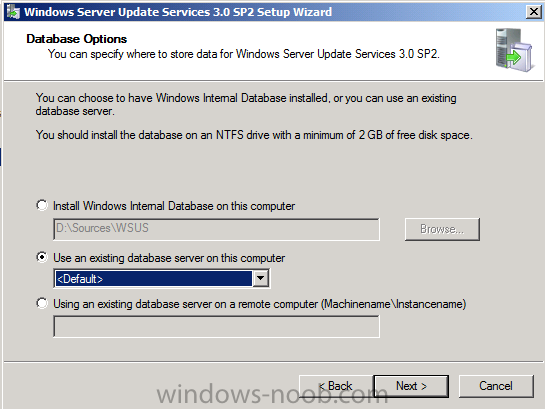
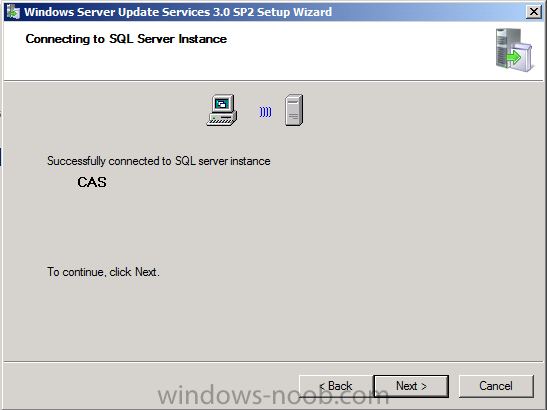
click next and watch it connecting to SQL Server Instance
Tip: In Production, as a best practice consider using a different SQL Server instance for the Configuration Manager database and WSUS database. This will make It easier to troubleshoot and diagnose resource usage issues that might occur for each application.
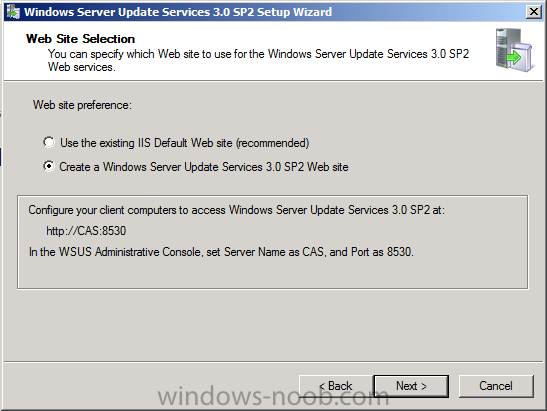
In web site selection select Create a Windows Server Update Services 3.0 SP2 Web Site
Tip: In Production, as a best practice, select Create a Windows Server Update Services 3.0 Web site so that IIS hosts the WSUS 3.0 services in a dedicated website instead of sharing the same website with other Configuration Manager site systems or other software applications. When you use a custom website for WSUS 3.0, WSUS configures port 8530 for HTTP and port 8531 for HTTP and you must configure your Active Software Update Point accordingly.
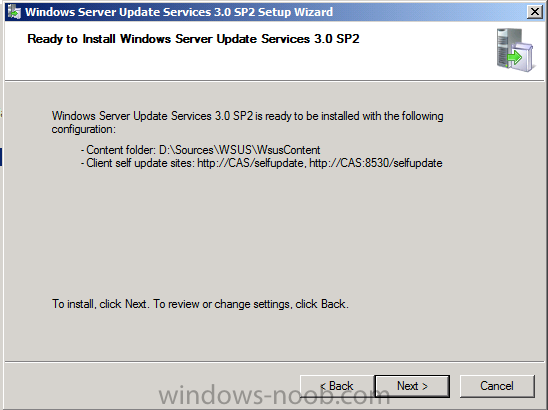
click next at the ready to install screen
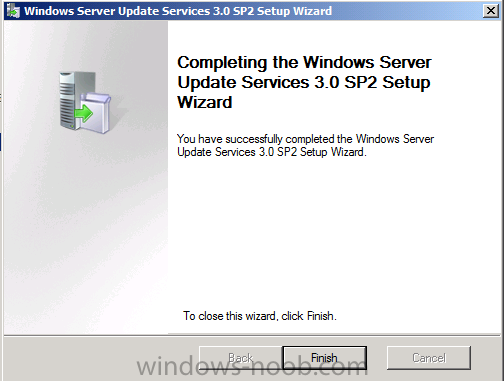
Click Finish when done.
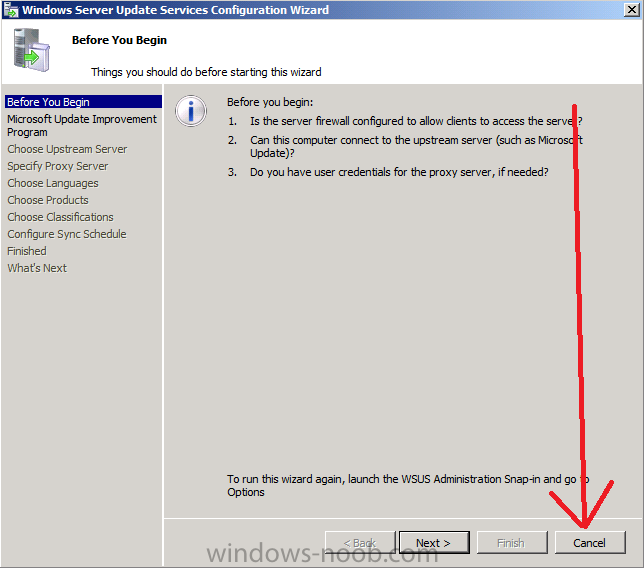
The Windows Server Update Services Configuration Wizard will appear after a few moments, Cancel it.
and then you can finally close the add roles wizard
Note: Repeat the above (installation of the WSUS server role) on your Primary server P01.
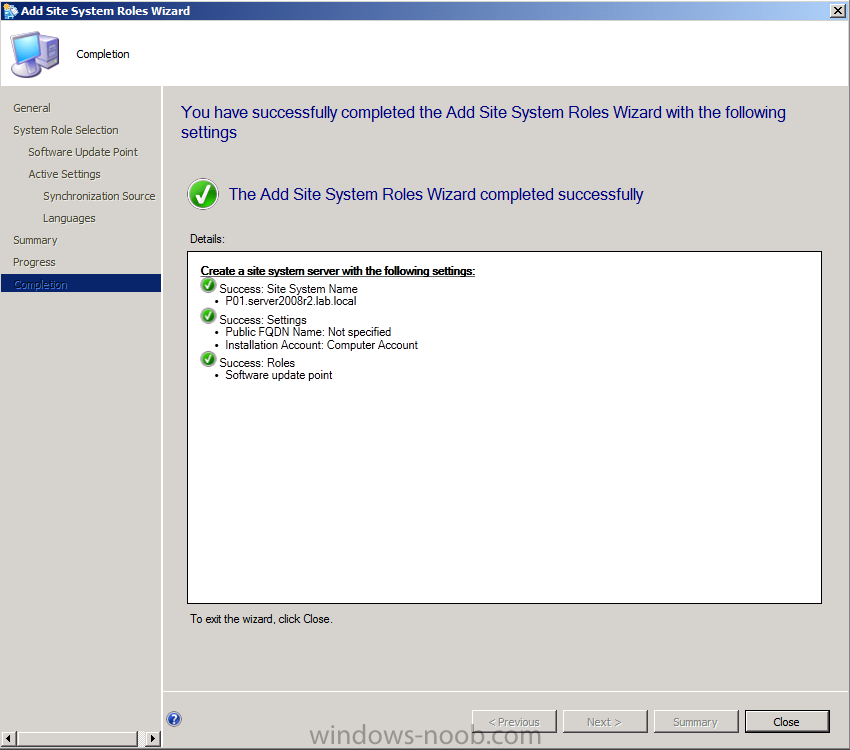
Step 2. Add the Software Update Point role
Note: Perform the following on the CAS server as SMSadmin
In a Configuration Manager hierarchy, install and configure the software update point on the central administration site before you install it on any other site. The software update point at the central administration site is typically configured to synchronize with Microsoft Update, retrieving the software updates metadata based on the criteria that you specify in the software update point properties. Before you install the software update point site system role, you must verify that the server meets required dependencies and determine the software update point infrastructure on the site. For more information about planning for software updates and to determine your software update point infrastructure, see Planning for Software Updates in Configuration Manager.
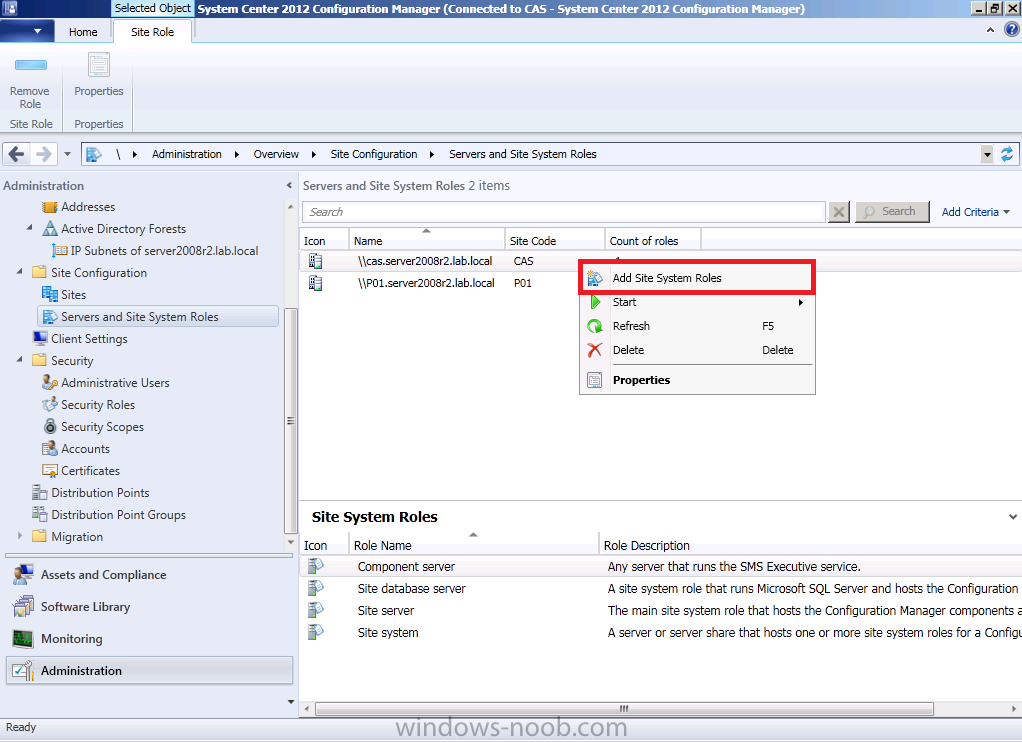
In the Administration workspace, select Site Configuration and select our CAS site server, right click and choose Add Site System roles.
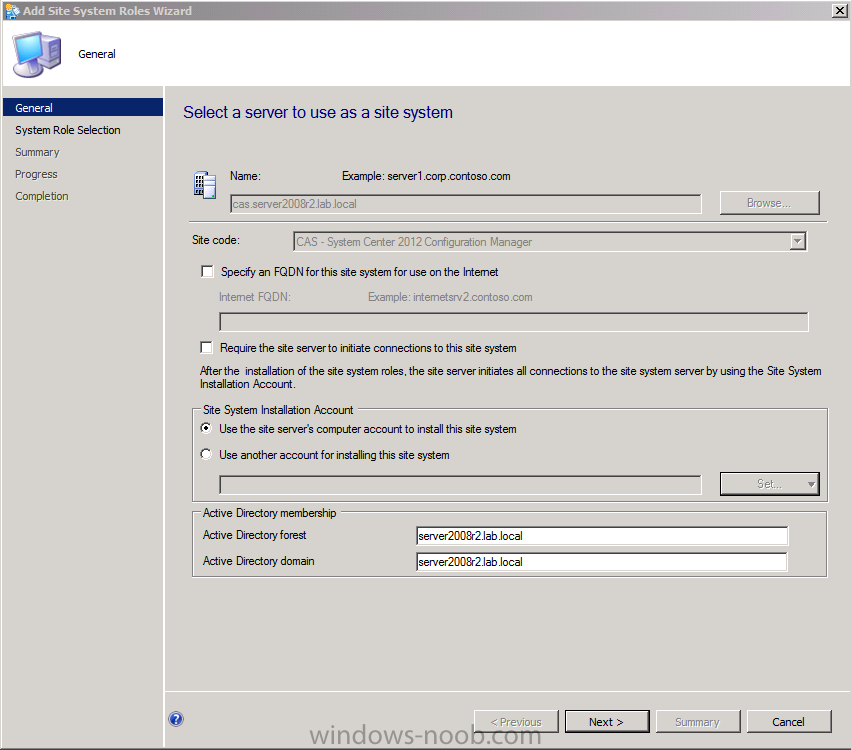
The Add Site System Roles Wizard appears, if you want to change accounts do so now otherwise click next
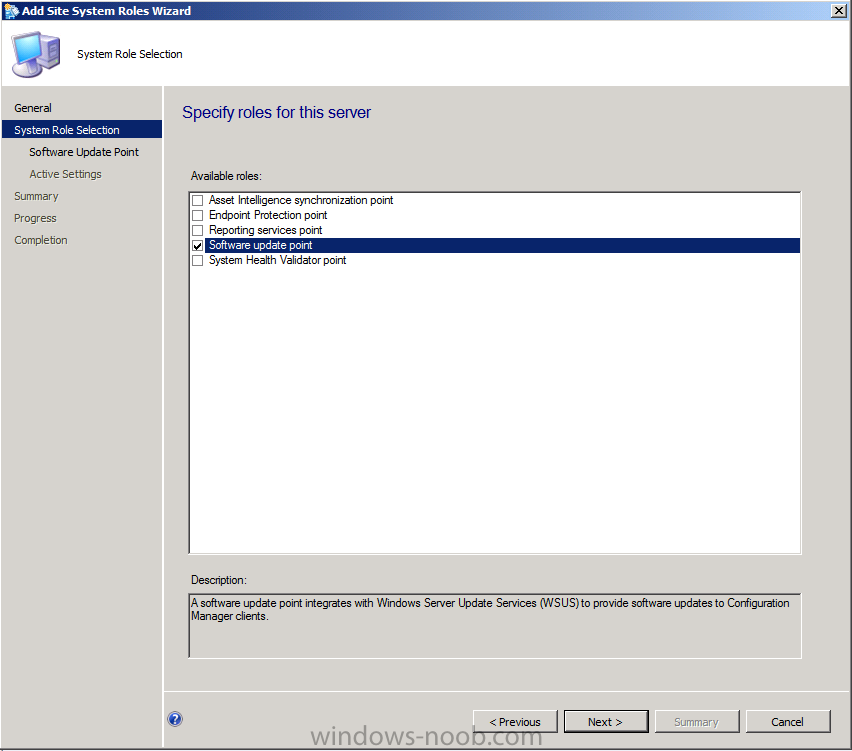
on the Specify Roles for this server screen, select Software Update Point
on the specify software update point settings screen you can specify a proxy and connection account if you are using one.

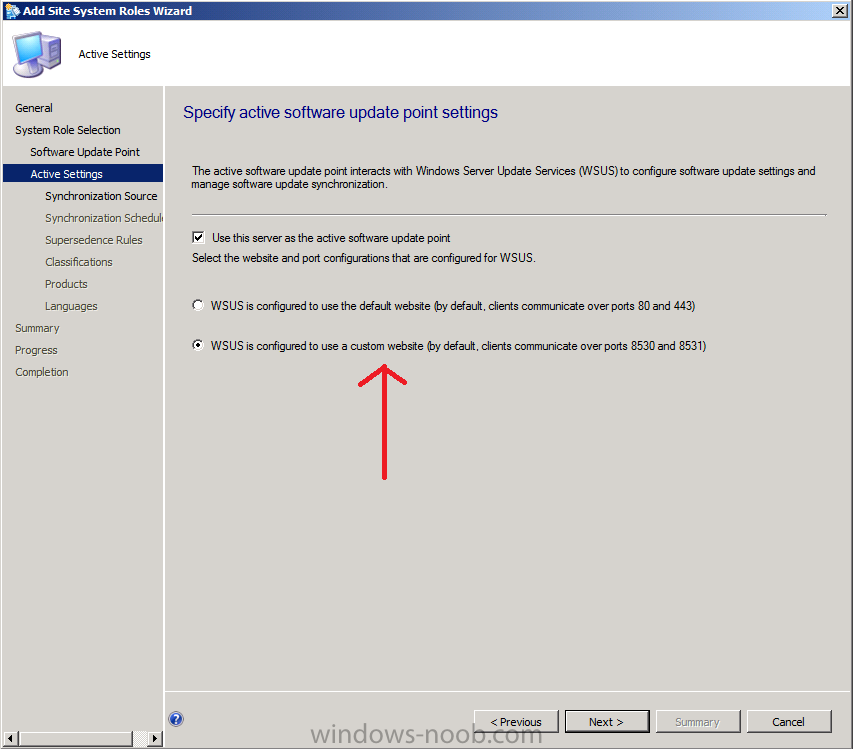
select Use this server as the Active Software Update Point and then select WSUS is configured to use a custom website as per the screenshot below
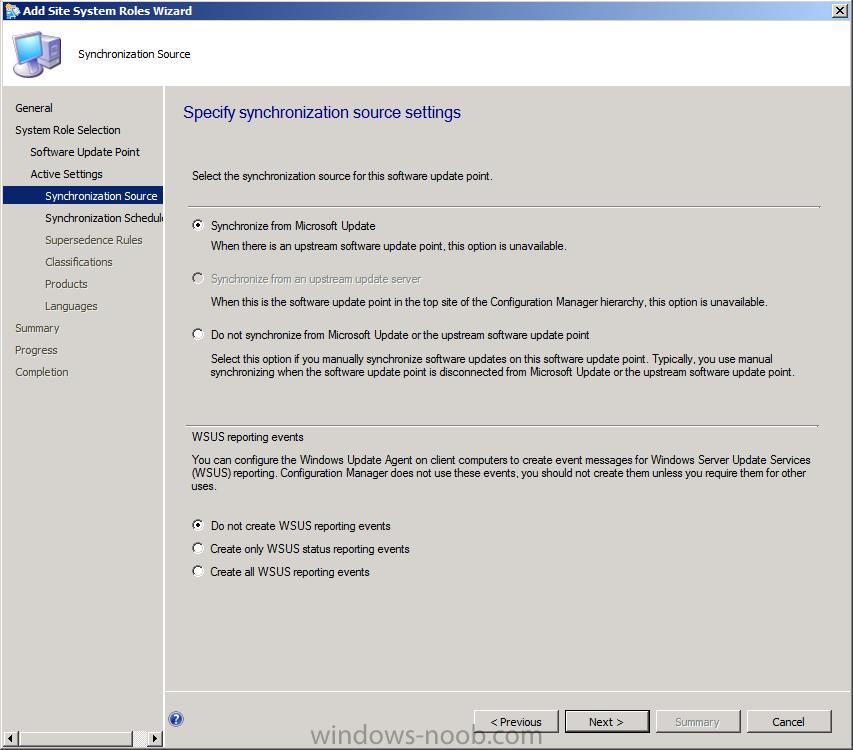
select Synchronize from Microsoft Update
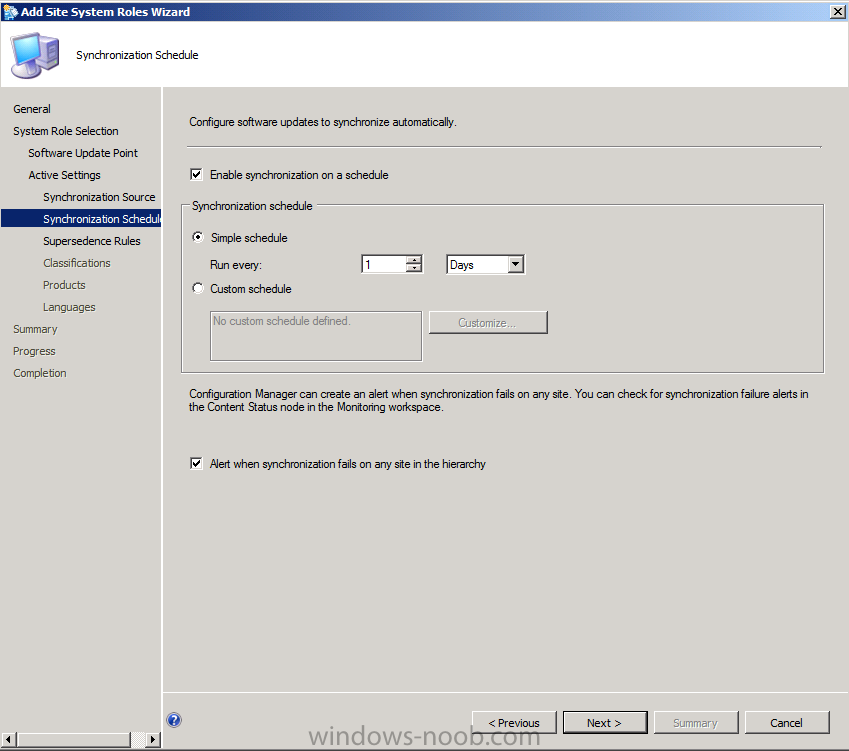
set the Synchronization Schedule to Run every 1 days as you want to synchronize daily for Endpoint Protection definition updates, and select the Alert checkbox as per the screenshot below.
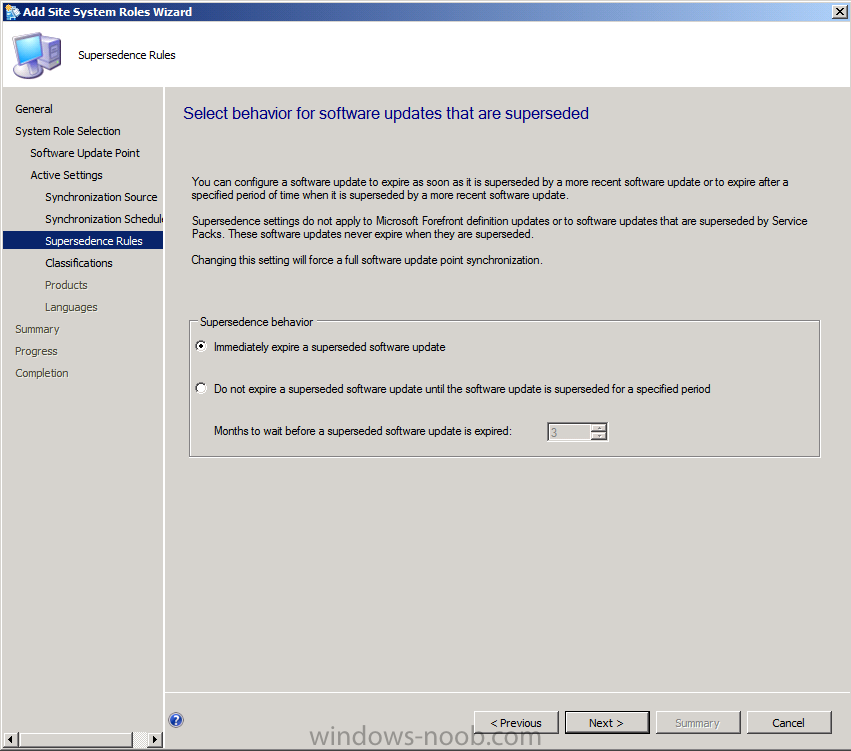
set your Supersedence Rules as you wish
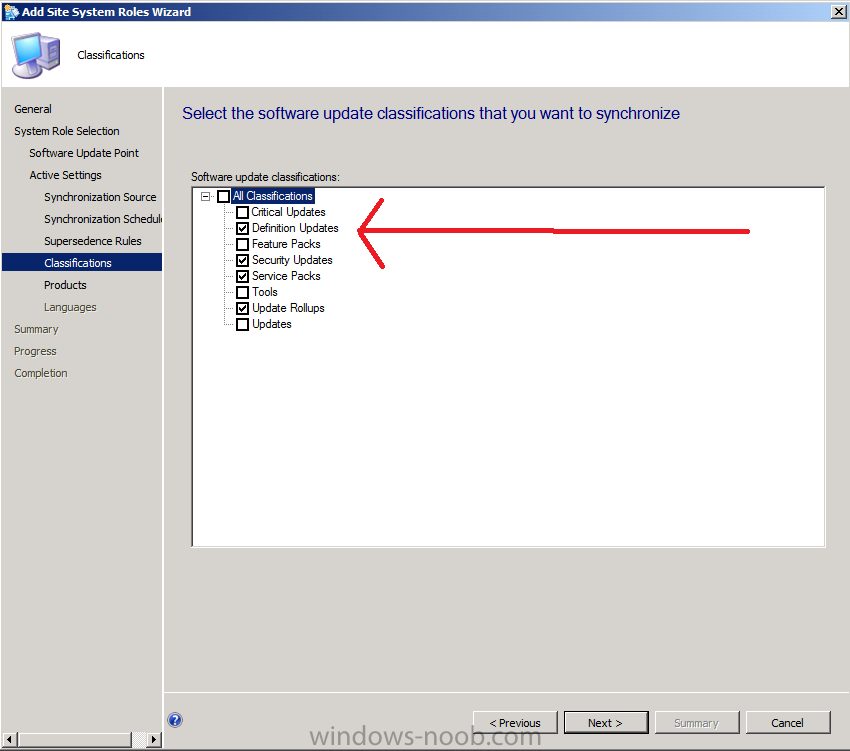
choose your Classifications, if you want to use Endpoint Protection then select Definition Updates otherwise none will appear when you synchronize
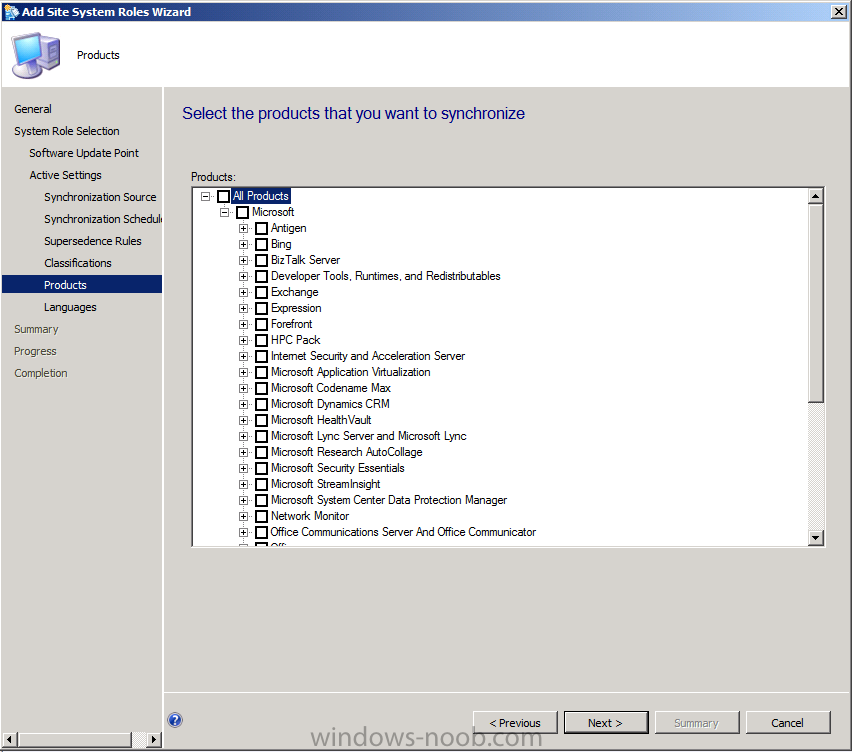
select the Products you wish to support, don’t worry about making any choices here at this point as some products won’t appear in this list until after you’ve completed your first successful sync
select your Languages

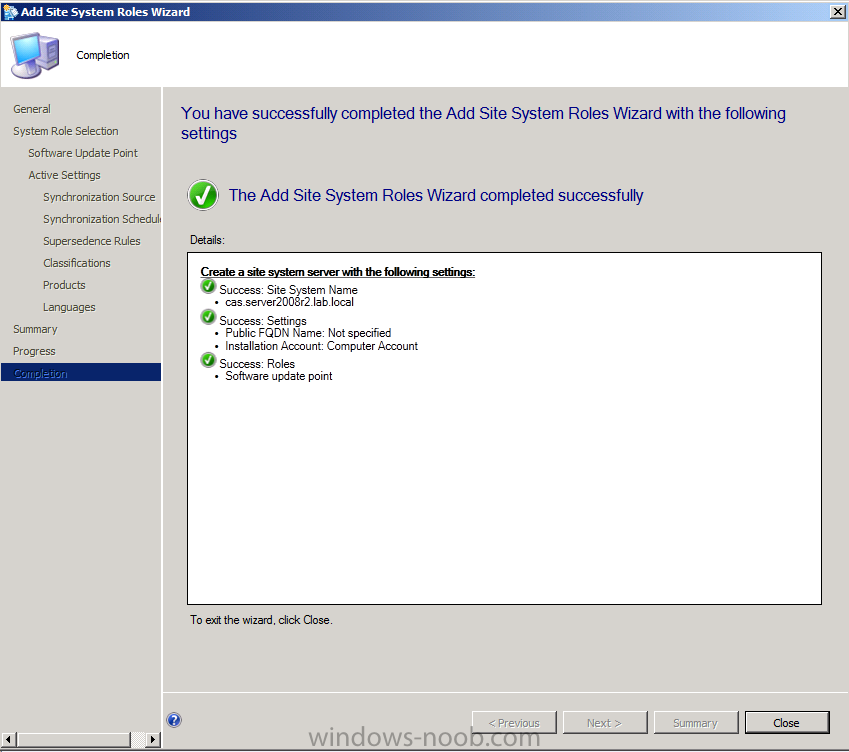
and click through to completion of the wizard.
Note: Repeat the above on the Primary Site server P01
Tip: the difference you’ll note when adding the SUP role on the Primary is that you cannot select to synchronize from Microsoft Update as it will automatically select to synchronize from an upstream server. This is expected as it will synchronize from the CAS server.

Step 3. Configure Active Directory GPO
Note: Perform the following on the Active directory server AD1 as a Domain Admininstrator
Software update-based client installation publishes the System Center 2012 Configuration Manager client to a software update point as an additional software update. This method of client installation can be used to install the System Center 2012 Configuration Manager client on computers that do not already have the client installed or to upgrade existing System Center 2012 Configuration Manager clients.
Note: To use software update-based installation, you must use the same Windows Server Update Services (WSUS) server for client installation and software updates. This server must be the active software update point in a primary site (in other words, our Primary site P01). For more information, see Configuring Software Updates in Configuration Manager.
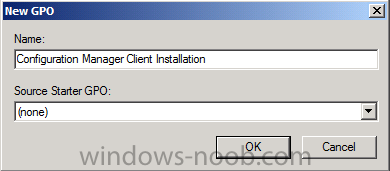
Open Group Policy Managment, right click and choose create a GPO in this domain and link it here
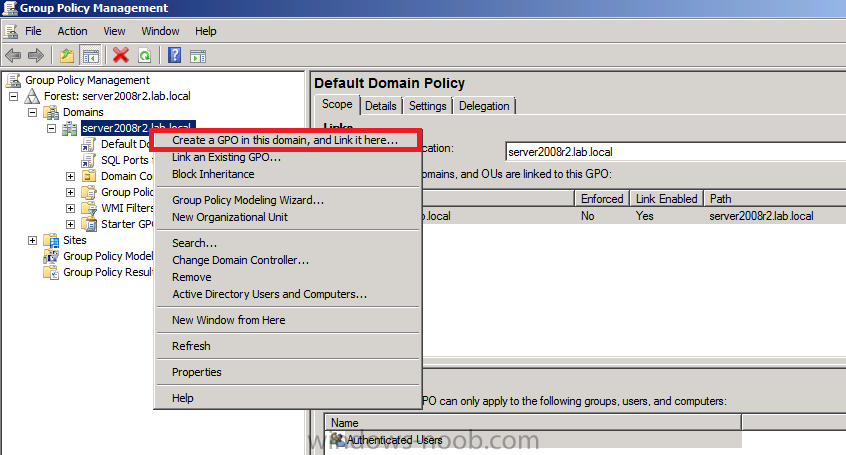
give it a suitable name like Configuration Manager Client Installation
Right click your newly created GPO, select Edit, select and expand Computer Configuration, expand Administrative Templates, expand Windows Components, and then click on Windows Update
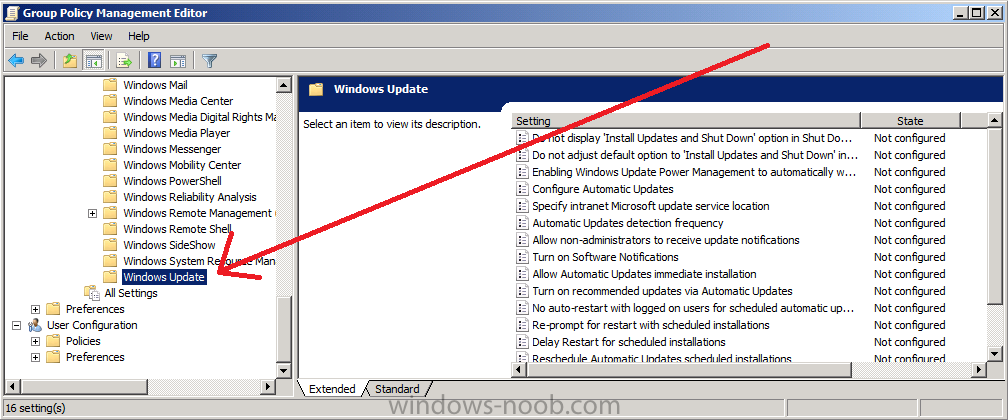
select Specify intranet Microsoft update service location, and set it to Enabled, and enter the name and port of our primary server SUP as per the screenshot below:

Note: If the Configuration Manager site system is not configured to use a fully qualified domain name (FQDN), specify the server name by using a short name format.
Step 4. Configure Client Installation Settings on P01
Note: Perform the following on the Primary server P01 as SMSAdmin
Navigate to the Administration workspace, select Site Configuration, Sites, and select the P01 site, click on Settings in the ribbon.
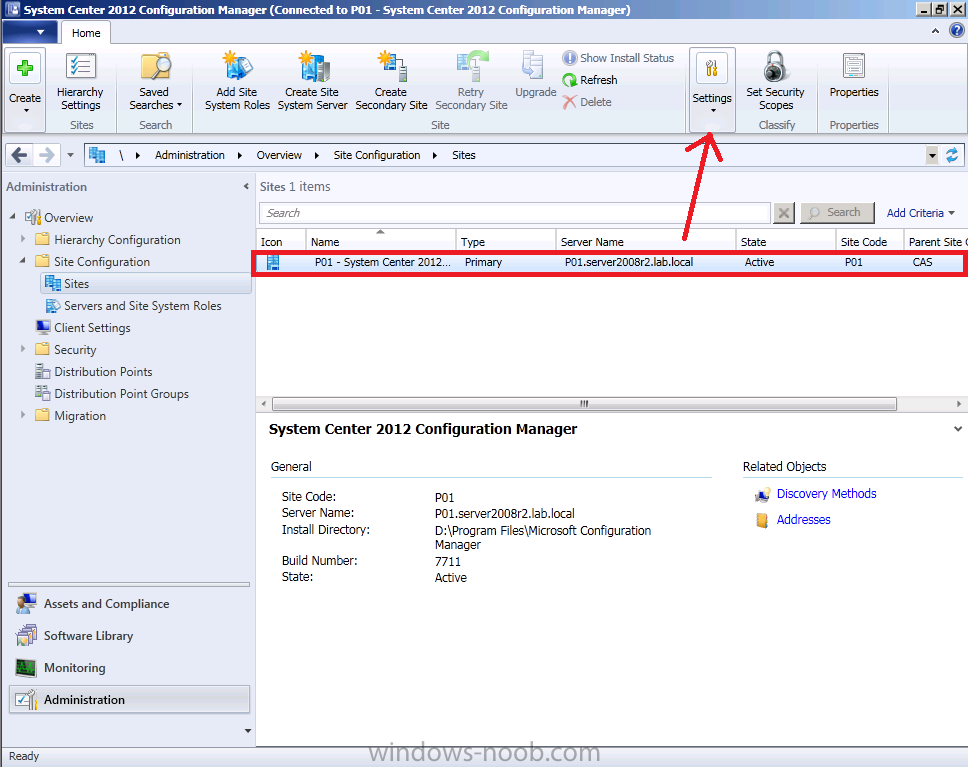
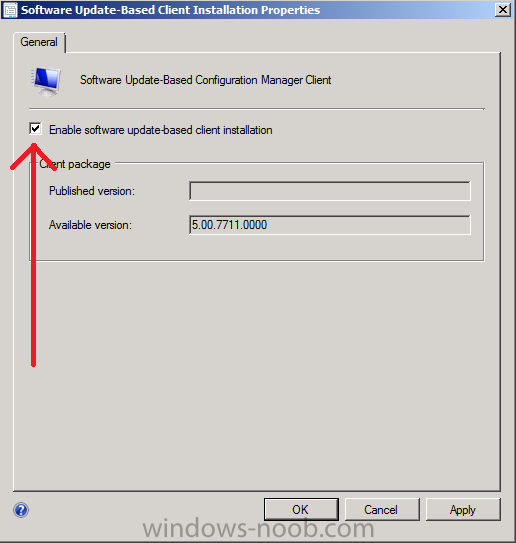
Select Client Installation Settings and then select Software Update-Based Client Installation

place a checkmark in Enable software update based client installation and click apply
Step 5. Monitor Client installation on your computers
Note: Perform the following on your LAB computers as SMSAdmin
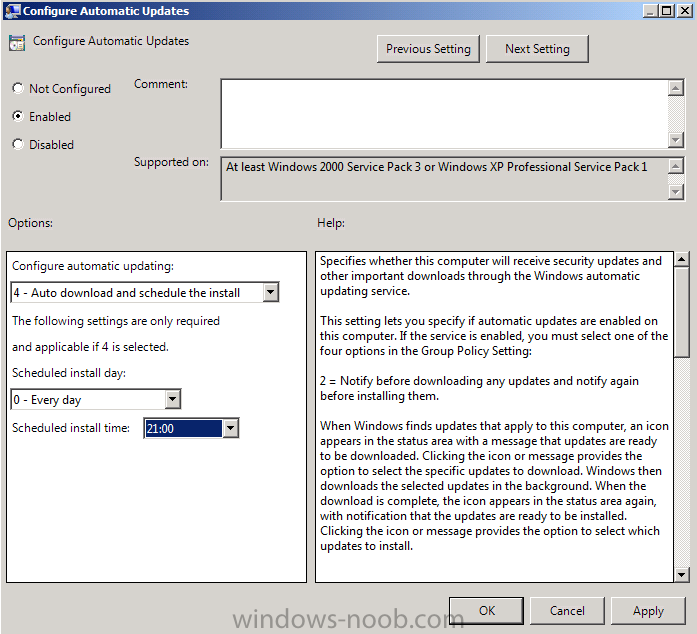
Now everything is in place for receiving the ConfigMgr client installation via the Software Update Point, except that your computerss will probably have Windows Update disabled if they are servers. How you enable that is up to you (GPO etc). Below is a sample setting for configuring Automatic Updates via a GPO.
Once you have enabled Windows Update you’ll see the following appear on your clients, 1 important update is available:-
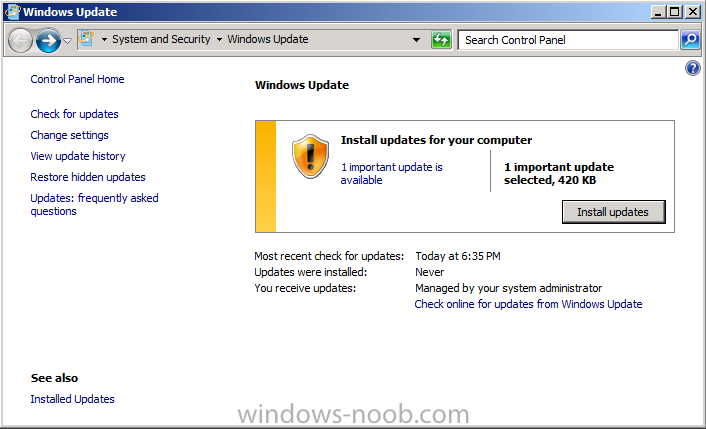
if you wait it will get installed via the schedule set in your GPO or if you are impatient you can click on Install Updates and you’ll see what the locally published packages actually is, it’s the Configuration Manager Client.

if you check task manager you’ll see CCMSETUP.EXE is running,
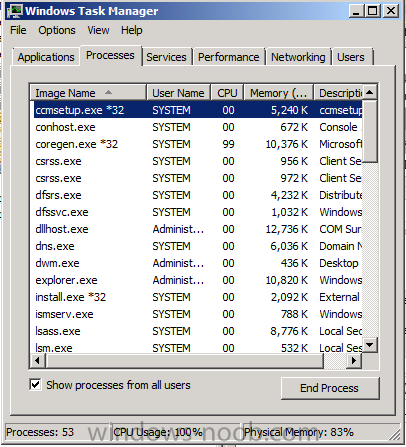
you can also monitor the C:\Windows\CCMSetup\ccmsetup.log file to see how the installation is progressing..
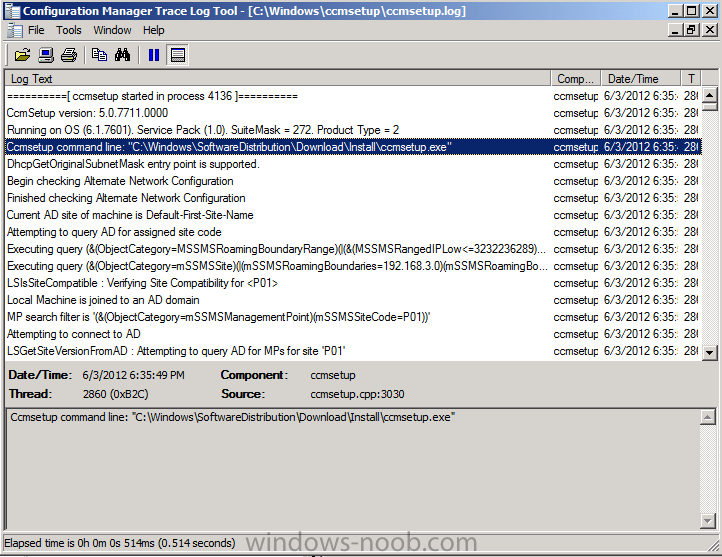
Tip: The Ccmsetup command line used to install is revealed in the ccmsetup.log file at the beginning of the LOG, and should reveal that the ccmsetup.exe file was started from C:\Windows\SoftwareDistribution\Download\Install\ccmsetup.exe, and this is because it was a Critical Windows Update.
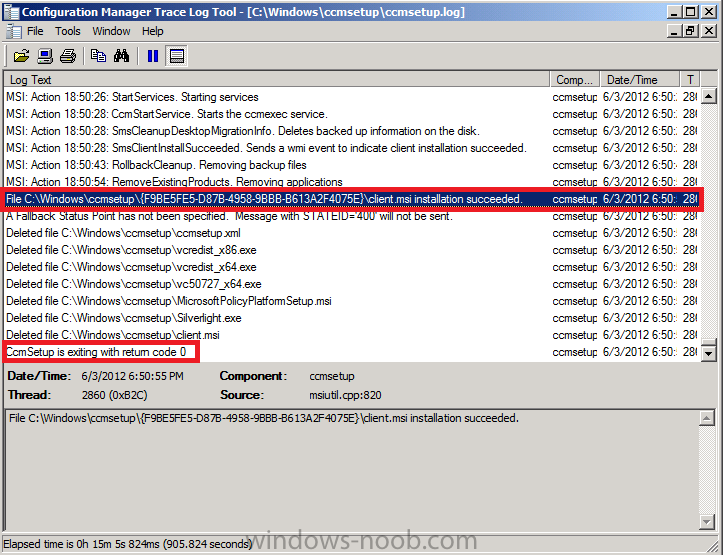
and after a while you should see that CCMSetup installation succeeded
and that means you can open Software Center via the start menu and it’ll appear like this
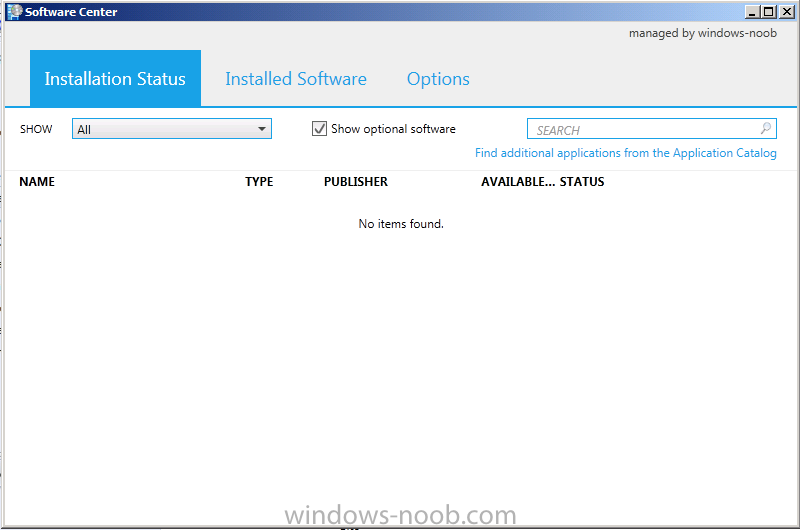
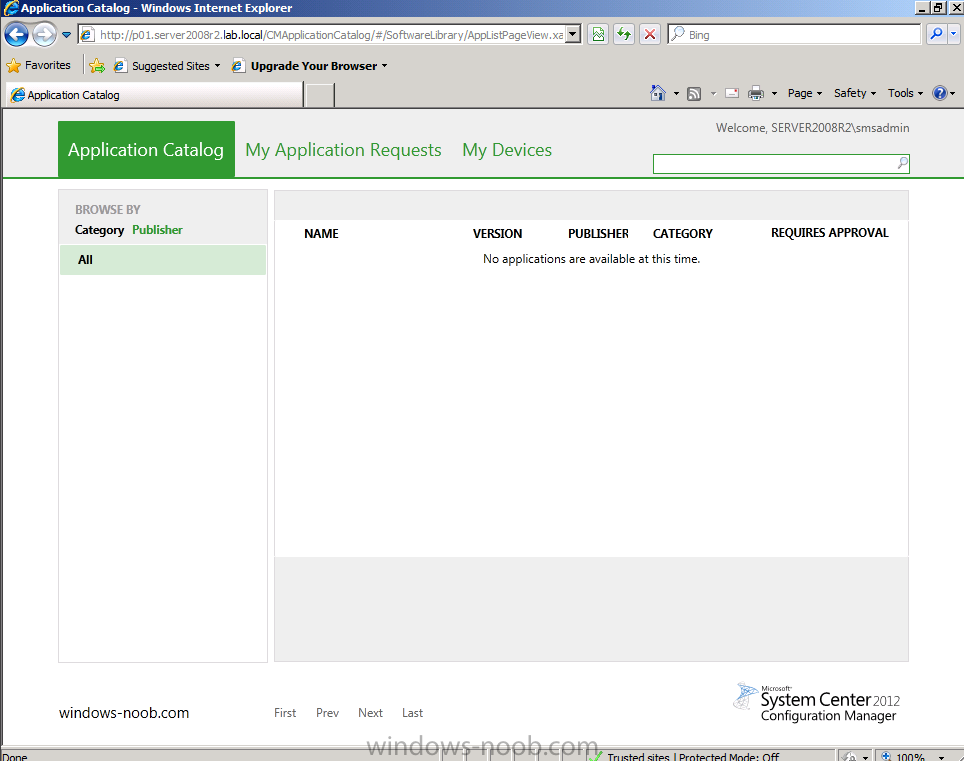
click on the Application Catalog link in Software Center and you’ll see the Application Catalog appear !
job done !
The original post is here on windows-noob.com

Dear Sir,
I am very thank full to for posting such an easy and graphic based guide. I still have some issues which I couldn’t figure out how to solve it.
1-Can not download updates Microsoft update and even fro WSUS server .
2- I have about 3 thousand updates in which most of them are expired. How can I clear that?
could you please help?
Thanks
Hakeem