
Introduction
In an earlier blog post I showed you how you can let your users use a self-service app to Retire their old PC’s, when getting their shiny new Windows Autopilot PC.
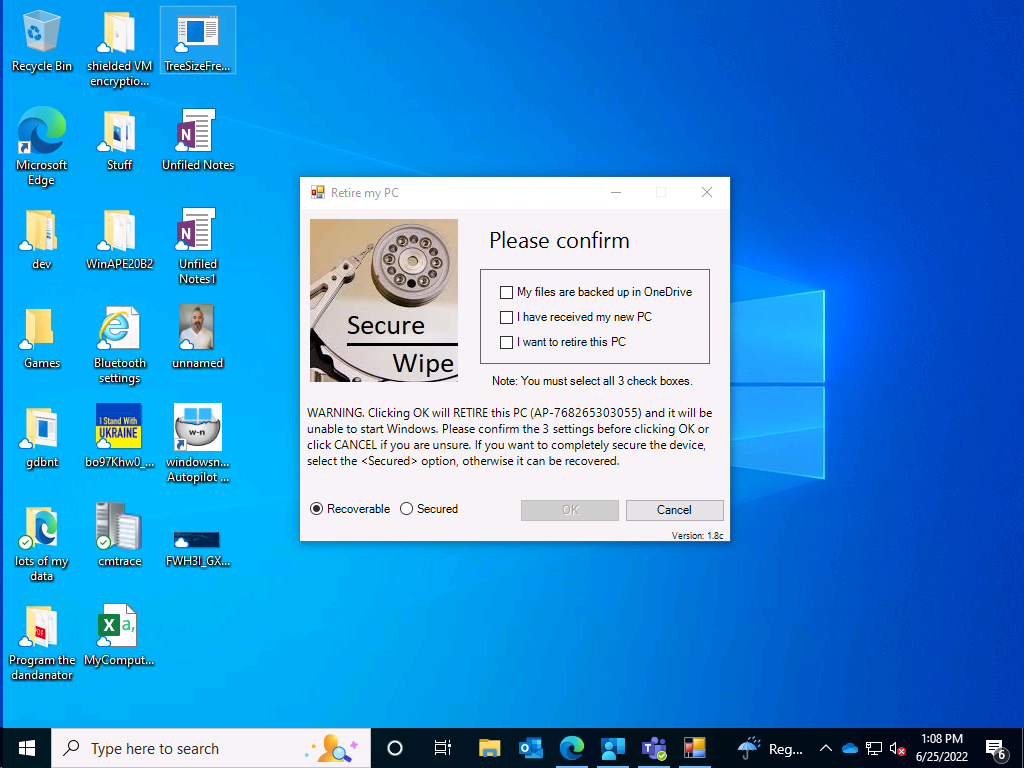
If you are not familiar with Retire My PC then please do take a look. This self-service app can be made available via Software Center in ConfigMgr or via the Company Portal in Intune.
Note: Retire My PC will secure Company Data prior to handing it back to support staff or to the reseller.
Regardless of which way you deploy the app, it still logs data to Azure tables, which allows us to verify that the user actually retired their old computer via Azure console access, PowerBi reports or other methods such as this one.
One way to gather that data is to use SAS read-only tokens, and that’s what we’ll look at today. The guts of this script were written by my clever work colleague Mikael Karlsson, I’ve modified the script to prompt the end user for the type of data they want to verify.
Step 1. Create the SAS read only token
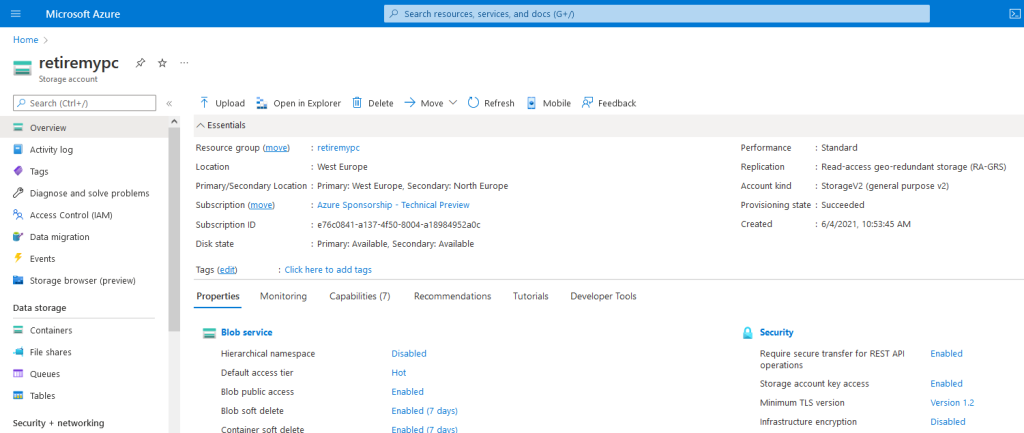
In Azure, locate the storage account that hosts the tables which you created earlier. For Retire My PC I use the following Azure Storage.
In the left pane, scroll down to Security + Networking and select Shared Access Signature as shown here.
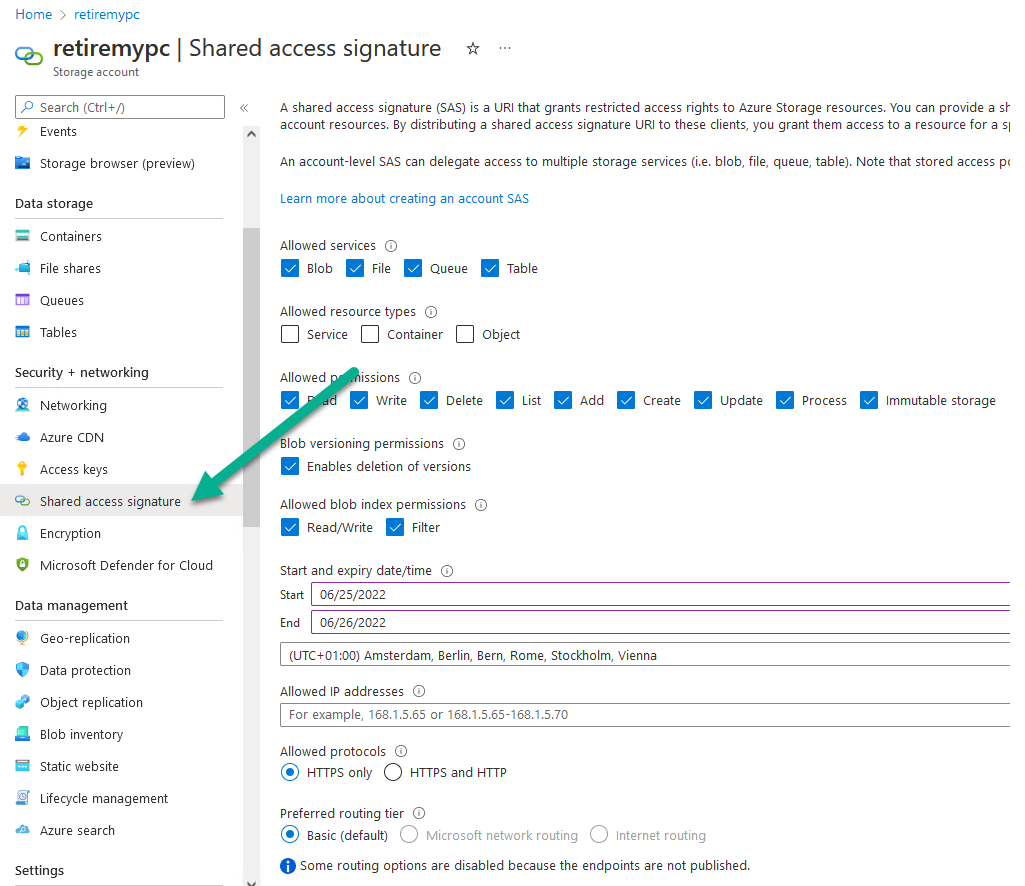
Select Object from Allowed resource types.

Select only Read and List from Allowed permissions to make it read only.

Select only Filter from the following Allowed blob index permissions.

And de-select Enables deletion of versions from Blob versioning permissions.

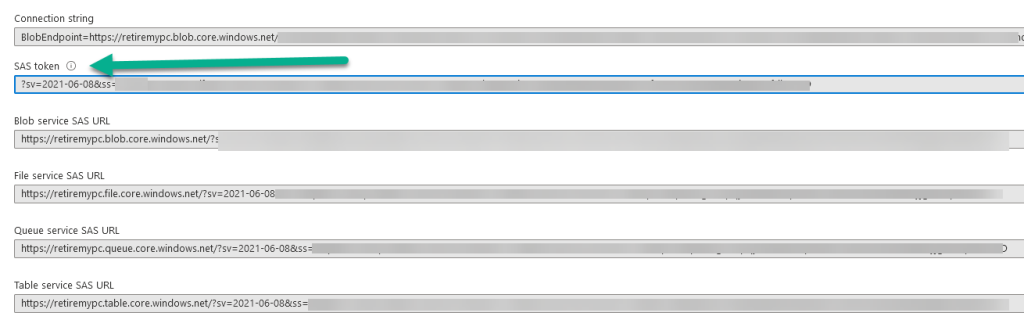
Modify the date range to suit your needs and finally click on Generate SAS and connection string.
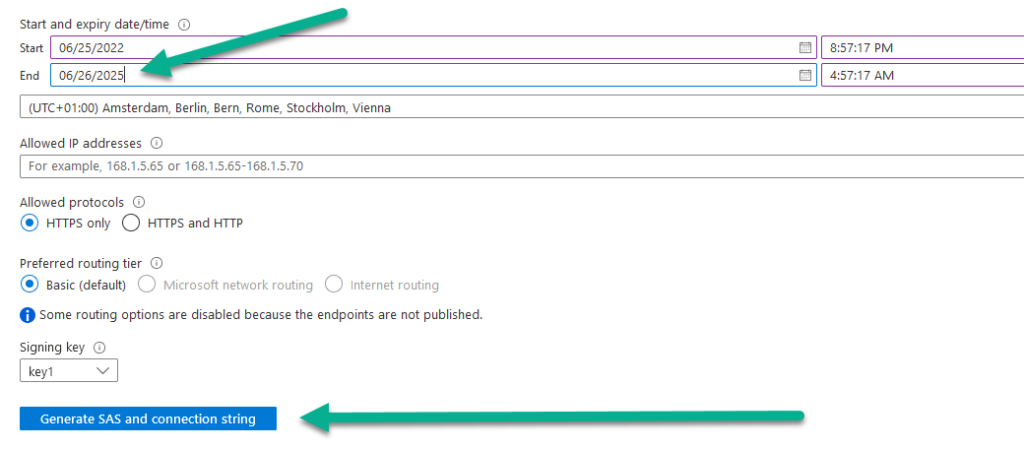
Finally you can copy the SAS token.
Step 2. Get the script
Note: This script is customized to work with data generated by Retire My PC. You may need to modify it if you are using another solution.
Here is the script, copy it and save it as Verify data from Azure tables using SAS read only token.ps1
# 2022/06/25 Original code Mikael Karlsson, modified by Niall Brady
# use this code to read from Azure Tables data using a SAS read only token
#
# you can dump all the data, an individual serial number, username or computer name
#

function GetEntryByFieldValue($fieldName,$fieldValue){
$tableUri = "$($global:tableBaseUri)?`$filter=$($fieldName) eq '$($fieldValue)'&$($global:sasReadToken)"
Invoke-RestMethod -Uri $tableUri -Headers @{Accept = 'application/json;odata=nometadata'} -UseBasicParsing|select -expand value
}
function GetAllEntries{
$continuationString = "" #default to blank for first query
do{
$result = $null;$result = Invoke-WebRequest -Uri "$($global:tableBaseUri)?$($global:sasReadToken)$($continuationString)" -Headers $global:header -UseBasicParsing
$result.Content|ConvertFrom-Json|select -expand value
$continuationString = "&NextPartitionKey=$($result.Headers.'x-ms-continuation-NextPartitionKey')&NextRowKey=$($result.Headers.'x-ms-continuation-NextRowKey')"
}while(-not [string]::IsNullOrEmpty($($result.Headers.'x-ms-continuation-NextRowKey')))
}
function Main-Menu
{
do
{
Write-Host "1. Check serial number `n2. Check computer name `n3. Check username "
$menuresponse = read-host [Enter Selection]
Switch ($menuresponse) {
"1" {$serialnumber= Read-Host -Prompt "Enter the serial number that you want to verify against "
GetEntryByFieldValue -fieldName "Serial" -fieldValue $serialnumber | Select-Object -Last 1}
"2" {$computername= Read-Host -Prompt "Enter the computer name that you want to verify against "
GetEntryByFieldValue -fieldName "ComputerName" -fieldValue $computername | Select-Object -Last 1}
"3" {$username= Read-Host -Prompt "Enter the username (eg: niall) that you want to verify against "
GetEntryByFieldValue -fieldName "UserName" -fieldValue $username | Select-Object -Last 1}
}
}
until (1..3 -contains $menuresponse)
}

$global:tableBaseUri = ""
$global:sasReadToken = ""
$global:header = @{Accept = 'application/json;odata=nometadata'}

#GetEntryByFieldValue -fieldName "Serial" -fieldValue ""
#GetEntryByFieldValue -fieldName "ComputerName" -fieldValue ""
#GetEntryByFieldValue -fieldName "UserName" -fieldValue ""
#
# if you want to dump all data unrem next 2 lines
# $allEntries = GetAllEntries
# write-host $allEntries

Main-Menu
Step 3. Modify the script
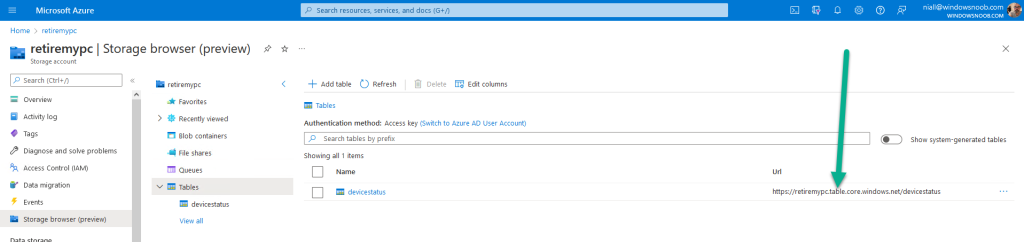
Now you need to modify the script to include the tableBaseUri, this should point to your Azure tables URI as shown in the example below.
Copy this value.
and paste it into the script.
Next paste in the SAS token generated earlier. Use the below as a guide to your edit.

Save the script !
Step 4. Test it
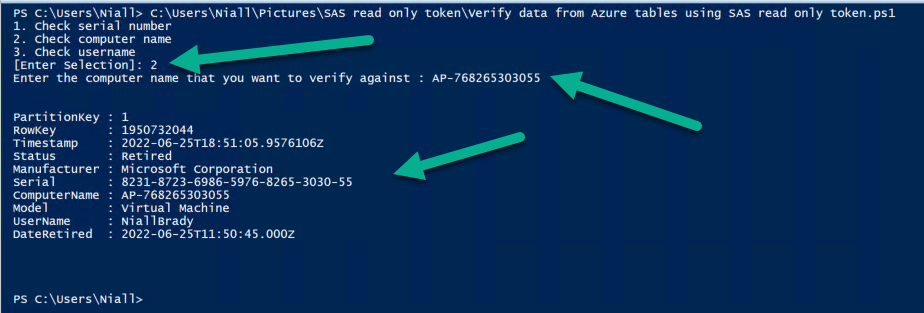
Now all the work is done, you can finally test the script. Run it and select a choice.
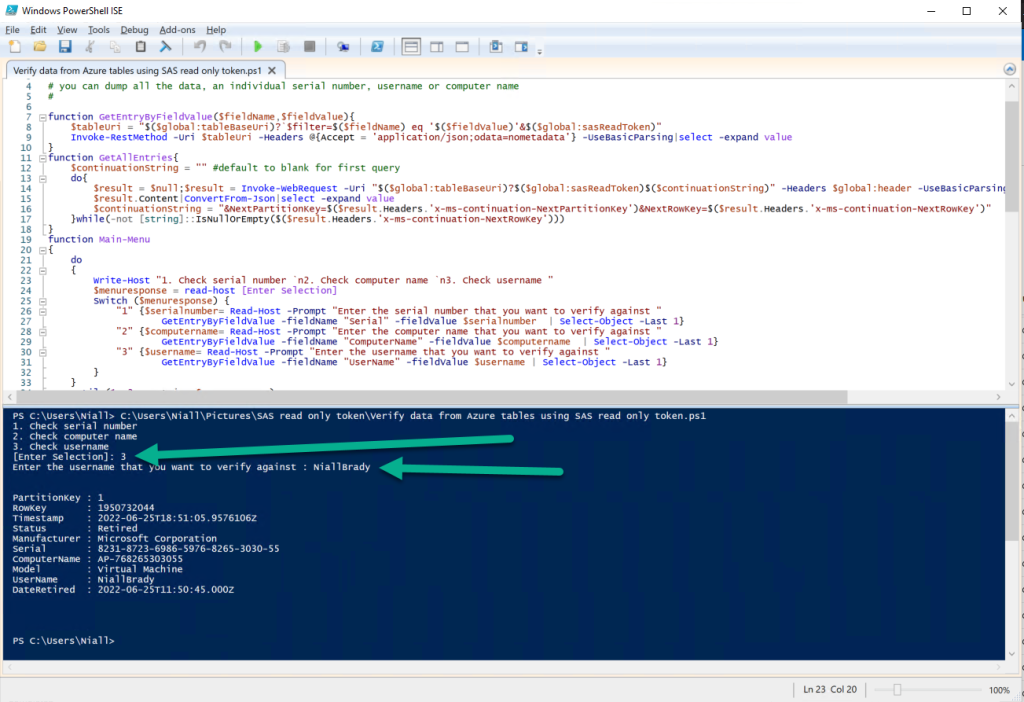
One thing to be aware of is the data to search for can be case sensitive, so if I search for niallbrady it will find no data, but if I search for NiallBrady it will succeed, it’s much easier therefore to search for serial number or computer name.
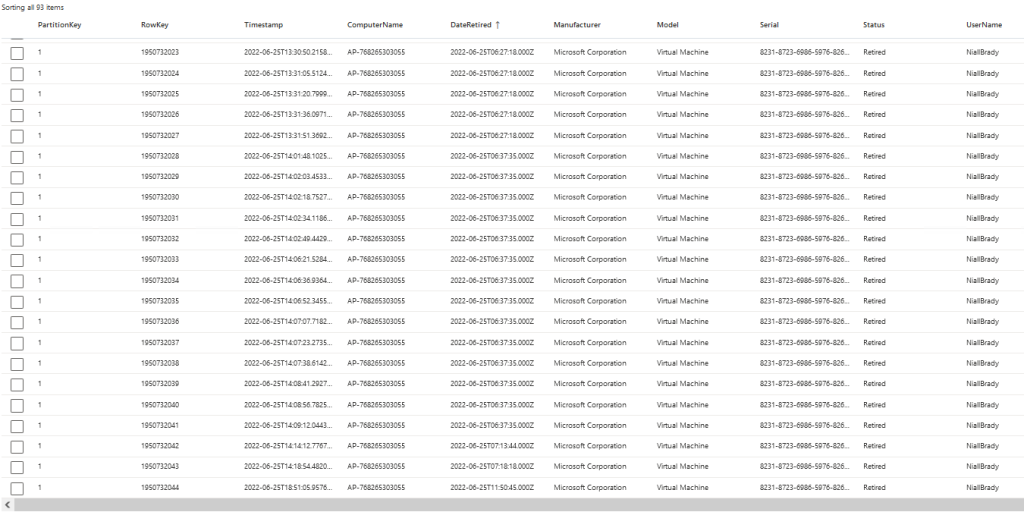
Below is an extract from Azure tables showing the data it pulled from:
And below is a search for computer name.
I hope you found this useful, until next time, see ya !
