
Introduction
Microsoft released System Center 2012 R2 Configuration Manager on October 18th, 2013 as planned (General Availability) and now we all have the ability to test the new features in the finished product. I’ve installed it in my lab and wanted to test the New operating system deployment features, one of which is the ability to create a VHD from a task sequence right from the Configuration Manager console.
Before getting started however you’ll need to have at least one host capable of running HyperV (such as Windows 8, Windows 8.1, Windows Server 2008R2, Windows Server 2012, Windows Server 2012R2) with the System Center 2012 Configuration Manager console installed.
Tip: You’ll need System Center 2012 R2 Configuration Manager installed, here’s a step by step guide to get your started.
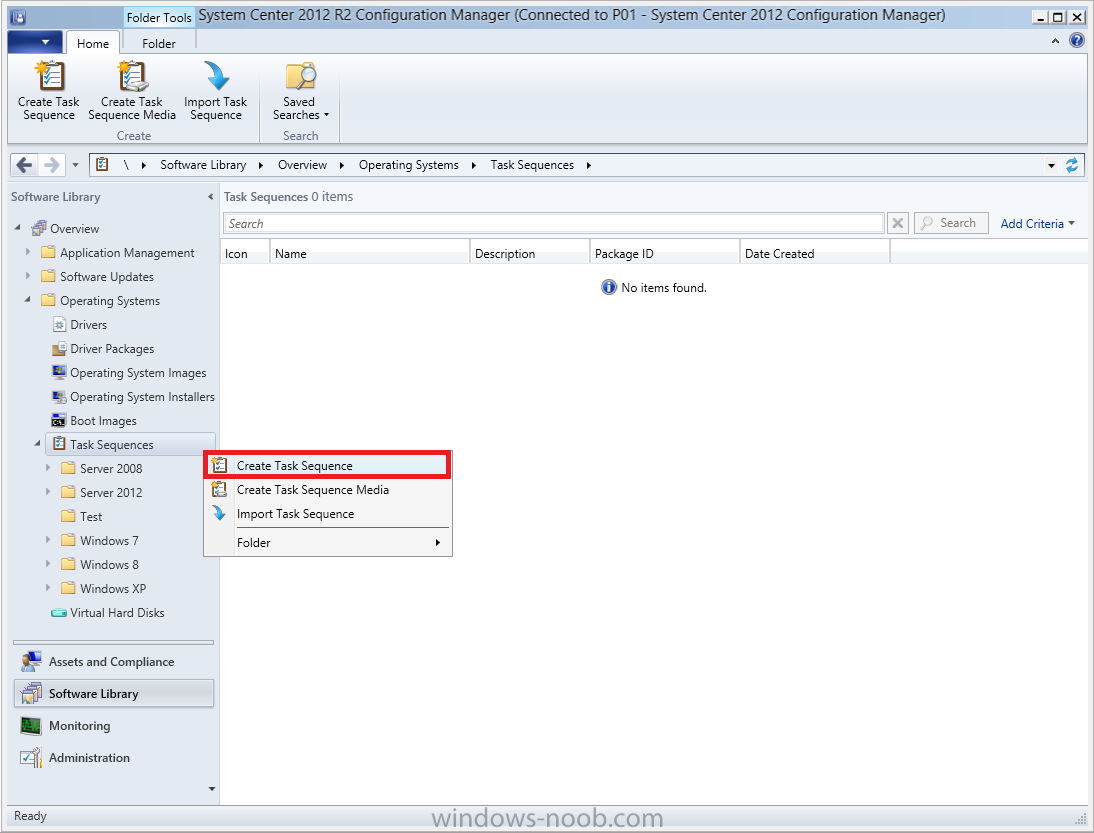
Step 1. Create a new task sequence
Note: Perform the following on any computer with the System Center 2012 R2 Configuration Manager AdminConsole installed as SMSAdmin.
Open the Admin console, expand Software Library, Operating System Deployment and right click on Task Sequences, choose Create Task Sequence.
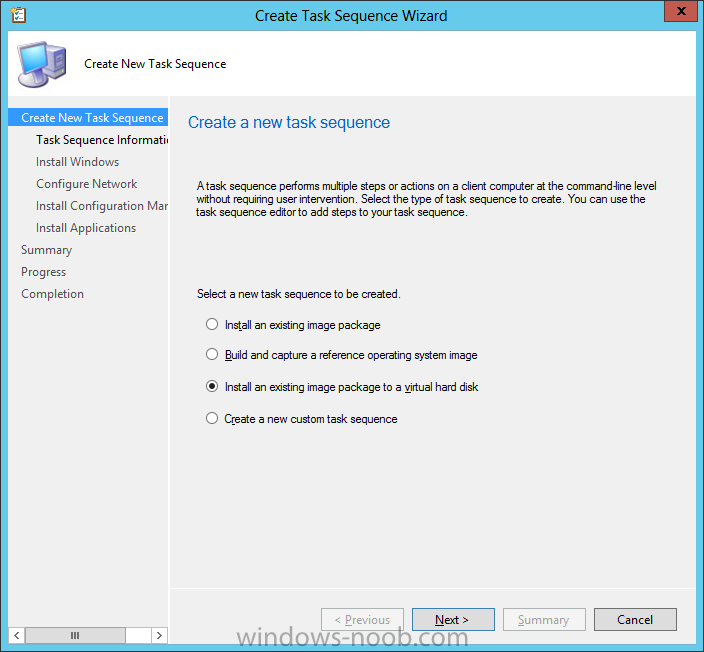
choose the third option, install an existing image to a virtual hard disk
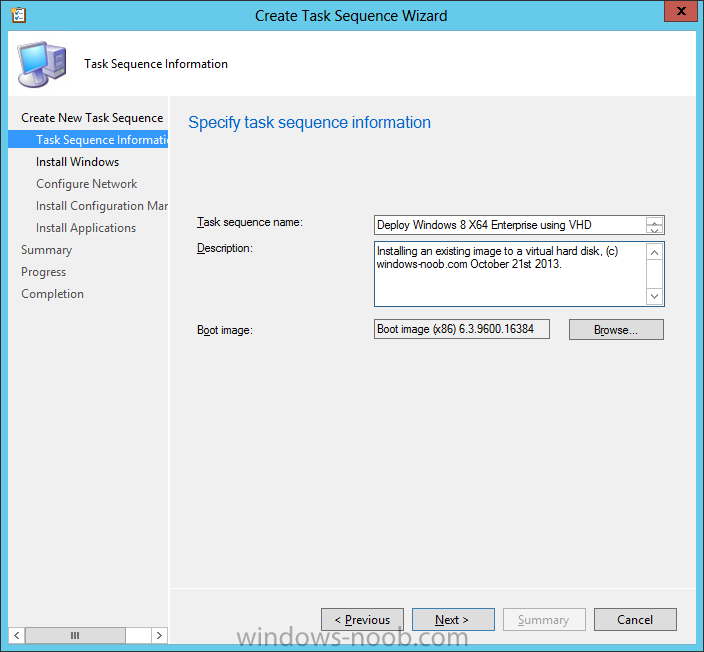
choose a suitable name for your task sequence and select a boot image
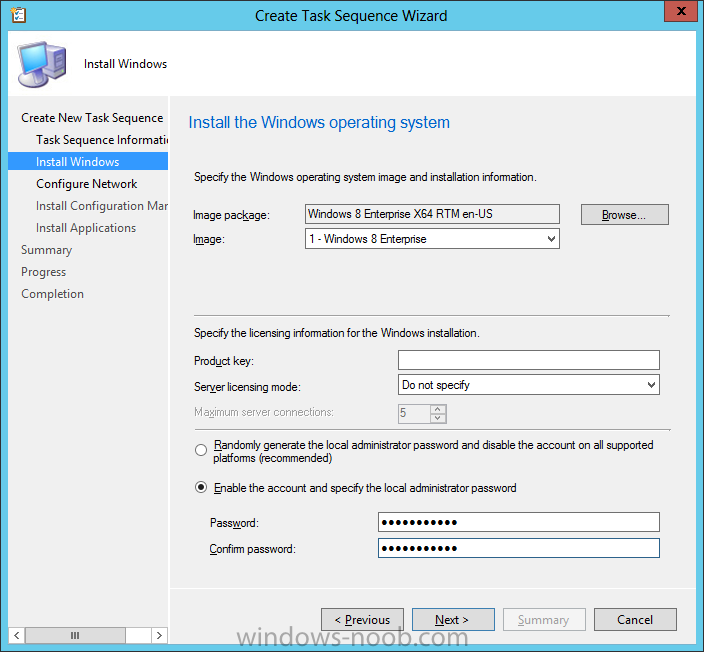
In this task sequence I am deploying Windows 8 X64 Enterprise using the Install.wim file from the DVD, I also select to enable the Administrator account and I specify a password
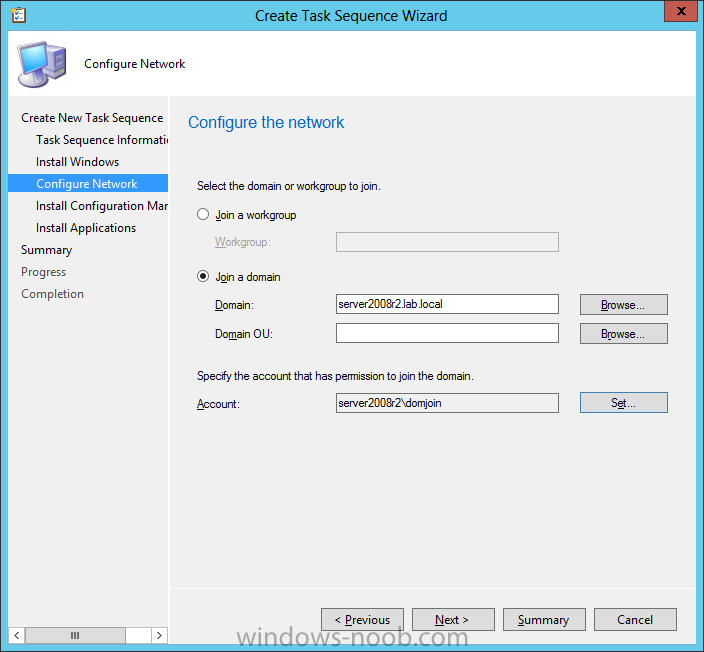
select to Join a domain and fill in appropriate domain join credentials
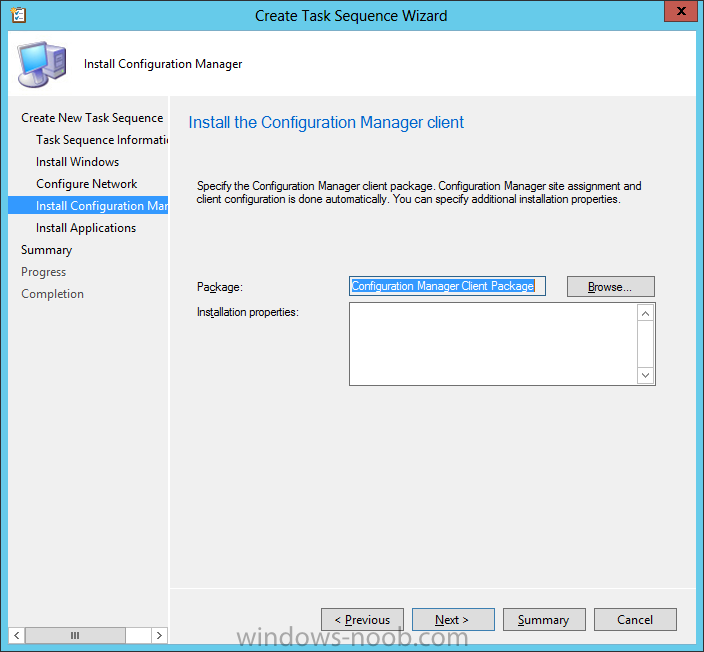
and install the configuration manager client, you can add switches here if needed
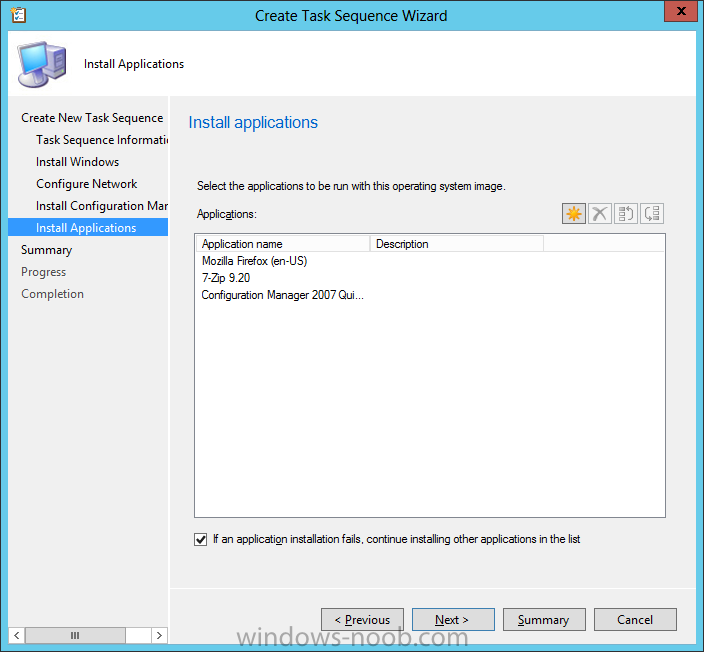
and select to install some applications if you wish
click next through to the completion message
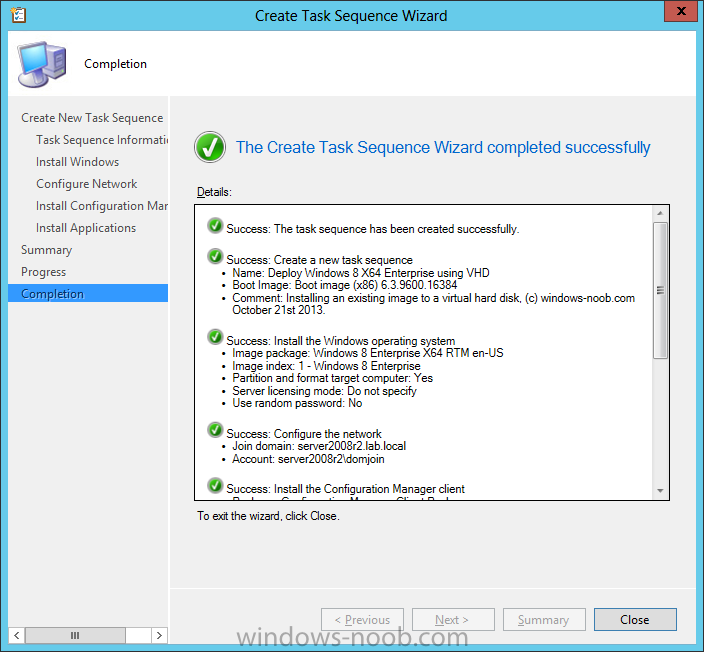
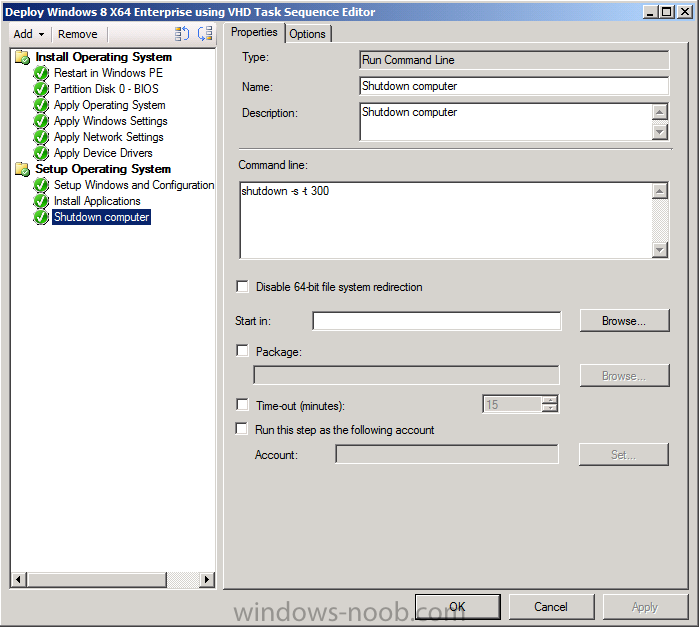
You can now edit the task sequence if you wish and add/remove steps, note the last step is a shutdown command, this is a special step and is ‘looked for’ by the wizard later on so that it knows the task sequence is complete and to generate the VHD.
Step 2. Create a Virtual Hard Disk
Note: Perform the following on a HyperV host computer with the System Center 2012 R2 Configuration Manager AdminConsole installed as SMSAdmin.
Method #1 – Do it using the AdminConsole
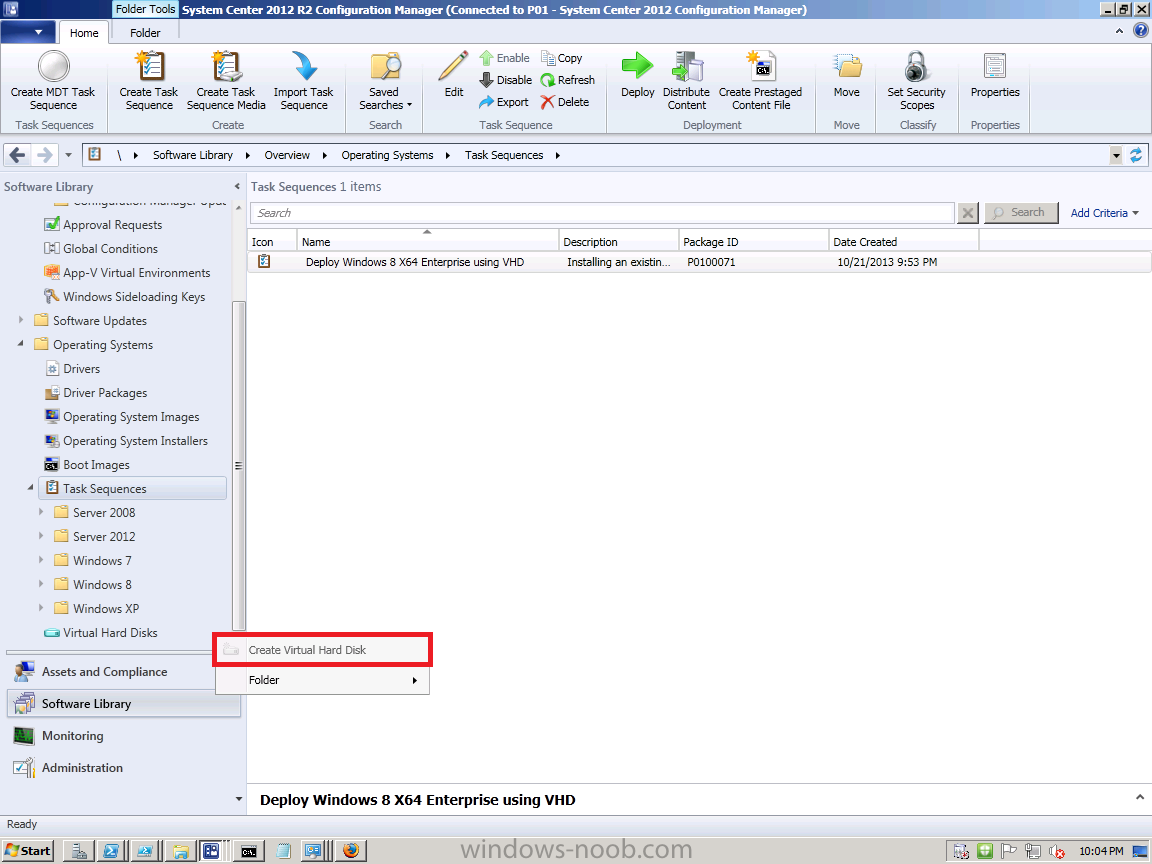
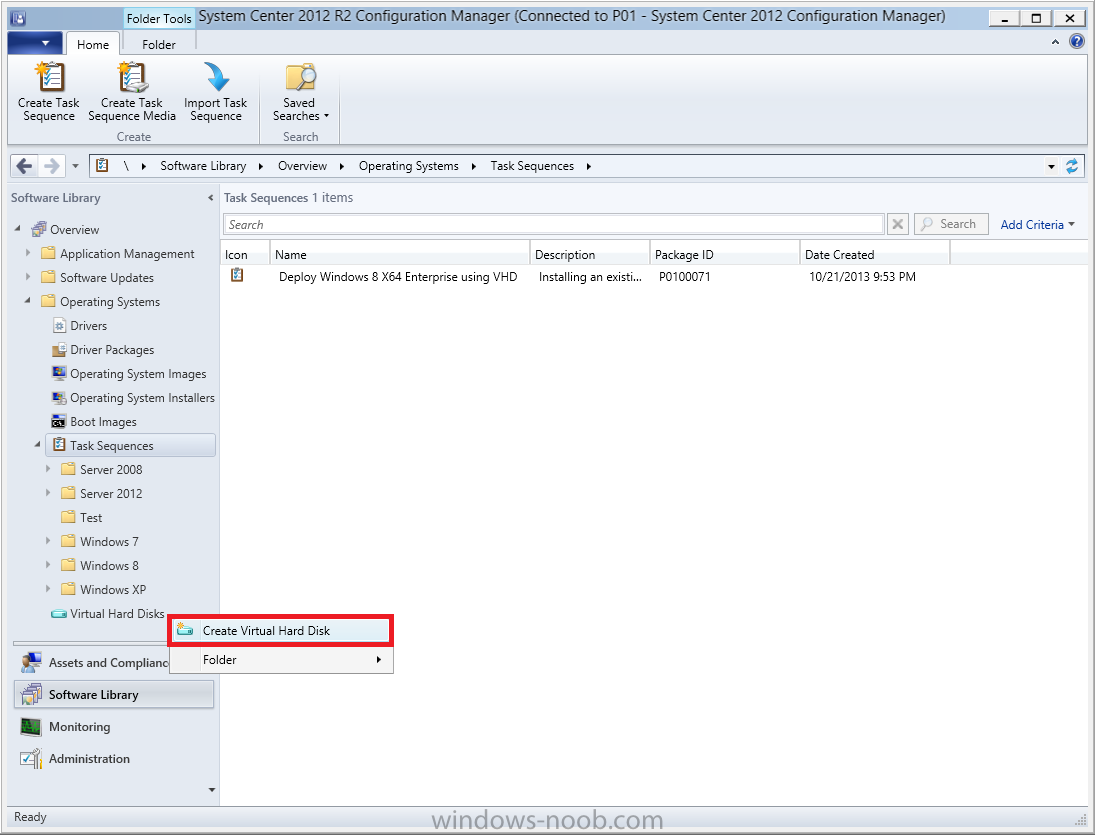
In the Admin console Expand the Task Sequences node in Operating System Deployment and right click on Virtual Hard Disks. If this is greyed out it’s because you are not running the console on a Hyperv Enabled host (I’ve tested it on Server 2012 running Hyperv with the R2 admin console installed). To make it clear, i’m including two screenshots of the same action, one on a hyperV host, the other is an adminconsole with no hyperV hosts locally installed.
Note: the below screenshot is on a host without hyperv installed or enabled. Note how the Create Virtual Hard Disk action is greyed out.
Note: the below screenshot is on a hyperv host
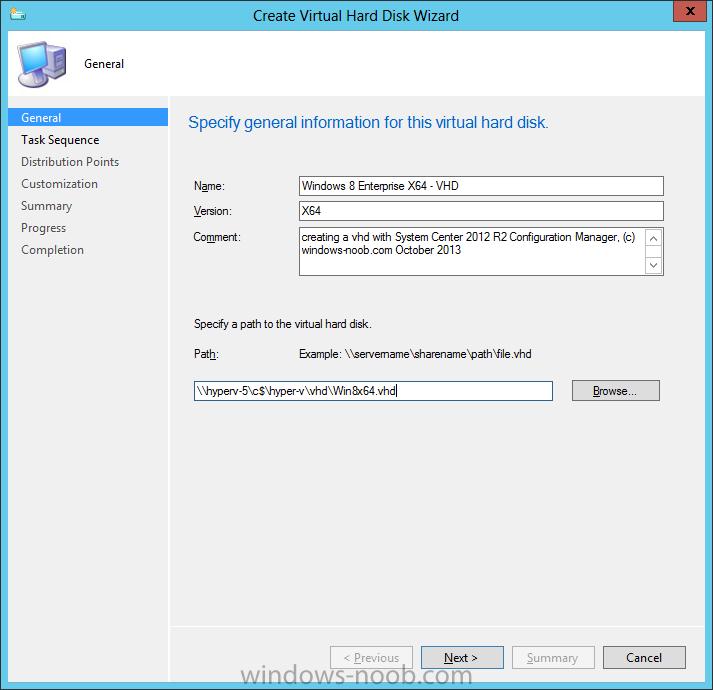
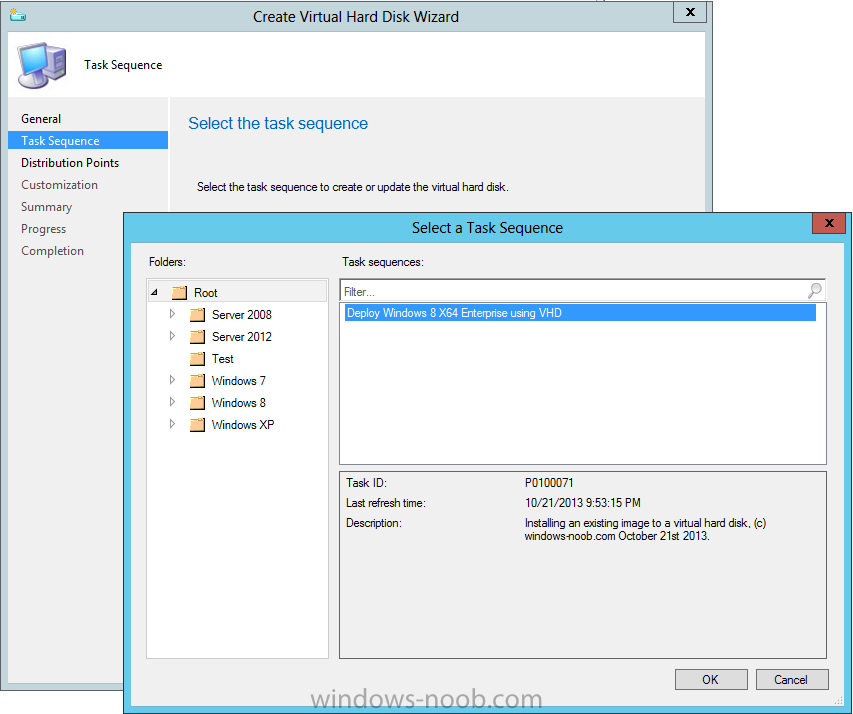
Now that we’ve started the create virtual hard disk wizard, fill in some details about our virtual hard disk.
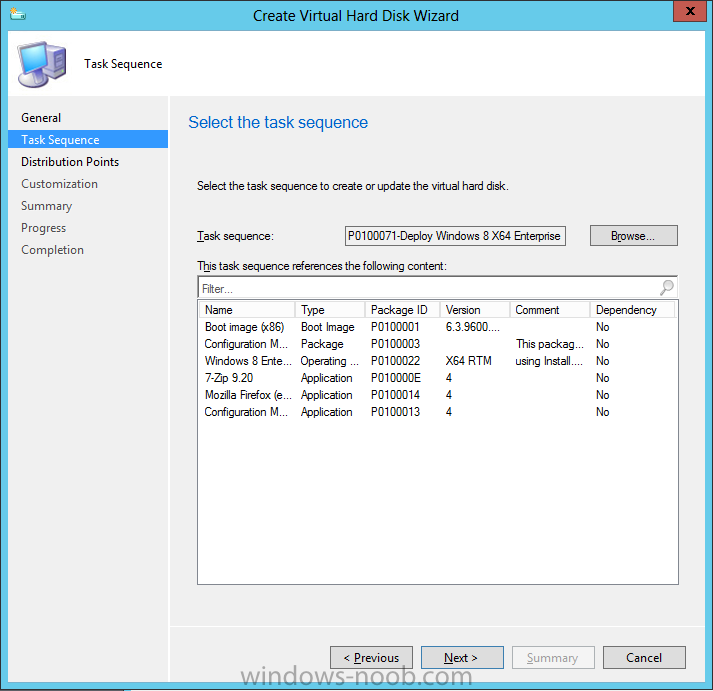
next select our task sequence that we created in Step 1
and depending on how complicated the task sequence was it will take some time to generate a list of task sequence referenced content
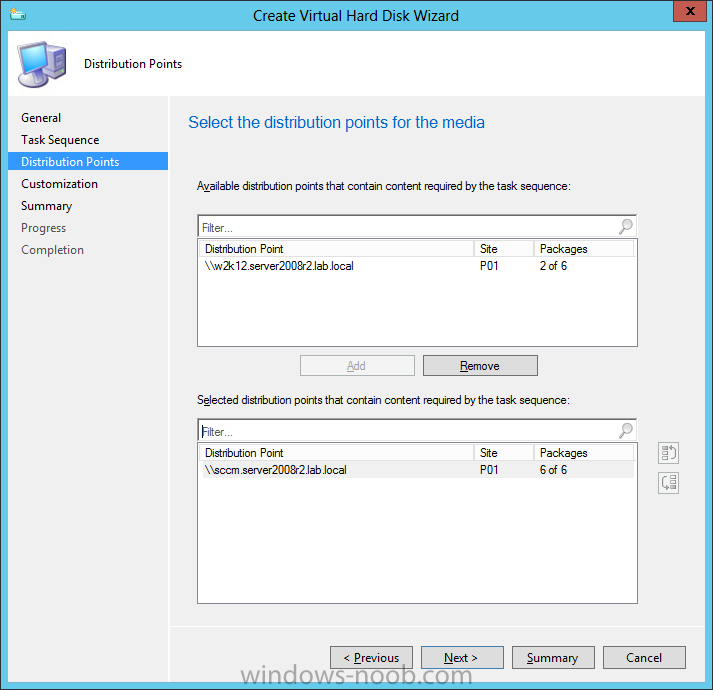
select a distribution point that has all the packages on it (XX of XX)
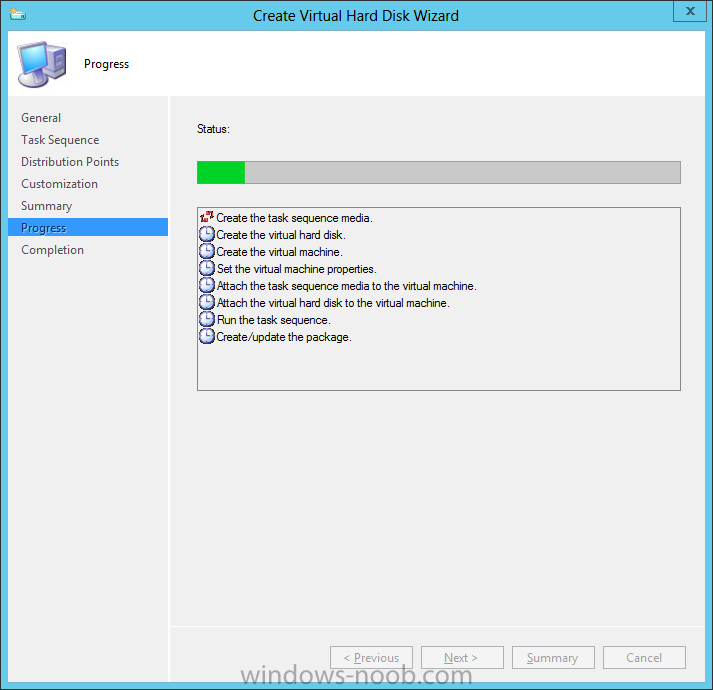
and click your way through the wizard, at this point you’ll see be prompted to allow access to your host computer (to create the file) and shortly after the magic begins
The task sequence media creation is logged in the CreateTSMedia.log file located on the hyperv host running the adminconsole (Typically C:\Program Files (x86)\Microsoft Configuration Manager\AdminConsole\AdminUILog)
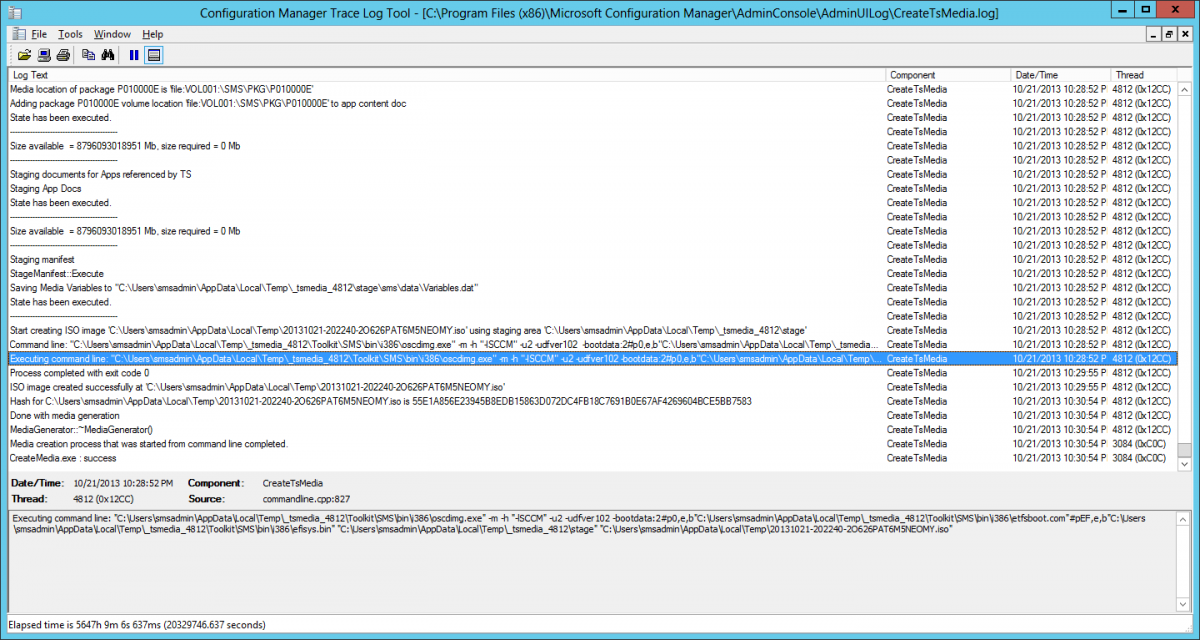
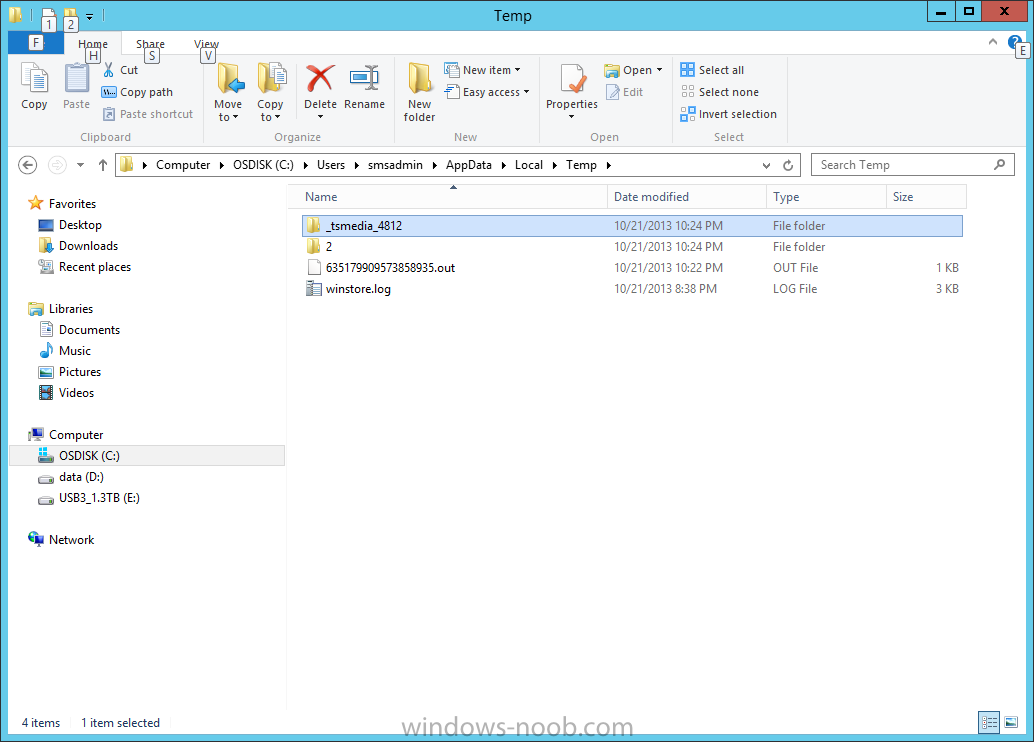
The user you are logged in as will have it’s AppData\Local\Temp dir used as a temporary scratch space, so make sure you have lots of space if needed or use the link at the bottom of this page to change your TMP environment variables to point to a drive with more free space.
and off it goes creating the virtual hard disk (look at this video to see the process in more detail, watch above the hyperv4 vm to see the new virtual machine being created, this video has no audio yet, it’s coming hopefully if i get time…)
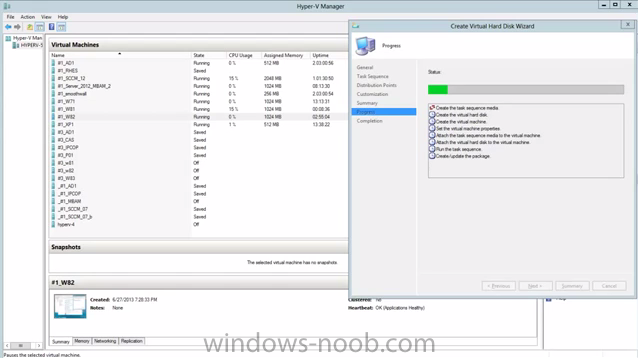
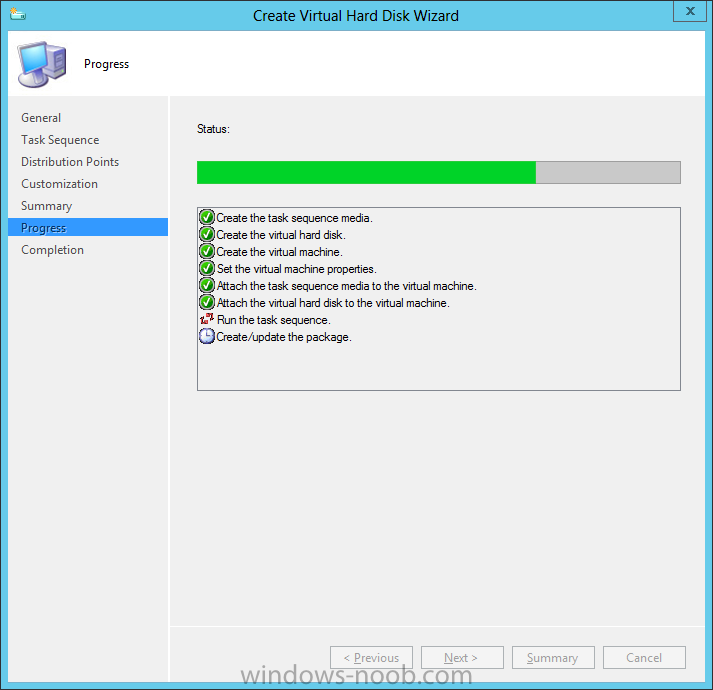
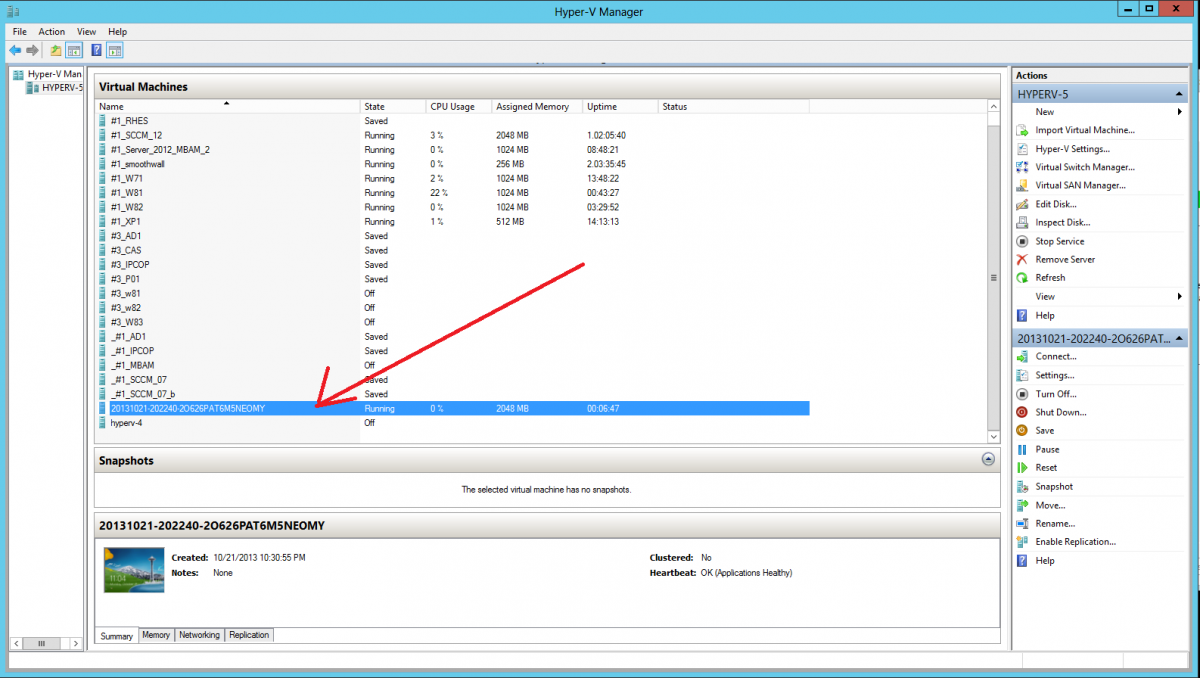
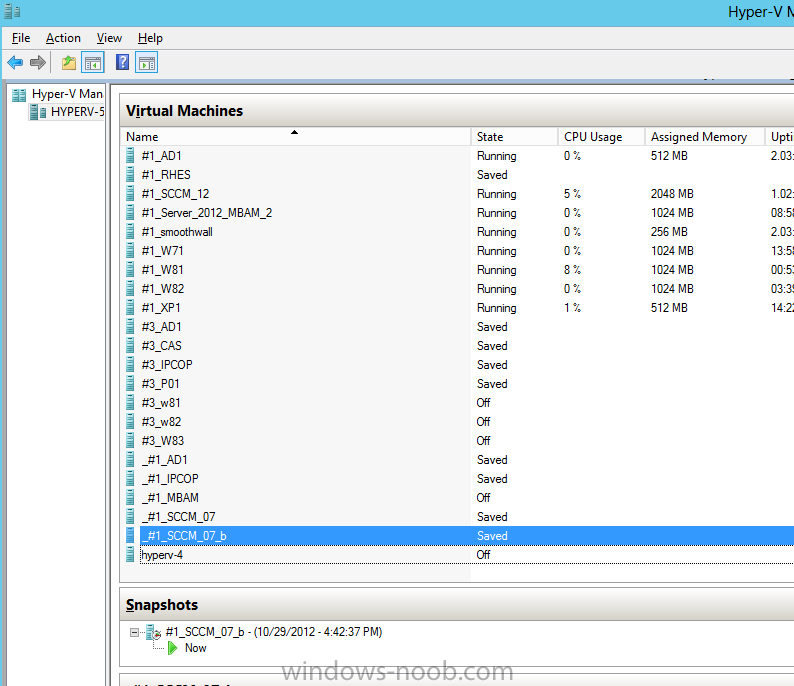
This involves, automatically creating a temporary virtual machine in hyperV, starting it automatically, starting the task sequence automatically and finally sealing the VHD file which can then be seen in the configuration manager console. Below you can see the temporary virtual machine in hyperv shortly before the VHD is created (task sequence is complete)
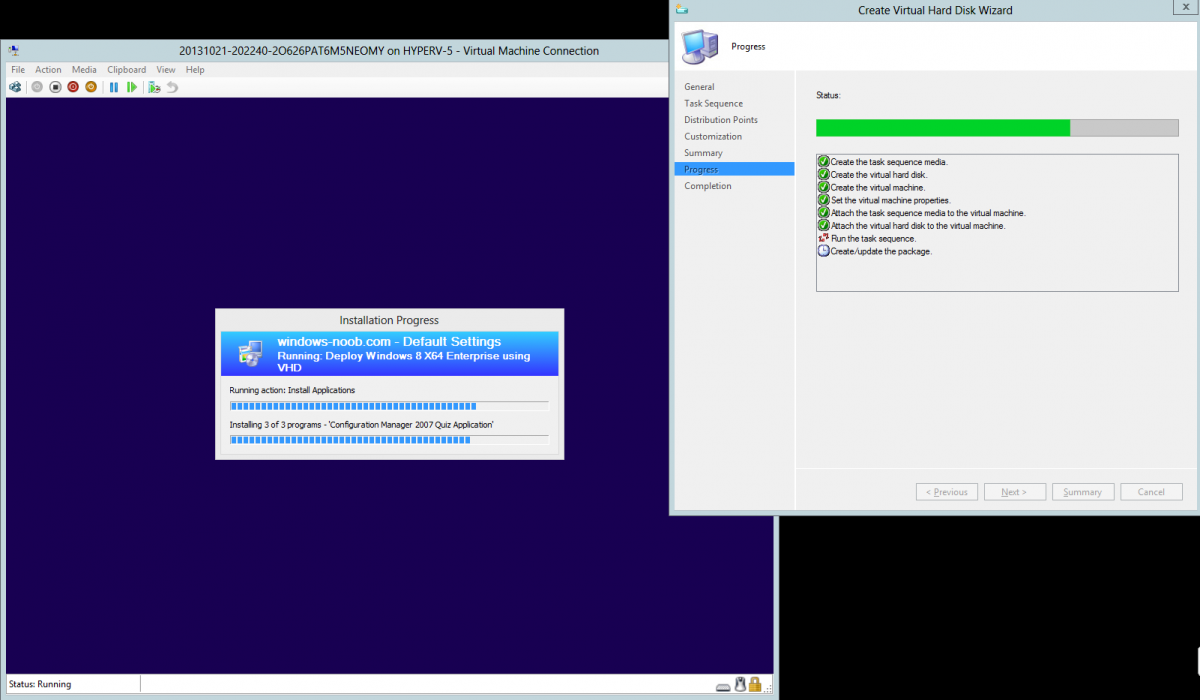
The temporary virtual machine continues to run the task sequence, eventually installing our applications
once complete the Virtual machine shutsdown and the VD copying starts, you can now monitor the DeploytoVHD.log file (in C:\Program Files (x86)\Microsoft Configuration Manager\AdminConsole\AdminUILog)
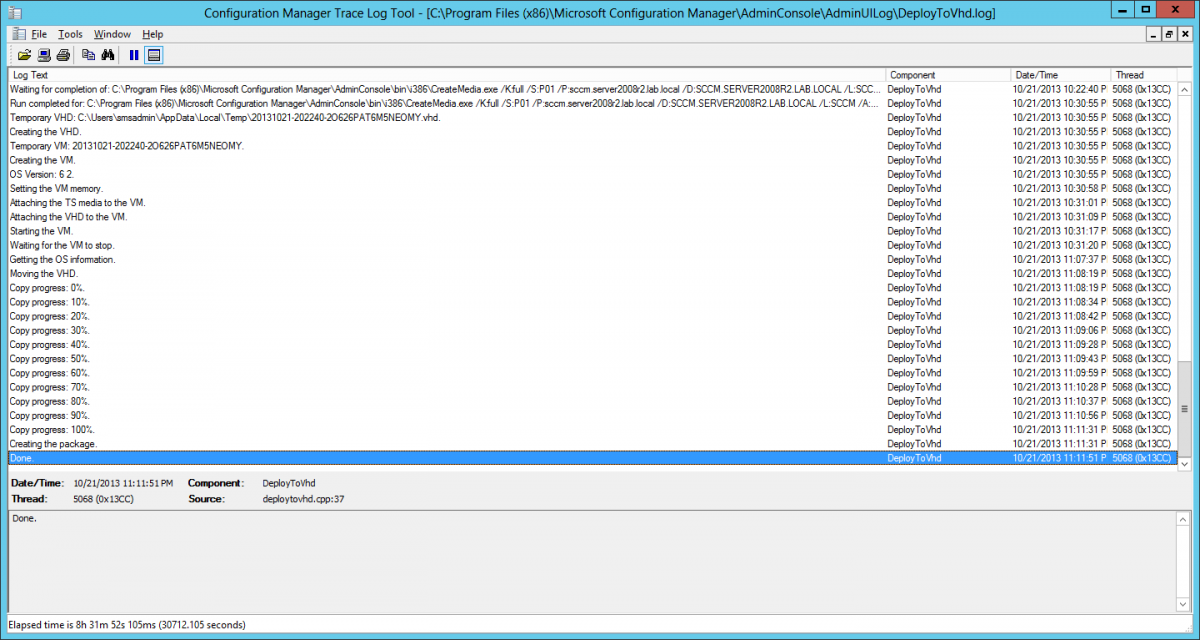
When the logfile confirms the process is done then you can assume that the wizard is also complete…and it is… 🙂
and you’ll notice that the temporary virtual machine is gone
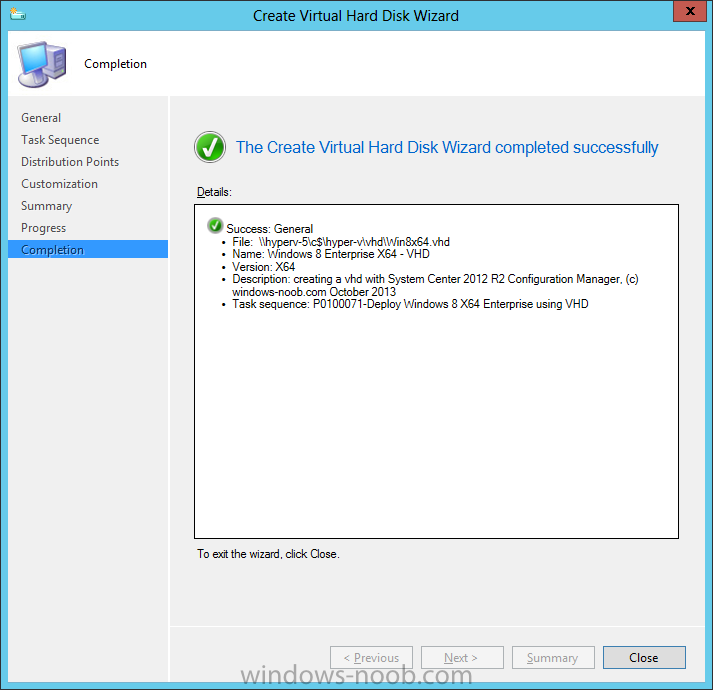
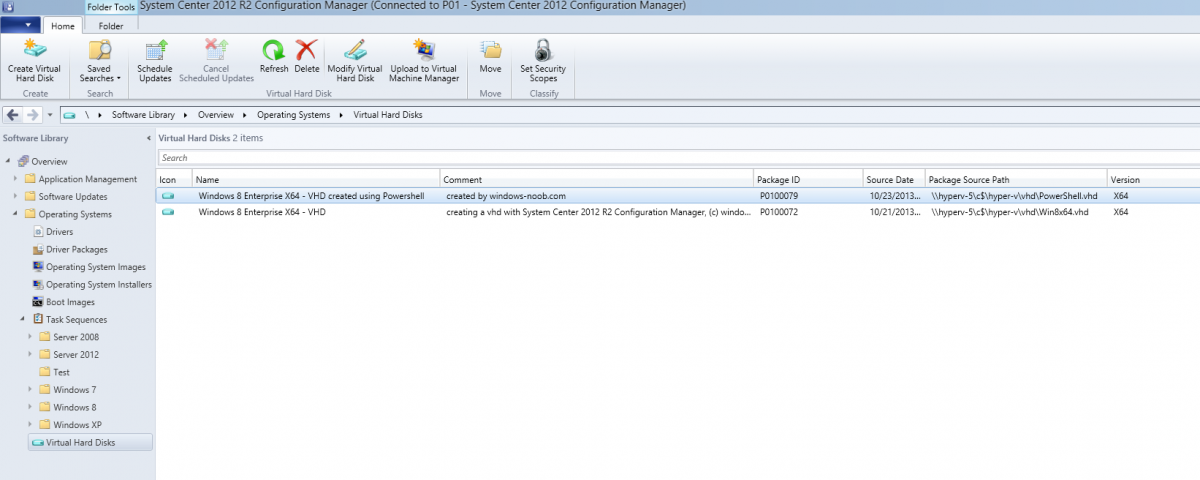
and clicking on Virtual Hard Disks in the Admin console will list our newly created VHD file, success !
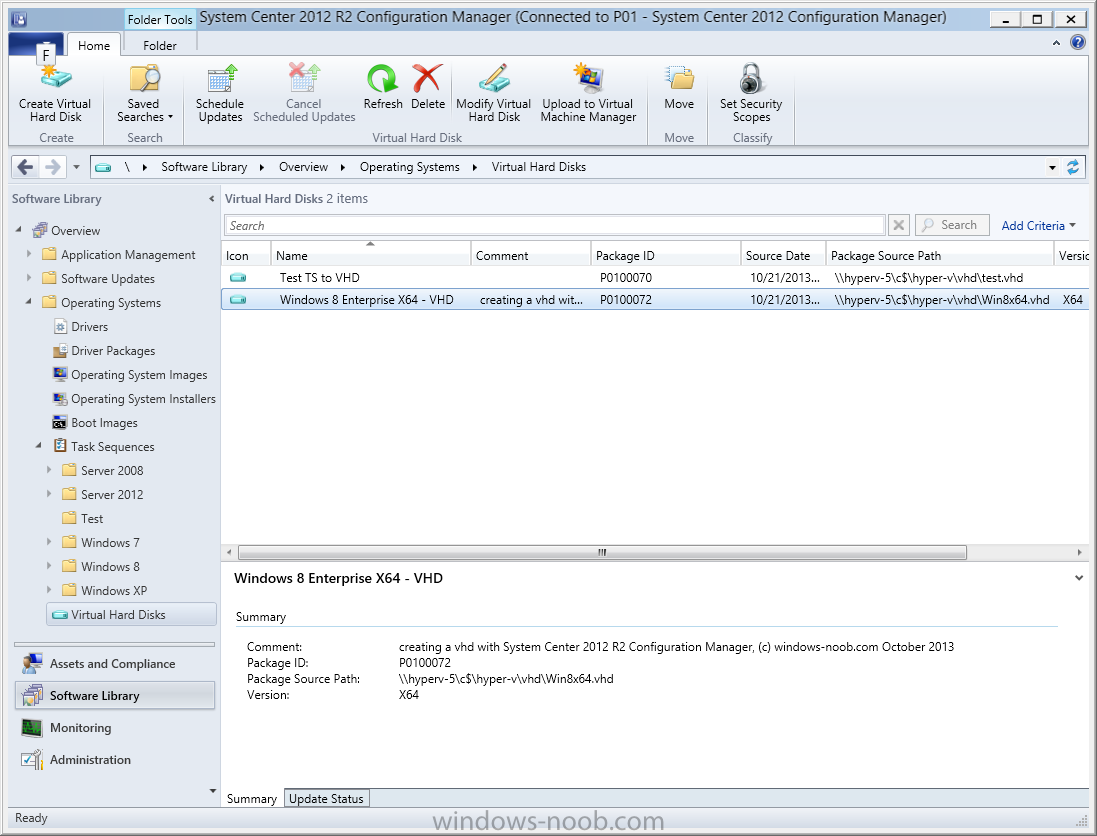
at which point you can modify the VHD (by choosing that action in the ribbon or via right click) or just upload it to Virtual Machine Manager.

Method #2 – Do it using PowerShell
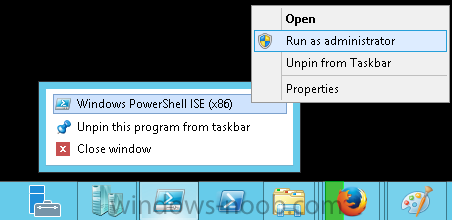
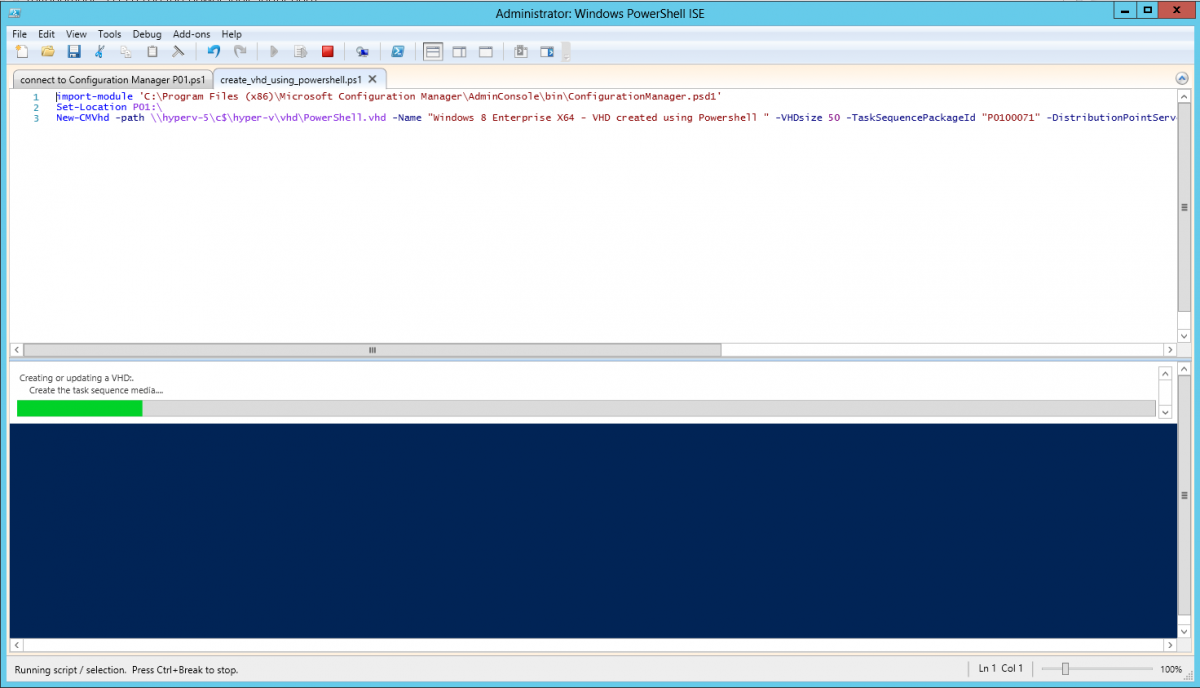
Start PowerShell ISE (PowerShell Integrated Scripting Environment) as Administrator
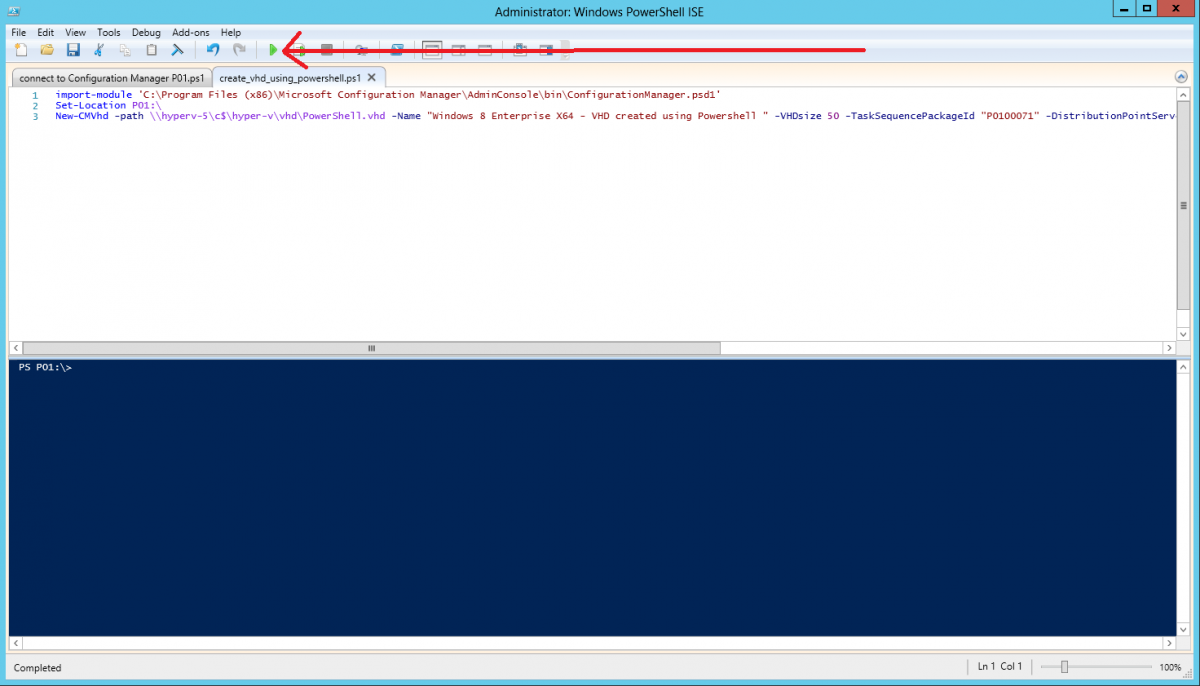
and paste in the following code
import-module 'C:\Program Files (x86)\Microsoft Configuration Manager\AdminConsole\bin\ConfigurationManager.psd1'
Set-Location P01:\
New-CMVhd -path \\hyperv-5\c$\hyper-v\vhd\PowerShell.vhd -Name "Windows 8 Enterprise X64 - VHD created using Powershell " -VHDsize 50 -TaskSequencePackageId "P0100071" -DistributionPointServerNames SCCM.server2008r2.lab.local -Version "X64" -Description "created by windows-noob.com"
The first two lines simply import the configuration manager powershell module and then set your path to your primary server P01.
The New-CMvhd cmdlet is a new cmdlet in R2 and it is used to create the VHD using powershell.
In the above, the -TaskSequencePackageId value is the PackageID of your task sequence, make sure to set the appropriate values in the New-CMvhd command to suit your environment (for example your server share).

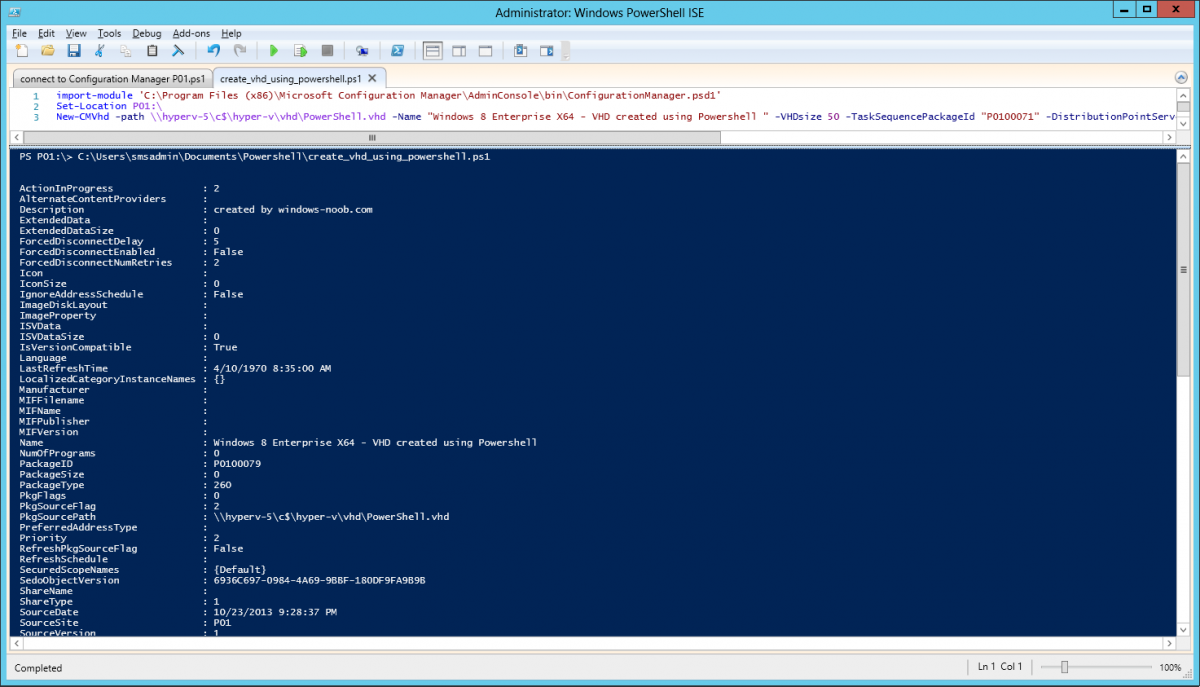
Click on the Green arrow to run your powershell script
and off it goes !
and after some VHD creation……………job done !
and our VHD appears in the console
not too bad eh ?
cheers
niall
Related reading
What’s New in System Center 2012 R2 Configuration Manager – http://technet.micro…y/dn236351.aspx
- How an I install System Center 2012 R2 Configuration Manager – How can I install System Center 2012 R2 Configuration Manager ?
- Changing the TMP variable for OSD media creation – http://blogs.technet…a-creation.aspx
- Windows PowerShell Integrated Scripting Environment (ISE) – http://technet.micro…y/dd819514.aspx
- using System Center 2012 Configuration Manager – Part 12. Connecting PowerShell and Building a reference image of Windows 8 with .Net 3.5
- Configuration Manager SP1 Cmdlet Reference – http://technet.micro…y/jj821831.aspx
