

Introduction
Mobile device management (MDM) in Configuration Manager is possible via the following methods
- Enrollment by Configuration Manager
- Mobile Device Legacy Client
- Exchange Server Connector
The methods above provide you with different abilities, Enrollment by Configuration Manager let’s you manage older and less popular hardware such as Windows Mobile 6.1, Windows Mobile 6.5, Nokia Symbian Belle, whereas the Mobile Device Legacy client can manage similar hardware such as Windows CE and Windows Mobile 6.0 mobile operating systems. Finally you can do remote wipe or settings control for devices managed by Exchange 2010 using Exchange ActiveSync by using the Exchange Server Connector.
Modern Device Management on devices such as Android, Windows Phone 8, iOS, Windows RT is possible by integrating Configuration Manager with Windows Intune. This ability has been in place since Configuration Manager 2012 SP1 but has been updated with new abilities and refined with the release of System Center 2012 R2 Configuration Manager.
As you’ll probably want a single pane of glass for managing your modern devices as well as your company servers and computers, integrating Configuration Manager 2012 R2 with Windows Intune is a logical next step. In this post I’ll show you how to integrate Windows Intune with System Center 2012 R2 Configuration Manager.
When you use Configuration Manager with Windows Intune, you have the following management capabilities:
- You can retire and wipe devices.
- You can configure compliance settings on devices. These include settings for passwords, security, roaming, encryption, and wireless communication.
- You can deploy line of business apps to devices.
- You can deploy apps from the store that the device connects to, Windows Store, Windows Phone Store, App Store, or Google Play.
- You can collect hardware inventory.
- You can collect software inventory by using built-in reports.
In this mini-series of guides on managing modern devices I will show you what you need to do to successfully integrate Configuration Manager 2012 R2 with Windows Intune and then manage them.
Step 1. Get a Windows Intune account
If you don’t already have a Windows Intune account then head over to http://www.windowsintune.com and click on the Try link to test a 30 day free trial. Windows Intune isn’t free, there is licensing cost involved, luckily there is a Windows Intune Licensing FAQ which can be found here.

After signing up you can login to Windows Intune using the credentials you specified. You will be presented with an Admin home page like the one below:

At the top of the screen you’ll notice three main tabs,

These tabs are described below:
- Company Portal
- Admin Console
- Admin
The Company Portal will open a new window that shows applications added to Windows Intune and deployed to this user, it will show All devices (for the logged on user, with a maximum of 5 devices per user) and some support options. The Admin Console is where you’ll do your day to day activities in Windows Intune. This is Silverlight powered so you’ll most likely get prompted to install Silverlight if it’s not already installed.

The Admin page itself *see further up* is where you manage Windows Intune subscriptions, licenses and initial setup of Intune Users.
Step 2. Add a public company domain
In order to ensure users are synchronized correctly you must create a verified public domain within the Windows Intune Account Portal. If this step is not performed you might end up with users with onmicrosoft.com UPN (User Principal Name) related names. Logon to https://account.manage.microsoft.com/ (that’s the Windows Intune Admin page) and click on Domains. Next, click on Add a Domain as shown in the screenshot below:

Enter your domain name

Click on Next, you’ll be asked if you want to verify using a TXT or MX record, I have chosen TXT in this example (and it’s the recommended choice as the other option could potentially give you issues).
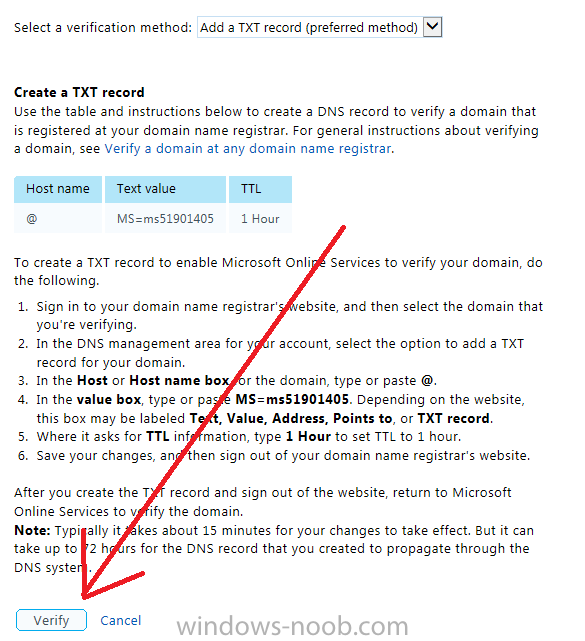
To allow Microsoft Online Services to verify your domain logon to your domain registrar or DNS provider for the domain you want to add to Windows Intune. The steps are listed below
- Logon to your Domain provider and select the domain that you’re verifying
- In the DNS management area for your account, select the option to add a TXT record for your domain.
- In the Host or Host name box for the domain, type or paste @. (If your domain registrar doesn’t let you enter an @ symbol then simply remove it (leave the @ blank). An @ in the Hostname represents the blank record for the root domain (windows-noob.com).
- In the value (or data) box, type or paste MS=ms57610744. (Note: this was the value I was prompted to add, your value will most likely be DIFFERENT, enter the value that you were given.) Depending on the website, this box may be labeled Text, Value, Address, Points to, or TXT record.

- Save your changes (in the screenshot above, that would mean click on Create Record, however your DNS provider may have a different setup).
In the Windows Intune admin section, click on Verify to verify the Account like in the screenshot below
Once the account is verified you should see something like the following

Click on close
Step 3. Create a CNAME DNS entry
In order to enroll Windows Phone 8, Windows RT and Windows 8.1 devices you’ll need to create a CNAME DNS entry which directs EnterpriseEnrollment to manage.microsoft.com
In your domain registrar, add a new CNAME record like the one below
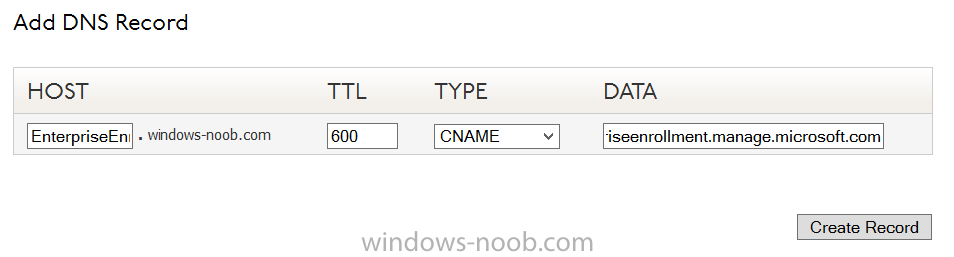
To do this create a CNAME resource record for the verified domain in the public DNS. The CNAME resource record must contain the following information:
- Alias name: EnterpriseEnrollment
- Fully qualified domain name (FQDN) for the target DNS host: EnterpriseEnrollment.manage.microsoft.com
Step 4. Setup User Principal Names for your Users
We need to ensure that users that will be managed have this Public Domain as their primary User Principal Name (UPN) in Active Directory. This Active Directory attribute for each user is synched up for each user to the corresponding user in Windows Intune. You can apply the UPN via a script or manually in ADSIedit.

Step 5. deploy and configure Active Directory Federated Services (ADFS)
If you plan to use single sign-on, Deploy and configure Active Directory Federated Services (ADFS) as described here.
In this guide I am not configuring or using ADFS for SSO but you may want to do so. If I do publish a guide for setting up ADFS in the future i’ll amend this post to reflect that.
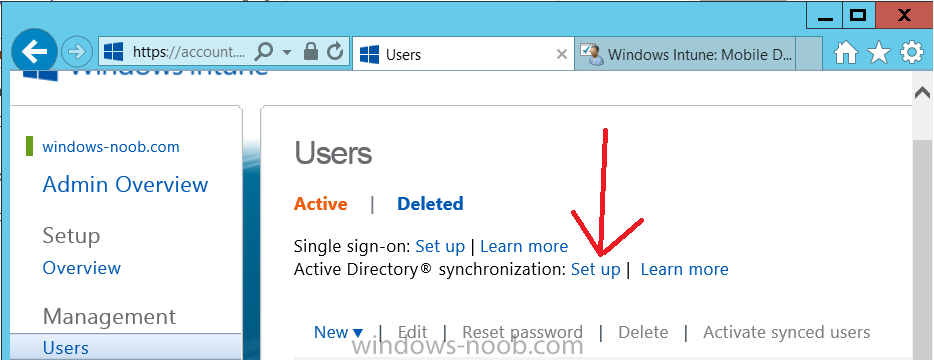
Step 6. Enable Active Directory synchronization (DirSync)
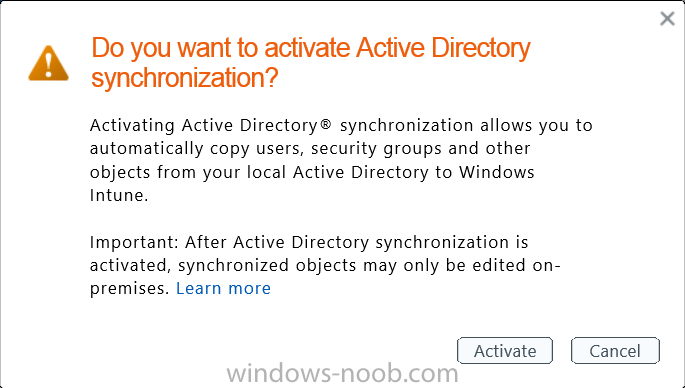
Activating Active Directory synchronization allows you to automatically copy users, security groups and other objects from your local (on premise) Active Directory to (a cloud based) Windows Intune. In the Windows Intune Admin Console select Users and click on Active Directory synchronization: Set up.
Follow the guidance on the page it links to (which are the first 3 steps shown below) and when ready click on Activate
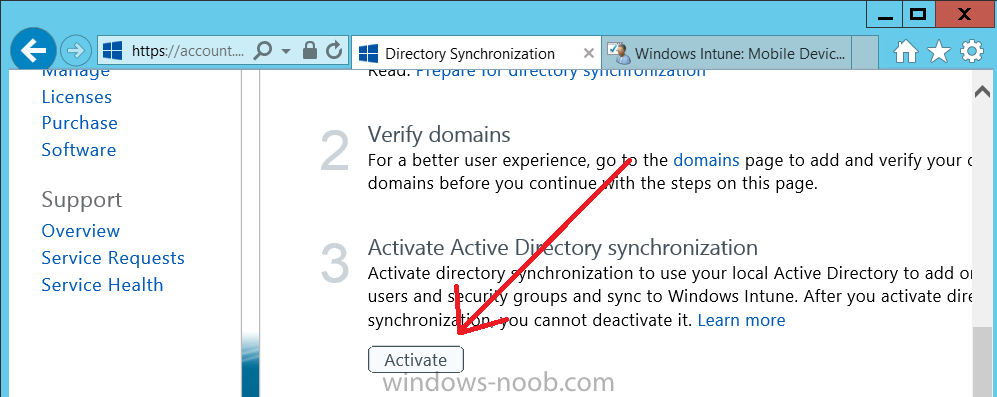
Another window will pop up, click on Activate again.
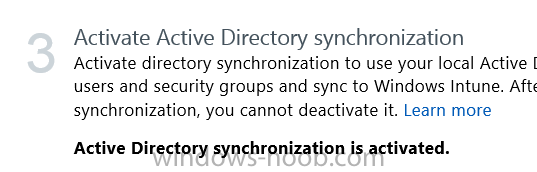
If all goes well you’ll be informed that Active Directory synchronization is activated.
Next you download the actual dirsync.exe tool to run on your Domain Controller, choose the correct architecture.

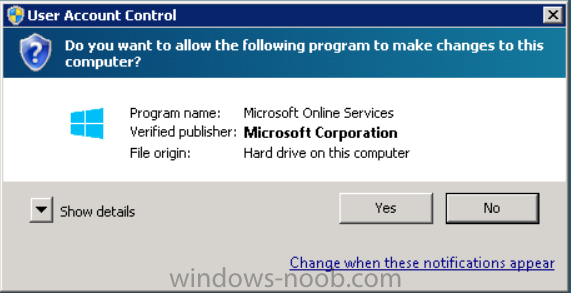
Once downloaded make sure that you have .NET Framework 3.5 SP1 and .NET Framework 4 installed on the computer which you run the DirSync tool, then run the tool with suitable credentials. (I ran it as a Domain Enterprise Administrator).
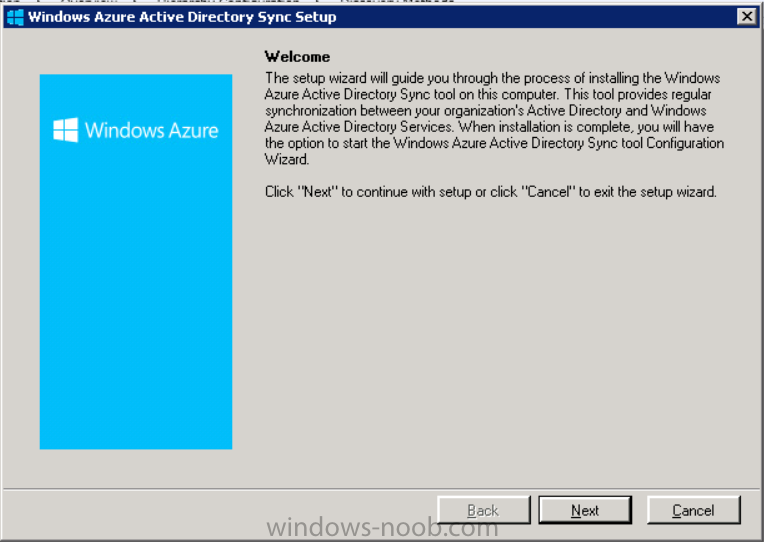
Click next at the welcome
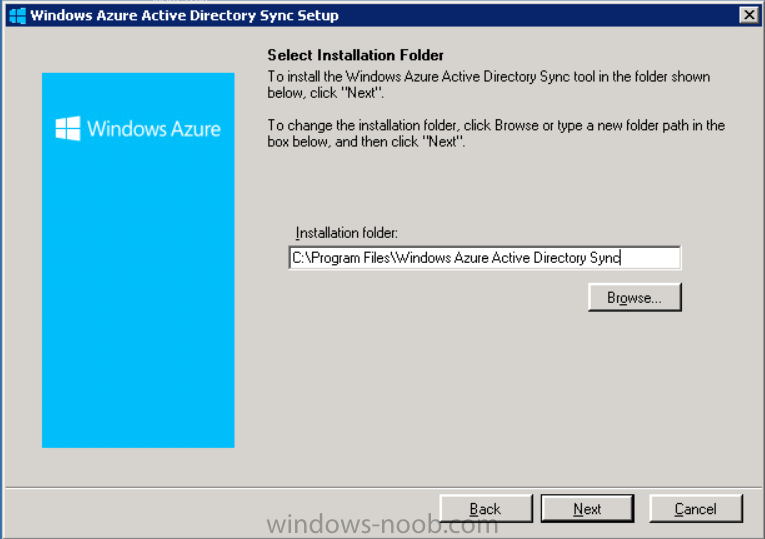
Accept the EULA and then select the installation directory
And click next again to let it install
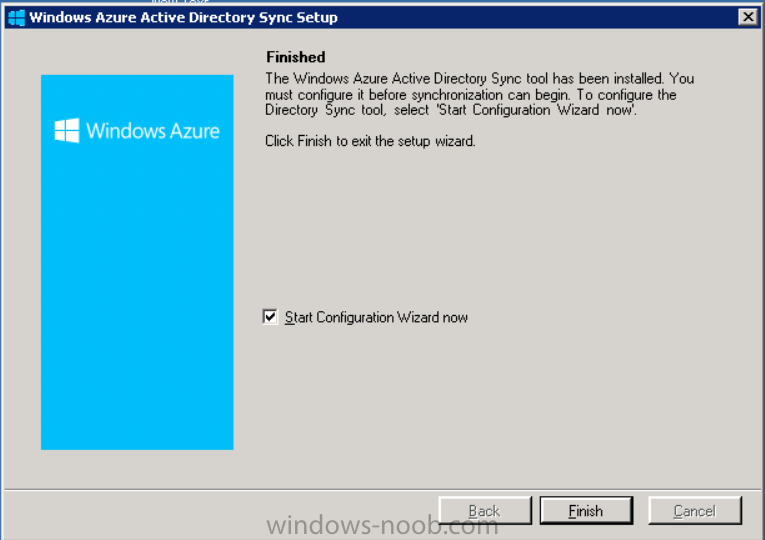
When the installation is complete click Next and place a checkmark in Start Configuration Wizard now then click Finish.
On the DirSync tool Configuration wizard welcome screen click Next and logon with your Admin credentials that you used when setting up Windows Intune. These credentials will be saved and used to synchronize changes from your organization’s on-premise Active Directory with Windows Azure Active Directory.

Next enter your active directory enterprise administrator credentials, after entering your AD credentials (eg: windowsnoob\administrator) you’ll be prompted if you want to enable Password Synchronisation. If you require this then select Enable Password Sync, (I did not) and click Next.

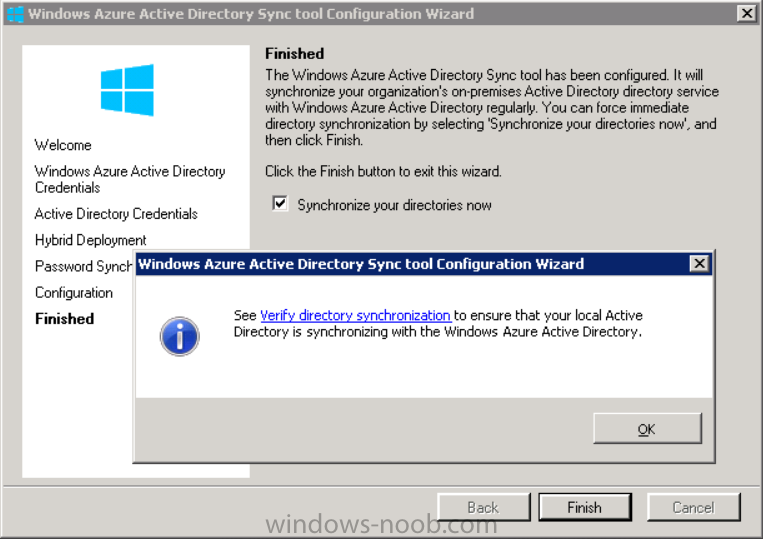
Once done you’ll see configuration complete

Let it complete until Finished.

You’ll then get a message prompting you to click on a link for details about the Active Directory synchronization progress – http://technet.micro…y/jj151797.aspx
Click Ok.
At this point you can wait a bit before once again browsing the Users link in Windows Intune. It should have populated with your users if all went well with DirSync. In addition you can browse Groups and you’ll see your Active Directory User Groups listed.
Note: The screenshot below shows a few users synched from another Windows Intune lab.

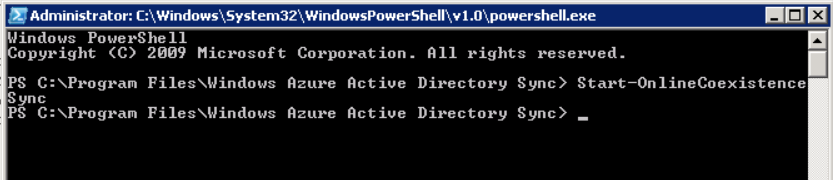
Tip: You can force a DirSync manually by double-clicking DirSyncConfigShell.psc1 in the Windows Azure Active Directory Sync installation directory, to open a Windows PowerShell window with the cmdlets loaded. In the Windows PowerShell window, type Start-OnlineCoexistenceSync, and then press ENTER.
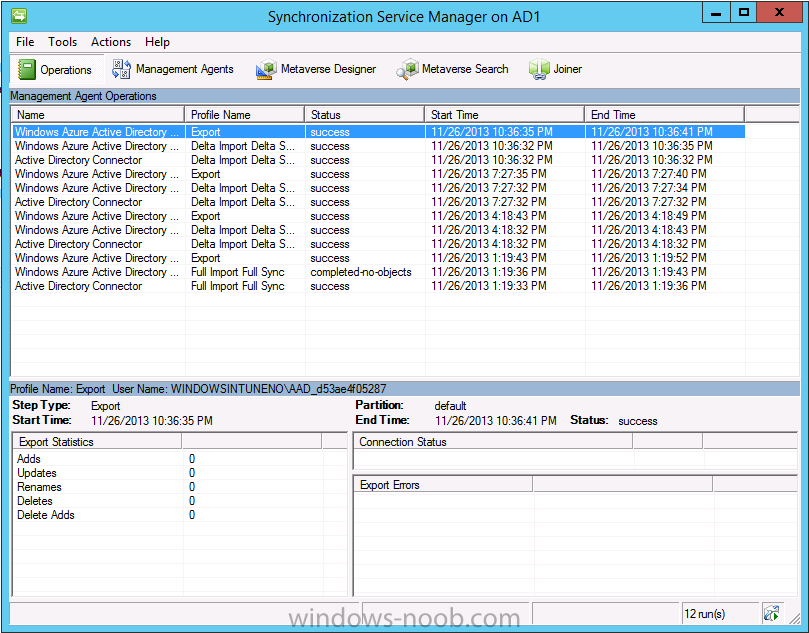
And finally, you can also monitor DirSync activity using the MiiSync tool located in C:\Program Files\Windows Azure Active Directory Sync\SyncBus\UIShell, however you should log off as the current user and logon again before running the tool (so that the correct AD Security group membership is updated for your profile.)
Step 7. Activate some users
Select a bunch of synched users and click on Activate Synced Users

Select a location and leave them in the default group

Select next, then Activate and if needed, select send email

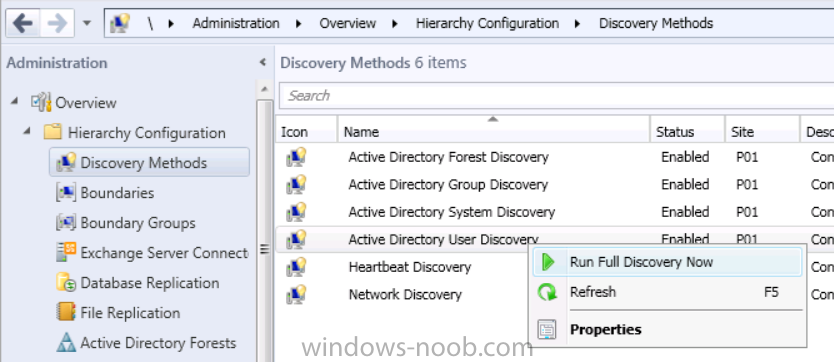
Step 8. Perform Active Directory User Discovery
In the Configuration Manager console perform a User discovery as shown below, this will mean Configuration Manager will have the most up to date details of your users including any UPN changes you made above.
Step 9. Create a user collection called Windows Intune Users
Windows Intune will need a user collection to allow users to enroll their devices, so let’s go ahead and create one. In the System Center 2012 R2 Configuration Manager console select Assets and Compliance then select User collections, right click and choose Create User Collection.

The create user collection wizard will appear, give the collection a suitable name like Windows Intune Users and limit it to the All Users collection or whichever User collection you deem appropriate.

Continue through the wizard until completion. Once you’ve created the User collection add some users to it using whatever method you wish (direct membership or query).
Step 10. Add Windows Intune Subscription
In the System Center 2012 R2 Configuration Manager console select Administration, and expand Cloud Services, select Windows Intune Subscriptions from the options available.

In the ribbon above, click on Add Windows Intune Subscription

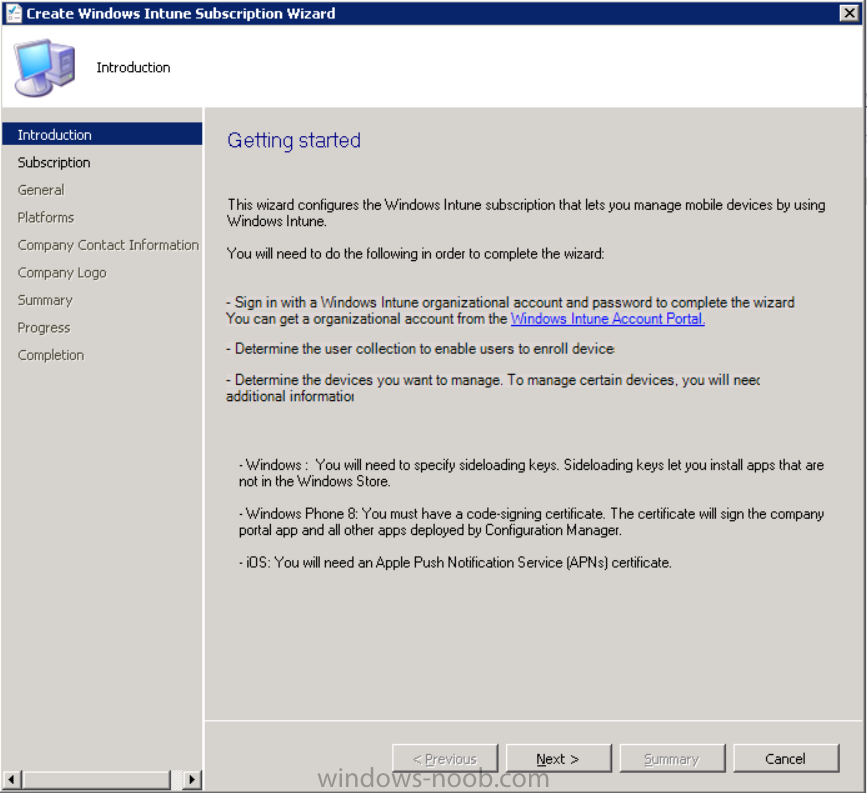
The create Windows Intune subscription wizard appears
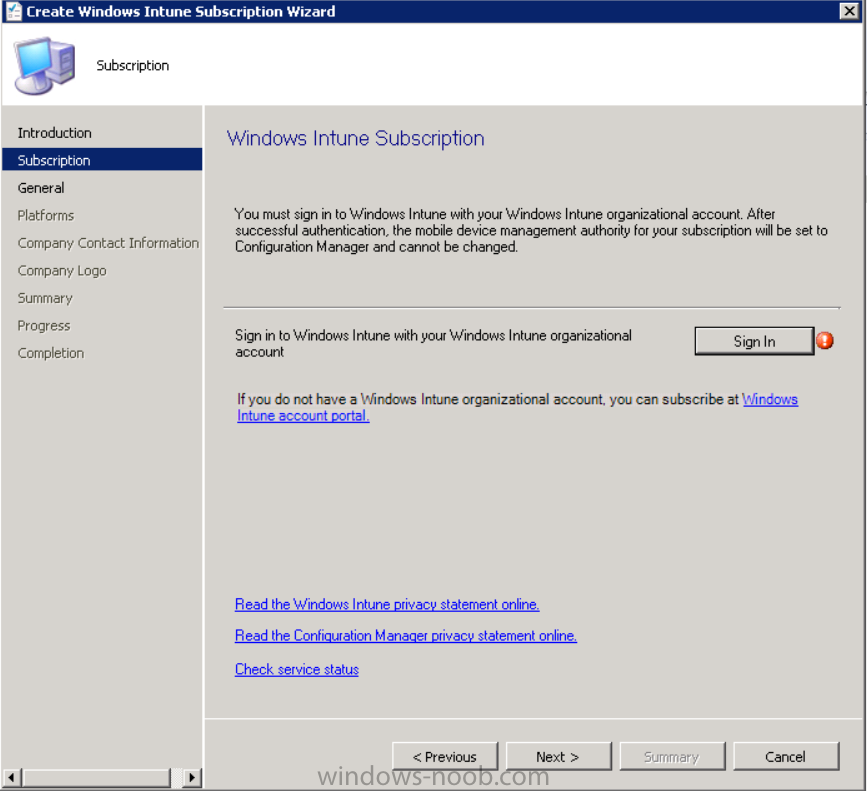
Click on Next and you’ll be presented with the Windows Intune sign in page.
This will pop up a Set the Mobile Device Management Authority window.

Place a checkmark in the check box and click on OK. Selecting this choice will ensure that Configuration Manager will manage your mobile devices by using the Windows Intune connector and any mobile devices currently managed by Intune will now be managed by Configuration Manager. This is not reversible, so if you want to manage your mobile devices with Windows Intune then don’t select this option.
Tip: If you have computers currently managed by Intune then they will remain managed by Intune. Only mobile devices will be managed by Configuration Manager if you chose it to be the authority above.
You’ll be presented with the login page, fill in your details used in Step 1 and click on Sign In.

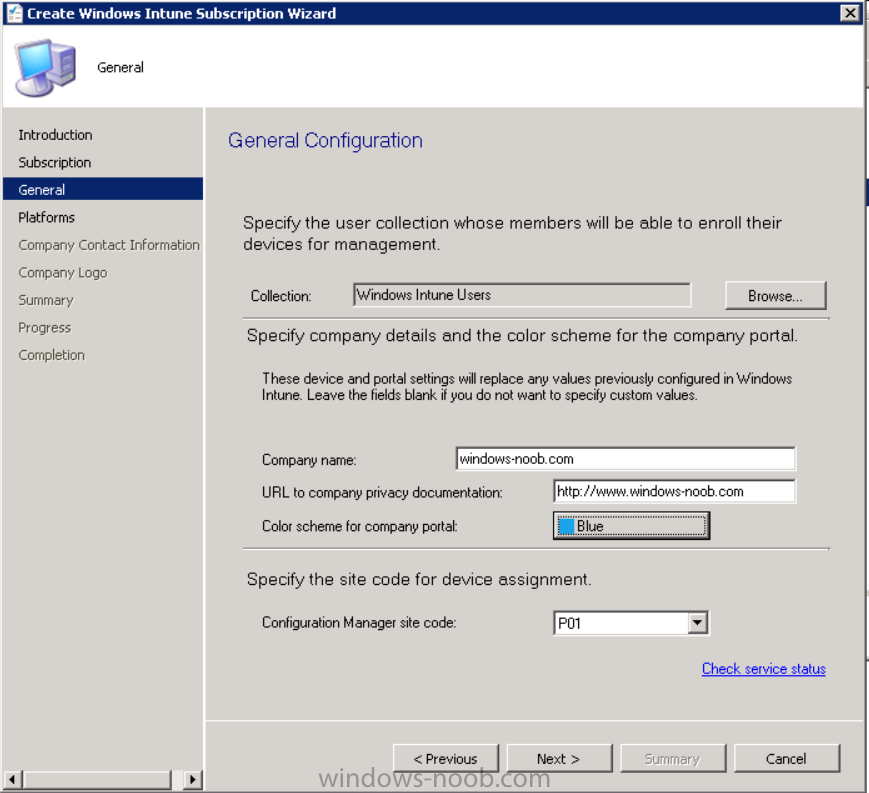
After signing in click on next, you’ll see the General Configuration screen

Click on browse and browse to the Windows Intune Users collection we created earlier, next fill in the Company name and URL to company privacy documentation, finally select the color scheme for the company portal and the Site code used for Device Management.
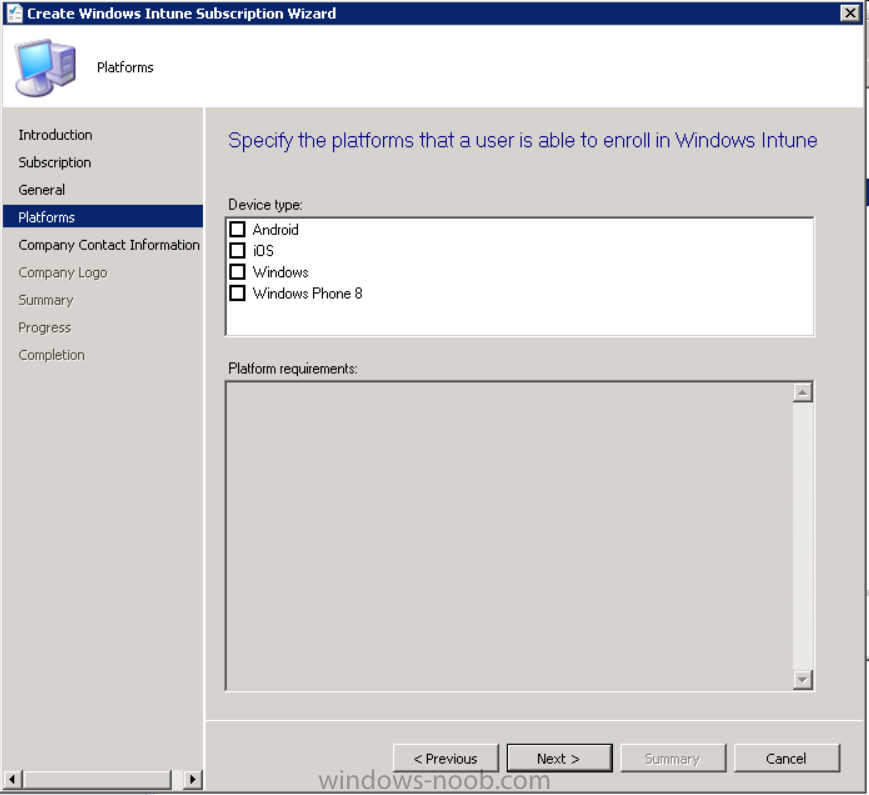
Next you will get the platform support screen, leave all 4 choices deselected. We will enable one of them in the next part of this guide.
The 4 choices you have and their requirements if any are explained below:
- Android: There are no platform requirements for Android devices.
- iOS: You will need an Apple Push Notification Service (APNs) certificate.
- Windows: You will need to specify sideloading keys. Sideloading keys let you install apps that are not in the Windows Store.
- Windows Phone 8: You must have a code-signing certificate. The certificate will sign the company portal app and all other apps deployed by Configuration Manager.
For now, select no platforms, we will add them later.
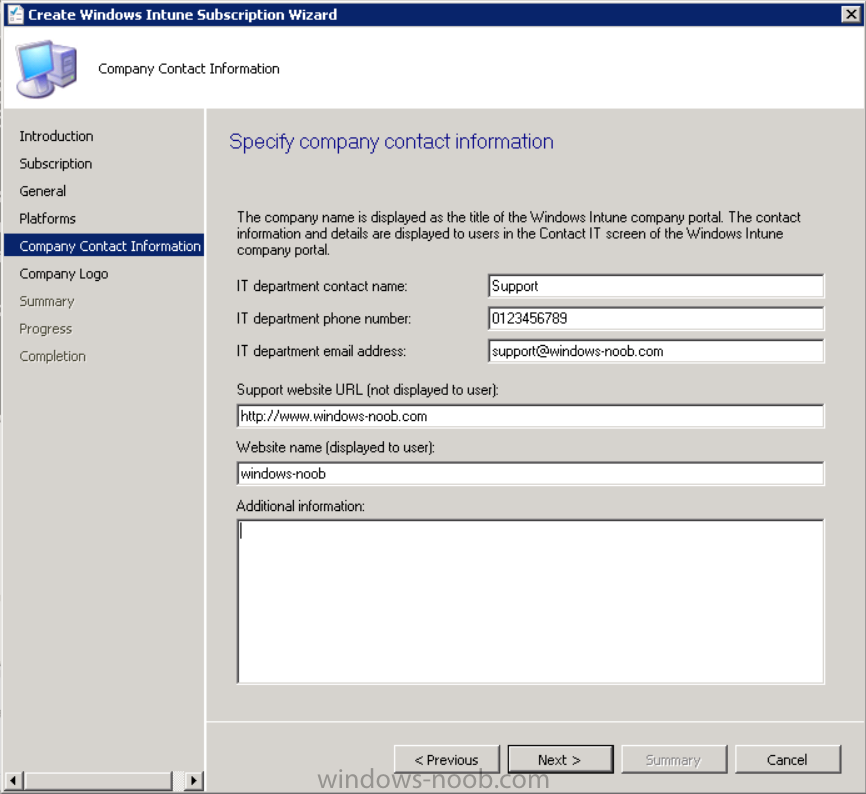
Then click next, and fill in the company contact information
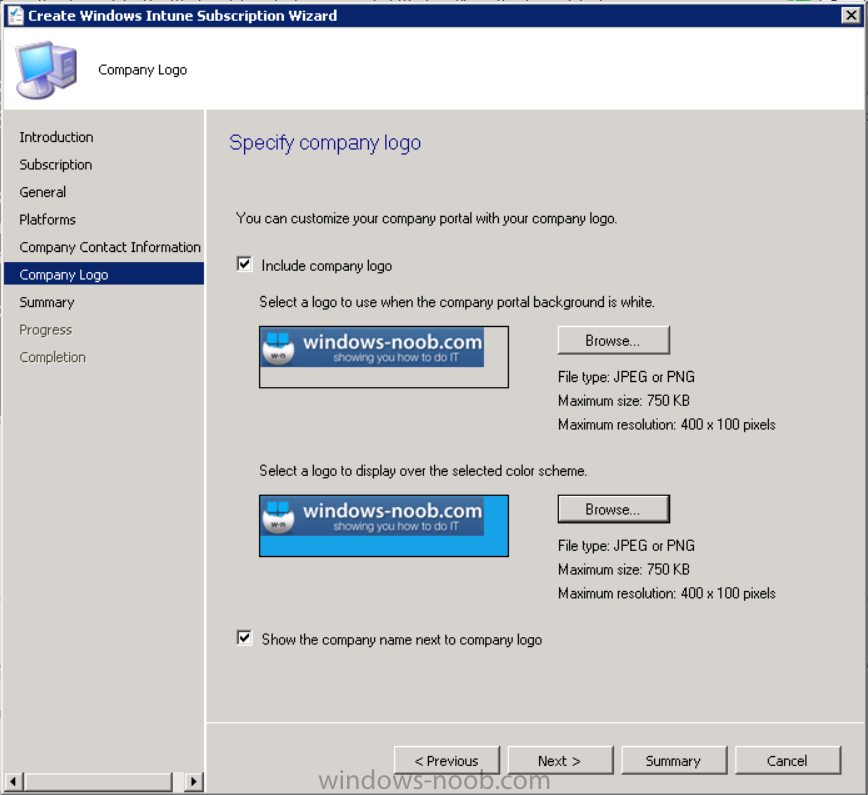
And add your company logo
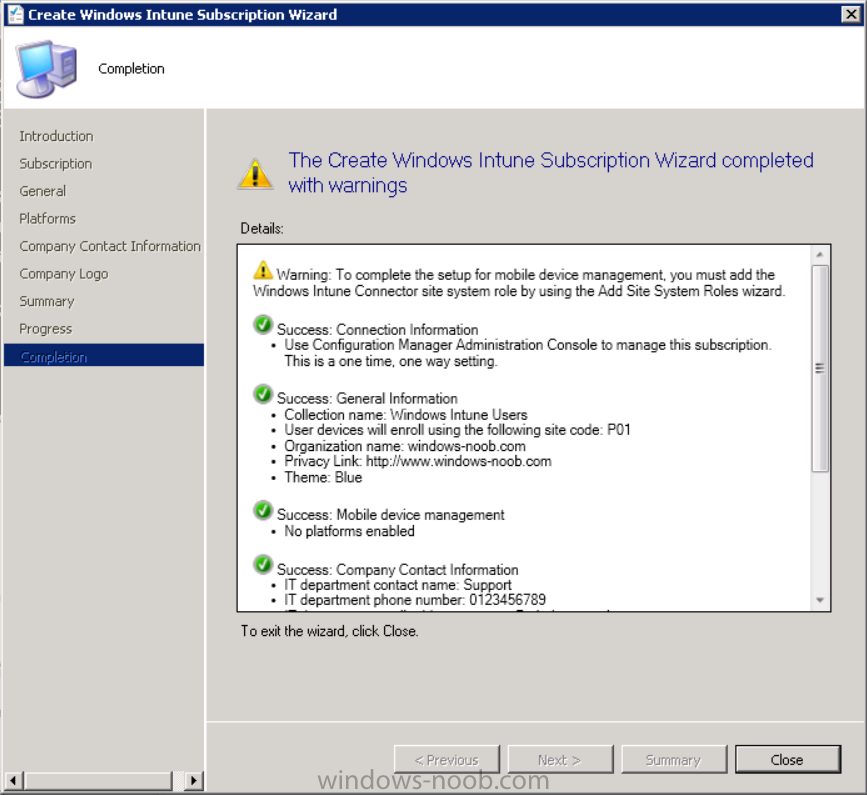
And click through to the completion notice, take note of the warning at the top of this screen.
Step 11. Add the Windows Intune Connector role
Note: The Windows Intune Connector role does not appear until after you have completed the Windows Intune Subscription wizard.
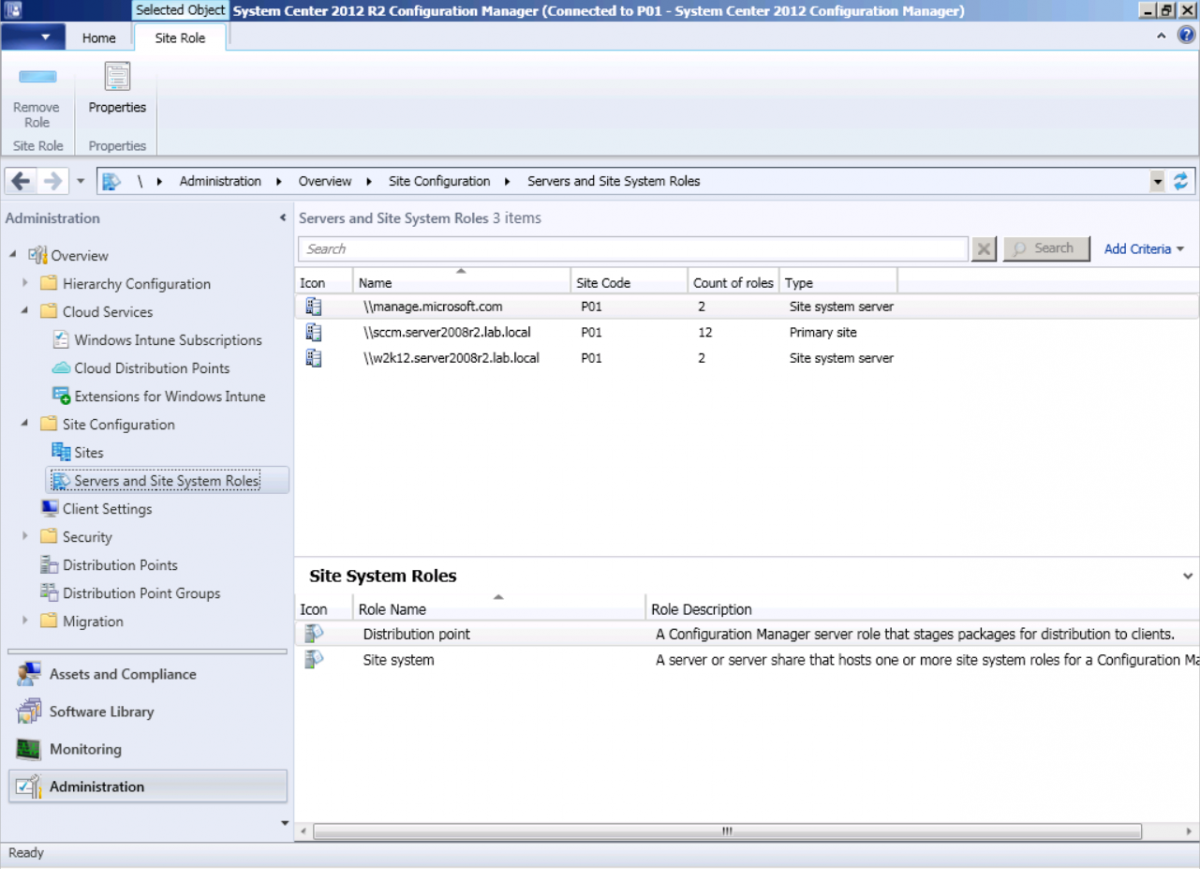
In Site Configuration, expand Servers and Site System roles and note that you now have a new site system server listed, namely manage.microsoft.com.
Select your Primary server and right click, choose Add Site System roles.
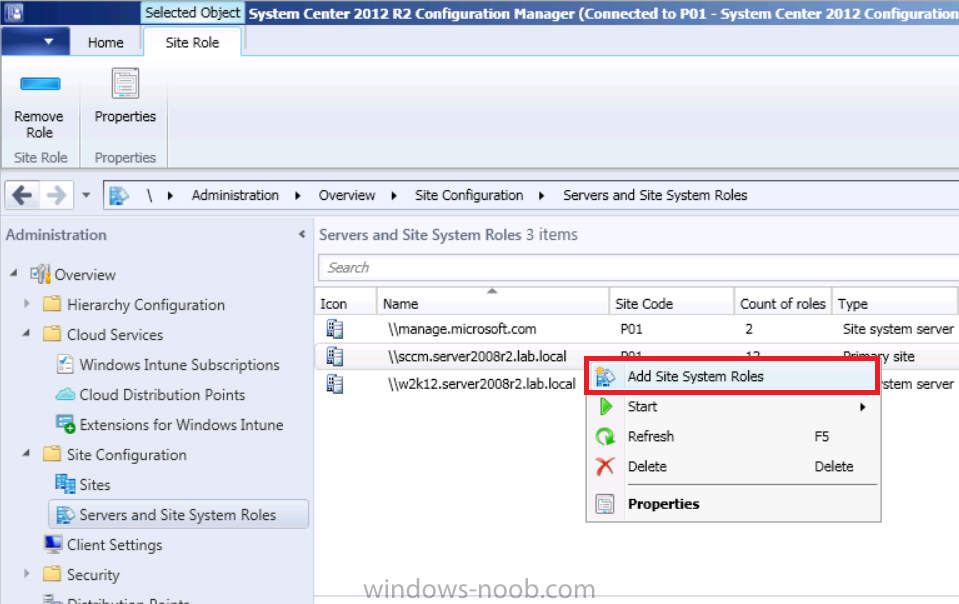
Fill in appropriate details for the General page and if you use a Proxy to access the internet then add those details on the Proxy page, on the System role selection page select our Windows Intune Connector role.
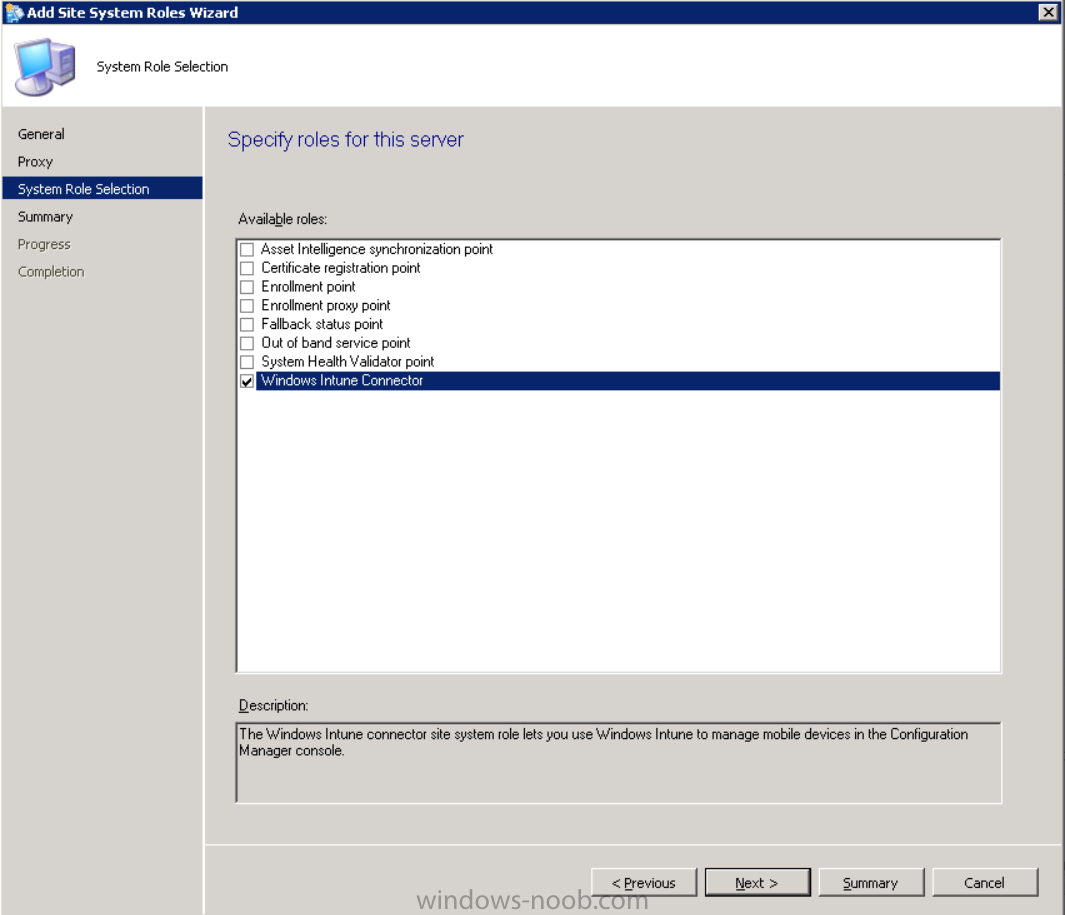
The Windows Intune Connector role is like a gateway between Configuration Manager and Windows Intune (in the cloud) and it checks every 5 minutes for changes and relays that information up to manage.microsoft.com.
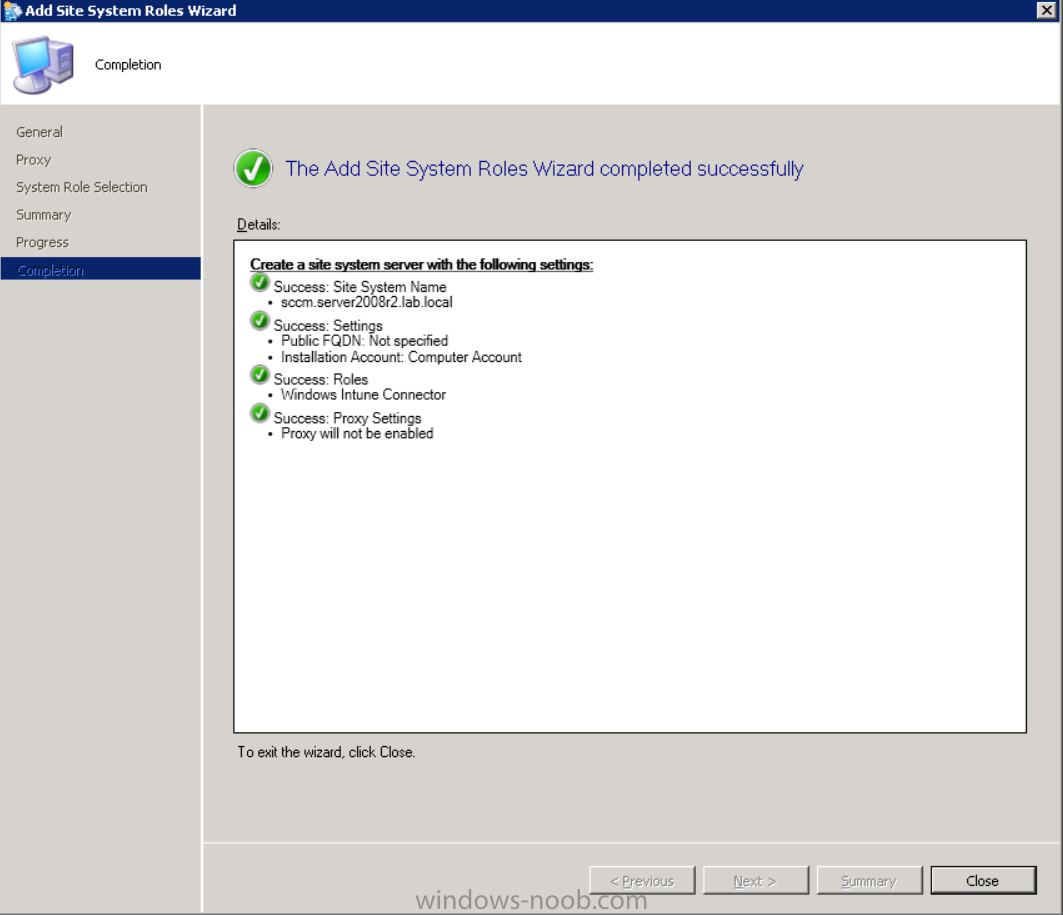
Complete the Add Site System Roles wizard.
Congratulations you’ve completed the first part of this mini-series, in the next part we will add iOS support.
cheers
niall
Log Files
The following Log Files are useful for troubleshooting problems with Windows Intune Integration in System Center 2012 R2 Configuration Manager.
- clouddmp.log
- dmpdownloader.log
- dpmuploader.log
- cloudusersync.log
For a full list of logfiles related to the Windows Intune Connector see here
Related reading
- James Bannan, an awesome Configuration Manager MVP – http://www.jamesbannanit.com/
- James and Peter demoing BYOD – Unifying BYOD Management with Windows Intune and Configuration Manager 2012 – http://channel9.msdn…and/2013/WCL309
- What’s New in System Center 2012 R2 Configuration Manager – http://technet.micro…y/dn236351.aspx
- How to Manage Mobile Devices by Using Configuration Manager and Windows Intune http://technet.micro…e10#BKMK_RTcert
- Support Tool for Windows Intune Trial Management of Window Phone 8 – http://www.microsoft…s.aspx?id=39079
- Set up Windows Intune Direct Management for Windows Phone 8 Mobile Devices – http://technet.micro…y/jj733640.aspx
- How to: Edit DNS records – A, CNAME, MX, TXT, and SRV https://help.hover.c…-MX-TXT-and-SRV
- Configuring Configuration Manager SP1 to manage mobile devices using Windows Intune- http://blogs.technet…ows-intune.aspx
- Deploying and Configuring Mobile Device Management Infrastructure – http://channel9.msdn…MS/2013/UD-B309
- Windows Intune Company Portal App – http://blogs.technet…-available.aspx